
What are
/r/Cordwaining's
favorite Products & Services?
From 3.5 billion Reddit comments
The most popular Products mentioned in /r/Cordwaining:

![Premium Quality Suede Sheets 8.5"x12" with Super-Strong self-Adhesive Backing. Ideal for Making Peel-and-Stick (self-Stick, Stick-on) Soles for Dance Shoes, [SUEDE-DIY-r01].](https://m.media-amazon.com/images/I/31Z8qjRDgFL._SL500_.jpg)


The most popular reviews in /r/Cordwaining:
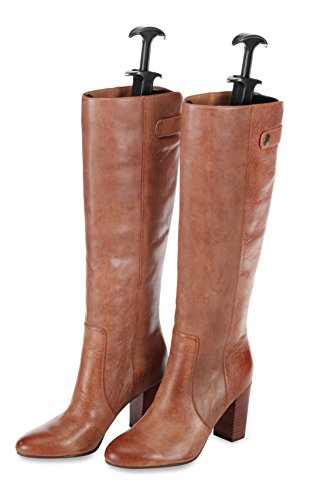
Not sure about that, water can stain leather if it's dry. The shaft inserts I'm thinking of are spring loaded. Whatever you do the odds of them standing up again on their own are low.
The reality is that leather softens over time and that's pretty much it.
The old-time lumberjacks used to put on their new boots and wade across a river to get them soaked. Then wear them until they dried completely for "form fit". That doesn't really apply in your case, but does say something about how leather adjusts.
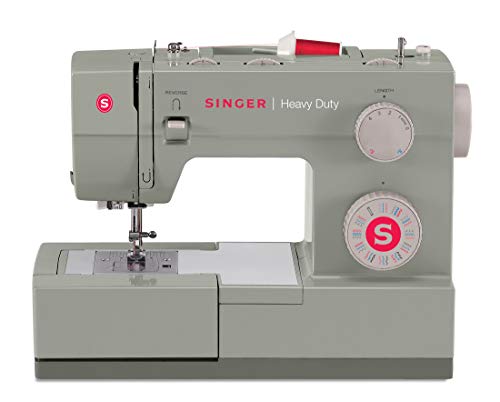
I would say that none of them are full-breakdown-immediately. But I would hazard an informed guess at saying if you were using it daily, in a consistent setting, you'd have more issues with them than a Pfaff (in the same condition/usage), for example. I can only speak to a few types, so I won't speak to all of them.
I've used the Yamata FY810 (which was a chinese knockoff model of a different post-bed) and it was fine. No complaint. I know a few Cobblers who use them frequently and like them.
I've used this style machine as well, and while I realize they have some value (portable, cheap, yay), I personally hate using them.
Perhaps post a link of the exact machines you're looking at, so you can get some more specific advice. Additionally, the Canadian Leathercrafters facebook page is useful. I'm in Western Canada too (though not where you are, because no snow here 😛) and I see post-beds pop up with reasonably consistency on the Facebook Marketplace.
I highly recommend stepping through time, written by a Dutch archaeologist, if you want to read more about historical shoes.
Have you thought about using This Hand Crank Shoe Patcher? I put These Together using it. Doesn’t take up much space and very affordable, even when compared to buying quality pricking irons.
https://www.amazon.com/Leather-Spacing-leathercraft-Embossing-Overstitch/dp/B079BV35DH/ref=mp_s_a_1_3?dchild=1&keywords=pricking+wheel&qid=1599267875&sr=8-3 Comes with 4 different stitch lengths, 3mm-5mm
I can send a link. It’s from amazon. It doesn’t have a roller foot but it still works out well.
The only purpose of the glue between the upper and bottom of the insole is to hold everything in place until the welting is completed, so you don't need it if you keep the nails in and just pluck them as you get close to them in the welting process. I like to use glue because I don't have to keep picking up a nail puller and pulling a nail every couple of stitches.
There is other glue like Hirschkleber between the upper and lining that does help to adhere the layers in place, but the primary purpose of that is as a leather hardener and is only applied to the heel and toe counters.
Here are the links for the book:
Barge cement is the way. It's what the cobblers use. You have to put on both surfaces and let dry. Then stick together. Rough up the surfaces and make sure they are clean. Will work well. https://www.amazon.com/Barge-All-Purpose-Cement-Leather-Waterproof/dp/B07WXJHGZP
There's this Japanese book from about 10 years ago that takes this internal stitchdown construction style and does some variations on it. There are some styles in it that make the most of the hand sewing, aesthetically.
Here you go. Never have to worry anymore.
Word of advice: whatever the calculation will be, just add a bit, to be sure.
https://play.google.com/store/apps/details?id=saddle.stitch.thread.length.calculator
It looks like these needles will fit your machine, and then you'd be in business:
https://www.amazon.com/Leather-Sewing-Machine-Needles-Multiple/dp/B07MJSW2Q2
After gluing up, when I need to punch through second layers or whatever - I often just hold a sharp needle with pliers, and pierce through the additional layers that way. You know, like you normally would do with a pricking iron and following up with an awl, except the scale here is much smaller and more detailed, so I use a needle instead of an awl.
Also helps to use a silver pen to thoroughly mark all of your lines so that you can focus on making the sewing machine go where you want, you'll end up using the hand wheel to go stitch by stitch around tight curves. Other than that, it's intuitive and yields good results - the stitches fall into place using tex 70 thread. You'll need some small hand sewing needles for this.
You mentioned having challenges with needles passing through the holdfast post glue last. What I have done in the past is heat my curved awl with a blowtorch momentarily and then pass it through the hole prior to sending the needles through. Great looking shoe!
The Speedy Stitcher comes with good instructions on how to use it. It's really difficult to explain, but once you actually do it, it's easy to understand.
I'd recommend practicing on another pair of shoes first if it's your first time.
Get this knife and a 10 pack of spare blades, it's an invaluable tool for this.
OLFA 1071858 XH-1 25mm Fiberglass Rubber Grip EHD Utility Knife https://www.amazon.com/dp/B000N7EU1K/ref=cm_sw_r_apan_glt_fabc_07ACJFQM2X4VP2GAZGYB
And remember to always cut away from yourself! You're going to be dealing with 4" of razor sharp steel. Just go slow and stop when you're frustrated, you'll figure it out.
You're welcome!
Thanks! Using a 25mm snap off blade in a sturdy handle was really helpful. It made removing the old soles much easier. (OLFA 1071858 XH-1 25mm Fiberglass Rubber Grip EHD Utility Knife https://www.amazon.com/dp/B000N7EU1K/ref=cm_sw_r_apan_glt_fabc_07ACJFQM2X4VP2GAZGYB)
I'm glad to be able to help! I love repairing things 🙂
I second this. I also like using single ply hemp cord, as it allows me to make thread that is as thick or as thin as I like. I make 9 ply for welt stitching and 6 ply for outsole stitching. It also hasn’t broken or unraveled on me like linen thread.
Someone in my leather-working guild recommended using a a Dremel tool, optionally attached to a stand. The variable speed is necessary for switching between burnishing and sanding on different leathers. And while Dremel has few options for sandpaper grits, others make kits with more options (like this one), and I think I saw a post on leatherworker.net where someone made his own drums with different lengths and paper grits.
Gotta use google my man. I literally typed “DPx5 needles” Pick the size appropriate for the job and thread gauge you need. 16 or 18 are usually best for sneakers. T70#69 bonded nylon thread is best for that gauge needle for example.
Best of luck!
100 Organ 135X5 DPX5 134R SY1955 Sewing Machine Needles (Size 18 (metric 110)) https://www.amazon.com/dp/B01FL0SP28/ref=cm_sw_r_cp_api_i_JPAtFbVY9BW44
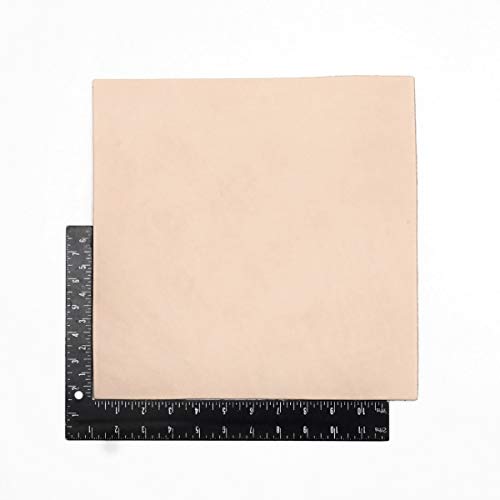
Sorry for the lateness in replying. That sole leather is much thicker than what I had in mind. And the suede wont have the same feel as a traditional leather sole.
This is more what I had in mind. It will only be about half the thickness of that sole leather. But will have the same feel and hardness.
https://www.amazon.com/Tooling-Leather-5-6oz-Pre-Cut-x24/dp/B01DFJMJF6
​
Hmm... this does look like the same backing material that is used on the replacement soles u/wanderedoff recommended on the post in r/shoemaking. Those soles do look to be suede.
The same company that sells the adhesive has whole suede sheets with the backing material already applied. This may be your best bet if you are looking to be able to cut to size instead of using the precut pieces.
https://www.amazon.com/Tandy-Leather-Jerk-Needle-1202-05/dp/B00S5MR5VM
You use this type of replaceable needle in an awl handle. Don't buy that exact one, it's ridiculously expensive, but Tandy leather should have them, along with the handle you need.
I've always heard them called a jerk needle.
Marcell Mrsan uses sheet of cork, maybe 2-3mm (1/16"-1/8") (see video here). Here's a product on amazon that seems identical to what /u/OneCrazyDonkey is describing and what Marcell uses.