
What are
/r/Irrigation's
favorite Products & Services?
From 3.5 billion Reddit comments
The most popular Products mentioned in /r/Irrigation:


The most popular Services mentioned in /r/Irrigation:
The most popular reviews in /r/Irrigation:
Yes I’m looking at this Rainbird 40psi reducer/filter. If it will save me $$ on my insane water bill, I’ll totally do it.
OP, method 1: go out to one of the valves that aren't working, disconnect the two wires & meter for any voltage to ensure something's not activated. If no voltage, twist the ends together, go back to the controller and and ohm meter out to see which two wires are short / ultra low resistance.
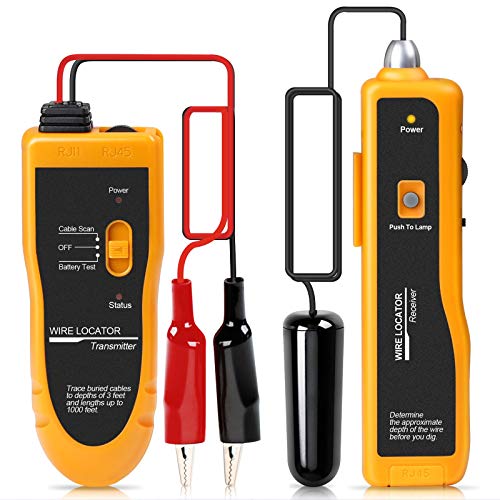
Method 2: Buy a wire tracker /tone generator like this and save yourself a whole lot of time and headache https://www.amazon.com/dp/B08T224QCC/ref=cm_sw_r_cp_apa_glt_fabc_DAXYNP30V2PRCSWW7RS6?_encoding=UTF8&psc=1
The risk is contaminating your drinking water supply if one of the valves ever doesn't work.
In other words, this is completely illegal without a very good backflow preventer. The hose spigot is NOT sufficient.
There is another way, which many gardeners have used successfully and which is much safer. Pipe up the rain barrel/tank to fill from whatever source you have, and hook a pump to the tank, with a solenoid/relay to activate the pump from the master valve station on your controller.
Then hook up your hose to a float valve in the tank (like this https://www.amazon.com/Hudson-Valve-Tank-Livestock/dp/B000H5T76Q ), so the hose will refill the tank once the water level drops. That way the system will automatically switchover, making the maximum use of the rainwater you collect.
I have mine connected for almost a year now with no issues. I do have it connected to a 2.5ghz only access point (Wi-Fi extender in the garage for other smart devices), so that might be the issue you are having. You could get a device like this (https://smile.amazon.com/TP-Link-Extender-External-Antennas-TL-WA855RE/dp/B0195Y0A42) and you can create a new 2.5ghz only network that connects to your main network.
If the dirt is small enough to pass through the head you can remove the nozzle from the head and then use one of these guys to keep the neck of the head up to stop dirt getting back in when you fire up the zone.
https://www.amazon.com/dp/B00NFRGIII/ref=cm_sw_r_cp_apa_glc_fabc_63VPDSSAXT018M10W44A
Alternatively, remove the head and install a riser and then fire up the zone to clear out the pipe.
If the dirt isn't getting through the pipe you'll have to do some digging and cut the pipe and the blow it out.
https://www.amazon.com/Rotator-Gauge-Hunter-Sprinkler-Guage/dp/B005NWW3U0
There you go.
Also its good practice to have separate regs for the house and irrigation because alot of times the ones that plumbers put onto the house arent rated for the flow a irrigation system demands.
They are indeed AC to the solenoid and there's a couple important reasons why; one is that it is easier to transmit AC over long distances, but also solenoids (which are just electromagnets) are inductive loads. An inductor has both a resistance and inductive impedence. Induction is only possible in AC circuits, it has to do with oscillating magnetic fields. In a DC circuit an inductor is just a wire. That inductive impedance lowers the amount of current necessary to drive the solenoid. In short, without explaining the math, if you run a typical valve solenoid at 24VDC it will draw about four times as much current as it would at 24VAC.
Cool, didn't realize it had a battery, but I'd still just power it off the 24VAC inputs, there's really no difference, but either way you'll need to rectify the voltage to DC. If the battery is constantly at full charge it isn't really going to be producing any heat so that shouldn't be a concern.
Just to reiterate, if you want to power it off the transformer, you should get this rectifier circuit which is able to handle the 24VAC from the transformer, and wire its AC input to the 24VAC inputs on the controller. The rectifier's output then goes to the input of your DC/DC buck converter. Then the output of the buck converter goes to the hotspot.
That's a DC/DC converter. The controller's I/O is AC. That still needs AC to DC rectification before it. What's inside that box is very likely the exact same (or extremely similar) circuit I linked to, its output voltage just isn't adjustable, it's set at 5V.
You'll need to put something like this before that. That device converts the 24VAC to 34VDC which you can then feed in to your DC/DC converter.
Outdoor install, otherwise I'd just be sticking the hotspot to the wall and running a USB cable to it from a wall outlet.
The device I've selected (a little Chinese no name inverter) was chosen because it's purpose built to go from 24vdc to a USB-C 5vdc 3a output.
https://www.amazon.com/dp/B07ZQB6S3L?ref=ppx_yo2ov_dt_b_product_details&th=1
Can you send me a link of the power supply device you're experimenting with?
And how many watts (or amps) does that hotspot consume?
If I were designing this I would probably opt for a 5V power supply that runs on main voltage instead of running off the controller's transformer. A simple USB charger can be pretty small if you don't need a lot of current (<2A) and it wouldn't be loading the transformer that way. The only somewhat tricky design consideration would be wiring it in such a way to protect the user from high voltage. Some shrink-wrap should be sufficient if connecting to the spade connectors - or you could disassemble the USB charger and solder new wires to the input and then just use wire nuts (although shrinkwrap would still be better/safer). Maybe the whole thing could fit behind the high-voltage door where the transformer connects to the mains. You'd just need to drill a hole for the 5V wire to come out.
If you're set on powering it off the 24v transformer then what you need is a full-wave rectifier circuit (4 diodes and a capacitor large enough for the current demand) and a buck converter. Both of those things are pretty small. These little buck converters can supply up to 3A. The rectifier though you'd probably need to build yourself because while you can buy packages that include the 4 diodes in a rectifier configuration they won't have a capacitor onboard. This isn't a bad option if you're able to solder together a perfboard. This method wouldn't need any protection from shock for the user since it's all low-voltage.
The simplest solution of course would to just buy a power splitter for the wall outlet (if needed) and power the hotspot from the power supply it comes with rather than all this power conversion rigmarole, especially if your electronics skills are novice. Do you really need to mount all of this inside the controller? Just plug it in next to it!
If there's a potential you'll want to use it later, or just know where this point is in the future, you can use a blank plug like this one on the top left: https://www.amazon.com/GREY-Angle-Nozzle-Rack-PGP-ADJ/dp/B0052D29E0
Alternately, unthread the entire rotor body from the riser and thread on a 3/4" fnpt cap onto the nipple riser the rotor body was previously threaded on to.
No they do not, sprinkler heads use National Pipe Thread (NPT) while garden hoses use Garden Hose Thread (GHT). You'll need an adapter.
I'd run a fishtape down it https://www.amazon.com/Klein-Tools-56333-Optimized-120-Foot/dp/B081TVVJTY/ (this is an example, you don't need one this expensive). You can run the fishtape bare to find larger obstructions, and bend the tip a bit to "make it larger" to find a pinched pipe. The problem is, fittings will often stop the fishtape as well, so you might have to trace down to the next fitting, cut that then repeat. Sometimes its cheaper to just run a new pipe from the nearest working head.
Interesting. Basically like the Maple syrup tools https://www.amazon.com/Handed-Maple-Syrup-Tubing-Lines/dp/B0795F429N. I've though about making a similar tool since I haven't found one sized for larger poly, mostly for repairs in tight areas.
Hi folks. I have this MiracleGro hose feeder but there's no way to attach anything to the output end. There are two (one and two) options on Amazon but both get bad reviews referencing how good the 2000s-era, now-discontinued, MiracleGro version was in comparison.
Is there a standard way to add an automation system for fertilizing 1/2" line drip systems? Or really any size line and I'll just get converters...
Thanks!
As far as why the noise came back after a few times of running the pump, the most logical answer was given by -pletch- here. Also, to eliminate the noise totally, he suggested installing multiple arrestors with specific distances. In my case, it will be too much hassle and digging up the ground, so I gave up. One unideal solution is to install one of those smart valve controllers like this at the irrigation shut-off valve which will only open the valve when it's time for irrigation and then shuts it off to allow air to accumulate before the next run. However, this will put wear on the valve.
I would definitely include a backflow preventor in the new setup too.
But this would probably work. Hose bibs have GHT garden hose threads and you need to change to npt.
Thanks!
are you talking about a pancake type compressor?
I was hoping that something like this might do the trick… provided I can get something to connect to the 51/qycc
https://www.amazon.com/Slime-40045-Direct-Drive-Inflator/dp/B01LXIS8XO
I think you mean well, but she would be better off hiring a professional.
If you want to educate yourself, you could pick up a copy of this book. I read it years ago and it is a decent introduction to this field.
https://www.amazon.com/Simplified-Irrigation-Design-Pete-Melby/dp/091488641X
The drip system is pretty rudimentary. It's just from the hose bib, 1/2" line that goes about 150ft long. All above ground. This is the exact kit I have but I extended it like 100ft making it the full 150ft.
I do have T-connector on the main drip (so the line can go right and left).
Is this the piece you meant for the GHT to 1/4 air plug?
You could also go with this
3/4 Female Hose Thread to 1/2 Male Pattern Threat aka Male Pipe Tread
and
Dig a trench on one side and an exit pit on the other (they don't have to be big). Use a jet nozzle to push the pvc underneath. Then either use it as a sleeve for your drip, or place adapters on either end.
Orbit jet nozzles can be found on amazon https://www.amazon.com/Orbit-Sprinkler-System-Tunnel-Boring/dp/B07X5CYBTJ
Yes. As long as its inside the controller box.
My preferred alternative to wire nuts though is Wago camlocks https://www.amazon.com/LEVER-NUTS-Compact-Splicing-Connector-Assortment/dp/B08W3QXN9B/ they are fully approved even for household voltages and are super fast and easy to use.
could I put something like this on it
You should be able to remove the broken nipple from the tee with a nipple extractor then replace the nipple.
>...don’t call current “amperage”; that’s strictly bush league.^(5) The same caution will apply to the term “ohmage”.
>
>^(5) unless you’re a power engineer working with giant 13 kV transformers and the like – those guys are allowed to say amperage.
These examples are not professional irrigation valves or timers. At this point either is fine if that is how you wanna go. I’d personally recommend this
The breaker is a double 25 amp so I was assuming its 220v.
This is the pump that I believe is installed however I did not install it and the stickers are faded out, I believe I pulled this model number off it though. Claims 135/230v support. Wondering if I can either split the breaker into two and make one a receptacle or if I can just tap off for power to supply the controller. Yea I'm a bit of a hacker was trying to avoid a real electrician.
pump:
https://www.amazon.com/Century-USQ1152-Service-Capacitor-Enclosure/dp/B007ATO30W
One simple solution be an automatic drain valve that releases the water once the pressure drops below a certain point. The sprinklers will still seep a little as the pressure drops, but then the system will drain pressure through the valve rather than the lowest sprinkler. If you install it at the system low point, it can also (partially or fully) drain the system for winterizing
Here's an example kit: https://www.amazon.com/HOMENOTE-Misting-Greenhouse-Trampoline-waterpark/dp/B07G33MVJ1/
Making some assumptions about your existing system, in addition to a kit like that, you would need to add anoth irrigation valve for another zone, wire it to the controller (hopefully there is an extra wire already, or else you'll need to run that back to the controller too), then use underground pipe (it would be polyethylene or PVC pipe in the US; I am not sure what's common or available to you) to get from the valve to where you want the misting, then bring it above ground and adapt from the 1/2" or 3/4" (15 or 20 mm) pipe to the 1/4" (8mm) flex pipe the misters are on.
4 Zonen:
Rain Bird WPX004 WPX 4 Bewässerungs-Programmierer, wasserdicht, für Nistkasten, Grau https://www.amazon.de/dp/B06XGHQV19/ref=cm_sw_r_cp_api_i_323B8KD4ATPX5A7GZED4?_encoding=UTF8&psc=1
“Verkauf und Versand durch Amazon”
Viel Erfolg!
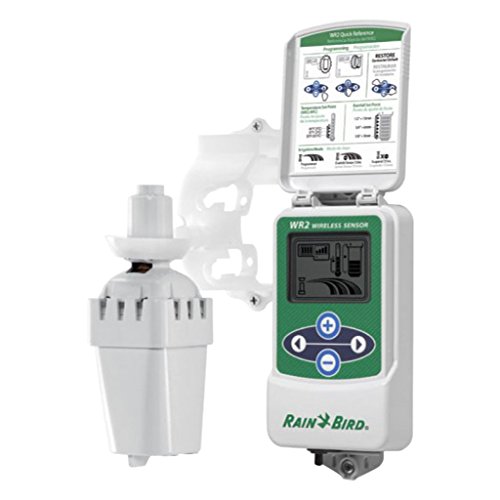
Rain freeze sensor* its a separate product but it’s compatible with your Rachio and assuming that your controller is set up correctly is a more accurate way to get your Rachio to not run during rain or freeze, rather then relying on weather stations that triangulate the weather patterns like your controller is currently doing
Rainbird Wireless Rain and Freeze Sensor System with 1 Controller Interface and 1 Sensor https://www.amazon.com/dp/B011TMYBDO/ref=cm_sw_r_cp_api_i_YWY71MXYW5DDH4J8P15S
Perma-Loc 3/4" Tubing x 3/4" FHT w/Swivel Irrigation Fitting | Drip Irrigation Parts | Reusable Connector Fitting | Adapter from 3/4" Poly Irrigation Line to 3/4" Female Hose Thread - 2 Pack https://www.amazon.com/dp/B08H8MR5T3/ref=cm_sw_r_cp_api_i_JEEJCKFXXJQ816PH6ECS
Sorry bout that. This one should work providing the hose end us male.
Anderson Metals - 57401-1212 Brass Garden Hose Fitting, Swivel, 3/4" Female Hose ID x 3/4" Female Pipe https://www.amazon.com/dp/B000FPDMWI/ref=cm_sw_r_cp_api_i_KKEVEW4PD6YZ1JXQ7EFC
GESHATEN 3/4” GHT Male x 3/4” NPT Male Connector, Brass Garden Hose Fitting, Adapter, Industrial Metal Brass Garden Hose to Pipe Fittings Connect (2 Pack) https://www.amazon.com/dp/B08151L2ZT/ref=cm_sw_r_cp_api_i_EA7Z9VG0G2BNTZHW6CK3
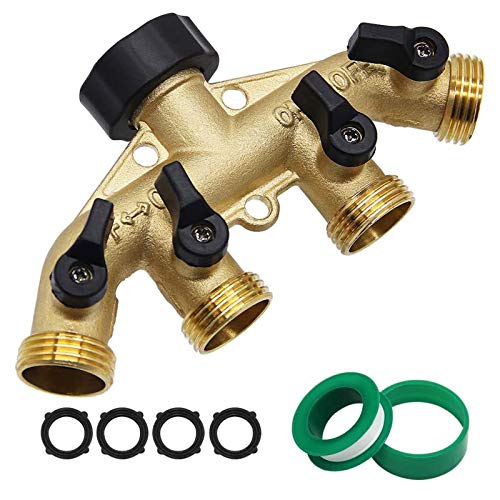
I don’t know what that is but I’m trying to connect it to something like this.
Twinkle Star 4 Way Heavy Duty Brass Garden Hose Splitter, Hose Connector 3/4", Hose Spigot Adapter with 4 Valves https://www.amazon.com/dp/B083V1TVM3/ref=cm_sw_r_cp_api_i_GKPG8E2BSWBZK22261CW?_encoding=UTF8&psc=1
Thank you so much for the detailed help. I picked this for the corner: https://www.amazon.com/gp/product/B00BFIUPPQ/ . Hope it’s the right one. As for the middle one, what do you recommend I buy? Will this work? https://store.rainbird.com/u10h-10-ft-plastic-u-series-nozzle-half-circle-spray-pattern-180-degree.html
It's only 1 year old. I installed it myself (diy) in August of 2020 and everything was working fine before I drained the water and closed it off for winter. It's an orbit system so I don't seem to have many options to work with other than opening the valve itself I guess? This one: https://www.amazon.ca/dp/B01M5E9ES1/ref=cm_sw_r_apan_i_W3HBJJNFY134J0TEFEXB?_encoding=UTF8&psc=1
I haven't done it but go for it. Those relays are rated for 10A 250VAC.
Not sure why you would want to though, unless it's a project for learning electronics, or the valves are controlling something like a potato launcher rather than an irrigation system. Irrigation controllers use TRIACs as switches, not relays.
Try leveling up your glove game. Medline VEN6045R Venom Steel Premium Industrial Black Nitrile Gloves (Pack of 50) (VEN6045N) https://www.amazon.com/dp/B00ER12NSK/ref=cm_sw_r_cp_api_i_BGG8AV3GDS4B0XGJD82T?_encoding=UTF8&psc=1
You’re welcome!
Here is the pressure regulator I used but I installed it at the start of the drip line instead of my hose since I still needed water in other areas.
Senninger Pressure Regulator 25 PSI 3/4" Hose Thread Drip Irrigation Pressure Reducer Low Flow Valve - Landscape Grade High Performance https://www.amazon.com/dp/B076BZ4GJJ/ref=cm_sw_r_cp_api_i_FYTYA3XVMYTA1Y9DQWE3?_encoding=UTF8&psc=1
If you buy the “indoor/outdoor timer” it will have its own cabinet.
Orbit 57950 B-hyve Smart 12-Zone Indoor/Outdoor Sprinkler Controller, Compatible with Alexa https://www.amazon.com/dp/B01D15HOTU/ref=cm_sw_r_cp_api_i_BH77SB6HEXKH1P0WF6HJ?_encoding=UTF8&psc=1
>I am using hose end sprinklers for the yard running off the spigots.
So, like, do you have some of these or something like it connected to the spigots? If so then you could also replace the spigots with solenoid valves, and use a Node that can control multiple zones to control everything.
Photos of everything would help immensely.
I'm going to sleep now so I probably won't reply until tomorrow afternoon, after work.
FYI, circuit breakers are not switches. They are not designed to be used like a switch. Continual use of a circuit breaker as a switch will eventually wear it out and it will need to be replaced.
Your post is a little confusing. Post photos.
`Usually a jet pump will have a foot valve on its input, which is a check valve that is down in the water source that has a coarse filter attached. The output side of the pump will have a tee with a plug in the top. By removing the plug and filling the pump with water you would be filling the pump and the line leading down to the foot valve with water - either by pouring in water or using a donkey pump. This primes the pump and input line allowing the pump to start up. The foot valve prevents the pump from losing prime. Often another check valve is installed at the pump inlet which also helps to prevent it losing prime.
If the new pump does not have a pressure switch, but is instead controlled by a relay, then a pressure-relief-valve should be installed on the pump outlet to prevent the pump from "dead heading".
As for the electrical question, I would assume that the pressure switch earth ground is connected to the casing, so using it should be fine, but to be certain it's a simple test; set your multimeter to continuity mode and probe between the pressure switch's ground terminal and the pump casing. If your meter beeps then the two are connected together. Make sure the power is off when doing this test.
Appreciate you for writing back!! Here is the wire locator - https://www.amazon.com/dp/B01GDZLZOU?ref_=cm_sw_r_cp_ud_dp_3FV55848ZKAT9PHKEXZH
I tried locate the 3rd( master valve) for 30 mins today am but failed to locate it.
I will start with the easy option and buy a new common wire since valve box is just about 20 feet away from the controller.
Thanks again for all the pointers. I will run to home depot to get the wire and troubleshoot tomorrow am, just trying not not to freak out my neighbors!
Btw, we down south and there are no basement.
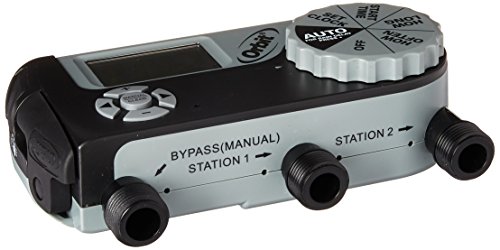
Is that an indexing valve? Gross.
Yes you can "upgrade" that hose timer to a different hose timer, it should work with any 6-program hose timer, like this one, but it probably doesn't function any differently, it just looks more modern.
If you wanted to spend a little bit of money to improve things you could remove that indexing valve and install a manifold of diaphragm valves instead, and connect those to a WiFi-connected irrigation controller, like a Hunter ProHC to create a more modern system with smartphone control and weather prediction.
yes ,i think so ,
PROS:
when it have not rained for so long or in dry area, the deep root waterer can help a lot.Feed water to root zone directly,eliminate waste due to runoff,evaporation,and wind.
It is a necessary tool that will make a big difference in the health and survival of plants especially when they're young
Watering deeply is important for tree
Watering deeply encourage root grow deeper,tree grow stronger.
cons:
it is easy to overwater the tree and cause root rot
Yep, that's the one. You'll probably also need this. It doesn't come with one. Alternatively you could just cut and strip a 3-prong extension cord and use that.
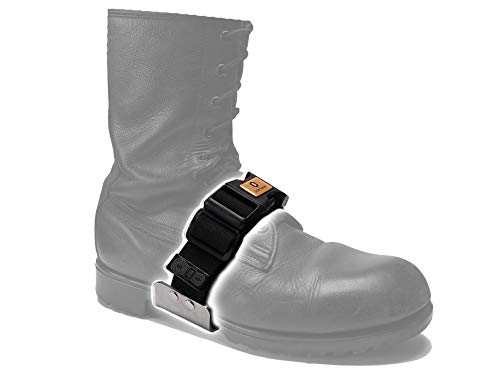
I haven't yet found a leather boot that is completely waterproof. Someone I work with however swears by Bates boots. Apparently they make boots for the military and their waterproof boots have a Gore-Tex lining inside them. For install I just wear whatever cheap leather work boot I can find with a TPU/PU (polyurethane) sole - it's stronger than lugged rubber, Vibram, and nitrile. For sole protection, look in to the Sole Saver, they're awesome.
For service work I generally wear rubber boots. They keep my feet dry, and they're easy to slip on and off which saves some time when I have to go in to customer's homes. I wear these suckers. They're warm and have a thick, strong polyurethane sole.
>Hunter Pro-HC
Does this model look like the one you're referring to? Amazon Link
Like this. Fittings have individual labelled plastic bins that fit on the shelves. Nozzles and other small stuff go in the stacked parts organizers. Our trailers have similar setups. Our entire service fleet are Mercedes Sprinter vans - if you're doing service out of a pickup truck you're gonna have a bad time.
If its debris in the nozzle, sticking a pick in there usually gets the debris out. Like these things https://www.amazon.com/Rotation-Pick-Hook-4-Piece-Tools/dp/B08W3H1SCV/
A small spring clamp can be put on the riser stem to keep it stuck up while working in order to service them while running. Clamp the stem, remove the nozzle (use the other hand to keep the spray from hitting you), then clean or replace filter/nozzle and reinstall.
That’s called a quick coupler. It allows you to connect a hose to your mainline.
Rainbird 33DK Quick Coupling Valve Key Double Lug https://www.amazon.com/dp/B009Y9ZRMO/ref=cm_sw_r_cp_api_glt_i_KQF4ZWKM8A1YEMXY2XFH
OMG, that's not purple pipe, that is white PVC absolutely drenched in primer! Whoever installed this did not know what they were doing. Like, at all.
I haven't used one of these yet, but I (kinda) look forward to the day I do: there are special drill bits made for this application so you can drill out the old broken pipe, then reuse the fitting to glue in a good piece. Looks like yours is 3/4"? This is the bit you would use: https://www.amazon.com/PlumBest-J44075-Socket-Saver-4-Inch/dp/B0069QW5JI/
I installed myself and it took like 15 minutes. One thing you may want to buy in addition to the rachio controller itself is the box: https://www.amazon.com/Rachio-Enclosure-Generation-Sprinkler-Controller/dp/B019885NUQ. It isnt necessary, but i liked that it would keep it more enclosed.
> I'd install either a 40 psi Senniger or Landscape Products pressure regulator . . . . inline BEFORE the valves
Is it ok to run these 40 psi senninger link you mentioned before the valve to reduce pressure? do you know if These can handle constant city pressure of 90psi? thanks
>I'm curious, how is water is getting out of the borehole
We have a 120m DC submersible pump. https://bitly.com/
It runs on solar panels alone. No controller, no inverter, no battery.
https://smile.amazon.com/gp/product/B01D0D54GS/ref=ppx_yo_dt_b_search_asin_title?ie=UTF8&psc=1
​
Here's the one I bought, not sure if they still make it.
This is a Rain Bird 1812 head - a 12" pop up. The barb elbow that connects it to the funny pipe is broken as well. You'll need these two parts if you reuse the 8-VAN nozzle:
A piece of the elbow is broken off inside the funny pipe. You'll need to cut off about 1" of the funny pipe to fit the new elbow in to it.
What he means here by being able to maintain that pressure is that you need sufficient volume. Those little $100 air compressors at Home Depot won't provide sufficient volume to be able to maintain a good pressure. They're meant for air tools. The smallest compressors we use are 70CFM, but you could probably get away with something as low as 30CFM...
You might be better off just hiring an irrigation company to come do it for $50-$100. Most people don't winterize their own systems.
I run my compressor at 70PSI, but occasionally, if the zone is very small, I still break things. 12" heads come up with a lot of force when there's only 3 or 4 on a zone and will break the top of the head off sometimes. It's pretty rare, but I did break 3 of them on a system 2 days ago with a 375CFM compressor...
Awesome thanks everyone. Can I use thread sealant on this instead of teflon tape? I have this on hand.
Hercules 15620 Real-Tuff Heavy Duty PTFE Pipe Thread Sealant, White, 8 oz https://smile.amazon.com/dp/B000BPOOXI/ref=cm_sw_r_apan_glt_fabc_YW4AR283JZ87THKW1KEZ
You can put a tee in the mainline after the PVB if you're worried about it - or a brass saddle right on the copper - but I blow right through them and it's fine. A PVB is generally rated to >100psi, and water is a greater force-carrier than air since it's more massive and doesn't compress.
You can blow through the test cock, but rather than finding a flared fitting to use, it might just be easier to either remove the test cock and use an NPT 1/8 or 1/4" fitting in its place - or to avoid having to remove it every time - a female-threaded test cock (check size!).
A picture is worth 1000 words.
Pretty sure that's called a flare fitting, and you shouldn't connect anything to it because whomever is testing your backflow annually, as generally required by law, needs to connect their testing kit to that flare fitting. Install a blowout point somewhere else.
Put a saddle on the line where it leaves the house. Copper? No problem, brass saddles exist. Bolt it on, and drill a hole. Then thread a PVC plug in it.
I ordered something like this a few years ago to locate an old doorbell wire for a ring camera. It worked well as long as you can clip it to at least one end of a wire. The tone will stop after you pass the break in the wire.
Kolsol F02 Underground Cable Locator, Wire Tracer with Earphone, Cable Tester for Dog Fence Cables Irrigation Control Wires https://www.amazon.com/dp/B01GDZLZOU/ref=cm_sw_r_cp_api_glt_fabc_2FZM8KNSVK9ZMVCHDKG5
Thanks. I don't know... this is my third conversion, though the others were 4 zone and smaller pipe.
I set up a small 4x6 tent over the top to keep myself out of the sun and put a fan to help with the heat... it works great.
These little tents are GREAT and EASY to setup. https://www.amazon.com/dp/B086Q2GQHL
Well you certainly get the award for most unnecesary splices. Just run the actual wire up to the controller. At least that's a decent way to do it if you're going to splice stuff.
Put duct seal or foam in the outlet though so that box doesn't get filled with insects and moisture. Or you can use a cable gland https://www.amazon.com/TUPARKA-Waterproof-Adjustable-Connectors-Plastic/dp/B07KFCGFYF/ to make a watertight seal.
First of all, a 1" line won't reduce pressure. That's not how it works. There is a misconception that going up in pipe size reduces pressure. There is small temporary pressure drop going from a small line like 1/2" to 1" for maybe a couple inches after the transition due to hydraulic effects, but nothing after that. You will always get more pressure and flow with a larger pipe.
Obligatory note: Underground irrigation requires backflow protection in many jurisdictions whether or not you are using automatic valves. At very least you should use a vacuum breaker like this (https://www.amazon.com/SUNGATOR-Backflow-Preventer-Anti-Siphon-Anti-Backflow/dp/B07VD7B6SM) if you are running off a hose. Personally I would consider this acceptable protection if you're not putting in a valve after (this type of anti-siphon protector is not meant to go before a valve), however your mileage may vary whether this is considered acceptable by your local water department/township/state laws.
You buy one of these at your local hardware store, etc. https://www.amazon.com/Orbit-Sprinkler-Plastic-Extractor-26076/dp/B000I1RQZ8/ref=asc\_df\_B000I1RQZ8/
Shove it in the top, twist it, and voila! You have a small piece of grey pipe in your hands.
Tool: https://www.amazon.com/dp/B0854BHFC3
Using this tool, I can replace a head in about 2 minutes if everything goes right vs 10-15 if I have to dig. I have run into issues where the soil was too wet or sandy, and debris falls into the pipe. I had to run the zone, and shove my hand down and plug the hole with my finger and shut the zone down, and then carefully slip the new head in. The other issues I have had are the elbow being at a slight angle, and being difficult to catch the threads. The included rod helps with both of these issues, put the rod in before you remove the existing body, and anything that falls is less likely to get into the line because the diameter of the rod is close to the inner diameter of an irrigation elbow. And the rod can be used to angle the elbow/riser to catch the threads. Make sure the area isnt super dry, and isnt super wet. You want the soil to hold its shape when the body is removed to prevent debris from falling.
Use a channel lock pliers for the body and top.
With age, the mechanisms that control the rotation could be worn out, and be getting stuck in one position, or missing an area they were previously set to cover.
I can get replacement 4" pop ups for less than that.
If you do want to replace the whole body, I use this tool, and it works fantastic to extract heads without having to dig. The trick is to do the work when the ground has just the right amount of moisture to keep dirt/rocks from falling into the line or fowling up the threads.
This looks to be the link, correct? Do you have a recommended place to buy it?
​
https://www.amazon.com/SPW-HPC-FP-Hydrawise-Upgrade-Professional/dp/B0786JKDZM
​
thank you for all the support and advice. Saved me $100!
Is going outside under a roof. According to amazon the X2's is a outdoor controller.
That is exactly what I'm trying to avoid: to switch out the transformers, and instead of using the cord that comes from the transformer and connects to the socket, just connect the external transformer.
Just leave the sprinklers where they are. Tee off under ground some more poly and then run a bubbler on a spike into the pots.
https://www.amazon.com/DIG-BA1PRO-Adjustable-Dripper-Bubbler/dp/B01H00H0UK
You could pick up one of these: https://smile.amazon.com/dp/B005NWW3U0?psc=1&ref=ppx_yo2_dt_b_product_details and put it on one of the heads to see if you have pressure fluctuations.
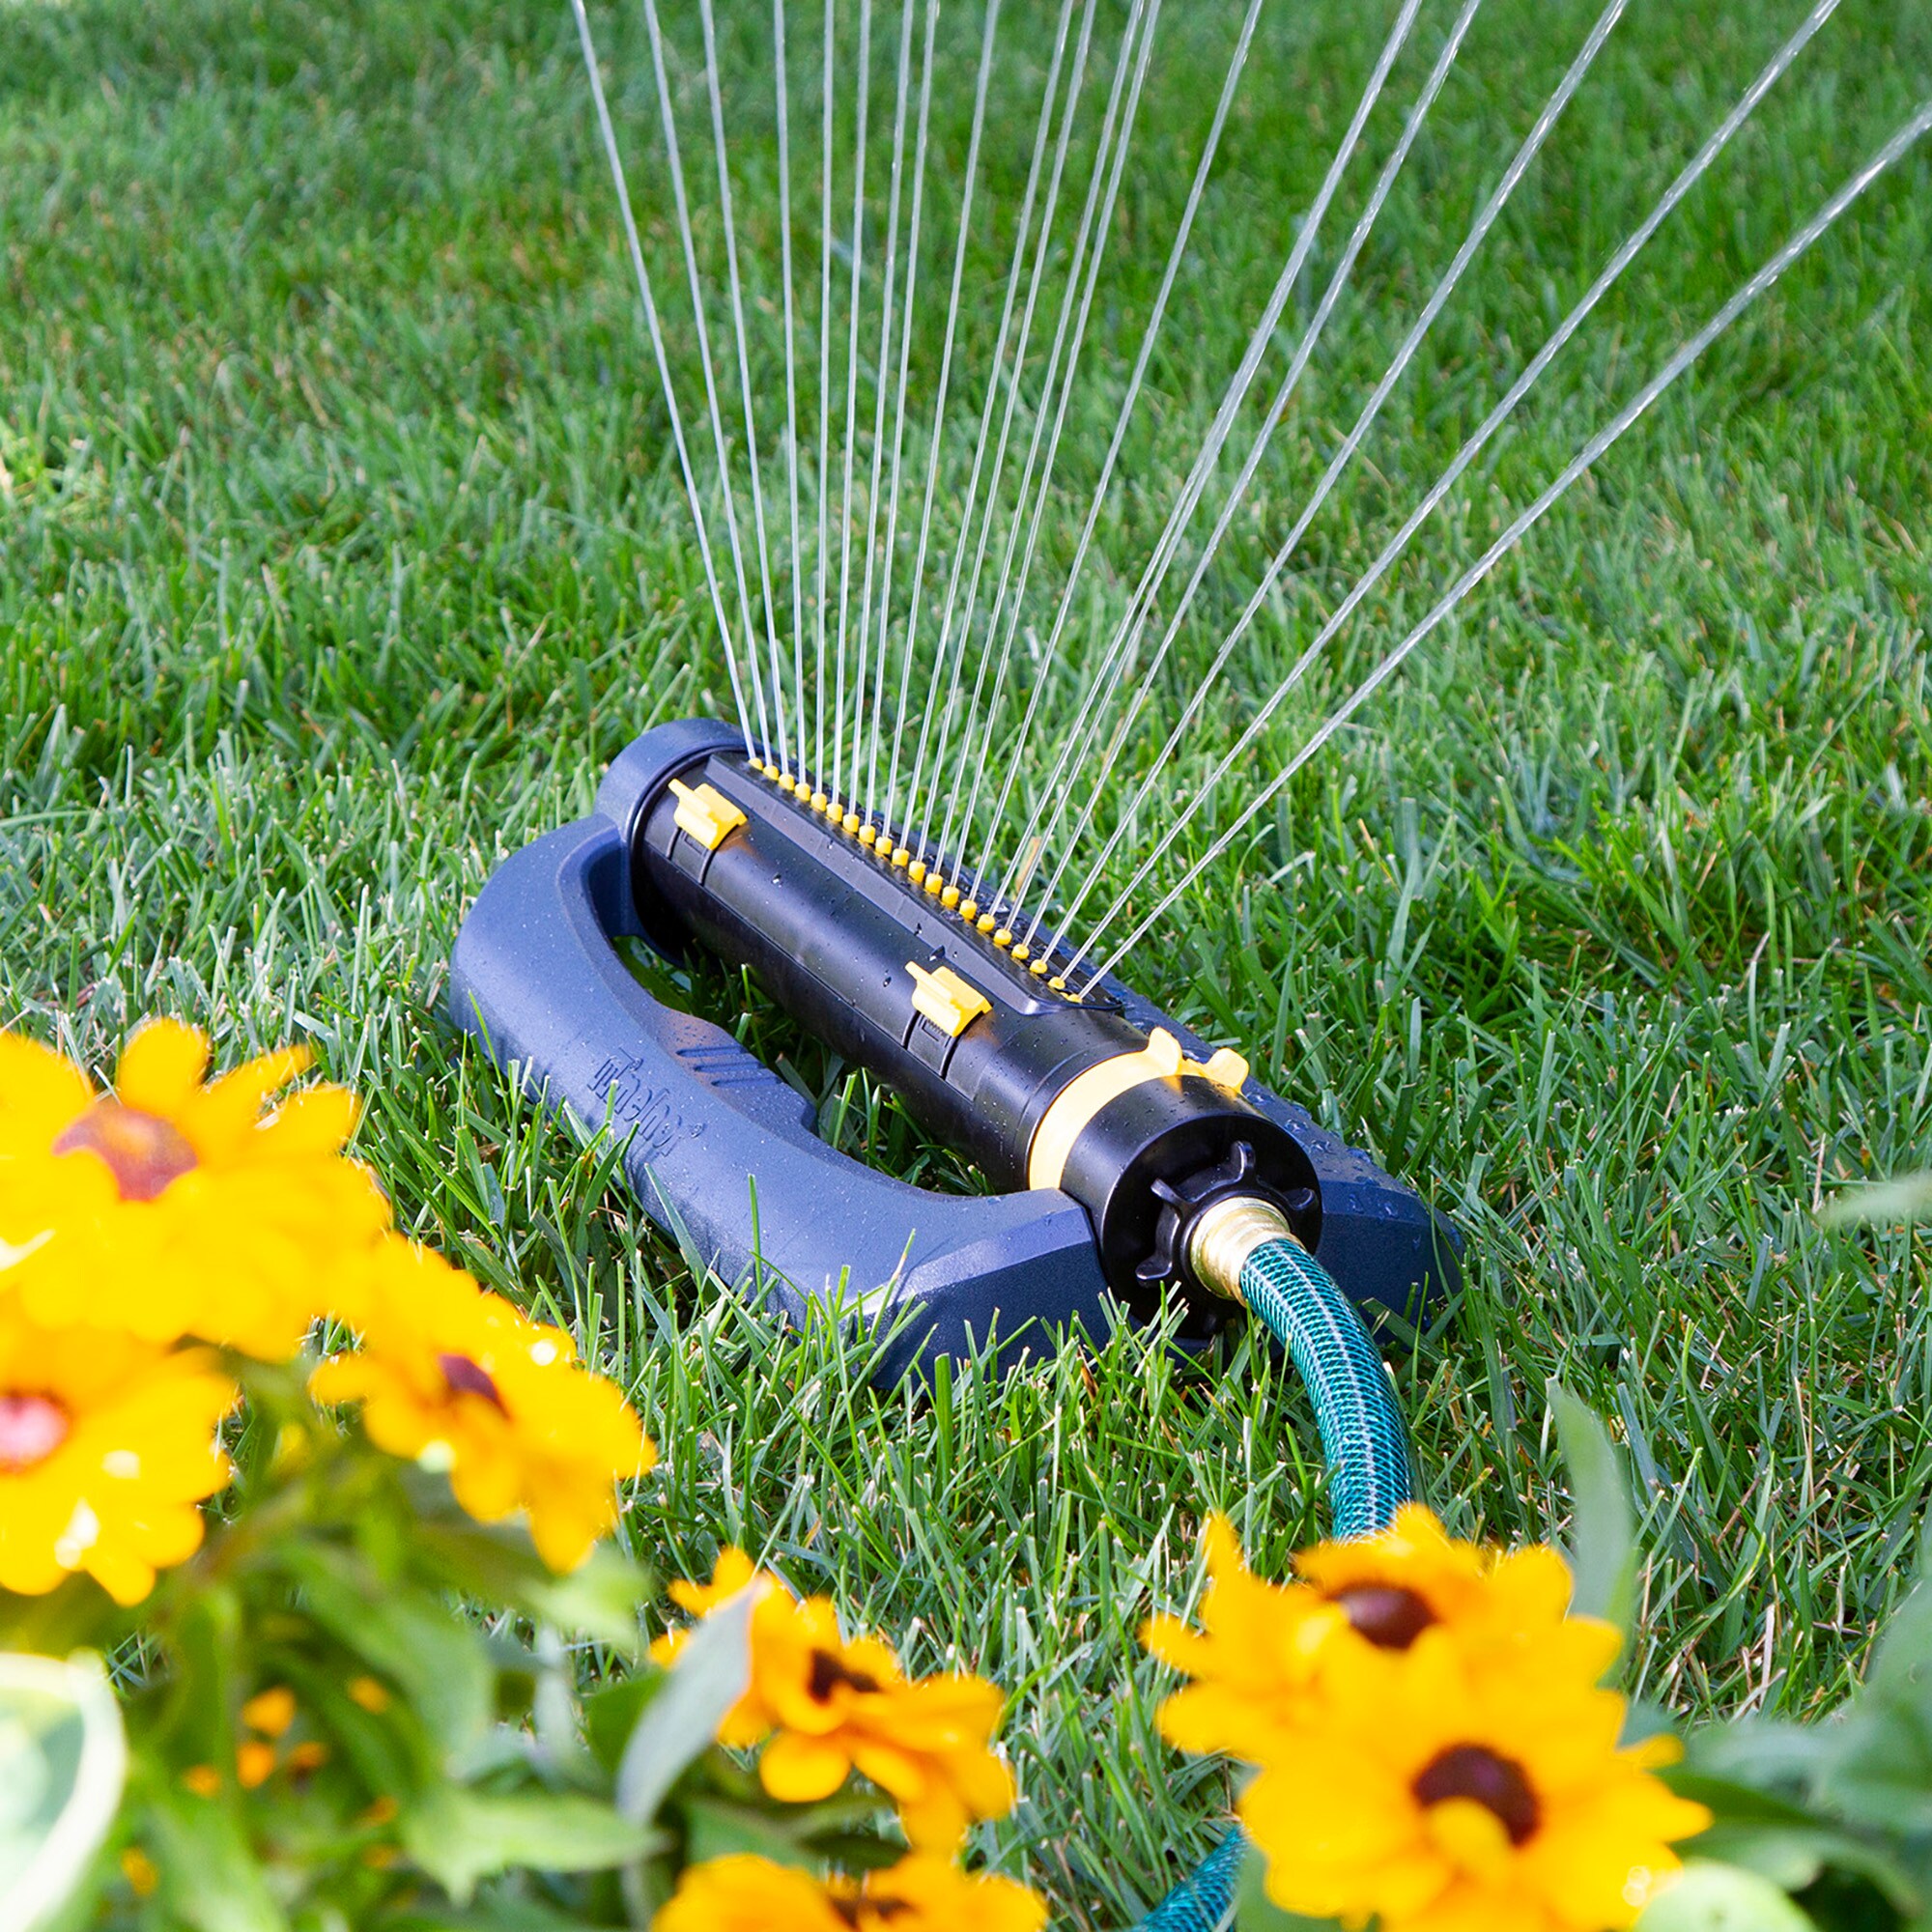
I just started replacing my MPs with Rvans and am happy so far with the throw and coverage.
Good luck and please post if you figure it out.
Doesn’t have to be adjustable, and you don’t want it to unless you get a gauge to set it.
25-30 psi should be good, but idk what threads you’re using as it doesn’t look like you’re in the US. There’s no way we’re could get a good adjustable pressure regulator for less than a fixed one here. I was looking at $60 or more for an adjustable brass regulator.
I have MPs and run up to 40 minutes on a zone with the front yard getting 1.5 hours to complete. It's scary at first coming from non-MPs but it's really correct.
I was doubtful so I got a set of these -- https://smile.amazon.com/gp/product/B005C5OP8G/ref=ppx_yo_dt_b_search_asin_title?ie=UTF8&psc=1
and right now I'm doing about .5 inches per water cycle. If you an only do once a week I would extend the time after measuring or if this is a home owners association I would water at night and to heck with them. /s
>Do you run multiple emitters for trees and bushes?
Yes
>do you run them both off the main line or split the spaghetti closer to the plant?
As a rule, 1 emitter per spaghetto. That rule can be bent, but better off following it.
>do you still run a solid main tubing for transport
Yes. Presumably there will area you don't want/need water between the spigot and garden. If not then fell free to go right to emitters.
There are a bunch of right ways to do it, but I like doing it with 1/2" solid line, with 1/4" barb and tubing punctured in to go to each plant, and stake micro bubblers ($20 for 100 of them) at each plant. Easy enough to set up, less prone to clogging, easy to monitor, easy to adjust.
Looking these over because I'm attempting to convert a few heads on a single station to drip for 3 garden beds we made.
These kits seem to missing what I've read should be included for such a conversion. Specifically, a PSI regulator and a filter. Also a flow control is a nice-to-have but not a firm requirement. The idea I am running with is to have things somewhat adjustable as my wife plants different stuff in the garden beds from season to season. Adjust water flow to specific bed, and then swapping out the 1/4" drip lines with different holes punched in them.
From those kits, do you know if the replacement heads the manifolds connect to include a filter and pressure regulator? I'm referring to the part that goes underground from this listing. I'd assume they do not as they look a lot like standard pop-up heads and perhaps use the same shape just to be a matched replacement.
I wear Dunlop's oil rig boots for service, and generic cheap work boots for install, with a Sole Saver.
I tried out Rock Fall's work boots, and they're damn good, they have a "digging plate" and nitrile rubber soles, but I still wore through them in a year without the sole saver. They're from the UK so they probably won't meet ANSI or CSA standards - if you care. Someone I work with swears by Bates boots - I think they have a waterproof lining - they make boots for the US military.
It's pretty close, I connect my manifold to my hose with a 5' hose (this one). I do notice now that it's a 5/8" line and I know I could get a 3/4" one somewhere. Honestly I wish my local hydraulic hose place hadn't closed up. Then I'd just have them make me something that would last forever.
I think you're right though, and that was my initial suspicion. Volume or pressure. I'll go through everything again and see if I can find any restrictions.
I'm on city water. I'll go through and flush the lines again just to check!
None of my sprinklers individually have more than 5' of 1/2" (or maybe it's 3/4", I think it's 3/4"). Most of them are 1" up to the last 2'.
Just grab it with pliers. You're throwing it away anyway, its soft plastic and not very reusable, and cheap to replace if you need too. If it breaks off, one of these is designed to extract it https://www.amazon.com/Orbit-Sprinkler-System-Extractor-26073D/dp/B000BQRAOM/ or a similar extractor, Lowes sells this type of tool for example.
The whole "soft plastic" thing is the reason to replace it. Not the end of the world if you can't remove it and plug the pipe, but risers are pretty much designed to break (to save the pipe underneath from damage) and so they are pretty weak and a potential leakage point.
There is a smaller, cheaper version which is the same, just smaller and more cheaply built.
Also, the difference between the indoor and outdoor models, is the outdoor ProHC has a locking door and key, and the transformer is built in, instead of having a wall-wart transformer.
Something like this would work:
https://smile.amazon.com/Functional-Devices-TR100VA001-Transformer-Threaded/dp/B007IAVJ64/
A local golf (Rain Bird or Toro) distributor might have buckets of old transformers sitting around they'd be willing to part with for nothing.
Get as rainbird esp-me3. It's modular and my easier to use than a Hydra wise.
https://www.amazon.com/dp/B011TMYBDO/ref=cm_sw_r_cp_apa_glc_fabc_Q0HCJC1PPXDE2XE0QP2P
This rain freeze sensor will will be enough. You can set your timer to water the most the bamboo will ever need on the hottest day and it will lower times passed on predicted and actual rainfall.
That company should have sold you a wireless sensor. The way they hooked it up is old school. The jumper wire is there if someone decides to flip the raid sensor switch to active with out a sensor wired into the controller it's self. So you don't need it if you put the sensor into the bypass position in the controller sensor setting.
I'd get your money back from the first company and return the rain sensor.
https://www.amazon.com/dp/B011TMYBDO/ref=cm_sw_r_cp_apa_glc_fabc_Q0HCJC1PPXDE2XE0QP2P
This is the sensor designed to go with your controller.
Order one of these off Amazon for really cheap. Sprinkler warehouse is also a great website for cheap sprinkler parts. If you want to go to a local store Find a siteone landscape supply they are Nation wide.
There's simple instructions in the manual with the rain sensor it consists of 4 wires in total and should take no longer than 30 mins.
If you're lucky, you'll be able to run the zones and just dig at the wet spots. If the ground is soft you might be able to stick a rod down (like this https://www.amazon.com/AMS-403-02-42-Tile-Probe/dp/B00B3ZH3UG/) until you find the head, after making an educated guess as to where the head is.
It is possible to cut the pipe at the last known head, run a fishtape down and use an irrigation tracer to locate the pipe, but you'd probably be better off just having a new pipe and heads installed for how much it would cost to have to locate a bunch of heads this way.
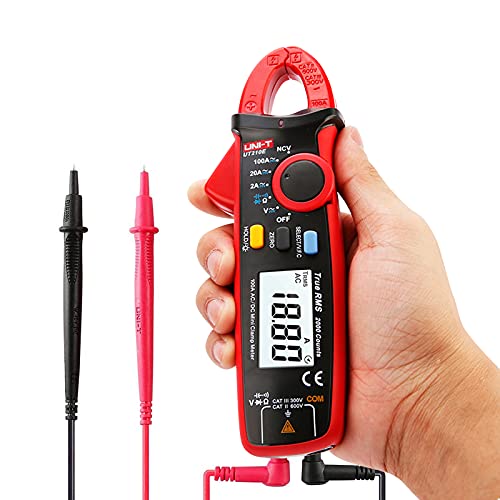
This might be very basic but the two things that changed the game for me were;
1 - leaning how to use a multimeter to test the ohms and the voltage. The amount of jobs that would have otherwise taken me hours to work out I can now determine what's wrong in minutes and inform the customer how long/how much the jobs will take.
2 - I recently discovered this guy (link below), I bought 3 and I'm going to get more. Saves so much time when you have to blow out multiple heads on each zone. Untill now I've just being using a small flat head screwdriver and jamming it between the stem of the head and the base. https://www.amazon.com/dp/B00NFRGIII/ref=cm_sw_r_cp_apa_glc_fabc_SKVREZCP3D72DJYC3496
Rain Bird Rotor Tool 5000 Rotor Screwdriver/Pull-up Tool https://smile.amazon.com/dp/B009Y9ZPSA/
Any small screwdriver will work but here’s the green RB one. It’s nearly a must-have for the rotors but adjusting the 1800s will work with any similar small screw driver.
Since you still haven't had a reply I'll take a shot in the dark...
What is the inrush current of the relay coil? Your controller can only output 0.65A, so if the inrush current of the relay is like 1A or more (plus you're running a solenoid on top of it around 0.25A) then perhaps that is causing the controller to sense what it thinks is a short and disable the MV for the cycle.
Why did it work manually? The holding current of the relay will be much lower than the inrush current and it's likely 0.65A is enough for that however this newer controller has some fancy fault detection that your Richdell didn't, so when it senses a spike in current it shuts down. The issue here might be that the inrush current is pushing past that threshold for some small amount of time, but the controller only takes current readings at some frequency and the inrush spike is shorter than that frequency, so sometimes it catches it and sometimes it doesn't.
If that's the problem I would fix it by just getting another very small 24VAC relay with a small inrush and holding current and use it to drive the larger relay. That way the pump relay is powered directly from the transformer and not from the P/MV port. Something like this has an inrush current of 4VA (166mA @ 24VAC).
Well there's this. But someone above says to get rid of orbit because it's trash. But... I don't know the valves are already there. Hmm.
https://www.amazon.com/Orbit-WaterMaster-Battery-Operated-Sprinkler/dp/B0747NZ64G?th=1
Hi
I did a test and swapped a good valve to a broken one and it worked. Trying to source buying some now. found this on amazon and it looks to be the same as i have. There is not much information though. Any idea if it should work
​
Thanks!
Just a suggestion, since I happen to be an electronics hobbyist... An automotive relay will expect a 12VDC control signal to switch. If you're looking to hook up a microcontroller like an Arduino/ESP8266/NodeMCU or a Raspberri Pi you'll probably want a relay that switches with 5V. Otherwise you'd need a logic-level MOSFET to drive the 12V relay. You could get 12V by rectifying the 24VAC controller input and stepping it down with a (7812) linear regulator or buck converter. A second (7805) regulator could power your microcontroller.
Good luck!
Updatre #2 so ive decided to order a new valve diaphram kit . which of these do you prefer: The anti siphon or Inline valves? https://www.amazon.com/Rain-Bird-DRKCP-CPF-Replacement/dp/B00004RAAW/ref=bmx_3/144-2541002-2708212?_encoding=UTF8&pd_rd_i=B00004RAAW&pd_rd_r=e810cdfa-0b13-4934-9970-92fefd0967e9&pd_rd_w=NMWwU&pd_rd_wg=3p8vi&pf_rd_p=8cea7b83-ade...