
What are
/r/furniturerestoration's
favorite Products & Services?
From 3.5 billion Reddit comments
The most popular Products mentioned in /r/furniturerestoration:


The most popular Services mentioned in /r/furniturerestoration:
Facebook Marketplace
Airbnb
The most popular reviews in /r/furniturerestoration:
Thanks for your fast reply.
The rental was 8 days, via Airbnb.com. The Airbnb Host Guarantee loosely dictates what the host (property owner) is protected against. In this specific case, there was no security deposit taken, and the owner has filed a dispute against me requesting $100 for the damages. It won't make my life hell at all, its just a back-and-forth until we both agree on a final price.
I do agree with you that she likely won't bother repairing it. If it were me I would put a runner over the top or some other protection that doubles as decoration. I guess in that light I am a little hesitant to giver her $100.
I don't think that changes your answer. In her message to me regarding the repair effort, she will have to sand, stain, and apply a top-coat.
I agree with the other comment, but I would probably start with a sandable primer, particularly on those damaged spots. Prime and sand to smooth out the rough texture.
This would be good: https://www.amazon.com/VHT-SP302-Sandable-Primer-Filler/dp/B000CPJLN0
I gave it a bit of a stress test and the stuff we have isn't likely good. To be fair, I have a hunch this was originally sold as something ike batting or the like.
I found an acrylic felt which is advertised for upholstery on Amazon:
It's cheap, so not a big loss if it's not great. I might try that.
The only other source online that I found that seems to reliably sell felt specifically for upholstery was Knoll. Of course, their stuff is $50 a yard. Which I'm sure is worth it for knoll furniture. Alas, not sure it's worth it for these $12 chairs. :)
She does amazing work. I paint furniture like this for a living, and this is excellent work and artistry.
I have the perfect gift. I recently discovered a company called IOD (Iron Orchid Design). The hottest thing right now are their “stamps”. These are large (dinner plate sized) stamps that can be used with paint or cloth ink. They are super easy to use, are quite unique, and they can be used with her normal plates.
Here is one example of a stamp. You can search for “IOD Stamp” on Amazon and see lots. Combination ones like this would be best if you are on a budget. If you can spend $100, I would get some large stamps and some combos...and maybe a container of ink.
There are lots of videos online on how to use these stamps. Take a look!
Sorry about the rude response you’ve been given here. I’ve managed to find this on Amazon after a bit of a search for you, hopefully it helps: https://www.amazon.com/Pivots-Barrister-Lawyers-Bookcase-Hardware/dp/B07RSWMR3J
A decent carpenter could fix this for you. If you were determined enough, you could probably fix it yourself. If you look closely at the pattern, it's really just two overlapping directions of lattice with regular notches cut in it. You could buy some material like this and make a pattern from the existing lattice, then cut out the notches with a Dremel tool. You'd have to clean up the edges of the hole in the lattice, then piece in your replacement pieces.
I would remove the drop leaf to get it out of the way. Then see if that leg will wiggle off. If so then scrape off the old glue, (which is hide glue probably) then re-glue with something like Titebond 2. If the leg wont wiggle off then get something like this and squirt some glue in the opening. Clamp up overnight. Be sure to clamp it either with a bar clamp (Harbor Freight) or use a ratchet strap. Wood glue needs to be clamped to be effective.
Oh, and have a damp rag available to clean up any glue squeeze out....which there will be.
Basically I bought a new house with a summerhouse, and the wood needs restoring. The colours are all over the shop. I need some advice to get started. I found this kit on Amazon, is this enough?
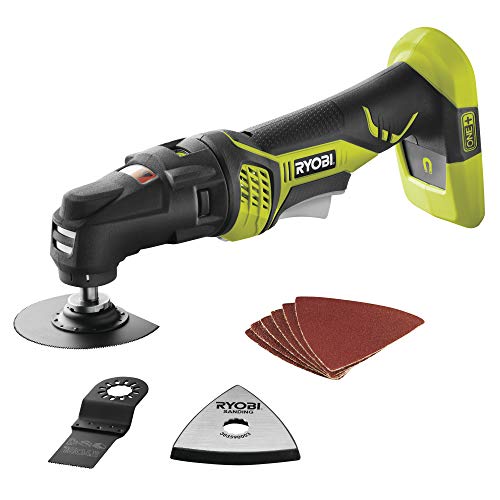
Removal is only half the task, and I don't think you have the right tool.
A sander/polisher combo is the best item. A bench mounted tool is not appropriate for the task.
https://www.amazon.com/RYOBI-Cordless-Variable-Polisher-PBF102B/dp/B09MKZJK7G/ref=sr_1_11?crid=9RALUKNI4LQ4&keywords=sander%2Fpolisher+variable+speed&qid=1661893107&sprefix=sander%2Fpolisher+variable+spee%2Caps%2C119&sr=8-11&ufe=app_do%3Aamzn1.fos.006c50ae-5d4c-4777-9bc0-4513d670b6bc here is a tool that would work well.
To do this well, you need to do the following on the affected areas: Start with 220 grit sandpaper, then 320, then 600, then 1000 (at least)
Then use a cutting pad with cutting compound over the affected areas and nearby areas.
Then use a polishing pad and polishing compound over the entire thing.
You'll want to remove the cushions for this process.
You could theoretically do all of that by hand if you don't ever plan to use a polisher/sander again.
If the lacquer is thick, and you would prefer to just have polished aluminum, go over the entire thing with the process I described above. It'll take forever by hand, though.
If you're concerned about the emissions wear a NIOSH mask. Wear an N95 or better for sanding.
Ok I just edited the post so it has pics of the full chair. Btw, is wood glue best for this? I've seen a product on amazon that seems like a super glue, not sure if this would be good?
Thank you again for your time, I really appreciate it!
Ah! Thanks much for the pointers! For future reference, how do you make out if it's veneer?
And ok! Do you mean this? https://www.amazon.com/OSMO-Polyx-Hard-Wax-25-3/dp/B003RDW1UY
And do I apply multiple coats?
And ya! It's a great find - has two leaves and even extends! It has cute little lion paws at the bottom for the legs too!
No but you can paint it. I just saw a video this morning where someone painted with a “liquid wood” kit. It was a base color then a top coat with a special roller that gave if wood grain.
Retique It Liquid Wood - Light Wood Quart - Paint it Then Stain it - Stainable Wood Fiber Paint - Put a Fresh Coat of Wood on it (32oz Light Wood) https://www.amazon.com/dp/B0758324CY/ref=cm_sw_r_cp_api_i_YDC59E2R1BY779DK9DW3?_encoding=UTF8&psc=1
We found updated hardware on Amazon and under "other sellers ", Amazon warehouse sells new returns at a steal, if they have them. We put these on dark java gel stained cabinets to update the look.
https://www.amazon.com/25Pack-Cabinet-Drawer-Kitchen-Hardware/dp/B072TZZSY3?pd_rd_w=DICHk&content-id=amzn1.sym.c4ee1111-7381-4c98-b5f0-82f9cae37cc4&pf_rd_p=c4ee1111-7381-4c98-b5f0-82f9cae37cc4&pf_rd_r=0K5BRXKR2C3H2MS0KWS5&pd_rd_wg=...
You can’t, but you can get stick on plastic strips on amazon that stop them from scratching.
Like these
https://www.amazon.de/-/en/protection-adhesive-transparent-furniture-anti-scratch/dp/B08B5LS8CN
If heat doesn't work, use a thin coping saw to cut through the glue, then (carefully) use a razor blade (or a utility knife blade if you need more reach) to scrape out all/as much as possible of the remaining glue. Then glue and clamp properly. Regular PVA wood glue like G-pa used it fine, just wipe off the excess that squeezes out with a damp rag before it dries.
I just Googled recliner extension cord and this came up from Amazon.
YHWSHINE 10 Feet(3 Metres) Lift Chair or Power Recliner DC Output Extension Motor Cable for OKIN Tranquil Ease https://www.amazon.com/dp/B01FLTU5NG/ref=cm_sw_r_apan_glt_i_GQ5FZ961Z2SY7ZPGD0FG?_encoding=UTF8&psc=1
Use a syringe and needle (blunt is fine, if you don't have access to normal hypodermic needles) to inject a small amount of glue "inside" the crack (try not to use too much so you minimize squeeze out). Then, cover with waxed/parchment paper or a silicone mat, place a block of wood on top of the paper/mat and clamp tightly. Let the glue set up, then (gently) use a card scraper or super-sharp chisel to remove any excess glue. Finally, lightly sand any remaining glue/imperfections and, if needed, apply a finish.
Also, from what I gather, "acorn wood" is not really a type of wood. It is just what West Elm calls walnut. So, worst case, you can probably find replacement veneer if needed (by searching for walnut instead of acorn).
Get some junk furniture you don't care about and start learning. Get a book by Bob Flexner, and disregard basically anything you see on YouTube. There's good info out there, but it's buried within mountains of shit. It's difficult for a newbie to tease out the real tips from the crap.
It's probably just a generic furniture key, there are a handful of common patterns, but there isn't really a way to figure it out other than trial and error.
Anecdotal, but I used this product to get old stains out of leather in my car: Leatherique 8 oz kits (8oz kit) https://www.amazon.com/dp/B00I9I5FGE/ref=cm_sw_r_apan_glt_i_VGXZWG2E79K6QXEP6C83?psc=1. This seems a bit far gone though.
Thanks....I brought it in Germany at Amazon...
OLI-NATURA Hartwachsöl
good luck
Are you open to weaving it yourself?
You could try plastic gimp, like the stuff that kids use to make bracelets.
String Gimp Plastic Lacing Cord for Bracelets Scoubidou Craft Kits 20 Colors https://www.amazon.com/dp/B085HJFNV7/ref=cm_sw_r_cp_api_glt_i_JG6PAGDWWFRVK4HFM18Y?_encoding=UTF8&psc=1
This style is not my particular area of expertise, but I'd guess that it's only going to be worth maybe a couple hundred dollars. If you can find some markings on it that indicate designer or manufacturer you might be able to find some comps online, otherwise you can just google "eagle dry bar" or something like that.
Remember that you're looking for sold prices, though. Any clueless or dishonest seller can list an item for however much they want, but that doesn't mean a thing. You can get an idea of an item's true value by finding listings that show sold prices, since that's what people are actually willing to pay. In other words, if you see this listed on 1stDibs for $75,000 don't get your hopes up. It may still only be worth $200.
If that plastic sleeve is missing from the bottom and the mirror is sitting lower, then yes that would cause the problem. Have you lost the sleeves? If so, you can probably get replacements at a good hardware store. Or you can get a kit like this on amazon.
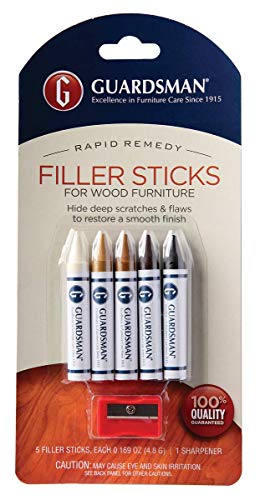
I would just use one of these.
Guardsman Wood Repair Filler Sticks - 5 Colors Plus Sharpener, Repair and Restore Scratched Furniture https://www.amazon.com/dp/B0057IV5PY/ref=cm_sw_r_cp_api_glt_fabc_TCYBPXT8Q9S35VZFECPK?_encoding=UTF8&psc=1
For the sticking issue, I'd just use a non-stick barrier between the glued wood and the rope. Some waxed or parchment paper would work, though personally I've taken to using these cheapo silicone baking mats for all my non-stick needs. No idea if they are any good for baking, but they work great for continuing messes and keeping things from sticking together! They are super cheap too, so I cut them into different sizes/shapes as needed and consider them "disposable" once they get ratty.
As far as moistening the wood, definitely don't soak it in water. First check and see how flexible/pliable the wood is. You may not need to do anything if it will already move back into position without fuss. If it is too stiff, or starts to crack, then you can look at either steaming it (if you have a steamer, of course, and you'll need to make a pouch/temporary enclosure to contain the steam.) Or even just wetting a rag and wrapping it up to soak up some moisture over night. You want to get the moisture content high enough that you can bend it without breaking, but no so high that it is releasing moisture ("sweating") that could interfere with your glue bonding. It's trial and error basically, so your best bet is to test periodically until you get another flex, then stop.
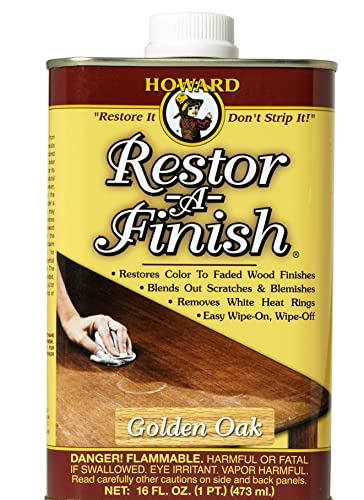
Because these pieces were originally finished with a nitrocellulose lacquer, oily products like Restorafinish can seep into the cracks and dry areas and give the wood a blotchy, uneven appearance. Like other commenters have said, it’s basically a quick-fix product.
My advice would be to strip and (lightly) sand the damaged areas, then apply a new lacquer coat. Mohawk spray lacquer can be ordered online and is pretty user friendly, just make sure you apply it outside or in a well ventilated area.
If it’s cloudy this should work. Clean it with vm+p naphtha first. If the finish is gone tho this product won’t work.
Mohawk Finishing Products M103-0475 Mohawk Plus Retarder No Blush, 13 oz, Clear https://smile.amazon.com/dp/B07N1WYHLS/ref=cm_sw_r_cp_api_glt_fabc_Y0YJESZ433CYBQ0P22QQ
Don't listen to them, you can't use any old Phillips or a square drive on this, it will strip out.
There are four sizes of Phillips head, this looks like a #3 or #4 head. You must use the correct size on this or you will cam it out to be totally useless. The correct head will fit totally snug and not rock in the head at all. It's probably this:
https://www.amazon.com/Williams-BITPH0401-Number-4-Phillips-Screwdriver/dp/B007YRCDC0
I have a beautiful old chair whose cushion is held up by leather straps fitted into standard metal webbing tips which are slotted into the wood. Unfortunately, these straps have desiccated and some of them have broken.
I have never repaired furniture webbing or worked with leather in general before, and I am on a fairly tight budget, but I love this chair, so I have two questions:
1.) should I replace these straps with leather? Even leatherworking companies that I've found online seem to sell mostly nylon, polypropylene, etc. furniture webbing.
2.) if I do use leather (and my intent is to both repair and restore, so my impulse is to do so unless it is foolish by comparison), will any leather belt straps do? I don't know if something like this would be appropriate; the current straps are about 20in. long each at 1.75in. width and 2.5-3mm thickness, and there are 6 of them, so it's a lot of leather.
Multi-tool or rotary tool with this type of head because the sanding drum is very harsh and will likely end up shaping as well as sanding.
Good luck!
Restor-a-finish is a product that may help remove this watermark without having to completely refinish the table. I would try that before sanding and stripping.
If you do not want to stain or put a finish on it like a Shellac or Polyurethane using Feed-n-Wax will bring out the natural grain of the wood while adding a little protection to the wood. This will not affect any future decisions if you do end up wanting to stain or finish the table.
Link to Feed-n-Wax
Link to different types of finishes:
Thanks for your thoughts on this. I was also looking into Minwax refinisher https://www.amazon.com/Minwax-67300000-Antique-Furniture-Refinisher/dp/B000DZDA7W/ref=cm_cr_arp_d_product_top?ie=UTF8
I was thinking of stripping and lightly sanding. I'm not sure if you can just sand the top coat finish off and not the stain color? I really want to keep the color of the wood. But just even out the scratches and make the watermarks less visible.
Might be closer to what you want. I searched for double capped bolts. They have some that the cap shaft is full length. Don’t know if the inside is fully threaded so dunno if you can cut them to length
Something like this might be a good substitute Black M8 Countersunk Rivet Socket Cap Connecting Bolts Cap Nuts Assortment Kit, M8 x 20mm/25mm/30mm/35mm/40mm
I don't think so. This seems more like a scraper for concrete or rough surfaces. You should be using something like a cabinet scraper, pulled towards you, not pushed.
Something like this: Scraper
You can also make one from an old saw plate easily, there's many videos online.
Even if you don't use one on this project, I'd recommend picking one up, they're great. Whatever you use, test it on some scrap wood first to see what sort of finish it leaves.
I ordered these earlier but if the floor doesn’t match I’ll do what you advised me earlier for sure:
Weiman Wood Repair System Kit - 4 Filler Sticks 4 Touch Up Markers - Floor and Furniture Scratch Fix https://www.amazon.ca/dp/B01G92GN08/ref=cm_sw_r_cp_api_glt_i_9SD9BAKD4NANAH6MJH3Q
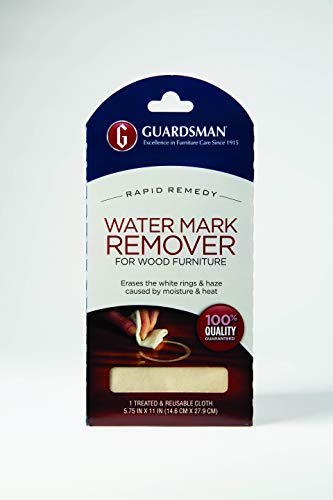
This isn't going to fix your TV stand, but if you want to put the plant back, you could get something like this to keep the plant from destroying the surface even more. I have them and they work great.
DUDE! I actually saw your post and almost commented but I'm not an expert. Anyway, I used a few of these all over my cabinet and it's almost good as new. The rings on the top are less obvious but not completely gone. I'm not sure it'll fix all your problems since your veneer damage seems a bit worse than mine, but that's what I did.
This joint will most likely have been glued by the manufacturer, so they probably didn't do the best job; it's supposed to be permanent. It depends on how thick you can make the glue. More glue + less water = better hold. If I'm using a pretty small syringe, I will sometimes pull out the plunger and load the glue from the back instead of trying to draw it up through the needle. In order to cover as much surface area as I can, I will also often try to gently pry the crack open further. Try tapping a few toothpicks into the crack to wedge it open slightly.
Edit: here's a cheap set of syringes for this purpose
I should have added some context with the photos.
I repair furniture full time and specialize in repairing and restoring leather. I have been doing this about 10 years and learned from my father who’s been at it 20+.
This sofa was originally a semi aniline finish and due to sun fading and allowing a dog to be on the furniture the sofa lost color and the finish on the arms and seat cushions. The process I use is to change it to a full finish. Aniline leather is dyed and left without any protective coating. Semi aniline is dyed and has a clear coat to offer a bit of protection. And full finish is dyed then coated with a pigmented color coat (may have multiple colors) and then clear coated afterwards. If you do this process to an aniline or semi aniline it will slightly effect the feel of the leather and make it a bit stiffer.
If you have genuine leather it is very important to clean and condition your leather at least every 6 months. I recommend a two part kit one bottle is a soft cleaner that you use over the whole piece first and then work in your conditioner.
Guardsman Leather Care Kit 4 Pack https://smile.amazon.com/dp/B01C3FC3IQ/ref=cm_sw_r_cp_api_glc_fabc_cPo5Fb1707NKJ
The process I used to restore is from advanced leather solutions advleather.com
I use their professional kit but they do have a diy kit, color matching service or ability to change color entirely. They also have videos on YouTube to check out.
replace the rails!
​
​
Make sure you're getting some with the same depth and length and the replacement process can be fiddly to get everything lined up, but my husband and I did this to two dressers we got (replaced old 3/4 slides with full extension soft close ones) and it's fantastic.
The bottom is chalk paint off Amazon I’ve linked it below. The top stain can be found on your local Home Depot link also below.
Prestige Interior Paint and Primer In One, Chalkboard, Flat, 1-Gallon https://www.amazon.com/dp/B00QF5XWGI/ref=cm_sw_r_cp_api_fab_z8jCFbVEW7GEF
https://www.homedepot.com/p/Varathane-1-qt-Gunstock-Classic-Wood-Interior-Stain-339711/305502016
The lid on my sectionals storage bin broke. What should I order to replace it, I found this hinge on amazon but there are several different options.