
What are
/r/AskAstrophotography's
favorite Products & Services?
From 3.5 billion Reddit comments
The most popular Products mentioned in /r/AskAstrophotography:


The most popular Services mentioned in /r/AskAstrophotography:
Hugin
Magic Lantern
Wormhole.app
MEncoder
GIMP
Gmail
qDslrDashboard
CaptureGRID
darktable
Facebook Marketplace
The most popular Android Apps mentioned in /r/AskAstrophotography:
DSLR Remote
Canon Camera Connect
The most popular reviews in /r/AskAstrophotography:
That's a Cisco cable and won't work for this purpose: it doesn't have the right hardware or pinout. You need an EQDir cable which is specifically meant to connect Skywatcher mounts to PCs. I have this one.
https://www.amazon.com/dp/B08642B4WN/ref=cm_sw_r_cp_apa_glt_fabc_7945QCHBE6NZQ18EVP33
Also baud rate should be set to 9600 for the HEQ5. A baud rate of 115200 is for the Skywatcher mounts with a built-in USB port.
If you have a hand controller the PC direct mode would work too with a USB-B cable.
If you already have a DSLR, why don't you get an adapter for THAT??? For example, I have used this one which mounts directly to my camera body and fits into the standard 1.25" eyepiece mount on my telescope. I had to get the adapter with the longer body to move the mirror far enough away from the telescope's focal point, but it also comes in handy to be able to drop eyepieces directly into this to increase the magnification. Just make sure you get a metal adapter (there are some made of plastic) so it doesn't break if your camera isn't vertically over the telescope.
I agree with 800 ISO
I have a couple T3i and if you are willing, I recommend you take a look at Magic Lantern to flash your camera for some nice features - like a software intervelometer to automate shots and screen brightness/gain settings to better find and center targets
I bought one of these, because running my car as a really expensive generator wasn't a good option to me, since the 12v adapter doesn't stay powered unless it's on.
Most that you can buy come to fit a range of apertures, such as this one which would fit your scope fine:
You can also make your own if you have a 3D printer, or don't mind spending a bit of time with a box knife and some cardboard.
I use this Mini-PC. It weighs basically nothing, so I mounted it hanging off the end of my vixen rail using a T-bracket from the hardware store.
https://www.amazon.com/gp/product/B07Q4WBLKV/
I control it using my laptop and Windows Remote Desktop Connection, which has been working great.
Sounds OK but I don't think the bulb will have given you an even illumination. I recommend a flat panel like this https://www.amazon.co.uk/dp/B07GSVB7RR?ref=ppx_pop_mob_ap_share.
Darks and bias sound correct and using the scripts should be OK.
You can share the files by uploading to Google drive.
https://www.amazon.com/dp/B07L68MRQL/ref=cm_sw_r_cp_apa_glt_fabc_QYH8Y2R0CG0B53EQ8Q1R
My girlfriend got me one of these Caden backpacks and it holds my SGP + accessories, dslr with 2 lenses, and everything needed except my laptop and tripod!
For $30 I think it may be worth a shot!
If the Dec axis sticks the mount won't be able to recover, you should have a light application of some good grease (I like synthetic, PTFE added grease such as thissuperlube ) on all metal to metal surfaces, any metal burrs will also interfere with smooth movement. The EQ5 I had, was completely taken apart and I cleaned everything and found lots of uneven surfaces, metal burrs that needed to be sorted and I lapped the gear teeth. Even new these are a complete crap shoot if you're going to get one that will work well or won't because during manufacturing they will use the tooling until it's worn as much as possible to save money.
This is happening because the 1.25" nosepiece of the T-ring you bought is smaller than the camera sensor.
A full frame camera sensor is 36 x 24mm.
A 1.25" eyepiece exterior dimension is just 31.75mm, and the widest interior dimension is usually 29mm.
This is why you can see the dark edges on the width of the sensor (36mm), but not the top and bottom (24mm). And of course the diagonal dimension is larger than even 36mm.
The solution is to get a 2" nosepiece for your T-ring: https://www.amazon.com/Serounder-Astronomical-Telescope-Eyepiece-Photography/dp/B07QV8RNB8/
However, if you only have a 1.25" focuser, then I'm afraid you're stuck with vignetting in that telescope / camera combo. Options would be to downgrade the camera to one with a smaller sensor whose diagonal size is smaller than 29mm, or upgrade the telescope to one that can actually support a 2" focuser.
Note that adding a 2" focuser to a telescope designed for a 1.25" focuser will not fix the problem.
Like u/4KidsOneCamera said, get the tripod for the swsa its self. Its $121 cad for me so just over 100 bucks. If you really need smth under $100
​
12V DC is pretty safe and easy to work with and because it's so widespread there are lots of ready-made parts. u/Broan13 linked a good example video. In that the guy used this adapter which already has a fuse holder built in, as long as you get something similar you'll be fine (make sure it's actually genuine and has a fuse).
Other than that just use sufficient gauge (thickness) wire for the current you need, the guy in the video used 14 gauge which is more than enough, but he's following the best advice for electrical work which is "when in doubt, overbuild".
One thing I would do which the person in the video didn't is cover the terminals of the battery or put a lid over the box, so that if you drop something at night or in transport it has no chance of falling across the terminals and causing a short. Keep it ventilated though.
Inspired by the post to go looking .I'm in Thailand. Not finding any Pelican cases on my local Amazon like site, and there's no Harbor freight here either.
I did find something called a "Safebox" 36 liter waterproof case for 3,300 Baht, or about $110US. I think I'll order it. It has dividers inside rather than being all foam, but who knows... maybe I can find foam somewhere and adapt, or maybe what's in it will work ok.
Searched for it on Amazon for all ya'll, but didn't find anything labeled as "Safebox." I did find a couple of similar items though... one was $366US, which is completely absurd. But there =was= a similar case for $166US. That's 5,146 Baht, so a lot more than the 3,300 Baht I'll pay, but still, not horrible. Besides, the US and UK are just more expensive countries than is Thailand.
For the curious, the "Safebox" case on the Thai website is here: https://www.lazada.co.th/products/safebox-eco36l-same-pelican-waterproof-case-i287172230-s467900864.html?spm=a2o4m.searchlist.list.1.3207a191M72H4t&search=1
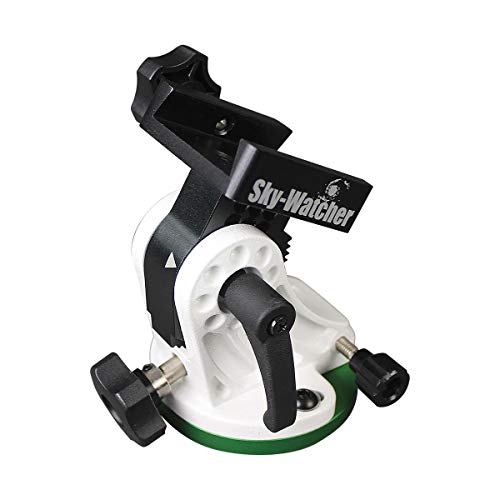
Talking about ONLY the tracker, you need everything that is posted for the Pro pack off Amazon. Not that you have to buy it from there, but those are all the pieces you need if you want to do any star tracking.
I've done it. (NOT OAT, which I'll probably do eventually, but put OnStep on it.)
I've also modified an EQ-1. https://www.thingiverse.com/thing:1923236 (The one it's remixed from is good as well, but depends on motors.)
The electronics are the same, and fairly cheap (One example (literally the first search result) of everything but the stepper motors ($15/ea is on the upper side of cost, unless you get fancy.): https://smile.amazon.com/Aokin-Printer-Controller-Arduino-Heatsink/dp/B07Q5R6YSK/
My thoughts, on what I've used:
- Barn door, bent/curved rod (Laser cut/3D printed): Pain in the ass. It works, but not great. Should theoretically work a lot better, hard to align.
- EQ-1 tracker: Lightweight, limited by lack of ability to align. However, will work pretty well with a rough alignment. With a widish lens, possibly 2 minutes or more.
- Celestron SLT mount (Alt-Az): Align is a bit annoying, intended for telescope. Works, but can be streaky without a very good alignment. (Also, as an Alt-Az: Rotation)
- EQ-5 OnStep (as tracker) (2x): Amazing. Phone control, or SHC, Goto, alignment if you want/need to. (Mine has a polar scope, but you can do a proper alignment, and it also supports dual axis compensation. Or dual axis guiding via USB/Wifi/Bluetooth, or ST4) Also costs about the same to build around an Orion SVP (~$500) as commercial star trackers with a half-decent tripod (and the SVP's tripod is MUCH more sturdy).
So get the electronics, and build it, they can be reused if you decide to change, or upgrade. (You can also get a better board, like some of the OnStep boards based on the Teensy, esp32, or others.)
Orion 5187 Wide T-ring for Nikon https://www.amazon.com/dp/B0069VXRUY/ref=cm_sw_r_cp_api_glc_fabc_FsibGbFDET4JB
2inch Telescope Camera Adapter for Nikon SLR Camera -Large Clear Aperture - with 2” Filter Threads https://www.amazon.com/dp/B01B78RKL0/ref=cm_sw_r_cp_api_glc_fabc_xtibGb3C2KQ99
One of these 2 options... depending on back focus needed
You could always get him this book, I know its hugely recommended across the astrophotography groups. https://www.amazon.com/100-Best-Astrophotography-Targets-Telescopes/dp/1441906029/ref=sr_1_1?dchild=1&keywords=The+100+Best+Astrophotography+Targets%3A+A+Monthly+Guide+for&qid=1610581680&s=books&sr=1-1 and then maybe add a giftcard on top of it
If funds allow, you could look into something like this:
https://www.amazon.com/gp/product/B003VSGQPG/ref=ppx_yo_dt_b_asin_title_o06_s00?ie=UTF8&psc=1
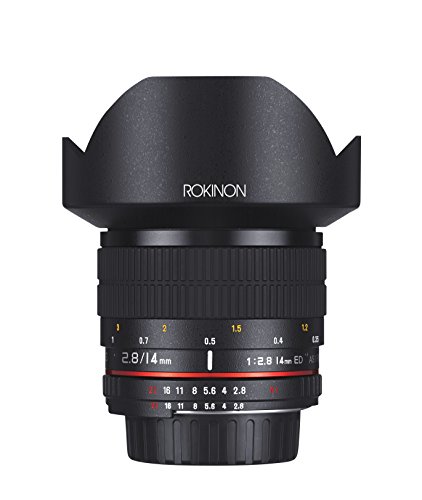
I'm pretty happy with this lens and aside from terrible processing on my part, the images looked rather incredible (for me).
Its hard to recommend one model, even something standard like the HP Pavilion is going to have a hundred different types designated with a word soup of letters and numbers. Fortunately planetary processing is a little easier on the hardware needs side than DSO.
I found this which seems decent enough. Planetary capture and processing will need fast r/w times so an SSD, a decently sized SSD since the video capture can rapidly eat up space, and a decent CPU / selection of RAM for the stacking process.
I have one of these and it seems to help.
​
I affectionaly call them 'bhatman mask'. You put it on the lens/scope, focus until you see a very sharp three dotted diamond image, and that means you're in focus.
I generally use a 50mm lens, higher iso with relatively short exposures to frame my target. Once I’ve got the target centred I’ll move to my imaging lens, which at the moment is generally 135mm.
I have also recently got a Celestron star pointer
And 3D printed an adapter to attach it the the show mount of my Canon 5Dii
https://www.thingiverse.com/thing:241592
I haven’t used that yet though but I don’t see why it wouldn’t work once it’s well aligned.
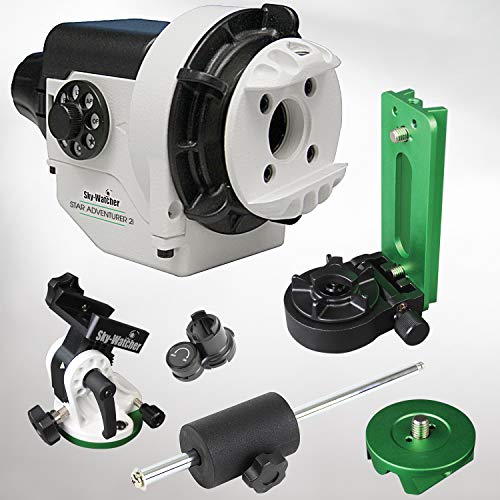
That is correct. Plus you’ll need a tripod and an intervalometer to take timed shots. This is the tripod and intervalometer that I grabbed from amazon, both have been fine for using with the Star Adventurer and DSLR/Lens (although the ball head on the tripod broke recently so I’ve upgraded that).
I have that lens and it’s great.
https://www.amazon.com.au/gp/product/B073R7P8G2/ref=ppx_yo_dt_b_asin_title_o00_s00?ie=UTF8&psc=1
https://www.amazon.com.au/gp/product/B00UN04SFK/ref=ppx_yo_dt_b_asin_title_o01_s00?ie=UTF8&psc=1
It doesn't matter and it won't affect the final image, though you will probably shake the camera imaging like that. Your camera has wifi, did you try this app? https://play.google.com/store/apps/details?id=jp.co.canon.ic.cameraconnect&hl=en
I use a deep cycle battery in a cheap ammo box and a cheap car battery charger, added a fuse and cigarette light socket to the box and you're ready to go for about $150 US. Newer LiFePO4 batteries are light and powerful, but you will need a more expensive compatible charger ($200 US to $220 US, with a box and socket).
I'll leave the conversion from freedom paper money to your goofy plastic bills!
I guess per Meade’s website it says 10A max on one DC output with 15A total.
I would think it’s just a matter of mathing up your total power need and comparing to that.
For my ASIair pro I just got a Talent cell LiFePO portable battery but I’m not running that much off it yet.
If using any dew heaters, those seem to suck power more than other stuff.
A ZWO 120MC (or MM for mono) is fairly cheap at $209. Its works well, I'll link tonight's Jupiter images I got with this camera. I have the color version.
The halos around those bigger stars could be from dew forming on the lens. Next time look at your lens with a flashlight and see if haze is starting to form on the lens surface. If so, you could get something like this to keep the lens warmer. How you supply the power is up to you. I use a small portable battery pack with USB adapter and hang it from a leg on the tripod.
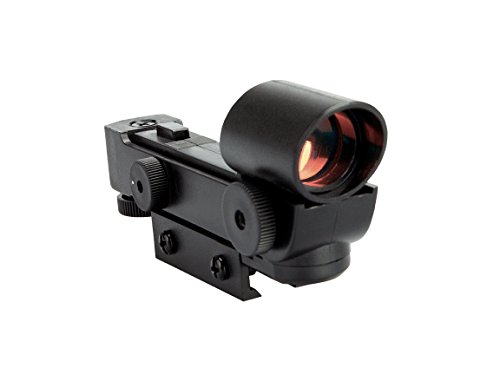
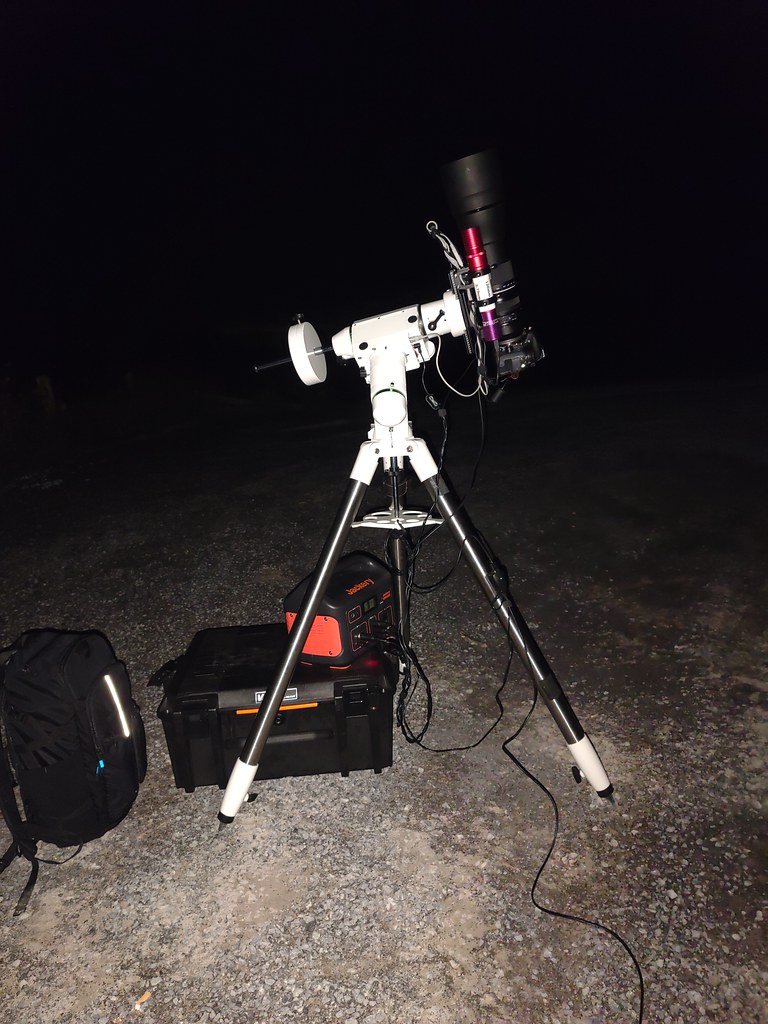
I used these Neweer hot shoe mounts from amazon https://www.amazon.com/dp/B00OT75QTA?ref=ppx_pop_mob_ap_share, and clamped the laser sight down to a T-bracket I found at Home Depot. The whole set up looks like this:
This t-ring off Amazon looks like it would work?
Also - do you own multiple Sony lenses? If the issue at this point is light pollution, you might want to consider astro modding your Sony camera to remove the IR filter and replace it with a CLS filter.
You could also buy a new Sony camera that has clip in filter options but that is also compatible with your lenses.
Spending $800 on the Redcat just for the filter thread seems unwise if you already have lenses that are comparable in focal length.
You can mount anything you want to the hot shoe on your camera. Start with something like this hot shoe -> 1/4-20 threaded rod. Nearly all camera accessories (until you get into larger and heavier versions) and lots of other things use 1/4-20 mounts. This will allow you to mount lots of things on your camera but many don't have any form of adjustment. If you need that type of adjustment you can also add a small ball head. These ball head mounts are really cheap and not something that I'd want to support a camera on but they work great for something like a laser pointer or a red dot sight. Similar to a red dot sight are things like the Telrad finder and the Rigel QuikFinder designed specifically for mounting on telescopes. I personally have a QuikFinder mounted to one of the hot shoe mounts I linked to above. I like using that because it sticks out far enough from the camera that I can use it at more angles. I personally machined a 1/4-20 adapter for it but if I were doing this without machine tools I would take one of the multiple feet it comes with and epoxy a 1/4-20 nut to the bottom of it.
I was meaning that it should be possible and find a way to do yours to. Like this video:
https://youtu.be/BGrSRQxg5I8?t=107
Anyway this is the adapter I use: https://www.amazon.com/gp/product/B003Y2Z6X2/
To help get good heat transfer I wrap the heating band with a tensor bandage.
I use a "Dew Zapper" controller that has 0-100% rotary dial controls and I run it at around 70%.
You could buy a thermometer with a remote wired probe for about $20 and put the probe between the scope and the heating band.
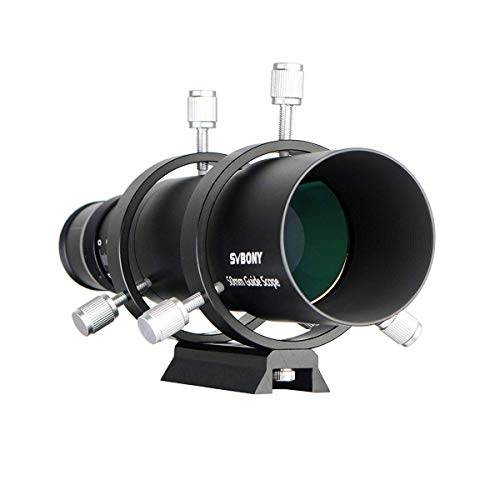
You can just attach the camera to a vixen rail with something like this. But you may want to get a longer one so that you can clamp on a guide scope later?
That is a from a Sky Watcher Star Adventurer package and I am not sure it ifs a classic Vixen style dovetail design.
or if you have a chance, support a local astro shop and ask there.
Sounds to me like it is just getting cold. Pending the age of your battery, below freezing is enough to shorten battery life.
Get yourself a dummy battery and connect it to an external power supply with enough juice to last all night.
Any old headlamp will not do, but I'll bet you a dime to a donut that they will love this one:
Don't believe what everyone writes about red lamps being necessary for astro; a 1-lumen headlamp is far better, and doesn't screw with your color vision.
sleeves, self adhesive straps, velcro strips and correctly measured USB cables go a long way
Not quite a stick PC but similar, I use this mini-pc: https://www.amazon.co.uk/gp/product/B08ZXS11KW/ref=ppx_yo_dt_b_search_asin_title?ie=UTF8&psc=1
It's not particularly snappy (if you've ever used a cheap notebook, it's similar to that), but it is perfectly adaequate for setting everything up in NINA and then leaving it to shoot for rest of the night
Looks like I misread your question earlier you were asking about just the dew cover, I thought you meant dew heater. I already use a cover and have the OEM dew heater coming Friday. Thew cover I got is this one: https://www.amazon.com/dp/B08M9SB92Y?ref=ppx_pop_mob_ap_share
It has worked well so far but I've been getting more dew with the cold as of late and wanted to add the heater as well.
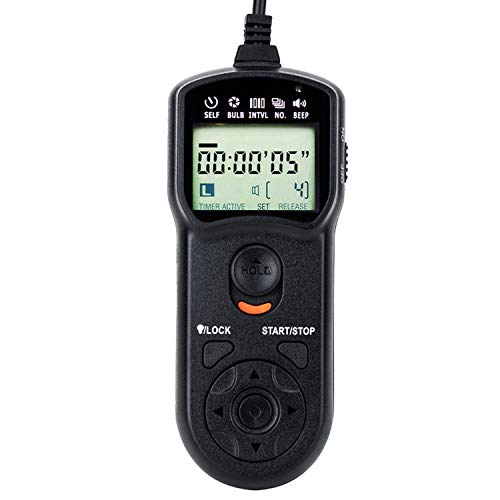
The next piece of astrophotography equipment you should buy is an intervolementer like this one https://www.amazon.com/Wireless-Remote-Shutter-Release-Control/dp/B07VMX8XD7 or any one that works with the a100 and then a tracker like the ioptron skyhunter (This one is belt drive and is likely more precise than gear drive) or the Star adventurer GTI (gear drive) but make sure you look up both extensively as they both are pretty good.
I got some decent shots of Jupiter and three of its moons with my 25 year old Minolta DSLR and a lens less than 600mm manually tracked on an Amazon Basics tripod. It took several long exposures to stack and show the moons. A much crappier setup than I thought that it would take. This looks cheesy and probably worth the money that it costs (not very much), but it's an experiment that I would have. If it doesn't work, you're only out $103
Get a Mini PC instead, and run NINA. This one is a $200 Black Friday deal. I use the prior version and it works great.
I would set it up this way for her. Stay “deepsky widedfield” (around 400mm focal length or less) This hobby’s already got a steep enough learning curve, no need to complicate it further with larger focal lengths in the beginning. Let her build her skills, then make the jump. You’ll still need auto guiding, but the smaller your focal length the less precise your polar alignment has to be. If you want a computer to control the guiding you’ll need a serial cable so the comp can talk to the mount.
There are plenty of software suites out there available for macOS that will control that acquisition, stacking, and post processing. For acquisition I like to use Kstars. It’s an all encompassing open source software, it runs on Mac or Linux.
Get a raspberry pi4 for like $80ish, load astroberry software on it, then use vnc to remote into the RPi. It a highly effective, budget friendly version of the ASIair IMHO.
Good luck, it’s a fantastic hobby!
someone else recommended this a while back, so i tried it out. its 50$ and it works
https://www.amazon.com/gp/product/B07P2LQXF4/ref=ppx_yo_dt_b_search_asin_title?ie=UTF8&psc=1
A lot of people use a small windows NUC/miniPC for the capturing process attached to the mount - I use a cheap "gateway" branded laptop myself.
You basically just need something with enough disk space to store a single night's worth of photos, 8 GB RAM (might be able to get away with 4 - this could be painful though).
Example: https://www.amazon.com/MeLE-Quieter2Q-J4125-Industrial-Astrophotography/dp/B08ZXXJL6N
You definitely don't want a star tracker for that scope. What you can do is buy a motor drive for your current mount though:
https://www.amazon.co.uk/Celestron-93514-AstroMaster-PowerSeeker-Motor/dp/B00039R23G/
That gives you tracking capabilities on your mount as long as you take the time to carefully polar align it.
Now, here's the reality check: that scope is not going to be a great scope for planetary imaging as the mount is very wobbly and the focuser is coarse. It will be challenging reaching good focus. DSLRs are also not great cameras for planetary imaging since they record compressed video and it often changes the effective pixel size/resolution when recording.
If you don't have a laptop, then a DSLR may be your only choice. If you DO have a laptop, then I would strongly recommend a dedicated high speed planetary camera. It records raw, uncompressed video at high speed and will let you get more data out of your scope. You'll definitely need a 2x barlow to reach focus with any camera you use and that scope, so a barlow is a requirement for sure. I don't recommend getting more than a 2x barlow to start with. Planetary imaging can be challenging, and using lower effective focal length will be easier to get the hang of things with.
You need the USB to connect it to your computer and a 12 volt 2.5mm center tip positive power source to power the cooler. Something like this which is what I use to power my camera and mount: https://www.amazon.com/dp/B07MXXXBV8/ref=cm_sw_r_cp_api_glt_fabc_Z9Q6T1RW70DH43SVYAZF
You could use a regular extension cable to move it away from your house, and that’s worked good for me. I’ve ran a cable probably 40-50 feet without issues.
>Where does the filter sit exactly?
The filter sits inside the camera body. Specifically, I'm using this SVBony clip-in filter.
>Which T-ring is this?
I'm using this William Optics 48mm T-mount
I use a dummy battery for my Canon T6 (1300d) with a 10000mah power bank with usb type c, highly recommend it, it could easily run for 8 hours. https://www.amazon.com.mx/dp/B08LNRM46V?ref=ppx_pop_mob_ap_share
for anyone else reading, this cable from amazon works with my heq5 mount as well https://www.amazon.com/dp/B07XVQCZBL?psc=1&ref=ppx_yo2ov_dt_b_product_details
Yeah, my camera only has the singular tripod hole. Would something like this work? I'm from Canada so the one you had linked costs quite a bit to ship. Also, for the one I linked, is it worth buying a separate set of screws?
Raspberry Pi's are almost impossible to find at MSRP nowadays and they are quite limited in terms of performance.
This is a popular option (and has a good price with a $60 off coupon now, making the total $210). And running Windows means you can use NINA which has a much more powerful feature set than the ASIAIR and it's free. And you won't be locked to ZWO cameras if you decide to get an astro camera.
The only drawbacks compared to the ASIAIR is that Windows' and NINA's UI is less friendly for touch devices (like a tablet) and that there are no 12v output jacks.
At 200mm I'd be willing to bet that the ball head will definitely contribute to tracking issues and misshapen stars.
There are things you can get that will allow you to more easily change your DSLR battery without having to move it from your target.
Maybe a tripod mount ring for your lens or something like this which will also make balancing in dec easier.
You can buy two apps in Android for intervalometer
This is the first:
https://play.google.com/store/apps/details?id=com.mobilephoton.intervalometer
This has bulb mode:
https://play.google.com/store/apps/details?id=com.booman.intervalometer
No problem. I hope it solves the problem.
If you're going to be attaching various bits of equipment, it may be worth getting a powered USB hub. I got this one, which works well if you are powering it from a USB battery pack rather than a mains adapter.
Using some heavy duty velcro tape and cables without unnecessary length, I've managed to mount the PC, battery, hub and (using a cheap bike bottle holder) the hand controller onto the side of the fork. Which eliminates any issues with cable wrap.
I've also just got a headless display adapter. I was using teamviewer for remote access but it was causing me issues. A lot of the alternatives (anydesk) won't work unless the server is plugged into a monitor and the adapter fools the pc into thinking it is.
I imagine all Sony cameras have the same port. I'm pretty sure all cameras have the same port, although I've only used a handful of DSLR's. There's no benefit to a more expensive one. One of the few things in this hobby where the cheapest thing is the most practical lol
This is the one I use for my Canon 60D that I use for landscape. There's no benefit to a more expensive one. You basically just tell it how many exposures of a certain length in bulb mode and it just does them. No input required after that.
The rest is fairly easy to search for.
This is the inverter that I bought that powers it through a cig lighter.
The plug on it matched the one on the panel perfectly.
https://www.amazon.com/HSK-B4-Centimeter-Millimeter-light/dp/B07WQXFZN5?pd_rd_w=82E4e&content-id=amzn1.sym.99d2f5bb-29d9-4f60-b07e-f97fafe39bec&pf_rd_p=99d2f5bb-29d9-4f60-b07e-f97fafe39bec&pf_rd_r=KG3P9NQ6M7M637XG052K&pd_rd_wg=d0d6... just fucking get this one it's the same I have the B4 model. On my screen it said 10" and if it isn't for you idk what to tell you it ain't that deep just find a different one
Do you have a headlamp with a red light? Otherwise, this should work.
I have a 67 mm from Thousand Oaks and used it recently for my first very successful ISS solar transit shoot! Like you, I was nervous about it -- it seemed very flimsy.
I'm so paranoid and compulsive that I had actually bought a backup 67 mm AND some sheets of solar filter paper, in case I borked up the original
I spoke with a guy at Thousand Oaks about the paper filters -- he said you could actually crease it and use it without its integrity being affected. Of course, they don't recommend it, but it's a lot more tolerant of abuse than you'd expect.
Furthermore, I managed to drop the damn 67 into the gravel/dirt on that ISS shoot. Picked it up, blew air on it, then gently wiped it down. Absolutely no effect on the image.
Rest easy, I think you'll be happy with it!
One extra thing, my experience with the ISS shoot and using eye protection: I wear corrective lenses/glasses, and using y (relatively) expensive Celestron solar lenses over them was a massive PITA. So was using the cheap solar eclipse paper glasses. What worked great were the Thousand Oak Solar Eclipse Viewer squares. Very convenient if you wear glasses to just hold in front of your eyes when trying to locate the sun, then slip it into a shirt pocket.
> I saw in your most recent photo of the triangulum galaxy, you used a Meade 80 telescope, do you personally think they are much more worth it than your camera lens?
I definitely love my Meade Infinity 80. It's exactly the same model as the better-known Orion ST80, as well as many other 80mm f/5 achromatic telescopes sold under different brand names. In my opinion, it's a great value for the money to use with the Star Adventurer. The 400mm focal length gives me twice as much magnification as my prime 200mm telephoto lens. Since your lens zooms all the way to 300mm, you may find 400mm less impressive than I do. It also has significant chromatic aberration, so your images will not be nearly as crisp as ones using an APO of comparable size. But for me, a $120 ST80 makes more sense than a $400-$1000 APO (your decision may be different based on your budget and taste). Not to mention the fact that those APOs are a lot heavier than an ST80 and would probably require a larger mount than the Star Adventurer.
That said, the Triangulum Galaxy is definitely within your reach even at a focal length of 200mm. It's about 1º across (twice as wide as the full moon), so you don't need a lot of magnification to see details.
> Also, my camera dies in like 2 hours on one battery pack, how do you manage to take 5 hours of integration time?
I bought a cheap AC adapter for my camera off Amazon, which I highly recommend. I used to be limited to about 2 hours as well; now I can image for as long as it's dark and just bring my setup in when I get up in the morning. The one I bought probably won't work for you since I use a Canon camera, but I bet you could find something similar for a Nikon. I'd consider this adapter one of the biggest bang-for-my-buck purchases so far.
Yes, that was my naive idea... I have looked into some Barlow lenses on Amazon. Do you think Svbony 3x barlow or Skyway 3x would be good enough? They're pretty cheap but have good reviews...
I can't find the Skyway 3x on amazon usa :/
Looking into picking up a telescope for planetary imaging and looking, and came across this on Amazon:
https://www.amazon.com/dp/B00Z4G3PRK/ref=cm_sw_r_apa_i_F0RH7R9JCWM5TH4VCF54_1
Part of the appeal of it is the fact that I can do monthly payments and not take a big hit all at once budget wise.
Of course first, I want to do my due diligence and get others opinions on it and if people have an idea of what I can expect quality wise from it.
Thanks in advance!
This is the one I have
https://www.amazon.co.uk/gp/product/B08ZXS11KW/ref=ppx_yo_dt_b_search_asin_title?ie=UTF8&psc=1
I have a single 300W 12V power supply that powers everything on my rig (PC, mount, camera, dew heaters, focus motor etc.) and I use teamviewer to remote into it. Usually from my laptop whilst I'm setting up (e.g. sharp cap polar align) and then once it's all setup I can remote in from my desktop inside.
I'm running a canon 1100D with a 60mm refractor telescope on the Star Adventurer 2i and it works great for me. I got a decent carbon fiber tripod for ~$50. If you already have a tripod, use it, but if you need to get one I'd get the one designed for the star tracker (I've heard great things about it).
This is the exact kit that I ordered: https://www.amazon.com/Star-Adventurer-Pro-Pack-S20512/dp/B07NY44782/ref=sr\_1\_2?keywords=star+adventurer+2i+pro+pack&qid=1659976364&s=electronics&sprefix=star+adv%2Celectronics%2C153&sr=1-2
This is the one that I use. It has three temp settings and a little controller attached to the cord. Hope this helps!
Svbony heater 1 - 400mm
Svbony heater 2 - 240mm, 320mm, 400mm
In "often bought together" or whatever its called, youre gonna see some kind of temp controller, you dont need that for these 2 strips. You can just plug them into your powerbank directly and it should get warm pretty quickly. Lately i need one of these as well but i think im just gonna make my own.
Just went out to check on my setup. Stupid clouds!
Anyway, this is the miniPC thats currently running. I added another SSD to it but other than that it's stock. I got it as it runs off 12v and is waaaaay more than I need but can comfortably run windows (which I prefer as there's some specific software I use that needs it).
Here's a screenshot of the basic resources while it's imaging. That 36% of the 8gb of ram is mostly windows itself (I've comfortably run astroberry on an rpi3 in the past). Nina bounces between around 740mb and what you see there, depending on what it's doing. PHD2 sits at a constant 47mb.
If all you want to do is guide then your stick PC will be more than enough. If you want to do any proper stacking or processing, thats where you need lots of ram and a decent processor
I got an SVBONY UHC clip in, and I do find it useful. I'm in Bortle 6.5 at ISO 800 shooting for about 40s puts me between 1/3rd and 1/2 the histogram through a 50mm aperture 250mm lens. With the UHC filter I can shoot ISO 1600 for about a minute for the same result.
If you get the more narrowband filters you become more restricted to emission nebulas. I find the UHC filters still let you get a lot of broadband color while still cutting back on some of the light pollution.
One of the issues with the narrowband filters is that mount tracking starts to become highly relevant. I'm not sure I could get three minute subs on my SWSAII with my Redcat 51. With 50S subs I can use about 80% of my shots.
The SVBONY clip in is pretty cheap, so maybe buy one and see if it's worth spending more money on a better filter before you go spending $300 on a filter that you don't have the mount for.
https://www.amazon.com/SVBONY-Astrophotography-Contrast-Pollution-inch-EOS-C/dp/B07DDJLNPT
You will absolutely need to learn how to color calibrate if you get any sort of filter. Shots with my filter are distinctively teal.
Definitely caused by bad flats. Copy-pasting an older comment of mine:
This is a good resource: https://www.myastroscience.com/proper-flats-with-dslr
Main takeaways:
Lower your ISO and/or add diffusion such that you can take a relatively long flat exposure (maybe 0.5s-2s) with the histogram around 1/3-1/2 from the left
The ISO of your bias frames must match the ISO of your flats (rather than the lights)
I use this for my flats with printer paper added on top to add enough diffusion: https://www.amazon.com/dp/B0755C2CBF
In a recent Nebula Photos video, Nico mentioned adding enough diffusion to get a flat exposure of about 1/40th of a second and not wanting to go any faster than that.
OK, that is a clone 60mm refractor on what is colloquially called the Mount of Doom. You will not need to use the diagonal at all, that will only place the DSLR sensor further out of the focuser. The nosepiece you have should fit directly into the empty focuser tube, however, what you have has an oversize flange on the end of the nosepiece which is likely causing it not to fit properly. The nosepiece I linked does not have a flange and will fit to a 1.25" focuser and lock into place properly once the thumbscrew is tightened. If your scope does not have a 1.25' internal diameter focuser you need the adapter linked below. Regardless, you still need the nosepiece without the end flange I linked earlier.
https://www.amazon.com.au/Solomark-0-965-Telescope-Eyepiece-Adapter/dp/B00OXKG8BS
Note that it may be difficult to achieve balance with your DSLR attached to the scope, given the additional weight. This will cause stability and targeting problems making the exercise frustrating and difficult.
There are way cheaper 1.25" noses than $41. I think his eyepiece dimensions might be a .96" but I can't find anything about it. hereis what I think is a newer version of his scope
I found a amazon link of my telescope.
https://www.amazon.de/-/en/KOSMOS-677015-Astro-Telescope-Refractor/dp/B00HYBXLHM
It states all eyepieces are 1.25". I think I am going to refund the adapter I bought and maybe start Astrophotography when I get a new Telescope.
That is the oddest nosepiece I've ever seen, it has an oversize flange on the end which is not required. The link below is what you should have.
https://www.amazon.com/Baader-Nosepiece-Adapter-T2-14-2458105/dp/B002P4LCAG
Where can I found a 0.98 to 1.25 adapter?
2x Barlow it is not a problem I have one.
and here is link to the t-ring set I bought https://www.amazon.de/-/en/gp/product/B016AI9S8A/ref=ppx_yo_dt_b_asin_title_o00_s00?ie=UTF8&psc=1
I use this app specifically for Astro work. Not only does it give you observing conditions, it also shows you what interesting objects are visible that night and during what times
https://play.google.com/store/apps/details?id=com.waddensky.nightshift
​
​
Assuming you telescope is a 1.25 inch diameter eyepiece.
You will need to be able to track objects, I also started with an astromaster, the RA motor from celestron made everything easier. But beware this will be difficult since the mount is not that sturdy.
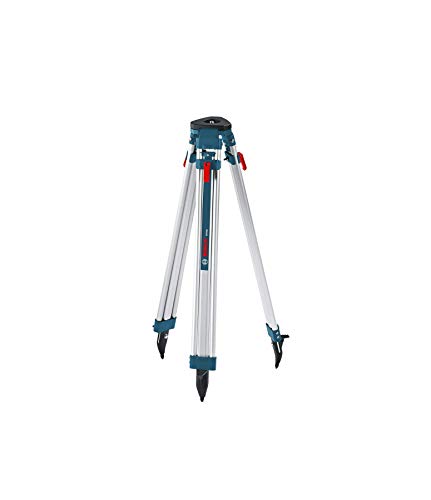
If you’re dying to get going, it might be worth considering canceling the tripod and getting one off Amazon, or a local camera shop. The SA attaches to any sturdy photographic tripod. I do not use my SA on their tripod. This is the one I got, the series 2, 3 section. I’m sure you could go a bit cheaper.
https://www.amazon.com/Benro-Mach3-Aluminum-Tripod-TMA37AL/dp/B00YEU9RW4/
I'm 95% sure your flats are to blame. Specifically, the exposure time for your flats is too short. Copy-paste from an older comment of mine:
This is a good resource: https://www.myastroscience.com/proper-flats-with-dslr
Main takeaways:
- Lower your ISO and/or add diffusion such that you can take a relatively long flat exposure (maybe 0.5s-2s) with the histogram around 1/3-1/2 from the left
- The ISO of your bias frames must match the ISO of your flats (rather than the lights)
I use this for my flats with printer paper added on top to add enough diffusion: https://www.amazon.com/dp/B0755C2CBF
One thing you might consider is an Eyepiece with cross hairs. I think they are all the same, but I have a Celestron one that looks just like this. It allows you to get a more accurate alignment more easily. First you can align the scope and the finderscope to each other better. Then when setting up/aligning the telescope, first find the object in the finderscope, then get closer with the main scope. If you use a wegde, it can also be used for drift alignment.
https://www.amazon.com/SVBONY-Illuminated-Double-line-Crosshair-Illuminator/dp/B06XTHLH7P/
What finderscope are you using?
I'm starting to play with this. The hardest thing is pointing my camera with so few visible stars. I'm slowly getting better but I'm not great at it. I have mounted a QuikFinder onto a hotshoe adapter that I mount into the hotshoe of my DSLR. And yes, you have to take a bunch of really short exposures (unless you use a narrow band filter).
The asi174 comes with a usb 3.0 usb b cable to usb a so as long as the usb a to usb c adapter you have supports usb 3.0 you should be able to get the max data transfer speed also if you want to minimize cables you can get a usb b to usb c 3.0 cable like this one Cable Matters USB C to USB B 3.0 Cable 6.6 ft (USB C to USB Type B 3.0, 3.0 USB B to USB C) in Black https://www.amazon.com/dp/B07W81GXV9/ref=cm_sw_r_cp_api_i_9T0JZDJVXKPDRCN6007Q?psc=1
Also the manual for the asi174 says 300ma@5v so you don’t have to worry about getting a powered adapter
Ignore the “it will go bang” people. If you’re not dumb and use the right adapter, you’re fine. I use this one with my EQM-35 Pro with no issues whatsoever.
I have no idea why astronomical equipment try to get you to power from a cigarette lighter jack. Give us a damn 2.1mm center positive, and then a 2.1mm to cigarette lighter plug.
I bought one of these recently. Works fine. Lasts long time. 10A, probably overkill, but there's no kill like overkill, I say.
Tried that. No luck. The only way I can get a clear picture is with a lens. I bought a extension tube that a eye piece sits in and the image comes from the eye piece. eye piece on Amazon
For 2 inch there’s the m48
Weooen 2inch Telescope Camera Adapter with Internal Filter Threads, Metal Telescope T Adapter and T Mount, Compatible for Canon EOS, SLR, DSLR https://www.amazon.com/dp/B09L4S229J/ref=cm_sw_r_cp_api_i_K5223NP3GKP9YC7WD49A?_encoding=UTF8&psc=1
And the m42
Solomark 2inch Precision Ultrawide 42mm Camera Adapter for Nikon DSLR Camera and 2inch Telescope Focuser https://www.amazon.com/dp/B00T4KEC7Y/ref=cm_sw_r_cp_api_i_H2CGS0FGVGVEXPSVN85H?_encoding=UTF8&psc=1
Both have standard 2” filter threads
If you plan on using old lenses the m42 mount is the one to get and if not the m48 is the way to go as it is a more common telescope accessory thread
Worst case is that some manufacturers use lens coatings that don't interact well with alcohol. Hopefully that's not the case but you should check with the instruction manual that came with it. The next thing is that you should wipe up as much of the alcohol as possible before it dries. After the alcohol dissolves the oils or other crap on the lens you want to pick it up rather than just spread it around evenly. Also the alcohol can have its own impurities which you want to pick up rather than letting them concentrate on the lens after the alcohol evaporates. After you've done that, don't use water at all. One of the reasons to use alcohol rather than soap and water is because the alcohol evaporates quickly and cleanly rather than water which doesn't (and also has lots of minerals dissolved in it if you're using anything other than distilled water and that will definitely leave a film on the glass if you just let it evaporate).
As an aside, cotton balls are not ideal because they frequently leave lint behind and can actually scratch fragile surfaces. There are several good lint free lens wipes. Pec Pads are one of the better of those.
I started out with this very telescope. Boy it set my blood on fire! You'll need a t ring adapter. I suggest to pick one up with the long middle barrel up from svbony (link below)
There's a reason for this one. That's because this telescopes backfocus doesn't allow it to reach the sensor of a DSLR camera.
What you need to do is have a play and see what works best for you.
Either drop eye pieces into the middle colomn of the adapter.
Or (I found this to be the best way) find a threaded 2x Barlow lense to screw to the ring adapter in place of the longer adapter here and slot that into the telescope. That pulls the backfocus to the sensor and you have a a decent native magnification.
You'll need to focus from the rack and pinion on the telescope however. And this is what got the fire raging. Its a very loose hold as it wasn't designed to hold the weight of a DSLR camera. So you may find it falls out of focus often.
Honestly I'm half tempted to just advise you to bin the idea entirely and get a decent telephoto lens because it was that much of a nightmare but persevere if you will! I never did have much patience. But I got some half decent lunar pics from it!
Closest to that I can find would be that one . F1.8 under 400 dollars is going to be tough. You could also check in Facebook Marketplace, there's always some good deal, especially for Canon's
My rig has a 15 foot usb extension cable going back to my laptop in the car. I connect a small USB hub to the extension cable. Everything connects through the bub. I got the USB adapter for the HEQ5 so I can control it without the included controller.
I'd recommend something like this: https://www.amazon.com/MEAN-WELL-GST60A12-P1J-Regulated-Switching/dp/B013EU0AQQ Spend a few dollars more for a "name brand" (These are by no means high end, but they are well established and fairly reliable) One thing to double check: Some equipment uses 2.1mm x 5.5mm connectors and some uses 2.5mm x 5.5mm connectors. Most astro is the former (as is the power supply linked) but not all (e.g. my CEM mount!)
Something like this?
https://www.amazon.com/Converter-100-220V-Transformer-5-5x2-1mm-Accessories/dp/B08C594VNP
Check the polarity of your mount and make sure it is similar to the adapter I linked.
I was going to do what you planned (got it off of Zelinka's video) but came up with another idea which also solved balancing by attaching my DSLR to this which in turn connects and slides back/forth via the release clamp end of this that in turn is attached to the tracker.
The guide camera can go on to the other end of the Nodal slide, opposite its release clamp.
You can probably get away with a good ball head if the camera and lens are light enough but as mentioned a direct connection to the dec is more stable. The key to that video the other poster suggested is having a dovetail plate so the camera can be adjusted front or back.
If you do it that way what's helpful is a quick release clamp