
What are
/r/Datsun's
favorite Products & Services?
From 3.5 billion Reddit comments
The most popular Products mentioned in /r/Datsun:


The most popular Services mentioned in /r/Datsun:
Facebook Marketplace
OfferUp
Microsoft OneDrive
Wrike
Vimeo
Imgur
Wayback Machine
Google Sites
The most popular reviews in /r/Datsun:
What ever you decide, buy this book. It will save you hours of researching how to restore a Z car. Get a copy of the Factory Service manual (FSM) for your 280Z as well.
How to Restore Your Datsun Z-Car: How to Restore Datsun 240Z, 260Z and 280Z by Wick Humble
https://www.amazon.com/How-Restore-Your-Datsun-Z-Car/dp/1931128022
In the long run its better to make your own. if it is liek a s30 then you can use https://www.amazon.com/Titan-Tools-51535-Double-Flaring/dp/B06XPRVCPV/ref=sr_1_3?dchild=1&keywords=brake+flare&qid=1621316216&sr=8-3
with the appropriate sized copper based line. Use the copper ones, the stainless steel ones are a pain in the ass to bent into shape, this can be done in hand. if you order a spool of 25ft you can do the whole car, and you might have to when you tackle the rear.
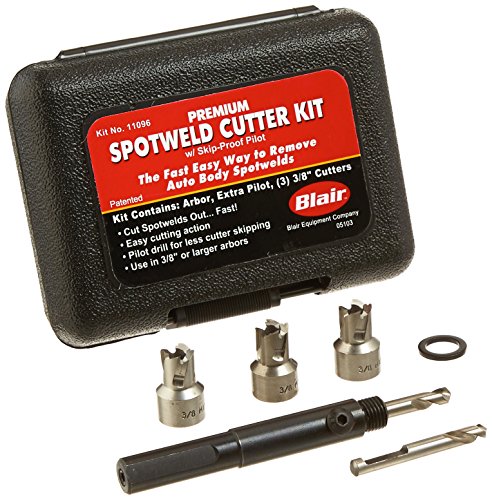
I'd recommend picking up one of these:
https://www.amazon.ca/Blair-11096-Cutter-Set/dp/B002XML5HK/ref=sr_1_1?crid=1VNUQUOLBVR2P
Makes drilling out all the spot welds SO much easier and faster than using the crappy Harbor Freight cutters, worth its weight in gold IMO. there are a BUNCH of spot welds holding the quarters on:
-in the drip rails
-back in the taillight surround
-where the inner/outer wheel arch meet
-doorjamb
-where the inner 'pockets' are welded to the quarter
After that, I'd recommend just making a small cut above the quarter window where the roof/quarter join is - the factory join is leaded, and you could melt that out and drill the spot welds underneath, but then you have to deal with re-leading it after putting the new quarter on.
This is how I did mine, the cut extended lower down as you can see because the replacement quarter had rust in that spot where the original was still good.
on the right side of the center of the dash there is a leather/pleather cover that wraps over the wires, and has some snaps to secure it. At the floors the proper routing places the wires under the carpets, i would use something like this https://www.amazon.com/Rolls-Tesas-Advanced-Harness-Mercedes/dp/B074YCG21Z/ref=sr_1_15?dchild=1&keywords=cloth+tape+wiring&qid=1600109960&sr=8-15 to wrap it all up.
I doubt the OEM part is easy to find or even available, but it should be easy to find an aftermarket replacement. You just need to know what diameter and length you need.
Something like this:
https://www.amazon.com/Gates-23924-Fuel-Fill-Hose/dp/B000CRDKJE
I'm still early in my resto journey and don't know much yet, but I just bought "How to Rebuild Your Nissan & Datsun OHC Engine" and it's got an incredible amount of detailed information in it.
With a respirator on and this being like a one time thing you'll probably be fine. It's good that you are considering these things when working, and we all have to make these choices for ourselves. Asbestos is still used in materials today, it just needs to be handled properly.
If you are looking for a good mask that will probably last you a lifetime of work. https://www.amazon.com/3M-Facepiece-Respirator-6291-Particulate/dp/B000FTEDMM/ref=sr_1_16?crid=GAP6YL2YG152&keywords=3m+air+mask&qid=1654458177&sprefix=3m+air+mas%2Caps%2C139&sr=8-16
I would say continue the removal all the way through, then do a deep clean of the space you are working in to remove the residual amounts that may linger around (and get kicked up later on).
Its about risk management, just wait till you realize this car does not have crumple zones :)
Of course 7 Inch Approved Round LED Headlight, 2PCS Halo Projector Headlight Angel Eye Ring DRL & Amber Lights Replacement for Motorcycle Jeep Land Rover Defender https://www.amazon.co.uk/dp/B08P1Q2BLQ/ref=cm_sw_r_apan_i_D8P38V2D3VQ1VAWT9DP9?_encoding=UTF8&psc=1
Looks good and I want one. I’m in NorCalifornia and my market is pretty overpriced.
Example: https://www.facebook.com/marketplace/item/207068230397425/ It’s nice and I’d buy it but 7800 is pretty expensive. What’s a realistic price for this?
Shops typically claim a year or more for a full rebuild. I’m three years in on doing things myself, but I wanted to enjoy the car during the process. The below guide will help develop a plan. It all comes down to time (typically never enough), the amount you want to spend (what you originally thought it’s going to cost is typically wrong because you will find unknown things), and what you want to do to the car (this can snowball as well)
https://www.wrike.com/project-management-guide/faq/what-are-constraints-in-project-management/
Stainless are a paint to deal with you’ll need a high quality die to roll the flare on it too, can’t use autozone rentals.
I would suggest using copper-nickel lines (25 for should cover the whole car), and https://www.amazon.com/Titan-Tools-51535-Double-Flaring/dp/B06XPRVCPV/ref=mp_s_a_1_37?keywords=flaring+tool&pd_rd_r=c2ed4628-2842-4beb-9279-290e32f401a2&pd_rd_w=T8Ef7&pd_rd_wg=rMXQN&pf_rd_p=ce028c81-ed8c-425a-8404-93bf425aa8ce&...
Here is the post I saw its a 280z not 260z. I was thinking about keeping my l series in the 240z and ls swapping the 280z...I can dream right haha
1983 280zx ; In the newer post he does have the hood for the zx at least. It has been posted for over 4 months though, so either no-one wants this thing or its not doing well in person.
Are they the same as this? Link
If they are the same (or similar), since the low-beam and high-beam are in the one bulb, do you plan on running all four bulbs at once? And did you simply add another relay to do this?
The stock headlights on my 620 are woeful, and I'm trying to work out the neatest way to transition to LED. I've seen some conversions that just run the outside headlights and leave the middle-two for airflow, but I just love the quad headlight look...
Thanks heaps!
You should be able to reuse the barrel as mentioned. Do you have the Brake line horseshoe clip that holds it to the mount? something like this https://www.amazon.com/Dorman-HW1457-Brake-Hose/dp/B0063MO5R8/
That clip should snap in and hold it right into that spot.
I added https://www.amazon.com/Noico-deadening-Automotive-Insulation-dampening/dp/B00URUIKAK/ref=sr_1_4?dchild=1&keywords=thermal+mat+car&qid=1599147690&sr=8-4 to my car at the metal, then i added https://www.amazon.com/Noico-Insulation-Self-Adhesive-Deadening-Material/dp/B07QW2RL2Q/ref=sr_1_5?dchild=1&keywords=noico+heat+mat&qid=1599147757&sr=8-5 to the firewall and trans tunnel sections. works well, i dont bake like a potatoe unless its super hot 90*+ outside. Although i need to put this stuff on the roof and do the headliner, thats probably where my radiant heat is coming from.
No problem!
Looks like you might be able to cut off the 'new' panel from the current quarter to re-use? depends on how far up the rust is on the new one, and pics can be deceiving as to how bent it is.
For sure, would be happy to help. My number one recommendation would be to get a good spot weld drill bit instead of some cheap one - especially on the new panel you'll have a LOT of panels to unpick given the size of the cutoff you're describing.
I have this and it has made life a ton easier than the crap cheap ones:
Otherwise, weld-through primer on any overlapping weld joins and use a gas-shielded MIG and you should be in business :) .
To remove the old one you'll want to drill out the spot welds around the taillight, the lower valence below the tail lights, inside where the quarter window sits, and the lower dogleg, and cut the quarter at the narrow spot by the top of the window (as you can see in my 2nd pic). Depending on how you want to do it, you'll also want to either drill out the spot welds from the drip-rail section of the quarter where the hatch meets it or cut it all the way up just before that and weld (I did the former as it was more factory + easier to make nice afterwards), and drill out the spot welds from either where the quarter meets the doorjamb or where the doorjamb panel meets the inner skin of the car - I did the latter as it is easier to clamp those panels together tightly to weld vs the other way where there's no easy rear access to clamp. Then just measure a million times and make sure panel gaps are good before you weld!
I’ve got the print live on Amazon here for the 240Z, 260Z, 280Z.
I also finished a print of all the Z Car Evolution here.
If you have an Amazon.com account and can leave a review after purchase, send me a PM and I can hook you up with a discount code.
I’ve got the print live on Amazon here for the 240Z, 260Z, 280Z.
I also finished a print of all the Z Car Evolution here.
If you have an Amazon.com account and can leave a review after purchase, send me a PM and I can hook you up with a discount code.
I’ve got the print live on Amazon here for the 240Z, 260Z, 280Z.
I also finished a print of all the Z Car Evolution here.
If you have an Amazon.com account and can leave a review after purchase, send me a PM and I can hook you up with a discount code.
I’ve got the print live on Amazon here for the 240Z, 260Z, 280Z.
I also finished a print of all the Z Car Evolution here.
If you have an Amazon.com account and can leave a review after purchase, send me a PM and I can hook you up with a discount code.
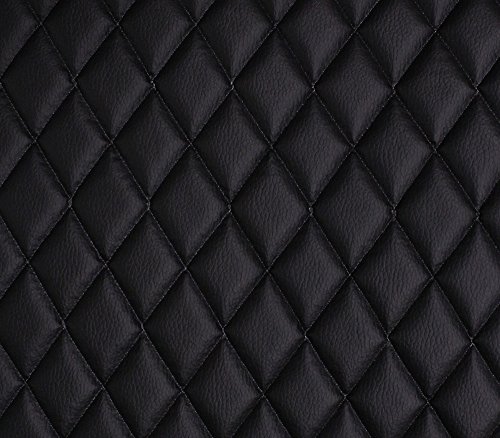
I'm not the same guy but I literally just googled diamond vinyl upholstery. https://www.amazon.com/Texture-Quilted-Upholstery-FABRIC-EMPIRE/dp/B07CR15YLK here's an amazon link. Probably the same one I used tbh.
ah. I did not read all of the text lmao. yeah this one needs the head off. I think these other ones you posted would work, ive never used them myself. I tried the other style of remover https://www.amazon.com/Neiko-50609A-Overhead-Compressor-Compatible/dp/B002GQ5HY0/ref=sr_1_11?ie=UTF8&qid=1529690305&sr=8-11&keywords=valve+spring+compressor
this one did not work at all, just avoid it. I end up removing the head for any headwork, usually can inspect seats // HG replacement while im down there.
https://www.amazon.com/Modify-Your-Nissan-Datsun-Engine/dp/1931128049
buy this, read this.
page 55, "Standard cylinder-head thickness-distance between top and bottom surfaces- is 4.218in"
see if VPM Company Inc, Tuscon Az has shims.
Thanks all for replying!
As far as I can tell, the shifter does not drain to the transmission itself, at least not in my car.
I ended up removing the reverse light switch with an adjustable wrench. I'd guess it's about 20 mm. The switch is about level with the fill plug, only closer to the front of the car.
Once you have the switch loose, empty out the old oil from the drain plug. Loosen it with a 1/2 in square recess. Clean off any metal shavings caught in the plug's magnet and tighten it back on after the oil is out. Don't be a gorilla about torquing anything down. Before fully removing the reverse switch, make note of the two wires and disconnect them.
I used a hand pump to add the gear oil, but you could probably feed a long hose above to the engine and fill using a funnel. I added 2 quarts of Red Line MT-90 (75W-90), which is a touch under how much the manual calls for (2 liters). Clean the area after you're done, and dispose of the junk oil responsibly.
So, the car is back on the road again, at least until I try to fix (break) anything else. There's a bit less transmission noise now, and shifting is slightly smoother. The biggest difference is the transmission tunnel temperature. Before, the shift lever and ash tray area would get almost too hot to touch. Everything runs much cooler now, so I'm happy!
Hope this helps anyone that may search through here in the future!
It's metal right? I had that same one but it broke off at the ring and lost it a long time ago. FWIW I bought this one about 6 years ago and for like 10 bucks it's held up really well.
Thanks for the recommendation. Do you think something like this would be good enough for a straight edge? https://www.amazon.com/Anodized-Aluminum-Straight-Guaranteed-Within/dp/B017CFWP58/ref=sr_1_1?ie=UTF8&qid=1475513296&sr=8-1&keywords=machined+straight+edge
I recently finished treating and priming my floor boards, to get all the black rubberized insulation crap off I had to use a gasket scraper with a mallet to chip big chunks off and to get the small(possibly melted on) bits off I had to use something like this tool, it came out really nice and I was able to just wire wheel, treat, and paint the floors after that.
To add onto what /u/breda076 said, if you wanted to reinforce it then getting something like a piece of polycarbonate and gluing it (or you could fiberglass it into the wing if you want to get fancy) onto the bottom of the spoiler should suffice.
I own the Datsun "How To" trifecta. While they are a bit dated when it comes to parts sources, they are great for reviewing and highlighting while watching TV or something. I would suggest a copy of How to Restore Your Datsun Z-Car. Forums are awesome information resources, but sometimes I like print too.
*The 1/2 inch thick upper part is rated up to 2200 intermittent, 1800 continuous, and the taped areas are good for 1800 intermittent and 1100 continuous.
This and this were used along with some sheet aluminum and hardware from Lowes.
We spent about $70 and have enough of the 1/2" thick shield and aluminum to make two of these along with two smaller plates that protect the distributor.