
What are
/r/VORONDesign's
favorite Products & Services?
From 3.5 billion Reddit comments
The most popular Products mentioned in /r/VORONDesign:


The most popular Services mentioned in /r/VORONDesign:
The most popular reviews in /r/VORONDesign:
Yeah it still isnt the best idea. Pressing them in isnt going to be as strong as melting them in and resin is NOT recommended, because it is extremely brittle compared to ABS. It is literally on official Voron's DO NOT USE list
You could try something like this transparent ABS and vapor smooth it. That would look nice. Here is another one
I found these. I'm gong to do a little more research on them but I think they might be a good fit. They are rated up to 120C, which should give me a reasonable safety margin since it won't be touching the bed itself and I could use some VHB or wire loom tape to secure it to the bottom panel. https://www.amazon.com/Posi-Lock%C2%AE-18-24-Connector-Choose-Amount/dp/B0BCXB9WM4/ref=sr\_1\_19?keywords=high%2Btemp%2Bwire%2Bconnectors&qid=1671187145&sr=8-19&th=1
You can directly add heat to the chamber to increase the temperature instead of relying on the bed.
Something like this can get it done easily I think, but I don't have experience trying it yet. https://www.amazon.com/Constant-Temperature-Electric-Heating-Incubator/dp/B07F3S2G9Q
I'd be more concerned with whether or not everything else can handle the temps.
WARNING: IM A FUCKING IDIOT
So my funmat has some issues with temps over 80c on the chamber so I got
This station and run the hot air gun in the chamber and just set it to 210C. Works amazingly when I print PEEK and PEAK. Insead of trying to do silicone tube try making a duct or just have the gun in it.
Hi All,
Just coming back to comment because I think I got to the bottom of this, and it's not what I expected the issue would be: Loose hotend fan wires.
I installed the most powerful miniafterburner hotend fan I could find (This one on Amazon.ae), and you can immediately tell it blows a much higher flow than the other fans out there. I started an ABS print and it went well, so I thought my problem was identified and solved.
I then started another ABS print, and noticed a bit of a stutter in the hotend fan at one point. The fan stopped spinning for just a few seconds, and that was enough for the hotend to clog again.
I traced back the wires and found a dupont connector that was loose. Tested to spin the hotend fan while fiddling with it and I was able to replicate the behaviour. Fixed the issue with the loose connector and launched the same print. It's now been hours of constant ABS printing, fully enclosed, and no issues at all.
It all seems to indicate that this was the only issue, and that the Voron 0.1 can indeed work perfectly fine with a Dragon High Flow.
I'll keep testing this for a while with long prints and will report back if I see any other issues. I'll test with PLA as well.
Thank you all for your inputs and help towards solving this!
I'm piecing together a 2.4 using the West3d configurator and for no other reason than I want to try it, I'm going with the octopus pro to allow for 48V AB motors.
The main supply will be Meanwell LRS-350-24 since I have one sitting around. To get up to ~48V I was thinking of using a 200W laptop supply (20V) in series with the 24V main supply. I will confirm that the laptop supply is isolated before doing anything, but assuming it is does anything about this seem like it wouldn't work? (I'm not asking if it's a good idea, but feel free to comment on that as well)
Alternate idea is using one of the cheap boost converters available everywhere (ex: https://www.amazon.com/Converter-Voltage-Regulator-Booster-Adjustable/dp/B07X95JBD5/) to step up the 24V to 48V. I have a few sitting around that I've used for ebike charging and they easily handle the load.
I use these sticker sheets on my ratrig's bed. they have a nice fine texture, that is less course than what you see on most PEI sheets.
https://www.amazon.com/CCTREE-Printer-Monoprice-Creality-300x300mm/dp/B07543KHCT/ref=sr_1_4?crid=2WW6T9YB66D30&keywords=cctree+build+surface&qid=1668400703&sprefix=cctree+build+surface%2Caps%2C128&sr=8-4
this particular brand is one of the only one's I've used that doesn't come apart after a while
I also liked the ones that used to come in the filament boxes with Overture filament. They were also good quality, but only 200x200mm though.
The OMRON one is usually well-recommended - you choose them based on the load you expect to use (with some headroom). The main point is to choose from a reliable vendor. This is a link to the one I bought, which appears to be no longer available on Amazon but may be through Digikey. https://www.amazon.com/gp/product/B00DJUH8DA/ref=ppx_yo_dt_b_search_asin_title?ie=UTF8&psc=1
Dig around as I'm not an expert on SSRs, but know that Omron is a reliable brand and has been recommended by others. But, know that SSRs can still fail even if from a reliable brand, so have a backup plan in mind (namely a thermal fuse).
The rest of the formbot kit is fine. Slap it together, and if you have issues, replace the parts as necessary. I can be a brand snob at times - Hiwinn rails, Slice hotends, etc - but at the end of the day my Formbot kit still prints just as well as one I sourced and put together with oustanding parts. The only difference (err, similarity?) is that *all* of my printers have good safety features.
To add-on, I used a 99% Isoprop soak, moved the rails all around in the "bath" for a good 3-4 minutes, then dried them out and lubricated them with "Super Lube 21030"
Yes on amazon. Here is the link: https://www.amazon.com/gp/product/B09N8K9P3K/ref=ppx_yo_dt_b_asin_title_o00_s00?ie=UTF8&psc=1. Don't know the quality but I just need a fan for now. Coming in tomorrow. For now, because I can't wait, I used a small 12v fan off of a Monoprice select mini. I have a 24v/12v step down so I used that in between the controller to the fan. Works fine for testing. Still can't figure out how to have it only turn on when the hotend heats up or how to not have it run at full speed. Any ideas?
Special tip is not necessary.
Ive been using a $35 WEP-927 II for the last two years. Does everything I need. Gets plenty hot. Heat-up time is less than 30 seconds, and it even has auto-sleep if I forget to turn it off.
If you already have one of these (https://www.amazon.com/PTFE-Teflon-cutter-tube-Allen/dp/B0756D2T73/), just cut the tube slightly larger and slowly shorten it until it fits. If you do this carefully you won't have any problems.
Yes actually I did. Though most of my parts were PETG so they became soft with a hotter chamber and the screws understandably had nothing to grip onto.
I actually went back and applied threadlocker to every rail screw and torqued them down with a torque screwdriver so I could be absolutely 100% certain that things are staying where it is fastened. I did test the threadlocker on a torqued screw first to verify that it was reasonably easy to remove without damaging anything. There is a noticeable snap when the screw breaks free -- not too strong to damage anything, but strong enough to keep those screws in place.
This is the torque screwdriver I bought and it is excellent:
Not without a separate controller. You'll want something like a WS2812 or WS2811 strip. Here's a 24v version: https://www.amazon.com/BTF-LIGHTING-Addressable-100Pixels-Non-Waterproof-Respberry/dp/B07X42467V/ref=sr_1_7?crid=18OXQZARA0VP0&keywords=ws2811+24v&qid=1666103368&qu=eyJxc2MiOiIzLjUxIiwicXNhIjoiMi43MiIsInFzcCI6IjEuMzgifQ%3D%3D&s=hi&sprefix=ws2811+24v%2Ctools%2C75&sr=1-7
Make sure you have enough juice in your PSU to power the number of lights you intend to use (especially if going with 5v versions). Connect the GND and V+ to your PSU and the DIN to the appropriate pin on your board.
So the broken one came out okay with the VHB tape onto the perspex but I have just ordered some of these magnetic phone pads as they might work and are only £5. I'd rather be able to just quickly remove the fan unit rather than take the whole side off.
https://www.amazon.co.uk/gp/product/B07DL8R7XN
I bought this NoCry Screwdriver a few years ago and it has seen heavy use by teenagers on my robotics team. Comes with a good selection of drill bits & accessories, holds a charge for a long time, and has adjustable output torque and variable speed. Highly recommended.
Protip, since you're making pretty links anyway, you don't need anything after the item code. https://www.amazon.com/DEWALT-DCF682N1-Gyroscopic-Inline-Screwdriver/dp/B011WRUODC
In fact, you can shorten it further to just https://www.amazon.com/dp/B011WRUODC too.
Oooh, I had this debate myself!
I actually found that my favorite option thus far is Craftsman 4v gyroscopic screwdriver. ........ Well crap, it looks like they discontinued it, and all the listing ive found for it are scams. Lowes used to cary them. That makes me sad. It worked like the es126, but its 1/4in hex instead. It could damage screw holes if driving into plastic alone, but worked fantastic otherwise.
Maybe the Dewalt version? Dewalt 8v gyroscopic screwdriver
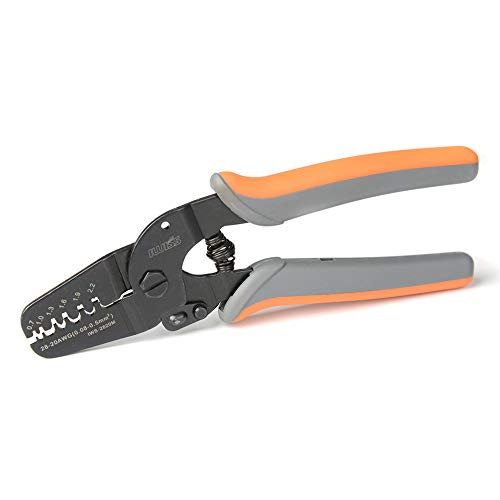
For Microfits, I tried the Iwiss version (2820M) of the BOM Engineer crimpers. I don't like the Iwiss one. I tried this one for Micro Fit and it works like a charm: https://www.amazon.com/gp/product/B01N1RFZZ4
The Micro-Fit terminals crimp on the smallest die in one go. 4mm-5mm strip.
For JST-XH I already had this one from a kit with DuPont Header connectors and and JST connectors: https://www.amazon.com/gp/product/B07ZK5F8HP
3mm-4mm strip on this one.
Make sure you're crimping the JST on the correct die. When I crimp silicone wire into a JST terminal I have to use my diagonal cutters to thin-down the insulation just behind the stripped part.
You will need a tool for whatever end needs to be crimped on. something like this should be good for the type of connectors you will have on most small electronic projects.
>Ah, okay. The reason I asked is because a U2C or similar isn't required with an Octopus (or Pro) as they have built in CAN transceivers. I never got my U2C working, the update for Klipper that allows direct connection with Octopus came out days before I set mine up so I just decided not to use it. You listed the correct steps though, holding the boot button after restarting it should put it into DFU mode.
Ah i read this in the manual. I couldnt find a CAN transcaiver in the SKR Pico manual so i bought the U2C board.
But wen i try this (holding the boot button after restarting it should put it into DFU mode) the STM32Prgammer cant find a USB device. With the EBB36 i doesnt have this problem, but on the EBB board is one jumper and two buttons to enter the DFU Mode not only one button.
​
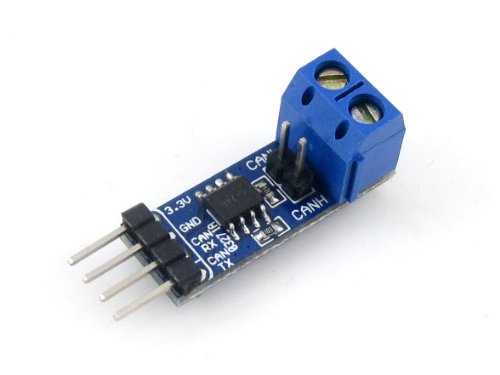
>If you continue having trouble and want to try something else, there's a guide to get the Pico working with the EBB modules, no U2C required. You will need a $5-10 CAN transceiver though, check it out here. https://github.com/rootiest/zippy-klipper\_config/blob/master/guides/Guide-pico\_can.md
The CAN transceiver used in the guide - https://www.amazon.com/SN65HVD230-CAN-Board-Transceiver-Microcontrollers/dp/B084M5ZQST/?pldnSite=1
You can find them cheaper on AliExpress, if you want to wait for shipping.
Thanks for this. wen i cant find any solution i try this.
What hot end do you have in your SB? I calibrated my Dragon a while back using a DMM with a thermocouple (like this one) by wedging the slathered-in-thermal paste thermocouple tip between the heater block and the top rim of the nozzle (tight enough to make good mechanical contact and stay wedged, but not so tight I crush the thermocouple).
I measured the actual temp vs the set temp at 8-10 points (enough to get a solid plot from the data) and created a thermistor profile in Klipper.
You could do the same, or at least use the technique to find out what the delta is between what you want and what you get.
I used the same technique to calibrate my bed (thermistor soaked in thermal grease pushed down on bed by a piece of belt (a softish insulator) with a weight on top of the belt (25mm socket) to ensure decent mechanical contact between bed and thermocouple.
Sadly no because I could mot find them, I tried not to buy the cheapest out there but reading the specs of fans turned out mote challenging than I expected, every chart seems to measure different metrics.
I got these from amazon:
WINSINN Ventola Ventola Ventola... https://www.amazon.it/dp/B07DB7DLMM?ref=ppx_pop_mob_ap_share
Are they wrong?
I added insulation to the underside of the heat bed on my 2.4 350….same reason, didn’t want to warp the plastic plate….Very glad I did.
I cut out the insulation by the extrusions so the bed lays evenly on the spacers and no insulation is pressed between the extrusions and the bed.
I bought / used this: https://www.amazon.com/FYSETC-Accessories-Insulation-Lightweight-Self-Adhesive/dp/B08XQ3CK81
Only the Octopus Pro has a beeper. And to my knowledge it can't be used within Klipper or for anything except board diagnostics.
You can easily purchase a little piezo beeper for a dollar or so and wire it up to your mcu or raspberry pi. Then you can use it for whatever you like including music tones.
I know you said "without having to add a speaker"
But you can buy a piezo buzzer for a couple bucks or less and easily wire it to the pi or just a free pin on your mcu. It's a really inexpensive addition and then you can do fun stuff like play music tones.
Shouldn't be an issue according to GreatScott!, but if you want your alternative brand to have DVE and ENEC certification, check out the ViD brand.
Also, for the cable, the CF113-007-D from Igus is $3.05/ft. That's a 22ga 4 conductor cable that is designed for this type of application. It should work pretty well with that mod. Mine gets delivered in 2 days.
​
Also to note, when it comes to flashing the EBB, I had issues with a few of the cables that I had. If you don't already have a USB-C cable, or if you have issues getting it to be seen by your PC in DFU mode, This Cable worked perfectly for me.
A little late but buddy and I run this with no issues, thoroughly questioned the seller about it and ran some tests first just to be safe. $30 and I have more than I know what to do with. I understand wanting to use whats recommended though!
Often too many balls are squeezed into the carts. Helped with one of my cheap amazon linear rails to just remove 1 or 2 balls and they worked fine after that.
What type of grease are you using? I used WD40 Lithium grease and on others this lube: https://www.amazon.de/gp/product/B000XBH9HI/ref=ppx_yo_dt_b_asin_title_o00_s01?ie=UTF8&psc=1 I think its a US product so should be available.
I have these nozzles https://www.amazon.com/gp/product/B07L5KJB59/ref=ppx_yo_dt_b_search_asin_title?ie=UTF8&psc=1
I would love recommendations on better nozzles. I'm using a brand new nozzle since starting printing Voron Parts
I would recommend a nevermore and the nevermore pellets as well.
I am using these filters for the exhaust.
10 Pack Smoke Fume Absorber... https://www.amazon.com/dp/B08R5NWMX1?ref=ppx_pop_mob_ap_share
I just bought this one, which has an answer from the seller claiming they will fit the LM-160. Otherwise, it's Amazon and easy to return...
Should be here Friday.
I don't know how their 2.4 compares to their 0.1 but I thought I was going to need a bunch of stuff for mine. I ordered an extra fasteners kit (all of the nuts and bolts) as well as an SKR mini E3 V3 because I wanted the newest board. To my surprise, it came with plenty of fasteners and it even came with the same board that I ordered, instead of the V2. The only thing I wanted was a different hotend, but everything else was there.
I have two recommendations though.
The main thing I'd recommend is a wowstick. There are so many little bolts to screw in, it really was a life saver for my build.
Second, a parts organizer. Something like this. I organized my bolts from largest to smallest and it was a huge help.
Yep. Or you can get bulk packs on Amazon.de
https://www.amazon.de/-/en/WINSINN-HT-NTC100K-Thermistor-Heating-Printer/dp/B07F3SMRLJ
Or this has three spare heaters too
https://www.amazon.de/-/en/Enhanced-Ceramic-Cartridge-Thermistors-Printer/dp/B08HCLD2FM/
If you need gpio pins, just get a raspberry pi pico as well.
They only cost about $5 (plus the amazon tax in this case)
You can add it as a secondary/tertiary/etc mcu board and then use all its gpio pins in Klipper.
I do this myself despite having a raspberry pi 4 as the host system.
It works beautifully thanks to Klipper's ability to use multiple mcu's on a single printer.
Hello fellow brit. Personally I would go with the LDO, its a marginal increase rather than gambling with something random, be easier for currents, set up and etc if this is all new to you as the LDO is more popular.
Personally i used this stuff, the guides said EP2, it was on amazon prime and cheap, its been perfect so far for my builds.
Noted. I’ve ordered the TS-BC2 replacement tip set (MASUNN Original Replacement Solder Tip For TS100 Digital LCD Soldering Iron -TS-BC2 https://www.amazon.co.uk/dp/B074V7K1S5/ref=cm_sw_r_cp_api_i_RDXWHS9S2ZZSV2XF3A4T).
I really appreciate your detailed reply!
Uhhh....
I'm running this at .8
How fuckdd am I?
FYSETC 3D Printer Parts 36mm Motor Extruder Stepper Motor 1.8 Angle 0.5A 2 Phase Round Body with 47.2inch Cable for Sherba Mini Extruder/Orbite Extruder Ender 3 Pro/ V2 /CR-10/Voro 2.4 Accessories https://www.amazon.com/dp/B099JMJNH2/ref=cm_sw_r_apan_i_E7EHW9NF1G0MVSYTHBXC
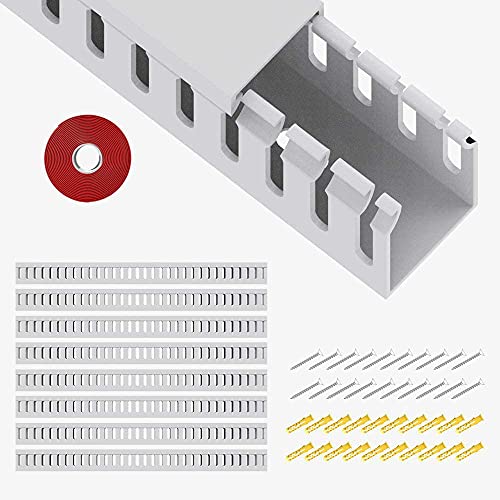
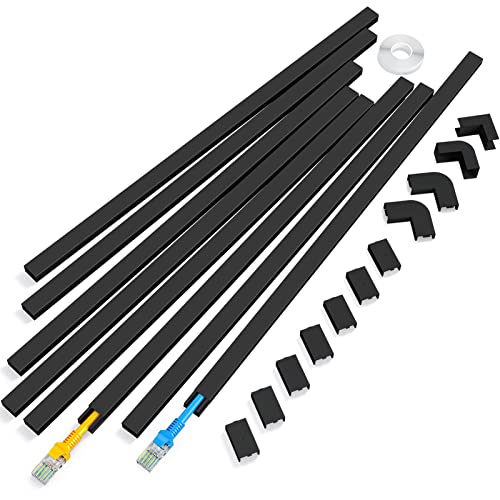
Look into self-adhesive cable tie mounts. VHB is not intended to be used as a duct tape replacement LOL https://www.amazon.com/dp/B077TSNMGD/ref=cm_sw_r_apan_i_H6N0F2GJZT2W36A8PT21
Something like this can really help clean up your build by aligning all your wires and keeping them held in place where you want them to be.
Hello and great post! If anyone still has bed adhesion issues, might a (shamelessly) suggest my new product 3D Print Stick please check it out and let me know what you think! Should help a ton with bed adhesion! https://www.amazon.com/dp/B09YKZF1P3
For anyone having bed adhesion issues, might a (shamelessly) suggest my new product 3D Print Stick please check it out and let me know what you think! Should help a ton with bed adhesion! https://www.amazon.com/dp/B09YKZF1P3
https://www.amazon.com/dp/B07LG646VS/ since it appears my board uses 3.3v logic I'm guessing something like this would be useful. Do you know what kind of current limit my control board is likely to have for actually powering the 3 pixels?
Specifically I need stall detection and to support 2.8 amps. These are the stepper I have: https://smile.amazon.com/gp/product/B00QG1ZF48
These look like great alternatives, actually!
I bought this:
https://www.amazon.com/gp/product/B07FFN2HN6
Comes with very strong foam tape pre-applied. I've been printing ABS for a month with 100C bed and 50C chamber, and it's still attached very firmly.
I probably only used 1/3 of the kit, so there's a lot of room to do even more.
Its an 7 inch touch screen from amazon (Ingcool 7 Zoll Touchscreen Monitor IPS Display 1024x600 7"HDMI LCD Modul für Raspberry Pi 4B / 3B + / A + / B / 2B / B + / A + / Zero W, Unterstützt Windows 10/8.1/8/7 https://www.amazon.de/dp/B08Z1HG8N9/ref=cm_sw_r_cp_api_i_MARHY2VPPBP3GM5CY7TA?_encoding=UTF8&psc=1) If you decide to buy this one send me a pm and I will send you my designed mount for it. Im using a Raspberry pi 4 + Skr Octopus
You need a machinist square, right-angle brackets, some clamps, and I used some thin strips of aluminum foil that I cut down. And be sure to use a flat surface! I used the machinist square to make sure each corner/connection was 90-degrees and then the right-angle brackets to align the extrusions, and double check the inside corners while I'm using the machinist square elsewhere or won't touch the extrusion. If the right-angle brackets wobble/machinist square not align then use a thin folded strip of aluminum foil on ONE SIDE of the blind-join on the opposite side that you want the extrusion to bend towards. You might have to fold the aluminum strip again. Screwing in the bolts can alter the extrusions so place the machinist square and watch the angle align and over compensate as you tighten and you will see what I mean. So you will have to loosen it a bit. Please be sure to use loctite on the screws/bolts.
I've got a Brother PT-1830 that takes "TZ" tape (3.5-18mm) and I printed heat-shrink labels for my Voron 2.4 wiring needs. I bought just one size, labeled 5.8mm and it worked just fine for all of wiring. I was able to label individual wires as well slipping a pair of them through.
I bought this off-brand generic product from Amazon and have been pleased with the result.
AC Infinity Controller 2, Fan Thermostat and Speed Controller, Controls AIRPLATE, MULTIFAN, USB Fans and Devices, for AV Cabinet Cooling https://www.amazon.com/dp/B00NG9TSG4/ref=cm_sw_r_apan_glt_i_M3VSJSX3KVAX5E1NKCXS?_encoding=UTF8&psc=1
Remington industries PTFE wire worked great for me. I used silicone wire from Amazon initially and it was terrible barely lasted 100 hours.
22 AWG Gauge Stranded Hook Up Wire Kit, 25 ft Length, 10 Colors, 0.053" Diameter, PTFE, 600 Volts https://www.amazon.com/dp/B07H5TSJTC/ref=cm_sw_r_apan_glt_i_E9FAA51S2T7NVSFD3KAW?_encoding=UTF8&psc=1
Oh, yeah, the filter sheets won't do much. I've found that for cleaning air in rooms (when, e.g. my idiot neighbor is burning tires in his driveway or some shit) basically all consumer carbon filters do jack shit. You need like, 15-30lbs of carbon to really make a dent even in a small room and most have ~1-2lbs, if that.
I wouldn't be surprised if what I end up wanting to do with the printer is either just vent it outside, or get something like this (but probably from terrabloom). Or, more likely, both.
Nano Polymer Adhesive (50ml) - Ultimate 3D Printing Bed & Build Plate Adhesion - No Mess, Non-Toxic, Works for PLA, ABS, PEI, PEEK, Nylon, PC and More. Easy Application, Easy to Clean! https://www.amazon.com/dp/B09JQWFVY3/ref=cm_sw_r_apan_glt_i_CJMSXQ5271GJ98ASZ8ER?_encoding=UTF8&psc=1
It's vision miner branded. It works really well and you don't have to apply it often which is what I was looking for. I'd rather just have PEI working though lol
Yeah not a good tool for that job.
You need to cut it like glass, with an scorer tool. You pass it a couple of times, and break it like glass. Check some videos in youtube. This is the tool: https://www.amazon.com/OLFA-1090486-Plastic-Laminate-Scorer/dp/B003UHUZ5U
You can accomplish the same with a regular cutter, but it would be more difficult. The olfa also has a side to make the edges softer after, so you dont get cut.
I have been using both these products for a few years now with no issue, just remember to retune input shaper after changing.
https://www.amazon.co.jp/NP4012GEL-Double-Sided-Adhesive-Vibration-Absorbing/dp/B009JYMVJ6/
I printed all my parts on and Ender 3 V2 with a Comgrow $50 enclosure. It did the job. I would absolutely get a PEI bed if you don't have one already.
They're pretty precise. I don't know that printing them would be successful. They're not strictly necessary. You can just direct wire everything from the toolhead to the control board. It'll make maintenance on your toolhead kind of a nightmare, but it would work.
But really, just about any disconnects would do the job. For example, I already had a bunch of these so that's what I used on my Trident.
This is the answer and I am stealing this for my own config. I went a step further and added a Mini WiFi Router connected to the Ethernet of the Pi so I could access it directly from anywhere. /u/timmit99 solution is cleaner if you know the WiFi info where you are going. My solution is for the Voron to be it's own standalone network but without internet.
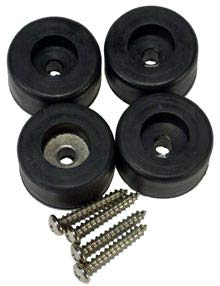
I use threaded inserts in almost every project I print and they really do work great. But you really need a press like this and the proper tip for your iron like these. With those tools the inserts go in perfectly square and much easier.
I have not seen any. That being said, you could get a cheap temperature controlled iron specifically for heat set inserts. For about the cost of a 512 tip. https://www.amazon.com/dp/B08R3515SF/ref=sspa\_dk\_detail\_3?pd\_rd\_i=B08R3515SF&pd\_rd\_w=9MVrt&pf\_rd\_p=57cbdc41-b731-4e3d-aca7-49078b13a07b&pd\_rd\_wg=8ALIP&pf\_rd\_r=BQ6VSM0Y45ADP8APECZM&pd\_rd\_r=bcdb92ad-62f6-43f8-a3e8-...
So I figured I'd find this thread again and add, I'm doing the wiring for my toolhead and noticing that I need different connectors than what came with the kit. Part of that is due to my switch to Stealthburner, but the other part is stupid things like the heater cartridge.
Anyway, I figured I could just use connectors I already have, but I can't. So order this and you'll be good. Now I'm waiting on a next day delivery. Hopefully you can avoid that.
Pi's can be very finicky about their 5v supply. if you're not using the recommended buck converter i'd suggest using one that is adjustable instead, these are super cheap and very effective: https://www.amazon.com/Regulator-Adjustable-Converter-Electronic-Stabilizer/dp/B07PDGG84B/
you want a MINIMUM of 5.0V, preferably 5.1V to power a pi and keep it stable.
I was planning on using this personally
PlusRoc Waterproof 12V/24V to 5V Converter DC-DC Step Down Module Power Adapter Compatible with Ring Keypad, Cellphone, Car (Micro USB Connector) https://smile.amazon.com/dp/B09DGFR24W/ref=cm_sw_r_cp_api_glt_i_QXSZD4817MR8FNQFJVT4?_encoding=UTF8&psc=1
Waveshare 5 Inch, your choice which resolution. Overkill is the OLED :-) Mounts are available in the Voron user repo...
I got this one, perfect!
Waveshare 5inch DSI LCD 800×480 Resolution Capacitive Touch Display Screen for Raspberry Pi 4B/3B+/3A+/3B/2B/B+/A+ Compute Module 3+ Compute Module 3 https://smile.amazon.de/dp/B08YRG27G7/ref=cm_sw_r_cp_apan_glt_i_M1H4FEMM59V2J10KKQR6?_encoding=UTF8&psc=1
If you buy a screen that connects to the Raspberry Pi, make sure to buy a capacitive one (vs resistive). This is what I use, which I recommend.
If you are using OctoPrint, I recommend OctoDash, which is really easy to use + allows you to set custom buttons if you need extra functionality.
If you are talking about the current rating of the thermal fuse, it should indeed be 15A, and it should look like what is in the link. If the circuit is heating when you bypass the thermal fuse, then it sounds like you have a bad thermal fuse. If you measure resistance across it, then it SHOULD measure <1 ohm. If it is not measuring that low, then it is probably blown or came bad.
The slow blow fuse should be on the mains power inlet, and it should probably be lower than 15A, but that can vary depending on what all you put in the electronics bay. Properly sizing that amp is a more complicated discussion, but I have a 10A fuse in my 350mm 2.4 since that will trip if something shorts out, and that's the biggest safety thing that I am worried about.
https://www.amazon.com/gp/product/B07KQFP17L/ref=ox\_sc\_act\_title\_1?smid=A1EH2FTB0N7OUD&psc=1
This one? IWS-2820M
I'm having trouble pulling the trigger on the pa-09's myself if you've done alright with these..
https://smile.amazon.com/gp/product/B08F9MW5C1/ref=ppx_yo_dt_b_search_asin_title?ie=UTF8&psc=1
2mm reamer, more accurate than a drill bit. Plastic is soft enough to use the reamer by hand. I’ve found a 3mm and 5mm are also good to have on hand.
Open Slot Wiring Raceway Cable Duct, Cable Management Channel Cord Track,Desk Wire Channel, Under Desk Cable Management to Hide Cables, Wires for Computers - 8 X 15.4in x 1.18in x 1.57in https://www.amazon.com/dp/B081GWZTB7/ref=cm_sw_r_cp_api_glt_i_4DJEGY38NCBJ2KHDFY59?_encoding=UTF8&psc=1
Does this look about right? I'll try to find it for cheaper, but I've got Amazon gift cards saved up, and I'd rather get this taken care of sooner rather than later. Thanks for the tip!
Pretty annoyed; I don't mind the smell of ABS, but for health reasons I plan to print a Nevermore filter. So the only thing that stops me from running my Voron indoors full time is the noise.
I see Noctua "Quiet" fans in 60mm size, but not "Ultra Quiet". They specify 12V though; so I'd still need to bump the voltage down, right?
>I used a buck converter
Something like this?
>The 24V will most likely not run enough cooling for your boards though
Not sure what you mean by this; they're running at 24V now, correct?
Thanks for the pointers, I'm looking at either a buck converter or possibly getting quiet(er) fans. I've got some Amazon gift cards to burn through so Noctua isn't too expensive at the moment.
I just use one of these PID controllers on my filament storage. Cheap, works super lasts a long time:
https://www.amazon.com/dp/B07XNQ538P
Then I also have a bme280 sensor hooked up to the pi for secondary monitoring and to provide another redundant backup that will cut the power if for some reason something goes wrong.
I got one of these for my ender 3 and it made a huge difference. Still had to print some parts with a brim to maintain stable edges. Keeping that temperature stable is really important for ABS based upon my observations.
I am printing every at 240/90 and it’s about as set it and forget it as can be.
A-KARCK 3D Printer Enclosure... https://www.amazon.com/dp/B08XZ3S5MG?ref=ppx_pop_mob_ap_share
eSUN ABS Plus Filament 1.75mm, ABS Pro ABS+ 3D Printer Filament, Dimensional Accuracy +/- 0.05mm, 2.2 LBS (1KG) Spool 3D Printing Consumables for Most FDM 3D Printers,Light Green https://www.amazon.ca/dp/B08N16JX56/ref=cm_sw_r_cp_api_glt_i_RV212P97GNYJRX49NA92?_encoding=UTF8&psc=1
I used this stuff. The green was fine with no enclosure but the black needed some help. All I did was put some old winter coats around the printer to help keep it warm and moved parts as close together as I could in the hope of them sharing their heat with each other. Seemed to work for me. Some people just use a cardboard box for an enclosure.
I just put a tip in a drill and took a file to it, spinning the tip with the drill and light pressure on the file until I had it down to the right size/shape. I used a soldering iron like this. In the product picture, I believe I used the 4th tip from the left, it was already close to the size I wanted for M3 inserts. Replacement tips for it are cheap, especially on AliExpress. Despite being an inexpensive iron, it has worked quite well. Lowest temp setting or slightly above works good for inserts.
Well, the microswiss is pretty expensive, me already spending $1000 on the voron parts, would this suffice as an alternative (https://www.amazon.com/dp/B09LHLPP5J/ref=cm_sw_r_oth_api_glt_fabc_T80S7FNGW3ZKXYCCETRR?_encoding=UTF8&psc=1)?
Yeah I wouldnt try hardened steel with their wood blades but this is the one I have: https://www.amazon.com/Freud-Diablo-10X3-32X5-8IN-Metal/dp/B00IPUDQ6C
​
I got mine from home depot back in 2015 for about the same price. Does clog up if you get aluminum too hot so I used some motor oil I had within arms reach.
A deburring tool like this is a handy thing to have around: https://www.amazon.ca/Deburring-Rotary-Remover-Plastic-Aluminum/dp/B07D1MMYTM/ref=sr\_1\_7?keywords=burr+knife&qid=1639621336&sr=8-7
https://www.amazon.com/BIGTREETECH-Direct-Printer-Display-Screen/dp/B08B34CXTV/
I may have been mistaken; it's the TFT50 and not the PITFT50, but it is a "v3.0" and has a knob. Since it's missing the "PI" from the name, I surmise it's not designed to work with the Raspberry Pi (and therefore Klipperscreen), so I didn't get it. Maybe the PITFT50 v2.0 will come back in stock; when I originally saw it was out of stock and the 3.0 was available, I thought it had been supplanted by a newer version.
I ordered a formbot kit early this year.
I too had seen the warp warning, but luckily before I assembled.
I put one layer of this on the bottom of the bed: https://www.amazon.com/dp/B07VWLHPSS/
A second layer would not work by the way. Not enough room.
I have had zero panel warping with just over 3000 hours of print time. I'd estimate that roughly 30-40% of that printing ASA/ABS+.
My chamber temps seem just fine, but I do have a heatsoak macro with tiered duration based on the delta of current temp and set temp.
I plan to add a chamber heater, thermistor and requisite safety things, to shorten the heatsoak durations, and set precise chamber temps, but it has been performing well enough without it. I wouldn't recommend that path to just anyone though. If you have to ask what heater to buy and how to wire it, it is not something you should consider undertaking at this time. Big safety hazard scaryness. Don't burn down your house please.
As others mentioned use JIS screwdriver like: VESSEL from Amazon
If you've got properly machined ends on your extrusions, they should do a pretty good job of squaring themselves. If you want to check, a framing square is pretty cheap and accurate enough for the purpose.
yep, those are the exact ones I used.
Ferrule Crimpers and a set of blade crimpers can also be useful not only for printer building but other repairs and hobbies around the house. Both of those above i have personally and have used them for years with great success.
So these? Is that all I'll need for Crimping then? I'm gonna get some ferrule crimpers too. Think those will be needed and if not, I still need them for my other printer.
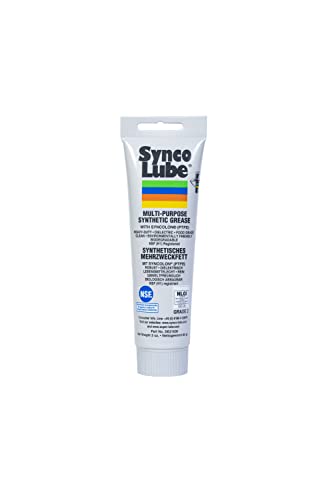
I, personally, use molybdenum disulfide infused lithium stearate grease for bearings and other high shear applications. I’ve had a tube of engine assembly grease that I’ll link below that has worked great for me for a variety of these types of applications, even if it isn’t explicitly labeled as such. The other stuff that folks tend to like is Super Lube. It’s a silicone grease with PTFE, so again, a heavy grease with a slippery solid additive that will coat the bare metal. I‘ve not used the Super Lube much, so I can’t personally vouch for it, but lots of other folks swear by it. https://www.amazon.com/Super-Lube-92003-Lubricating-Translucent/dp/B0081JE0OO/ref=sr_1_38?keywords=molybdenum+disulfide+grease&qid=1636294857&qsid=141-7196544-8751933&sr=8-38&sres=B085D8KFVC%2CB00MWLD2VY%2CB07B277CZ5%2CB00ICXS2OS%2CB08PTMXCJL%2CB07TNDL1HD%2CB01BSMMJ2A%2CB08Z9X7FM5%2CB004UVISZO%2CB001HWBSJW%2CB000CQ4DK0%2CB0735RLMCC%2CB000CPAEJA%2CB0083BWUYW%2CB0045NK4YK%2CB008RWA7SS%2CB00H7LPKKU%2CB006RYX0QY%2CB08ZYB2W3T%2CB00BO8A6P
Sourcing guide for Trident cable chains shows required number to be 2, but the note at the end says it requires 3 end sets.
Component: 10x11mm - 1 meter with 2 end sets (2 fixed end, 2 free end), R18 (18mm radius)
Qty: 2
Recommended: Amazon
Notes: Requires a total of 3 end sets
If I order the Amazon "10mmx11mm Outside Open" option, will I need 2 or 3?
My guess (and it's a pure guess since I haven't seen the crimps) is that you are using too large of a die for crimping. I have these (https://www.amazon.ca/Iwiss-Crimping-0-08-1-0-Ratcheting-Connector/dp/B01N1RFZZ4/ref=sr_1_10?dchild=1&keywords=Iwiss+2820m&qid=1635345914&sr=8-10) and use the smallest die on the end that has a 1.5/1.2 dual width (larger for the insulation and smaller for the wire, obviously). This works great for me, but if I go to a larger size, the crimped pins won't fit in the microfit housing correctly. I would suggest trying a smaller die and seeing if the pins fit. Good luck!
Unfortunately, the only advice I have is practice. Also, you can use a blunt tool (I use an unbent large-gauge paperclip) to push the contacts into the housing (taking care not to crush the wires or the contact) -- it takes time and unfortunately the Molex connector is unforgiving -- if you don't have the removal tool, it's basically impossible to get the contacts back out of the housing. I burned through a LOT of connectors at first.
You might consider switching to a different wire-wire connector, like these: https://www.amazon.ca/ACTOO-Connector-Power-Female-Adapter/dp/B07GGNFPQQ/ref=asc_df_B07GGNFPQQ/?tag=googleshopc0c-20&linkCode=df0&hvadid=335358990862&hvpos=&hvnetw=g&hvrand=15610222964785706626&hvpone=&hvptwo=&hvqmt=&hvdev=c&hvdvcmdl=&hvlocint=&hvlocphy=1002057&hvtargid=pla-817097266771&psc=1 -- they're much easier to use, but I'm not sure they're rated for the same power as Microfits.
No. People took those strip lights and ran a wire for it. I used these for my overhead light but they would work for AB probably too. You just need to find some that are small cut intervals. BTF-LIGHTING FCOB Flexible High... https://www.amazon.com/dp/B0828YHH7H?ref=ppx_pop_mob_ap_share