
What are
/r/Vermiculture's
favorite Products & Services?
From 3.5 billion Reddit comments
The most popular Products mentioned in /r/Vermiculture:


The most popular Services mentioned in /r/Vermiculture:
Facebook Marketplace
Nextdoor
Gumroad
The most popular reviews in /r/Vermiculture:
Hi friend, the main benefit of sifting is to separate the worms and cocoons from the finished castings. If the worms have already moseyed off to a different tray, then you can save yourself the bother of sifting, and use the vermicast as is.
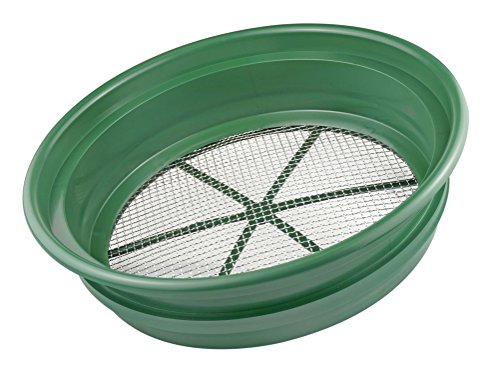
But if you do decide to sift, here is what works for me after trying a bunch of different methods. Let the castings dry down some by putting them outside in a shady spot. (UV light kills microbes.) You don't want them to dry out completely, just enough to where they won't clog up the sifter. A 1/8" sifting pan like this works well. Sift about 2 cups at a time over a tote. Sifting smaller amounts at one time actually makes the process go faster. With a 1/8" screen you will get fairly pure castings because the bits of bedding and food that have not been consumed usually are too big to fit through the mesh.
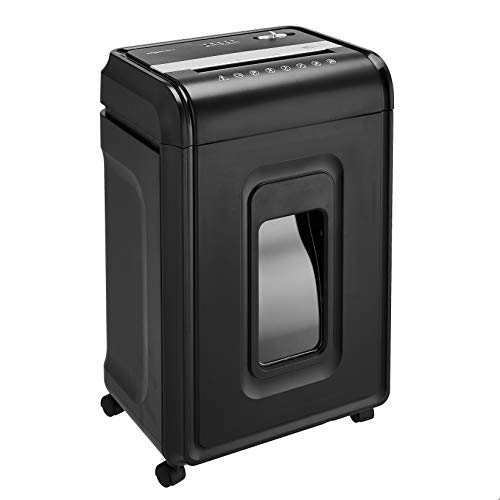
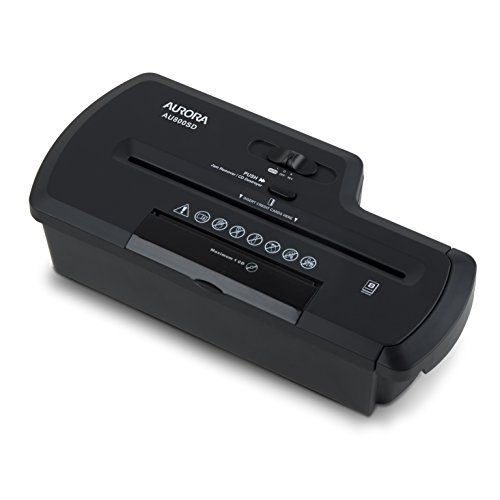
Just over your budget, but this 12 sheet shredder handles most cardboard boxes, which the red wiggler worms love:
I splurged a bit on a 16-sheet micro cut. About $100 for this one by Bonsai. Works great even on thicker cardboard.
It's a more expensive option but if you need a shredder anyway, the Amazon 12-sheet Crosscut model is 💯. I get 1/4" x 1.5" strips that have been GREAT for mulch and this thing gobbles up Amazon packages without much problem, either. Also good for taking down sensitive documents!
The theory of flow-through bins is based on granular convection, the same principle of physics that leaves you with a bunch of crumbs/dust in the bottom of your bag of cereal or potato chips. Plus, the worms theoretically are supposed to consume food, as they migrate upwards.
As a practical matter, the material at the bottom of your Hungry Bin will still have bedding and a bit of food that has not been consumed, along with some worms who decide to stay put. No big deal. Screening with a 1/8" sifter like this or building one with hardware cloth, will sift out virtually all of the worms, 80% of the cocoons, and pretty much anything that is not finished castings. Whatever does not fall through the sifter gets dumped back into the Hungry Bin.
Hi friend, bacteria will multiply more with warmer water. An easy fix is to get a cheap aquarium heater that will warm water to a consistent 75F. I use one like this, which has a suction cup with a holder that the heater clips into. I stick it to the inside of the bucket, and am good to go.
But even without a heater, your worm tea should brew up just fine.
For larger worm systems, sifting seems to be the least irritating way of harvesting castings. Empty into a tote as much of the bottom of your Hungry Bin as you intend to harvest; put the tote outside for a couple days to dry down a bit, preferably in a spot with some shade; and sift the castings using a 1/8" screen. You can build one from hardware cloth or get one like this. A 1/8" screen size will catch virtually all of your red wigglers and about 80% of their cocoons.
The fact that there are worms in the damp bottom does not mean you are doing anything wrong or that you have not properly controlled moisture. It is just gravity at work. Moisture percolates downward --> worms are attracted to moisture --> worms wiggle downward. Worm castings are amazing at holding water, so that is also a big part of it. During the semi-annual harvesting of my 75-gallon worm compost bins, the bottom 6-8" of finished castings is a solid clump.
I hope that works out great for you. I have tried a sifter system by using stackable 1/4" and 1/8" sifting pan like this, but it seemed to be harder and take longer than doing a "rough sift" with the 1/4" pan, letting the sifted vermicast dry down for a couple days, and then doing a "fine sift with the 1/8" pan.
I have the Amazon Basics 24-sheet and I shred all of my cardboard with it. I bought it two years ago and it's chugging along.
I am not happy with how wide the slot is, but the price jump up to "departmental business equipment shredder" is massive.
I'm just starting off, but I seem to have good luck covering them with a hemp blanket like https://www.amazon.com/Urban-Worm-Hemp-Blanket-22/dp/B09411SYJ7/\
They seem to like mating in it.
P.S. I soak it, let it drain, and then put it on. And then mist often.
I hope that works really well for you. If all else fails, sifting using a 1/8" screen will get all the red wigglers and ~ 80% of the cocoons. I use one like this, but if you are handy, you can get 1/8" hardware cloth from a hardware store and build your own.
Happy harvesting!
Hi there, worm wranglin' friend. Worms dislike light and dry conditions, so one way to evict them from the side of the bin that you are trying to harvest is to: (1) uncover the side of the bin that you want them to leave; and (2) do not add anything with moisture to that side of the bin. If you have a shop light on a cord like this, rig it to where the lightbulb is close to (but not touching) the soil. The light and heat will help dry out the soil.
To harvest worms, I throw them in a large tote; let the tote dry out some in the sun for a day or two; and then screen the material using a 1/8" sifting pan. The mesh is small enough to catch all the red wigglers and ~ 80% of the cocoons.
If you want to separate the castings now, before everything is fully composted, the easiest way would probably be to sift is using a 1/4" sifting pan or something similar. I would love to know whether anyone has tried sifting using a kitchen strainer. Seems like it might work fine, and be a lot cheaper too.
Ants can be defeated by creating a water barrier. A tray of 1” deep water, and putting the bin in the center on top of a paver stone. After they lose interest you can remove the tray.
Reducing the fruit sugar for more vegetable peels and shredded paper will reduce the insects.
Your nose is pretty good at detecting pH. Any sour rotting smell is a good sign you need to aerate or remove. I’ve used pH strips but have found the moisture/ph combo meter to be easier, but easily broken. A dedicated pH meter is more reliable (just wipe the tip and store indoors) https://smile.amazon.com/dp/B07M7TG742/ref=cm_sw_r_cp_api_glc_fabc_ZmD9FbZ3ETVKZ
Coco coir is best for worms, but coir is actually a sustainable substitute for sphagnum peat moss used in gardening. Peat moss would be a good substitute, but Amazon has a $15 brick of coir that should last you a year. Linky.
>I don't know of a shredder that can take care of cardboard.
What? How is this the top comment?
I have a cheapo $35 shredder from Amazon that shreds cardboard just fine. If I'm doing more than a couple boxes at once, it'll shut off after awhile because it gets hot, but give it some time to cool down and it's ready to go again. I've been doing this fairly regularly for a couple of years now and it's still going strong.
https://www.amazon.com/gp/product/B00HFJWKWK/ref=ppx_yo_dt_b_search_asin_title?ie=UTF8&psc=1
Since I don't have outdoor electric access, I'm going to be looking at something like this to use in my two outdoor bins this year. Each of my bins is a little smaller than half of yours. I'm considering building a Styrofoam box or using something like an insulated delivery bag on the outside with some airspace and then use the warmers inside. I'm also going to use a heavy burlap layer on top and try to leave air space all around. I'm in Maryland and we occasionally get below zero maybe once a season with an average temperature of 28 degrees on the coldest day of the year.
If you could move your bin into a sheltered location like a garage then a heating pad or a terrarium warming pad might work.
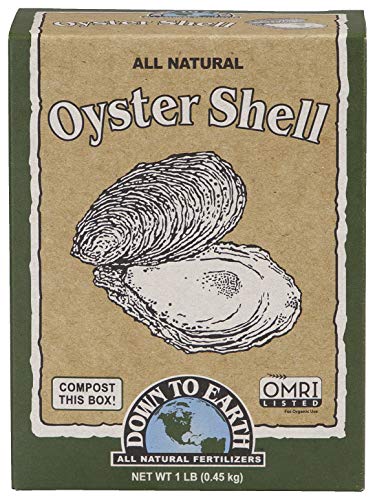
I sprinkle some Oyster Shell with all feedings. Never had a PH issue.
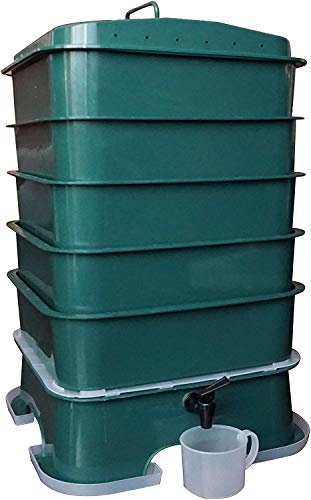
I had tried a few styles then found this:
VermiHut 5-Tray Worm Compost Bin, Dark Green with Free Worm-saver Tray https://www.amazon.com/dp/B018RU0BAS/ref=cm_sw_r_other_apa_i_S2suFbFT257MJ
from Amazon. The company is local (to me) and it has great ratings. No escapees, no stink, no warping from sun, and no excess moisture. It's three months shy of two years; I have three 5 gallon buckets of very compacted castings. The benefit of tea is fantastic.
I hope this helps!
Like this.
Think hot compost for a cheap fix, if you can get the ratios right. Need to keep it warm without getting to max temperature.
For the layman I would suppose a heating blanket would be a viable alternative. Attached is a random one I found https://www.google.com/url?sa=t&source=web&rct=j&url=https://www.amazon.ca/Products-Thermo-Chicken-Heated-Black-12-5/dp/B00JHK3740&ved=2ahUKEwil0OeUwtv6AhX7FVkFHbVLCIsQFnoECAsQAQ&usg=AOvVaw3akdJgrWV_jfQdBUvub3uU
:( I have this Amazon Basics shredder and it tries its darndest, but it’s only able to handle about 20 minutes of work before a mandatory 20-30 minute break.
I’ve had my eye on an upgrade like your Bonsai, and I’m wondering how long you’ve had it/any quirks or extra prep required pre-shredding?
Since you mentioned 1/4", there is this soil sifter
I use one that's similar, but 1/8" instead
Sure!
I stir by hand a lot. But, when working in some of my bigger bins I stir with a tool similar to this so I can get deeper down.
https://www.amazon.com/Tumbleweed-90-Aerator/dp/B074WZFLN2/ref=sr_1_6?keywords=compost+turning+tool&qid=1661902795&sr=8-6
You could use a hand trowel or shovel, or you don't need any tools at all. Your goal of stirring is just to spread the moisture around. My bins tend to show moisture retention where I've recently fed them, but the corners of the bins get a little drier. So, I just stir the bin up to spread out that pocket of moisture, to even out the moisture content of the bedding.
As for harming the worms, someone here had recently reminded us that often these little ones are shipped cross-country and survive. They will be okay with a gentle stir of the bedding if you choose to do so. I do always check my hands or tools for little babies before I close up the bins. :)
Not gonna lie, that gardeners supply sifter looks sweet af. But I'm not about to spend $50 to save a few worm cocoons. I have this one, and it does the trick. It's only $10. Frankford Arsenal Quick-N-EZ... https://www.amazon.com/dp/B004J4F09O?ref=ppx_pop_mob_ap_share
If it's not a big deal for you, I would 100% go with the gardeners supply option. But if you want to save $40, you have the option.
BTW, after spending some time picking out cocoons myself, I had to find a happy medium. What I started to do was sift and look down in the bucket after sifting. If I see any on top, I quickly handpick those cocoons and don't allow myself to keep looking, on to yonlthe next scoop. Sift, look, pick fom top and repeat. I was binge watching a Netflix show while I sifted to help keep my eyes off the bucket.
I hope this helps. Good luck with your new cocoons.
One more thing.
I think when I go to harvest, the stress of the situation causes the worms to drop the hatch. I think this After realizing that the worm was still in the action of expelling the cocoon when I picked the cocoon from the pre-sifted pile. I, as a woman, felt a little unsettled after this happened a few times.... so I only pick from post sift.
The one I got I cannot find on Amazon.com maybe it's only in the German Amazon but it's pretty much the same idea as this one just different design https://www.amazon.com/Essential-Living-Composter-Worm-Plum/dp/B0913HVF9G/ref=mp_s_a_1_2?keywords=plastia+worm+composter&link_code=qs&qid=1658776966&sourceid=Mozilla-search&sr=8-2
Lmao! I have the less expensive version of that one. It looks like your interior trays are nicer inside. Mine have a bunch of nooks and crannies which I’m guessing are there to reinforce the bottom, but it’s definitely going to be more annoying to empty.
Thanks. It's an Amazon Basics 18-sheet cross cut shredder I bought for shredding the cardboard boxes in which my orders arrive, including the shredder's box. Does a great job. Amazon Basics 18-Sheet Cross-Cut... https://www.amazon.com/dp/B07R3FXLLQ?ref=ppx_pop_mob_ap_share
The plastic bins are 4-gallon Sterilite bins. They measur e 18" L X 12-5/8"W X 7-1/8 H. Bought them at Walmart for around $7.50 USD each, back in March. I drill holes in the bottoms & lids so they can crawl up to the next bin when I set it on top. Gonna keep 3 bins in rotation so that by the time the 3rd bin is filled, all the worms will have had plenty of time to hatch and move up from the bottom bin...no sorting or screening needed. The very bottom bin is a waste liquid catchment bin of the same type as the other 3 with a layer of nylon screen door screen laid on the lid to help the guys from accidentally falling through the drainage holes in the lid. It's fitted with a rain barrel bulkhead fitting drain also bought on Amazon for approximately $8. RAINPAL RBS100 Plastic Rain... https://www.amazon.com/dp/B00J5K5VA0?ref=ppx_pop_mob_ap_share I find that if I keep the bin stocked with proper bedding and food at the ideal moisture level, there's really quite little leachate to discard, and only 5 - 20 worms down there at any time. The ones that stay in the bin are rewarded with a happy life of endless food & the privilege of reproducing. The worms are Red Wigglers bought from some farmer with a good rating on Ebay. The arrived in fine condition when I bought them in March. The standard estimate is that there's approximately 1,000 worms in a pound & that they double in number every 60 days. It's been about arriving in 4 months, so they've seemingly doubled twice, to 4,000 in number.
I captured this using a portable USB microscope similar to this one:
https://www.amazon.ca/Jiusion-2560x1440P-Microscope-Cellphone-Magnification/dp/B09653SCG6/
Except mine was 50x to 500x and much older. I use it to look at random things in my aquarium and it's a lot of fun.
Nice concept and nice drawing!
As much as I love the grow bed, if you are hauling large quantities of compost material like grass clippings and wheel barrows of leaves (or even just transfer material between the beds), you will probably end up trampling whatever you plant there.
For the worm leachate, you could recycle it back up stream to your 2nd stage compost. Depending on the height difference between the bins, you may even be able to passively do this via gravity feed.
To avoid having to separate out and disturb your worms once their bin gets full, you could use a continuous flow worm bin (I have seen posts on here where people have had success making these from trash cans, although they can be finicky). Otherwise you will probably need additional stacked worm bins to allow them to naturally migrate to the top and out of the fresh castings.
For convenient sifting and transfers between stages, you could incorporate a DIY version of this across the entire train or have it flip on a pivot between the worm bin and the 2nd stage. Although you might find your 2nd stage sifting to be counter productive depending on your compost media and relative volumes and times between transfers. In a typical 3 stage composter you are going to have a lot of bulky debris going from 1st to 2nd which makes sifting a cumbersome task.
All in all, a great concept. All you need now is soldier fly larvae for processing meats and fats, and a chicken coup over the top for passive compost media harvesting haha
I ordered 500 red wrigglers from Meme’s Worms and they arrived in a couple days and were healthy. Just make sure you wet them when they arrive since they ship them on the drier side and have nice moist bedding ready for them to go in within a day or 2.
""avoid adding fruit/veg in case the open container attracted fruit flies"" Well, since you are setting out BAIT, it should be more attractive than what's available to the worms at the moment. Maybe your VC still contain good stuff for the worms to hang around. Moisture will also keep them in place because that's where the bacteria is, what the worms also live on. I do not "alternate" the contents of the bait cup. I added shredded paper products (or other absorbents) just to avoid standing liquid at the bottom of the cup. You can cover the cup with a piece of paper or cloth and completely bury it. It will limit the fruit flies.
Often times I used very similar to THESE BAGS. However, check it often once the worms found the bag and switch/empty or if you're late, they would have eaten the goodies and left.
Soil Microorganisms
Wheat Bran
Cedarwood Oil
Eucalyptus Oil
Cedar Leaf Oil
""*Will this affect the worms at all or *is it just the microbes they need?"" The worms could use the MO and the wheat bran but the oils are already mixed into it, are they not? I wouldn't use it in a worms bin. Those oils are rather "harsh".
The oils are supposed to make your compost material smell nice. Does nothing to the composting process.
THIS is what I use for the past 8 yrs. or so after wrecking 3 blenders. Run through a flour sieve 2x.
Please note that I put the egg shells in the oven using ONLY the residual heat after baking and the shells became brittle, easier to grind.
Glue one of these things on there:
OCEANPAX Cat Scat Mat with Spikes Prickle Strips Anti-Cats Network Digging Stopper Pest Repellent Spike Deterrent Mat, 78 inchx11 inch https://www.amazon.com/dp/B07SDCK7WJ/ref=cm_sw_r_cp_api_glt_i_5RGXNVSA8KSFV0DSFQJF?_encoding=UTF8&psc=1
This is my favourite mini mini bin:
The lid already came with ventilation holes and high enough of a dome for air. It can house about 50 Red Wigglers easy. However, I did change the substrate often as soon as it's level with the bottom edge.
That's how Costco's roasted chicken are sold here. Or you can use any take out container. The ones with the black bottom would be better but white will work too if you line the inside with cardboard to block some light. Don't forget to cut vents on the lid.
Nice! I use a manual grain grinder like this one.
I wasn’t able to find the one that I have (they are yellow and white). I did see a two for $10 deal on Walmart’s website: https://www.walmart.com/ip/Chainplus-2-Pack-Bug-Zapper-Plug-in-Electronic-Insect-Trap-Mosquito-Killer-Lamp-Eliminates-Most-Flying-Pests-with-Night-Light/550339410 as well as a four for $22 on Amazon: https://www.amazon.com/Electric-Zapper-Mosquito-Electronic-Outdoor/dp/B092QV6YDL/
So right now I'm using a tiered Vermihut. Would you recommend I just dump this top layer entirely, or should I just put the bottom layer on top and let nature run its course on this bin?
Yup! I'm using a vermihut right now. Would you recommend I just put the bottom layer on top of this one, or should I just completely dump this top layer? Any saving it at all by adding some dry bedding?
Very true. My wife knew what she was getting into while dating me. I've seen other permaculture farmers use urine with great results. I buy a product for my lawn that is commercialized human shit from Michigan https://www.amazon.com/Milorganite-lb-Slow-Release-Nitrogen-Fertilizer/dp/B08TM3ZCVL/ref=mp_s_a_1_3?crid=1HGKWKMRRSCK4&keywords=milorganite+fertilizer&qid=1643601795&sprefix=milorg%2Caps%2C117&sr=8-3
Try upgrading your mask to a P100. Worked really well for me and it was way more comfortable. I use it when I do masonry cutting as well and spray painting. There are lots but the one I use is this one....
Wood treatment? And paint in the compost? What are you talking about.
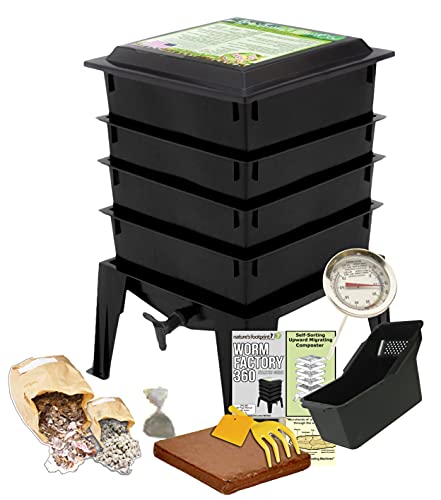
Sure if cost isn’t an issue worm 360 is an option also.
But for a easy DIY for about $25 usd vs Worm Factory 360 for $130 I call it a win
I burned through a $200 paper shredder in 6 months so I bought this $1,200 electronic wood chipper and love it. https://www.amazon.com/Patriot-Products-CSV-2515-Electric-Shredder/dp/B001KMZK3E/ref=mp_s_a_1_3?crid=2DZ0WGD5EI2NG&keywords=patriot+shredder&qid=1639145184&sprefix=patriot+shred%2Caps%2C92&sr=8-3
I use a Royal 1212x for cardboard and toilet paper / paper towel tubes.
Use the center credit card cutting area as it seems to handle thicker stock
https://www.amazon.ca/Royal-Consumer-1212X-ROYAL-CROSS/dp/B009FFPAJC
I got this one on Amazon a while ago and it hasn't let me down. I also got an electric cutter to help me break boxes down into manageable pieces. Also got some shredder oiling sheets to maintain the machine
I have a large, stackable bin that is too big to bring indoors. I bought one of these (BN-LINK Durable Seedling Heat Mat Heating Pad 20" x 20.75" with Digital Thermostat Controller Combo Set Waterproof for Indoor Seed Starting and Plant Germination https://www.amazon.com/dp/B08ZZ2521W/ref=cm_sw_r_apan_glt_fabc_A8W9QSYNYA5GZZ7SQTRH?_encoding=UTF8&psc=1), placed it under the layer with the worms and it has kept the temperature stable at 70F outside even thought the nightime temperatures have dipped into the teens (Zone 6). I also have one of the worm thermometers to double check and it has never left the green zone. The mat is designed to repel water and heats the soil slowly. The soil is still moist and the worms are still very active.
The lengths we go to for our noodles!
Can I have a job? Check out YouTube, particularly https://thewormman.com.au/ YouTube videos. I would also recommend checking out the Worm Farm Alliance: https://gumroad.com/a/608842867 (I get a kick back from that link and am an active member)
I have a rather large, homemade bin and there was no good place to bring it inside. I bought one of these (VIVOSUN 20" x 20.75" Seedling Heat Mat and Digital Thermostat Combo Set https://www.amazon.com/dp/B081ZPC2M7/ref=cm_sw_r_apan_glt_fabc_4XR44EWG22GERDS3BWSD), set it at 72° and the reds are doing fine. Even with the temperature going down to the teens, the lowest temp I have seen in the bin is mid-60s.
As KarinSpaink said, its not the room, its the contents of your bin temperature that matters.
60-80F or 16-26C
If you really have a concern, get yourself a worm therm.
For me, my bins are in the garage, when garage heats up, I make sure to use my fabric-only lid to allow all heat and humidity to escape from the bins, when it gets cold, I put the regular lid back onto my worms. Pics of mine.
I just put one of these under my bin today. I have no idea if it will work, but seems like it should. I've had it for years for starting plants, so it didn't cost me anything. But they're pretty cheap anyway.
I suspect it would also work if you sat it on top of the bedding. But my bin is sealed and I don't want to punch a hole for the cord.
https://www.amazon.com/VIVOSUN-Waterproof-Seedling-Hydroponic-Standard/dp/B00P7U259C?th=1
I use a soil moisture/pH meter similar to this one primarily to monitor the bin's moisture, but also to check the pH if I have concerns that it may be too high or low. (Usually, the bin stays in the neutral range.)
Yeah I’d say that’s a bunch of aphid. First thing I’d do is vacuum as many as possible. Then I’d pour out some diatomaceous earth and vacuum that up to kill em in the vacuum bag or chamber. Then I’d buy these👇
https://www.amazon.com/dp/B0968WSXC6/ref=cm_sw_r_cp_api_glt_fabc_4XY4CEAC3JP2FPE7YMDN?psc=1
I was having the same issue as they were occasionally dropping out the bottom drain hole of my feed through. They get glued to the garage floor. Add some water and they will rehydrate and come off.
I stopped this problem all together, going on 3 weeks now without a single worm lost, by just laying this LED light in a loose spaghetti on the floor below and they think its daytime and no longer escape.
Check the Internet for the term "fungus gnats" to see if that's what you have.
I had fungus gnats in (and around, oy) my (indoor) worm bin, but no longer do. Act as early as possible because their population can expand exponentially. I tried the BioCare yellow sticky strips (amazon.com/gp/product/B000NCUTS8/) and they did not catch any, so I just used a combo of killing them manually inside the house and putting the worm outside when I uncovered it to minimize releasing them indoors, and aerating the top of it more so it's more dry. It got rid of them.
I have several, and while it's not my favorite, it's the absolute best for the price range you're looking for IMO.
https://www.amazon.com/dp/B07PRKLCZQ?ref=ppx_pop_mob_ap_share
It's not as big as the Pic looks, I use it for inside (it's like small trashcan sized) as it has an ant trap and spigot to get rid of excess moisture, and the trays are small enough that you can pick them up and soft them as the holes in the bottom of each tray is just big enough for castings to fall through.
Currently I have it processing about a lb of scraps a week but I don't keep the majority of my worms in it.
My absolute favorite is the 3 tiered Worm cafe.
The reason is once you get all 3 trays going it processes a LOT of food and by feeding the top bin the worms leave the bottom one, making it easy for me to harvest. And they are thick enough to where I can really get a nice ecosystem going. It's $150 but worth it. It's essentially just a larger version of the Amazon one I linked above.
The Amazon one is nice as they throw in a few tools and stuff and it comes with a handy magnetic animated chart of what to feed worms and what not to feed them which is nice for beginnings.
It's clean E ough to where I could if I wanted to put it under the sink, though I wouldn't recommend that.
This does well with cardboard. While I've not tried it on the packaging you've shown, I think it would probably do a pretty good job but it is still going to be tedious.
I ordered one of these . It was recommended by someone on the sub. It's worked out pretty well. It's a fast sift, and I pick out worms as I see them. Some worms will get through on these, but there is also the 1/8 inch version if you don't like the idea of that.
This is the 1/8" sifting pan that I use. You may be able to find something that works just as well at an office supply or bed/bath/kitchen shop or a thrift store. Look for an organizer tray with a fine metal mesh bottom and sides. You're looking for something that looks kind of like this. A flat-bottomed kitchen strainer might also work, but most of them have mesh that is too small for the castings to fall through.
I use this sifting pan, but I have heard of people using a thrift store kitchen strainer instead. Here is a different type that also works well. I wonder if an metal mesh box from an office supply store like Office Max or a kitchen/bath place like Bed Bath & Beyond wouldn't do the trick. You want something with a flat bottom, and small openings.
I bought two of these. When one is full it goes into the freezer and the clean empty ones goes back on the counter. Thawed produce breaks down faster and the worms devour it all sooner.
https://www.amazon.com/Olympia-Guillotine-4415-Maximum-Number-15-Sheets/dp/B00TXPKWPG That's what intend ro buy but im sure there are better options my local supplier sell this for 75€ i ll also buy a blender to blend my fruits leftovers with the cardboard, for the leaves you need a leaf blower packed with a shredding functionality i have no idea on this part yet and im pretty sure you shouldn't either we are in rhe midst of summer
I have this worm bin. I live in an apartment too and this was worth it. Sorry but I don’t have any advice. I usually give them ice cubes so it’s not dry and that works very well.
These are regular polypropylene boxes like this one: https://www.amazon.de/gp/product/B01MCXJX23/ref=as_li_tl?ie=UTF8&tag=ml99-21&camp=1638&creative=6742&linkCode=as2&creativeASIN=B01MCXJX23&linkId=99b81c128b8485d3d3a2a27373c6c4c3
I bought this micro-cut paper shredder. It was $32 when I bought it, now it’s $40.
I no longer put amazon shipping boxes in recycling. Shred them all for the worms.
Hey, I’m going to save you a LOT of frustration. You are going to find yourself CONSTANTLY searching for enough of the right kinds brown materials, leaves don’t count, invest in one of these and start shredding all the cardboard you can find. Make sure that you are getting enough airflow to the bottom of your bin. You don’t want liquid collecting in the bottom at all. If you have red wigglers then you so t need soil. These guys are composting worms and live in organic material above the soils surface. To reduce the moisture currently in this bin I would first shred a bunch of cardboard, then dump this bin out on a tarp, throw a bunch of shreds at the bottom of the bin, put this stuff back in while breaking it up and adding some shreds to it to suck out some moisture, then top it off with damp shreds. Then start pocket feeding. Start at 12:00 position, place your scraps there, cover it with damp shreds, next feeding at 1:00 position, etc… Make sure to feed them realistically. They can only eat so much. If you have a family that makes a lot of waste, there is a cool way to pre-compost your scraps using fresh grass clippings. One last thing, if you have a lid to your container, cut the middle out of it and make it more like a ring, place a thin sheet of fabric over your bin, replace the ring lid to secure the fabric on the bin. This will keep out unwanted pests and allow airflow to the top of the bin.
Edit: damp shreds
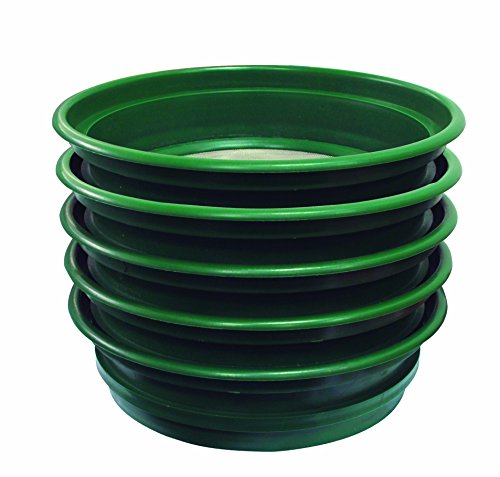
https://www.amazon.com/Stansport-Classifier-Sifter-Pan-14-Inch/dp/B00A8BHIIS
I love these gold panning sifters. They fit on top of a 5 gallon bucket. Scoop in about halfway to the top and shake the bucket until most of the vermicompost falls down, then toss the remaining worms into your new bin.
Now, I lose a few worms this way, but a second sort or doing a sun exposure in a wheelbarrow, so I don't have to crouch down, leaves me satisfied.
I've been using this one since last May. Feed it tons of cardboard and paper every month. Friend bought one a couple months later after she stole a couple handfuls of worms from my bin to start her own. So two of us have been happy with it for almost a year now.
$44.98
Those are mites, the red ones are spider mites. If they are becoming a big enough issue you can buy things that kill mites These are the predators of those mites
You can also buy lacewing larvae to help control them Here you go
I have one of these
https://www.amazon.com/dp/B08KQ3GYVP/ref=cm_sw_r_cp_apa_fabc_t4o8FbVVKRSD5
Had it for the past year and a half and the population has kinda leveled off recently. I see it as they are self regulating their population
And yes I also remove all the worms and use castings in the garden . My outdoor garden is 20x20 and I can easily supply enough castings for that
For an immediate help, try a bug vacuum. That should get rid of the one that are flying, Make a habit of vacuuming a couple of times a day and you should be able to get rid of most of them and then do the same as the they hatch.
I've been using this Fellowes 10-sheet micro-cut shredder for the last two years and it has been a real champ: https://www.amazon.com/gp/product/B010E9M3KG/ref=ppx_yo_dt_b_search_asin_title?ie=UTF8&psc=1&fpw=alm
Amazon says it's currently unavailable so they may have some new model or something. I think when I bought it it was about $80 but I could be wrong. But at the time I bought it I specifically wanted something that was rated for several sheets because when I run paper grocery bags though, I just rip them down the middle and fixed them in, which works really well from an efficiency standpoint (as opposed to having to cut the whole thing up). If you think about it, when feeding them in this way when the bottom of the bag goes through the shredder it is having to process up to five sheets thick of grocery bag (two sides of the bag plus two sides of the lower bag plus the bottom).
Additionally, the micro cut option seems to be the perfect size. I put kitchen scraps in a 5 gallon bucket with a Gamma Seal lid. When I do a run out to the worm bin I often mix the kitchen scraps with the shredded paper and then put it into the overall bin. I've had really good results with this as it generally prevents big pockets of kitchen scraps and keeping things airy and all that. The gamma seal lid on a 5 or 7 gallon bucket has been really great because my scraps sit outside my kitchen (I have a side door in the kitchen) and the lid is really quick to remove but also tight enough to keep fruit flies and things out. It's the best solution I've found over the years in terms of balancing how much effort I need to put in as well as keeping rats out of the 'staging' area.
Inkbird Wireless Thermometer Hygrometer Smart Sensor Data Logger with Waterproof External Probe Magnet for Food Storage Brewing Reptile Instrument Cigar IBS-TH1 (IBS-TH1 Plus+Aquarium Probe) by Inkbird Learn more: https://www.amazon.com/dp/B07TSRCMRV/ref=cm_sw_em_r_mt_dp_LpeVFb02AQ6QT
This is a little bit overkill, but you get the idea about what’s available out here
I got this one about 3 years ago. I absolutely love it. It is from a local company; I like that a lot. Good luck!
So I bought this Down to Earth Blood Meal Fertilizer Mix 12-0-0, 5 lb from Amazon. My guess is it will last me about 3-4 months at 2x a month.
You could experiment in the same bin just do it on one side so if it heats up they can escape to the other side. A partition could lock them in to die.
I bought this shredder in June 2017. I wish it had some kind of ticker that would show how many feet of paper products I have run through it. I have shredded way more than the average person. It’s incredibly hard to get it to over heat.
I've done a few iterations of compost sifting tables, including one with a reciprocating saw that ended in a lot of broken blades.
Here's what I use for motion now, with the lower shake table hanging from springs.
Concrete Vibrator Vibration Motor 30W and
Variable Speed Controller
This is an expensive shredder but I had it since June 2017. I cannot begin to imagine how many hours of use it has gotten. Never overheats. Eats anything I feed it. I have destroyed many shredders over the years but this one just keeps going.
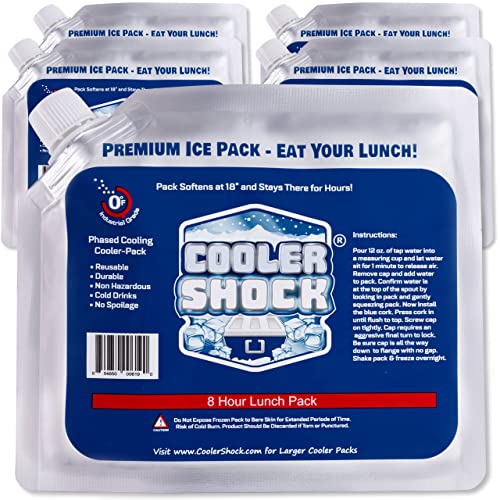
I'm going to try some of these to see if they work for keeping my bins cooler longer. Will update this post, I get them on Saturday so should have some idea either Sunday or Monday.
Worms will eat cotton. So plan to replace it often. I personally would use mosquito netting if your in the US. It’s made out of polyester and $5. Huge quantity and you’ll have plenty left over for other projects.
I bought some of these Cool Shock Packs. They tend to stay colder longer. I posted in an earlier thread about some testing I did. I know rotate them into my bins whenever the outside temp of forecast above 85 degrees F. The provide a lot of surface area that should cool things down faster than a bottle (Unless the bottle is buried in the middle of the bin.) They come in larger sizes. I f you're interested, I'll dig up the thread where I posted my results.
No, I wouldn't use that. The kind you are looking for is especially for worm bedding and it will say it on the package. This is what I use. It expands quite a bit when soaked overnight. https://smile.amazon.com/dp/B07ZC7KJBM/ref=cm_sw_r_cp_apa_i_WizpFbZF133AP
I have the same issue as you but live in Maryland so we aren't (normally) as extreme. The problem is made worse when you have small bins that don't have a lot of thermal mass like mine (at least mine are insulated). I'm looking at some of the sealed reusable chemical warmers that at filled with sodium acetate. The ones that you click a metal disk internal that set's off the reaction. like this --> HotSnapZ
My concern is that my bins are so small that I they may get too hot except for the depth of winter. They get to about 130F and last for an hour. I need to do some experiments to see how a primarily coir-based bedding will conduct and then hold the heat. Ideally, I need a big walk in freezer to test before winter but that may be hard.
Or the same thing for $7 here: Finnhomy Mesh Drawer Organizer Shelf Storage Bins School Supply Holder Office Desktop Cabinet Sliver 6" x 12" https://www.amazon.com/dp/B07286D6RB/ref=cm_sw_r_cp_api_i_UszeFbBQPA92S
My first bag of castings I hatched thousands of pot worms. I thought they were baby red worms at first too. The condition of the bin shouldn't be skew in any way. If you're worried about PH and things like that there are neat meters you can buy off amazon.
Luster Leaf 1605 Digital Soil Test Kit for pH, N, P and K, 1 https://www.amazon.com/dp/B00FGPLZZS/ref=cm_sw_r_cp_apa_i_5hXBEbCFNDFES
If your goal is breeding European Nightcrawlers (Eisenia hortensis/Dendrobena venata) just get Bruce Galle's booklet Raising European Nightcrawlers: Composting And Fishing Worm
I bought the Kindle version that I read on my Lenovo Android tablet with the Amazon Kindle app.
Galle clearly explains the difference between using ENC's for vermicomposting and breeding them. For breeding (vermiculture) it is important that you put less ENC's in a bin than you would for vermicomposting. In his booklet he gives you all these details.
Additionally the bins I buy stack with about 5 inches of room between each bin which is similar to the worm farm 360.
I ordered 24K worms yesterday. Ordering 24K more of the dealer is good.
https://www.amazon.com/Rubbermaid-Commercial-Brute-Tote-Storage/dp/B07VPKNNC5
make sure you are adding grit. I have heard they need grit to breed and also they can get sick if they don't have grit. I just bought a bag of crushed oyster shells.
If you get a blender you need to add water or your stuff won't want to blend up. I think using a food processor is better. I just bought one (biggest I could find for cheapest price) and it works pretty good. I have a $150 one I use in the kitchen but I don't really ant to use it for worm food lol.
https://www.amazon.com/gp/product/B076PM2QWB/ref=ppx_yo_dt_b_search_asin_title?ie=UTF8&psc=1
not as big as I would like but it does that job well enough. If you have the time check out used ones at goodwill or something. Anything online they want WAY to much just for shipping I found.
but that's what I do is over think things haha
I have never had a fish tank or had to deal with pumps. Is something like this good you think?
I’ve just received my order of the DE. Was curious if you could recommend how to use it? Where to apply and what amount. We have a 360 worm factory: https://www.amazon.com/Worm-Factory-WF360B-Composter-Black/dp/B002LH47PY
You'd be out ~$200 by the time you got the heat cable and ran this: https://www.amazon.com/Koumeican-thinnest-extension-0-0354-Inch-9-84-Feet/dp/B00SMVG0O4/ref=pd_sim_60_1?_encoding=UTF8&pd_rd_i=B00SMVG0O4&pd_rd_r=ae3f11cd-d7a3-11e8-8ab2-735607aeb124&pd_rd_w=3Srfi&pd_rd_wg=c89BF&pf_rd_i=desktop-dp-sims&pf_rd_m=ATVPDKIKX0DER&pf_rd_p=18bb0b78-4200-49b9-ac91-f141d61a1780&pf_rd_r=W1PJPM6TMCKSX9C99DXG&pf_rd_s=desktop-dp-sims&pf_rd_t=40701&psc=1&refRID=W1PJPM6TMCKSX9C99DXG , but it's a flat power cord that you can shut a window / sliding door on.
If your landlord would let you run a power connection out to the balcony it's $100 worth of material to do it to code, maybe $300 if you paid an electrician to do it and then you'd have a bit of drywall repair. Just some options.
tons of videos out but I watched this guys stuff.
My bins seems to be doing really well so far. I would just get some totes/bins and put some holes in the lids and stack them up. I would recommend getting this book also.
It helped me out a lot and even has plans on how to build your own if you want.
The only references I can give are anecdotal. I did research into killing gnats, discovered that gardeners use beneficial nematodes to fend off gnats in their plants, and decided to give them a shot.
These on Amazon are what I used. You simply dilute them in water and pour it into the bin. The nematodes kill the gnats, but are no harm to the worms whatsoever. I suspect the worms actually eat the nematodes, although I have no way to prove this.
This happened to my bin twice, and it was enough for me to throw everything into the leaf pile, and I didn't have worms for a good 6 months or so. The hardest part of this is that everything I read online only talked about house flies as a problem for people who put the wrong stuff in the worm bins, and I had never once added meat or dairy products.
I finally read that using 'mosquito bits' or 'mosquito dunks' will kill all fly larvae. These contain bti (bacillus thuringiensis israelensis), a naturally occurring microorganism that kills the larvae of many species in the fly family, including mosquitoes, house flies, and fruit flies. Since using mosquito bits 2x per worm factory tray, I've had zero fly problems, and my worms haven't been affected at all.
I ordered this one from amazon (www.amazon.com/gp/product/B0001AUF8G), and a year later it is still 95% full.
I don't have one, it might work. Try it and report back!
Otherwise blade grinders are common at Goodwill I think, or pretty cheap new. This is the one I use, it was my wife's in college, but she's since upgraded.
Drum sieves. You'll have to look around and find the coarse ones. it'll sift out the casting material from the worms, bedding, and unprocessed food. Of course this is only suitable for smaller amounts. http://www.amazon.com/Multi-Purpose-Interchangeable-Sieves-5Pc-Set/dp/B00F9MV9LS/ref=sr_1_12?ie=UTF8&qid=1420848071&sr=8-12&keywords=sieve