
What are
/r/olkb's
favorite Products & Services?
From 3.5 billion Reddit comments
The most popular Products mentioned in /r/olkb:


![SMART&COOL [ 2 x 6.6 ft L-Shaped, 2 x 3.3 ft ] GenX 3 in 1 Magnetic Charging Cable, Support Max 3.0A Charging Current & Data Sync, Blue](https://m.media-amazon.com/images/I/41xpzhQwABL._SL500_.jpg)


The most popular Services mentioned in /r/olkb:
Git Bash
SourceForge
Aliexpress
GitHub Gist
Karabiner Elements
Docsify.js
Visual Studio Code
imgbox
Notion
Snipboard
Plotly
CLion
Launchpad
Codeshare
GitHub Desktop
The most popular Android Apps mentioned in /r/olkb:

Unified Remote

MessagEase Keyboard

Termux
The most popular reviews in /r/olkb:
Yep! You can buy solder paste on Amazon or wherever.
A heat gun would work, but there are hot air rework stations made for this purpose.
QMK sees it as an analog input so I can either use the built-in joystick feature or just write a function that looks at the value and press a key based on that value.
I used something similar to this:
120 PCS Breadboard Jumper Wires + 5 PCS Joystick Breakout Module Game Controller for Arduino PS2 https://www.amazon.com/dp/B07SJYWW8J/ref=cm_sw_r_cp_api_glt_fabc_D1K2WMXE2GKWTVCQ8T61?_encoding=UTF8&psc=1
Let me know if you want to see the keymap and/or configs, I can upload later this week if not tomorrow
I have some tall (10mm) rubber stick-on bumpons on the top edge of my Preonic. Not quite 6 degrees, but sufficient. Something like this https://www.amazon.com/Black-Adhesive-Bumper-Feet-Electronics/dp/B07PKV9D7R/
IMO the mt3 profile doesn’t work that well completely flat, especially the bottom row.
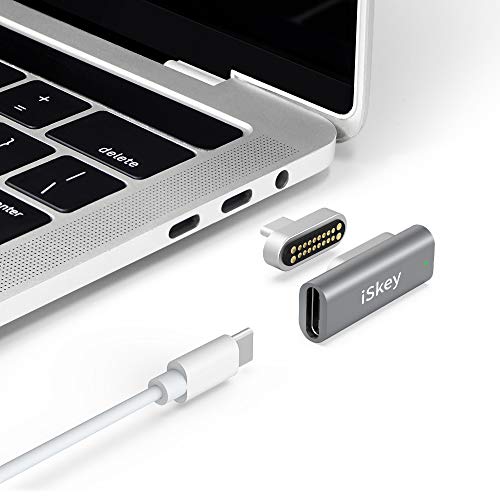
Amazon has a lot of them. Just search for "magnetic usb c". The Planck can probably use the ones intended for the Macbook, but I don't know for sure (might only work for the low-pro case). Here is the one I have, which is narrower for broader compatibility.
For sure! They're just an OEM Profile kit from Amazon. I went basic on my first build, but I'm pretty pleased with them so far.
The 108 set gave me enough keys to match heights & profile across the full row of 12 with no mismatches, and ive got what would-be the function row on the bottom thumb row of my Lily, flipped 180degrees
Looks like it's the Supremacy stethoscope bag as seen here. Amazon link.
So a passive USB female to PS/2 male converter won't work unless QMK natively outputs over PS/2 compatible protocol, which I doubt it does. You'd need an active USB-to-PS/2 adapter which are rare and hard to find. One that I believe would work is this KVM switch. There may be others as well but I did some cursory looking around and found this one. Seems like they are much rarer than PS/2 to USB for obvious reasons- very few people are in a situation such as yourself.
This is the encoder I used: https://www.amazon.com/dp/B07R5D6HNZ?ref=ppx_pop_mob_ap_share The left side of the pcb has 4 available spots to solder in an encoder. On the default layer, it is used to switch between desktops, lower is used for volume control, and raise is zoom control. Here is the encoder knob I used: https://www.amazon.com/dp/B00XMYCVJ4?ref=ppx_pop_mob_ap_share I did get it powder coated in the same soft satin white as the case.
The Kensington Expert Wireless Trackball Mouse (link to Amazon) comes with the wrist rest. I didn't lube the holy pandas, should I? I did lube the trackball which dramatically improved it, but lubing switches sounds like a lot of work.
If you google "ortho keycaps set" you'll get a good amount of results. Cheap keycap sets can be bought through both AliExpress and Amazon (e.g. https://www.amazon.co.uk/Dye-Sub-Profile-Suitable-Switches-Keyboard/dp/B07RKFZM7H/ref=mp_s_a_1_7?dchild=1&keywords=ortho+keycaps&qid=1590779564&sprefix=ortho+key&sr=8-7)
Also many of the keycap group buys posted on r/mechanicalkeyboards include ortho options, but you have to wait patiently until it ends and they're shipped. Hope you find something you like!
Here is a link! Sorry it took so long, been pretty busy. https://www.notion.so/Let-s-Split-Build-ef25b09dd88b4064afaa66c9a586a270
dfu-programmer is what's used to flash the .hex files to the chip - you'll need to compile the firmware (make - not the Arduino IDE) in order to generate that file, though!
It's likely you can program the PCB from Arduino, but the firmware isn't written for that, and I don't think it's been tried.
You can download dfu-programmer for windows here: https://sourceforge.net/projects/dfu-programmer/files/dfu-programmer/0.7.0/ but since I don't use Windows I can't really say where you're supposed to put it. In the shell run echo $PATH and see where a suitable location could be.
It looks like the links are out-dated (maybe) - here are the download pages if you'd like to try installing them manually:
This would be better done with AutoHotkey (assuming you're on Windows).
Bonus: If you use NirCmd.exe (http://www.nirsoft.net/utils/nircmd.html) in your AHK script, you can mute the specific Spotify app while keeping the rest of your system unmuted. Here's a function call to use it from AHK.
MuteApp(vAppName = "focused", vMuteMode = 2) { global local vCommand := vNirCmdPath . " muteappvolume " . vAppName . " " . vMuteMode DbgMsg("NirCmd Command = " . vCommand) Run, %vCommand%, , Hide return }
You need to download https://git-scm.com/download/win - Git for Windows
Then from mysys2 go to your C drive by typing
cd /c/
Then run this command
git clone --recurse-submodules https://github.com/qmk/qmk_firmware
Then you will navigate to the qmk checkout by running this command
cd qmk_firmware
https://i.imgur.com/012l9bE.jpg going for this flat bottom plate not the milled bottom
I recommend using a keyboard stand like this one: https://www.amazon.ca/Flip-Computer-Keyboard-Stand-Laptop/dp/B07YF31LJK/
It's adhesive and it fits both the preonic or plank. I use it in the lowest setting, and works like a charm with MT3.
I also bought some bumpers to give mine an angle. I put these on the back and some smaller ones that I had already bought (for cabinets in my house) on the front. The Preonic comes from Drop with four very small bumpers, a little smaller than the ones I put on the front.
I also started with the Sofle V2! My strongest recommendation is to socket the pro-micros - desoldering 24 pads if something goes wrong with a MCU isn't super appealing. If you order a kit it may not come with the sockets (mine did not), something like this should work.
I learned a lot getting to the point I'm at, but I don't really know how much of it is useful (e.g., shipping from Vietnam can take > 3 weeks), so if you have any questions I'm happy to answer what I can!
/u/_fafer, I really wish I'd found that list earlier! I ordered my kit from https://ergomech.store/ but I don't see it listed. I had a pretty good experience with the seller: answered questions about their products and got the order in the mail quickly. I'm having an issue with one of the pro micros, but I don't know what the cause is yet.
I got these on amazon pretty quickly... if you don't want to wait for a group buy via Drop directly. They still ship from Drop. I guess they are left overs from previous group buys.
Bonus tip: The Planck's USB-C port sits flush with the side of the case, so you'll probably be able to use magnetic connectors that are intended for the Macbook. The BM40's port is a bit inset, which means you'll either need a straight-on magnetic connector or you'll need one that sticks out a bit, like this one from Amazon (the one I'm using).
If you want one that's L-shaped (and also fits the BM40 which is a little more inset, I think), I found these. Really impressive for the price, but they only come in blue.
If you are using the stock steel plate, it does tend to have a lot of ping with the screws mounted into the based of the case.
I saw this in another post on /mk, but putting a thin line of sticky tack between the plate and pcb between the 1st and 2nd, and 4th and 5th rows does wonders!
https://www.amazon.com/gp/product/B001F57ZPW/ref=ppx_yo_dt_b_search_asin_title?ie=UTF8&psc=1
For metal cases, some people put a dab at the corners of the plate and case as well, but I didn't do that on my acrylic case preonic. Happy to post pics or a typing test if you are interested in hearing/seeing it.
Yep. I miss Radio Shack. Home Depot definitely didn't have small enough. Ended up going with: https://smile.amazon.com/gp/product/B07GV2BSNF/ref=ppx_yo_dt_b_asin_title_o00_s00?ie=UTF8&psc=1 One of those is bound to work.
I'm extremely hesitant to drill...I don't have the tools or expertise to trust the results.
it's a 20 pin connector that probably sells under a few names, but this is the one i got. it works great; no complaints! feels pretty high quality and overbuilt for the purpose of attaching a keyboard. I read about some issues with the type c port coming off the drop planck and although this is not the same product or company, I figure i'd take a punch in my wallet now than be surprised later.
So, I did a bit of shopping. I found a review photo of someone using a laptop stand to open his laptop 180° - the kind of stand usually used to save space when docked.
I also found some 14x11" fiberboard that seemed like a good option for my original intent of just covering the built in keyboard to prevent it from activating.
I actually ordered this stand that lifts the whole laptop up such that the keyboard can be placed beneath. It's adjustable so I can get it pretty high, hopefully in a way that's also stable. This stand folds flat for travel. Despite being larger, folding flatter probably makes it more portable than the dock-type stand.
I used a pair of cutters from this amazon link. https://www.amazon.com/gp/product/B00FZPDG1K/ref=oh_aui_detailpage_o06_s00?ie=UTF8&psc=1 They work great for flush trimming stuff. I think I saw some of those at home depot last week if you are in the US and are near one of those...
About 2-3 times more expensive. Here's a link: https://www.amazon.com/gp/product/B01B26MAR6/ref=oh_aui_detailpage_o00_s00?ie=UTF8&psc=1
Its only about twenty bucks, the blue ones usually go for around 6/7 on amazon (from what I have seen).
Yes! I tried mixing laser toner and I was able to get colors such as orange, red, green. But for my first set of keycaps that you see on the picture I used black laser toner and some special powder: https://www.amazon.com/Variety-Colors-Pigment-Diamond-Pigments/dp/B071SB48Z7.
I'm finishing another post where I'm mixing laser toner to get some colorful prints. Hope you will find it useful.
Do you have links where I can get blank pbt? Kbdfans isn't an option because keycaps for planck is 16 and shipping is 18. Besides I don't know how long it would take to reach me in US.
I currently purchased pbt from ymdk on amazon https://www.amazon.com/dp/B07NP7SFWY/ref=cm_sw_r_cp_apa_i_kQTqFbK13AQRK
I used the ones that came with my kit that I bought off a user on mechmarket. here is a link to what is almost certainly what came in my kit. It looks exactly the same. If you are hand wiring it though, this breakout board from amazon should be a lot easier to use. However, I think for hand wiring it is probably easier to have it as one matrix connected via whatever your preferred cable type is and use a single controller that QMK thinks is on a Planck or other 4x12 grid board. There is a video on youtube I will find for you if you want where someone did this to clone an Iris 58
Further reading leads me to Termux, list of packages. Using this would allow me to keep the Chrome OS security model intact without "rooting" it (no flame wars... I know, I know)
Funny, I already use this on my tablet for little things but I didn't realize just how full featured it is. It uses clang instead of gcc by default. I don't know if that's a hard stop for QMK. A lot of people say that basically any linux program that doesn't need a GUI can run in Termux. It sounds like of group of users is even close to getting Java working which would make my developer life on a Chromebook so much more streamlined.
Is that enough to work with @jackhumbert? What information would you need researched to determine? I'm still on the fence about moving forward with this workflow.
It's a very hacky workaround, but if you have room for it, you could use an ADC chip or breakout board that use SPI or i2c. Those were just some of the first results, so there's probably better options.
You would then write a getSliderVal() function which would read the value over SPI / i2c, and call that instead of analogReadPin().
You might want/have to have a look at the Git book for some basics. Generally, you add each file to the staging area, then commit that set of changes to your local copy of the repository. None of that can trigger any actions, since those are pure git operations. Actions are a Github concept (as are e. g. pull requests) - so git knows nothing about them. They are triggered (by the Github plattform, not git ;)), when you push your locally committed changes to the copy of the repository that lives on the Github servers.
Have a look at the status of your local copy again, to make sure your changes were committed successfully. git log shows you whether your newest commit has already been pushed to Github 🤞
Oh nuts. That's not so good. Sorry 'bout that.
At this point I'm out of ideas because I've not needed to debug that situation before. The only insight I could find was on this Git page but TBH I don't really understand much of what it contains.
Might be worth joining the discord server and asking there - link to this post and ask what they would suggest.
Believe it or not, the mate is the cheapest DAW alternative hardware to ever come out. Musicians all over the internet were freaking out at how cheap it was.
For comparison, the previous reigning champion of the space is the OP-1, coming in at $2000.
For crying outloud, people pay 80$ for a shitty half-built calculator that can only play a prerecorded set of instruments in a loop.
https://www.amazon.com/Teenage-Engineering-Programmable-Synthesizer-Sequencer/dp/B08LHBLNCS/
With C, the compiler flags and includes will be different for each keyboard/keymap. It's entirely possible for one call to qmk compile to work and another to have errors, without changing the code.
However, if we focus in on just compiling for one keyboard & one layout, this might help:
https://code.visualstudio.com/docs/cpp/faq-cpp
e.g. in my case, I build the keyboard:layout bm40hsrgb:rgoulter I saw from running make --always-make --dry-run bm40hsrgb:rgoulter that there's a cflags.txt which gets output to .build/obj_<keyboard>_<layout>/.
The C++ extension lets us set the compiler arguments, but it expects one per line (and cflags.txt has spaces in between). So we can copy, e.g. on macOS it'd be
e.g. cat .build/obj_bm40hsrgb_rgoulter/cflags.txt | tr ' ' '\n' | pbcopy.
and then paste this into the compiler arguments of the C/C++ configuration.
It won't fry the board, but the power draw .... I used some of those 5v solenoids on a corne, and it could/would cause brownouts.
Relays would work better, I think: https://www.amazon.com//dp/B00LW15A4W
And can be hooked up directly to the pin.
I'm curious about the hardware. Is your PCB open source? :)
Looks awesome by the way!
It's this one. It's huge as I planned to get my SLA printer out of the garage and keep it in there too, but still far too stinky to be in the house. I've been thinking about picking up a fume absorber because the enclosure has a duct for one in the back, but bringing the Photon inside for one night was enough for me.
Hey just realised i missed an enitre paragraph of text:
Recently, bought a ID75 second hand which looked identical to this keyboard i found on Amazon. The amazon one advertised itself as NKRO and so I made my purchase thinking it was NKRO as well
https://www.amazon.com/Ortholinear-Anodized-Aluminum-hot-swappable-Mechanical/dp/B07ZQCQ5YH?th=1
However, after testing and paying for it, i realised that it was only 6KRO. Has anyone else had experience with adding NKRO to your keyboard? As of now i am hoping that it is simply a firmware issue and the hardware is capable of supporting NKRO, however I have not fond any materials online as to the process of how the firmware can be adapted.
Ps: Currently learning Steno so the lack of NKRO is a dealbreaker.
This isn't the one I had, but something like this at the simplest.
Nylon spacers are your friend. Put them on the standoffs in between the PCB and switch plate. I had to do this with one of my Sofles. Some vendors seem to get their acrylic cut too thick for the switch plate and this is what happens.
Ok, cool. To be clear, it's all a freakin' work in progress. :) Almost every feature I roll out after lots of testing always needs more tweaking, if not wholesale reworking. Like the BTU cluster. It worked and would sell as is, but it's sort of another bolted-on feature, so I've gone back to a base camp to find a better way up that damn mountain.
If you don't mind throwing the STL my way, I'd love to try it out.
Do you have a link to the ceramic balls?
If anyone's interested in trying the BTU stuff in my repo, there is a TRACKBALL_BTU option for thumb cluster that works fine, and there's a "ball_transfer_unit" branch that has a modular twist-in mount.
I've been using these for the BTU trials:
Oops, they are Silicone Nitride not oxide balls. I got from Amazon to get them quickly but they are much cheaper on aliexpress.
https://smile.amazon.com/gp/product/B07SXJWLHN/
I'll share STL later.
You are making me nervous with that USB connector there :) Unless it's a magnet, I mean. The Planck (any board with a PCB-mounted USB port, really) has a tendency for the USB-C port to snap off under pressure. By making it longer you are adding more leverage, making this scenario more likely.
If that's not a magnetic connector you might consider getting one, like this maybe.
I hear you. I had to fill a 95-key ortho. I finally settled on Akko SAL, which I prefer over XDA sets. It has the wrong profile for my tilde key and lacks a 1u Enter key, but otherwise it's great.
I regularly browse the large XDA sets to see if any include 1u Tab and 1u Enter. The only one I've found is this Moon Landing XDA set. I may try it one day.
At one point, I priced getting an acrylic sheet cut based on a simple SVG design. I checked a couple online laser cutting services (I forget which) but the single price seemed to be around $25 (shipped? I can't remember). Ordering more at once would obviously lower the per unit cost, but a group-buy might be overkill, and I have no interest in running one.
My very simple design was basically eye-balling the unavailable ElevenTen keyboard bridge, which is probably identical to what you listed. Never had one made, but I might still do it if I start working away from home more.
Honestly, if you can find any reasonably sized sheet of acrylic, you could probably measure the needed size, score it, cut it, and round the corners with a sander, and then throw some rubber feet on it. Laser cutting just gives you a fancy shape with little effort.
I use the paid version of "Unified Remote". I think the free version had ads. You have to install client on pc and then you have alota control options. https://play.google.com/store/apps/details?id=com.Relmtech.Remote
The mouse i use since like over 10years is razer naga. tho is my third they tend to break. this current updated version has nicer buttons too.
They are pretty good quality, really enjoyable. It's my first set so I don't have a comparison point. But my Logitech keyboard looks very cheap in comparison. I got them from Amazon https://www.amazon.fr/dp/B09PNBB243/ref=cm_sw_r_awdo_DBTWAQF1T4WJT8H1636G?psc=1
Oh dam. i thought you were joking! LOL.
I got the set from a local shopping platform, it's a really comprehensive one and yea surprisingly it fits my desk theme really well with this ortholinear keeb.
Ok enough talk. I've found the amazon link for you guys, enjoy! They also have different colour choices. Amazing.
If you aren't able to make your own, you can get this for pretty cheap: Glorious Gaming Wooden Wrist Wrest.
Glorious Gaming Wooden Wrist Wrest, check it out, I recommend.
For those that can't make their own, check out Glorious Gaming Wooden Wrist Wrest. I love mine and have been using it for about 4 years. I like it a lot better than any gel or memory foam pad, it looks great, and it lasts. You can see where your wrists are the most by the wear on the varnish, but I think it's a cool look.
It's hard to see in the pic but there's a small Bluetooth receiver on the side of the laptop, that's for my wireless mouse (out of frame).
The stand is https://amzn.com/dp/B08VXJMJ75
Can definitely recommend the stand, it has adjustable height and rubber pads on the top and bottom where it comes in contact with the table and laptop itself. All aluminium and has various colour options.
I'm not sure of a way to do this with QMK, but you could use KMK Firmware (Python-based), which allows your keyboard to also present itself as a flash drive to your computer. Black Pills technically support it, with a few caveats.
You'll need to solder on an external flash chip to the Black Pill, since KMK needs much more space. I used a 16MB chip, and have about 15MB of free space.
You'll have to rewrite your firmware in Python. There aren't many boards with pre-existing KMK firmware, so that likely means converting everything from C.
Black Pills have a limited number of USB endpoints. There is keyboard functionality, USB storage, and serial communication. You only have enough endpoints to enable 2 of these at a time. I have mine set up so I can hold certain keys when I reset the board to enable the features I want to use.
I did all of this and it was a headache and a half to figure everything out, but it mostly works. You'll probably be better off just getting a small flash drive and keychaining it to your keyboard.
I drilled some holes in the case and mounted a piece of wood floorboard trim (that i sanded and stained). As far as the grippy feed I’m just using an assortment of rubber feet from my local ace hardware. The cable is this
If you want to make sure they stay in place you can opt for weather stripping. They are a little less grippy but the dampening is great (you can layer the 1/16" stuff if you prefer, or just go for 1/8"), and it's very unlikely to peel off, unlike a tiny foot.
Another option to look at is the Lilty58, it's one of the popular variants that can be Low or high profile. My lily58 is the hotswap version from Boardsource which I've outfitted with MX and Choc hotswap sockets. This allows me to use low profile or high profile switches.
However, If I'm reading correctly you want the thumb grouping from the Moonlander but in a low profile switch? If so check out the Tiara, I just found out about it recently. It's not exactly like a moonlander's thumb cluster but it's LP and closer to what you want.
Two of the other options I was thinking that may fit for you is...since the moonlander is hotswap from what I remember, is to use soemthing like a Silver speed switch but with a spring swap. The silver speed switch (and the general Speed family of switches) all have a reduced travel but a stupid light spring, e.g. easily pressed keys but may cause many typos. While not exactly as shallow as a low profile they get closer to you goal.
The other option I have for you, is one I don't recommend only because I'm not a fan of how the switch feels when pressed but YMMV. These Red MX style LP switches are in between a MX and LP switch. This switch is lower by a few mm's and I feel like they are the closest thing to a LP switch but in an MX style. The reason I don't like them is because they are MUSHY... and while I like linears there is something that feels off with these switches. Performance wise they are just as good as LP or MX switches but I can't get over the mush. lol
yep, took me forever to find an actual 3u space. Before this, I had a long shift key put upside down for comfort. The space bar in now came with the keycap set from amazon:
For anyone interested, I can vouch for this mat : https://www.amazon.com/gp/product/B08SW9FHYR best $/surface ration I found, good adherence, and the top fabric is easy to peel off. It's also large enough to service at least a dozen Ferris's. It's on the bottom of my Ferris right now and it feels noticably more cushy than the original rubber feet. Also less prone to slipping. Searching for "non-slip mouse mat" or something around this theme should do the trick for anyone.
Additional questions for GEIST >
- What did you use for adhesion? glue? double-sided tape?
- How did you make these holes? I plan on crafting a hole-puncher from a hollow metal tube with chamfering drillbits, but not everyone might have these tools at their disposal.
Here is a link! Sorry it took so long, been pretty busy. https://www.notion.so/Let-s-Split-Build-ef25b09dd88b4064afaa66c9a586a270
3 in 1 Magnetic Charging Cable (4-Pack), YKZ QC 3A Fast Charger Cable Nylon Braided with LED Light, Multi Magnet USB Cable for Type C/MicroUSB/i-Devices (3.3ft,6.6ft) https://www.amazon.com/dp/B08LD8TWYS/ref=cm_sw_r_cp_api_glt_i_WZ4HHFZQ1ASWM6J9C5JJ?psc=1
I just finished a Sofle (which does require smds) with these outemu low profiles. Socketing into kailh cherry form factor hot swap sockets. they're the same pin layout with minimal differences that seem to work although they're not truly 1:1. I just had to get shorter standoffs to account for the height difference.
You could probably use them on other boards depending on the socket holding mechanism in my case, that the pcb thickness the switch clicks into, wasn't too thick.
I believe I ordered these from Drop. It's the Ortholinear kit. Might be able to find it on Amazon: https://www.amazon.com/Redsuns-Samurai-Keycap-Ortho-Keyboards/dp/B081DD83LB
If you've never used git, and you really just want your macropad for now, just skip doing anything with github (beyond downloading qmk, which you have)! You don't actually need git*hub* at all after you have qmk set up, and only need git if you're trying to keep track of changes you make.
If you want to learn the ins and outs of git, github, and uploading to github, start with learning how version control works in the git documentation and then move on to how your local repository can talk to github in the cloud if you'd like. Github & its gui makes far more sense when you first understand what git is, does, and some basic commands.
It just does not feel natural for me to tuck the thumb that far under the palm to then press 'down' (outwards, really) on a key.
FWIW, with FancyZones, you can use just Win+Arrow to snap to arbitrary positions.
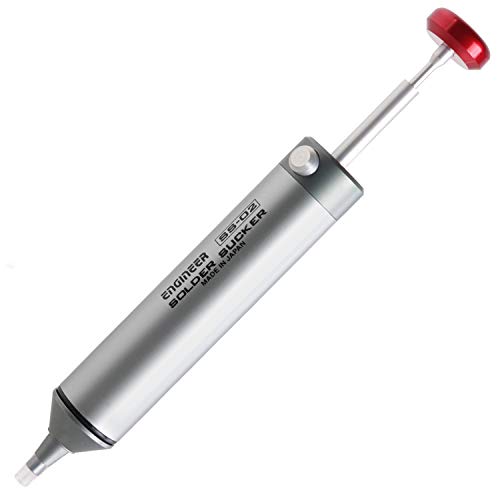
Definitely something better than a $20 iron from Amazon. I use the Hakko FX-888D. It made a huge difference in my soldering.
I have. Very similar ideas!
My vision is to make a readily available dongle that has a great form factor. People can then use something like rfnano which is available on amazon now for their wireless builds.
Yea that's kinda fiddly. I glued a really tiny switch on the bottom of the PCB. And sticked the battery under the Nice!Nano. Than connect B- to the minus pole on the battery and B+ to the switch and from the switch to the + pole of the battery (you could use also use B- and the - pole, it's just important that you can use the switch to interrupt the circle). I used a really tiny wire for it, so I could run it through one of the unused holes in the PCB, to make it look cleaner. Unfortunately I can't show you pictures of it, since I got this mousepad thing on the bottom of my PCB, which hides the wiring.
I'm not in the UK, but Amazon UK has it listed. No idea how Amazon shipping works in the UK, but it might be worth considering.
https://www.amazon.co.uk/DROP-Preonic-Keyboard-Kit-Programmable/dp/B08L3WD9ZN
Sorry, I'd skimmed that bit.
Specifically Nordic, or even ISO keycaps, are rare vs ANSI, but [full kits can have plenty of 1U placeholders](https://m.media-amazon.com/images/I/81jXnEUEX1L._AC_SL1500_.jpg to be used, such as this set.
If you can touch type, you can also consider blank keycaps. Or mix 2 sets, alphas vs modifiers.
I ordered a set of the first, edge-printed; looking forward to those around March Break! ;-)
I also saw (and ordered) a set thus https://www.aliexpress.com/item/Colorful-PBT-37-Keycaps-for-Mechanical-Keyboards-cherry-switches-compatible/32671867069.html that seem well-commended, and reasonable in price.
As far as checking out a branch goes if your not checking out a specific commit hash into a new branch you can do the following:
$ git checkout arm_rgb $ git checkout -b dev_branch
This will switch you to the arm_rgb branch and a checkout -b <branch_name> will create a new branch from the current branch.
[git checkout help](https://git-scm.com/docs/git-checkout)
Yup, that's one of them, but there are a lot more. And I like using this site for finding software. If you know one, it can help you find alternatives.
There is a discord server for qmk specifically, and I recommend asking there. It's active and filled with people that can help you out (not saying you won't find help here or anything, just that chatting live might be easier). https://discord.com/invite/Uq7gcHh
In addition to a decent soldering iron, the correct gauge solder wire, flux and etc., a good, lighted magnifying glass in mandatory equipment. Mine looks something like this: https://www.amazon.com/Magnifying-Magnifier-Stepless-Adjustable-Workbench/dp/B092JF846T/ref=sr_1_4_sspa?keywords=lighted+magnifying+glass&qid=1639281996&sr=8-4-spons&psc=1&spLa=ZW5jcnlwdGVkUXVhbGlmaWVyPUEyUFVJREROWDg4Qko5JmVuY3J5cHRlZElkPUEwOTk3OTEzMThHOTdMT1YxMDFERiZlbmNyeXB0ZWRBZElkPUEwMDAyNDUwMURPWTNOSko0T0VOSiZ3aWRnZXROYW1lPXNwX2F0ZiZhY3Rpb249Y2xpY2tSZWRpcmVjdCZkb05vdExvZ0NsaWNrPXRydWU=
Clean off the flux with >90% isopropyl alcohol and examine your joints under magnification. Keep in mind that just because you didn't use two rows of microcontroller pads doesn't mean that those pads are just along for the ride. Those unused pads are still connected to your circuit. Any bridging of a used pad to another used pad, or even an unused pad will cause the symptom that you describe.
Kinda yes. The F row is only thing I think should be on my XD75. That said, it then wouldn't fit those sexy 60% cases. But I am very happy with my current layout, where I used most common F keys in the base layer. Here it is.
If you need macro's to spam text, check out this: https://codepen.io/Traverse/full/zwMwKX/
It's very useful, just add an enter space before and after. I use this to quickly queue up a few salt reactions (my favorite is "left click to win" for symmetra). :)
I'm also trying to find a way to "spam" certain keys to auto-cast in Diablo. The only problem I'm having is timing... I'm not really sure how to get that to work properly (I'm not good at programming)
Very cool!
Could you link to the wrist rests? I've been using these (https://smile.amazon.com/dp/B00519TMAY/ref=cm_sw_r_apan_glt_fabc_Y6Q2Q7MCHBBMC6J4CVK9?_encoding=UTF8&psc=1) on my custom keyboards, but the ones in your pic look super slick.
I have both the Planck and BM40 low-profile cases, and although both are nice I prefer the Planck. It's thinner (but still a tank), has a better texture, and is less pingy out of the box.
If your concern is the typing angle, for Planck users I would suggest buying some rubber hemispheres. I prefer flat, myself.
They’re just labels from a mechanical label maker 😂
DYMO Embossing Label Maker with 3 DYMO Label Tapes | Organizer Xpress Pro Label Maker Starter Kit, Ergonomic Design, for Home, DIY & Crafting https://www.amazon.com/dp/B0000AQOD3/ref=cm_sw_r_cp_api_glt_fabc_9HDCQAWF4X7CYQ640TCB
Love it!
I was in fact in the research/design stage of a 9 key macropad (9 keys, 2 encoders and a mode switching key) with a slightly different layout. I'm new to electronics and programing in general, I come from a mechanical engineering design background.
I have a few questions, hope you can help me out.
I need a mode switching feature in my macro pad since I need to assign program and use case specific shortcuts and macros. Is that possible to accomplish by QMK? I was preparing the code heavily referenced from Retro Build Games Macro Keyboard V2. I am implementing a dedicated mode switching key that cycles between 4 modes (for now). I would appreciate suggestions.
And yes, I am using the matrix approach with the diodes. This would be my first PDC design so trying to make it as simple and easy to work on.
I want to include a SSD1306 Display on it as well. Optional LEDs if I could, and Arduino libraries exists for all of these, so it won't me too much of work, I hope. I have a 3D printer handy, so probably gonna design and print a case for it.
Love your keycaps! Where can I get similar or custom keycaps without spending a fortune.
I've had my Planck EZ for a little over a year and it's been excellent. I use it for work everyday programming in C++. The open source QMK software is really cool, and you can play around writing your own LED effects. I can also highly recommend a stethoscope case for carrying the Planck. And if you plan to travel with it often, a USB-C magnetic quick connect so you don't wear out the Planck's socket is very nice. Here's the stethoscope case I have. It fits perfectly. https://www.amazon.com/dp/B019IZZKUC
Look into front-facing or side-lit shine-through keycaps, there's a few sets on Amazon and AliExpress.
same issue, tried a bunch of things, what worked was this wrist brace on Amazon in the end
think many of us who just sit at the desk all the day gaming or working will face wrist issues at some point
Thank you so much for this. I did flash the hex, with power it makes the same tuneful little buzzer ditty.
Unfortunately it still appears as an unknown device on my PC.
Because the tune plays I'm inclined to believe that the microcontroller is ok, and the the problem lies between the microcontroller and the USB, but I can't tell
I use windows and found that it is possible to create your own Windows keyboard layouts. That way you can keys to be what you want. For me this was a good solution to get the special characters were I wanted then.
https://www.microsoft.com/en-us/download/details.aspx?id=102134
So I followed the directions found on http://www.msys2.org/ I had to use pacman -Syu and pacman -Su if that helps. I tried to follow the instructions afterwards found on qmk website
I'm stuck here now. I'm a newbie at this kinda stuff and I thought I should try to set this up before building my planck tomorrow! Thanks
For my Tab 90M, I use a combination of BTT as stated by other comments here, though mostly for mouse functions. But the real magic bullet for getting the function keys working was Karabiner Elements. There's some overlap between BTT and Karabiners capabilities, but I found I had better control with Karabiner. Within Karabiner, I found an option for both launchpad (F4) and Exposé (F3), as well as all the other functions.
Closing the loop on this one. As it turns out, I had Karabiner running on my laptop with the function keys settings mapped to media/special functions, but didn't have it active for the Planck on my the mac that wasn't working as expected, despite Karabiner running.
Allowing Karabiner rules to apply to my Planck restored the fn key behavior I was looking for on the problem machine.
Something like http://keypirinha.com/ or build/find something similar in ahk. The idea with a fuzzy launcher is to have a single binding then type a few letters and your script runs. I tend to just use aliases or fzf in my terminal for that though.
Have you installed all the prerequisites? It's telling you that you need to install diffutils. Oh, and are you running CMD as administrator?
Most of the problems I've had with QMK were on Windows. On Linux it works much, much better. Oh, and I didn't use the default CMD in Windows, instead I used Cmder.
Couldn't you use arrow keys to skip forward/backward?
Also I suggest MPV to watch videos (you may get better experience with it, not to mention there is keybinding for everything).
In MPV left/right keys work as in VLC to seek, and up/down skip by larger chunks or to the next chapter (if there are).