
What are
/r/sfx's
favorite Products & Services?
From 3.5 billion Reddit comments
The most popular Products mentioned in /r/sfx:


The most popular Services mentioned in /r/sfx:
The most popular reviews in /r/sfx:
Fake blood has a tendency to bead on wax or greasepaint. The trick is to add a surfactant. Dick Smith used Kodak Photo-Flo which is toxic, so an alternative is lecithin.
- 2 Quarts Corn Syrup
- 5 oz Water
- Red/Yellow/Blue Food Coloring
- Non-Dairy Coffee Creamer to Thicken
- Liquid Lecithin
- Peppermint Extract to Taste
A better option is to use blood gel.
Here would be my go to recommendation Liquitex Professional Matte Fluid
I use this stuff to seal latex masks so flexibility is key for my needs. The medium gloss is super glossy as a heads up, so certainly go with matte. Here is a recent example of me using the gloss, and then pressing into the mask showing the liquitex varnish flexing with it a bit
Product line labels itself as: "They have excellent flexibility as well as great water and ultraviolet radiation resistance"
Holy shit - this is an unexpected reply. You'll be happy to know, then, that I got my gelatin molding/sculpting techniques from YOUR videos! :-P Your videos/tutorials are great! I'd love for you to check out my Instagram! - @gremlin_fx
Color Theory for the Makeup Artist: Understanding Color and Light for Beauty and Special Effects by Katie Middleton (a second edition comes out on Oct. 12)
Because your edge is round, read https://www.amazon.com/Techniques-Three-Dimensional-Makeup-Lee-Baygan/dp/0823052605
and as may makeup books as you can find, its about edge design, how tapered, how one crosses over texture perpendicular to the skins natural crease direction, look at dick smiths makeups before he's painted them, see where the edge sits, and understand why.
A small neck appliance needs skill and care, some areas like that need larger appliances with cleaver edge placement, the right tension in application.
Practice, practice, practice.
You can put the blood into one of these and keep it in your pocket. You can squeeze it in their direction when your cue comes but it might not be accurate depending on how far they are behind you. It would take some practice.
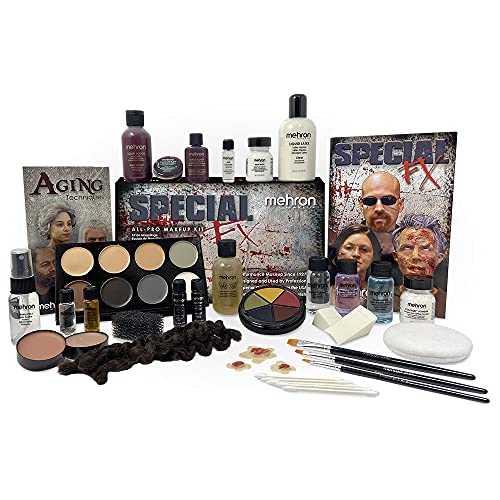
She just used this kit from Amazon but homemade scar wax instead of the one in the kit, and then she used my foundation for the skin tone, some gauze, and then of course the pencil 😊
Would this stuff do the trick or is PAX just the best?
And by "prosthetic adhesive," I'm assuming that you mean "spirit gum?" Are there varying strengths of the stuff or is spirit gum just spirit gum?
Make-Up Designory's Character Make-Up https://www.amazon.com/dp/098023185X/
This book is pretty decent, but like I said there is so much that goes into this aspect of makeup that it's difficult to give an answer. There is no best product list really, different things are good for different situations. Also different availability depending on country and that's likely why you're finding so many options.
For example: for the lifecast you have the option of platinum silicone or alginate. Each has strengths and weaknesses. Once you have that there are so many ways to go (such as making your positive in hydrocal/ultracal/fiberglass etc) depending on your space, needs, budget and so on I'd highly encourage you to take an in person class if you can because they will have guidance regarding what to do and when and how to tell what factors you need to consider. We spent 3 weeks in school learning how to do a silicone prosthetics and it is honestly not something I'd even consider without a dedicated lab/shop space and some highly expensive safety equipment. A thing that was recommended by a long time pro though was starting practice on sculpting techniques because when you do start making your own appliances you'll need those skills to bring your vision to life.
thank you so much! :) you appear to be more educated on the pellets than i am (lol). do you mind checking to see if these are the same type of pellets you are talking about?
would orthodontics wax work?
I'd cut through the clay and then use wire cutters for the rest. Jetech Diagonal Pliers 5 Inch - Professional Electrical Wire Cutter Snips Dikes with Ergonomic Grip https://www.amazon.ca/dp/B07NPGWTWW/ref=cm_sw_r_apan_glt_i_2KAWR9Y6QJ6ARX4Y4GX4?_encoding=UTF8&psc=1 something like this I would think would work
I used a plastic mask from Amazon, I’ll link it since it’s hard to describe. Then I made gelatin and added some foundation once warm, and swirled it around inside the mask until it cooled. It dries in only about five minutes! Because it’s gelatin it doesn’t last more than a day, I’ve been wanting to try it with silicone!
The oat milk has a white cast to it and will run things pink.
http://www.amazon.com/PACK-Party-Additive-Rockin-47016-00010/dp/B004RIXP8U This pool color is only around $11. It’s safe for skin, but I would avoid eyes with any product that isn’t specifically made for eyes.
Powdered sugar and cocoa powder (blended well) are great for opacity. Be mindful of the plumbing.
A book my parents got me when I was just starting was this one. But I truly don’t remember using it too much.
Like a lot of people here said, there aren’t too many books I have that I learned a lot from. But I learned probably 90% of what I know about SFX from U/Freakmo on YouTube. Her early videos are so great and contain such amazing instruction for the step up from latex and nose and scar wax, to encapsulated silicone.
Your 9 year old may already watch Glam and Gore on YouTube, but she has some good step by step for latex and cotton pieces as well (the most recent prothetic she made to attack to a face mask could be a fun project!).
Every Black Friday, the Stan Winston online school has a year long subscription for all their classes for I think half the price. It might be a little but much for right now, but something to think about in the future!
Thanks for the advice! I was thinking about a manifold (though I had no idea about the equal lengths thing) but I was concerned about how complicated a set-up it would be considering the director wants like 30% goo coverage on each hallway wall (left wall, right wall, AND back wall). I'm currently wondering if I can pre-drill a series of holes along a length of PVC pipe, suspend it from the ceiling against the wall, fill it with goo, then just tilt it when the shot starts so the goo runs out of the holes? Of course then the challenge is resetting that fast and figuring out just how much weight good duct tape can handle...
Your point on the faucet is interesting too - do you literally mean a pressurised canister like a fire extinguisher filled with goo, given a narrow opening, and piped into the tap system? Or are you talking more like a garden sprayer like this? If the second one, I was worried that the super small nozzle on sprayers like that would make the goo seem less viscous coming out of the tap - is that incorrect? Can a pressure sprayer handle viscosity in general?
Your thoughts on the fox effect make sense too. I imagine it'll be tough to plunge that syringe with a couple of meters of tubing but the control will be worth it!
Thanks again for the advice - I feel like I'm shooting in the dark/making a lot of assumptions that I don't have the budget to test. Your insight is great!
skin illustrator is hella expensive for beginners. probably PPI on set would make it better as its a bit smaller and cheaper. 80$ vs 55$. (cream paints work for wax as well) liquid latex, some scar wax, spatula, petrolium jelly, sfx gelatin.... lots of stuff needed to be honest %) I would recommend Mehron sfx kit for the starting point https://www.amazon.com/Mehron-KSPFX-Special-FX-Kit/dp/B00GS8GJ6C
I used this product and molded it around my teeth like a retainer: http://www.amazon.com/gp/product/B00WRWKM6G?psc=1&redirect=true&ref_=oh_aui_detailpage_o03_s01
and then made/painted teeth with it also. Then i used non toxic super glue to glue them in place!
I know this specific one looks ridiculous, but what you're looking for is along the same lines. A normal bald cap is going to be very labor intensive to get the effect you're looking for. Normal bald caps are very close to balloons, once they get a rip (or two giant holes in your case), it's curtains.
This is great, thanks so much for all of the info!
I've done a cap before but it was a long time ago, I'm going to have a friend assist with the application/painting process so hopefully that helps. The one I got (this) actually came with some coloring makeup that I was going to try to use to match my skin tone, the instructions for getting the coloring right are actually quite good and somewhat mimic what you said. I'm not sure if using this would be quite as good as the PAX paint you suggested but since I already have the various colors I figured I'll give it a shot.
So I'd really only need to pick up a few black/brown shades for the hair and the stipple sponge. The kit comes with spirit gum but I've read that pros-aide is more effective so I might try to get some of that to use instead, especially if I am going to use it to mix the paint anyway. Do you think (after measuring where I want the hair line) it would be possible to paint the hair with the cap off, or would I need a mannequin head to do that effectively? I was thinking that would be much more precise than having to wear it while a friend applies the stipple technique.
http://www.amazon.com/Monstrous-Monster-Make-Up-Manual-Book/dp/B005203LQI
That's a great starting point.
I'm working on a step-by-step photo tutorial, but I can also be very lazy. Hopefully I can get that up here one of these days
Hey guys, I did a test run on my husband and as you can see it looks OK. By the time I was done it was already smudging and I don't think powder and sealer would be enough to keep an all night look. So I've done some digging around but can't really find what I'm looking for.
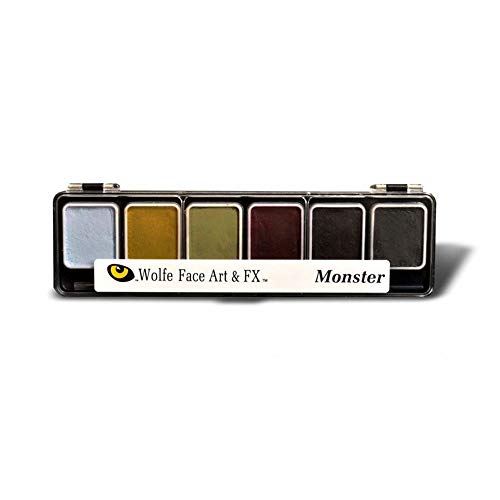
It looks like a lot of people have recommended a water based paint? I found this Wolfe FX pallete but I have zero experience with water based paint outside of painting canvases. Can anyone tell me about how well it applies? Specifically the blacks and whites?
What products would you recommend? I want something that moves a bit since I like to nudge my lines, but I want it to last the whole night. And since I'm not a professional hopefully something that won't break the bank? Any feedback is welcome!
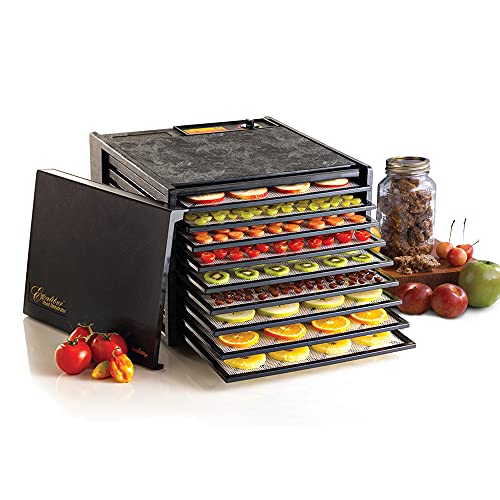
I use flocking, the tiniest amount of Liqutex Acrylic, & a Plasticizer. I keep them pretty translucent, with the slightest bit of color. I will freeze them, pull them from the mold & re-freeze them. Then let them air dry if time permits.... Though a friend of mine was letting me use his dehydrator that worked wonders! It had a fan, & adjustable temp http://www.amazon.com/dp/B004Z915M4/ref=cm_sw_r_udp_awd_zGeGtb178CJ4R
It's good for large transfers too, or quick curing a silicone mold. Though I get the best results when they air dry.
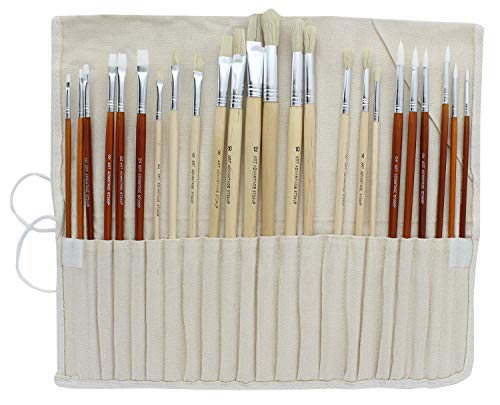
One last question; what type of brush should i use with the FX palette? Can i use regular ones like these or should i go for a specific kind?
For something simple like this, I use childrens adhesive eye bandages. Here's an example, https://www.amazon.com/dp/B001UJ2SUK/ref=cm_sw_r_awd_MAqlub1HVTDZ0. I am sure they have them at your grocery store or pharmacy :)
I bought these in black and white to start:
http://www.amazon.com/Mehron-Liquid-Face-Paint-Makeup/dp/B008NCXJ5K/ref=pd_bxgy_t_img_y
Ever used them? It's only an oz but I'm hoping a little goes a long way. Plus since it's paint maybe I won't need so many layers? I also looked into wolfe FX (Holy crap so pricey for so little!). I didn't find as many results for alcohol activated paints/makeup but from what I've read they sound ideal. Also do you know what kind of makeup skin illustrator is? I saw it on SFXwarehouse and I see people talk about it here a lot, but is it just a high quality cream pallet?
Your options depend greatly on the exact clay you used, many Roma Plastilina based clays contain sulfur - sulfur will totally annihilate the curing of any silicone based material mold rubber. Triple check to see what clay you used and if it is sulfur free. Smooth-On has some awesome options, I have used Rebound 25 with PLasti-Paste ll as the support shell jacket Just like in this vid clip. Mold Making can be an intense technical art form requiring some practice to be sure. If this is your first mold making attempt I would recommend mocking up some rough demo pieces and practice doing a two part mold before working on a piece you care greatly about. In many two part mold scenerios you are creating a clay based dividing wall that includes key registrations and a separating coat (vaseline, even tin foil, etc) to ensure that once one side is completed, you tear down that wall and start on the other side once you apply seperator to the new wall created from your temp barrier.
A good video demo for some of these techniques is found on Mark Alfrey's Standard Molds and Castings
Smooth-on also has a pretty awesome free library of videos and demos on all their products! Check your clay for sulfur though! Best of luck
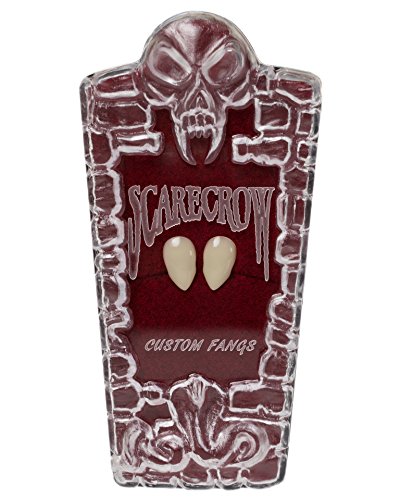
This picture also shows contacts and fangs. Any suggestions for where to get the contacts? I already decided to go with these fangs, but I'm not sure if you can use 2 sets and use one on your bottom teeth.