
What are
/r/Bladesmith's
favorite Products & Services?
From 3.5 billion Reddit comments
The most popular Products mentioned in /r/Bladesmith:


The most popular Services mentioned in /r/Bladesmith:
IGTV
Aliexpress
Screencast.com
Wikimedia Commons
MapQuest
Google Drive
DealExtreme
Camelcamelcamel
The most popular Android Apps mentioned in /r/Bladesmith:

The most popular reviews in /r/Bladesmith:
Ah yes, the finest "handmade" damascus direct from Amazon. Granted, the handle is slightly different and there is no fuller in this blade blank compared to the link, but the point stands.
Mods, can we just ban /u/safitechs? They've been spamming their dropshipped garbage as "handmade" and "handforged" all over every knife sub for the past week or so.
I think I found the same knife on aliexpress. What a scam.
Absolutely, the trick is to identify what the blade will be used for and thus what properties you want from your steel. For the vast majority of knives, O-1 has all the properties you want! If you're doing a big chopper, you may think you need more impact resistance and go for 5160. Remember though, the key is the heat treatment, the steel can only take you so far if it's being heat treated incorrectly!
By polishing I mean shiny, bare steel with files, grinder or sandpaper. It's not necessary, I leave some of mine forge finished for aesthetics, but the smoother it is, the smaller the surface area and therefore increased rust resistance.
If you haven't already, I strongly recommend reading the Complete Bladesmith. That book was my bible and taught me most of what I knew! There's a brilliant section near the start on the benefits and drawbacks of most common steels and goes onto the heat treatment as well as just about every other step in making a knife! AFAIK the book is no longer printed so you'd have to buy it second hand, so I have no issue linking you to a digital copy for the sake of knowledge:
https://drive.google.com/file/d/0BwhWWp2WVgHFdXR3YkdnejRKMEk/edit?usp=sharing
I'm guessing you're new to knifemaking. My advice is to take it slow and don't expect too much to start with. I very nearly quit because I'd work 8 hours a day at weekends and in 2 months I never produced anything I was happy with. Make sure you know your basic blacksmithing skills and have a play with simple knives that require minimal work on the grinder as it's a big time waster when you want to learn the forging side of things! These Viking woman's knives are absolutely fantastic practice for forging blades and gives you a bit of practice with drawing, twisting and scrolling. They take ages the first few times, but I can now forge them in less than 40 mins!
http://amazon.com/Kidde-466204-Fire-Extinguisher-Rated/dp/B0017TE8BK
This is currently a great price for an abc fire extinguisher, according to camel camel camel. http://camelcamelcamel.com/Kidde-466204-Fire-Extinguisher-Rated/product/B0017TE8BK
I have never set my shop on fire, but I have burnt myself, and cut myself, and abraded myself, but nothing too bad. I try to work intentionally slow and deliberate. I like my fingers. In my grandfather's shop though, everything was a mess, and there was a shotshell lodged near a grinder, and when he was grinding with me there, that went off... scared the hell out of us.
Fluffy above has it right: wear protective equipment: goggles and ears are a must power tools.
As far as a first aid kit goes, I keep in my shop bandages and stuff for compressing, staunching blood flow, with a real first aid kit in the kitchen 30 seconds away.
Brand was different, but it’s built the same as this one. Prices the same as well.
Mophorn Hydraulic Shop Press 6 Ton H-Frame Hydraulic Press 13227lbs with Heavy Duty Steel Plates https://www.amazon.com/dp/B07WQVX5B1/ref=cm_sw_r_cp_api_glt_fabc_WZ1cGb5XJN7YN
I’m going to make some rounding tools and square compression tools to lock into the work plate that will compress the work and then pop back up when I take the pressure off. Only downside is I need to do something better with the hydraulic release valve, because it’s designed to use the end of the pump handle, which I don’t want to waste time removing the handle in order move my work piece
I have a good old fashioned Lansky diamond stone set. Works like a charm, and I dare say it will be around long after I'm gone. I don't make so many knives that I would ever need a faster sharpening system though, I can see how you'd need to upgrade pretty quick if you were trying to do anything quickly or in bulk.
Amazon
You can try this, I used one to clone my slow hard drive on the laptop to a fast SSD, and then swapped it out.
I use a 3" pvc pipe half filled with smallish rounded river rock. Knife is etched In Ferric chloride, then tumbled in the pipe for 20 minutes or so on some old skate board wheels. Video here https://instagram.com/p/x0gi0Dt6eh/?modal=true
Bucktool Combo 2" x 42" Belt Sander 6" Bench Grin... https://www.amazon.com/dp/B07ZQ6LCK8/ref=cm_sw_r_sms_api_glt_fabc_4AFWV34R3EYHVRBCDH3F?_encoding=UTF8&psc=1
$260 for a 2x42 all you need. No regerts!
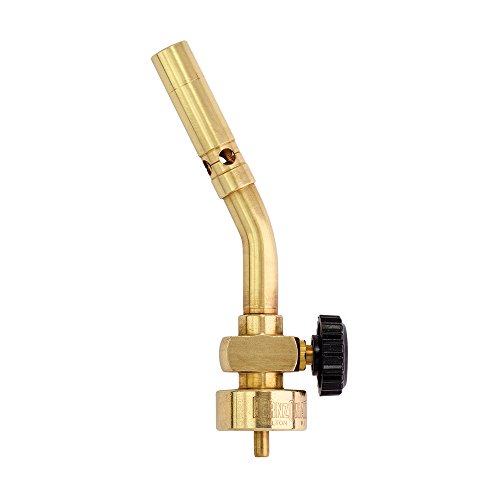
I built a two-brick forge. I bought a MAPP torch with adjustable flame from Home Depot to provide the heat.
Here are the bricks I purchased: https://www.amazon.com/dp/B07MHKNRP1/
You can find similar bricks for a lot cheaper on other sites but once shipping is added these are fairly competitive.
Alex at outdoors55 has a good tutorial for building the forge: https://youtu.be/ifTIuNt3aNY
Couple notes: you only really need one hole, and if the hole is closer to the front and angled backwards and upwards a bit (to create a swirl) it might work better.
I hear ya. I also keep a can of silicon spray lubes like: https://www.amazon.com/300038-Specialist-Long-Term-Corrosion-Inhibitor/dp/B084VNY27P handy. If you plan on glueing a surface the silicon is less the ideal but it works well on blades and tools as well.
It can be a constant fight
Disclaimer: I use propane, not coal. My advice is only based on other people's experience, not my own.
I think the problem is the idea that a hairdryer is going to pull the same weight a proper blower will. Companies are trying to save money by making products that meet, but just barely, their intended use. Use as a forge blower was never considered as a use-case when any hairdryer was designed. The duty cycle and run times aren't comparable and the operating environments are near opposites.
You see a lot of YouTube videos where people throw together a forge with this and that and it usually has a hairdryer blower. This might work for a bit or for the home gamer, but it can't last long term or fit the needs of a hobbyist or professional. You don't see follow-up videos or blog posts of forge owners praising their hairdryer blowers. You do hear when people upgrade and how much better it is.
I appreciate your pain. As a hobbyist myself, I've tried to make some tools that I really should have just purchased outright. Many times you can hack something great together that'll last a long time (i refused to spend two grand on a belt grinder, so I built one), sometimes it's better off to just get the right tool for the job (purchased the wheels for said grinder instead of trying to make them out of wood or skateboard wheels).
I think a proper variable speed fan for a forge blower is something I would just buy outright. Amazon even has a few cheap options you can put a speed control dial on. https://www.amazon.com/dp/B001OM1L7E/
How much money do you keep spending on replacing hairdryers until you get a tool that'll last forever?
Good luck
nice. Tips: you can keep Ferric Chloride solution in a ice cream bucket, i have had mine in one for a few months with no problems. also you can also use a soda bottle for dipping the blade.
For engraving you cant go wrong with a rotary tool as its the easiest way to do engravings. ghaa my engraving tip busted well i was doing the engraving on my latest blade as i developed a makers mark and put it on all my blades. so well I got it on it I screwed up the engraving so I did not do the best i could.
also amazon sells ferric chloride so here's a link: https://smile.amazon.com/gp/product/B005T8Y20W/ref=oh_aui_detailpage_o09_s00?ie=UTF8&psc=1
For etching resist you can use acrylic paint and I hear you can use electrical tape but have not tried it yet.
Amazon has packs of 10 for $9. Can't get much cheaper than that. And they go up to 400 grit. Nothing fancy but cheap enough to play around with. https://www.amazon.com/POWERTEC-111350-30-Inch-Aluminum-Sanding/dp/B0068AV57I/ref=mp_s_a_1_6?ie=UTF8&qid=1544818817&sr=8-6&pi=AC_SX236_SY340_FMwebp_QL65&keywords=1x30+sanding+belt&dpPl=1&dpID=51VYWJJMh2L&ref=plSrch
There is one on amazon that a lot of people say is pretty decent but it’s close to $200. Honestly you not going to fund much for less than that unless you use some railroad track or a big piece of mild steel.
That might be your problem. I'm surprised it didn't come with one but I'd order one on Amazon. They're not expensive and make sure it's a high-pressure regulator like This
Without the gauge, I assume you adjust until you get a good neutral flame. To be honest, I've always had a regulator with a gauge so when I'm forge welding, I move it from roughly 5-7PSI to 14 or a little higher when I'm running 2 burners and that usually works for me in my specific forge.
I bought one of these and installed it on an old Craftsman Bench Grinder I got from my grandpa. It is unfortunately about $100 more than when I bought it. But it has worked pretty great for knife grinding compared to a large professional 2x72 set up.
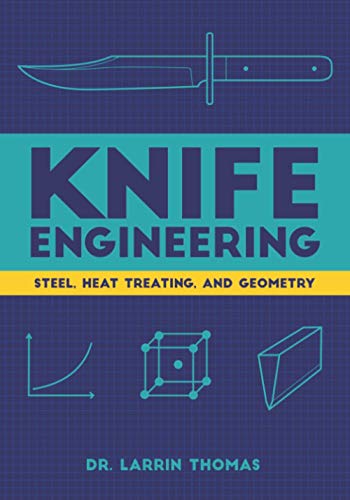
Break grain is actually not accurate to grain size btw. I highly suggest knife engineering https://www.amazon.com/Knife-Engineering-Steel-Treating-Geometry/dp/B08D4P9D95
Great void and will have all your answers in it.
What kind of steel is it?
This is the one i have. I like the adjustable airflow, and its generally more than enough for my needs. Highly recommend it
I use a slightly larger version of that anvil, I've got the 30kg one. That mixed with a Mr Volcano Hero forge and I've turned out quite a few knives. As for a hammer I bought a Picard Hammer and with these three things I'd say I've turned out some pretty alright knives. Steel wise, I'm partial to 80Crv2 and specific types of junkyard steels. Railroad clips and coil springs I've had decent luck with.
Thanks! I'm going to try these - I'm interested in what effect the black nickel might make in the pattern. Hopefully I remember to post the results here!
https://smile.amazon.com/dp/B078NP2N7G?psc=1&smid=A12WR87R05HFJH&ref_=chk_typ_imgToDp
https://www.amazon.com/Crack-Finder-Penetrant-8-5-Aerosol/dp/B00XLW5OMI
Something like this, though I trust the non-aerosol systems more. Should be able to pick up a handheld uv inspection light for ~100$.
Double check where you are ordering from. I dont know if I can link to Amazon and not get in trouble but it's only around $135USD.
If you want to get cheap about it, you could save money by using angle iron and refractory bricks that go up to 2700+ F / 1000 c. Then you can make your own propane burners with a few pieces of pipe from Homedepot and a decent 20psi regulator. Depending on how you set it up, youd only need a drill and something to cut the lengths of steel.
All of that DIY can be had for about $100USD or so. Fire bricks are normally around 4x8. Sizes may vary a bit. A box of 6 bricks is around $25-35USD
Mr Volcano Hero 2 - Portable Propane Forge (Complete Kit) MADE IN USA (Stainless Steel) for Professionals Artists Hobbyists Knife Making Tool Making Farrier Blacksmith https://www.amazon.com/dp/B0931992WL/ref=cm_sw_r_cp_apan_glt_i_YS00YZ5YY43Z6PZG0F2V
FamYun Hand Cobbler Shoe Repair Machine Dual Cotton Nylon Line Sewing Machine Manual Leather Machine Shoe Sewing Machine (Green Machine) https://www.amazon.com/dp/B087F7KMQG/ref=cm_sw_r_apan_glt_fabc_AA72A2WMNKAT033634FB?_encoding=UTF8&psc=1
Yiviya YY151 Fixed Blade Knife, D2 Blade and G10 Handle Karambit Claw Knife EDC Tool Knife for Outdoor Camping Hunting Hiking(Black) https://www.amazon.com/dp/B09BYYSYPT/ref=cm_sw_r_apan_glt_fabc_B8Q0EQ7AZ2RYZ50QV03D
Buddy I got you, here is a cheap little guy, it’s close to what I started with. You can only do a little at a time, sure but it worked for me for a long time until I started getting really serious. But 100 bucks for something you don’t have to hand build or fuck with. https://www.amazon.com/Portable-Propane-Forge-Single-Burner/dp/B09CD6R66S/ref=mp_s_a_1_35?keywords=Gas+Forges&qid=1640186775&refinements=p_36%3A1253531011&rnid=1243644011&s=hi&sr=1-35
This problem is when you start going cheap and big on online bought forges, hoses catch on fire, leaks start happening and welds start popping. This little guy will do most stuff and you should not have an issue for a long time.
It was a K-tyoe thermocouple (2wire) similar to this Twidec/2M NPT 1/4"inch (6X100MM) Pipe Thread Temperature Sensor Probe Two Wire Temperature Controller (0~600℃) 304 Stainless Steel K Type Thermocouple MT-205-1/4 https://www.amazon.com/dp/B07QN33FFB/ref=cm_sw_r_apan_glt_fabc_DTFT1BH7NHXVS0FDWRQN?_encoding=UTF8&psc=1
I tried a pt100 but it didn't work too well, but could also be because i tried to go cheap....
A 5 degree difference is not too bad, but 20degree differences could be problematic 🤣
I don’t know the answer to your question but I’m a plumber and use a Ts8000 to solder copper pipe and I somehow managed to mess up the turbulator in the nozzle and it hasn’t worked right sense but after hours of searching I found a replacement on Amazon, maybe this will help if every you need to replace the tip stowaway. Worthington Torch Tip, Propane/MAPP, 0.51 In/12.95 mm https://www.amazon.com/dp/B07MHFZ5DX/ref=cm_sw_r_cp_api_glt_fabc_GVFZAWJT7YNT7T7TNW8Z?_encoding=UTF8&psc=1
Ideal Reel 71572 16 Gauge Tie... https://www.amazon.com/dp/B0042U9B9U?ref=ppx_pop_mob_ap_share
This is what I used. The longer your layers are, the easier it is to get a tighter bind I’ve found. And like the other guy said, light, fast taps of the hammer on each pass when you’re setting the weld. I go at least 10 heats to make sure they are stuck, putting more flux on between heats. When I’m done, I grind all the sides to ensure their are no seams before I draw the billet out for another cut and stack. Also, before binding, make sure you grind the faces you want to weld clean of any mill scale.
I use a 3" pvc pipe half filled with smallish rounded river rock. Knife is etched In Ferric chloride for about 7-8 minutes (PCB Etchant from Radio Shack, mixed 50/50 with water), then tumbled in the pipe for 20 minutes or so on some old skate board wheels. I spray in a bunch of windex to help the abrasive cut. Short video here https://instagram.com/p/x0gi0Dt6eh/?modal=true
I’d go with this bar of W2 (2 knives’ worth, or do what I did and make a short sword. Actually I do not recommend doing that at all, lmao) and these scales from Amazon for a one off purchase. But buying steel for smithing gets DRAMATICALLY cheaper if you buy in bulk. Same for wood but to a smaller extent if you have the means of shaping into scales.
W2 Steel Flat Barstock | 12x1.5x5/16 | Knife Making https://www.amazon.com/dp/B08FYW3N1K/ref=cm_sw_r_cp_api_glt_fabc_HVGE6NY4XMW9PHFE5YKF
Bookmatched Zebrawood Knifes Scales, Handle Blank Exotic Knife Scales Wood https://www.amazon.com/dp/B078YZ79TJ/ref=cm_sw_r_cp_api_glt_fabc_W81C3E5QE6KAYWC588ZW
Name of event: Power Hammer Party at the Compound, care of Iron Tree Forge
Date(s) of event: Friday, October 4th (afternoon-ish) to Sunday, October 6th
City, State: Leslie, Mi
Price of admission: $50 for the weekend
What to bring: Camping gear, forge-friendly clothing, your favorite hammer, and if you want, a dish to share.
Applicable link to a flyer/etc: The facebook planning group Send a request to join and message me if this doesn't work
​
To celebrate our Little Giant power hammer turning 110 years old, we're throwing a party! Join us for demonstrations, food, and games.
We'll have a smelt and various demonstrations all centered around smithing. Come try your hand at fencing or try to win the anvil toss. Camping is on site. All food is provided.
Keep checking this pinned post, as well. As we get the schedule and demonstrators locked in, I will be updating this post each month. Feel free to pester me with any questions.
I use a 3" pvc pipe half filled with smallish rounded river rock. Knife is etched In Ferric chloride, then tumbled in the pipe for 20 minutes or so on some old skate board wheels. Video here https://instagram.com/p/x0gi0Dt6eh/?modal=true
Like the other person said, GFlex is an awesome, and my personal preferred epoxy. Devcon makes one also, which is usually available in a smaller container at your local big box hardware store. Or Amazon: https://www.amazon.com/dp/B005K091ZU/ref=cm_sw_r_apan_glt_fabc_A9QN8D5Z3JN3QMAYC18H
It’s a little bit of post quench and some bluing. After I tempered it I put a wire brush on my dremel and cleaned it up then put 2 coats of bluing liquid.
This is what I used
I got this one below. I am mostly planning on using it to design and fabricate guards and pommels, so it's kind of small. Like the flask is about 4x6x3.5 inches, so can't cast anything huge with it. It's actually not that tough. The longest part of the process was waiting for the print to finish. You're going to need about 8x8 inches of clearance for the crucible if you're planning on smelting in your forge.
​
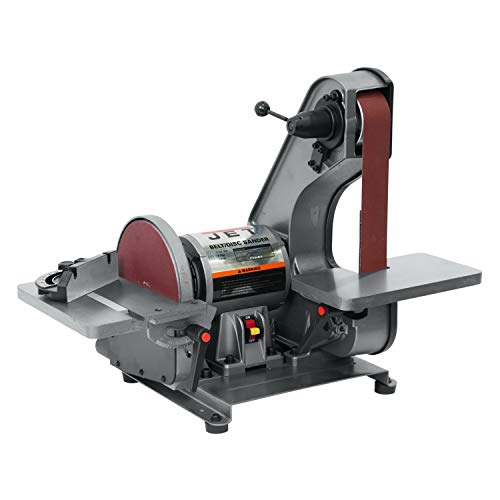
I started out with a 2x42 Delta 3/4 HP belt/disc combo. I did have to modify the platen a bit by welding a proper back plate and then put corning glass so I had a flat surface to grind on. I still use it but I did eventually purchase a 2x72. You can still get a version of this grinder from Jet J-41002 2"x42"
Get the book Knife Engineering ! I have found myself leaned against random walls reading this. I can't get enough of it.
If you're talking about this: https://www.amazon.com/T-king-Brushless-762x25MM-Sharpener-Polishing/dp/B083R85WMY/ref=lp_13223093011_1_4
The 915x50mm version is equivalent to a 2x36.
Yeah, I bought it for 600 free shipping on Amazon a few years ago... This appears to be the same thing. Wouldn't be surprised if it's made in the same factory somewhere, but I haven't idea haha.
Straight edges are a thing...
POWERTEC 71332 Anodized Aluminum Straight Edge Ruler | 38 Inch | Metal Straightedge Machined Flat to Within 0.003” Over Full 38” - Professional Woodworking Tools https://www.amazon.com/dp/B07R6RK87W/ref=cm_sw_r_cp_api_glt_fabc_E24WKQDGX2AZW4745S8R
Kinda? I have heard wood miter saws referred to as chop saws, and you can buy miter saws made specifically for metal.
https://www.amazon.com/Evolution-Power-Tools-RAGE3-Multipurpose
It all depends on context.
Also, a dry cut saw does not completely replace an abrasive chop saw. I have both, because the dry cut saw doesn't do well with anything tougher than mild steel.
SoTry to bug ya again but is this kind of what I should be looking for?
Yeeco + K Type Thermocouple 0~1300℃ Temperature Thermocouple Sensor Temperature detector Temperature Gauge
https://www.amazon.com/dp/B00XJ0VUBG/ref=cm_sw_r_cp_api_glt_fabc_XKBCNNFB02GXH9Z3RR0S
Health and safety guy here. When you shop for a respirator spend some money on a good one. Higher quality (and price) models are built with mostly replaceable parts and a wide variety of filter cartridges so they'll last a lot longer than the cheap ones. North/Honeywell and 3M both make good stuff. I generally advise moving toward a full face respirator so you don't have to worry about separate eye protection interfering, and they'll also offer more respiratory protection than an N95 or a half face mask. make sure that you've got HEPA filters on for protection from particulates and grinding dust, a chemical filter won't do you much good. i'd also push you to look at which of your work practices can be modified to give better airflow (set up a dust collection system, run some fans and open a door while grinding, only use angle grinder outside, etc).
​
pay attention to the color of your snot, gross as it sounds. if you're blowing black boogers, then you probably should have used the respirator a little more.
​
Link to the one I use: https://www.amazon.com/North-760008A-Silicone-Facepiece-Respirators/dp/B00142BRF0
Same sander, nice! If you start getting zapped while grinding you can hook up an anti-static bracelet. I use this one, does the trick.
https://www.amazon.com/Rosewill-Grounding-Alligator-RTK-002-Detachable/dp/B004N8ZQKY
I am also guilty of being a pyro lol! You should, propane is great to work with!
This is my forge 19" long https://www.amazon.com/Hells-Forge-Portable-Propane-Capacity/dp/B07DJYMB2D/ref=sr_1_9?dchild=1&keywords=forge&qid=1607397674&sr=8-9 I bought it used for like $100
Yeah depends on where I go but $20-$25 I live in southern California. Everything is expensive lol
Quenchant is the name of the fluid you use.(water or oil)
I have done what you are saying before, it does work. Another option would be just digging a hole in the ground.
I got mine from a local tool store but it looks just like this one. It likes to jump around so practice on some junk first.
As u/ClapeyronNS told eye shower is a "good taste" if you work in hazardous condition.
For example this.
Besided knives i also work with dangerous acids so i also have speial eye wash for chemical solutions.
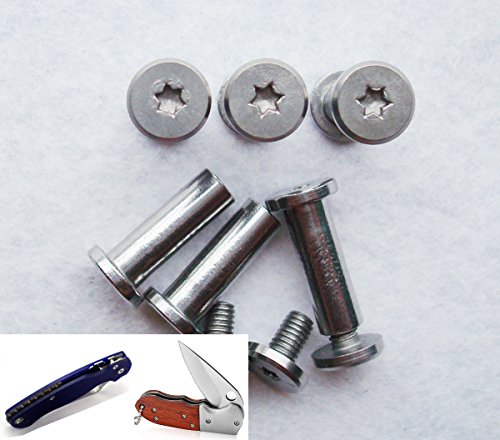
Did you see the ones I found on Amazon? They look a little rough, but I think I can finish them with some sandpaper and chucking them into my drill...
https://www.amazon.com/gp/product/B073RXKKQJ/ref=oh_aui_detailpage_o00_s00?ie=UTF8&psc=1
Hmmm.... I thought it was cheaper. Maybe the price went up, https://smile.amazon.com/gp/product/B07MXN546R/ref=ppx_yo_dt_b_asin_title_o02_s00?ie=UTF8&psc=1
There are round diamond rods that can be used for a very dull blade or to repair damage. Some pocket ones are available, Gerber makes one about six inches long when the rod is in the handle.
Knowing that I wanted to try doing forge welds, I got myself a laser thermometer:
https://www.amazon.com/gp/product/B079HHSHLQ/ref=ppx_yo_dt_b_asin_title_o05_s00?ie=UTF8&psc=1
Though when I got mine it was like 30 bucks less. But yeah, you won't have to guess at temperatures so much!
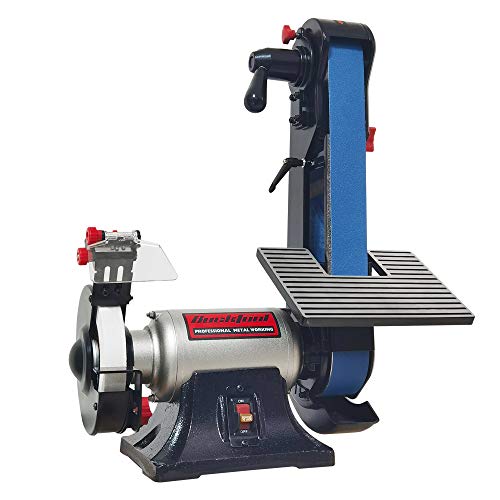
Haven't used this brand but used similar machines and they do decent work, better than any 1x30 I've used. Like this one because of the wire wheel/ stone, most have the sanding disk. Can get a good selection of ceramic belts in this size too
https://www.amazon.com/dp/B07ZQ6LCK8/ref=cm_sw_r_cp_apa_fab_ogQyFbS7MYQQD
alternately, you could always get some metal specific belts for that one, definitely would be better than the aluminum oxide it looks like you've got on there, zirconia belts are definitely a step up
When I do my knives I take the edge bevel down to 0.7 mm or less, then I use a lansky system
It takes a while but it gaurantees to hold the exact angle you want. The super rough black stone I use to set the secondary bevel then work my way up the grits after I get a burr with each grit. With the lower grit stones I set a timer on my cell phone to flip every 10 minutes to help make sure its even. Takes a while but I to it while watching TV or movies anyways and if you do it right the bevel will be super smooth and shiny and slice paper real good.
There are pen blanks that could possibly be used as scales for a really small slender knife handle.
Did a quick search for hardwood on amazon.com and came up with this https://www.amazon.com/Hardwood-Lumber-Assortment-Species-Perfect/dp/B07FK2HGCY/ref=sr_1_1?dchild=1&keywords=hardwood&qid=1597073293&sr=8-1
Not available on the .ca and I'm in Canada :(
My first oven was built from Kanthal coil wire stapled into soft bricks hooked up to a PID (this one actually: https://www.amazon.com/Temperature-Control-Controller-Dual-Alarm/dp/B017MO04X4 ) I actually did that because I was making 4 spears for a guy and I had trouble with heat treating the spears in my charcoal forge.
If you have a welder, id recommend building something like this.
Other than the basics of hand sanding such as sanding in different directions I highly recommend sticky backed sand paper if you can afford it.
Obviously best used with a sanding stick/jig.
I cut it with an angle grinder. If you get a bigger sheet, just be sure to draw your design out close to the edge so you don't need to make very many cuts. You can also choose a smaller blank so you don't have to do any cutting, just start grinding.
Thanks everyone for the suggestions - I ordered these this morning and will see if they end up working. This is the basic idea I was looking for - and would have preferred a slightly bigger screw thickness-wise, but I'll probably have to cut them shorter to make them work for my application.
https://www.amazon.com/gp/product/B073RXKKQJ/ref=oh_aui_detailpage_o00_s00?ie=UTF8&psc=1
I have used JB Weld kwickwood with good success for a number of repairs.
The epoxy plus wood shaving is also a great idea. I have done similar things to fill cracks on a smaller scale with superglue
I use those myself ( assuming you mean this kind ), and they work pretty well. One suggestion: make them fit tightly, but keep in mind you WILL have to replace them if you're forge-welding/using borax flux. The borax builds up to a really gummy consistency and sticks to the firebricks. I haven't found a way to get it off of the bricks besides just replacing them. After a while that borax will end up building up on whatever workpiece you lay on it, and you'll have to brush it off often. So fit them tight enough to keep borax from dripping below them, but not so tight that you have to tear up refractory to get them out. Mine are oriented like this to prevent a gap.
If you're not forge-welding you don't need them.
Don't use scrap steel. Go here http://newjerseysteelbaron.com/ and buy some 3/32" 1075 (2) inches wide. Cut out your pattern using some cheap, thin (1/8" thick) A36 steel plate that you can get at a scrap yard. Draw your pattern on paper, cut it out (roughly) and glue it to the A36 with that white glue we used in the first grade. Drill the rivet holes BEFORE you cut out the pattern. Cause once you cut out the pattern it is difficult to clamp in a vice. Once you have the pattern the way you want it clamp the pattern to the 1075 down on your bench and etch around it and mark the holes with this https://www.amazon.com/General-Tools-88-Tungsten-Carbide/dp/B00004T7S0/ref=pd_yo_rr_bia_t_2?_encoding=UTF8&psc=1&refRID=6KE1W903PPP22FSCHQC6 Drill the holes BEFORE you cut it out. Buy some temp ssticks at a welding store. Get 1450 degree and 1500 degree sticks. That way you will know when its hot enough to quench. Canola oil is ok to quench 1075.
I think Kalamazoo makes a nice 2x48 close to your price range:
https://www.amazon.com/Kalamazoo-Industries-Abrasive-Sander-Motor/dp/B071NPJ2VN
That said, you'll end up spending far more in belts than on the grinder in the long run.
That my friend is a bbq knife. They make 'em. My buddy got me one years ago and I'm still not quite sure what purpose it serves. Can't imagine cooking on something hot enough to require a 2 foot handle but they do exist.
I have had success with a carbide tipped hole saw like this one: https://www.amazon.com/gp/product/B0185Z5UFQ/ref=oh_aui_detailpage_o06_s01?ie=UTF8&psc=1
The biggest thing I learned is to go slow and use lots of coolant, or the metal will get too hot and harden under my bit.
I have toyed with this idea too, but I think a better option would be to make a larger forge with fire bricks like this one:
and make a frame out of angle iron or whatever to keep all the bricks together and secure the torch in position.
Ok so alot of creating a blade from this point is sanding and polishing, and alot of doing it well comes down to technique. Technique mostly revolves around holding the blade at the right angle to the belt and doing so consistently. By far the best book I know of for sword makers (which I am) is this one here (not written by me but the definitive guide as far as I am concerned): https://www.amazon.com/Medieval-Sword-Modern-World-2nd/dp/1481891472/ref=la_B00A6X16X6_1_9/131-5853081-3985969?s=books&ie=UTF8&qid=1493741383&sr=1-9
According to Ian Ferguson
Aluminum. . . "due to it's low melting point and ability to form low temperature phases, it is limited in its application with other metals."
https://www.amazon.com/Mokume-Gane-Ian-Ferguson/dp/0873499018
https://www.amazon.com/Mitutoyo-Advanced-Absolute-Digital-Caliper/dp/B00WMKUUAQ I've been using a set of these professionally for the last 20 years, they're awesome. I used to be an automotive prototype fabricator and this is what I used to measure parts being machined, etc..
I have one of these. I made a stand for it. I have cut out more knife blades than I can remember! I have had it about six years. It is still going strong. It probably isn't a lot better than a Harbor Freight saw.
https://www.amazon.com/DEWALT-DWM120-5-Inch-Deep-Portable/dp/B001TL0BVW
My wife is the photographer. It's a new lens, so I happen to have the info handy. It is mounted on a Digital Rebel SLR. https://www.amazon.com/gp/product/B00X8MRBCW/ref=oh_aui_detailpage_o04_s00?ie=UTF8&psc=1
It's been doing some very artsy stuff with the depth of field in the recent knife pics.
That's super helpful to know.. I was also eyeing this one for starters what do you think about it?
Whats the benefits of the 72inch vs a 42inch at first?
I found this video from Ian Atkinson to be very helpful. As far as leather, I picked up some tooling leather that worked well for me on Amazon. I was able to get two sheaths out of one piece, but I imagine that depends on the size of your knife. If you're looking for what kinds of tools you need, check /r/leathercraft. They have some really good guides on the toolbar.
Simple you put the buffing wheel on the bench grinder, you just need to mach the Arbor size of the grinder to the buffing wheel. (I had to dig out my bench grinders Manual to get the word) Mine uses a 1/2 inch arbor rod, and looking on amazon it was fairly easy to find a wheel with the same diameter. you may need to mod the rests a bit but you are smith aint you. (this last bit is ment to be playful.)
this is the bench grinder i use: https://smile.amazon.com/gp/product/B01DK70QLM/ref=oh_aui_search_detailpage?ie=UTF8&psc=1
this is importent cause i am basing my data on this model grinder.
Depends were you live and it may take a visit to the place to see what they really have. I found a local store that had tool steel, O1 and W2, in both round bar and flat bar for reasonable prices BUT that isn't listed on their website. They also had a bunch of small cut off pieces of various metals for art projects which was really handy as well.
I know you didn't want to buy on line but Amazon has O1 with free shipping. Might be able to get a better deal locally if you look around.
It would really depend on just what way the wheel spins what direction the blade would go.
as for a belt buffer well if its not a thing, we make it a thing is how this kinda thing works.
I also Desided to make start a post to brainstorm on how to make a buffer safer to try to prevent a death like this from happening. i put what i cam up with on after thinking on the subject and feel its something we as both artisans and bladesmiths need to figure out.
Link: https://www.reddit.com/r/Bladesmith/comments/5upyny/brainstorming_on_how_to_make_a_buffer_safer/
I hope your son meets with success in his journey.
hmm it should not bee too hard to make a cloth buffing belt, as the belts are already cloth. they make a leather buffing belt for some grinders Link:https://smile.amazon.com/Leather-Honing-Polishing-Buffing-Compound/dp/B01G5ZM3LW/ref=sr_1_5?s=industrial&ie=UTF8&qid=1487394885&sr=1-5&keywords=buffing+belt
I was thinking one of those Chinese build-your-own kits from amazon. They run off a battery I think, but there may be some that run off a wall plug too. I believe you can cut them to the size you need, and you could connect separate pieces to one control unit with a bit of soldering.
EDIT: Something like this. Never used one so I can't attest to their effectiveness
reminds me a bit of Ed Caffrey "fossil damascus" where he takes his bits of left over damascus and canister welds them into something really unique.
http://www.knifenetwork.com/forum/showthread.php?t=63521
Have you watched his DVD yet? its full of super useful info/techniques i think someone of your skill level would appreciate...
https://www.amazon.com/Mosaic-Damascus-Ed-Caffrey-Dvd/dp/B001IIJ194
hmm, this is a great looking 'antler' shaped knife. cant wait to see this all polished up.
Im not trying to be a smartass here, i have been reading: The Book of the Sword: A History of Daggers, Sabers, and Scimitars from Ancient Times to the Modern Day i have only read 15% of it. its a old book but if you like blades is a fascinating read. the book was written in around the end of the 19th centery early 20th, so its language is worded a older dialect. however the good thing is its not that hard to find as you can get it on Kindle.
Link:https://smile.amazon.com/gp/product/B00H12FLFO/ref=oh_aui_d_detailpage_o02_?ie=UTF8&psc=1
This is the regulator I used.
This one isn't my favorite hamon but it is still nice. i would say the hole process is important but the most crucial parts for development of an active hamon are Geometry (thin is more active then thick) thermal cycling, and a nice even clay application (i keep it thin and symmetrical on both sides) and then you need to quench in parks 50 or HEATED canola oil.
if the above steps are completed you have a hamon now the trick is getting it to show up. you need to carefully grind to highest grit you can (like 600) and you'll start to see something show up. now you get it flat on a disk grinder (if you have one) or draw file flat. start hand sanding, i start around 320 to 400grit and work my way up to 1500 grit. (it helps to change direction of sanding every grit change) now more of a hamon will show. now you start etching in DILUTED ferric (1 part ferric: 4 parts water) for 10 to 30 seconds. now polish with carbide powder here or look on ebay. now you repeat the etch and polish steps a bunch of times (like 10 times) and you will get a bitchen hamon.
Fiberglass AKA polyester resin. It works, but epoxy has better performance for knifemaking purposes. Are you doing hidden tang or full tang? this is what I use.
Ended up going for one of these bad boys. Figured for twenty bucks, it was worth the insurance against a sexy scar and/or horrible mangling.
How many of these bricks do I need? is one layer of these bricks fine? Can I use clay bricks for the main shape of the forge than us a layer of these brick on the inside?
Do I need thick ones?
Thanks, thats an idea, but i dont want anyone thinking im advertising one brand over the other, truth be told DMT diamond coating is the best but like i said i have no affiliation with them or another supplier.
Anyway here is the link to the DMT diamond files/stones its about 40 dollars and will save you lots on sand paper in the long run. plus the finish is kinda amazing.
I had to order this one off Amazon. I think it will have sufficient resistance to tension the belt, but I haven't finished yet so I can't be sure.
My advice is if you want to have a good shave and make it affordable, get a shavette. They are fairly cheap to buy and the blade is just half a safety razor blade. They can be as cheap as 10 cents a blade (5 cents per half) and last 3-5 shaves in my experience. Super cheap and the shave is pretty great compared more popular razors.
If you are going to pay 10 bucks for a clip, I'd look at Tek Loks. They come with everything to mount to kydex eyelets.
Need a hard backing and some way to keep your sandpaper pulled as tight as you can. I have one of these and it works pretty well but I also made sort of a hand sanding block out of some oak with some u-bolts I can tighten down. It's also important have fairly clean lines going into hand sanding.
Too lazy to change the drill press table height for one hole? Throw a 1-2-3 block under it and lift the work up.
Need to punch out a tight pin? Align the pin with a hole in the block and you won't be on the floor searching for that damn pin.
Need to square the platen to the work rest but you can't find your square because the kid was pretending it was a gun and now you can't find it? Put a 1-2-3 block on it.
Is your 2x4 scrap bowed slightly so drilling a thong hole near the end of the tang causes the piece to lift, or flex? Use a 1-2-3 block instead, as long as your tang is flat it won't do that anymore.
You'll find all sorts of ways to use 1-2-3 blocks once you have some.
I bought my chamber off of ebay, if you want to stabilize wood ive read you need to get a pyrex lid for the chamber, or if you're just using a pressure pot or something to make one I guess you don't have to worry about it but it helps to see inside to prevent overflow. There's a few different brands but shattervac is the one that comes to mind it's designed specifically for stabalizing wood .This is the pump I bought and it works like a champ, what you're paying for with the pumps is speed, and to evacuate a small chamber doesn't really take long. I would definitely invest in some casting resin though it's amazing what you can do with it, i think I paid 30$ for half a gallon and I haven't even gone through half of it yet even with all my dicking around with it.
You can find it at Home Depot, too
Might not penetrate as well, never used CA glue, but it'll definitely gap fill and then some.
It's often used for bar/table tops.
One of these. It automatic because you don't have to hit it with a hammer. You push down on it and the spring loaded mechanism inside gives it a tap that leaves behind a divot in your target material that the drill bit can bite into.
Ended up going with this guy: Nicholson Hand File, American Pattern, Double Cut, Rectangular, Coarse, 12-Inch. It's got one blank edge, so I can get those clean plunge lines.
i use one of these. i was using my pocket knife to get a spot i missed shaving this morning while at a stop light. works like a champ. i am lookiing to add a leather strop or belt asap. http://www.amazon.com/Work-Sharp-WSKTS-Knife-Sharpener/dp/B003IT5F14/ref=sr_1_1?ie=UTF8&qid=1438571884&sr=8-1&keywords=work+sharp
You could always build one yourself for ~400 dollars including the motor. Also Coote has a bunch of economical grinders you could get. There's plans online for one you can build without a welder.
Have you searched your local craigslist for a grinder? I spent 300 on mine. 1 hp continuous ~1700 rpm Leeson motor and speed control included.
The one I use is a modded version of this https://www.youtube.com/watch?v=hHD10DjxM1g I use it to melt cans and I am working on a pair of tongs as soon as I get my anvil in. As far as heat tempering goes a toaster oven works well. A good book I have been reading is called $50 knife shop it goes in to great detail on knife making.
Is the brick method better than creating a forge using clay and a large metal coffee can? Would this be a sufficient torch when used with a forge? Any benefits to using the more expensive MAP gas over Propane?