
What are
/r/BloodAngels'
favorite Products & Services?
From 3.5 billion Reddit comments
The most popular Products mentioned in /r/BloodAngels:


The most popular Services mentioned in /r/BloodAngels:
Cults.
Teletype.in
Google Photos
The most popular reviews in /r/BloodAngels:
GW's Decals can be very forgiving if you're smart about them.
First thing you want to do is go to amazon and buy this: https://www.amazon.com/Decal-Setting-Solution-Micro-Scale-Package/dp/B01LXZ03W9/ref=sr_1_1?crid=1OSCWQXEIRPQC&dchild=1&keywords=microsol+and+microset&qid=1586816249&sprefix=microsol+%2Caps%2C154&sr=8-1
Second, is hope it shows up despite the corona apocalypse. (I've had good luck)
Third, put your decal on with plenty of water, slide it into position, and let it dry. Then use the microsol, which eats away the glossy weird part, let it dry, then the micro-set, which seems to help keep it from flaking. After that they practically look painted on.
blessed the man who gives his work to his brothers (ok, not free but dirt cheap, doesn't change the fact). I checked on cults3d.com and "Lord Alighieri" and " He keeps hard candies in the mouth of the mask so his blood sugar doesn't get too low. " are just peak (divine) comedy.
Thinner is to thin out heavily pigmented paint so it won’t be as chunky, usually depending on if your using regular brush or Airbrush you will use differant mixture ratios, thinner is required to use an airbrush mostly but is good for regular brushing if you don’t use much like 1 drop to 10 drops paint or 10% Link for Context https://www.amazon.com/dp/B08D3VSXWY/ref=cm_sw_r_cp_api_glt_fabc_EM2AHZ6JGARF33AEJ6P0?_encoding=UTF8&psc=1
Flow improver is a retardant and makes the paint dry slower, so when using thin coats it will allow the paint to flatten and flow a bit more before drying.
Winsor & Newton Professional Acrylic Medium Flow Improver, 250ml (Packaging may vary) https://www.amazon.com/dp/B0060KRND6/ref=cm_sw_r_cp_api_glt_fabc_SQE53DSE3SDRYPMEWKM1
I used this one: Winsor and Newton Galeria 75ml Gloss Acrylic Varnish https://www.amazon.co.uk/dp/B001HJN0GY/ref=cm_sw_r_cp_api_glt_fabc_DQ50W198BR0N1YJWNPMP
Mainly as it was on offer at WHSmith (I live in the UK) when I bought it! Seems to work well so I think I’ll be sticking with it.
The old way of painting them as described in the Mike Mcvey eavy metal 40k painting guide
https://www.amazon.co.uk/Warhammer-40-000-Painting-Guide/dp/1872372708
and which is how I've done it is as follows:
Undercoat: white primer Basecoat: 50/50 Blood red and Blood angel orange 1st highlight: 25/75 blood red and blood angel orange 2nd highlight: blood angel orange 3rd highlight: 75/25 blood angel orange and sunburst yellow Finishing touch: red glaze
If you want to be a real stickler then highlights were always blended back then, edge highlights weren't a thing yet.
I learnt this week to mix evil sun scarlet and trollslayer orange to get the same basecoat and highlight colours. For the yellow im still using an old pot of sunburst yellow so I have no idea what the modern day equivalent would be.
The Impulsor is the smaller transport and is more worth taking but sadly can only transport 6 Primaris models not in the Mark X armor (more bulky and chunkier primaris armor)
Since no one has posted a specific brand of brush yet I will make my recommendation. I use to struggle a lot with eye lens but recently found a brush/technique that works extremely well.
The brush is a Tamiya Modeling Pointed Brush (Fine). I tried a few other "fine tipped" brushes but for me, this one works perfectly, the tip is unbelievably sharp and stays that way with a speck of paint on it. It's a bit pricey but I became much more satisfied with my lens work with this brush, my last posted models have some close ups of the lens if you want to look at them.
get this:
https://www.amazon.de/gp/product/B01MTL2XEP/ref=ppx_yo_dt_b_asin_title_o02_s00?ie=UTF8&psc=1
for transfers, it softens the decal and it will sit smoothly on curved surfaces. You have to be a little more carefull though and dyirectly "scartch" it onto the model. When I used water I first got the transfer loose and entirely on a brush - that will likely not happen with this productr as the transfer most likely will wind itself on the brush
once dried, you can put any sealing on it
My phone! I made a cheap DIY lightbox out of black foamcore poster board. For lighting I use a few architect-style lamp fixtures and these bulbs.
Here's a link for brushes i use a they are cheap ad pretty good in my opinion Good cheap brushes I'm not the best mini painter but I did find having brushes like this really helped
Great job! Great attention to detail and following the lines. Painting the little bits really help. You did much better than I did my first time around.
Taking care of little details like trimming the mould lines before priming helps. I also recommend drilling the barrel. I use this hand drill.
From here I recommend
- trying some shades to help add to the shadows and little lines throughout the model. The big ones are Nuln Oil (black shading, great for mostly anything, silver) and Agrax Earthshade (brown shading, great for yellows, browns, metals, grime, leather.) There is also a Crimson one but it might be too bright for this model.
- Dry brushing is also a fun skill set. It's a fast and easy way to edge highlight or add depth to spherical objects.
- You still want to base the model, eventually. It's an aspect that many overlook. I waited until I had about 1500 points worth of models and I just based them all at once so they would be matching.
If you want to dive into painting, I recommend constantly experimenting. One of my friends who has been painting years longer than me recommended picking up 3-4 paints a month so you're always expanding your range and skills, as well as trying different individual models, just to try new things. I find that the Games Workshop free model each month helps with that. It's the first Saturday each month. Other local shops may sell/re-sell individual models and you could find 3d printers to try new models too.
Keep up the great work!
I've got this one and the official blood angels cup I'll try to link that one as well
cool, that's almost the same combo that I've come up with.
- for the helmet, I got the deathmask from the blood angels upgrade.
- instead of the regular sanguinary jump pack I got the Mk II assault jump pack from Forgeworld. Makes it a little tricky to attach the wings, but I think I'll manage.
- I will put him on a 32 mm base.
- the death mask helmet already has a halo, so maybe I won't attach the lord executioner one.
- I think my hammer is from assault or vanguard veterans
Still not 100 % sure on some of the choices.
The assault termie shield adds a lot of specifically blood angels stuff, the rest of the lord executioner makes it a little hard to customize (fixed pauldrons, not easily possible to switch BA ones).
Still not sure if I should use that wreathed helmet, my death mask or something else.
(an earlier iteration, termie shield had not arrived yet)
you can try using retarder (yes that is the name of it). add just a tiny drop in the mix. you can pick it up at most hobby painting or Art School supply stores. Here's what I use. https://www.amazon.ca/Golden-Acrylic-Retarder-Oz-Bottle/dp/B00125EYDG/ref=sr_1_8?keywords=acrylic+paint+retarder&qid=1643468804&sprefix=acrylic+paint+re%2Caps%2C80&sr=8-8 that bottle will last you a really long time.
All of them are basically the same, except appearance and where the on/off switch is. So anything that looks like this one, with the bulbous thing on the left to catch water, and a big tank on the bottom to store compressed are, will do the job. This is also about the price you can expect for any also. You should be able to just grab the one I linked and be alright.
Couple things for you.
- You may find the water trap doesn't fit correctly when rotated on, it'll be a weird angle, I know mine didn't. Get it to vertical, as tight as you can, then use PFTE tape to get a good seal on it. Youtube has videos on this.
- When you're done with a session, make sure to open the tank and empty all the air. There'll be some kind of screw undereath it to do this. Don't make a habit of leaving compressed air inside it. The moisture in there will rust it.
Is this the sort of thing with Abest? I couldn’t make out whether the compressor would be any good or not?
ABEST Portable Dual Action Mini Air Compressor Airbrush Kit for Make up Art Painting Tattoo Spray Model with Airbrush Cleaning Set Air Filter https://www.amazon.co.uk/dp/B07H85JQJ7/ref=cm_sw_r_cp_api_glt_i_BGT3X7X2518PVC0846AA?psc=1
Thanks. I'm afraid there isn't much of a tutorial to them, they're 3D prints, mainly by the sculptor Cornivius from Cults3d.com. He does excellent work.
I did slightly rescale the STL files. The heads are all normal GW tactical marine helmets.
I’d be careful about using super glue on painted models as it often leaves a white residue around the glued area. Magnetizing before you paint is definitely the way to go.
How faithful do you want to be, because even the legendary Duncan's approach here isn't 100% faithful.
Go evil suns scarlet or blood red mixed with trollslayer orange for the base. BLENDED (😉) highlights by increasing the amount of orange. Final highlights are orange mixed with yellow. Then finish off with a red glaze. The "original" BA painting tutorial, published here https://www.amazon.com/Eavy-Metal-Warhammer-Painting-Guide/dp/1872372708 didn't include any washes or recess shading.
These were the sheets I got off Amazon. I chose them as they were thicker than the ones I could find at Hobby Lobby. For me they are strong enough that the models won’t move around in transit. Just went on a multi-state road trip with two armies in a tote with my mag sheets and washer in the base method. Didn’t have any problems!
For the washers I just brought two different sized bases to Home Depot and found basic steel washers that fit in the bottoms. Hope this helps!
Thank you! It’s just glow in the dark power mixed in with clear resin. I cut a hole in the base that’s uneven and puddle shaped, then make a crater out of miliput. Once the crater is built, I make the rest of the ground look natural, then paint it all. Paint the puddle dark green in the middle and light green/brown on the sides to give the illusion of depth, mix the resin and glow powder, then pour it in. Probably not the most efficient or easy way to base your rank and file infantry, but it looks cool on characters, and is definitely worth the effort in my opinion.
These are the exact products I used:
Resin - https://www.amazon.com/dp/B00CVYNQ4U/ref=cm_sw_r_cp_api_glc_fabc_XPS-Fb9GZV968
Glow in The Dark Pigment Powder - https://www.amazon.com/dp/B01K081MYO/ref=cm_sw_r_cp_api_glc_fabc_2LS-FbMJ0RQ9V?_encoding=UTF8&psc=1
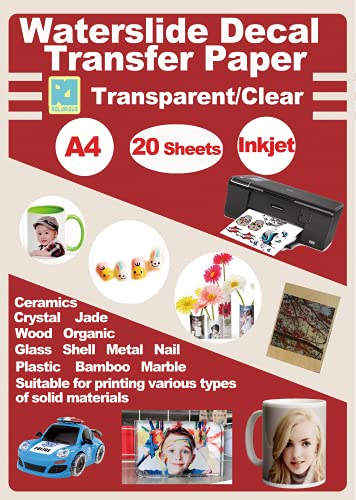
So don't bother with the forge world sheet. Get yourself some transfer paper and use this free PDF.
http://www.bolterandchainsword.com/files/file/470-blood-angels/
I've got access to a color laser printer and used this paper. It worked perfectly for me. https://www.amazon.com/gp/product/B076VFHV1F/ref=ppx_yo_dt_b_search_asin_title?ie=UTF8&psc=1
If you don't have access to a color laser and only a color inkjet, make sure you get the paper specifically for inkjet printers. BUT you will need to apply a coat of varnish on top of it when you print it on an inkjet printer.
Got them at my local hobby shop, Citadel/Games Workshop makes them, they’re just the Citadel Skull box.
Here’s the Amazon link: https://www.amazon.com/dp/B074WH9LX8/ref=cm_sw_r_cp_api_fab_ScEHFbYZ1TYSV
So don't bother with the forge world sheet. Get yourself some transfer paper and use this free PDF.
http://www.bolterandchainsword.com/files/file/470-blood-angels/
I've got access to a color laser printer and used this paper. It worked perfectly for me. https://www.amazon.com/gp/product/B076VFHV1F/ref=ppx_yo_dt_b_search_asin_title?ie=UTF8&psc=1
If you don't have access to a color laser and only a color inkjet, make sure you get the paper specifically for inkjet printers. BUT you will need to apply a coat of varnish on top of it when you print it on an inkjet printer.
So yes, I did the same thing as you, I can not state enough how much watering down the paint helps with overall look and control. Yes it takes a bit more time as you will need to do 2-3 coats for your base layers but it really helps keep the model looking slick.
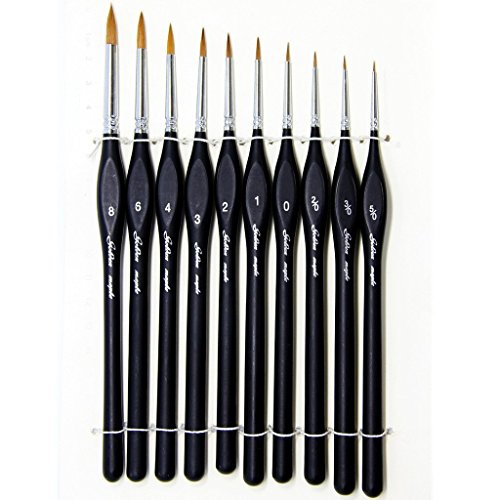
I would advise buying a nice set of brushes as well i your serious about painting I ended up buying these for like $25 and my god they have been amazing, and have held their point thus far.
https://www.amazon.com/gp/product/B01M7UFLP5/ref=ppx_yo_dt_b_asin_title_o04_s00?ie=UTF8&psc=1
The answer is, sortof. Originally I didn't, I had a different blue and Game Air's red, those produced a poor effect, you couldn't see any gradiant at all with or without camera. The blue was too light, and Game Air's Red is too opaque.
I found out the blue he uses, Dark Sea Blue, has been renamed as Steel Blue, which threw me off.
I use the exact same colours now except the white, and the effect is wonderful (Yep, that's my IG with my Terminator) on both tanks and infantry.
As for the white, I use acrylic ink, not paint. I got sick and tired of dealing with the always gunky white paint. Hilariously I did this before his PDF release, where he paints Blood Angels using solely acrylic inks, so even now I'm still not far off his method XD
So what you're seeing on my profile, is my 'trying' to get his scheme right, but between wrong paints and the learning curve, I only succeeded recently with the Rhino.
Are they brighter outside the camera? A little bit. The lighting of that room does mute my camera a bit. But after spraying with nuln oil they definitely darken down. If you wanted, you could just pin wash the recesses and not the flat surfaces and it would be much brighter.
If you want to use this method, the reason for the yellow phase is that Model Air's Red is a slightly magenta tone. Magenta + Yellow = Red. So if you skip the yellow phase (as I tried once), you'll end up with pink on the white, and purple on the blue XD
Okay so here are some links that are useful.
Drill I still use https://www.amazon.com/Migiwata-Aluminum-Miniature-Three-Jaw-Delicate/dp/B071ZH5TXL
Army Painter Magnets with sizes https://www.miniaturemarket.com/amytl5038.html
Model to flight stand used two 3 mm magnets. Arms and torso used 3 mm magnets, a total of 4 for a models upper body (1/arm, 2/torso). Finally it is most ideal to use two 5 mm magnets on the flight stand to base. I've used a 3 mm on the flight stand, and 5 mm on the base... The result was the 3 mm and would spin more freely. I have a system that I've utilized to make sure all of my polarities are consistent so therefore I can move model arms or flight stands interchangeably. At one point I used to use 1mm magnets for heads.... I quickly got over that b******* LOL.
I just mixed clear jewelry resin from Hobby Lobby with glow in the dark pigment I got on Amazon. It was my first time doing it, so I wasn’t sure if there was gonna be a reaction or anything, worked totally fine. To get the puddle recessed I just cut a hole in my base and sculpted a crater with milliput under it.
I forget the brand of the resin (I can post it when I get home), but the pigment I got is this one: https://www.amazon.com/dp/B01K081NCA/ref=cm_sw_r_cp_api_fab_SIQBFb5JVGQMJ I got the neutral green one as it’s supposedly the brightest, but they make other colors too.
Mixed some with citadel medium today and it painted onto an old model’s eyes fine, it’s such a small detail it’s hard to notice though. Good to know though it works.
I’m not in the UK but I bought this off amazon and it’s great.
Pin Vise Hand Drill with Twist Drill Bits 31 Pack https://www.amazon.com/dp/B07CTHCJPM/ref=cm_sw_r_sms_c_api_i_ZFzWDb1MC64RZ
Also these are what I use for script and you can use them for pupils if you don’t want to darken the eyes down.
Sakura Pigma Micron 005 - Pigment Fineliners - 0.2mm - Black [Pack of 3] https://www.amazon.com/dp/B01FYDJWTC/ref=cm_sw_r_sms_c_api_i_vJzWDbYBZRK71
Just yesterday I ordered this drill bit set.
https://www.amazon.com/gp/product/B000BQWM0E/ref=ppx_yo_dt_b_asin_title_o00_s00?ie=UTF8&psc=1
I comes a 1mm, 1.5mm, 2mm, 2.5mm, and 3mm drill bit. Perfect for all your barrel drilling and smaller (think infantry) magnetization needs.
I also picked up one of these to drive them.
https://www.amazon.com/gp/product/B00EEOD03C/ref=ppx_yo_dt_b_asin_title_o01_s00?ie=UTF8&psc=1