
What are
/r/PiBoy's
favorite Products & Services?
From 3.5 billion Reddit comments
The most popular Products mentioned in /r/PiBoy:


The most popular Services mentioned in /r/PiBoy:
Retropie
Win32 Disk Imager
PuTTY
Linux kernel
SD Card Formatter
LÖVE
Recalbox
Autodesk Tinkercad
The most popular reviews in /r/PiBoy:
I would second running a speed test on the sd card.
Class 10 only covers sequential read/write speeds but emulators are more sensitive to random read/write performance. An A1 card is what you ought to be looking for.
If this is a card that you've had for a while, it's possible that you might be dealing with the affects of garbage collection. If that's the case, format the card using the SD Card Formatter.
I would personally mount a USB to RetroPie and load your ROMs on that. That way if you have to reflash your SD card you won’t lose your saves and game files.
I found the instructions here:
https://retropie.org.uk/Running-ROMs-from-a-USB-drive/
USB drives are faster, bigger and more reliable.
Hope this helps!
EDIT: You do need the PiBoy in hand for this process I think.
AmazonBasics Hard Travel Carrying Case for 5 Inch GPS, Black https://www.amazon.com/dp/B004I5BUSO/ref=cm_sw_r_cp_api_fabt1_.STSFbZ3KMPY0?_encoding=UTF8&psc=1
I have this one. It fits PERFECTLY. It isn’t a super hard case, but I just like to throw it in a backpack. It does what I need it to do.
Upon first boot the system needs to set itself up and will boot cycle several times; this is normal behavior for the software and hardware.
The RetroPie documentation shows how to transfer ROMs via a USB stick without the need to use your local network: https://retropie.org.uk/docs/Transferring-Roms/
Haha, I figured it out last night and was about to come here to provide a tutorial for you to add to the main post, but it seems you beat me to it. The only other thing that might get in folks' way is needing root privileges to write the controller config file to the /opt/retropie/emulators/pico8/ folder if you're using WinSCP or an FTP program with WIndows. That might be outside the scope of your instructions, but here is a some good info for those unfamiliar.
https://retropie.org.uk/docs/Running-ROMs-from-a-USB-drive/
I'll say, do this without any rom installed, so you avoid the copy between the SDCard and the USB. Once the folders are created, transfer all roms to the USB file from you computer
I used the official PiBoyb image and then did this : https://retropie.org.uk/docs/FAQ/#where-did-the-desktop-go
I must admit the reason for doing this is kinda dumb : I'm going out of town for Xmas and there are free games to claim on the Epic Game store everyday. I thought damn I don't have a laptop with the Epic App, what do I do? Then as I was playing with the Piboy I thought hey this is a computer and it's portable! It'es not until everything was installed that I realized I could just log on to the website with my phone...
Amen. Added BG Music to EmulationStation yet?:
Pretty simple. DM me with any issues.
Sorry about that, I just posted that you could load the roms into the SD card through Windows, but that actually doesn’t seem to be true!
I was 100% wrong.
Seems Windows can’t read the Linux format and that is why the other methods exist. So sorry for the earlier misinformation, I have since deleted my post. Here are the actual instructions: https://retropie.org.uk/Transferring-Roms/
Yup thats the goal. I want to design this so it would fit inside something like this.
​
https://www.amazon.com/gp/product/B07WNVH4R8/ref=ppx_yo_dt_b_asin_title_o04_s00?ie=UTF8&psc=1
​
I also designed this to work perfectly with my modded case vent so there's no heat concerns.
https://www.amazon.com/dp/B00ZUA5I84
But not that exact one. It's cheaper elsewhere but that was the first result. Also a heat gun to soften the shell just enough to widen the hole and hot glue to keep it in place
Showing as less than $18 on Amazon US
https://www.amazon.com/dp/B001DQOL5U/ref=cm_sw_r_cp_awdb_btf_t1_hvEFFbPEGQCYS
They should be cheaper there anyway since they're made there. That and everything in UK is more expensive than the US 😂
I have a thumb drive that plugs into both classic USB, USB micro, and usbC. It's also not really a thumb drive, you plug an SD or micro SD card into it. I have used it for so many different use cases and projects. Like this one https://www.amazon.com/Tri-Connectors-Adapter-Compatible-Windows-Android/dp/B09B9HQ6BX/ref=asc_df_B09B9HQ6BX/?tag=hyprod-20&linkCode=df0&hvadid=532907645911&hvpos=&hvnetw=g&hvrand=12058399447006798711&hvpone=&hvptwo=&am...
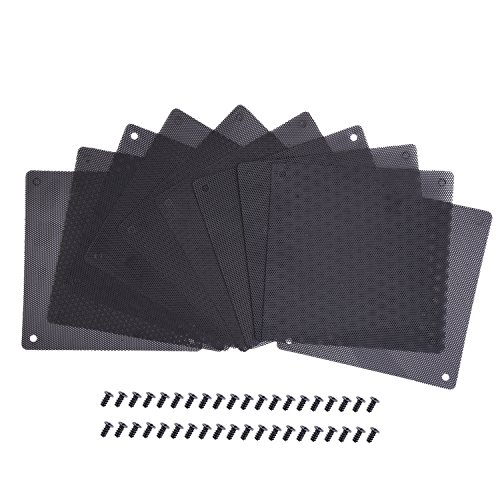
EBOOT 120 mm Dust Filter Computer Fan Filter Cooler PVC Black Dustproof Case Cover Computer Mesh 10 Packs with 40 Pieces of Screws https://www.amazon.com/dp/B01N6BFVKO/ref=cm_sw_r_apan_i_VW7JZE42XPGB6KZFKQXQ?_encoding=UTF8&psc=1
Nice job looks really clean. I’d recommend getting the AliExpress heatsink over the geekworm. Clearance is better and since it’s copper over aluminum it performs better. Also if you buy these fans (link below) you can sand down the shroud and it will slide right into the hat. Then you just need to glue it in place.
WINSINN 30mm Round Fan Circle 5V Hydraulic Bearing Brushless 3010 31.5x10mm for DIY Mini Cooling Pipeline/Notebook - High Speed (Pack of 5Pcs) https://www.amazon.com/dp/B08C78WRF6/ref=cm_sw_r_cp_api_glt_i_RJF08DZTHTZXYFC1F272?_encoding=UTF8&psc=1
If you mean RetroPie, I updated several days ago, but I recently stumbled across a post here by the developer saying firmware 1.0.3 isn’t compatible with RetroPie 4.7.1. I haven’t experienced any new issues—just the same old ones—but it’s probably best to wait for firmware 1.0.4 before updating.
Anyway, this article should tell you most everything you need to know about updating:
https://retropie.org.uk/forum/topic/15577/ppsspp-controller-setup-guide-for-when-nothing-else-works
​
I did this, seems complicated but just follow the steps and you should be fine. You gotta plug a keyboard into the piboy to input these commands. Also make sure you are connected to wifi.
Official image is based on retropie
Will list all the emulators, etc available “out of the box” plus you can install pretty much anything that runs on a raspberry pi in general
The new firmware is only in beta right now, dropped 2 days ago. Check /r/PiBoy for the dedicated post.
The theme is the NES Mini theme by Ruckage. I added the background music. :)
Windows doesnt see the root partition because it is EXT4 file system. That is where the majority of the SD card is allocated.
This makes it that little bit more complicated to copy roms to it. I recommend using WinSCP to copy ROMs over to the Piboy. Its free and works very well but does reaquire you setup Wifi or plug in a Ethernet cable. You can find the Piboy's IP address using "Show Ip" in the Retropie menu on the Piboy after connecting the ethernet or setting up Wifi.
Alternatively you can use a USB drive/key to copy over ROMs. Here is a link explaining different ways to copy ROMs on the Retropie Website.
Check out the below in the config hierarchy section:
https://retropie.org.uk/docs/RetroArch-Configuration/#config-hierarchy
I think you’re looking for core override - which I normally do in retroarch GUI but might just need to add SystemName in the path for the cfg file
here's a tutorial on exiting kiosk mode: https://retropie.org.uk/docs/Child-friendly-EmulationStation/#ui-modes
As far as the scrolling up and down, I'm not sure what would cause that. Perhaps make sure that the joystick is centered and not being touched when booting up?
Not sure what batocera uses for an emulator, but on my piboy I’m using lr-Genesis-plug-gx
Seems to work, but check https://retropie.org.uk/docs/Sega-CD/
As maybe the emulator retropie uses needs different bios files than emulators in batocera?
Just a guess as I’ve had issues before with diff emulators using diff bios files
As a comment above mentioned the latest update toggled on the Multi-Tap. Try to disable it by going to the Options from the Quick Menu in a game and setting “Enable Input Settings” or something similar to On. Exit the game and launch it again. Go to back to the Options in the quick menu and there will be extra settings, turn Multitap off. Also, keep in mind that older PSX games did not have support for the Analog sticks, https://retropie.org.uk/docs/Playstation-1/
I ended up installing raspbian and then installing retropie after that. But, they have pre-made images: https://retropie.org.uk/download/
When your Pi Boy arrives, you'll have to reinstall everything, but at least this is a good opportunity to learn RetroPie :D
The RG Handheld discord linked to this subreddit has a fix that worked for me - basically involves manually adding a line to gamescontrollerdb file, deleting another ini file, then mapping works and dpad isn’t all wierd directions,etc
Based off https://retropie.org.uk/forum/topic/15577/ppsspp-controller-setup-guide-for-when-nothing-else-works
Not my work - credit goes to the awesome folks in that discord. Hopefully works for you too
I'm sure it's possible lots of people did that with the retroflag nespi4. Like others said it would be easier to just use a USB for the roms. https://retropie.org.uk/docs/Running-ROMs-from-a-USB-drive/
I used the two links below:
https://retropie.org.uk/docs/OpenBOR/
https://retropie.org.uk/forum/topic/18565/tutorial-openbor-the-complete-guide
Basically installed from source through retropie menu, copied pak files and ran extract.sh from the first link
Then ran the wget script from the second link under part one, did the route 1 under part 2
Then used keyboard to configure one game with the piboy controls
Then went into options->system-> save config as default.cfg in the one game I configured
After a restart it let me use the controller in the select menu
Looks like there’s a ton of pak files out there; not sure if all work on the raspberry pi version or not but the two I had did
I did have to read those two or three times and reinstall as many lol
This device is the first time I’ve ever gotten openbor working on a pi haha
I'm still waiting on my PiBoy, but I set up a new Pi4 recently and have been messing with RetroPie on my own while I wait.
​
I've been using the official docs religiously: https://retropie.org.uk/docs/
​
What I've done is set up some games for specific systems and set up ports. I also find myself spending lots of time in the RetroPie configuration script utility. You can find alternative/new emulators there, Steam Link, and other apps like Kodi. I installed the Plex addon in Kodi so now I can do Plex on my Pi. (I'll be doing all of this when I get my PiBoy)
Everything was working fine before. After updating the new firmware and OSD files, the Piboy will keep shutting itself off. With the first new image, I would get random inputs followed by an auto-shutdown. To alleviate this, I downloaded the base image from retropie.org.uk and installed the new software u/TheOriginalAcidtech just recently uploaded. I am no longer getting random inputs, but a minute or two into copying my roms back over, the PiBoy turns itself off. I'm able to see the message
"Broadcast message from root@retropie (somewhere) (timestamp)
Closing Emulators
Broadcast message from root@retropie (somewhere) (timestamp)
Closing Emulation Station"
Would this be a firmware issue? Or maybe the Software issue? Happened with ExPi provided image and also with fresh image from Retropie with installed OSD and Shutdown Software.
Probably means that your directory isn't in the place the script expects it.
Check that you have it exactly as written in the tutorial as "ShovelKnight" (no space, and watch the capital letters).
If you're trying to run another game, you have to point the "cd" and "box86" lines to the directory and executable of your game respectively.
As for the PS3 controller, i believe that you can point xboxdrv to the event id of your connected controller. Read the remapping guide, and point your "--evdev" line to the event number of the connected ps3 controller. You might have to doublecheck that with the guide though.
Airpods or any other bluetooth device is hard to connect. The other thing is it also introduces latency, say if you use other wireless things. Basically it may not work out well.
Now with all that said, its not impossible, check out the retropie forums: https://retropie.org.uk/forum/topic/20338/tutorial-bluetooth-audio-on-retropie-v4-4-and-raspberry-pi-3-model-b
Have you checked out Retropie forums link
If it's a controls issue you could create a bash script to assign Xboxdrv controls. I did this for box86 games.
Salut !
Il faut ajouter le profil des contrôles du PiBoy dans la base de données de contrôleurs utilisée par PPSSPP. C'est expliqué ici.
En gros, tu ajoutes la config du PiBoy dans le fichier /opt/retropie/emulators/ppsspp/assets/gamecontrollerdb.txt
Je l'ai fait pour moi et ça fonctionne très bien. Voici la ligne que j'ai ajoutée :
15000000010000000100000000010000,PiBoy DMG Controller,platform:Linux,a:b1,b:b0,x:b4,y:b3,back:b8,start:b9,leftstick:b10,leftshoulder:b7,rightshoulder:b6,dpup:b12,dpdown:b11,dpleft:b13,dpright:b14,leftx:a0,lefty:a1,lefttrigger:b2,righttrigger:b5,
Je ne sais pas si cette ligne fonctionnera pour toi. Essaie et si ça ne marche pas, suit la manip indiquée dans le lien ci-dessus.
​
In English: following the instructions here, the gamecontrollerdb.txt file from the ppsspp assets must be appended with the specific controller profile of the PiBoy. Above is the string I added for mine and it works brilliantly!
Using dongles or wired, yes. Using Bluetooth requires more tinkering, see here. Note that I did not try it myself. If you own a PS4 controller, try first in wired mode. If you like what you get, then go the extra mile for Bluetooth connectivity!
Since it is literally just a raspberry pi running retropi, any tutorial should cover it. Also it will run Dreamcast and N64, just like a pi4. Most should do well, but some games will be slow, won’t work, or will need an overclock to be smooth.
Here is ETA prime’s tutorial. Its old, but should do the trick. https://youtu.be/pQOHr7gQ-rI
Step by step instructions for adding roms to retropie are here as well https://retropie.org.uk/docs/Transferring-Roms/
And r/RetroPie will be a trove of knowledge for digging into your retropie setup.
I had the same isssue, I followed this and now everything is fine.
https://retropie.org.uk/forum/topic/15577/ppsspp-controller-setup-guide-for-when-nothing-else-works
WINSINN 30mm Round Fan Circle 5V... https://www.amazon.com/dp/B08C78WRF6?ref=ppx_pop_mob_ap_share
It was a tight fit but it did fit without any modification. I haven't seen the piboy hit over 58*c with it. No longer sounds like an electric beard trimmer. Had to cut the wires and I used some solder sleeves to connect to the original fan connector. 5 fans came in the box, which i didn't realize when I purchased but whatever now I have spares. Definitely recommend this fan. Now just have to sort out my joystick issues.
You can change the cpu governor on the fly by writing to /sys/devices/system/cpu/cpu0/cpufreq/scaling_governor
eg: echo performance > /sys/devices/system/cpu/cpu0/cpufreq/scaling_governor
For more info:
https://www.kernel.org/doc/Documentation/cpu-freq/governors.txt
Setting to performance puts the CPU at the maximum mhz(eg 1500 if not overclocked) always.
Setting ondemand is the default which will change the cpu freq as demand dictates. This can cause stutters in some games.
Setting to powersave will force cpu freq to the lowest setting(600mhz by default).
A script could be added to Retropie to let you change these on the fly.
Wouldn’t the PiBoy require the stock image as a starting point to ensure it has all of the required shutdown scripts, LED controls, etc.? Or maybe those could be easily added to an existing non-PiBoy Retropie image?
For copying an SD card, I would create an image from the original and then flash a new card using this software: https://sourceforge.net/projects/win32diskimager/
A working beta (with few bugs) is available here https://www.recalbox.com/download/beta/handheld/piboydmg/alternative
Stable is due on this Friday.
I have got this one: https://www.amazon.nl/gp/product/B077K6GQYF/ref=ppx_yo_dt_b_asin_title_o01_s00?ie=UTF8&psc=1
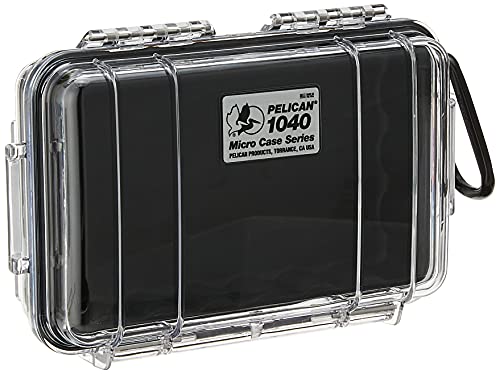
A lot of people here have also shared in the past that pelican case 1040 is a perfect fit.
I got this one for mine MoKo Schutzhülle für Navigationsgerät, Hartschale, schwarz https://www.amazon.com/dp/B078LYG1PJ/ref=cm_sw_r_awdo_navT_g_QY26E9VCJQ9W2FDY8Z8C
In there is also a Powerbank (10.000mah), a HDMI to mini HDMI cable and one USB to micro USB cable.
Was able to shoehorn this puppy into the piboy.
https://www.amazon.com/dp/B08C78WRF6?ref=ppx_pop_mob_ap_share
Needed to sand the outside of the fan shroud to get it to fit. Solder the proper connector on and the heatsink below stops it from tilting.
Everything is SUPER tight. The fan is basically held in between my vent and the heatsink, but nothing hits.
It flows a lot of air and makes 0 noise when moving the piboy around even at full blast.
I’m not sure if I’m going to offer this as a stand-alone product yet, but for those who are handy this is an option.
I use Putty to SSH into my PiBoy from Windows. On Android I use ConnectBot. You'll need the IP address of your PiBoy. The default username of the official image is pi and the password is raspberry
Pasting into Putty is just a right-click.
I had a feeling thats where you were going. I reached out to expi and confirmed the model charger I'm using is appropriate, but you more than likely know more about electronics than I do.
That's what I'm using.
This is really nice.
For the record, the Pelican micro case 4010 is also a perfect fit. Like, a bizarrely perfect fit. Pelican 1040 Micro Case (Black) https://www.amazon.com/dp/B001DQOL5U/ref=cm_sw_r_cp_apip_bA4I7TkljGvYN
I like that design, actually its nice since it can actually stand on its own, I just can't figure out why they didn't release a model of the back plate to print, since they actually say to modify the back plate for better airflow.
I was looking at a couple of 18650's I have laying around (Panasonic 3.7/3400mAh) and they are not much thicker/longer then the battery box and you could fit 2-3 of those together using something like this: https://www.amazon.com/Aokin-Battery-Storage-Parallel-Batteries/dp/B07Q13T3RH
I am not sure about the charging circuit but I know that good 18650's are decent priced.
SD Card was fine on 1.03... dunno why a few updates would've made it poor? my Micro SD Card is a Patriot 512mb, Performance Class A1. Video Speed Class : V30. Read Speed up to 100 Mo/s. Write Speed up to 80 Mo/s.
https://www.amazon.ca/Patriot-Support-microSD-Smartphone-Optimized/dp/B07S98ZVLZ
Anyway, 4-5 times played with it and no hang on the white screen since... which is a good sign :-)
I dont know what happened between 1.03 and 1.05 but I've seen a nice performance boost to N64 games... Killer Instinct Gold was barely playable on 1.03... and on 1.05 it runs pretty damn fine... still glitches in menus, but in game... got a little lag here and there (mostly during big explosion or lotsa visual effect from a super move) but its very very playable now :D I'm real Happy with this! have not seen improvement on Sega Saturn tho :( That would be my ultimate wish for the PiboyDMG :D lol
Although not direct proof that Piboy XRS is real, the following does suggest its existence:
Puccy 3 Pack Screen Protector Film, compatible with PiBoy XRS TPU Guard ( Not Tempered Glass Protectors )
Although not direct proof that Piboy XRS is real, the following does suggest its existence:
Puccy 3 Pack Screen Protector Film, compatible with PiBoy XRS TPU Guard ( Not Tempered Glass Protectors )
just for info. For tidying that hole up. A cheap deburr tool will do that near perfect. I have found for any 'inner' holes the deburr tool is awesome at cleaning up plastics. much better than a dremel or file if you are careful Silverline 248844 Deburring Tool,145 mm: Amazon.co.uk: DIY & Tools
Continued: I don't want to ever scratch the screen of course and these feel slightly soft but I don't know. Seeking opinion.
Here is link to case: def overpriced a bit too but I do like it!
Hi! Something like this would work with Alsa-USB. I tested a similar USB sound card extensively during development. By plugging the sound card into a USB port on the Pi, then plugging your speakers into the sound card, all of that line noise you mentioned would be completely circumvented + non-existent. Such was my experience during testing. :)
You could optionally go full digital and get a USB-compliant speaker setup like this (just as an example - I haven't used that product myself). Seems like it would be difficult to find high quality speakers that are designed to work over USB like that, though. High-quality USB headphones are much more common.
I have small heatsink that usually come with rpi 2/3/4. They will fit with maybe slightly higher fan mount. Everything still fits no problem.
Edit: these are the type i talk about. Pastall 100 PCS (8 Different Sizes) Heatsink Kit with Conductive Adhesive Tape, Aluminum Heat Sink Cooler and Copper Heatsink for Raspberry Pi A B B+ 2/3/4 https://www.amazon.com/dp/B082RWXFR2/ref=cm_sw_r_cp_api_glt_fabc_XPF43VXS759YR43JRKCP
You have at least 5mm to play with.
Yes, a lot of the piboy community use these: Easycargo Raspberry Pi 4 Heatsink... https://www.amazon.com/dp/B07D4BWK6G?ref=ppx_pop_mob_ap_share
With the heat sinks installed and drilled holes, I get constantly less than 60C on my DMG.
Yep let me know how you go. My one the heatsink was not hovering and the feet were still on the board.
I purchased off Amazon, maybe ordering on the geekworm website it's a newer model.
https://www.amazon.com/Geekworm-Raspberry-Embedded-Compatible-Expansion/dp/B07Z3Q417K?th=1&psc=1
AKZYTUE 3.7V 4500mAh 805082 Lipo Battery Rechargeable Lithium Polymer ion Battery Pack with JST Connector https://www.amazon.com/dp/B07TTD2Y5G/ref=cm_sw_r_cp_api_glc_i_Y8E.FbCMB0QT9
Amazon is a source for plug and play as well....at least here in the states
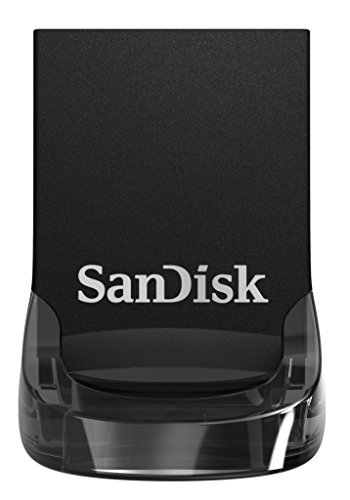
That’s a great idea! I am using this and it’s perfect!
SanDisk 512GB Ultra Fit USB 3.1 Flash Drive - SDCZ430-512G-G46 https://www.amazon.com/dp/B083ZS4HYD/ref=cm_sw_r_cp_api_glc_fabc_Wdn-FbJHSEVHG
The unit with that USB plugged in fit PERFECTLY in a Pelican 1040 micro case!!
I have just attempted this fix and can say that it totally WORKS! For about an hour. :( I took the LCD Hat out, removed the fan, added a drop of Liquid Bearings, and firmly but gently pressed the axle in using one of the star drivers from my iFixit kit as it has a circular dimple in the top. I heard and felt a small, soft *boop* (not quite a click or a pop, idk), and after re-assembly it was like a whole new PiBoy. Very quiet fan operation, even at boot, it no longer vibrated in my hands, and while the fan changing speed/sound when moving around issue was still present, it was largely ameliorated. Played about an hour of the Alien Trilogy on Playstation and after taking a break it was back to normal. Will continue to investigate.
I also had purchased this set of heatsinks previously, and was able to take a dremel to one of the larger ones and cut the fins in half so it fits. Not the prettiest, but it has to be doing something, right? Over that hour of Alien Trilogy my temperature leveled off at about 62^(o) Celcius, no overclock.
This is one I have been using. It’s great and it’s barley sticks out the top!
SanDisk 512GB Ultra Fit USB 3.1 Flash Drive - SDCZ430-512G-G46 https://www.amazon.com/dp/B083ZS4HYD/ref=cm_sw_r_cp_api_glc_fabc_yME0FbGNRMY32
Pelican's models are a standard size for each model number, with the 1040 being a perfect size for a PiBoy.
Amazon is usually the best place to get them and they come in different colours too: https://www.amazon.com/dp/B001GGBORU/ref=cm_sw_r_cp_awdb_imm_t1_nVVSFbFMMJQMP
I have a 16Gb card and a 128Gb usb flash drive (https://www.amazon.com/gp/product/B07D7PDLXC)
This way I can redo the card without worrying about the games
I don't think Experimental Pi's new heatsink is going to be much help. I just commented on FB about the shortcomings in their design...especially without a redesign of the back cover to allow for proper air exchange.
I (and several others) have used this heatsink kit. https://www.amazon.com/gp/product/B07D4BWK6G
CPU sink fits perfectly snug against the fan housing without being too large for it. This reduces vibration and noise from the fan once reassembled.
I would use something like this to stick LED light strips or similar in place:
I've used it on a few kinds of plastics before and it does dry to be as clear as glass. IIRC it's solvent free so shouldn't cause any kind of reaction with the shell.
Trickiest part would be to hold it securely while it dries, as it will need to be left for a day to fully cure. Maybe some small clamps like these to hold a strip around the sides of the shell:
https://www.amazon.co.uk/dp/B0002YYW3A/ref=cm_sw_r_cp_apa_fabc_1-BQFbTGA2KK1
I've had this for a few months while I played around with a Pi to become familiar with it.
https://www.amazon.co.uk/dp/B089K1GBLL/ref=cm_sw_r_cp_apa_i_.EYOFbZM9EFXJ?_encoding=UTF8&psc=1
I wasn't expecting much to be honest, but it works very well to be fair. Nice crisp image and can easily read white on black text (something I've struggled with on cheaper screens).
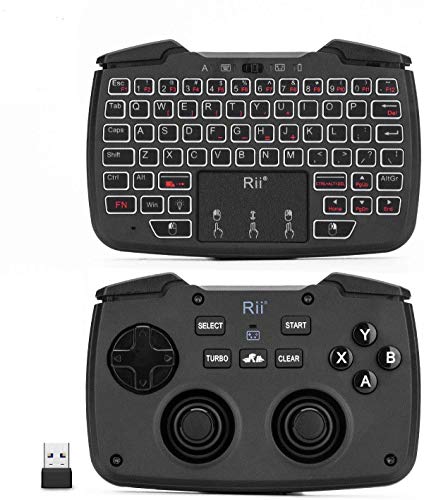
I have an 8bitdo controller that I will try at some point for longer gaming sessions at home, but I just bought a Rii Wireless controller from Amazon that has a full keyboard and touchpad on the back. This is a great idea Incase you need to edit the configuration files or input a command to the actual operating system, especially on the go when you probably won’t have access to an actual keyboard. It got good reviews so I am excited to try it once my unit comes in the mail:
(Backlit Version)Rii RK707 https://www.amazon.com/dp/B07STY21PS/ref=cm_sw_r_cp_api_i_ugAIFbN6JB9DR
I have a slim copper heat sink plate that came with the new retro flag case and it fits under the fan. And then I put regular fin style heat sinks in the other 2 chips, which is small enough to clear the rest of the pcb board without any problems.
They look similar to these
ALLUS Passive Heatsinks for Raspberry Pi 3 Model B for Sticking On 3 x 4sets alu https://smile.amazon.com/dp/B07P72Q1CT/ref=cm_sw_r_u_apa_i_2ViIFbQHAF8DG
sorry for the delay. This is the copper heatsink set I bought: https://www.amazon.com/gp/product/B07D4BWK6G You can get at most a 6mm tall heatsink in there if you flip the fan like I suggested. I post a pic in a minute or two...
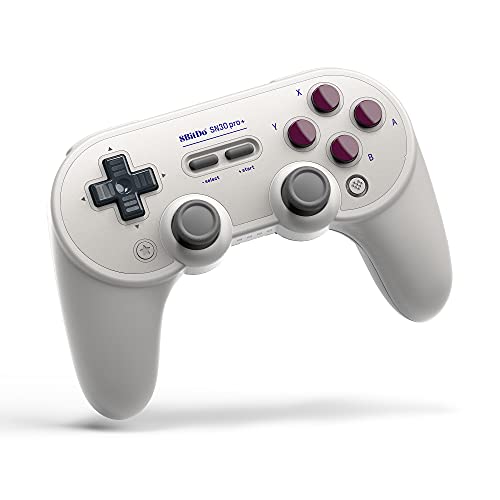
I've bought 4x 8bitdo SN30 Pro Plus G Edition. Should have all the sticks and buttons needed and complement the PiBoys colour scheme (hopefully, my PiBoy is on its way).
Perhaps you could make the larger battery look something like this and connect via the USB?
https://www.amazon.com/Game-Boy-Rechargeable-Battery-Pack-Adapter/dp/B00002ST2L/
There was a thread on this a few years ago here: https://www.reddit.com/r/Gameboy/comments/8bc8l3/best_gameboy_case_ive_found_yet_link_in_comments/
In this thread the user is talking about the best case they have used for their GameBoy Zero, which is essentially an earlier version of the PiBoy DMG and the same dimensions I believe. There is also a picture of the GameBoy in the case which is nice.
TLDR: link to the case they liked: https://www.amazon.com/dp/B003VVH8Y6?ref=yo_pop_ma_swf