
What are
/r/ender6's
favorite Products & Services?
From 3.5 billion Reddit comments
The most popular Products mentioned in /r/ender6:


The most popular Services mentioned in /r/ender6:
SD Card Formatter
Banggood
Cults.
The most popular reviews in /r/ender6:
Sounds more like a broken fan, not a broken printer.
Fans are replaceable. It's one of the most common upgrades to a printer, and is one that is usually "on the list" of upgrades for just about everyone with every printer ever made.
Basically, you just saved yourself some time and are getting to it sooner :)
Shroud comes off. Haven't had a chance to take mine off yet, so not exactly sure how it goes on this printer. On my other printers, it's pretty easy. Fans are usually attached to the shroud. Replacements are sold on Amazon for $5'ish. You'll need a 24v 40mm fan. It's entirely possibly that you may need to do some splicing/soldering etc, not sure how it goes on this machine yet.
I like these, and use them on my other printers - https://www.amazon.com/gp/product/B07R97ZSF6/ref=ppx\_yo\_dt\_b\_search\_asin\_title?ie=UTF8&th=1
As the other folks have commented, the motherboard is getting power from the raspberry pi which it should not. Rather than relying on tape though, which somehow works it’s way off, I suggest getting one of these. They work very well. https://www.amazon.com/dp/B08VHDKCX3
It’s easier if you return the BL touch and get the right one for Ender 6.
Creality Ender-6 BL-Touch Auto Leveling Kit https://www.amazon.com/dp/B08RX9Y1KQ/ref=cm_sw_r_cp_api_glt_fabc_V5AVPBVMPVCX3J8FYTNS
I have my glass bed turned over so I print on the smooth side.
I use something like this with a small rubber mallet similar to this.
You just gently tap the razor blade so it gets under the edge of the print.
( As I noted though, this would work best with the smooth side of the print bed, since the razor would likely mess up the textured side of the glass bed. )
I ended up liking the blue springs the best. I accidentally ordered too short a spring, but they're perfect with those spacers under them and the bed is super stiff.
Yes. I'm not sure what you mean by "pin number", but the BLTouch socket is clearly marked.
You need the BLTouch to Ender 6 adapter cable to directly plug it in. I am using this one:
Thanks for the help. I actually just got it working last night with a dsi display, but my bl touch does not work even when enabled. My bltouch is connected to the breakout board. I ordered this from Amazon (https://www.amazon.com/dp/B09HCBQSJ5/ref=cm_sw_r_sm_apan_i_0B91T3C59NBY2VR8EZ7H) to try connect to the motherboard to see if it fixes my issue, but it may be too short. Do you have any solutions for the bl touch not working with klipper? I would appreciate the help.
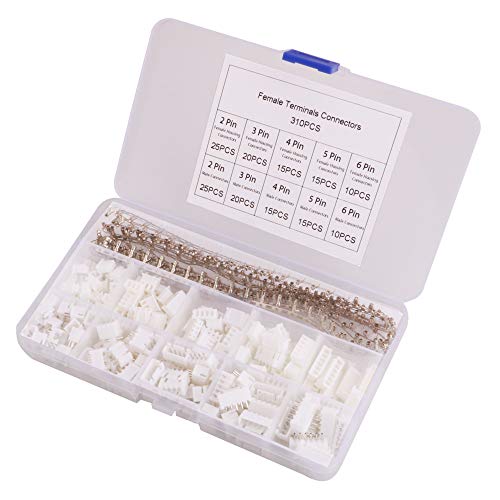
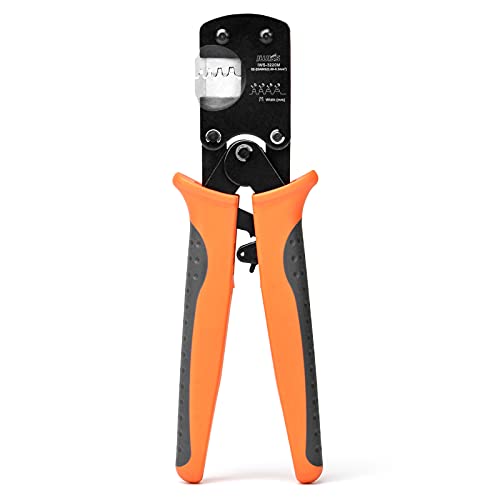
Since the connectors are jst on the sprayboard, you need a good crimper and very small, meticulous work to get it done. This IWISS crimper is reportedly pretty good. Plus you need connectors.
Doable, but expensive and time consuming (without experience), and the connectors are really tiny.
I've opted instead of buying a box of pre-crimped pieces of cables and some heat shrink tubing, and I just solder on the ends.
Will do, What I’m thinking of doing is flashing everything back to original. Then flashing it again, but this time gonna use this cord
FYSETC 3D Printing Build Surface 300x300mm/11.8x11.8 inch Black Double Sided Textured PEI Spring Steel Sheet Powder Coated PEI Build Sheet with Magnetic Platform Side B for TAZ 6 https://www.amazon.com/dp/B088TBZSV6/ref=cm_sw_r_apan_glt_i_APPXY1H6FH74B65R1KYE?_encoding=UTF8&psc=1
Creality Ender-6 BL-Touch Auto Leveling Kit https://www.amazon.com/dp/B08RX9Y1KQ/ref=cm_sw_r_apan_glt_i_D6380C15918GB7D3CW9J
The SSR is for a 110v heater for the enclosed chamber. The black box has a 30A relay in it to cut the 24v power to the main board before the UPS. I have moonraker cut power to the board on any problem.
For the display I run a 5 inch DSI screen with 30cm cable to the pi and run klipperscreen. Screen klipperscreen is so much nicer.
I had an EZABL when I had the SKR2 but when I switched to the Octopus I put in a cr-touch to gain back some x-axis movement that the EZABL mount took up. On the SKR I powered the EZABL with the 24V to 5V converter and ran the 2 wires to the probe connector on the board. I would imagine you could use the bltouch port. Here's my config if it helps. printer. cfg
Head to Amazon and get a [4S JST-XH extension cable](https://www.amazon.com/dp/B078QHLQ7W?psc=1&ref=ppx\_yo2\_dt\_b\_product\_details) .
They seem on Amazon to mostly come in 20cm lengths, but they are usually multi-pack so you can just use 2.
My CR Touch cable went from the hot end all the way down into the base following the existing wire route to the hothead, but you need about 30 or so centimeters of wire to make it to the main board.
With these there will be no splicing of crap like people do with those cables for the CR-10. Just plug and play. Make sure it's a 4S cable, as the 2S and 3S cables don't have 5 wires like it needs.
They should be MK-8 .4 mm nozzles.
That's all you need to search for.
On Amazon, there are plenty of replacements, many with a variety of sizes and material ( like steel for printing abrasive filaments).
I have this kit: MK8 variety pack
I installed a couple of these sd card reader. I have them mounted on the backside of the display housing mount. They come with 3M tape on the back. There's room to slide the cable through the bottom back side of the metal display mount. You may have to bend it forward a bit to slip it through. Then it just plugs into the sdcard slot on the board.
22awg is the upper limit for the jst connectors. 16awg would be too big. But would be good for power cables. I used the existing power cables and some 14awg copper wire.
until then if you have concerns about the spray board and BLTouch buy a few of these ferrite ring. And put it on the cable between the touch and spray board. The shared ground introduces noise, and that'll help a bunch with that meanwhile with pretty much no downsides.
Try formatting to FAT32 WITHOUT WINDOWS. Use a real SD card formatting tool like from the actual SD card association: https://www.sdcard.org/downloads/formatter/
The windows tool kind of screws it up.
All we need is the cable in this kit https://www.amazon.co.uk/Creality-Ender-6-Leveling-Printer-Accessories/dp/B092MH5ZQR/ref=mp_s_a_1_3?adgrpid=134387049750&gclid=CjwKCAiAzrWOBhBjEiwAq85QZ3msAdtT5AgixK_KuUwsQQjcvUQZIFj9LhPh4oJAsyft9RRDP9Bj8hoCem8QAvD_BwE&hvadid=566241200845&...
They must sell it separately somewhere?
Antrader 2 Pcs Glass Cabinet Door Hinges Wine Cabinet Clamp Display Cabinet Hinges Ambry Gate Hinges, Zinc Alloy Matte Black, No Need to Drill Hole https://www.amazon.com/dp/B07ZNBMTFS/ref=cm_sw_r_cp_api_glt_fabc_FDQJENWC8CJJM3GH8ZSK?_encoding=UTF8&psc=1
https://www.amazon.com/gp/product/B09761NSK4/ref=ppx_yo_dt_b_asin_title_o03_s00?ie=UTF8&psc=1
This is what I use today. It typically has a $20 coupon, so you get a larger bed for cheaper.
If that's the original stepper, I'd get a smaller one. Too much weight. This is the one I'm using with a Triangle Labs DDX. stepper
Another follow-up… realized the dsi screens won’t work for me as I’m running my printer with a raspberry oil zero 2 w, so no ribbon connector, I need a screen with hdmi input.
So will any hdmi 5in screen work? Something like this:
Can confirm that this one comes with the correct cable for plugging into the daughter board.
The official BigTreeTech V3.1 one on Amazon with extension cable should work. You're going to want to plug it into the main motherboard via said extension cable, not the breakout board, otherwise it won't work consistently and you'll get bed crashes as well as software crashes.
There are several ways to full format or full erase. I’m on mobile right now, so not sure if exact names or options, but: Rufus and select full erase. There is also a HP tool, something like hp usb erase tool. Just google “full format usb/sd”
Mini partition tool (for any kind of media) will work too.
There is also a “official” tool from SD, here
Before erasing, double check that you are erasing the se and not your hdd…
https://www.amazon.com/gp/product/B00DYKE2ZC/ref=ppx_yo_dt_b_asin_title_o02_s00?ie=UTF8&psc=1
or buy a filament dryer but that's a whole other level of commitment.
I just received the PEI mat and have a question. it is a metal sheet with a 3M magnetic sheet underneath. SO how do I install it? The size is 250 x 250 mm as I could not find the 290 x 290 mm and the 310 x310 is too large.
There seems to be a sticky backing to the 3M magnetic sheet. link to product
did I get the wrong one?
These are what I used. https://www.amazon.com/gp/product/B07HLFT5H7 Bit overkill for only needing one connector but I just wanted to get it working and I couldn't find just one for any cheaper.
This is a direct fit for a DDE. Comes with a bunch of unnecessary stuff but the cable fits perfectly. Direct Drive Extruder Conversion Kit for Creality CR10 Ender-3 3D Printers, Aluminum Alloy Direct Extruder Adapter Plate Kit Compatible with V-Slot Linear Guides
Unfortunately you will have to replace the board with the same version.
I just ordered these:
[All metal extruders](https://www.amazon.com/gp/product/B082G9H94F/ref=ppx_yo_dt_b_asin_title_o00_s00?ie=UTF8&psc=1
I found this HQ on Amazon.
What does "N-O" mean?
I had the same issue. This is the one I ended up getting. Right connector on both ends.
Creality Ender-6 BL-Touch Auto Leveling Kit https://www.amazon.com/dp/B08RX9Y1KQ/ref=cm_sw_r_cp_api_glt_fabc_Q8WZGME90Y35V0V93CHW?_encoding=UTF8&psc=1
Great Design All Metal Dragonfly HOTEND BMS Bimetal Heatbreak Plated Copper Nozzle, Heater Block for Upgrade CR10 Ender 3s Ender 3 Pro V2 CR-10 Ender 5 Pro 3D Printer (BMS) https://www.amazon.com/dp/B08N6SWNCV/ref=cm_sw_r_cp_api_glt_fabc_SQGJ6YR8385ADNG32XBQ?psc=1. Is this the one you bought?
you beat me to it by like 5 minutes :)
Someone from Creality got back to me today. I'm going through the process of getting a replacement through warranty (will keep as spare), but they also told me which dimensions etc i need if i want to order one.
And you're right - Tr8x8, 2mm pitch, 4 starts, 500mm.
just ordered this ReiliaBot one five minutes before i saw your post. Comes with a brass nut.
https://www.amazon.com/gp/product/B07B65RQM5/ref=ppx_yo_dt_b_asin_title_o01_s00?ie=UTF8&psc=1
thank you for your help.
Haven't got to changing the fans on this machine yet (just over a week old), but on my other printers i tend to use these -- https://www.amazon.com/gp/product/B07R97ZSF6/ref=ppx_yo_dt_b_search_asin_title?ie=UTF8&th=1
They're quiet and push a lot of air.
You have a bad cable, mine shipped the same way. You can a replacement off Amazon.
RuiLing 4PCS 1.5M 59 Inch Stepper Motor Cables Lead Wire HX2.54 4 Pin to 6 Pin https://www.amazon.com/dp/B07QHTG82K/ref=cm_sw_r_cp_api_glt_fabc_S9ZMZHFXVW4GGJH2RPVV?_encoding=UTF8&psc=1
You need to take the bottom cover off and run the new cable from the main board up to the patch panel. Note the factory cable is hot glued to the receptor on the main board, you will need to snip it off before you can unplug it. The factory will send a new cable and main board if you go through the warranty, it took several months though.
Definitely it’s easy to install and it takes out one of the most tedious parts of the printing process just watch the Creality video on how to do it for the machine
There is the Amazon link where I got mine
Ender 6 stepper drivers seem decently robust. My guess would be probably A/C Line Power, especially if you are in a hot weather season and there are any kind of rolling brown outs too!!! Most, if not all of these 3D Printers are designed to pick up where they left off if the power goes out and then comes back on awhile later ...a few minutes to an hour. Worst is when you get the bounced power effect...either during a strong wind storm or someone hits a power pole causing the power to bounce & flicker on and off multiple times....very hard on data sensitive electronics which is why I recommend people use an Uninterruptable Power Supply (UPS) especially for computers. Only difficult thing is, you're not supposed to use UPS with devices that have a heated circuit...draws a good bit of current and hard on the UPS. This being the heated bed and the hotend. If it was just the mainboard, it might be ok...but thinking about it, I'd be curious to try a UPS with a smaller 3D printer and see how well it would run if unplugged for a short period of time. If a UPS wasn't available then there's NextGen PCS by ESP that makes a power conditioner with a data logger for recording power line events. These power conditioners with integrated data logging are mostly used with copy machines as copy machines use a computing circuit in conjunction with a heating circuit...very much like a 3D printer. I wouldn't hesitate to put one of these power conditioning data loggers on my Ender 6!!!...which come to think of it, I have one lying around that I just might try out. BTW...The link for the power conditioner follows:
> BL Touch 2.0
https://www.amazon.com/gp/product/B08RX9Y1KQ/ref=ppx_yo_dt_b_asin_title_o03_s00?ie=UTF8&psc=1 this is what I got
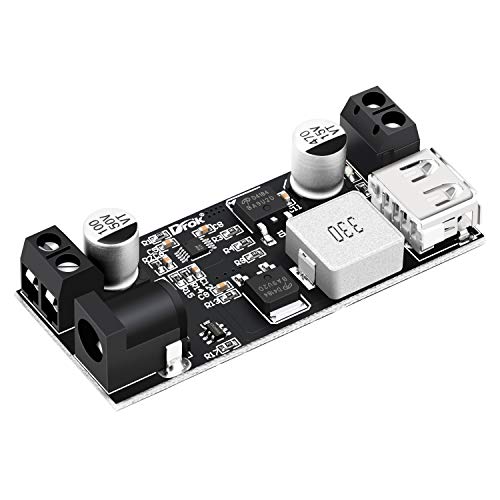
I am assuming that you have an adjustable buck converter (you can get USB converters that are probably more convenient for this task - they take in various voltages and output 5v through a USB connector like this one: https://www.amazon.com/dp/B01NALDSJ0/ref=cm_sw_r_cp_apa_glt_fabc_N7HA7X041TRP40BHMVF1)
I needed a variable output to drive my 12v LED lights, so I used this one: https://www.amazon.com/dp/B08CRSL41Q/ref=cm_sw_r_cp_apa_glt_fabc_APM6Y1CTYVH9EHRSNPXZ?_encoding=UTF8&psc=1)
I soldered a 500 ohm resistor across the output pins. This will constantly provide a load to the converter. I'm not certain why it is designed this way. You will need a voltmeter and a small screwdriver to adjust the output voltage. I would not connect the pi until you get the voltage close to 5v.
Don't forget to cut off the power and ground wires to the pi when connecting the USB cable to the printer or you may blow the printer and/or the pi.
It's really not hard. If you just want to power the pi, get the USB converter, connect it and you are done.
If you have the adjustable one, connect the resistor, adjust the voltage, and then you can connect the pi.
Ender 6 endstop: https://forums.creality3dofficial.com/download/ender-series/ender-6/
Scape your bed with your flat spatula, clean with some rubbing alcohol, the use a glue stick on your bed where the print is gonna be , like this: https://smile.amazon.com/dp/B07F8QMTK6/ref=cm_sw_r_cp_apa_glt_fabc_6MYB50BGX850TWHC0YK3?_encoding=UTF8&psc=1 Use can also download z offset plugin in cura and set your z offset like -.1 mm
This is the one I got. I'm currently having them send me a replacement, and I'm going to try what the other commenter mentioned. The software seems to work correctly, I believe it's a hardware issue I'm experiencing.
Sidenote: to make this BLtouch work you will have to dismantle the connectors on the extension cable and wire up a new connector for yourself.
While I cannot relate to your other problems, I have a warped bed on ALL of my ender printers. Embrace bl touch friend, you’ll end up buying it anyway. To get bl touch working easily I recommend buying a extension cable and male to male cables. No cutting or fitting the wires, just plug and play once you flash firmware. The best is yet to come, don’t give up! Good luck! Cables: https://www.amazon.com/gp/product/B07GD2BWPY?pldnSite=1
If you haven't gotten it to work yet, I got mine working by making my own cable that matches both the BLTouch and that secondary "spray connector" board and have it connected 1:1 BLTouch -> spray connector but am also using the BLTouch firmware from Creality found here: https://forums.creality3dofficial.com/download/ender-series/ender-6/
I bought and am using these as the heads for my cable: https://www.amazon.com/gp/product/B07HLHCVSL
I ordered this one: https://smile.amazon.com/gp/product/B08J9WN356
It's the 3.1 version, and it works fine for me. I would try re-flashing the firmware maybe?
Since it came with the extension cable, all I did was swap the short cable on the BLTouch (it shipped already connected) with the extension cable, then I grabbed some male-to-male breadboard jumper cables, matched the wires up by color to the dupont connectors on the BLTouch extension cable, then attached the short BLTouch cable to the other end of the jumpers, again matching up the colors.
Thanks, would rather know now than find out when it all arrives!
So this instead?:
https://www.amazon.com/1-25MM-Female-Single-Connector-150MM/dp/B075YDKZPR/