
What are
/r/productphotography's
favorite Products & Services?
From 3.5 billion Reddit comments
The most popular Products mentioned in /r/productphotography:


The most popular Services mentioned in /r/productphotography:
G2
darktable
Pexels
The most popular reviews in /r/productphotography:
It seems that your comment contains 1 or more links that are hard to tap for mobile users. I will extend those so they're easier for our sausage fingers to click!
Here is link number 1 - Previous text "b'G2'"
^Please ^PM ^/u/eganwall ^with ^issues ^or ^feedback! ^| ^Delete
Evanto 22x35Inch Darkness Background Kit for Food Photogarphy and Video, Flat Lay Backdrops, Black Cement & Marble &Wood Texture https://www.amazon.com/dp/B07PWDQ1Q9/ref=cm_sw_r_cp_api_fabt1_YqtUFbNB782V4?_encoding=UTF8&psc=1
I think the face portion is looking great. Is this a common way for watches to be displayed with the bit of strip hanging out at the top? Maybe look into something like this https://www.amazon.com/10pack-Watch-Display-Stand-Holder/dp/B00PRIDCMS so you can get some of the strap on the top and bottom. Have you looked into focus stacking at all?
I would use something like they do in stop motion animation. It's a jointed rod assembly with a little grabber on the end. You could put a bit of putty on the end of the grabber so that you aren't actually grabbing the piece. Then the only thing you'd have to do is crop the arm out of the background.
https://www.amazon.com/Assemble-Stainless-Armature-Animation-Charactors/dp/B0883G7QGC
Bought a used Godox FV150 strobe, for under $200. It will arrive Thursday-Friday.
I might buy:
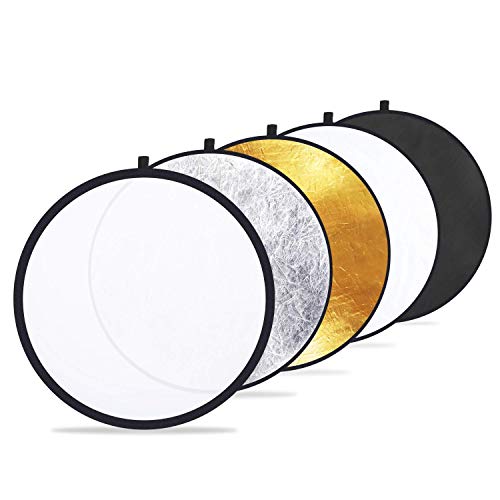
Collapsible Diffuser/Reflectors from Amazon ( this one)
1 C-stand
--------------
I have to finalize them tonight. Got any suggestions?
I think you're on the right track. I remember being overwhelmed when I was first started taking pictures int he studio.
For manual "studio" camera settings try this:
- Set your ISO as low as your camera allows. You want the least amount of noise in your images.
- Set aperture to f/10 to get more of the product in focus.
- Adjust your shutter speed as needed to allow more light in so you get a good exposure. Start at the fastest speed and then just work your way up until you find what works.
Additional suggestions:
- Shoot on a tripod
- For convenience, consider shooting tethered to a laptop so you are not fiddling with the camera
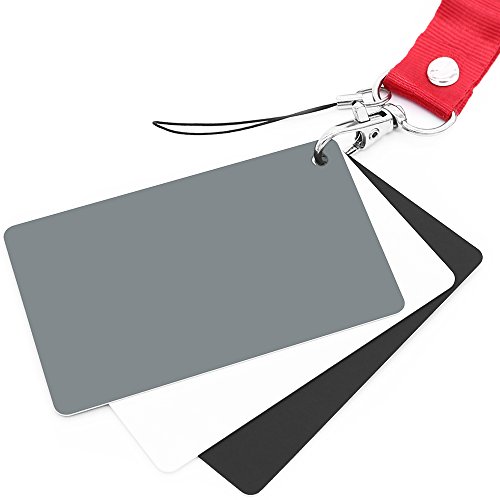
- Once you have your camera settings dialed in, take a shot with a grey card in the frame and use this to set your white balance in Lightroom/Capture One/Camera Raw/etc.
- As tempting as it is, I wouldn't aim for a pure white background "straight out of the camera" with your limited lighting setup. I would aim for a light grey background and then doing a background replacement to pure white or whatever you have in mind for the background. There are tons of different ways to approach the background editing and it really depends on what you're shooting. Getting the whole product in focus makes this much easier as well.
Why Choose ZLMONDEE Electric Turntable ?
The 42cm rotating display stand has a large loading capacity max.110lb (50kg), it can be used for product demo, theme exhibition, window display, photograph shooting, shot-form videos, advertising, party decoration. The rotation is uniform, smooth and quite .
White light/Yellow light/ Warm White light LED light changing.
AUTOMATIC REMOTE CONTROL TURNTABLE
Display Turntable supports storing the current settings in the turntable.
Rotating Display Stand supports 45°, 90°, 180°, 360° angle rotation
Turntable supports returning to the original position and setting the original position.
Photography turntable supports the control of clockwise or counterclockwise rotation.
Electric Rotating Turntable has acceleration and deceleration functions.
Thanks for watching!
Like, comment, share, and subscribe!
I have bought many display stands to display my action figures.
I think this one fits most. You can try it. 360° Rotation with Remote.
https://www.amazon.com/ZLMONDEE-Motorized-Rotating-Turntable-Photography/dp/B097BT6SM6
I bought an inexpensive one on Amazon and have been happy with it so far. https://www.amazon.com/dp/B07KF4QDL8 I wish it had a bigger diameter and had the ability to attach something to rig product from above but it's done the job that I needed.
You have a few options to deal with these reflections. You can use foamcore like you get at any hobby shop. White or black. Those are square/rectangular, but can be curved if necessary. The better answer here is to use a material like Savage Translum (which can be cut to size and/or shape). It's opaque white and can be used as a bounce, OR you can shoot light through it to create a gradient reflection for the metal.
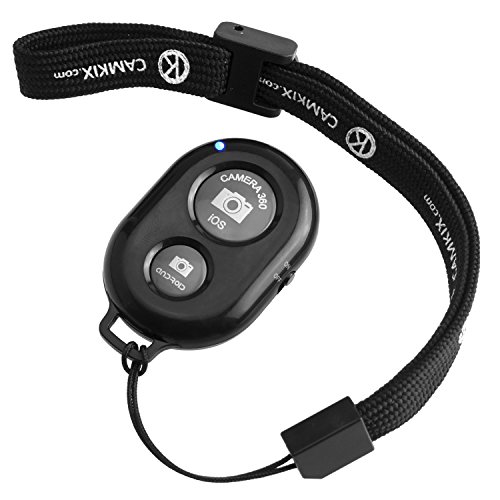
Honestly a good camera phone will get the job done and is within the price range you’re looking for. You can take the photos and save them into a Dropbox app on your phone and access it via your comp. Remote photo buttons for phones are super affordable.
Bluetooth camera shutter remote: CamKix Camera Shutter Remote Control with Bluetooth Wireless Technology - Create Amazing Photos and Videos Hands-Free - Works with Most Smartphones and Tablets (iOS and Android) https://www.amazon.com/dp/B00PJSIIES/ref=cm_sw_r_cp_api_i_FKAR39BVYYHJSK8S9H0X
Phone adaptor for tripod mount: Vastar Smartphone Tripod Adapter Cell Phone Holder Mount Adapter, Fits iPhone, Samsung, and all Phones, Rotates Vertical and Horizontal, Adjustable Clamp https://www.amazon.com/dp/B01L3B5PBI/ref=cm_sw_r_cp_api_i_S2BYD30QF9E8S19K6H6E
Best way: get a level like this:
umei T-Type Spirit Level, Transparent, 2-Way Spirit Level, with Magnetic Scale, Size 95 x 51 x 13 mm https://www.amazon.de/dp/B088PD21JR/ref=cm_sw_r_apan_i_PFJ827XXB5MP06WNK4PX
Level the shooting surface Level the camera Done
Wax never worked well for me. It doesn't hold well, and is just messy. The UV glue comes off pretty easily since it hardens. I can usually just use a fingernail to remove it from the surface. Here is the UV glue I use. I also use this syringe to apply to a spot exactly where I want it. There are 3 kinds: soft, thick and thin. I find the soft and thick work best for jewelry.
If you are able to get a copy of the book Light Science and Magic: An Introduction to Photographic Lighting I would highly suggest it. It covers all sorts of lighting, and has a full chapter dedicated specifically to shooting glass.
Holy moly, that's a tight budget! If that's the case, then I'd recommend a really cheap chinese flash, something similar to this: https://www.amazon.ca/Neewer-Speedlite-Panasonic-Fujifilm-single-contact/dp/B004LEAYXY/ref=sr_1_37?crid=2NUL3RTJNRMRN&keywords=neewer+flash+lights&qid=1643930527&sprefix=neewer+flash+lights%2Caps%2C104&sr=8-37
You'll also need to find an on-camera remote for the flash, and that'll pretty much take up your whole $100 budget. That being said, you'll still need diffusion material, bounce cards, backgrounds and stuff to rig everything up. My best suggestion is a few rolls of gaff tape and a lot of elbow grease, because it doesn't sound like you have enough money for light stands and stuff.
Definitely not the end of the world though, when I first started I was on a crazy tight budget too. Don't let that discourage you.
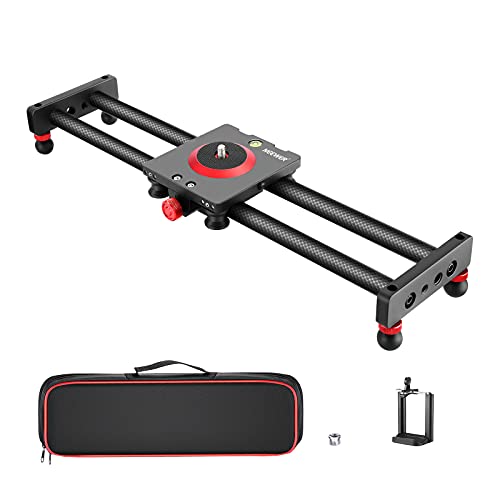
Next time you do some accessory shopping at Amazon consider one of these
Sometimes even when you think you have it nailed in the viewfinder, you really don’t. Good luck on your next trial. You’ll do better😀
This is what I'm currently using. It's not available anymore, but I'm sure you can find another one that would work just fine. For wood I would use the soft, it doesn't harden up like the others, so it's easier get off. I also use these type of syringes to help be more precise in placement.
I think you're on the right track. I feel like it's going to be a ton of retouching and compositing no matter which direction you go. I would probably use a small acrylic tank (example) roughly the size of your temperature bath container. The flat surface would help with refraction and then it's a matter of comping in the sides of the actual container and making it feel like one shot. Please share however it turns out because this is definitely a tricky one.
I think you have a pretty good plan.
Camera: Your smart phone camera should be a decent way to start. I think it's important that you learn to use the settings of your S10 and shoot in raw. It'll be important to get that "non typical smartphone look" you mentioned. You'll need a workflow for post production as well.
Tripod: I'm thinking something like this would would be a good start. It would allow you to shoot from above. You can also try just holding the phone from above. That would give you the most control.
Lighting: Those lights are probably an ok start. Since jewelry is usually reflective, you typically don't want to shine a light directly at it. I would pick up something like this. You'd position the diffusion panel between the jewelry and the light source and it will have a nice diffused effect. You want the jewelry to reflect the diffusion panel, not the bare light source. I think you could also get by with using natural window light, especially if you can diffuse the light with a translucent curtain.
Surfaces and Background: From your example images, it looks like most could be shot from above. I would grab a set of those backgrounds from Amazon and start sourcing more materials. The ones with the printed textures are very popular. I would also recommend tile samples, fabrics, wood panels, and fancy art store paper. Just start collecting interesting surfaces.
Additional Lens: I've always thought those smart phone lenses were a gimmick, so I have no input there. I wouldn't be in a rush to add it though.
I feel like you can see the shadow of something in the background. If I were doing this, I would look into a gooseneck clamp like this (https://www.amazon.com/Gooseneck-Bed-Phone-Holder-Mount/dp/B07S9JXQP2) and remove it in post. Try to find one that has minimal overlap from the clamp parts.
Happy you like it.
The adhesive is from amazon. It comes with activator as well. It's called:
Everbuild MITRE1IND Mitre Fast Two Part Instant Bonding Kit, 50 g Adhesive , 200 ml Activator
amazon UK link: https://www.amazon.co.uk/gp/product/B00BDTF0PW/
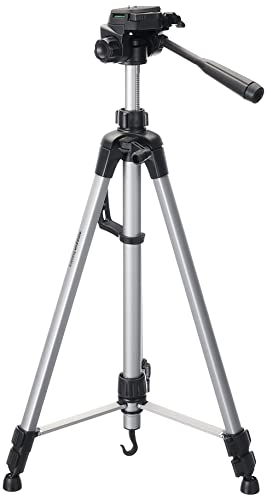
amazon basic tripod is a good place to start to see if you want or need any other features like a geared center column and geared head.
https://www.amazon.com/AmazonBasics-60-Inch-Lightweight-Tripod-Bag/dp/B005KP473Q
You're welcome.
I left out something. An accent light. I bought a small LED panel.
I think the most important takeaway is this - Be creative. You can achieve some amazing results with very little.
Get a small piece of seamless paper or even a large piece of poster board to use as a backdrop. That will get rid of the contrasting shades of gray black and have a single color. Also the harsh “horizon” line will be fixed. Maybe some more props too. As others have said too definitely need to upgrade the lighting maybe try natural sun light going through some sort of diffuser like this
Try using a tent cube. Inexpensive and portable. https://www.amazon.com/LimoStudio-Photography-ChromaKey-Backdrops-AGG108/dp/B0058KJK0S/ref=sr_1_15?crid=2F989Y4V0WY5O&dchild=1&keywords=tabletop+photography&qid=1612989057&sprefix=tabletop+phot%2Caps%2C169&sr=8-15
​
I use one for all my can shots.
If the paper is resilient enough and a tiny bit of residue wouldn’t ruin your life, you could use doublestick tape. Zots are a bit thicker, but would likely leave less residue.
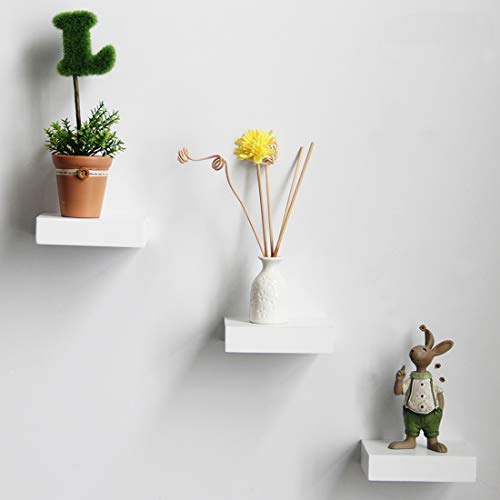
>Here are the little shelves I used. They are both about the same size, but one is matte and the other is glossy. I used the matte for the main surfaces in the shot, but the glossy is mixed in there. Keep in mind that one side of the rectangle will be unusable because it has the wall mount stuff.
>
>https://www.amazon.com/gp/product/B07CGDXJ2G (matte)
>
>https://www.amazon.com/gp/product/B00EV5DC4G (glossy)
C stands are generally the way to go. I try to pick them up used from Craigslist since they typically go for a few hundred dollars (but ultimately worth it). I have super short light stands like this https://www.amazon.com/Manfrotto-Backlight-Base-Spigot-3094/dp/B001M4HTAC/ and https://www.amazon.com/Neewer-Photography-Relfectors-Softboxes-Backgrounds/dp/B00LGGVOL6/ I mount my strobe on and angle it upwards (my strobe head has an adjustable angle). I recommend the one with a wider base so it is more grounded. In a pinch, i've set up some sandbags on the floor and propped the light up from there.
What sort of strobes are you using?
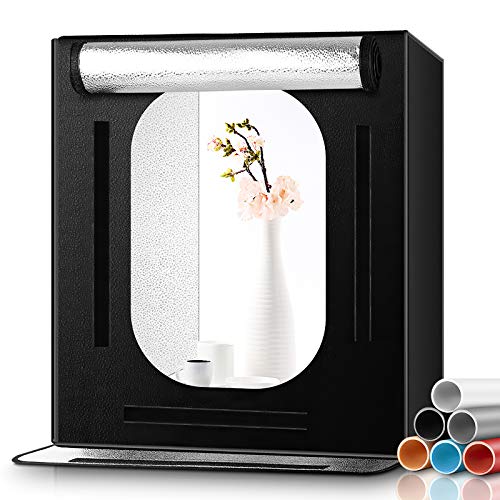
I am using this light box https://www.amazon.com/dp/B06Y5KQ3CK/ref=cm_sw_r_cp_api_i_y0.bEbN47V8HZ this is my first time using this new box and l like it very much. The lights are nice and bright with no bad shadows or reflections. I spent a lot of time trying different positioning for the chain and shooting from different angles for this shot before I ended up with something I was happy with. This photo was shot with a Fuji XT-2 with the 18-55 lens
So I know it is not as fun, but Ott light makes this little craft light that’s on a bendy arm thing. Well I’ve used 2 of those forever when shooting cuff links. They were like $45 each and they can bend any direction, you can control the power of the light and they are Omni so your replcation sun light and seeing every wave length.
here’s the link to amazon to see what I’m talking about
Edit: Found the link
If you're just shooting photos, you can't beat the Alien Bees B400/800 lights. You can get them for less than $300, and they are champs. They will last forever. Lots of photographers swear by them. They were what I used for years, before upgrading. Since you're shooting jewelry, and you may be asked to get some video, These LED panels from Falcon Eyes are really good all-around lights. They can be used with or without diffusion. They are adjustable from 1-100%, and can be mounted on stands or placed flat on a wall. They weigh almost nothing, and are easy to use in the field. I own 2 of them that we use in our everyday production light kit with several other Kinos and LED Fresnels. The fresnels we use are CAME-TV Boltzen 100w Fresnel Focusable LEDs. They are less than $300 per light, and work great as well.
I use these: MyStudio AL2-2 5000K"Daylight" Fluorescent Photography Lighting Kit Accessories - Dual Bulb Accent Lights (Set of 2) https://www.amazon.com/dp/B007SHJJV4/ref=cm_sw_r_cp_api_i_D1IzCbW09M8AS
Check out this lens. I picked up one recently and actually really like it. It’s going to be all the stuff that everybody said about the 50mm lens but for a crop frame sensor like yours.
Canon EF-S 24mm f/2.8 STM Lens https://www.amazon.com/dp/B00NI3BZ5K/ref=cm_sw_r_cp_api_OdiaCbGEFZ8MT
If I remember, I think I bought a stand that has an adapter on top to hold lights and there's a hole to slide the umbrella into. I forgot to put that on the above list, so I'll have to see if I can find a link to it.
Edit: this is basically the adapter that sits on top of the stand. I'm pretty sure I bought a stand with the adapter included, but this at least shows you what it is and how it attaches to a basic stand.