
What are
/r/sewing's
favorite Products & Services?
From 3.5 billion Reddit comments
The most popular Products mentioned in /r/sewing:


The most popular Services mentioned in /r/sewing:
Etsy
MasterClass
Instructables
Facebook Marketplace
Walmart
Omni Calculator
eHow
Barnes & Noble
Alibaba.com
Google Photos
IGTV
Aliexpress
Shutterstock
The most popular Android Apps mentioned in /r/sewing:
The most popular VPNs mentioned in /r/sewing:
The most popular reviews in /r/sewing:
I guess I need to add a detail comment? Not sure what though. Self drafted pioneer outfit to make fun of PG&E. Made it in 5 hours. No idea what kind of fabric it was, I got it in a free bin. It was very easy for me to make as I’ve been sewing over 10 years regularly, learned 15 years ago. I hated making the bonnet and I think if I were to go back and use a pattern that’s what I would use. This was my main inspo, along with Little House on the Prairie. GRACEART Women's Pioneer Woman Costume Colonial Dress Blue 18 https://www.amazon.com/dp/B07L2X45FP/ref=cm_sw_r_cp_api_i_vypTDbHZJFH76
I hope this helps my post get back and not filtered!!
I totally agree and wanted to add for pvc, leather, or unpinable materials just use clips! Either cheap binder clips or quilting clips like these Clover ones. I used to work in a leather sewing shop and we use clips if we needed them at all. Really got used to sewing things without pinning.
https://www.amazon.ca/Clover-Wonder-Clips-Standard-Size/dp/B004ZKPX8A
It's good to avoid things that can gum up your machine. Useful in a pinch or really tricky things but good to try to just sew it the old fashioned way and develop your skill at holding materials with your hands.
The professional cutters I work with just use weights and pins and they make world class costumes for film and theatre. Just takes practice.
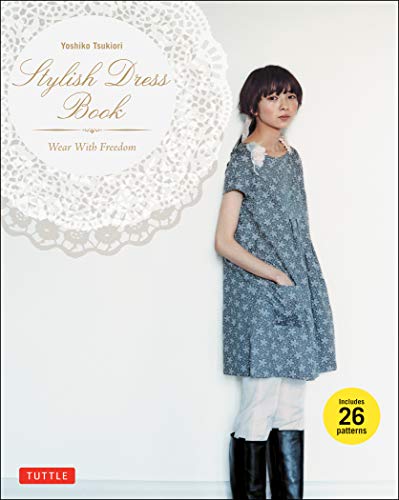
I made this for one of my uni classes, this is the sample although anything that’s pink will stay in the same material. I drafted this myself with instructions from my prof so I can’t really post a how-to but I’ll try to find the book she used! I included the technical so it was a little bit more clear ✨
Link to the book: https://www.amazon.com/Bare-Essentials-Construction-Drafting-Lingerie/dp/0983132860
Also just Incase someone wanted the link for the petticoat!
I bought a Klutz Mini Animals craft kit and customized this little alpaca for a christmas gift. He is very fancy! He's made of handstitched felt, embroidery thread, and poly fill. Kit link is below.
Klutz Sew Mini Animals Sewing & Craft Kit https://www.amazon.com/dp/1338106449/ref=cm_sw_r_cp_apa_i_Jut9DbB06EEGZ
Sweet something that I can help with! My parents used to own a fur and leather business and my dad taught me how to repair a lot of different things. You'll need some leather glue. Places like Tandy sell it but I'm sure you can get it on Amazon. I'll get a link for you shortly but I'm in mobile.
You'll also need another price of similar colored leather about the size of the hole. I'm not sure where this spot is but I feel confident that since you're on r/sewing you can fix up the lining, because you'll need to open up an area nearby to get behind the tear. Cut the leather to a piece a little bit bigger than the hole and place it behind the tear.
Add some glue in between the two pieces and then paste the torn part back on top. You'll need to use something to push the edges together closely, a seam ripper or tweezers would work. Also put a tiny bit of glue in the rift between the two pieces and smooth it out with your finger. After you let it dry, you can fix up the finish a bit with spray (which I will also find a link to) but be careful because black isn't black... you don't want a big spot with a different shade. Hope this helps! I'm happy to answer more questions if you have them and I can try to find photos too, I know I took some of the process at some point.
Edit 1: Fiebings makes the best leather stuff: Eco-Flo Leathercraft Leathercraft Cement, Tandy Leather 4 Ounce https://www.amazon.com/dp/B003W0GFTU/ref=cm_sw_r_cp_api_dXhrybR140A4C
Edit 2: My dad and I always used Colorbond. They have a color chart you can look at and I know he called them a few times and they have great customer service. http://www.colorbondpaint.com
$150 is a good deal. Mattress foam isn’t cheap and then you have to figure out a frame to put your foam roll on. Consider this instead. Cheaper, more comfortable and you can deflate it and make it disappear when not in use.
Braza's! Basically any bra tape that you find works best for you. Braza has the teardrop and shelf. I basically cut and mold. Have to be careful with these ones because any lines showing from the tape can show on the outside. There are tons of options on Amazon, though, so I'm sure you can get something smoother and maybe with some padding if you want it. I just found these stay on after all night of sweating/dancing. Be careful taking them off, and probably test on your skin first? I've found a few times that either I took it off too fast, or I had some reaction to the tape (I have fairly sensitive skin). It doesn't stop me from wearing it, but just a warning.
Thank you so much! :)
I ordered these soles from Amazon and the paper pattern came with it. Maybe you can find something similar where you're from?
Or maybe have a look at Youtube or Pinterest? I am sure there must be some free patterns there! Good luck!
I've found that double sided sticky tape is great for placing a zipper on fabric.
P.S. That fabric is gorgeous.
I present to you the magnetic seam gauge.
I just place where I want the edge of the fabric to be, and voila!
I used some cotton fabrics I got from amazon in bulk. I watched a few YouTube to learn how to sew the scrunchies with my mom giving advice on how to set up the machine and other tips/tricks. I still am a beginner so I had some gaps in between the seams so I hot-glued the rest. I’m afraid that I don’t know if it is very reliable to stretch the elastic or putting it in the wash, but with time I will improve!
Here is the fabric I used: Vintage Floral Miniatures Jelly Roll Collection 40 Precut 2.5-inch Quilting Fabric Strips https://www.amazon.com/dp/B07L5ZM957/ref=cm_sw_r_cp_api_i_j-RdEb4HZGN58
Hi! i bought this snap-setter from Amazon. It was my first time using one, it was a bit finicky trying to set them the first few tries. I've only used it once though, maybe after a few tries I can give you a better review.
It’s a gift, I get green tea from japan with packages occasionally. That is roasted buckwheat tea.
Edit: Amazon reviews: Dong Suh Korean Tea (Buckwheat Tea (메밀차), 50 TB x 1 Pack) https://www.amazon.com/dp/B07DY4NZX7/ref=cm_sw_r_cp_api_i_PZbsCb2RTRVGF
Are you trying it again because you think you messed up on this one? You certainly did NOT mess up on this one. It's gorgeous! I wish I had the skills to do it. Maybe I'll try that tutorial you linked. In any case, it's definitely a job well done on your part :)!
My grandma on my dad's side was full Japanese and told me about this style of bodice and mentioned Tomoko Nakamichi's (the creator of this style of bodice) book called Pattern Magic way back in 2010 when the book came out. She bought the book but I have no clue where it went after she died. My grandma wasn't a seamstress by trade but she did enjoy sewing and would always support Japanese designers lol. I don't know how she heard about Tomoko Nakamichi's book but I'm glad she did so I could share it with you years later lol.
Dog's are not the only household pets that can be used for crafting. I introduce you to Seattle City Library least checked out book:
https://smile.amazon.com/Crafting-Cat-Hair-Cute-Handicrafts/dp/1594745250
She's 4. I put the sew safe presser foot on the machine. It has high sides so you're less likely to sew a finger.
You can get a guard for sewing machines to keep fingers away from the needle. I like the style by Clover best.
It's really not that common to be stuck by a needle when machine sewing. I think it is more likely when hand sewing. It is the pins that are pokey. Use clips or tape instead of pins to get around that.
Nice job! I like the smooth drape you achieved at the bust.
And if you want even thinner spaghetti straps, since you're kind of limited to the width of your safety pin, this cheap tool will do it easily :)
https://www.amazon.com/Dritz-647-Loop-Turner/dp/B005570Z9O
If you don't sew (and no offence, but asking what kind of string you need suggests you don't, lol) you'll want to find an iron-on mending tape, something like this - you iron it onto the inside of the shirt, over the tear and it'll hold it back in place.
Sure!!
I did get a lot of people asking for commissioned pieces but then scoffed at the price. That dress was 8 layers of skirts, including: mesh ruffle on cotton, lame, many layers of tulle and poly satin. Not to mention theres boning in corset top to keep shape on the bottom and lots of crystals on the drape. A ton of work went into it and it drives me crazy when someone tells me it's not worth paying me for my time... sorry, end rant lol.
Couldnt find the exact links (dang phone) but these are pretty dang similar. Just different sizes from what I used.
For the top: https://www.amazon.com/dp/B01GYP7M82?ref=yo_pop_ma_swf
For the bottom: https://www.amazon.com/dp/B07FD8ZKQM?ref=yo_pop_ma_swf
I splurged and bought these rings & sliders! They're more sturdy than the plastic variety
I am not KamikazeButterflies, great name. but I will recommend Fast Fit by Sandra Betzina She has fixes for most of the common fitting problems. The thing I think she does the best is she describes the fitting problems in easy terms. Like, if your pants dip down when you sit you need this adjustment. I think beginners find it easier to understand then other fitting books.
It's available on Amazon, sizes 8, 10, 12, 14, 16.
Sorry, I wasn't clear - getting to speed without continuing to catch the fabric or miss the catch of the thread is the steep learning curve. The process itself is crazy simple, the execution (especially with tricky fabrics) is the hangup. I'm still trying to get just the hang of it for beading/ sequining larger projects and I'm not confident enough to plan to use the technique yet. Good on you for getting the equipment and I hope you have an easier go with the process!
Also, when you do try the running stitches, there's a couple historical/ couture technique tricks to make the thread stronger and less prone to tangles/ snagging. Use silk thread (it can be bought at Joann, just takes a bit of hunting) and then run it through a beeswax puck. The beeswax helps to hold the fibers of the thread together and prevents wear on joints/ rub spots (and protects against any beads/ sequins you need to sew next to/ through). When the beeswax warms up with wear on the body, it continues to strengthen the fibers by permeating them a bit more, so they are less likely to snap or fray even when used in a very delicate manner.
I usually pick mine up from our local RenFaire Honey Shop, but you can get them online (I think in Joann too, but never really looked for it): https://www.amazon.com/Dritz-622-Beeswax-with-Holder/dp/B00AQ7CVPO
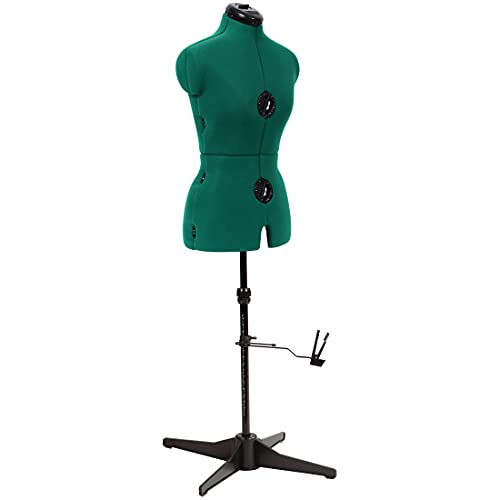
That's very thoughtful! If you can, try to find one that's pinnable (not just a hard shell with a fabric cover). They're way more useful- she can stick pins into the body of the dress form to manipulate fabric easily. They'll look something like this listing, but you should be able to find cheaper ones if you look around.
One thing to keep in mind is that dress form size numbers are not the same as women's clothing size numbers, so find a measurement chart for your dress form's brand and go by that. It's also likely that you won't find a form that has your girlfriend's exact measurements. It is common for people to add their own padding to dress forms.
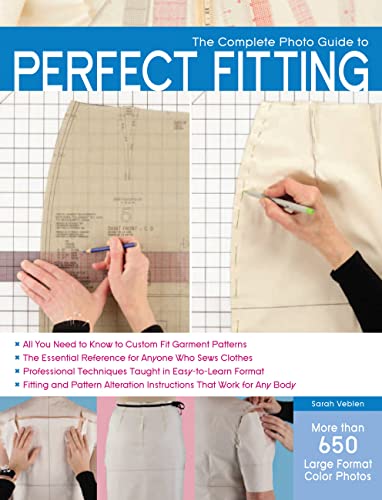
One fun thing to do is take this dress, make a pattern from it, and then make some tailoring adjustments for your next dress. With each one, you will learn new techniques. It's sort of fun to learn how your body fits clothes. This book is very pattern-oriented, but it is amazing for figuring out "fit issues". Excuse all the dorky looking clothes and models. https://www.amazon.com/Fit-Real-People-Clothes-Pattern/dp/0935278656
This Pattern from Etsy. :) It's a great pattern for the price, easily modified. I can whip these up in ~30mins. Great practice for newbies! Happy to hear what you threadditors think!
Edit: So this has officially become my 2nd highest post, behind a pic of my son in mismatched clothes. Glad you like them! :D
Could make or buy blousing straps like the military uses. There are skinnier options as well but husband says these are more comfortable for all day wear
To solve the pricking yourself with pins problem-- try sewing clips! I bought these from Amazon and I think they're great. I find pinning stuff can sometimes distort the fabric, and you can't pin some fabrics because it leaves holes. They don't totally replace pins since you can only work from the edges with these, but they are really nice regardless!
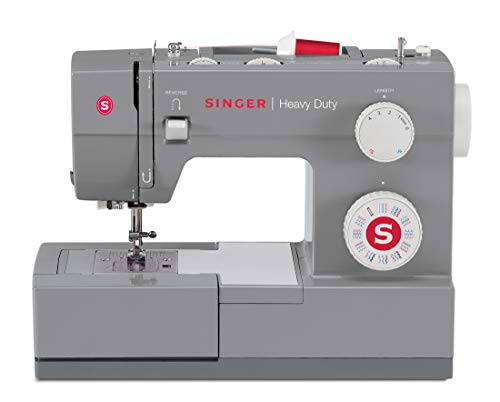
She needs class 15 bobbins. It’s possible the ones she has are actually slightly too short. Even plastic shouldn’t be “popping up” if they are the right size. I’m assuming you’re in the US so here’s a link to Amazon for the bobbins she needs. If she sees regularly she’ll appreciate a decent number as it’s a pain to be winding bobbins constantly when changing colours.
Additionally, old machines are almost always better than the new ones (especially the reasonably priced ones). Consider watching this and cleaning it out and oiling it (with sewing machine oil) for her. I’m sure she’d appreciate it!
I am really bad at picking clothes that fit me just right, off-the-rack clothes never really fit me and I don't have experience yet to be able to make my clothes on my own. So I looked up "tailoring" in our collection, picked a book from the shelves and got to work some of the clothes I thought were "fine"!
- Shirt - Thrifted "Faded glory" shirt
- Sewing machine - Singer Quantum Stylist 9960
- Book - Simple tailoring and alterations by J. Francois-Campbell
Sure, it was basically a mistake: I sewed a strap into the shoulder seam there, but the seam itself is the kind you’d use on jeans, so it has a “direction”, and the strap ended up extending backwards instead of forwards. I decided I kinda liked it though, so I used a jeans button to hold it in place.
The strap has a clasp on the end I found on Amazon (I knew I wanted to put a lot of these sorts of details on the suit, so I just bought a bunch of different ones that I thought looked cool and added them when it seemed like a good idea):
TRIWONDER Enlarged Mouth Clips Hooks for Paracord Sling Outdoors Bag Backpack https://www.amazon.com/dp/B01IXWUXGW/ref=cm_sw_r_cp_api_glt_fabc_RHZFGBPW8WWW88WM4Z4D?_encoding=UTF8&psc=1
I got the fabric from Joanne's last year, the bats glow in the dark! I didn't have an official pattern, I cut apart this shirt as a template: https://smile.amazon.com/gp/product/B06XQJRJVH/ref=ppx_yo_dt_b_asin_title_o04_s00?ie=UTF8&psc=1
I usually draw and cut a paper pattern out with the dimensions found in this calculator , then I just slice down the paper pattern to make another seam until you can fit all the pieces onto your fabric. I REALLY suggest making it out of paper first especially if you're working with limited fabric since it allows you to maneuver the pattern to get the most out of your fabric.
Pro-tip, if you have to add seams to make the pattern work with your fabric, try your best to keep one edge of each pattern piece on the straight grain. Seam one straight to one bias for stability and your skirt won't stretch out as much as if you did bias to bias.
As a person who wears skirts quite a bit, I caution you on this. Once the fabric flares away from the legs, it is no longer constrained by the body. It has a momentum of its own.
Watch this video and pay attention to how her legs push the fabric away from her behind her as she and other parts of the fabric are moving forward. Think about how when you’re driving and stop suddenly the brakes stop the car but not you, and you go hard against the seatbelt.
Now imagine a pocket mid-thigh and whatever is in it slamming against your thigh twenty times a day, especially as you go up stairs. It would probably not bruise, but it would be annoying as hell.
Very nice! Gonna need a presser foot (or a few). That has the old fashioned Singer snap shank, but would recommend a modern style one (like this https://www.amazon.com/KUNPENG-1PCS-98-694886-00-PRESSER-HOLDER/dp/B077GLC7MM/ref=sr_1_21?crid=2UUGRLUM414VW&keywords=low+shank+adapter&qid=1667505962&qu=eyJxc2MiOiI0LjAyIiwicXNhIjoiMy42NyIsInFzcCI6IjMuMzcifQ%3D%3D&sprefix=low+shank+adapter%2Caps%2C77&sr=8-21) and a few feet (at a minimum, get a zigzag foot, a straight stitch foot, buttonhole foot, and a zipper foot. Overcasting foot and button foot are also good to have handy: there's TONS of feet for all different kinds of uses!).
Also second what people are saying about taking it to a repair shop for a tuneup, cleaning, and oiling if you don't feel comfortable doing it yourself (lots of YouTube tutorials for old machines if you're mechanically inclined, not super difficult). It should last you for many years!
I swear by this marker. Cricut’s fabric marker has quickly become a favorite of mine as well. I just use sewing chalk for darker fabrics.
I got the pattern second hand but here it is on Amazon: https://www.amazon.com/Butterick-Patterns-B5497-Misses-14-16-18-20/dp/B005QSRSSI
Here's the flamingo print too in case anybody is interested :) http://www.joann.com/novelty-cotton-fabric-44in-flamingos-on-cream/15518749.html
We keep getting questions like this, and it's always a scam site.
Look, if an online store just popped up yesterday out of nowhere and claims to have a gajillion sewing machines in stock which are sold out everywhere else and is selling them for an absurdly low price... use your common sense. The addresses they give on their contact page are shopping malls. There is no evidence of "Pacific Root One" existing as a company outside of this page (and some other dubious pages, all recently created) despite it allegedly being founded in 2010 -- because it doesn't exist. (Edit: also, their "reviews" are scraped from BestBuy.) This is 100% fake.
Picture 1 is the costume I made and picture 2 is the actual costume from the film.
I made this costume from a self drafted patterns. I used a book called Metric Pattern Cutting for Menswear by Winifred Aldrich (https://www.amazon.co.uk/Pattern-Cutting-Menswear-Winifred-Aldrich/dp/1405182938/ref=mp_s_a_1_1?dchild=1&keywords=winifred+aldrich&qid=1617566759&sprefix=winifre&sr=8-1) For this costume I drafted a historical frock coat, trousers waistcoat and shirt. I drafted basic blocks from this book and adapted them to what I needed.
The jacket is made from a checked wool and the trousers are made from a striped wool. The waistcoat is made from a black and silver floral brocade and the shirt is made from turquoise cotton. All these fabrics came from Minerva crafts. The neck tie is a black Liquorice allsorts pattern cotton that came from Etsy.
The trousers feature embroidery on one of the legs and the coat and waistcoat feature pockets.
This costume was made for my final major project at university and it turned out really well and I am sooo proud of what I accomplished with this costume!
I got it off of amazon here. It is an investment for sure, but something I'll use for years. Fully adjustable and really really helpful when you're making something for yourself!
I've seen pre-made zippered pockets you can sew into the inside of clothes. Here's a tutorial for making your own: http://blog.fehrtrade.com/in-progress/795/a-hidden-travel-pocket-tutorial/
Also I just discovered that if you search "secret cash pocket" on Amazon you will find all kinds of inspiration for places to add pockets
You've got a MAJOR head start since you know how to sew and make paper patterns already!
Inkscape is a free program that loads of seamsters are using to digitally create and manipulate their own or purchased PDF patterns. Marta Gvozdinskaya has a lot of YouTube videos showing how to use it. I started working my way through the basic instruction manual for Inkscape, so I could be more familiar with what Marta was teaching, but I got a little tired of learning computer stuff when I really wanted to be sewing.
I'd try the thin latex or nitrile coated knit gardening gloves. You get to keep a lot of the touch sensation and dexterity but all the working surfaces would be way too smooth for the velcro to snag. Or suck the moisture out of your skin.
ETA: something like these
I make this bag inspired in this video from EasySew on YouTube:
DIY CROSSBODY & SHOULDER BAG | DIY BAG | ZIPPER BAG BAG SEWING TUTORIAL
I used old jeans for all the exterior, interfacing, and quilting cotton for the interior.
My machine is this one:
Have you tried getting knee pads? And personally I have one of these
Madam Sew Rolled Hem Presser Foot Set – 3 Piece Wide Hemmer Foot Kit Includes 1/2”, 3/4" and 1” Presser Feet – Compatible with Singer, Brother, Babylock, Euro-Pro, Janome and More https://www.amazon.com/dp/B07ZS1MP7B/ref=cm_sw_r_cp_api_glt_fabc_A1YTJXM5GJ4RR2TERF5Y
These were made from a self drafted patterns. I used a book called Pattern Cutting for Lingerie, Beachwear and Leisurewear by Ann Haggar to draft the basic patterns and then adapted them to get the style I wanted Book: https://www.amazon.co.uk/Pattern-Cutting-Lingerie-Beachwear-Leisurewear/dp/140511858X/ref=mp_s_a_1_1?dchild=1&keywords=ann+haggar&qid=1619364448&sr=8-1
The hooded top is made from a maroon jersey that came from Minerva Crafts and is a boxy style with a hood.
The trousers are made from a maroon and white gingham cotton and have an elasticated waist with a centre front zip.
The night shirt os made from a rabbit print brushed cotton from fabric land Fabric: https://www.fabricland.co.uk/product/brushed-cotton-animal-print-biscuit-bunny-saxe-blue/
The night shirt features and collar and button stand.
I am a pretty experienced sewer so these were very easy to make and only took a few hours to make.
If you knit or crochet, they're also used for blocking things after they're washed so that they will become and remain the right shape. These pins are much stronger than straight pins and they're pushed into blocking boards that are much like cushy play carpet squares for children.
I stretched a friend's wool sweater that she'd accidentally thrown in the dryer and shrunk into a size small back into a large by letting it soak in Eucalan and cool water overnight and then rolling it into a fresh towel to get the excess water out, and then stretching the hell out of with the help of T-pins and welding TIG-rods that I sanded the points off (way cheaper than blocking wires.)
These are the blocks I like best Once it dried, it was wearable once again.
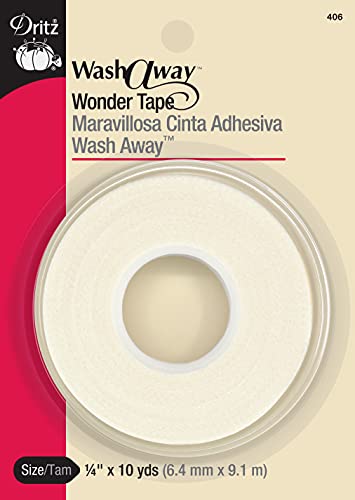
My top tip for sewing with stretchy fabrics is wash away tape. The name brand is called Wonder Tape. Stick it on the seam line and it will hold the pieces together AND prevent them from stretching as you sew. It washes out with water.
I think it is this one, I'm out right now. Sulky KK2000 The benefit is that you would only need to air out your mat to clean it. Disadvantages is that it only lasts a few days and that it is more expensive. Look for adhesive sprays that only last a few days and don't need to be washed to remove the adhesive, the adhesive naturally dissipates. I think they are used more in machine embroidery than quilting like the longer lasting sprays.
This one is from Amazon! I was happy to find it at this price, since it is normally quite expensive. I've worked with better quality, but this one is good for $40. https://www.amazon.com/dp/B0127925BS/ref=cm_sw_r_oth_api_BG8myb4J4Z7JR
I have a desk that goes from sitting to standing because I love to stand and sew. It's amazing! You could look into that. They have them at Ikea but I got mine from Amazon and it's super sturdy and large and the crank works great.
I bought these 8" Gingher and couldn't be happier. Was prepared to spend 3 times what I paid for them. For the price on Amazon, they can't be beat.
A crinoline would be overkill I thing, but a petticoat, absolutely. From pictures I've seen, it doesn't seem too complicated and I think this pattern will do just fine.
Good luck !
HAITRAL 60-Spool Thread Rack, Wooden Thread Holder Sewing Organizer for Sewing, Quilting, Embroidery, Hair-braiding https://www.amazon.ca/dp/B07MM57XJK/ref=cm_sw_r_cp_api_i_7poeFb43QSEZT
But i stained it with wood stain as well :)
The original dress the pattern was based off: https://www.amazon.com/Hacos-Womens-Medieval-Costumes-Renaissance/dp/B07K2VZVXS#immersive-view_1580846715191
(Although they are using the pictures of a beautiful dress to advertise a much cheaper looking garment, keep scrolling through the pictures to see).
Materials: crushed velvet, brocade, georgette (sleeves), all purchased online through Amazon.
Skill level: as I said, this is my first big project but I'm not really a beginner, so 🤷♀️
This took a few months to complete but I was mostly only doing it during my weekly sewing lessons, which are two hours each, so I'm not sure of exactly how long it took.
That’s such a great gift! I have the Brother CS6000i and love it. It comes with several attachments and accessories, has a lot of stitch options, and sews smoothly and easily. It’s way under your budget (depending on where you purchase it from) so you could probably find something even fancier / more powerful.
https://www.amazon.com/dp/B000JQM1DE/ref=cm_sw_r_cp_api_i_WDJNCbJ0CS4MK
Okay, as with any yuge project, you need to break it down to manageable bits. Wild guess, you are probably not going to start a fashion brand before the end of the year. But what are the steps to getting there? List the big goals to get there, and then break those down into do-able steps. After all that typing (if you do it on the computer, it's easier to add more stuff later) you might even feel like doing something. If not, it's a guide.
Apart from that, my best tip is the same as for exercise, cleaning, or getting any work done - just do five minutes. And then if you really hate it you can stop. But quite often you'll get into it and do more. Fancy version of that is called the pomodoro technique. There are lots of other writings about motivation, but these two strategies of breaking it down and then starting a little bit have taken me a long, long way.
I think it’s damask. Is it a reversible pattern? If so, it’s likely damask. This article might be helpful! (Jump to the part of damask vs brocade) >> https://www.masterclass.com/articles/everything-to-know-about-damask-fabric-history-characteristics-uses-and-care-for-damask#how-is-damask-used
I’m teaching someone to sew and this is my first time using a stretch knit fabric, so we are both learning. We chose this pattern. Total of 6 pieces, instructions are clear and easy. The best tip I could give you (thanks to my daughter) is Wonder Tape has made it much easier; double sided tape that removes the need for most pinning, adds rigidity to the fabric, and doesn’t gum up the sewing needle.
I’m a slow, achy old woman but my daughter recently introduced Wonder Tape.
Double sided tape that washes away. It gives stability to fabrics and doesn’t gum-up the needle. Very little pinning and I apply it to the fabric while standing at my table.
Try a different closure. When you want to hide it try one of the flat style like these
http://www.walmart.com/ip/Dritz-SKIRT-PANT-HOOK-EYES/55211797
This kit from Amazon has the flat closures as well as snaps
FASHIONTOAD 50 Pairs 3 Styles Skirt Hooks and Eyes Sewing Hook, Sewing Snaps Clothing Fixing Tools with Metal Snaps Buttons Fasteners Press Studs for Trousers Skirt Dress Sewing and Crafting https://www.amazon.com/dp/B082TVK866/ref=cm_sw_r_cp_api_glt_fabc_NPCXK1BG543A7W72VBMD?_encoding=UTF8&psc=1
I made these from a self drafted patterns. I used a book called Metric Pattern Cutting for Menswear by Winifred Aldrich (https://www.amazon.co.uk/Pattern-Cutting-Menswear-Winifred-Aldrich/dp/1405182938/ref=mp_s_a_1_1?dchild=1&keywords=winifred+aldrich&qid=1617566759&sprefix=winifre&sr=8-1)
The shirt is made from white satin from fabric land and features a collar and button stand.
The grey top is made from a ribbed jersey from fabric land and features a collar and centre front zip.
The waistcoat is made from black and silver floral brocade and polyester lining from Minerva Crafts and features 4 pockets in the front.
I am a fairly experienced sewer so these was pretty easy to make and was all loads of fun to make. My boyfriend absolutely loves them!!
yup: https://www.amazon.com/Schmetz-Sewing-Machine-Needles-705H-J/dp/B01EQJ1EGY,
there are also needles for lighter fabrics, so, picking the ones ou need for your project helps a lot in the long run
It's a type of hemstitch. You can learn to do it on your sewing machine by consulting Carol Ahles book, Fine Machine Sewing. Beyond learning how to do machine heirloom techniques like this one, this is the book that taught me how to sew more accurately and the effect fabric grain has on seams and topstitching.
Wonder tape is seriously magic. It is a double sided sticky tape that can be sewn over, and washes away with water. I bought it for hemming a chiffon dress, but now I use it for curved hems, hemming exactly 1/4", or even in place of pinning a slippery fabric.
You can use it on knits as long as you use a stretch stitch over it, because it washes away and the fabric will stretch again.
Sergers are, in my experience, harder to come by cheaply than sewing machines. I almost never see them for sale used (and probably wouldn't buy one that way if I could, unless it was from a store and came with a warranty).
The cheapest ones go for around $180 on Amazon but honestly, price should be your second consideration after personal preference and features. Mine was around the $200 mark but had I known how much I'd like the capabilities, I'd have gone for one in the $400-$500 range instead.
I'd recommend trying a few out in a store if you can, and saving up for one if possible. If you try it and love it like most people do, you'll probably want to view it as making an investment that you'll keep for a while and get the best you can reasonably afford.
On the other hand, if you really just want a relatively inexpensive one, I'm fairly happy with mine: SINGER 14CG754 ProFinish 2-3-4 Thread Serger With Machine Intro DVD https://www.amazon.com/dp/B003H3J50S/ref=cm_sw_r_cp_api_5z8gzb4VSAQE6
Do you mean the wire hinged piece? It looks like it is meant to keep your cord lifted and out of the way.
Nope, I already checked myself and that part, according to amazon is a hanger bar for hanging freshly ironed shirts. Pics in use in the link.
It's called a bow tie baseball cap, or just a baseball cap with a bow in the back. You can find lots of free patterns online for baseball caps and then, instead of the stiff band in the back, just make tie ends. There's also this pattern: https://www.amazon.com/Kwik-K3481-Sewing-Pattern-S-M-L/dp/B000PJBSRA
Or McCalls 6521 shown on the same Amazon page.
You need a class 15 bobbin case. If you are in the US, amazon has one for $4.
https://www.amazon.com/MACHEE-Sewing-Machine-Loading-Machines/dp/B0042CO7Z6/
or a pair for $7.
https://www.amazon.com/Sewing-Machine-Bobbin-Loading-Machines/dp/B06ZY7SBBV
I've got a machine I love. Super easy to use and thread. Computerized so you just put in the number. My only beef is it doesn't have a thread cutter (which is really just a teensy bite out of the metal to snap the thread so WHU DOESN'T IT HAVE ONE?
Brother, Computerized Sewing Machine, XR9550PRW, Project Runway Limited Edition, 110 Built-in Utility, LCD Screen, Hard Case https://www.amazon.com/dp/B06Y4BCRWG/ref=cm_sw_r_cp_apa_UQj6BbPV31P2H
I was running the same budget as you and after a while of Amazon searching I was happiest with this purchase
Amazon has a lot of the tools for very cheap! I got my 24x36 cutting mat from them for $26 and it even came flat and not rolled up!
It was quite strange, really. I started and just seemed to know what I was doing. I'm convinced that my grandmother whom I never met passed down her sewing skills in my DNA. You can see more of the Moulin Rouge dress here: https://www.etsy.com/listing/13464407/moulin-red-smoldering-temptress-satine
I went to the mall yesterday and looked at Christmas décor items. The pillows were really appealing, so I came home and started to make a Christmas pillow. It features a large octopus, which will be wearing a Santa hat in the finished article. Here it is so far: https://www.instagram.com/p/99I2N4OqFi/?taken-by=rollingincloth
Here's the pattern and instructions
My drawing skills are about as good as my handwriting so let me know if you need any deciphering! The one I made in the photo was for size 0-3 months; I've expanded the pattern up and down to fit newborn up to 12 months (lots of babes around me currently, all looking smart in caps!).
A pic of the hat sans cat is here
From a fabric perspective, anything stretch will do. Old t-shirts can look really colourful and are lovely and soft, so remain my favourite. If you use a sewing machine for this pattern then sew in zig-zag and press all seams open as you sew.
If you make up the pattern, it would be great to see your work so please post! I love the inspiration I get when reading this sub - thankyou you wonderful talented people! :)
As said, clips are a great alternative to pins, though I personally find them a little clunky for hand sewing since I find they weigh down the fabric more. As for caps for pins… I don’t know if an actual product exists, but I imagine those rubbery earring backs that tend to come with hook earrings would work? like these
Example link. You might have to sew belt loops on the sides of the dress to keep the belt in place as it's a little heavy, but they are very sparkly and pretty.
It’s similar to this one .
Will come? LOL
I sometimes I need my magnifying glasses with headband (similar to this: https://www.amazon.com/SE-MH1042C-Multi-Power-Head-Magnifier/dp/B000RB574Q/ref=sr_1_40?dchild=1&keywords=magnifying+goggles+with+light&qid=1625689427&sr=8-40) myself.
Very useful! Not the prettiest thing to wear, but who cares?
Just a pair of shelves I got off Amazon... Apparently we buy everything there! 🤣
The wood is really light (like balsa wood) but doesn't feel flimsy. I think it'll be okay.
My husband used 50 lb drywall anchors. The machines only weigh maybe 10-12 lbs so it's perfect.
After we put them up I realized we could have put them lower so that when we moved the table against the wall, the machines were hidden. I kind of like them on display, though! Just make sure to put them somewhere you're not going to clock your head on them.
I searched high and low for a year on the internet to find this top that I had imagined in my head with a high neck and a built in shelf bra. Finally found it in leotard form! If you don’t mind taking off your whole outfit to go to the bathroom or sewing on snaps at the bottom, here’s a link☺️
You can trim away the loose threads if you want. You can get a cleaner cut using a buttonhole chisel and block or by running a line of Fraycheck down the middle of the uncut buttonhole and letting it dry before you open the hole. I like using small sharp scissors to open up the buttonhole if it is large enough.
The pattern is the free American Duchess 1910s wrap cape, with an extension at the back so it buttons up instead of tying with ribbon, and a slight alteration for more bust room. I have 2 hidden pockets, try to guess where! embroidery pattern is from a 1960s simplicity embroidery transfer, Simplicity 5768. The outer layer is wool, and the lining is synthetic (not sure what exactly) with little sea shells on it. Fabric as well as the trim was from fabric depot in Calgary, Canada. The collar and hem have horsehair canvas, the collar is padstitched. The horsehair canvas was from fabricland. Everything else I'm wearing is thrifted so not sure about what brands!
Detailed Construction Comment: I used some cosplay fabric I found at Jo-Ann's for the sleeves. It was not fun to work with. But eventually, it cooperated enough. It did make the sleeves poof out more than I would have wanted, but I suppose it still fits the look. The only downside is it's very hot. I also didn't see one of the seams was suppose to be 3/8th allowance, so I had to adjust the pattern slightly to accommodate. I will probably make this outfit again but in a non-spacey-looking fabric. I really liked the bottom cut of it.
For the helmet for those curious, I bought a clear dome from amazon and drimmeled the opening larger (this way it still kept it's integrity) then I used high-powered magnets to attach the antenna so it's easier to travel with/i can easily replace it if needed.
My SO wears a lot of the Knocker brand boxers, but they aren't nearly as fancy. Fun colors, though.
I have taken to adding embroidery to them if they get a hole in them. So he has a few pairs with a heart, bee, egg, etc. on them as r/visiblemending . I figured I spent so much on my "sewing computer" I might as well put it to good use.
an ironing pad (because I don’t have room to put up the whole ironing board in my room AND sew)
snippy scissors (I don’t know what they’re actually called but I love them)
a light table (if you buy a lot of pdf patterns this makes it so easy to put them together, also nice for piecing).
I had this exact same blanket in my childhood home and I loved it. I'm assuming you have a similar sentimental attachment to this blanket but if you want to buy another one I found it on Amazon for a pretty decent price: https://www.amazon.com/Double-Blanket-Featuring-Decorative-Tassels/dp/B01H77IG7C/ref=sr_1_2?ie=UTF8&qid=1488168973&sr=8-2&keywords=Sun+blanket
Thank you! Mine was SO dirty with all kinds of soot or something that I couldn't see the decals on the back at all. But I did some online info searching and experimented, and got it cleaned up with gojo waterless hand cleaner. Mine is well worn, but still works great. There is a book that also helped me a lot : https://www.amazon.com/dp/1507500998/ref=cm_sw_r_cp_apa_i_q77wFb122NCFT my local library ordered a copy when I asked!
HAITRAL 60-Spool Thread Rack, Wooden Thread Holder Sewing Organizer for Sewing, Quilting, Embroidery, Hair-braiding https://www.amazon.ca/dp/B07MM57XJK/ref=cm_sw_r_cp_api_i_7poeFb43QSEZT
I stained it with wood stain as well :)
I got this Rowenta model for Christmas last year. It may not be quite the level you're looking for, but there are some fancier Rowenta models, too. It's a bit longer than your standard iron with an extra long and pointy nose for getting the little details. There's a blast-of-steam button that came in really handy for the 10 feet or so of pleated hem I just made.
Apparently we're both right. Looks like there is fine muslin and coarse. I have the kind that dhotis are made of in India, I think. Kinda krinkly like a bandage wrap. I didn't know muslin could be fancy.
I've sewn on printer paper before to get the hang of sewing odd curves on-the-fly and it was doable, but for something you want to last it's certainly preferable to have a heavier paper such as card stock or scrapbook paper. You might find this tutorial helpful.
I like this color wheel from Adobe. Sometimes I spend hours at the fabric store carrying around fabrics to see how they "feel" together, and then I get home and decide I don't like them, necessitating another trip to the fabric store to find something else. It's hard to pick fabrics that click with each other.
Yes, I can't wait! For those trying to watch outside of the UK (like myself), I recommend downloading a plugin for your browser called Hola - it's free and acts as a VPN to allow you to stream video content from different countries.
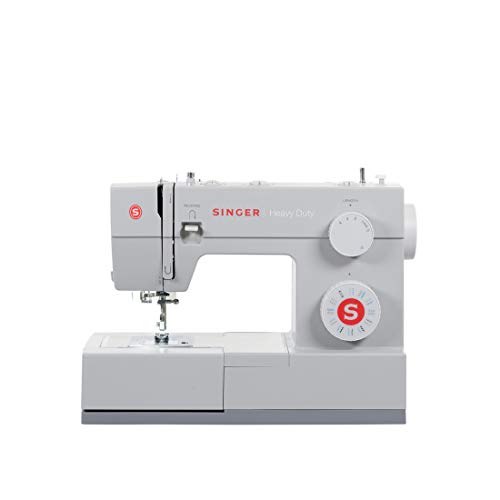
I’ve used this machine before and I’ve had good results. I don’t recommend sewing heavy fabrics with it but, as a beginner, I wouldn’t recommend that normally. Only thing though, originally when I bought it (may 2020), it was 120.00. So I’d look to see if this one is sold anywhere near you for around that price.
Other than that, I’d aim for a machine at least 100.00 but, no more than like 150-160.00 USD. I’ve used machines under 100.00 and I returned it in a couple hours after use. I also wouldn’t let the sales people talk you into that “industrial” machine they seem in the stores. I’ve used real industrial machines for work and school and the strength isn’t the same honestly.
I also personally liked ones that don’t need a bobbin case (ones that a built in one). Their easier to use since a bobbin case alone can act finicky if not under the right conditions (not put in correction, bobbin not put in correctly, tension is wrong, etc). Your gonna have a lot of work to do learning the sewing basics alone so I think putting in that extra couple dollars for a “built in one” (not honestly sure what it’s called) will save you some time at least.
The other thing is simplicity. Don’t get one of those fancy ones where it’s nearly all computerized. Just look for one where it has a straight stitch, zig zag stitches, and some decorative stitches. The one I suggested (if you can find it) isn’t to bad honestly as the computer is mainly used to change the stitch number.
This is of course from my personal experience.
So, I'm a quilter and have lots of experience with rotary blades. Sharpeners suck. However, the cheap bulk packs of rotary blades from amazon are just as good as the expensive brand names. I use these https://www.amazon.com/gp/product/B07875X3S4/ref=ppx_yo_dt_b_search_asin_title?ie=UTF8&psc=1
Im looking for a similar pattern since some time now, theres a jacket like that on the Lady_lancaster IG profile, but i can't figure out how to make this upside downable gimmick.
​
This image is from the Making the cut amazon store ( https://www.amazon.com/Levis-Unisex-Upside-Downable-Trucker-Jacket/dp/B08Z1Z611X?ref_=ast_sto_dp&th=1 )
​
Thanks to y'all :)
I've tried every high end iron known over the years, and none of them seem to last as long as I would have thought they should for the price. I finally figured, what the heck, buy an inexpensive one and if it doesn't last, no big deal. Well, the inexpensive one has outlasted and out preformed all the expensive irons I 've ever owned!
https://smile.amazon.com/gp/product/B071HFP57N/ref=ppx_yo_dt_b_search_asin_title?ie=UTF8&psc=1
Not OP but I think Simplicity 1356 with it reversing to pink (to match the cute boots) would be nice.