
What are
/r/ErgoMechKeyboards'
favorite Products & Services?
From 3.5 billion Reddit comments
The most popular Products mentioned in /r/ErgoMechKeyboards:


The most popular Services mentioned in /r/ErgoMechKeyboards:
Autodesk Tinkercad
keybr
Barrier
Microsoft keyboard layout creator
Excalidraw
TheTVDB.com
CadQuery
i3
Karabiner Elements
yabai
Onshape
Lobsters
Matrix.org
Nitter
Plotly
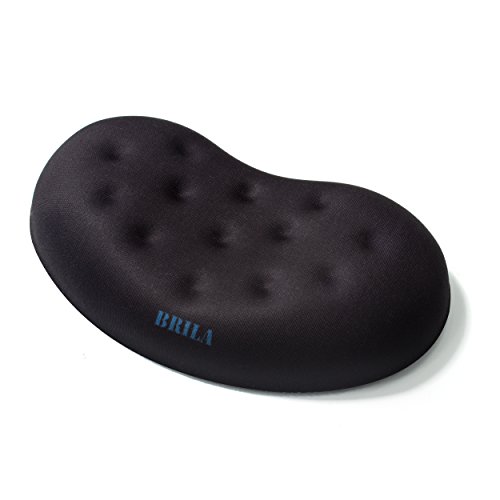
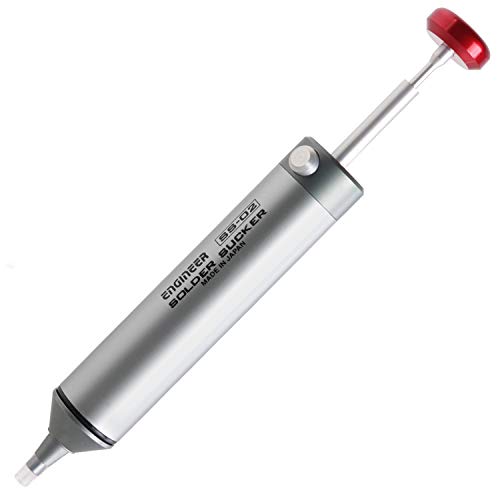
The most popular reviews in /r/ErgoMechKeyboards:
My advice? Buy a better solder sucker. I tried for a while with the cheap plastic sucker pump that came with my cheap-as-fuck soldering iron and I just thought I was bad at desoldering but in reality that plastic pump with the hard tip is a piece of junk. I got the Engineer SS-02 that so many people recommend and it's so much better it's nuts. I can actually desolder now.
On the other hand, if you're not in a rush you could also try to find someone with a desoldering station who could remove it for you way easier. Shipping it to someone else and then shipping it back would cost as much as the SS-02 though
it is a Sain Smart TS-100running IronOS. because of course a soldering iron needs custom firmware!
Thanks! I used these (the single-channel round ones) as feet for tenting so I was able to run the macropad cable through them
Thank you! This is a Kyria rev 1.4 from splitkb.com with gchoc switches and caps from mkultra.click. The cable is a USB-C cable from KBDFans.com.
The wrist rests I found on Amazon here: https://www.amazon.com/gp/product/B07XSFVN5H/ref=ppx_yo_dt_b_asin_title_o01_s00?ie=UTF8&psc=1
thanks, it looks more cream than the chalk grayish that you see in the product picture
https://www.amazon.com/gp/product/B08DBY1MFH/ref=ppx_yo_dt_b_asin_title_o01_s00?ie=UTF8&psc=1
I got it for 10 dollars because of some coupons but I still see it as good buy for 20.
The Microsoft Sculpt Ergonomic Keyboard is close in some ways but maybe not quite what you’re looking for. It’s not fully split, but there’s a little bit of separation and tenting, and it uses butterfly switches like on some laptop keyboards.
The Kinesis Freestyle2 actually doesn’t use mechanical switches, but the Freestyle Pro and Advantage do.
In addition to others’ points about mechanical switch options, if you like the shorter travel of your laptop’s keyboard, you could try a keyboard with silent low-profile mechanical switches (Kailh Choc is the most common low-profile switch). And on most switches you can add O-rings to reduce travel and dampen sound.
The main disadvantages of split mechanical keyboards are that they can get pricey fast, and prebuilt options are limited (especially for low-profile). Also a lot of them are 60% or smaller, meaning you have to learn to use layers and probably custom layouts—which is more powerful, but the learning curve can be annoying.
I like to put bike wheel weights in my keyboard case to make the board heavier. Helps a bit, but plastic is plastic. I like the sound of lubed filmed linears in them, especially after weights.
Edit: here's an Amazon link for the ones that I use, but be warned, they changed the adhesive lately, and I've been having to reinforce with super glue
I plan to add two of these: https://www.amazon.com/Glorious-Wood-Keyboard-Wrist-Wooden/dp/B08KSQ895Z/ref=pd_sbs_1?pd_rd_w=EKvZg&pf_rd_p=98101395-b70f-4a52-af63-8fac2c513e02&pf_rd_r=5BCFCQZ2WN4DDW9PC38T&pd_rd_r=c1b67fcf-6e62-491c-9f9a-7340fdbf3105&pd_rd_wg=5fL2J&pd_rd_i=B01NBGZIII&th=1works great with a lili58 pro for example, but this PCB shape seems to make it more difficult to fit
I used these rubber feet I found on Amazon:
https://www.amazon.com/gp/product/B07PDJ7T71/ref=ppx_yo_dt_b_asin_title_o00_s00?ie=UTF8&psc=1
Also, double check keyboard layout on OS level, you can do alot interesting things together with your physical keyboard.
In windows there is interesting utility called Microsoft Keyboard Layout Creator (MSKLC) Version 1.4. You can set multiple layouts on different layers. I have us english as default, with AltGrp I access additional Lithuanian letters and Russian phonetic, which I wanted ;))
Mech keyboard gave me a physical layout I wanted. Software layout, gave me possibility to type different languages without switching languages.
I know it's not exactly what you were looking for, but I simply just place my Planck EZ on top of my keyboard. I use karabiner to disable the Mac keyboard to prevent unwanted keypresses. I'm sure you could do something similar with an Atreus.
I might be willing to collaborate. I don't have a rev 4 pcb kit though. I did make a version of his case using tinkercad that I'm using for my latest build - check it out here: https://www.tinkercad.com/things/fti2FA2MAvz-hacked-together-iris-case ps: /u/wizarddata I hope you don't mind, please let me know if you don't want a publicly posted remix
Based on the new pcb which doesn't require a pro-micro, we'd probably want to drop the height of the base by a couple mm as well. Otherwise, you/we can probably tweak the position of the standoffs pretty easily.
I am not completely satisfied with my version yet, but have taken a pause after printing 6 or 7 iterations of the same thing. That's a lot of filament and time :-)
u/dovenyi is there a way I could help with this? I wonder if there's a model like themoviedb.org or thetvdb.com that could be implemented where people can create an account and add/edit properties of keyboards, in that way it's not on a single person to find and enter everything.
I use this in R3 with my XDA, you can choose another row or color also
Big Chic Blank TPR Rubber Gaming Keycaps 4 Keys Set 1u for Cherry MX Mechanical Keyboards Compatible OEM (R3, Neon Orange) https://www.amazon.com/dp/B081CP8GN6/ref=cm_sw_r_cp_apan_glt_fabc_9SYY2K6TYC0EKHER0Q6V?_encoding=UTF8&psc=1
The pads are "Allsop ComfortBead Mini Wrist Rest". Super-comfortable, except after a few days they lose their grip and slide around too easily, even after cleaning. I need to rig some kind of permanent solution where I glue them to a 3x mouse pad, that the keyboards sit on, or something.
The spread between the boards isn't a problem. I honestly would have worried about the same, before trying it out of necessity of getting the tiny screen really close (that I then use with reading glasses which I don't normally need, just for a more panoramic view with the hidpi-ish display).
When I'm at home, my keyboards are usually under my monitor which is on a desk arm, so they are much closer together and pointed more towards each other. And I also alternate keyboards every week or so, with a Planck in that rotation. What I've found is the important thing, is the angle of the wrists that matter, rather than how close they are or aren't. (And in that regard, the Planck falls a little short.) The wide spread feels weird at first, but once you're concentrating on work, it disappears pretty quickly.
It is a nice stand, I was surprised with the quality. All aluminum and pretty rugged. This laptop isn't light, and it could hold slot more even fully extended.
Urmust Laptop Notebook Stand https://www.amazon.com/dp/B081Z263H8
The counterweights are only because whenever I itch my nose or something, for a while Iwas knocking it off. Hence the bungee and weight. But I'm adjusting and it's not strictly necessary.
I don't need to see any of the keys (but can), esp the thumbs. But I don't use them too much anyway, they are redundant, as my layout shares a 36-key Microdox as a least-common-denominator.
One of these ripped apart https://www.amazon.com.au/gp/product/B0171QQ7IY/ref=ppx_yo_dt_b_asin_title_o04_s00?ie=UTF8&psc=1
The internal diameter was just a little too tight to clear the shaft of the encoder (it would fit over the turning part fine, but the stationary sleeve that the shaft turns within was too thick, so it wouldn't click). So I had to take a drill and widen it a bit.
https://www.tindie.com/products/jkicklighter/pmw3360-motion-sensor/
If you meant the actual trackball, this one from amazon.
Definitely not sculpted like what you're looking for, but I use a pair of these beaded wrist pads with my Ergodox. I wonder if you might be able to position them in a way that achieves what you need.
And I know how hard it can be to find the right solution for this kind of RSI problem, so I wish you the best of luck. It took me several years to isolate my problem (ulnar deviation mostly due to heavy use of the keys on the right side of the keyboard) and to come up with a solution.
crystalhand's DM fork can generate a tented/tilted holder for kidney shaped silicone gel palm rests like this. I've been playing with finding a comfortable angle for my thumb.
I grabbed these when I couldn't find elite-c's in stock. They worked just fine for me.
And don't forget to socket.
Thank you! I put some time into deciding each non-alphanumeric key :)
https://www.amazon.com/dp/B08T9BJ34H?psc=1&ref=ppx_yo2_dt_b_product_details
if you're intersted.
Thank you for helping me over the entire duration of the build.
I bought the keycaps from Amazon. https://www.amazon.com/dp/B08T9BJ34H?psc=1&ref=ppx_yo2_dt_b_product_details
Loveley! Thx for sharing.
Btw, can you link / name the cushions... they look comfy. Is it the Hama mini wrist pads?
What bumpons are you using for your tenting?
These are the ones I have on my Corne right now. Work well, but always looking for new ideas.
I'm working on a wireless charging setup based on something like this:
https://www.amazon.com/dp/B01M11UT3V/ref=cm_sw_r_cp_apa_fabc_5GM50EH3YCEP3GBQTDFC
Are you running nice!nanos, or something else?
So, wrapped the diode leg around one end of the socket, and soldered it. Then I put all the switches in, stuck the sockets on the bottom and laid out the wiring to length. I used this wire because it was easy to slide the insulation down. So I’d cut the insulation at the start of the socket, the lift the socket and wiring out, wrap it, solder it, replace it, and down the line. Second half was a lot easier. Same setup on the diode side, but I spread the tab on the other side, put the stripped section of wire in, pinched it shut, then soldered. A lot neater, a lot faster detail shot.
It was a full size ergonomic keyboard. Something like this.
I was just thinking initially I could make something better if I could do that but mechanical, but it may just be easier going with that.
Would this one work in purple? Customer images look a little darker than the seller image, so it may match well.
The wrist rest is from Elecom, they made some awesome trackball like the Elecom Huge. I bought it locally so I don't know of any link you can buy.
This one looks similar but mine doesn't come with the trackpad
https://www.amazon.com/ELECOM-Japan-Brand-Fatigue-Reduction-MP-096BK/dp/B000JCEP6O
It's not exactly photogenic. Just a simple desk with a swiveling arm monitor mount (like this) hanging over a bed. It's especially nice for watching movies.
If I'm feeling more energetic, I can just swivel the monitor back over the desk. Since the desk is set next to the bed, I can use the bed as an ottoman. The desk also doubles as a nightstand and a place for my headphone amp.
If I were to recreate this setup, I would go for a monitor mount with a longer arm like this. The one I have doesn't quite center in front of me as much as I would like it to.
The only helping hands I would recommend is the QuadHands. It's a lot more expensive than the standard helping hands, but is worth every penny. Most helping hands aren't large enough and don't weigh enough to hold what you're soldering in place. I do small electronics repair as well as soldering wiring harnesses together and it makes soldering a lot less frustrating. I used one of the regular helping hands for years and it was more frustrating than helpful. I will never go back to a regular helping hands.
This is the tripod I use: https://www.amazon.com/Abithid-Professional-Portable-Aluminium-Camcorder/dp/B07GV8HGQX/ref=sr_1_4?dchild=1&keywords=horizontal+tripod&qid=1601851480&sr=8-4
And this is the write up I followed to build this. It has the other necessary parts listed (I didn't mount a trackball in the center so I only needed three cheese plates): https://stenoblog.com/georgi-stand-with-trackball/
Building it yourself honestly isn't all that hard for someone with average eyesight and hand-eye coordination. Yeah, it increases the price because you have to buy the tools, but you can use them for other stuff afterwards, if you find you enjoy the process.
As for something itself, just watch a few videos, and then a few more, and go buy a cheap diy kit to practice with. Check this out: https://www.amazon.com/dp/B0711MHKDZ/ plus the soldering kit, and you get practice and a clock.
I also happened to purchase a dactyl manuform (4x6+3) from u/brown_elvis lol, same situation as OP in now urgently needing wrist rests. Are you me? lol.
I asked in the mech keeb discord (specifically the #kbergo channel) and got this as a recommendation, mine should be arriving by the 23rd per Amazon, will be able to give my thoughts then. In the meantime, I'm stuck using a regular keeb because I was already getting some wrist pain from neglecting to use wrist rests when I first got my dacman (like an idiot I might add lol)
Looks like this phone stand
I've bought off of Etsy before, but you'll pay a PREMIUM. You can get lucky on amazon, I just grabbed one for $25. It was blue/pink.
Max Keyboard x ErgoDox PBT Dye sub DSA in gray. They're a cheap set I picked up for another (unfinished) project, so I slapped them on this build for the time being. My only gripe is no 1U quote key. That comes as a 1.5u since these were destined for a Dactyl Manuform.
I wanted blank keycaps, but different profiles, so I ordered this set from amazon: https://www.amazon.com/gp/product/B06XK984SB. Yes, I have the remaining 20 keycaps in a box somewhere (I'm using almost all of the 1u's). For $15, most of what you're paying for is packaging/shipping/listing/overhead. The actual plastic keys themselves just aren't worth that much, so it just isn't that big of a deal if they don't get used. It feels a bit like those products on amazon where you can buy a 1 pack for $5 or a 6 pack for $6. Maybe that'd be different for a more expensive set.
There are a lot of people in this community that also do their own 3D printing, and the idea of getting hung up about making some plastic product that'll sit in a box somewhere or trashed is pretty incompatible with the hobby as you're going to end up with failed printing attempts or iterating your prints into new improved versions and not using the old version.
But if you're that concerned, especially if you want uniform profile caps, there are plenty of sites out there (like a lot of the vendors that post to this subreddit and /r/MechanicalKeyboards) that let you order them in batches of 10 or even any exact number you want.
I have a couple of these in a prototype keyboard that I built 10+ years ago.
They have a similar switch to the one you posted inside of them (those are also used in lots of other foot based applications), and held up to thousands of presses over the years without issue.
I used network cable to wire them to the controller (an Arduino at the time), and had no issues.
I think we're using the same piercing, I just hadn't managed to unscrew them so I was beginning to wonder (looking at the reviews, I'm not alone!). Also this is my first time 3d printing, so wasn't sure whether I did something wrong.
Thanks for the help!
I have a ferris sweep (choc spaced, so maybe a few mm smaller and without a bottom plate, so a bit lower) that fits very well in a GPS case. I think it's https://www.amazon.de/-/en/dp/B019H2PT6Q Check the measurements. I think many other GPS cases would work as well. Each half fits into one net. The usb and trrs cables fit as well without removing them from the keyboard. The can also be used to prop the bord up for tenting.
STM32F401CCU6 or Raspberry pi pico. You're not gonna be able to use keyboard firmware builder for either of those. But I personally love the raspberry pi Pico's. Fully supported by qmk now too.
Both are overpriced on Amazon but here's some links
https://www.amazon.com/gp/aw/d/B0B96YMQQP?psc=1&ref=ppx_pop_mob_b_asin_title
I use this a lot: https://www.amazon.de/gp/product/B00CQ93X6Q/ref=ppx_yo_dt_b_search_asin_title?ie=UTF8&th=1
You can surely find something similar locally. It's TFC silicone with a Shore hardness of A 35.
Do you class machine pin sockets as different to these DIP/DIL sockets?
Because they worked fine with diode legs for me.
Glue or double-sided tape? I mostly use https://smile.amazon.com/gp/product/B07FVHZHJY when I want some piece of keyboard to stay put but still allow taking it apart in the future.
For displays specifically - many keyboard designs allow screen shields screwed on top of the display module for this purpose.
For regular maintenance at home, I wet a Q-Tip with alcohol and wipe the top and sides of my keycaps. (I have two cats at home, so dust and cat hair is always finding its way onto the keycaps.) At work, I keep a box of KeyKleen swabs for the same purpose.
I thoroughly clean my keyboard maybe once a year. I soak the keycaps in warm water and dish soap, run them through an ultrasonic cleaner, rinse them in clean water, wipe them with a clean towel, and air dry overnight. While the keycaps are off, I vacuum any cat hair and board chow from the board and wipe a Q-Tip soaked in alcohol between the switches.
Note, the design targets the perixx spare 34mm trackballs on amazon.
https://www.amazon.com/gp/product/B07BDGSX5X/ref=ppx_yo_dt_b_search_asin_title?ie=UTF8&psc=1
There's two new profiles that are similar to this, the XVX named after the Chinese brand of the same name that largely makes boring OEM keycaps: https://www.amazon.com/AHHC-Japanese-Keycaps-GH60RK61GK6466ALT6187104-Mechanical/dp/B099DXXWHP
And the Siakeyb, which I believe is only available here: https://www.switchcaptain.com/collections/new-arrivals/products/sikakeyb-cherry-forrest-keycaps
I'm actually currently running half of my split on one and half on the other to see what I like more and they're quite similar. One has a bar homing pip and the other three bumps in a row.
If you do use micro usb I might recommend giving these a shot(or something like) https://www.amazon.com/NetDot-Braided-Magnetic-Charging-Compatible/dp/B07LBG1DFQ/ref=sr_1_5?keywords=Magnetic+Micro+Usb&qid=1667529867&qu=eyJxc2MiOiI1LjE1IiwicXNhIjoiNC44MCIsInFzcCI6IjQuNTcifQ%3D%3D&sr=8-5 these use magnets between the connector and the cable, so you can easily disconnect the device. it's rare but sometimes these micro usb connectors do break, and this helps to minimize the plug/unplug/replug motion that wears on the metal bits.
Thanks for the comments and questions! Yes, the reduced size spacebars have not been an issue. I think the right control is also .25u off leaving a small space between that and the arrow key. This set had PLENTY to choose from. Keychron but cheaper shipping through Amazon.
https://www.amazon.com/gp/product/B09V6VNJZW/ref=ppx_yo_dt_b_asin_title_o00_s00
I only ordered a few customs to give me a windows logo, a red escape (that I remapped to ~) and a custom GIDDYUP key which is actually mapped to MEH. Super brings with it the pain of Microsoft Office integration and that menu coming up constantly. I added some o-rings. The pictured looks to show a BIG disparity in color between the Mint color and the white but under my lighting, I can barely tell the difference. I'm color deficient so that might be a reason too.
I had been looking for an aluminum case to replace the laminated acrylic one I had been using for a long time, but I was struggling to find a decent tenting solution.
I stumbled across these stick on tenting feet designed for laptops and they work great! They're kinda slippery without a desk mat, so I still need to figure out a way to increase the friction a bit to make them more sturdy on smooth surfaces.
I use gas strut monitor arms like this one. And I have 2 24 inch Dell monitors on them. Another monitor stand is the desk-top style which needs you to use a Hex key to adjust vertical movement so it's pretty sturdy as well.
Thank you! It looks like to make it wireless I'll need to get a 2 mm jst connector. Do you know if something like this will do ? (amazon link) I know you listed DF3A-3P-2DS from digikey but shipping from the us seems to be a lot, and the canadian warehouse doesn't hold this item.
I know this is a mech keyboard subreddit, but why not try a Microsoft Sculpt? It's more or less identical geometry just without the numpad. Great palm rests and adjustable negative tilt. Only real downside is having to use a 2.4ghz dongle.
Question... why you have TRRS for Nice!Nano?
Make sure the colors are correct on the cables (black to black | red to red).
Connect female JSTs to N!N in their respective spots (-/+).
Rotate battery and connect to female JSTs under the N!N.
​
Then you have a way to disconnect battery. I highly recommend adding a switch, but that's a little more work. Very possible though.
​
This is just my opinion on what you could do. Good luck.
https://smile.amazon.com/gp/product/B09M3WW7Z4/ref=ppx_yo_dt_b_search_asin_title?ie=UTF8&psc=1 these are the keycaps !
​
there were a couple reasons i went with the wired
1) unlike with headphones you don't typically walk around using a keyboard so it didn't seem as necessary
2) wired connection is more reliable
3) i switch between devices (personal and work) so bluetooth just introduces more complications
when i am on the go i just use a usbc to usbc cable to connect it to my computer so i dont have to get out any dongles (i am a mac user) - you can even use a mac charging cable to connect it
That's also my guess. As a vendor (and user of lily myself) i have to think how to make the best solution for as many as possible.
What i was thinking to use on mine is something like this:
https://www.amazon.com/Nillkin-Keyboard-Adjustable-Invisible-Computer/dp/B09M9XX8ZV
>I really dig these kind of setups and how all in one they are. great work! I must ask where you get the clamps from for holding the keyboard?
Ty!
The phone holder with the tripod adapter was this one on Amazon.
Nothing special about the brand, I just measured my corne and found the first holder that fit it. Though with this one specifically, I like that it's not spring-loaded, since the corne case I have is 3D printed and I don't know what sustained pressure would do to it.
Nice.
I use a similar stand at work, albeit without the attached keyboard (currently using a Moonlander with the platform). Since I no longer need the laptop keyboard, I overlay it with a second screen.
Confuses the hell out of folks around me.
I'm actually not done with the firmware mods for that build, but I will post
that build soon. Your use case got me thinking though and I modified the low profile, magnetic case above to add a pocket for the same 3,700mAh battery (Thingiverse link). The extra 9mm makes this decidedly not low profile, but it's not too thick. This is the build I'd want if I was backpacking with a keeb for months at a time.
Looks like a Kensington Orbit
unfortunately this doesn't help your current predicament, but promicro ports are notoriously fragile. I'd strongly suggest getting a magnetic cable/tip like this so you put less strain on the port itself in future builds
Usually it’s not great to rest your wrists like that as it can restrict blood flow. It’s better to either float your hands while you type or use palm rests like these: https://www.amazon.com/Memory-Keyboard-Support-Cushion-Computer/dp/B07DF83HK7
Another thing to try is this stuff. You apply it as though you were adding solder, but it stays liquid longer so that you can undo several pins at a time. However I don't think it will work with that many pins.
It's this one, the shortest I found on amazon: https://www.amazon.it/gp/product/B09MHXG37C/ref=ppx_yo_dt_b_asin_title_o06_s00?ie=UTF8&psc=1
the case and caps go together so well!
/u/t5557 you should get this ball: https://www.amazon.com/Perixx-18021-PERIPRO-303GR-Trackball-Compatible/dp/B07BDGSX5X/ref=sr_1_2?crid=32ZAY0ILKUPRZ&keywords=trackball%2Breplacement%2Bball%2Bperixx&qid=1661723435&sprefix=trackball%2Breplacement%2Bball%2Bperixx%2Caps%2C...
I actually picked these from amazon if I remember. Here is the link: braided trrs cable
If you want to have a cable between your board and the controller, then Dupont connectors would work, but do note that you need a crimping tool, which is not included in that kit. These are the basic pin headers I was talking about. These are nicer, but I have no personal experience with them. All of these solutions still require soldering on both ends, mind.
https://www.amazon.com/gp/product/B094ZCRXMN/ref=ppx_yo_dt_b_search_asin_title?ie=UTF8&psc=1
Best $40 I've ever spent... Takes this from a daunting task to a piece of cake.
Hovering over the keyboard is the correct ergonomic position. Wrist rests are generally supposed to be used to rest your wrists when you're not typing. Might be your body needs to get used to typing in the new way, or perhaps your desk isn't at the correct height (your elbows should form a 90° angle).
I personally use a single wrist rest for my left hand only when gaming. This mouse rest works well enough for that and is pretty cheap.
https://www.thingiverse.com/thing:5171857
I used this one, its a friction fit shoe case though so you need to print it in flexible TPU rather than hard plastic.
https://www.amazon.com/Lacdo-Waterproof-Protective-Compatible-SuperDrive/dp/B01LZI88D9/
I use one of these to carry it around in my bag, works well enough and is fairly cheap, ive heard of others using Stethoscope cases too.
I've been looking at doing something similar. Do you find the arms drifting over time? What about wobbling, is that noticeable or bothersome? I was considering getting something similar like this, but still to figure out how to mount it to my board and currently am trying to 3d print a custom back that accepts a screw (donno how good of an idea this is, screwing metal into plastic could be not great especially if I don't nail the tolerances). I'm curious about that gold colored tab next to the 1/4" screw... is that important to prevent the keyboard from rotating on the mount as you use it? Because the mounting arm I was looking at doesn't have that.
These are the mounts I’m using: https://www.amazon.com/dp/B09J4DKXKP/ref=cm_sw_r_api_i_JKATM6VW4X87YM4V9X57_0?_encoding=UTF8&psc=1
I posted a link in an earlier comment but it seems like automod blocked the comment.
Oh yeah, I just remembered that this micro trackpad exists. I think you could pretty easily mount it onto the side of a keyboard.
Bought on Amazon: https://www.amazon.co.uk/gp/product/B083TW551V
Tried a few different cases for my wireless Lily58, this one fit best. Hard case, very snug without pressing keys accidentally and doesn’t rattle when moved.
Bit larger than the ploopy, and no clue how good or bad it might be. And no qmk ofc.
Poopy nano is now available fully assembled.
You could also get a standalone trackpoint. These pop up on Amazon and ali express from time to time from third party sellers. This one looks like it has been extracted from a ThinkPad keyboard and seems a bit DIYish (there's some visible hot glue on the photo, but that's probably fine. I've been using a track point keyboard that I've reassembled for the last 7 months or so, and it looks a lot more janky than this photo).
Mistel Barocco MD 770 - https://www.amazon.com/Mistel-Bluetooth-Mechanical-Ergonomic-DoubleShot/dp/B08GX7RJ6M/ - is also a great option. The non-Bluetooth option costs $29 less.
There is also 60% variant Mistel Barocco MD 600
I used these bumpons and just stacked like 5 of them on top of each other.
I’m not OP of that thread but those appear to be magnetic adapters. Funnily enough, they look very much like these that I have.
Digital Ant Gen-X 3 in 1 Nylon... https://www.amazon.com/dp/B07GWLF4GR?ref=ppx_pop_mob_ap_share
Some people will tell you not to use magnetic adapters for USB because it’s dangerous, and I’m not knowledgeable enough on the topic to argue, but I have personally not had any issues. It makes flashing both sides of my Corne so much easier, I’ll have them on all my keyboards from now on.
Specs:
Hotswap Corne with acrylic plates
L+F Jwicks
NP Blanks
I used some bumpons to "tent" it a little.
Sounds surprisingly not terrible for a careless acrylic plate build
If you like the nonstick, I bought this https://www.amazon.com.au/gp/product/B07C13Q5GT/ref=ppx_yo_dt_b_asin_title_o06_s00?ie=UTF8&psc=1 to keep around, used hundreds of them now on keyboards to doors to stop dents etc. But mainly keyboards, and now I incorporate them into all my projects.
It's been a while, but I recall that there are some helpful guides out there for describing what saws are used for what, and there are woodworking subs and beginning woodworking subs and wood carving subs.
If you are starting small, really just a tenon or back saw and some woodcarving knives is all you need (a hook knife if you want to make spoons), and maybe a clamp or two to help with sawing and gluing (if you stick with the hobby, you will own 40 clamps some day...it just happens nobody can explain it). The first saw I ever bought was similar to this. Nothing fancy, we're talking maybe $50–75 investment in total. Oh yeah, and a bunch of sandpaper. If you only buy one power tool, make it a hand drill.
If you want to make keyboard stuff, you will eventually need a router (which allows you to shape holes and cavities in the wood—so the hole that will hold a PCB). I don't recommend starting there though, because a router won't do much good until you're comfortable shaping and finishing the wood.
Actually, the very first wooden keyboard I built was made with a $12 hand coping saw (no router) and I just left the bottom open. I still have that keyboard, although I have since made a better case for it (I have since acquired a router).
> I could technically plug both in separately but that is really cumbersome
If not a battery, that second board needs to be plugged into something. Is a cable connecting the second board to your computer so much more cumbersome than a cable connecting the second board to the first board? Cables of just the right length or cable ties could go a long way. You could also get a usb hub or a cable that splits and connects to two devices (maybe those only support charging? But as long as you have nanos and you plan on powering them full time, it doesn't matter much whether you do USB/Bluetooth). For that matter, neither side even need to connect to the computer at all, just bring usb power to both with something like this: https://www.amazon.com/Charging-Wiredge-Braided-480Mbps-Charger/dp/B09P32CWFL/ref=sr_1_14?crid=SG5LX6SRXDUJ&keywords=Two+Into+One+Usb+C&qid=1657084861&sprefix=two+into+one+usb+c%2Caps%2C77&sr=8-14
A controller with USB-C (ex: Elite-C) can take a lot of connect-disconnect cycles, but there's an even better solution : keep the Pro Micro and put one of these on its connector : https://www.amazon.com/gp/product/B09PTM283T/
They're magnetic USB connectors. I use them on all my keyboards. Much faster and safer when putting the USB cable in or taking it out.
Look into trigger point therapy. I had a lot of pain problems in my hands and arms, this book helped me a great deal.
https://www.amazon.com/Trigger-Point-Therapy-Workbook-Self-Treatment/dp/1572243759
I had the same problem, reposting a potential solution from the QMK Discord by sigprof:
OK, this is the proper procedure for removing write protection from STM32F4x1 (e.g., if you had tinyuf2 there and want to go back to plain DFU):
1. Enter the DFU bootloader normally (hold BOOT0, press and release RESET while still holding BOOT0).
2. Run the following command while holding BOOT0 (you may release it between steps 1 and 2, or keep holding it the whole time — that does not matter):
dfu-util -d 0483:df11 -a 0 -v -s :force:unprotect

After running this command the MCU will reset, and should reboot back into DFU, because BOOT0 is held. (If you don't hold BOOT0 and have tinyuf2 there, tinyuf2 will start and just enable the write protection again.) After that reboot completes, you may release BOOT0.
3. Now you can actually do a mass erase:
dfu-util -d 0483:df11 -a 0 -v -s :force:mass-erase

Looks like the mass-erase command takes the same amount of time even when the flash is write-protected, but does not actually erase the flash in that case (even the unprotected area is not erased), so you really need to do that unprotect before.
This however didn't work for me, so I'll be returning the boards I bough off of eBay. I just got new boards from here that worked immediately when flashing my Cantor blackpills: https://www.amazon.com/gp/product/B09MLGWBQ2/
This is the one:
https://www.amazon.de/gp/product/B09WCF8JZC/ref=ppx_yo_dt_b_asin_title_o02_s00?ie=UTF8&th=1
At first I actually didn't push it in all the way, but it's the first thing I checked.
Maybe you're onto something though. The sockets on the moonlander are a little bit recessed. While it feels like the plugs go all the way in, maybe the plug housing is too big to fit the recessed area. I've had this happen with mobile phone cases a lot. Maybe I should just shave off a little bit from the plastic around the plug and try again.
Ive got this one and i love it. doesn't matter what hand. fully programmable and you can even write scripts. https://www.amazon.com/Koolertron-Single-Handed-Programmable-Mechanical-Keyboard/dp/B076LRJ528/ref=sr_1_6?keywords=Koolertron&qid=1656009317&sr=8-6
This one from Amazon has worked on my Moonlander:
https://smile.amazon.com/gp/product/B07FFW8YZR/ref=ppx_yo_dt_b_search_asin_title?ie=UTF8&psc=1
Which one did you buy?