
What are
/r/Lettering's
favorite Products & Services?
From 3.5 billion Reddit comments
The most popular Products mentioned in /r/Lettering:


The most popular Services mentioned in /r/Lettering:
Behance
Dribbble
Creative Market
IGTV
SkillShare
Procreate
Paletton
FFFFOUND!
Google Fonts
TeeSpring
Later
Buy Me a Coffee
Jarnal
Issuu
The most popular reviews in /r/Lettering:
Some backstory:
The other designers on my team and I wrote words/phrases on pieces of paper and put them in a bucket. Then occasionally throughout the week we draw one and everyone has 5 minutes to plan and 30 minutes to execute something, whether it's an illustration, lettering, UI or some other form of design. I usually do an illustration but couldn't think of anything interesting for this one so I just used it as an opportunity to practice some lettering. You can see the initial sketch and some of our previous challenges on my dribbble.
What a great sentiment, if I could offer one price of constructive criticism, those paws would look even better in that single line art style like this but it looks great now too
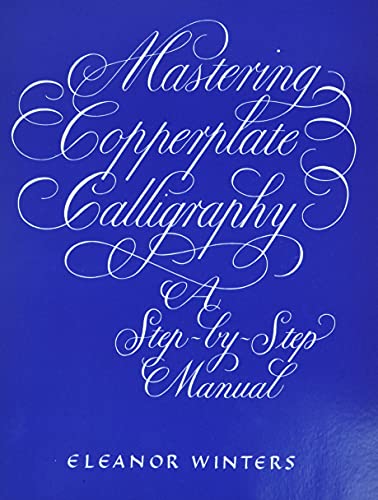
I'm using the book from this lettering artist : https://dribbble.com/letters hopped , really enjoin it and I think is one of the best educational book I ever read, easy to follow, highlight keypoints; the only part is not covered is the basic drawing knowledge required by lettering itself. She has a YouTube but i didn't check it. Hope it helps.
Interesting project! I did something similar as part of my uni course a few years ago. we had to produce a 20 page book using just the words of the song/poem. here was my attempt. It shouldn't be too hard to re-work into a poster if you like the look of it.
Hey Sarah, it’s Janna. :) If you haven’t already, you should invest in some graph/squared paper as it will make it a lot easier to make your sketches nice and uniform.
You might want to try single-word compositions at first so that you can experiment with different styles and techniques. When you find some styles you enjoy or are best at, work your way into longer compositions. At that point try just writing out your words in your normal handwriting and playing around with the scale and positions to see where things should fall in terms of hierarchy and emphasis. Then it will be easier to see what words you should make bolder, all caps, scripty, etc.
There are a few lettering classes on Skill Share that you might want to consider to get started. I haven’t tried any personally, but they look like quality material.
I think the majority of us here are beginners in some capacity, or at least intermediate, so please don’t be shy about posting any work. We’re here to help and offer critiques. Welcome aboard!
Edit: Also we have weekly challenges that are just for fun/practice. The links are always posted in the sidebar, and there’s an archived list if you want to use that to start out.
You totally make sense and that's a great pen! You're doing great! If you ever want to get into Modern Calligraphy using dip pens, the Nikko G nib is a great start with a nib holder you can buy on amazon/Michael's/Joann's. Nikko G Nib with Holder
Incredible work. Some of the decisions you took here, like mirroring the b and r, or making the L loop back up so that it matches the other vertical line, work SO well. I also really like the blacked out A that gives your whole monogram a frame.
Very clean, all it needs now imo is a cleanup of all the parallel lines in the various shading areas. if you haven't already I recommend getting one of those rulers with feet on it to help with parallel lines. One of those guys
It's not just about doing an impression of fonts. It's about understanding what makes up a font. What's an ascender? What's the ear of a letter? Why do those things exist, and what does adding them (or not) mean for your lettering? Where does the terminus go and how deep or wide are your counters?
The biggest part of getting good at something is definitely practice, but you want to make sure that you are practicing the things the right things, and that you are backed up by a decent amount of knowledge in what you are doing. Think of it as studying anatomy to learn to draw (which is something that artists do).
You might find it useful to find a copy of "Drawing on the Right Side of the Brain" by Betty Edwards. Go through it a couple of times, and you'll have a lot of control over how you draw.
I'd also advise that you start with pencil, and then ink over for a finished product. I'm not sure if that's what you did or not here, but it is something that I do in all sketches. Most of my design is for UI / UX elements for the web though, so take what I say with a grain of salt.
I think that what you produced is a very respectable first shot at hand lettering, by the way, otherwise I wouldn't waste time by giving you four paragraphs of advice.
https://www.behance.net/gallery/27115917/Super-Smash-Bros-Lettering
This was a personal project to get more acquainted with hand lettering. I lettered the name of every character in the Super Smash Bros series. I'm new to this so feel free to criticize.
Yo it's so good to see you taking advice so well and wanting to get better, you pretty much hit the nail on the head, too many styles, just simple it up a bit. I mean I started this shit like a year ago and have never learnt or even watched tutorials. Just found nice shit on the internet, copied it (pretty much exactly how it was) and then gone from there to come up with my own style. This is my inspiration / copy-from folder - (gotta love cloud storage I can't believe how easy it is to share stuff across the internets with strangers these days. Technology is fabulous. And we're using it to talk about manual artwork based on handwriting and god humans are so weird and wonderful wow ok sorry got very distracted). Great artists steal and good artists copy y'know.
Also I pretty much do like five styles max in anything: cursive, a slab serif, a weird geometric square kind of thing, that same thing but with extra lines on the left, words in starbursts and words in ribbons.
Dude I have seen your work on your Dribbble! Really excellent stuff, man. I might contact you in the future if I need a company logo created. Love your style - it's visually stimulating in a special way.
I am self taught, though I've had some great mentors that have helped guide me on my way.
As a mentor of mine told me, a letter carver has to will themselves into existence, much like the things they carve! I would recommend two books to get started. Letter Cutting in Stone by Richard Grasby: https://www.johnnealbooks.com/product/lettercutting-in-stone
And The Art of Letter Carving in Stone by Tom Perkins: https://www.amazon.com/Art-Letter-Carving-Stone/dp/1861268793
If you're serious about trying it, get a good set of tungsten carbide tipped chisels. They aren't cheap, but are well worth forgoing the frustration of softer chisels.
No problemos :) Don't wonder, just try and see where it will take you :) A lot of things will become much clearer as you are going through the challenge. As for the logotypes question the best advice I can give you is to study typography aside from lettering and calligraphy. Logotypes are all about letters in all shapes and forms. Learning the fundamentals of typography and visual rules and nuances will be immensely helpful in the long run. Back when I was just getting started, this was a book that was extremely helpful for me - https://www.amazon.com/Type-Matters-Jim-Williams/dp/1858945674
Wow! Very useful feedback! I’m definitely punching above my weight, as this is only my second attempt at the style. Previous to this I didn’t have any source for critique, so I love it! I’ll be practicing more, so when I get some progress under my belt I’d love more of your helpful feedback.
Here is my first attempt at the style. I’m only really going off of what I find on Google, so these resources you point to are going to be most helpful.
Thank you!
It kind of straddles the line between lettering and typography but I think there is enough creative input here to call it lettering. This person's whole portfolio has intersting lettering, including the alphabet one- https://www.behance.net/gallery/20714113/-Creativ-Alphabet-
I like this person's portfolio too- https://www.behance.net/kattphatt
Update! Finally brought it into Illustrator and fixed some of the negative space problems. You can check out the final version on behance.
Hey thank you! I am using procreate yes, this particular piece was done with the technical pencil (a default procreate brush) However i have a collection of personal brushes available for download at : https://creativemarket.com/max.juric Cheers! :)
https://creativemarket.com/Downloads4Designers/1488397-Grit-and-Grime-Vector-Pack
this is a great vector texture pack - when I get back on my home computer I'll try and find out where I get my other textures from. But I know dribble and creative market put the above pack out for free awhile ago (I'd check creative market out every Monday to see what they are giving away for free)
Thank you! To get the rough edges I used Effect>Distort & Transform>Roughen. You can play with the settings to get the desired effect but this shape was about 213x260 px and these were my settings. The grunge texture is a vector pattern that came in this pack I got in a bundle awhile back.
This is a hand lettering project I started on skillshare which was a great way educator into hand lettering - it was my first project that I took seriously but as with most of my projects I never got it finished (maybe one day). My grand idea was to finally vectorize it and using my vinyl cutter cut it out and stick it somewhere. The link below takes you to my page which describes the process in a bit more detail and how I went about building it up.
I took both of Mary Kate's classes and recommend both. If you only do the first one it'll leave you hanging if you're interested in digitizing. I've been eyeing Jon Contino's course, too.
Thanks! It is, indeed, a pencil (Prismacolor Turquoise lead holder with size F lead, to be exact). The top one was actually an older piece on the same piece of paper, done in Sharpie.
Regardless of medium (I've used pointed pen, soda can pen, lettering brush, etc.), I take these and digitize them for use in my upcoming website's header. A small-but-growing collection can be viewed here.
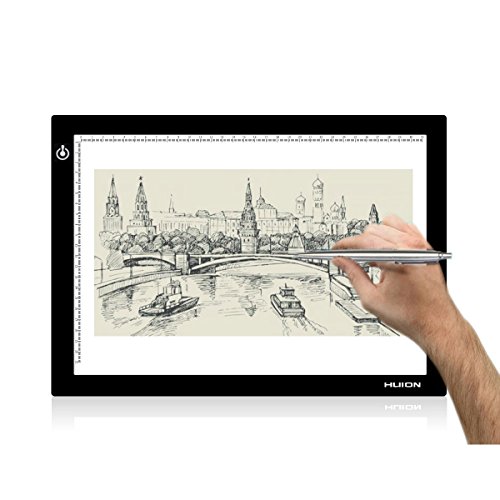
For student musicians there's a program called SmartMusic that uses a quality microphone to "listen" to them play a piece of music displayed, then showing them how they did: pitch accuracy; volume; length of notes played or rests held; etc. You could do the same sort of thing with this app, but for lettering. I think.
I've got a Wacom Intuos wireless tablet, and trying to kludge a way of using it for paperless, inkless practice. Mostly just loading up a screenshot of some alphabet I've found on the web, and using OneNote to annotate over with a pen. There are plenty of free alternatives to OneNote for this, like xournal or Jarnal. Maybe you could have a version of your project (great idea, BTW!) for people with tablets.
Thank you! And I got it on Amazon. It comes as a pack. STAEDTLER Mars Plastic, Premium Quality Vinyl Eraser, White, Latex-free, Age-resistant, Minimal Crumbling (526 50 BK) https://www.amazon.com/dp/B00006IFAN/ref=cm_sw_r_cp_api_i_2TRpCbB97G1W1
I’ve had it a year and am still on my first eraser haha. Best erasers ever! :)
I love Davids work! His reverse glass guilding is amazing!
I have lots of old books, one of my favourites is this one:
https://www.amazon.co.uk/Wonderful-World-American-Advertisements-1865-1900/dp/0695803506
If you’re talking about brush lettering or anything in that kinda style, I’d recommend this book as a basic foundation on how to structure your strokes (it’s a calligraphy book but brush lettering is based on the same principles).
I second/third/n’th Tombow pens for brush lettering, but once you get the basics down you can also use fun stuff like Crayola markers or anything with a vaguely chubby nib.
Rhodia makes excellent paper that won’t bleed but is rather pricey.
I just started and personally find this book helpful. For more practice, you can also buy tracing paper and trace lettering as well.
Thank you! I basically copied this post
And yeah, I love a good brush pen. I used the Pilot Pocket Brush Pen.
She could work on her filligree. It looks like she didnt even use the right type of pen for this, instead she traced the letter forms and filled them in (in which case the main lettering for 'TOM" isnt horrible)
But since she has interest in lettering I'd suggest you give her a cute-ass gift for which she's going to be eternally grateful to you: a parallel pen. I started off with these and recently I just did monogram logos for my friends wedding. It takes less than a day to learn the letters and maybe a weekend to get the writing flow down but if you like lettering you'll be addicted. Check out the link below!
EDIT > to show what type of work you can do with this pen check out below https://www.google.com/search?q=parallel+pen+calligraphy&espv=2&biw=1150&bih=876&source=lnms&tbm=isch&sa=X&ved=0ahUKEwjuoaS1zKrKAhVCKGMKHcLPACUQ_AUIBygC
Here's a picture of the pen I used for this: Marvy 5.0mm Calligraphy pen. I literally just took a chunk out of the tip with a pocket knife I have next to my bed, and it works like a charm.
Seems that I lowballed their price a bit from memory after I looked up prices online. Amazon has them for $5 for the 5mm pen, but I'm fairly sure the art store I bought mine from (Plaza) wasn't $5 per pen.
If the store I got these pens from had Pilot Parallels, I'm sure I'd have bought them instead, because you can modify those as well to get the same kind of effect. Though, seeing as I'm still pretty new to calligraphy and lettering as well, I went with this seemingly cheaper alternative. They've held up pretty well, though! I definitely would recommend.
LAASR's advice is solid and you definitely should study some typography basics. But, that'll take time and you'll probably will have no intention of going back to this work. So to finish this piece I want to give you some tips:
Every letter, hand-drawn or not, must repeat a certain pattern of strokes, which has it's beginning from regular writing of letters and words with a certain instrument. For example, this one would be done in hand by a round brush or a dip pen with a flat circular nib. So I'd advice you to get some instruments to understand how strokes work.
When vectorizing a sketch, keep in mind that lines(in basic strokes) repeat one another e.g. are parallel or curve at the same paste. For example look at your H's, their vertical strokes (besides the start/finish) should have a constant weight (look at the question mark in my pic). If you don't see it (it comes with practice), get a round brush the size your stem is and just hover it above the stroke, you'll see where the stroke gets thinner or thicker than your brush. Download some fonts and a font viewer like Nexus Font, it will give you an opportunity to check and compare what you have and what you shoud have.
But then again, I strongly recommend reading something about letters. My favourite book is probably Logo, Font & Lettering Bible, it covers the basics of letter structure, types and working with vectors.
If you prefer online orders, here's the Micron pen set I've been buying every now and then for the past 10+ years. They're really good for line work, and have a pretty good selection of sizes. As /u/Shveet mentioned, sketch things out lightly with a pencil first, use a ruler, and pay attention to spacing. Practice makes perfect!
Kuretake ZIG Calligraphy pens, and I used some Micron pens for the black bits. Very reasonably priced, IMO. Couldn't find any Pilot Parallel pens at my local craft store, so I got some of these instead, plus I like that they're dual-tipped!
^That's ^why ^I'm ^here, ^I ^don't ^judge ^you. ^PM ^/u/xl0 ^if ^I'm ^causing ^any ^trouble. ^WUT?
https://www.amazon.com/dp/091138068X/ref=cm_sw_r_awd_1tAhvb1M7N6AA
This book has a bunch of great alphabets and an extensive layout guide, would highly recommend it. As far as lettering Pierre Tardif has a bunch of great hand lettering videos, but it's mostly for brushing letters.
I have some calligraphy books that are written in german and pretty obscure so that I can't even find them on amazon but the main ones I'd recommend are called hand to type and flip the script (for graff).
An eraser shield is a useful tool for if you use pencil first before going over in ink. It helps you erase really accurately and precisely so you don't have to redraw a giant chunk. They're pretty cheap at craft stores in the drafting section.