
What are
/r/SCREENPRINTING's
favorite Products & Services?
From 3.5 billion Reddit comments
The most popular Products mentioned in /r/SCREENPRINTING:


The most popular Services mentioned in /r/SCREENPRINTING:
Facebook Marketplace
eHow
Wave
Walmart
Pixabay
Dribbble
Photopea
Shutterstock
Rasterbator
Etsy
Fiverr
Gumroad
TeeSpring
Typeform
Ghostscript
The most popular reviews in /r/SCREENPRINTING:
I agree that using halftones is the only way to keep this a 2 color job. What color shirt is the print going on, because if it isn’t white, you’ll also need a white under base.
The other thing is, I’d find out what fonts they are using. The fact that the text lays over the thermometer, with no clear or white stroke to separate it muddles the logo in my opinion )it doesn’t have to be a large stroke, 2 pixels should remedy it), but you’re also getting into changing a companies logo, which is something they don’t always appreciate.
The quick way to do this in photoshop is here https://www.dummies.com/software/adobe/photoshop/how-to-execute-the-color-range-command-in-photoshop-cs6/
And then halftone the thermometer. https://www.shutterstock.com/blog/how-to-halftone-images-in-adobe-photoshop
We printed these for ourselves a few years back - Black & Gold on Black with Gold edges.
We printed these for a client a few years back - Red Metallic & Black on Kraft with Red Metallic edges.
I imagine this would be better suited than my current lightsource. I overlooked this when I was buying my initial supplies. I appreciate the comment
Same thing, it's basically what you get when you get the slightly higher models.
I've tried with mixed results with a friend of mine. But I got some good tips from another pedal printer, Juxtaprints, on my instagram account on this photo: https://instagram.com/p/rgKx08DtTz/
We already had that ink and those thinners he mentions, so it was a matter of getting the quantity percentages correct, the screen clean, and the process quick so we didn't clog or dry too fast. It wasn't easy, and we haven't tried since getting a set of 6 enclosures done, but it can be done in the right environments.
Of course you can. You can get artwork from places like pixabay.com .
When you want to learn design, you can use Inkscape, which is a free vector art program.
Logos by Nick is an amazing channel for learning Inkscape and design.
Laser printer? Toner Aide! Fixes speckles. Works on vellum, too. We use it on single color/low res jobs all the time.
are they positive films? this link is something similar to what i am talking about
https://www.amazon.com/SUB-Transparency-Positive-Waterproof-Printing/dp/B07422PH4D
you can tell by licking the tip of your finger and touching the film. one on the side will stick. that is the side you print on
You tryin to grown some weed? You need a ballast to run MH bulbs.
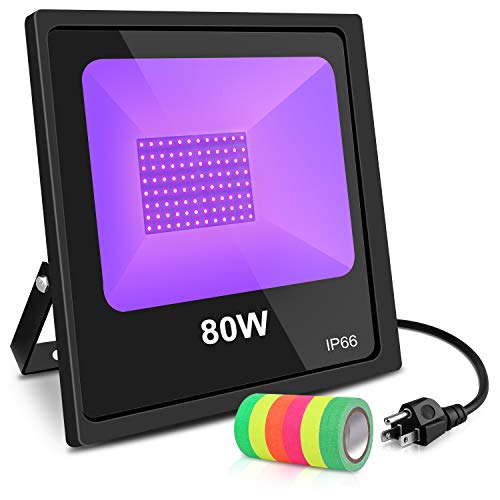
Just get a 50w UV led off Amazon and call it a day. I use this one. I expose for about 40 seconds @ 16" away. (Your time may vary depending on emulsion, distance, etc)
Those blue presses are garbage. Don't waste your time and money trying to save a few bucks on a press. Crappy presses don't teach you anything but frustration. The learning curve for screen printing is steep enough without dealing with junk.
Look for a better used press on craigslist or Facebook Marketplace. If you want to buy new, look at a Hopkins press. If you're just going to start out with single colors, a set of hinge clamps is a great way.
So , several things to breakdown here.
Your stencil making is the key to good screenprinting ! ! !
The unit you're looking at will not give you the results to get better.
The baselayr appears to be a very reasonable entry level lightsource.
The https://www.amazon.com/QUANS-Blacklight-Fishing-Aquarium-Waterproof/dp/B07JFGGXRQ?th=1 would be good if you buy 4.
I'm currently using a bank of 7 Sunblaster 6500°K LED gro-lights and a extra large vacuum bag with good results
And once you get your light setup do several exposure tests to determine your times
Washout booth is good, i'm less happy about the exposure unit. The CFL bulbs give out very little light ( I'm assuming they are black lights ? ) and you are correct, they are quite close to the glass so will give hot spots of light.
I've recommended and tested the lamp below, it exposed emulsion really well but you need to have some distance away from the frame to avoid hot spots. Or you could follow your plan and line the bottom of the light box with led strips
https://www.amazon.com/QUANS-Blacklight-Fishing-Aquarium-Waterproof/dp/B07JFGGXRQ?th=1
Definitely will! I've been using the Ecotex Tex Red from Amazon. On my second quart and I love it.
Like imagine a piece of wood that braces from the side of the cabinet to the floor. Imagine something that works a bit like this:
Securityman 2-in-1 Door Security Bar & Sliding Patio Door Security Bar (2 Pack) via Interchangeable Caps - Constructed of High Grade Iron - Black https://www.amazon.com/dp/B07NVSP174/ref=cm_sw_r_cp_api_glt_fabc_3ZEQYB6MEPGF1VHBSR9X
But the door is your cabinet.
Platens on their own aren't sticky. They're just metal or wood. You'll want to use an adhesive, but not something that's going to stick so hard it messes your print up. Here's the stuff I use. You can spread it with a card, it's easy to scrape off for cleaning, and you get pretty good mileage out of a bottle:
https://smile.amazon.com/gp/product/B079DYZGBB/ref=ppx_yo_dt_b_asin_title_o00_s00?ie=UTF8&psc=1
Canon!
Canon Pixma iX6820 Wireless Business Printer with AirPrint and Cloud Compatible, Black https://www.amazon.com/dp/B00HM0IVDY/ref=cm_sw_r_cp_api_glc_fabc_I2Z.FbSHQ33VW?_encoding=UTF8&psc=1
Do you have a glass top coffee table? You can just set the light on the floor, tape the film to the screen(on the flat back, not the inside) and set it film side down on the glass.
I would recommend a UV LED light. My exposure time is around 54 seconds with my DIY setup. Here's an example of the one I've been using: https://www.amazon.com/gp/product/B06XJZL97N/ref=ppx_yo_dt_b_search_asin_title?ie=UTF8&psc=1
As long as you have some clean, scratch-free glass to expose on, you should be able to DIY your own exposure unit. I recommend 36" between the light and the glass (My table is shorter than that though and it still works)
Until the screen is sprayed out it needs to remain in the dark. All steps involving emulsion do. I spilled so much emulsion last week, blue goo everywhere....
Yes, they are junk. If you have been on this sub for a few years there have been numerous posts from users who thought they were getting a good deal on a press and regretted it.
Like u/Ballin_Hard420 says, save up a few more bucks and get a Hopkins, or look on craigslist or FB Marketplace for a good used press. The learning curve for screen printing is already steep enough without dealing with crappy equipment.
If you are only going to do one color prints, get a set of hinge clamps, they are much better than a junk press. Catspit YouTube channel has a great video on using a set.
I've also built one from these exact same plans and agree that it's much better to just purchase an affordable 4 color one station. This one ( https://www.amazon.com/Screen-Printing-Press-Color-Station/dp/B0086P5JO8 ) on Amazon after time and effort I think would be much better. And free shipping!
You could probably spray it with fixative.
It'll keep it from yellowing and smudging.
If you don't want the glossy coat, you can just Amazon search fixative.
Buy a head cleaning kit on Amazon. It will have instructions.
Printhead Cleaner for Epson Printers - 5oz 150ml https://www.amazon.com/dp/B004VMWTSO/ref=cm_sw_r_cp_api_ME4IzbFQGPM4P
If you print a ton of files get a cis system from cobra ink. Also check out the waste tank they offer
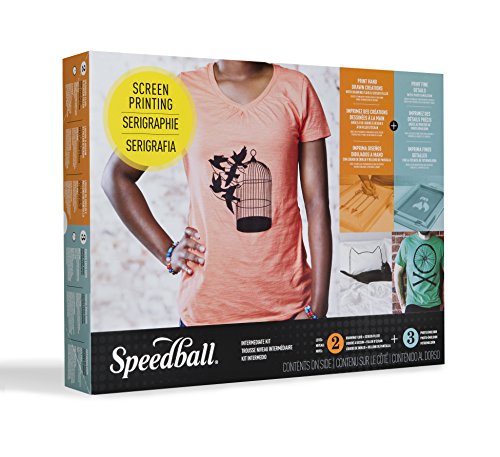
I think a kit from Ryonet is going to be your best bet. They’ve done a good job at putting together affordable and easy to use kits for beginners. This kit is a pretty good deal: https://www.screenprinting.com/diy-print-shop-t-shirt-kit
If you want to save some money and just get your hands dirty you can get the speedball kit on Amazon which is what we learned on about 15 years ago: Speedball Ultimate Screen Printing Kit https://www.amazon.com/dp/B000SKRHX0/ref=cm_sw_r_cp_api_NReNAb4AGFXF3
I thought about getting into building them but shipping them would be a huge pain. I used Amazon for the 395nm LEDs, a 120v to 12v converter from eBay and I just switched to this timer:
https://www.amazon.com/Inkbird-Digital-Switch-110-220V-IDT-E2RH/dp/B008KV65MS
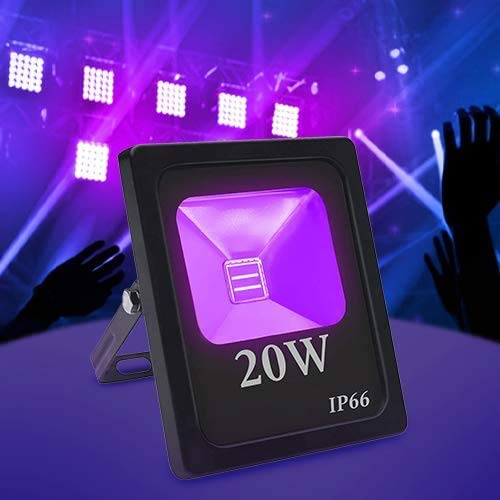
Looks great! I think I found the light on Amazon. Exulight UV LED Flood Light, 20W High Power UV Ultraviolet Blacklight
What emulsion do you use?
Are you using a timer?
Have you figured out a vacuum setup or how are you holding your screens down? I'm thinking of something simple like a heavy duty trash bag hooked to a shop vac.
Here’s the ones I use. However it may not be your film. Is your image opaque enough? Like can you see light through the black? CISinks 100 Sheets 13" x 19"... https://www.amazon.com/dp/B00NI0DBT6?ref=ppx_pop_mob_ap_share
Buying a properly pre-stretched screen. With stapling your mesh is probably going to be loose which wont help with coating or printing. They arent super expensive. We sell them, as well as Amazon/ ebay https://www.amazon.com/Aluminum-Screen-Printing-Screens-Pre-Stretched/dp/B07RB84R9F/ref=sr_1_12?dchild=1&keywords=screen+printing+screens&qid=1602267713&sr=8-12
Genesis GHG1500A Dual Temperature Heat Gun Kit with Four Metal Nozzle Attachments https://www.amazon.com/dp/B00EU2T8GG/ref=cm_sw_r_cp_api_SerOBbD9N3VW3
Heat guns are cheap.
I think they might even be cheaper at Home Depot.
The pro 100. We would get streaks in our Epson if we didn't clean the heads twice a day. The Epson also had problems with taking the 11x17 paper we used for transfers onto white shirts; this Canon does not. I also personally think the prints are more crisp as well, but that could be bias. Canon sends you free photo paper too when you buy their ink, which is nice. The Canon does take up a lot more space on your desk though, things really big.
Canon PIXMA Pro-100 Wireless Color... https://www.amazon.com/dp/B0095F5BCS?ref=yo_pop_ma_swf
Edit: we use this printer (have 2 of em) for mock ups and scanning. I got it for $182, not $300. Also a solid buy, don't know how it would do for small transfers though
HP OfficeJet Pro 8720 All-in-One Wireless Printer with Mobile Printing, HP Instant Ink & Amazon Dash Replenishment ready - White (M9L75A) https://www.amazon.com/dp/B01CJNMMZG/ref=cm_sw_r_cp_apa_v5ZLBbFFZBTSR
Led UV like this one: https://www.amazon.fr/Projecteur-Eleganted-395-400nm-Imperméable-Ultra-violet/dp/B08BCJ8M4G Are the best DIY option. One or two pieces are enough depending on the size of your screens :)
Problems with speedball emulsion
The emulsion goes away when I wash out the screen with water after the usage to clean off the inks, it doesn't go completely away but the image lose quality. I don't know if it's the emulsion that is the problem, or the screen, or the exposure. Bu i tried different times of exposure from 8 to 15 to 20 minutes, and already with 8 minutes the image will appear on the screen. But everytime even the first time, when I wash out the screen the emulsion lose quality.
I use this light: it's a 60w light, and the screen meshi use is 100.
https://www.amazon.it/BOSITE-Inondazione-Impermeabile-Blacklight-Fluorescente/dp/B099N7TJ24/ref=mp_s_a_1_6?crid=3OQE2VQNRRNVR&keywords=60+w+uv&qid=1670844268&sprefix=60+w+uv%2Caps%2C185&sr=8-6
Id be much obliged if you could help me out.
I tried to dry the stencil under the sun but it didn't work.
The best small vacuum I found and am running on my DIY table now is actually a pet blow dryer! Same HP and CFM as a 'vacuum', but it doesn't have a catch bin for dirt you'd normally suck up, so it's smaller. I built a 'sound proof' box for it and it fits under the table nicely. It's plugged into a harbor freight foot switch to turn on and off.
Im excited to see how the new positives perform, hopefully everything works out this time! ill try backing the light up. is 5 mins too long? This is the light I bought.
https://www.amazon.com/dp/B09WMWV3Q6?psc=1&ref=ppx_yo2ov_dt_b_product_details
And….
Tripod for Phone, Flexible Phone... https://www.amazon.com/dp/B07ZNP3BRD?ref=ppx_pop_mob_ap_share
The UV light i use i reach 4min for a4 size and 6 minutes for a3 size. i attain halftones easily.
Take out the glass of this light before using it. Place the light 50cm .away from the screen if printing an a3 sized image. If you don't have space to make a box, maybe create a setup under a desk or in a cupboard of your house. Or you could even take out the bottom panel of your box and prop it up.
I genuinely faced the exact same problem as you and this is the solution that has worked. A lot of people talk about Metal Hallide bulbs but i live in Australia and they're way too expensive here.
Many would argue why bother when you can print them on a printer or pay for a company to do them en masse. I like to screenprint stickers because they have a nice old school feel to them and if you do them right they're way more durable than anything you'll churn out of an inkjet. Obviously you have to think about your design and multi color prints are going to need to dry/cure inbetween layers.
Whilst I have a 4 head setup for doing garments, I set up a cheap piece of MDF with some screen clamps off amazon for my sticker rig:
https://www.amazon.co.uk/Screen-Printing-Metal-Butterfly-Hinge/dp/B07B7LX4VR
I use 305/120t screens and solvent ink - make sure you have a respirator mask that can deal with the fumes because it's going to stink when you're printing and not be great for you.
Get everything set up before you start because the solvent ink isn't going to wait for you. Work quickly and methodically and get that screen cleaned as soon as you're finished.
Once printed and dry, I cut them using a Silhouette Cameo and they're good to go.
Check out my post history for some of the stickers I've printed or send me a message and I'll be happy to go into it a bit more.
I have used the blue painters tape, it works for a single job but will absorb if it is left on the screen. If you are planning on doing multiple uses go for one of the chemical resistant tapes. Also to clean the ink and screens look at Ecotex® Plastisol Screen Wash... https://www.amazon.com/dp/B079F4DVTQ?ref=ppx_pop_mob_ap_share It is amazing and does not have a nasty smell to it.
Good luck and have fun!
Sorry for such a late reply as I haven't been on lately. I have been looking for presses in my area and not much. I found this one https://www.facebook.com/marketplace/item/2490423731270170/. Let me know if this is worth it. I think it is. I also think im just going to have my screens made online, saves me the headache and is cheaper than the labor imo.
They don't have art supplies like that in Japan? I would think that Speedball would be everywhere. I did find this link on how to make your own emulsion. http://www.ehow.com/how_8561186_diy-photo-emulsion-screen-printing.html
Yeah thise were to loose on the 3/8 16 thread and fell off. I did however order these and they are perfect! https://www.amazon.com/KALOPEZY-Furniture-Levelers-Adjustable-Cabinets-Sofa/dp/B09GY18YQG/ref=mp_s_a_1_5?crid=2VQA8C80PC607&keywords=3%2F8+16+furniture+legs&qid=1666918235&sprefix=3%2F8+16+fur%2Caps%2C154&sr=8-5
$100 is a pretty decent budget. Theres plenty of DIY exposure box videos from YT. https://www.amazon.com/gp/product/B07TWWNDH8/ref=as_li_ss_tl?ie=UTF8&linkCode=sl1&tag=theinkbuild0b-20&linkId=3d44bd78c413d82214d2038dd735edf6&language=en_US
This one is from a channel named "The Ink Build Up" go check him out.
I made one myself and bought a UV led strip for about $8 3/4 plywood scrap Timer delay relay $4 Aluminum foil tape $1 12v 3A DC power adapter $3 1/4 glass $5 Speaker box corner $1
You need to get your exposure time WAY down. Long exposures and half tones don't mix too well. Find a bright UV light or lights and get your times down.
I had a Ryonet RXP with fluorescent tubes and exposure took a LONG time. I pulled the tubes and installed two of these: https://www.amazon.ca/gp/product/B07VH3CVSF/ref=ppx_yo_dt_b_search_asin_title?ie=UTF8&psc=1
Cut my exposure time to 10 seconds.
I use this stuff because even after 5 years, I was still a dum dum and messing a lot of screens up. I expose for 10 minutes under a halogen lamp from 18 inches away, then spray with cold water, let sit in a trash bag for a few minutes, then spray out easily in my backyard with a hose, even on a full sunny day which I would have never done before. It's been a game changer for me.
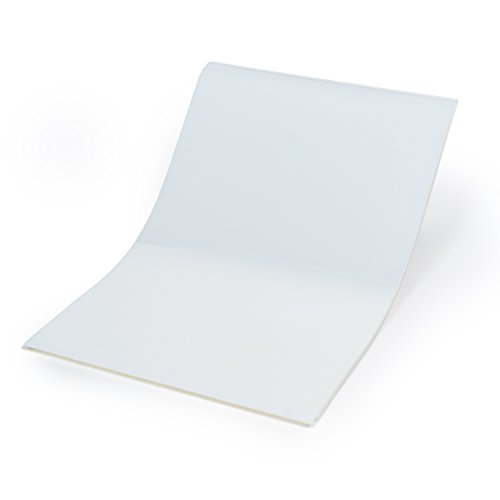
Any kind that is 100% clear, waterproof, and specifically for an inkjet printer. 11x17" and 13x19"
Word of warning, the film does have to go into the printer a certain way. One side of each sheet of film will be slightly sticky; that's the side you want to print on. So you'll load that sticky side up in the printer.
Also, always keep your film!! Even misprinted film sheets can be useful.
I like your setup but I would really recommend two things. One, move the light to the bottom of the box. The photo looks like the light is right near the glass which may not be getting light evenly over whole screen. Strange angle so maybe its further away than it looks?
Two, invest in a UV light. You can get them for under 30 bucks and it will change your exposure time drastically. I will link the one I use and I expose at exactly 60 seconds. It is so worth it to lower your times. I think this one($50) would work great in your box...
> EIKO Suoreme photoflood bulb
https://www.amazon.com/Eiko-Supreme-ECA-Photoflood-Light/dp/B000TZQUF0
Not UV, just a bright white flood light bulb I think
I use ink I got off of Amazon. I’m sure a lot of others also use this brand. I’ve had no issues printing transparencies and there’s even a YouTube video guide that someone made for darker prints.
something like this on amazon is good for big prints- Amazon transparencies
​
for printers- damn near any epson photo printer is gonna be good but here are some highlights-
- epson 1400
- epson 1430
- epson P800
also need to find your local screenprinting supply shop and just call them up. they're usually very willing to help as screenprinting is a pretty small community all things considered.
Oh sorry, is there still a thin layer of emulsion left? I still use dehazer/degreaser to get that out. We use Ecotex Hyper Haze and it has a slight abrasive that can help break down that last bit of emulsion when you scrub it in.
- one more 10 meter of strip.
The timer is a cycle timer I used for terrarium humidifier: https://www.amazon.com/Techbee-Intermittent-Electrical-Programmable-Countdown/dp/B0B1HN36QY
I’d like to get a 12v timer to go in after the power source transformer box for two reasons:
1: to eliminate the need for the outlet on top left which would reduce the vertical profile and I could get my cycle timer back for terrariums.
2: the transformer takes a partial second before the dc is ready. It really doesn’t make any difference in quality.
UV Flood Light, 30W... https://www.amazon.com/dp/B08NDLT94B?ref=ppx_pop_mob_ap_share
Bought this and it works better than I could have hoped for. I just burnt my first screen a couple days ago with it and I got it right on the first try.
I use this one and power it with a v Mount battery. The water pump is separate from where water sprays out so it’s very light. Great pressure. 100000% happy with it.
I have a one color press that I would be happy to send you if you pay shipping. Its kinda crap but it's what I started with.
I always used a plain old halogen work light and calibrated with a step wedge. My exposure time was 12 minutes & 30 seconds. The blacklight probably puts out a lot more UV, so it should be a lot faster.
Use a step wedge to calibrate.
I had a unit similar to this. The lights sucked and the electronics fucked up. So, I opened it up, took out all the old guts and put four lights that you are asking about inside.
This is it!
Had nothing but solid results. I normally print on glossy/semi glossy on high or best settings.
There’s a smooth and a slightly rougher side, as long as you’re printing on the rough side, should all be good!
Look on amazon for a nylon roller idle bearing....its the same ball bearing but with a nylon wheel around the outside. This will soften the landing and increase the diameter so you can get the registration tight.
Yinpecly 608Z Plastic Roller Idler Bearing 0.31 x 1.26inch Sliding Door Pulley Nylon 0.31" x 1.26" x 0.47"(IDxODxT) Flat Pulley Wheel for Furniture, Hardware Accessories, Mobile Door White 4Pcs https://www.amazon.com/dp/B08TBL37VH/ref=cm_sw_r_cp_apan_i_F68H7GRKMHPSM0G6X06N
Thanks for responding to quick to this! Here is the silk screen. I would add links to the shirts and ink, but I'm not having any issue with that step.
my screens are like 9x11.5 in for a 8.5 x 11 in. trasparency so I should have it like 14.5 in away from the screen?
Also I figured out my problem I was printing my inkjet transparencies on the wrong side haha I am getting good prints now any tips or settings to change to make them more opaque? film im using https://www.amazon.com/gp/product/B07S5GKGSJ/ref=ppx_yo_dt_b_asin_title_o00_s00?ie=UTF8&th=1
No nothing washed out of the 7 second run or any of them
I have been taking them outside to rinse with a garden hose in double wrapped tote bags to stop light They are probably getting cooked in the process of taking them out of the bag or my light is too close I am going to put it further out and rinse it inside in the dark I just dont feel like my shower head is strong enough pressure thats why I took it outside I will try the 7 sec thing again and see if my screen washes out
Switch your vinyl. Find a nice stencil vinyl (perhaps like this and you might have better luck. That permanent vinyl is a great brand, but not a good one to use for this.
I use pwr and a 30w uvled, so pretty close to your setup. I expose for 25s with ink jet transparencies.
I agree with mrsmee 100%- put something on top of the screen. It blocks the light from the top, and if you use something heavy (a ream of printer paper for instance) it'll hold the screen against the positive.
About the glass-fast table is thick and probably tempered. That will likely cause issues. Go to your local hardware store and grab a piece of window pane glass. You can probably get something just larger than your screens for ~$10.
If the ink is smearing when you print with ink jet, make sure your printing onto the rough side of the transparency. If you don't have a rough side, you've got the wrong transparency. This waterproof one should work - https://www.amazon.com/dp/B01H7RSXF2/ref=cm_sw_r_apan_i_0CX8KTCAQH75NPW8TN3X?_encoding=UTF8&psc=1
Sharpie Industrial Permanent Markers (12 Count) https://www.amazon.com/dp/B00006IFEO/ref=cm_sw_r_apan_i_Y3PS143X3S22WXBB6W6P?_encoding=UTF8&psc=1
I used these at the last shop I worked at. We'd write directly on the screen frame and cover with clear packing/box tape 2x on opposing corners front/side
When the tape gets old just relabel on the other opposing corners
I had really good results just writing on the aluminum with those industrial sharpies though with no protection at all
I’m going to attach a link for the dip tank and the emulsion remover we use at my shop. Submerge the screen in the tank for literally 30 seconds, pull it out and spray with power washer and it washes right away.
NEVERTHELESS 25 Gallon Dip Tank for Screen Printing https://www.amazon.com/dp/B08ZNSHCVZ/ref=cm_sw_r_cp_api_i_PV8AVXYR3RYZPZQCSP4Z?_encoding=UTF8&psc=1
Well, as I said, the laser can be bought for under $100. I didn't say the machine, I said the laser.
All that is needed for this is a laser capable of marking fabric, not cutting it.
This laser can mark on material and engrave leather.
But even if you are looking for a machine, you can absolutely get a laser engraver under $500 that'll work fine with about a 15x15in work area.
I'd been running a small shop vac on my DIY vacuum table like that for years … then I discovered this pet dryer thing: https://smile.amazon.com/gp/product/B017AGL046/ref=ppx_yo_dt_b_search_asin_title?ie=UTF8&psc=1 Its basically the same motor, same suction, flow rate, cfm, etc, but it doesn't have a big bucket for collecting what you vacuum up (which we aren't doing, anyway). It works exactly the same, is slightly quieter, and is way smaller so I can build a soundproof box around it that's not super big. Results of the box to follow!
https://www.amazon.com/gp/product/B00HM0IVDY/ref=ppx_yo_dt_b_asin_title_o05_s01?ie=UTF8&psc=1 This is the one I use. It allows me to print 13 x 19 in film transparencies. I haven't used it to print vinyl stickers so I cannot speak on that but so far it has been a great printer.
Ive used that with comet white from Green Galaxy and Snow white from ecotex. Its worked fine on both.
Another option is to buy a cheap reptile fogger.
I linked you to the one that I used for a while. It will work wonders if you can't move very fast between prints.
This is the one i use. I only need one and it gets the job done for sure. The results are great as i have a few local printers paying me to burn screens for them. LED Flood Light, Exulight 20W... https://www.amazon.com/dp/B076LKX8SM?ref=ppx_pop_mob_ap_share
Ok, so yes there is "pallet tape" that can be put on top of a platen (aka pallet) for easy cleanup later. After you finish printing you can just peel it off, and all the adhesive/garment residue on top of it, and just toss the whole thing then put a fresh piece down.
Its not required at all but its pretty nice to have as it speeds up cleaning. It is pretty expensive though so most people don't use it.
It looks sort of like a really wide roll of masking tape. Although it isn't masking tape, or at least the adhesive seems to be different and more heat resistant.
https://www.amazon.com/Pallet-Screen-Printing-Platen-Masking/dp/B07NP5V84T?th=1 is one i found on amazon real quick
QUANS 110V 20W UV Ultra Violet High Power LED Light for Curing Glue Blacklight Fishing Aquarium with US Plug https://www.amazon.com/dp/B018C71QHI/ref=cm_sw_r_cp_api_glt_i_58EMSHMJ98PAWRNMTDX1?_encoding=UTF8&psc=1
I use this
not this exact one, but something similar that we got at the local hardware store. Amazon link
QUANS 50W Ultra Violet UV LED Light for Curing Glue Blacklight Fishing Aquarium Glow in The Dark Special Effects, 110V US Plug (50 Watt) https://www.amazon.com/dp/B06XJZL97N/ref=cm_sw_r_cp_api_glt_i_TZS3PDV0BDKG5HK4NATN?_encoding=UTF8&psc=1
This light works great!
Using the sun for exposure is not the best idea, too many variables. You will also likely expose the screen to sunlight while carrying the screen in and out of your house.
Get an LED UV Blacklight like this one. Your exposure times will be much quicker.
By the way, a 60w bulb will not work for exposure, it's the wrong wavelength.
An LED UV Blacklight works better than the halogen, quicker exposure time and cooler.
The link I have is to the German Amazon but I also found them on the American one, but it's way cheaper for me to order from Europe.
Hi, thanks for your input! I don't think the bulb is the problem ... This is the specific bulb I've been using.
It was being sold with the other Screenprinting equipment at the art store, and came recommended by the resident Screenprinting expert there, so I'm assuming it'll serve that purpose. I haven't seen a worse performance with this bulb compared to the UV bulb that came with my Screenprinting kit. If anything, it exposes faster.
You can diy expose the screens. You need a scoop coater, emulsion, UV flood light lamp glass bigger then the art and a something to hang the floodlight above the screen film and glass sandwiched together.
That magic wand is what I used when my pressure washer broke it's not a pressure washer but you can get the screens clean enough until you can get a real one. Do cleaning with the wand put them wer into contractors trash bag take them to the carwash with the coin operated pressure washer add dehaser put select rinse and wash away. You will save a bit of money in the carwash.
I dont think I'd be direct competition at all. I'm looking to aim more at a local market and I already have some small stuff lined up through a good friend of mine in local government.
https://www.facebook.com/marketplace/item/569579583941793/
This seems like a good deal to me
Yup here ya go! VEVOR Screen Printing Machine 4 Color 1 Station Screen Printing Press 21.7X 17.7 Inch Silk Screen Printing for T-Shirt DIY Printing Removable Pallet https://www.amazon.com/dp/B07Y4R8ZYS/ref=cm_sw_r_cp_api_glt_i_KX39VZ3TH23RQE06F86Z
It’s a nice press but for that price I’d want one that self opens after timer runs out. It’s hard to justify the high cost against shittier but competent Chinese heat presses in the $300 range.
A new auto open hear press runs around $500: Heat Press Machine 20" x 16" Auto Open Heat Press Machine Horizontal Version 110V https://www.amazon.com/dp/B01EN02YHE/ref=cm_sw_r_cp_api_glt_i_0ACZA4H0E8WC20AP3ED8
I use iceing spatulas from Amazon
Ateco 1307 Ultra Offset Spatula with 7.75 by 1.25-Inch Stainless Steel Blade, Plastic Handle, Dishwasher Safe, Silver https://www.amazon.com/dp/B000BRQXVW/ref=cm_sw_r_cp_apip_METSEYMvRPlM1
400-410 NM wavelength. https://www.amazon.ca/dp/B07Y9XK26D/ref=cm_sw_r_apan_glt_i_KFXR8Z9QM1WAXQ6SB6X7
That's a link to it there.
I will take pictures and come back to this thread the best burn I do! I have both 230 and 110 mesh.
I am going to try better positive contact with my film and a better black out method for burning aswell
If you want to do your own designs there is a free vector program, Inkscape, that will allow you to draw your own. It has a trace bitmap feature that will allow you to trace your own designs.
and I'm saying 2K canadian, btw. Because all that other stuff, up here at least, is going to run you well over a grand.
https://www.facebook.com/marketplace/item/496032541024539/ look at this rip off for example.
Yea it seemed to wash out fairly good except the ones close to the edge but all around was the easiest washout I’ve done yet I’m still figuring a lot of but this was my most successful print yet except the reclaiming part.
I’m using this one UV light and I’m using chromaline emulsion
I was hoping it was just haze well would haze remover get this out?
I use this
Though I can't seem to find the single light on amazon anymore, just this 2 pack.
I have it about 16 inches away from my screen and expose for 50 seconds. (your time will vary depending on emulsion type, distance, etc)
I prefer it PMI honestly because I don’t have to use any sprays or glues to help my shirts or hoodies stick. I use #380 in general for shirts but when I use it for hoodies I have to just scrub off lint every 2 sweaters because the hoodies are so linty lol. But they have #382 which is high tack and is perfect for hoodies PMI link
If you are looking for free invoicing, payment and estimates I would check out Wave Accounting. Been using it for years for my screen printing business, it’s free and I love it. In addition to full accounting software you can set up products and services for estimates and invoices so you don’t have to enter them every time. Not sure if that is as specific as what you are looking for but the price is right!
I've been working through Gumroad's Small Product Lab and I've found it really helpful in getting something out the door. You don't have that problem, but IMO it could help motivate you to practice the marketing and sales part. https://gumroad.com/smallproductlab
You can also print them separately and piece them together. If you have a design software, just set the image up in different artboards, otherwise you can use something like https://rasterbator.net/
Just a suggestion in case you cant find a print shop or individual to do them for you.
When you're in the art phase, make some guides around the image and stick some registration marks in there. 1/2" x 1/2" works good. I usually place them in the top right and bottom left corners. Be sure they use the "registration color" so it'll print with all the other colors. If it's cmyk process you're doing, make sure you pull light to dark (yellow-cyan-magenta-black); you might have to fiddle with it to get the vibrancy you want.
As long as the screens are registered and held firmly, it should work until you're done.
Check out the recent reviews, someone else used a 500W light and it worked well for him.
Thank you so much for your help! here’s a link to the emulsion i’m using, Ecotex AP Blue All Purpose Ready... https://www.amazon.com/dp/B075QKGB1R?ref=ppx_pop_mob_ap_share and i do print the stencil with my inkjet printer so that might be the issue 🤔 The power washer was definitely much too close. I’m going to try it with a coin that sounds like a good idea, I am going to get my next transparency from fedex and see if that makes the difference, i’ll cross my fingers 🤞🏼 Thank you again!
When asked about low cost lights I always recommend this one. https://www.amazon.com/QUANS-Blacklight-Fishing-Aquarium-Waterproof/dp/B07JFGGXRQ?th=1
We bought one and tested it and it worked great, fast exposure and good cure. Emulsion for water based is PWR. You can use the AP Blue as well but I would recommend the amazon light.
https://screenprintdirect.com/collections/emulsions/products/ecotex-pwr-water-resistant-emulsion-screen-printing