
What are
/r/classicmods'
favorite Products & Services?
From 3.5 billion Reddit comments
The most popular Products mentioned in /r/classicmods:


The most popular Services mentioned in /r/classicmods:
Retropie
Gofile.io
Batocera.linux
The most popular reviews in /r/classicmods:
If you get adapters and plug in the NES Classic to a CRT, maybe. I'm assuming you already have the Duck Hunt ROM loaded on the NESC. It won't work on an LCD or (O)LED TV because light guns can only read from a CRT. You'll need a CRT if you wanna make it work.
​
Here's some Amazon links:
You need to enable OTG via custom kernel. Autobleem has an option for this.
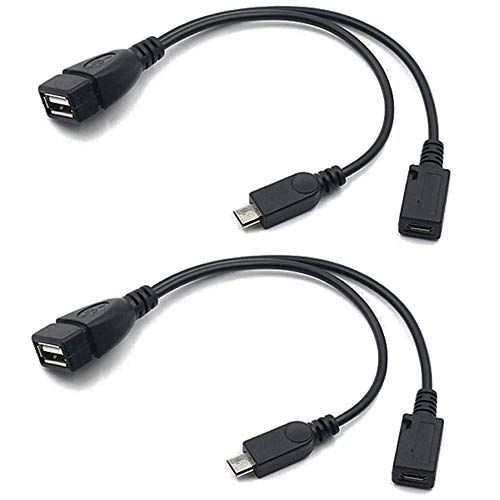
I use this OTG cable, very cheap.
https://www.amazon.com/gp/product/B0826QR2RJ/ref=ppx_yo_dt_b_asin_title_o00_s00?ie=UTF8&psc=1
I read this thing that might solve the problem, " Your romset (game zip file) is not compatible with the emulator you are using. Most commonly this is because the the romset version does not match that required by the emulator. Its also possible, but less likely, that the game is not compatible with the emulator at the moment.
You can confirm you have the correct romset version by checking the emulator you are using against the romset version it requires:
https://retropie.org.uk/docs/MAME/ "
Series S only recognizes official XBox compatible controllers, so they have to be licensed to be XBox One or Series X/S compatible. 8BitDo makes a wired XBox version of their Pro controller which has a retro-style d-pad on the left so you get the SNES feel for retro games but the twin sticks are still available down in the middle like a DualShock if you need analog controls.
If you don't want to spent $300+ on an Xbox though, I'd highly recommend picking up a Raspberry Pi 400. It's the most powerful iteration of the Raspberry Pi 4 built into a C64/Amiga-style keyboard "console" so you don't need to add your own case and heatsink. In fact, the Pi 400 is reinforced by a metal plate that acts as a big heatsink against the SoC so it's actually clocked to run at a higher speed than the bare Pi 4 boards.
The Pi 400 is a great alternative to hacking a mini console b/c the OS install is as easy as flashing a Batocera disk image onto a microSD card and booting that up. There is zero risk b/c you're not hacking it like the mini consoles where the custom firmware has to be managed by the Project Lunar or HakChi software you need to keep installed on your PC. And you can even swap out the SD card for one flashed w/ the Raspberry Pi OS and you have yourself a fully functioning Debian-based Linux desktop PC.
Since the mini consoles are all discontinued, their resale prices are now inflated and can range from about the same as a Pi 400 to way higher. That's not to mention the tricky issue of counterfeits when you're looking at the Nintendo mini consoles. Finally, all the mini consoles were equipped with the bare minimum of internal storage, RAM and CPU power to run their retro emulators. The Pi 400 was meant to function as a light desktop so it has 4GB of RAM, as much storage as you want to buy for your SD card, and built-in wifi/ethernet/Bluetooth.
You need to have the correct bios placed in the system folder of retroarch and make sure they are properly named as shown here : https://retropie.org.uk/docs/Sega-CD/ ------> roms go inside the segacd folder. I got everything working great and am now moving onto crt / scanline filters etc (= hope that helps!
Ok, so here's how you can extract the ROMs out of the backups that Project Lunar creates. (Turns out that alldata.bin and alldata.psb.m are already created for you when it does the backup)
Download MArchiveBatchTool from this link. Extract the zip file and copy alldata.bin and alldata.psb.m from your Project Lunar backup into the extracted directory.
Now, open up a command prompt inside the MArchiveBatchTool folder, and run this command:
MArchiveBatchTool.exe fullunpack --keep alldata.psb.m zstd nY/RHn+XH8T77 64
When finished, the ROMs will be located inside of the "alldata.psb.m_extracted\system\roms" folder. Enjoy!
Good to hear. This is the wireless controller I bought recently and works great on the Mega Drive Mini.
Well it looks like a misinformation on the amazon page then. If your box doesn't say its for the mini, and if the manual doesn't indicate its for the mini also, it simply is not for the mini. Both of my links have the info written on the bottom left on the box, the box in your link doesn't say anything about the mini.
Also, your controller has a Start and Mode button, all MD mini compatible controllers have a Start, Select and Home button, of which the latter takes you to the home menu of the mini. There are even Saturn like retrobit controllers that are compatible with the Mega Drive mini, they also have the Select and Home buttons
https://www.amazon.de/Retro-Bit-Official-Wireless-Playstation-Raspberry/dp/B07Y5M8R3Y/
The box says for PC, Mac and Steam. There are Retrobit controllers that explicitly say fir MD mini. I have a wireless retrobit 8 button arcade pad, the 2.4g version, not Bluetooth and it works fine with the mini...
I just had a look on amazon UK and it looks like your best bet (wired) is this one https://www.amazon.co.uk/Retro-Bit-Official-6-Button-Controller-Raspberry/dp/B07S43KJL7/
It's only 6 buttons but to be fair, that's fine for mega drive games.
And here's the one I have
https://www.amazon.co.uk/Retro-Bit-Official-8-Button-Playstation-Raspberry/dp/B07Y5KR44L/
Both model's box explicitly says it's compatible with the MD mini.
Generally, following this video will get you there.
To load Sega CD games to a Sega Genesis Mini using Project Lunar:
- Acquire BIOS files (Google is your friend)
- Download the appropriate Sega CD core for RetroArch
- Load the BIOS files on your USB drive in the /project_lunar/retroarch/system folder
- Sync the games using Project Lunar
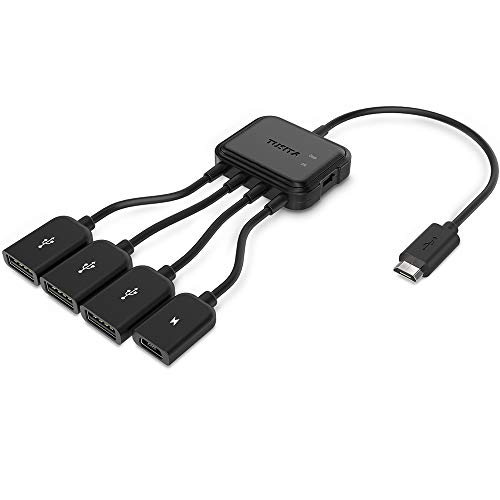
Sega CD games are MUCH larger than normal Genesis ones. It's possible that you might find a game that fits without using an external drive but most won't. Get a simple USB stick and you can use something like this hub which fits on the back so it won't get in the way of your controller ports.
Forget that oversize crap and get this. It looks 3x better and smaller. Only $92 PCエンジン mini https://www.amazon.co.jp/dp/B07QHNRVYV/ref=cm_sw_r_apan_glt_i_F0J6F3HGPDZFMKAFM3A0?_encoding=UTF8&psc=1
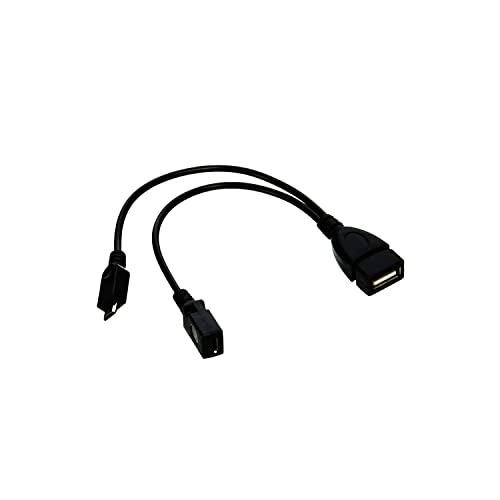
You can either add a USB stick to the front of your Mini or get an adapter for the rear like this which is what I have, and lets you keep your front port open for P2's controller
That's a really neat concept I was thinking myself. My best thought is to buy your own small shelving system somewhere and paint/chop it up how you want. Best I could come up with on a quick google search are something like small art/utility storage (but you'd want to take a closer look at the dimensions first): https://smile.amazon.com/Multikeep-Adjustable-Shelf-Floating-Organizer/dp/B07FNSHLT3/ref=sr_1_4?dchild=1&keywords=Art+Shelf&qid=1608068471&sa-no-redirect=1&sr=8-4
That or it's never a bad time to get into woodworking!
Maybe throw a small drawer below it to keep controllers? Let me know what you decide!
Try unplugging your PS Classic, then inserting the USB, plugging power back in and waiting 30 seconds before turning the system on.
I was having issues that the USB stick was being bypassed when turning it on too quickly - probably due to too little power being provided to the stick. The front USB ports are weaksauce when it comes to power.
What actually solved it for me 100% of the time was to get an “On the Go” adapter (https://www.amazon.co.uk/dp/B07FY9Z9GD?ref=ppx_pop_mob_ap_share) to plug the stick in-line into the micro-USB power socket at the back of the console. This provides ample power for the stick and the system can still read the USB.
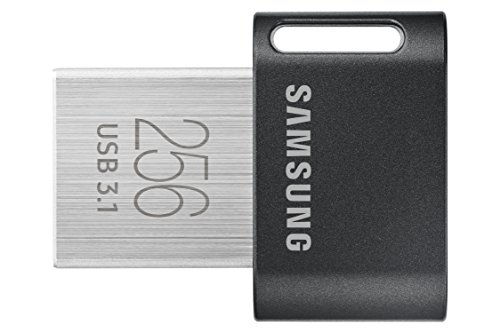
For added measure, I grabbed a decent USB 2.0 stick (https://www.amazon.co.uk/dp/B00RM1EC1S?ref=ppx_pop_mob_ap_share) which draws much less power than USB 3.x and now I’m happy gaming with mad storage.
Hopefully this info helps, as I had to do a lot of searching to find out what’s what.
I’d definitely say try at your own risk, because this deal is way cheaper than any other 256gb usb 3.0 flash drive.
If you don’t have a Microcenter near you, it’s only $1 more shipped from Amazon.
I got the 256gb, but I’m returning. Read speeds are slow on my PSClassic - it takes quite a while to load up a game via bleemsync 1.1. I started out with a sandisk 16gb 2.0 and that boots up much faster. Returning the microcenter and looking to get a 128gb from a more reputable brand.
And in terms of space, I only recognized about 230 gb of usable disk space.
Good luck to those who get it to work.
i think it mainly depends on the USB flash drive and the retroarch build. I'm using this SanDisk Cruzer Glide CZ60 64GB USB 2.0 Flash Drive from Amazon: https://www.amazon.com/gp/product/B007YX9OA8
I've tried many USB flash drives and MicroSD to USB adapters ranging from 8gb to 128gb but none of them perform as fast as the SanDisk Cruzer Glide CZ60 64GB.
As for the cores I'm using, I actually downgraded to KM's October release as I notice his latest build doesn't run PSP games as well. So I'm using Autobleem with RetroArch 1.7.7 Xtreme and the cores from October. However I did replace the Flycast core with the Nov release as that one can load Atomiswave games.
I have a separate 16gb USB that I'm using with Bleemsync and KM's latest cores to play Sega Saturn games.
I prefer these ones as they are compact. Just be sure to get left angled. Right angled is for the SNES Classic.
As a cleaner alternative, I recommend this OTG adapter:
https://www.amazon.com/gp/product/B07TZFS7V7/ref=ppx_yo_dt_b_asin_title_o04_s00?ie=UTF8&psc=1
Not sure I understand how he was doing the controls though. I was just planning on using something like this https://www.amazon.com/dp/B07LBV9SJ3/ref=dp_cerb_1 but somehow wire gamepad like buttons. I suppose there may be some way to mount micro switches.
This is the one most people are using. I have made 5 modded PS Classics with both the 128 and 256 GB versions of this drive:
This is a pretty good one with a 5 ms response time, and has audio out, which is a concern if you're using a monitor without a soundbar or HDMI audio/video extractor.
So far as I know, the neo geo mini has no hack yet, but this one already has one usb hack, it is slow to install the first time (like 30-40mins) but it works.
I just know a little about the C64, but you could connect a usb keyboard, also, there is one cfw that you could add games from the usb stick. But not sure how many can you put.
First you will need an otg, this one works like a charm, in comes in a pack of two
Then watch this tutorial to prepare your classic for otg support (you will need a 2.0 usb for this)
Then, download autobleem and retroarch, add yor pbp’s to any usb you want and you are set to go
This way you don’t need to modify the hardware and you cam play two player games