
What are
/r/360hacks'
favorite Products & Services?
From 3.5 billion Reddit comments
The most popular Products mentioned in /r/360hacks:


![SABRENT SuperSpeed 2 Slot USB 3.0 Flash Memory Card Reader for Windows, Mac, Linux, and Certain Android Systems Supports SD , SDHC , SDXC , MMC / MicroSD , T Flash [Black] (CR-UMSS)](https://m.media-amazon.com/images/I/31fH9ChQYYL._SL500_.jpg)


The most popular Services mentioned in /r/360hacks:
WeMod
Gofile.io
Let's Encrypt
Rufus
Hard Disk Sentinel
RPCS3
The Eye
7-Zip
The most popular reviews in /r/360hacks:
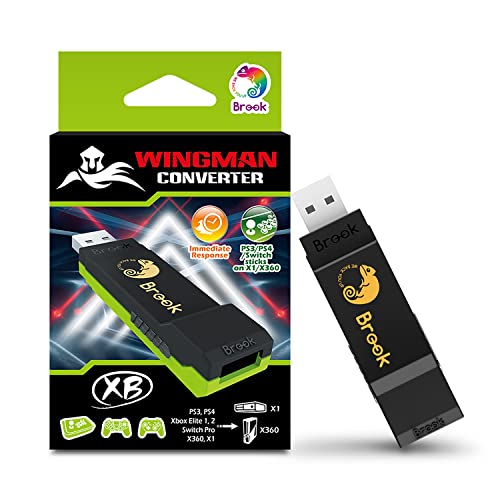
This adapter will allow you to connect an Xbox one controller (and a bunch of others if you so desire) to your 360. Slightly expensive, but well worth it. I have one and can vouch for it— I play a lot of shoot em ups and use an 8BitDo M30. Works like a charm.
You can do it for free these days with services like Let’s Encrypt, it’s probably more likely that when Xbox Unity was created these services didn’t exist and not using SSL was more common. Since then, it’s probably been a “if it ain’t broken, don’t fix it” situation, since there’s nobody at Phoenix actively working on it.
Why...
buy this, it'll last you years. You're making your life difficult for no reason.
You need a USB adapter that supports 1 Bit mode. The transcend USB adapter, https://www.amazon.com/Transcend-TS-RDF5K-microSDHC-Reader-Black/dp/B009D79VH4
This will work. I use this for every console. No issues
You said phat not slim. Slims can either be easy or a royal pain to open. So it's better to use the opening tool on both of them to avoid breaking anything. I wouldn't use a flathead on any plastic unless you like marring the plastic. Some of the special editions are a royal pain to open, especially that Halo 4 edition. This is the set I got for slims: https://www.amazon.com/gp/product/B07DNX4ZPZ/ For phats I use this tool: https://www.amazon.com/Gam3Gear-Unlock-Opening-Xbox-360-Console/dp/B01GDPI3FE/
Heyo. I'm one of the few folks who's actually followed this path as well. Unfortunately I can't offer much help.
I used this monitor, on a Trinity: https://www.amazon.com/dp/B019GQS3UC
It is ridiculously small, and has no audio or controls of any kind.
I looked into HDMI as well, and the problem I ran into there was getting access to any pins. You have to get under the metal AV block and getting that off the board is hard to do without damage, without the proper training and tools. I tried it on an already dead console, and I'll spare you the gory details, it did not go well.
Good luck. Feel free to reach out and chat with me, but I can only offer inexpert advice.
I used very small tipped tweezers to scrape it. Here's the soldering iron tips I have. I used the smallest here. https://www.amazon.com/gp/product/B076ZQZQ8W/ref=ppx\_yo\_dt\_b\_search\_asin\_title?ie=UTF8&psc=1
Use a box cutter or a heat gun to open the plastic case. Amazon is having Prime Day sales and a lot of SSDs are on sale. I linked a 480gb Kingston ssd for $30 right now. Load times will be snappier with an ssd but don’t expect any performance gains over an hdd. The ssd is bottlenecked at sata II speed due to the 360 architecture.
Opening hdd case: https://youtu.be/-Kp0y6JxC3A
Links for the NB 50mm 5v fans
Leave the slim drive intact. Open the "phat" hard drive's enclosure, and attach the hard drive inside to the slim console using a USB-SATA adapter. Then just use the file manager to copy everything from the slim drive over onto the phat drive.
The only thing that will need to be adjusted is the fan settings, as those are saved to the
SMC. And that's only if you use modified fan settings.
There is a better third option. Get a starter iron and some cheap soldering practice boards so you can learn how to solder with those. This way you will be much better prepared and could probably skip the "secondary xbox" part unless your primary console is something that is really rare or special in some way.
I was once in your shoes and decided to learn how to do this stuff myself and its been one of the best decisions I have ever made. The skills you learn with this are incredibly valuable as you will be modding and repairing things left and right as time goes on. Here are links to get started:
https://www.ebay.com/itm/185209229742?hash=item2b1f5491ae:g:EpoAAOSwpAhdEEqC
Then you will want to pick up one of these cables: https://www.amazon.com/dp/B07B6K88BR?psc=1&ref=ppx_yo2ov_dt_b_product_details
And then follow this guide: https://digiex.net/threads/xbox-360-hacked-xbox-backwards-compatibility-v5832-april-2018-download.15742/
I had the exact same issue on two separate controllers. I tried all sorts of things I read online to get them to work; foil in the battery pack, bending the prongs at the bottom, pulling the bit of metal out in the middle etc, but nothing worked.
I bought these on Amazon: Venom Xbox 360 Twin Docking... https://www.amazon.co.uk/dp/B00284AI3K?ref=ppx_pop_mob_ap_share
I’ve not had one issue since and they’re so convenient. You literally charge the controller on the docking station, pick it up and say goodbye to your issue with the controller and bye to buying batteries for controller ever again.
God I sound like a sales rep lol.
I would say keep your stock and get a slim s (corona/trinity). Easy to find on eBay for ~$50, even easier to find on Facebook marketplace. I say keep your original because on your modded one you won't want to go on live unless you want it banned, so you can get all your game accomplishments, then transfer your account to your stock one to sync things up.
Regarding which method, go with RGH3, it's the easiest one out there for the slims, no glitch chip required. You will need a way to extract your nand- you can get a raspberry pico to do it or an xflasher 360 (those is the one I have and it's fast), there are others in not familiar with but you will need them.
As for soldering items, get 0.3mm solder so you aren't dealing with huge blobs and also get wrapping wire it's solid and easily manageable around the board This one: https://smile.amazon.com/dp/B078MVC2GB You can also use 28 or 26 guage wire but I prefer wrapping wire.
Once you've gotten your slim, you might also need a postfix adapter depending on your console and manufacture date, and you will need a resistor - I've used 22k in mine and they've worked out fine.
When it comes to soldering you need to keep your tip hot, like north 375 and you only want to touch your solder points for less than a second or you'll end up like the horror stories of people burning traces and damaging their boards. Also get good solder flux you will need it, without it it makes soldering a bit harder. Since you aren't experienced I would practice on some throw away boards first to get a feel of your iron, flux and solder.
Watch the RGH3 videos on YouTube and you'll see why I say get a slim, it just makes things easier.
Goodluck with your moding, I only started this year and I've modded all my halo editions and several slims.
P.S - when you have it apart, don't run it without the APU cooler one, you could damage it (found out the hard way on one)
Close, but this helps a bunch! I'm talking about putting a 10k RPM WD Velociraptor 2.5" Hard Drive INSIDE a phat 360 enclosure. https://www.amazon.com/dp/B007W715AI/ref=cm_sw_r_cp_apan_i_KYN2ZK53JMAM6RW0NW1N
The link is for a 1TB Version but I found a 500GB for like $20 on eBay.
I actually did a bunch of googling and legwork and am about halfway through the project. I have the enclosure disassembled and hddhackr flashed the drive with no issues (thank God). I still have to set up the Xbox Partition but I will do that later.
What I am now planning on doing is either running molex into the 360 by drilling holes in the bottom of the enclosure OR using an external molex power supply (apparently they make them) and cutting holes into the back of it.
Really all you need is flux, solder, two wires, 1k-10k resistor, and a post fix adapter (depending on your mobo). If you are comfortable with soldering it's really easy, I did my first 4 slims last weekend 1 was a rgh2 with a matrix glitch chip, then I found out about rgh3 and did the rest using that method.
My advice about soldering and the whole process is this:
If this is your first go round, get something small to practice on, the solder points are small and a microscope isn't really needed but can help you check that you did not mess things up - especially on the PLL points on the board
Make sure your iron is hot, and I mean hot...if it takes a while for the solder to melt when you touch it with your iron, it's not hot enough and when you solder the wires to the board you just need to touch and go, don't keep it on the board or else you run the risk of burning things and use flux, it will save your board.
This is the wire I used, but you can use 28 guage wire also https://smile.amazon.com/dp/B078MVC2GB
Weekendmodder had videos on rgh3, so you can have an idea on what you are aiming for.
Goodluck.
Would something like this work?
Are you could go on to Amazon and buy an an empty hard drive shell for the Xbox 360 and fit a different hard drive in https://www.amazon.com/Ximimark-Internal-Drive-Enclosure-Replacement/dp/B07FCWQR2T/ref=mp_s_a_1_3?keywords=xbox+360+hard+drive+case&qid=1646630945&sr=8-3
Yeah those cheap irons without temperature control can easily get above 400 degrees which only gives you about 1 second to be on the pad.
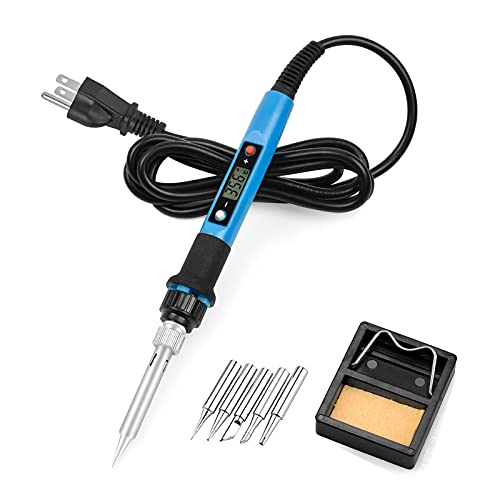
Here is the iron that I have used for years. I love it and it's only $20 :)
I made a pdf containing every xbox game title id ever made along with folder id's. 33 pages containing 1000's of games. I know this is all online but I wanted a quick offline reference. Here's a link if anyone is interested in a copy. It's alphabetical or use CTRL+F to search it. 100% verified. Enjoy
Name: XBOX 360 Game Title ID List.pdf
Size: 290.6 KB
MD5: ebfdb8763c3add7b3c49d3bb5666c918
I highly recommend this one. It matches quality of one 5x it's cost.
https://www.amazon.com/gp/product/B089SKWMPT
The tips it comes with suck, so get some extra tips.
https://www.amazon.com/PINECIL-Smart-Mini-Portable-Soldering/dp/B096X6SG13
Pinecil soldering Iron is pretty awesome for projects like this. Fine point and uses USB-C power. I use my extra 60 watt phone charger for it and it heats to ~500c
if you ever need another resistor kit, here's a decent looking one off amazon. i have it and it has 1k, 10k, and even 22k resistors (I used a 22k because Falcon)
although if your soldering skills are up to par, an SMD resistor would be better - i accidentally tore off a pad by soldering the 22k resistor directly to it (but fixed it using a bunch of flux, hot glue, and using a 30awg wire soldered to the resistor)
Try out Horizon, https://www.wemod.com/horizon
Format a flash drive to fat32 (twice) on your computer. Then plug it into to your 360 and allow the console to format it at the first prompt or go into settings and format it. Then on your 360 browse to the media directory and find the music tracks that you want to copy. Then copy or move them to the usb flash drive. Plug in your flash drive to your PC and use horizon to browse to the location of the music tracks. Copy them to you PC and profit.
It's literally on their main download page, right on the right of the Windows option. But don't go with high expectations: > # For Linux Users > RPCS3 is still in its early stages of development and the binaries we produce are highly experimental. Do not expect stable performance or consistent compatibility as changes are always being made to the codebase.
LONOVO Soldering Iron Station Kit – 60W Solder Station 194℉-896℉ Adjustable Temperature, LED Display, Sleep Function, C/F Switch, 2 Helping Hands, 5 Extra Solder Tips & 1 Solder Wire https://www.amazon.com/dp/B09C18NL86/ref=cm_sw_r_cp_api_glt_fabc_MXVY8E82F18ERD5F4KA3
This is what I used. I just count enough pins, then cut it with a pair of scissors. I've done this on all my Ace chips. After you solder the pins, use a set of wire cutters and clip the pins off on the bottom side of the chip. https://www.amazon.com/gp/product/B07PKKY8BX/
Try these: Hp DVD+R Dl Double Layer 8X 8.5Gb White Inkjet Printable 50 Pack in Spindle https://www.amazon.com/dp/B008YQAFH0/ref=cm_sw_r_apan_glt_fabc_NY1EFARN9CHE5ZRXAW26
I've actually had my HP discs hold up much better throughout the years than the Verbatims which I literally had to pot-tweak my 360 to read.
HPs surprisingly worked without a hitch.
I personally use ArctiClean from Arctic silver to remove the old gunk. Add and let it sit for 5 mins but it takes a couple of times. It works a lot better than IPA at removing & cleaning.
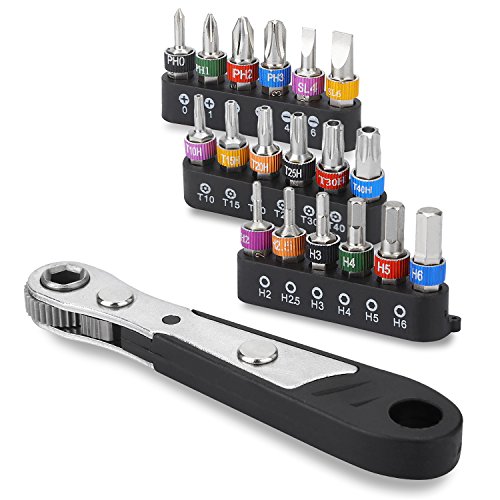
O'reilly auto parts sells this tiny little ratcheting wrench that accepts torx bits. I used them to remove some really stuck jets in a carburetor once. Usually they are in the front of the store in the gimmick display by the counters. That should give you enough torque to remove screws. I wouldn't use the drill. Also, they have one set that has all the torx that fold up into the tool like a multi-tool for bikes or a swiss army knife style. That would allow you to set the tool at a right angle and use the tool body as a handle to turn.
The wrench I have looks similar to this: https://www.amazon.com/Ratchet-Screwdriver-Phillips-Slotted-Reversible/dp/B077YFVC3W/
This is the key set I also have: https://www.amazon.com/Titan-12710-Tamper-Proof-Star/dp/B000LQEUJ0/
Man I thought about doing a project with the chatpad because I remember there being rainbow led chatpads. But I would die with that many smd components.
​
​
That was the product.
It should work just solder it to the shield or another larger ground. I ran into alot of issues with the 4gb. If your soldering is good and you followed the guides. Then it comes down to your sd card reader. I ended up going to a dollar store and found a cheap one that worked. Ive read the the anker and sabrent sd card readers on amazon work well.
Fiberglass scratch pens have saved me when I've lifted a pad. (Too much ground plane and a pad next too it got too hot)
Edit: same as my previous comment, but my fat finger hit the delete button instead of the edit button on my phone.
The actual edit: Kester 951 no-clean has been my favorite flux to use.
KSGER T12 Soldering Iron Station OLED DIY Kits STM32 V2.0 Temperature Controller Electronic Welding Iron Tips Handle Aluminum Alloy Case Power Equipments 110V T12-K D16 JL02 Sting https://www.amazon.com/dp/B07PYFSCJ9/ref=cm_sw_r_cp_api_glt_fabc_HYA7SQA9321NYXZ5SME7?_encoding=UTF8&psc=1 Bro telling you you don’t even need a hakko this is my current soldering station is works wonders. And they take the same t12 soldering tips as a hakko. And it’s a little cheaper
Just because I think your USB drive may be the problem I'll suggest you buy a HDD case and a 2.5" sata hdd under 2tb in size.
https://www.amazon.com/dp/B07FCWQR2T/ref=cm_sw_r_cp_apa_fabc_KC8TSNB6Q878P3C4EV45
I do have what I believe is Trinity, matt finish, mfg date of 2010-08-07, and power cord that is 10.83a. This is a 4gb model, that will need to be upgraded for use but, it looks like a good starting point.
This should be on a current or a few steps behind dashboard, not sure if that will effect things.
I saw this, an ACE v3, I assume this is what your referring to.
What type of Matrix flasher should I be trying to find and is there a good step by step tutorial for this that you know of ?
Never modded a 360 before. I did a few RROD fixes so I have been inside them but, not modded.
Thanks !
You can get what's usually called a "wireless bridge" or "gaming adapter" that takes ethernet and runs into a wireless adapter. Something like this:
https://www.amazon.com/TRENDnet-Wireless-Gaming-Adapter-TEW-647GA/dp/B0024G48VA#customerReviews
My bad, I should have linked the things I was talking about. It comes with the pointy tool and the flat tool for those tabs on the grilles. The little tabs right above the hard drive are a royal pain to remove. Usually, I have to sneek the pointy tool at an angle to remove them. If you rotate the flat nail file looking tool around, you can remove the vents by gently prying up on them.
Xtools unlock kit: https://www.amazon.com/gp/product/B07DNX4ZPZ/
Xclamp removal tool: https://www.amazon.com/gp/product/B07BV42DSM/
I don't know how you found that but thanks, I've been looking everywhere for it. I use the J-runner from Octal's shop https://octalsconsoleshop.com/ Go to downloads and download his version of J-runner with extras. Sonus 360 editor is built in.
As for JR programmer, I have V2 from Amazon https://www.amazon.com/gp/product/B01MTUWLVJ/
It programs the original bins just fine. I haven't tried any custom sounds yet because all the links are dead but I think I can do it now.
Happy cake day and thanks for the reward!
I have a soldering station, a Weller WES51 analog ESD safe beast. The pencil tip just happens to be really good for this work. It's a shame they don't make it anymore. I love the sound of the unit when it's heating the iron.
They do sell circuit board holders on Amazon that holds your project upright so you can get really close to it, I've just never used it after I stopped recapping TVs. To hold my wires in the spot I want, I will either quickly dab the iron tip with solder and tact it in place or use a q tip to hold it down while I do a proper job. There's probably a better way of holding it in place, but I hate looking for the right tweezers.
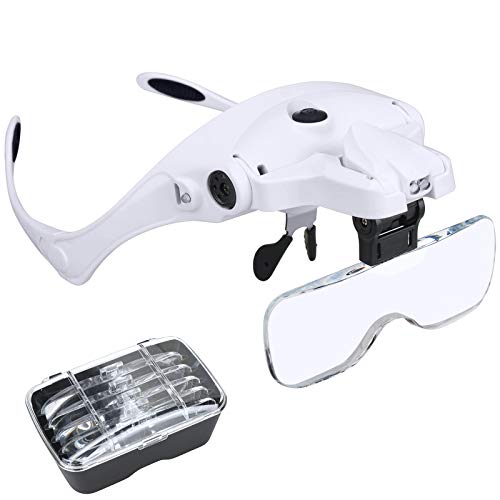
These glasses are one of the best products I've ever bought. I settled on the 2.5x magnification, it seemed to be just right for close work. https://www.amazon.com/gp/product/B0827WBQYQ/
If you can find the location of the items that are missing, you can take pictures and r console repair might be able to help. I have a Corona open and might be getting another Trinity soon if you need pictures. I don't have any Phats right now, but I am considering getting a MW2 console because I want to have a Phat in my collection.
It would be wiser to buy another second hand falcon or jasper considering how inexpensive they are now and tremendous amount of time it will take for the repair. Then you can desolder the glitch chip from the dead console and reuse it for the replaced console (might have to use a different timing file though).
The way to repair this would be to use 0.1mm enameled copper wire. You’d scrape away the geeen film from the cut trace line with a rounded scapel knife to expose the copper trace. You’re essentially bridging the cut trace with the enameled wire. The wire has an enamel coating which prevents it from shorting components on the board.
https://www.amazon.com/Enameled-Winding-Thickness-Connecting-Soldering/dp/B075RCMCTF
You going to cut your own disc tray? Just be careful cutting the metal, but it's not too difficult.
These are the blue strips I use on all my case mods. They are bright and easy to tuck into spaces. They are 12v but it's easy to tap into the dvd drive cable for power.
https://www.amazon.com/dp/B012FFZWRI?ref=ppx_pop_mob_ap_share
To add to the list known good card readers, I used ths one recently to successfully RGH my v4 corona:
https://www.amazon.ca/gp/product/B00FJRS8F8/ref=ppx_yo_dt_b_asin_title_o00_s00?ie=UTF8&psc=1
Do yourself a great favor and buy the wire that is linked below. That's what I use for my installs. Its 30 awg kynar and pre-tinned wire. I stopped using the standard colored wires that come with the rev c chips. Plus its blue!
https://www.amazon.com/gp/product/B078MVC2GB/ref=ppx_yo_dt_b_asin_title_o09_s00?ie=UTF8&psc=1
It might be your cardreaders.. I had issues with my build in and my usb reader at first too. This one worked for me: https://www.amazon.com/UGREEN-Reader-Adapter-Portable-Windows/dp/B07D1J88CF
Two USB drives or drives using a USB adapter, specially.
A 2.5in SATA drive placed in a 360 slim drive case does not count against your total of USB drives.
You're also aware of the 2TB cap on drive space? That applies to all HDDS, SATA and USB.
There are external HDMI graphics adapters that will upscale your resolution and add antialiasing to take care of the rough edges. Look up the mClassic adapter on Amazon. Works great!
https://www.amazon.com/dp/B07X6KDQ98/ref=cm_sw_r_cp_apa_i_g8gxFbS1PEC9E
Your choice I guess. However, Amazon sells the 360 internal drive case so you can simply add in any laptop hard drive up to 2tb.
https://www.amazon.com/Elloapic-Drive-Enclosure-Replacement-Microsoft/dp/B014QKANTM
You mean something like this? I just don't understand how the tool interacts with the SD Card. Does it plug into an adapter that then plugs into a reader? I was planning on getting a new USB SD reader but most of my PCs have card readers built in to the case so I shouldn't run into too much of a problem there.
From what I'm seeing, this drive should work.
You'll also need this adapter since it sounds like you'll be doing this on a laptop.