
What are
/r/Ceramics'
favorite Products & Services?
From 3.5 billion Reddit comments
The most popular Products mentioned in /r/Ceramics:


The most popular Services mentioned in /r/Ceramics:
Pastebin.com
Brave Search
IGTV
Chess.com
Etsy
AbeBooks
American Science Surplus
The most popular reviews in /r/Ceramics:
It's a great one! The one I go back to time after time is Clay and Glazes for the Potter by Daniel Rhodes. https://www.amazon.com/Clay-Glazes-Potter-Daniel-Rhodes/dp/0873418638/ref=sr_1_14?ie=UTF8&qid=1536187998&sr=8-14&keywords=Ceramic+glaze+chemistry
I am a huge fan of Bison trimming tools. They are crazy expensive... but I have been using mine almost exclusively for 10+ years. And I am a fairly high volume potter. I tested one out at NCECA when I first bought it and it was definitely unlike anything else I had ever used. And I have always been so happy that I spent the money on one. I just brought it back to Bison this year at NCECA for sharpening (again, 10+ yrs of high usage!). Definitely the highest quality tool you can get for trimming.
They are made of Tungsten Carbide. The sharpness lasts forever. The metal is brittle. It is fine- but just don't drop it on a concrete floor or the weld will pop.
Dolan went through some changes several years ago (after shutting down for a bit) and their tools changed. Everyone that I know who has purchased one in the last 3-4 yrs has complained about them and says that they produce a lot of chattering. Whereas they did not before the company changed.
(edit) forgot a link: https://www.etsy.com/shop/pdpbison
I just graduated with a BFA in ceramics about a month ago. I don't know what kind or facilities you have, but we were decked out with what we could do. pretty much everything under the sun. that being said, if you want to play around with cone 10. This book is a must for anyone in the ceramic world. cone 10 book
Then, if you want to start getting deeper, look up Tri-axial blends. there should be literature online, but if not, shoot me a message and I can walk you through it.
I my self went from cone 6 electric, to cone 10 reduction. But got familiar with low fire, Raku, wood, and soda while there. Also, A great thing to do is check out NCECA if you can this year. It is in Milwaukee.
Aftosa has them: http://www.aftosa.com/rubber-stoppers/
And the always fun, American Science Surplus always has a fun variety of things- including stoppers: http://www.sciplus.com/p/LG-ORANGE-STOPPER_50288
I second buying books from the country you’re in! I tried to teach myself some throwing in high school using a book published in the UK, and it turned out that much like driving, we typically throw in opposite directions. Plus, I’d only “taught” myself bad habits that I had to be broken of once I was in college. Seek guidance as early as you can! Apart from helping your work vastly and saving money, there’s a lot of dangerous stuff in a ceramics studio that needs to be handled with care. For beginning (or continuing) with glazes, The Complete Guide to Mid-Range Glazes: Glazing and Firing at Cones 4-7 (Lark Ceramics Books) https://www.amazon.com/dp/1454707771/ref=cm_sw_r_cp_api_fabt1_xciRFbR6TQJZH?_encoding=UTF8&psc=1
A simple fix would be to trade these switches out for manual "infinite" switches. A quick search turned up this page: http://www.theceramicshop.com/store/category/39/207/Switches-Relays/
Alternatively, if you only wish to bisque in this kiln, turning on each element one at a time will ramp the temperature. I would start with each element turned on one hour apart and go from there. Thermocouple monitors are inexpensive on Amazon as well. I own this monitor: https://www.amazon.com/Signstek-Channel-Digital-Thermometer-Thermocouple/dp/B00FFYEPVQ/ref=sr_1_2?ie=UTF8&qid=1476032393&sr=8-2&keywords=thermocouple+reader and while the thermocouples that come with it are useless in a kiln, a couple of type K eight gauge thermocouples are very cheap and easy to install, this will read them accurately.
Another option would be to use the guts of this kiln and install solid state relays, controlled by anything from a raspberry pi to a PID controller. This isn't as difficult or expensive as you might think, though you have to be into DIY stuff and willing to learn a few things.
If it is paint, use a sealant like this to preserve it. Not food safe, just for preserving the decoration.
https://www.amazon.com/Mod-Podge-Acrylic-11-Ounce-1450/dp/B007QNI2U4
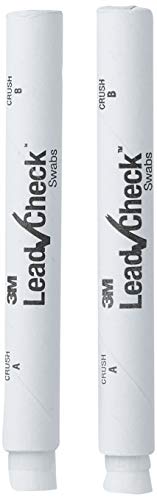
Lead swab tests can be purchased on Amazon:
https://www.amazon.com/3M-051141936130-LeadCheck-Swabs-2-Pack/dp/B0051VARFG
How have you been learning to do stuff so far, and what are your resources? Asking because it sounds like a few sources (books/websites/facebook communities that are local to you) that suit you might help. Wondering if you might like to see those out?
options: 1) have a wet sponge, and just rub the contact points of the base of your pipe to remove enough glaze so that it won't stick to the kiln shelf. The shelf itself should be prepped with kiln wash, so sticking should not be a problem. If you're new to pottery and glazing, Amazing Glaze is a book I'd recommend to newbies, particularly if you're american, because american terminology: https://www.amazon.com/dp/B07JMNMP42/ref=dp-kindle-redirect?_encoding=UTF8&btkr=1
2) ask folk in the comments who have done what you want to do see /r/pottery for some folk who have done what appears to be all over glaze on ornaments etc
3) work out how to make your work so that something is bare - check out #ceramicpipes on IG and have a look for inspo.
hth.
The thinner the tape, the easier it is to shape. Also, do some trials first with the glaze you’re using. I found that taking the tape off when the glaze is semi dry can help with chipping.
8 Pack 1/4" inch x 60yd STIKK... https://www.amazon.com/dp/B09VVSNB4B?ref=ppx_pop_mob_ap_share
I actually favor this idea as well, assuming you have enough depth left in the body to do so.
I would use my Dremel with the flex shaft, and get an assortment of carbide bits, like these:
I would shave the whole area down, including more around the edges until this flaw is “gone”, smooth out the shaved back area with successively finer sandpaper grits until it’s the same texture as the rest, then carve the fur detail back in. Practice on some other bisque pieces first. If you use those carbide bits turned on their side, you can shave back very fine areas. Don’t try this without the flex shaft and hang up the dremel. It will give you super good control.
I think this is going to be the best looking repair that allows you to get the soda firing you want. I think if you can approach it carefully enough, it may not show at all.
If there isn’t enough depth in the bisque to do this, I would fire the broken piece separately and epoxy.
But I’m a madwoman so I would go for the perfect fix, lol. There’s just no going back from that.
Usually bisque as its less risky breakage wise (and you can wash it) but these are bone dry.
Just normal art brushes. According to my Amazon order history it's these
I’m sorry, the walls of the mold are 1 inch, not the slip. I’m making drinking cups that are based on this.
https://www.amazon.com/MODERN-MASTERS-MCS90332-Clear-Coat/dp/B0089V1UIS/ref=sr_1_4?keywords=Modern+Masters&qid=1664129163&qu=eyJxc2MiOiI1LjE3IiwicXNhIjoiNS40MCIsInFzcCI6IjUuMTAifQ%3D%3D&sr=8-4I sent a link because prices vary widely depending on the vendor. also there are 3 other vendors selling this same can for 135.00 so i sent u this link for getting it under 50.00
Hello! I'm so sorry if this is the incorrect place for this question. I'm housesitting for a client in October who is getting married. They have two cats and I'm planning on customizing these mugs and leaving them as a gift. https://www.amazon.com/Matching-Anniversary-Engagement-Valentines-Girlfriend/dp/B07MQCGDH6/ref=sr_1_4?crid=8TI4CW7BO0AC&keywords=cat+mugs&qid=1660683459&sprefix=cat+mug%2Caps%2C94&sr=8-4
Do you guys know what sort of paint I would need to customize the white cat? Would I need some sort of setting spray? Will the new paint be microwave/dishwasher safe? Will it even work if I'm painting over an already painted piece? I appreciate any help!
This! Epoxy clay is great for this kind of fix. No need to bake. You can paint it, sand it. We use this to fix/fill all our ceramic things. https://www.amazon.com/dp/B000VPO0R8/ref=sspa_dk_detail_0?psc=1&pd_rd_i=B000VPO0R8&pd_rd_w=zSTsu&content-id=amzn1.sym.3481f441-61ac-4028-9c1a-7f9ce8ec50c5&pf_rd_p=3481f441-61ac-4028-9c1a-7f9ce8ec50c5&pf_rd_r=YD93R39A87S47Y23SG7...
Hi, I use fine needle tip plastic bottles with celadon glazes to do many of my tiles. There’s really no way to do it with a brush. I apply them thick and though color can be a bit patchy I overall get very good results. They are relief carved so the patchiness is more of a feature than a bug. It takes a lot of time though! I use twist top bottles to flood the rest of the tile once the fine detail is done with the needle tips. One color tiles I still use a fan brush.
I don’t use those bulb thingies, they are stupid expensive.
We use primarily Amaco glazes and with the exception of a few they are all about the same consistency and the needle tip bottles should work.
You can see my stuff at www.mothandravenstudio.com
Amazon carries the needle tip bottles, I use these: https://www.amazon.com/dp/B07JKTPJ3V?ref=ppx\_yo2ov\_dt\_b\_product\_details&th=1
I'm after a pair of dipping tongs where both sides meet in the middle like this [ ] if anyone knows where to get one.
At the moment the studio uses these style:
https://www.amazon.co.uk/Atyhao-Dipping-Sculpture-Stainless-Supplies/dp/B08SKBTSZD/
And I find that they absolutely fucking SUCK at cups or curved objects or dip in a way that protects the inside of the vessel.
Suggestions welcome - I've just bought a car dent tool which is supposedly good at sticking to the base of vessels and letting you just dip easily.
Honestly have no clue what cone it will be fired at. I’m just in my highs schools ceramic class. The wire is just a high temp wire, I have no clue what the results will be after it’s fired so I’ll just have to see what happens. This is the wire Kemper High Temp Wire 17 Gauge 10 Feet Great General Purpose Support Wire (Original Version) https://www.amazon.com/dp/B00CLC5JWO/ref=cm_sw_r_cp_api_i_PSHBVNTJBT787CMMTPVH?_encoding=UTF8&psc=1
Grit 60 diamond pads work, you need to work wet and it will take a while. You typically don't want anything finer than grit 60 for bulk removal. The Xiem sticks that someone else mentioned are too weak. https://www.amazon.com/Diamond-Polishing-Sanding-Concrete-Granite/dp/B08TVGFDYT/ref=sr\_1\_5?keywords=diamond%2Bsanding%2Bpads&qid=1651749232&sr=8-5&th=1
Congrats on making that next step! There's lots of 'advice for craft shows' blog posts online but they all say the same stuff, so here's a few things I learned the hard way.
Do you have a way to take credit cards? Most shoppers do not have cash. I highly suggest investing in a Eurmax popup canopy if you do outdoor shows- everyone who buys cheaper popups has a bad time and ends up buying a Eurmax anyway. This wagon is awesome for loading in/out https://www.amazon.com/MacSports-Extender-Collapsible-All-Terrain-Wheels/dp/B087N2WJGJ?th=1
ALWAYS bring lights. Lots of venues have poor lighting and light can help make your booth look cozy and attractive, even for a cloudy outdoor market. I use these https://www.amazon.com/Clip-Reading-Light-3000K-Brightness/dp/B085HCJLLQ/ref=sr_1_21?crid=18GMS4MOM2I1V&keywords=Usb%2Bbook%2Blamp%2Bclamp&qid=1651332428&sprefix=usb%2Bbook%2Blamp%2Bclamp%2Caps%2C163&sr=8-21&th=1 with an Anker battery pack. Bring stuff like exrta battery packs, charging cords, tape, zip ties, binder clips, rubber bands, safety pins etc. All kinds of random issues can be fixed with a good show kit. While you're there, write down things that you need for next time, or things that you want to do differently.
Set up your whole display at home first, and take pictures to refer to on the day of. Give yourself at least 2 hours to set up the first couple times.
Relax and don't stress too much, other vendors are generally very friendly and helpful.
There's these wax carving sets on amazon that have worked pretty well for me
And I've got some little loop tools but I'll have to look up where they're from.
Hey - indie dyer here. What you do on textiles re: natural dyeing doesn't translate, due to the massive heat in a kiln which turns your organics into ash.
What can work is natural sources of glaze materials eg: oyster shells + eggshells = calcium = whiting in glazes.
Ash can be a source of glazes, and different ashes can give different results - this is how unglazed wares going into a woodfire may come out glazed - ash is deposited on the wares and melts.
There's the book natural glazes: https://www.amazon.com/Natural-Glazes-Collecting-Making-Ceramics/dp/0812222628/ref=sr_1_1?crid=3MV7DPG7WOEMJ&keywords=ash+glaze+ceramic+book&qid=1649717664&sprefix=ash+glaze+ceramics+boo%2Caps%2C285&sr=8-1
While they're saying "get colour out of grass" - my understanding is that creating that ash first is how you're going to do it. For example in japan, there's a rice hull ash (creative, huh?).
The other thing is it's a bit of alchemy and knowledge, but it's possible to leave an imprint of something eg snakeskin whilst firing in a saggar. Made in Australia is known for this: eg: pots packed with husks for color in the kiln: https://www.instagram.com/p/Ca4bbv1Bcgw/
hth.
"It is the ideal solution for jewelry, metal clay, and ceramic firing."
Metal clay, but not clay. Ceramic, but not specifically clay. Hmm. I'm fucked.
Acrylic Paint Metallic Gold, Certified Safe, Non Toxic, Non Fading, Rich Pigments for Painters, Adults & Kids, Ideal for Canvas Wood Clay Fabric Ceramic Craft Supplies (100ml) https://www.amazon.com/dp/B09373T6VF/ref=cm_sw_r_cp_api_i_PWM56ZG225EF29V454RH?_encoding=UTF8&psc=1 took a couple coats before it started looking solid - an effect I enjoyed! First coat gives it a slight shimmer while maintaining the color beneath.
the picture didn't upload so I have the link to it on here https://www.amazon.com/Norse-Tradesman-Tankard-Eternal-Polished/dp/B01GPCKJZC?th=1
You can get a fairly cheap set of carving tools and use the loops for removing lines line in your design.
https://www.amazon.co.uk/dp/B08X7CHKP4/ref=cm_sw_r_apan_glt_i_N5CENYB89AGM4VEN0T90
Also, like others have said, a nice smooth clay would work better than grogged, and a little less dry.
Successfully cut plasterboard/drywall on the laser cutter this arvo. My mold is also constructed as are other ones made out of MDF and boxboard. The scorch patterns I've talked about have come out best on the boxboard. The MDF and plasterboard didn't scorch as much as I would have liked but upon successful casting (fingers crossed) I'll try and refine the process.
Some pictures can be found on my instagram
What is available depends on your skill level, budget, what you're looking to learn, amount of time you want to spend there (when you say short, is that days, weeks, months?) and your expectations. Is the course all you'll be doing? Or are you looking for something that's a day a week, and the rest is spent gallivanting around asia?
Are you already in asia somewhere? If not, why not stay where you are, learn more, and do a residency/apprenticeship when you're ready/accomplished enough and spend a decent amount of time there? Possibly the easiest thing to do is spend more time learning/making/socialising with others in ceramics where you are, and ask them about what you want to do, and get their advice. Find folk where you want to go, and ask them.
If you're keen on japan, no harm in tracking down a copy of the japanese pottery handbook, which has resources re: learning too:
https://www.amazon.com/Japanese-Pottery-Handbook-Revised/dp/1568365527
hope that helps.
I have this set of diamond bits that works great despite the cheap price. I’ve drilled through many a closed hole with them. Just use water and eye protection as mentioned.
eoocvt 50pcs Diamond Tipped Coated Rotary Grinding Head Jewelry Lapidary Burr Grit https://www.amazon.com/dp/B01ALPYYQO/ref=cm_sw_r_cp_api_glt_fabc_YXNE474SSZRWTP2AHHCV?_encoding=UTF8&psc=1
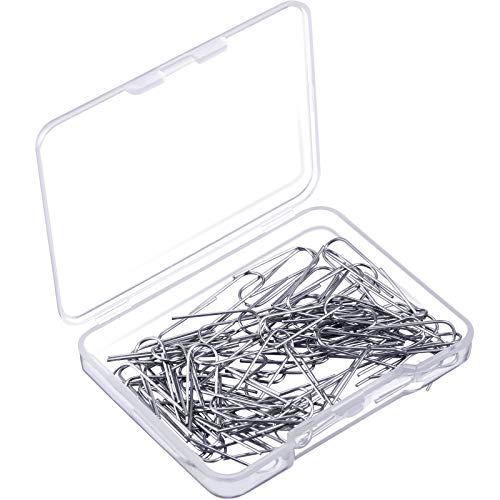
Nichrome is what I use. I’ve bought it in long rolls so I can cut to size and also pre-cut like these: 200 Pieces High Temperature Nichrome Wire Jump Rings, 21 Gauge with a Plastic Storage Box, U Hanger Hooks for Hobbyists DIY Pendant, Ceramic Ornaments, Fusing in Glass https://www.amazon.com/dp/B081SFJ66D/ref=cm_sw_r_cp_api_glt_fabc_1V1E3ZS1E1TBV0TTT6ZG?_encoding=UTF8&psc=1
I'm wondering if it might be helpful for you to have a book like "amazing glaze" hanging about in the studio - guessing it's you or someone without kiln knowledge who is loading the kiln, and it's going to be helpful to learn about kiln cookies/wadding/testing/firing safely so that your glaze doesn't turn up on the kiln shelf.
AG: https://www.amazon.com/Amazing-Glaze-Techniques-Recipes-Finishing/dp/0760361037
re: not being US based - guessing amaco will have a distributor. Feel free to DM me if you get stuck and need help.
It gives a bright white background for photographing a piece!
Here is my set up: https://imgur.com/B5ka5Ht
Here is the light-box I bought off Amazon: https://www.amazon.com/gp/product/B07TNPZ6HR/ref=ppx_yo_dt_b_asin_title_o00_s00?ie=UTF8&th=1
The base is bone white, and the slip is sedona. I put a clear glaze on top and had it fired a second time, so the hues became a bit darker as a result.
I meant to provide an explanation with the initial post, but I'm new to reddit, so here goes: the piece depicts the final position of this game played in 2015.
It's my favorite work that I've produced so far, because every time I etched in the outline of a piece, I felt like I was on the cusp of failure- especially the dark pieces on dark squares. I pulled through, however, and despite a few reservations, I'm satisfied with it. It's currently resting on an easel in my kitchen, next to the stove top.
I can help here! I have the same model of kiln sitter. Getting the proper cones (or honestly, bars are better) is absolutely required to run this type of kiln, as the cone/bar melting is what determines when the kiln has been running the appropriate amount of time/temperature. Up until that time/temp is hit, the cone/bar keeps the switch on and the coils just keep getting hotter. So seek out your nearest ceramic supply (or Amazon) and get yourself two sets of cones/bars, one for bisque firing and one for high fire glazing. Here’s a link to some bisque ones:
Orton BRB O6 Pyrometric Bar Cones for Ceramic Kilns https://www.amazon.com/dp/B07BX57BD7/ref=cm_sw_r_cp_api_glt_fabc_75YQ2T9S5W05EDD57HNW
Nichrome wire. You can get a small spool from your local distributor or these little doodads from Amazon:
200 Pieces High Temperature Nichrome Wire Jump Rings, 21 Gauge with a Plastic Storage Box, U Hanger Hooks for Hobbyists DIY Pendant, Ceramic Ornaments, Fusing in Glass https://smile.amazon.com/dp/B081SFJ66D/ref=cm_sw_r_apan_glt_fabc_WJGM77XG7Z15T6GSSKJJ?_encoding=UTF8&psc=1
I've personally worked with the above and had no problem. It would be cheaper to just buy a spool, though.
low fire does not = porous. clay selection + glaze fit = strength regardless of firing temp. Re: not having access, you do via online ordering + shipping.
there’s also a book that might be useful;
Handmade Tile: Design, Create, and Install Custom Tiles https://www.amazon.com/dp/B07Z1L247V/ref=cm_sw_r_cp_api_glt_1S3GEZ9B5MGFWQSAZJN6
Ceramic Arts Network has tons of resources on their website. I'd check out their bookstore and the online forums as well.
I would glue it with super glue and find a steel insert to make it a viable drinking vessel. Something like this on amazon. There are lots of options. https://smile.amazon.com/dp/B00911UWSE/ref=cm_sw_r_cp_apa_glt_fabc_RH4XFYMAGAHT9MKEMGHQ?_encoding=UTF8&psc=1
Pleasure. The book is great too :) (out of print: so libraries, pottery friends and ebay may be useful sources. )
Finding One's Way With Clay: Pinched Pottery and the Color of Clay https://www.amazon.com/dp/0671213245/ref=cm_sw_r_cp_api_glt_fabc_FZT1F1RC068BAXFHW7BH
Get something like this: https://www.amazon.com/dp/B01DGLRLVA/ref=cm_sw_r_cp_apa_fabc_ZRCaGb4APPMN6?_encoding=UTF8&psc=1
And don't mix air into your slip when mixing it. Pour slowly from a height so the bubbles pop as they go over the edge of the bucket.
This one's good
Epoxy-Resin-Crystal-Clear-Kit for Art, Jewelry, Crafts,Coating- 16 Oz | Bonus 4 pcs Graduated Cups, 3pcs Sticks, 1 Pair Rubber Gloves by Puduo
For books I'd recommend these two above the ben carter books... Don't get me wrong. I think Ben carter is a fantastic potter and teacher. But these books I think cover more useful philosophy:
Try amazon smile to donate to a charity of your choice automatically at no cost to you!
https://smile.amazon.com/gp/product/B088T1HCB6/
^^^I'm ^^^a ^^^bot ^^^and ^^^this ^^^action ^^^was ^^^performed ^^^automatically.
Thank you so much! Yeah of course. It's just a photo box off Amazon. It's super nice and comes with a bunch of colored backgrounds. They're like plastic so they don't really wrinkle or need to be replaced if you take care of them. This photo is shot on the grey background but it also comes with black, white, red, blue, and beige. The front flap comes down and has reflectors on it to help lighten the shadows underneath the piece and you can just shoot through the holes at the front. Dimmable light switch too. It's $75 (with amazon prime) but it's absolutely worth it if you don't have a photo setup available. Here's the link!!
What if you got one of those reusable straw cleaners to wash it? Like this
I am in the market for a new Skutt kiln, as my old kiln has died. My dilemma is that my current nema plug is a 10-30, and the nema plug for the new Skutt kiln is 6-50.
My question is can i just buy a simple adapter to make it work?
something like this: Nema Adapter
I think the answer is no.
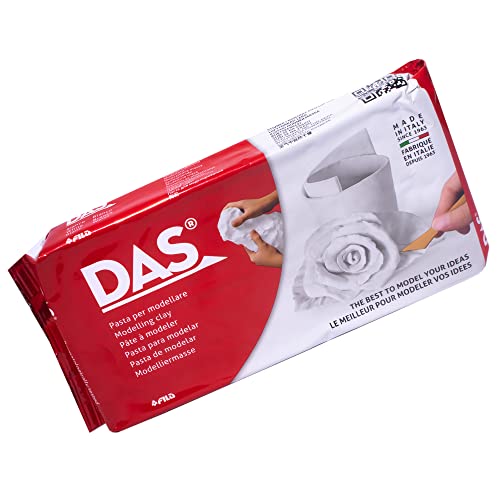
Are you talking about air-drying clay, like this from Amazon? I believe that will eventually dissolve in water. It's also not a ceramic clay and will feel and behave differently than actual ceramics.
Certainly if you're talking about forming something with a ceramic clay body and then letting it dry to a bone-dry stage, that will dissolve in water (and will be brittle and not very strong) unless it's fired.
Looks bent and maybe not the right type. You'll need to know the thermocouple type in order to figure out what the best unit is for it.
In kilns we generally use a type k, type r, or type s. It depends on your firing environment and max temperature. That has a chrome cover on the tip where the welded joint is, so unless it's labeled with the type, you'll just have to plug it in and see if it looks ok? To be honest though the thermocouple we use in kilns is so cheap (type k) that I don't know if it's worth the trouble. Here's a cheap accurate pyrometer: https://www.amazon.com/dp/B018QHQSB8/ And here's a type k insulated thermocouple: https://www.amazon.com/dp/B01N0YA9ZR/
If the glaze has lead, then you should not drink out of it. Crazing has nothing to do with whether the materials will leach out of the cup. That is just an indicator that the glaze shrank at a different amount than the clay during firing.
Boil some water and leave it in the cup for a week. Then test the water with a lead testing kit.
https://www.amazon.com/Drinking-Water-Test-Municipal-Well/dp/B06VVQ7Y2Q
3M Mold and Lead Paint Removal Respirator, Medium https://www.amazon.com/dp/B00063Y25U/ref=cm_sw_r_cp_apa_4FlBBbNMYGRVM
That's the particulate mask. Get an actual mask like this if you're going to be doing it more Than once. Those. Cheapie masks might work but you don't want to risk it
Check the bricks and elements for lead before firing. If it tests positive I would not fire it indoors, and only use it for sculpture or tiles.
https://www.amazon.com/3M-051141936130-LeadCheck-Swabs-2-Pack/dp/B0051VARFG
any paint would be ok on the outside (just so long as it is not at the rim where your lips make contact.
Glazes like this that go in the oven would be a good bet https://www.amazon.com/Pebeo-Porcelaine-China-Paint-Bottle/dp/B002020AAQ
The Ceramic Bible - https://www.amazon.com/Ceramics-Bible-Complete-Materials-Techniques/dp/1452101620/ref=sr_1_1?ie=UTF8&qid=1516500859&sr=8-1&keywords=the+ceramic+bible one of my favorite books.
I've never used this type myself but this looks similar to the one Simon Leach used in his youtube demo to spray wood ash onto some pots
https://www.amazon.com/BQLZR-Stainless-Painting-Sprayer-Atomizer/dp/B00R470X2M
powdered plaster will not work. it will bond with whatever you pour into the mold and ruin the ceramic material.
the reason slipcasting works is because the cured plaster absorbs the water and deflocculant out of the ceramic material.
if you're really interested in learning about slipcasting and dont want to take another class on it from someone who knows a lot, I would recommend Andrew Martin's book - https://www.amazon.com/Essential-Guide-Making-Casting-Ceramics/dp/1600590772
nobody here is going to go in depth enough to teach you how to do it
You may be able to use a 2 part clay that does not need firing and it will not shrink, like this product:
http://www.amazon.com/gp/product/B005J03Q5W/
Or an oven bake clay like this one: http://www.amazon.com/Polyform-Sculpey-Polymer-2-Ounce-Black/dp/B000H6QR8Q
Good luck with your project!
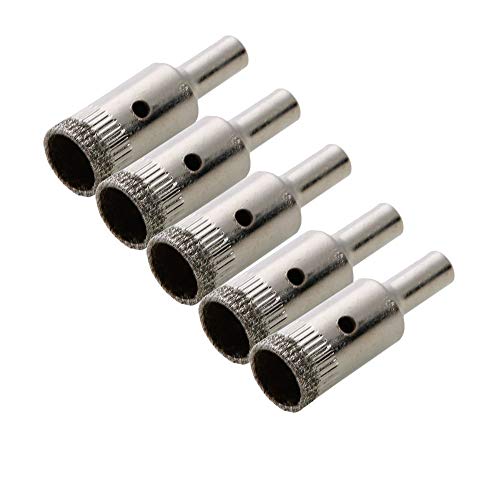
Any sort of glass or tile drill bit has worked for me in the past:
http://www.amazon.com/TOOGOO-Glass-Drill-Metal-Ceramic/dp/B008S7ZDYK
http://www.homedepot.com/p/Bosch-Glass-and-Tile-Drill-Bit-Set-4-Piece-GT2000/202242753
I got a book a few semesters into taking and found it helpful for a lot of what I did in class. It has instructions for skills of all levels and each skill had an accompanying project to practice with. It has handbuilding and throwing projects.
My absolute favorite is Simon Leach's guide. I read it cover to cover, footnote to credits. It's very informative. Anytime I question something, I turn to it. http://www.amazon.com/Simon-Leachs-Pottery-Handbook-Comprehensive/dp/1617690228
basically it's this stuff called Liquid Leaf. it's dishwasher safe (I figured that out by one really scary experiment that turned out in my favor) and as long as you don't use it inside the pot, it's totally life safe! I just use a paint brush to apply it on the glazed pot.