
What are
/r/Pottery's
favorite Products & Services?
From 3.5 billion Reddit comments
The most popular Products mentioned in /r/Pottery:


The most popular Services mentioned in /r/Pottery:
Pastebin.com
Wikifactory
Google Photos
Greasy Fork
Wise
Alibaba.com
Tumblr
Google Images
MetaFilter
Patreon
The most popular reviews in /r/Pottery:
Hey Friend,
Have you looked into getting a rotating pottery/cake turntable or pedestal?
Just about any regular ceramic studio should have these laying around.
I obviously don't know what your setup is, but these things come in all shapes and sizes. If you could throw a towel over your lap and get one of these between your legs, or sitting on a board across your knees you' be working directly above it. Sort of like working on the wheel. You could find a hunk of non-skid grip drawer liner to keep it on the board if it's moving a little too much.
I've taught ceramics for 17 years and I've rigged a lot of stuff up for kids who needed modifications to be successful.
All that being said, that's a pretty successful build for your first coil mug. You did a solid job blending those coils together, I can barely see any seems on it. Nice work.
Claypron. It's a split-leg apron that seems silly until you have one. My teacher had never seen one before, and bought one the first day I took mine into class. While we were in class.
Most clear glazes should work okay. That said, in my opinion, the best one that stays clear in most situations is Amaco's Zinc Free Clear. Here is a photo https://www.amazon.ca/AMACO-Sahara-High-Glaze-Clear/dp/B00A6WDK1I
That glaze may be out of stock on Amazon, but it's available at several places online, and I am guessing that it can also be found at your local ceramic supply shop.
One of the things that this is particularly good for is overglazing an underglaze on something where the glaze can pool. So, say you take a bowl, do underglaze designs on there, then bisque. If you overglaze with a regular clear, it might go cloudy in the bottom, or it might not. But if you overglaze with zinc free, it stays clear in the bottom.
So if you're using a clay that has speckles or a tint, using zinc free will preserve that look, even where glaze might pool a bit.
Really cool! Does anyone have a guide on how to make the whistling water vessels?
Edit: This post has some good links, in case anyone is interested in exploring it further. One of the PDFs that it links has a diagram of the whistling water vessel.
http://www.reddit.com/r/antiques
To me it looks cheap. No makers mark, the image is decal sloppily and unevenly overpainted. It's a pretty enough vase and all though.
For all I know it's probably some super rare delft ...
The shape is sometimes wrongly called a Calabash vase, after the gourd - but they should have two bulbous parts. I think it's actually a carafe for water, you see some older shapes like this with a small cup that sits on top.
http://www.alibaba.com/product-gs/470151404/Blue_and_White_Porcelain_Vase/showimage.html
What do you know about the vase, presumably you just got it?
Thank you! I use the flat end of this tool, and hold it flat to the surface of the pot while the wheel spins at a high speed over a leather hard surface. Hope this helps!
Creative Hobbies - Double Ended... https://www.amazon.com/dp/B07L1CBGMR?ref=ppx_pop_mob_ap_share
There are diamond sanding bits that will smooth it down. Make sure to wear a mask while sanding and keep the area wet while grinding. I use a Dremel bit but I’m sure you can get one for a regular drill. Here is an example of the type to use. 60 Grit 20Pcs Diamond Burr Set - GOXAWEE Rotary Grinding Burrs Drill Bits Set with 1/8-inch Shank, Diamond-Coated Stone Carving Accessories Bit Universal Fitment for Rotary Tools https://www.amazon.com/dp/B0767LV7KY/ref=cm_sw_r_cp_api_fabt1_Z-vSFb7S90Y3X
It would for sure look cool. your stuff is perfect for it. i used to do it with those color in mandala things.
easy 3d effects.
this is what i used but probably smarter way somehow https://www.amazon.com/Outus-Sheets-Cellophane-Colors-Pieces/dp/B01MA4V4MW/ref=sr_1_5?dchild=1&keywords=colored+transparency+sheets&qid=1614185666&sr=8-5
I was going to recommend this awesome architecture book, https://www.amazon.com/This-Brutal-World-Peter-Chadwick/dp/0714871087/ref=mp_s_a_1_1?dchild=1&keywords=this+brutal+world&qid=1605478948&sprefix=this+brutal&sr=8-1, but it’s pretty expensive now than when it first came out. Another architecture book might be a possibility.
I used these dotting tools that are meant for mandala painting on rocks. They work great, as long as you can keep a steady hand hahah
I agree 100% about the weed burner, but, then why not build a proper design.
OP: If you want a small kiln, this book: https://www.amazon.com/Building-Your-Own-Kiln-Instructions/dp/477002973X includes a detailed break down for a VERY small but excellently servicable cone 10 reduction kiln. You can even easily reduction cool it with wood for enhanced surfaces.
I snipped this picture: https://imgur.com/FbmcjgN out of the amazon look inside feature. It's 18" wide by 36" deep and 20" high, not counting any chimney (which I'd recommend.
It fires similarly to a phoenix kiln but with a 20lb propane bottle, top loaded. It's a very good option for small spaces.
I found a set on Amazon for relatively cheap.
We found ours on amazon. About $20 Nothing fancy. Might have been this one
But LED lights and black and white backgrounds. Nothing to pricey and we like it mobile
The problem with plug in kettles is that they draw big power whenever you turn them on. If you're just trying to keep your water from getting screaming cold, consider an immersion heater:
A dinky little 300W heater can keep your water warm without drawing huge power, if you keep your water in an insulated container. It'd take forever to boil lots of water for tea, but it'd work for keeping water warm on a cold but not Siberia cold day.
Ideally you'd stick the heater right in your bucket, but again GFCI protection is important, especially with cheap Amazon heaters. Make sure you get something UL/CSI rated.
Underglazes would be interesting. I've never had a studio object to the Amaco velvet underglazes, and you can even get a paint-tray style "semi moist underglaze" SMUG set.
I love my split apron
If she's a wheelthrower:
- a good quality trimming tool
- a laser level (that shows vertical and horizontal planes) to help with throwing the same size, adding handles
If she's a handbuilder:
- an angle cutter like this thing https://www.amazon.ca/Creative-Hobbies-Trimming-Ceramics-Sculpting/dp/B07W6JLNRR/ref=asc_df_B07W6JLNRR/?tag=googleshopc0c-20&linkCode=df0&hvadid=459413862891&hvpos=&hvnetw=g&hvrand=12061209565605277103&hvpone=&hvptwo=&hvqmt=&hvdev=c&hvdvcmdl=&hvlocint=&hvlocphy=9001329&hvtargid=pla-812434937441&psc=1
For either:
- a really good fettling knife
- sponges
- xiem carving tools
- a clay stamp with her symbol/signature for "signing" her pots
Hey there. In watercolor it is very common to fill travel pallettes with liquid watercolor tubes--just squirt it in and let them dry till they are solid. A good quality yet affordable set would be something like Winsor and Newton Cotman. They aren't "artist grade" so some of the colors will be made from a few different "hue" pigments, but they are decent quality in my experience. Here is a set of 20 tubes on amazon, though they have sets of different sizes and with different colors. It all depends on what you want. One 8ml tube should be good for a 5 or 6 half-pans (which are about 1.5ml in volume), so one of those sets should be good for 5 or 6 pallettes.
This is a big set, but the extruder and the tools with the stainless balls on the end are used ALL the time in my shop. They are great for seams like on handles and other places, lots of sizes. The pink ones are OK, but I hardly use them.
You can also pick up one of these jobbies, there are many available. I work in both our studio and bedroom and like to monitor the AQI for particulates. I pretty much just do slab work, glazing and painting in the bedroom area but still… I do see it go up slightly when I’m making slabs, probably because the canvas is very dusty. So it’s a good indicator of when I need to take the canvases outside and shake them off. Background reading in our region (when we aren’t having fires) is always 2-3 but it will go up to 8-10 for a couple minutes when I’m making slabs.
I had amazon deliver this guy to me on Wednesday: https://www.amazon.com/dp/B07WRZXXRC?ref=ppx_yo2ov_dt_b_product_details&th=1
I set it up immediately and had a go. Honestly, it isn't bad and is better than I hoped. I read a lot of the reviews so I had a pretty good idea about what to expect.
What I love:
- It's small enough to really be portable. I set it up on a table so I could throw standing up.
- The hand control is what I wanted and it works great.
- It handled 3 pounds without too much trouble making a bowl. I plan to make batches of mugs and smaller items so it will do the trick.
Concerns:
- It's pretty easy to slow it down when centering. I have to be gentle.
- It doesn't really go as slow as I'd like. When I had the above mentioned bowl going I wanted just a bit more slow.
- It's too short for me to use on the floor. I don't have a stool short enough to work. Not a problem for me but if you want to use it on the floor it might be a problem for you.
For comparison, I have a big old Lockerbie kick/electric as well as a Clayboss electric. This new wheel won't replace either of those but is a nice addition to my studio.
It is better to be a person that admits and fixes mistakes then someone who gets caught trying to bullshit.
Amazon has several options, act fast and you can get black firday deal too.
Yeah sure thing. Trying to figure out how to post a picture in the comments lol. I’m new to posting on Reddit. test tubes on amazon
Yes you can use beach sand, however, as 13SilverSunflowers points out you will get a bunch of calcium carbonate chunks in it. From clam shells etc. The problem with calcium carbonate, aka. whiting, is that it loose about 40% of it's weight when fired and spalling and bloating can happen. To solve this you can biscuit fire the sand, this will typically turn the calcium carbonate into calcium oxide. Then add water to your sand and let is stand around for a couple of days. This will dissolve the calcium oxide which can then be washed away. Use gloves, it is somewhat caustic if I recall correctly. Ideally you want to get sand from a source that is not full of shells.
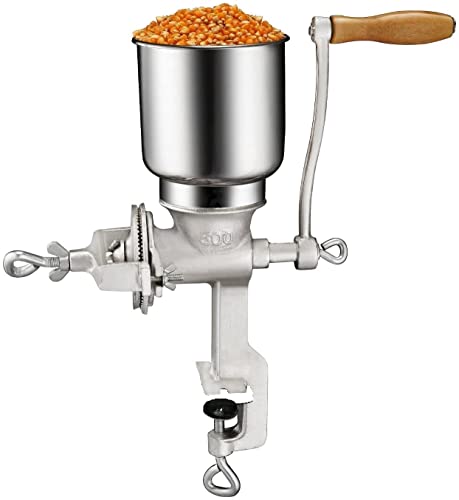
Another option if you have a bunch of old broken biscuit ware standing around is to grind it up to grog. The easiest way to do this, as far as I know, is to get yourself a cheap corn mill.
I have one like that and it is really useful to grind up all kinds of stuff, like biscuit fired granite. It will not get you a super fine mesh but you can either grind it again until your are happy or run it through a ball mill if you need finer.
Larger than 8 inches is probably better, grit around 100-150 usually works, you can find them on Alibaba, Ebay, etc. Mount on a bat so you can put it on the wheel. Get a pitcher of water, you need to grind wet. It works reasonably well for removing large amounts of glaze drips.
There are a bunch of consideration to take into account, but there is a new book on the subject that might interest you:
https://www.amazon.com/Wild-Clay-Creating-ceramics-resources/dp/1789940923
You could throw it like a tiny bud vase and just trim the bottom down to a point. Ornaments caps just need a hole to go into.
Mostly I use Amaco Velvet Underglazes and a few Mayco underglazes. Here are the brushes I like best, which are pretty inexpensive:
If you look at my profile, I posted another video recently with a few tips on underglaze. I think it is great, low risk way to get started with surface design in ceramics. Have fun!
Woah these look like another level! Thanks for the recommendation.
I think for your current issue with the plastic bats getting loose- instead of sticking clay underneath, that’s where a throwing cloth comes handy!
Things were hit or miss for me until I got a high temp digital thermometer ( k-type thermocouple )
Turned out I was WAY hotter than I thought I was. Using a BBQ propane tank and a weed burner, I can pretty easily get the kiln over 2,000F when the raku glaze only needs 1,800F and could probably go a bit less. The extra heat caused bubbling and cracking.
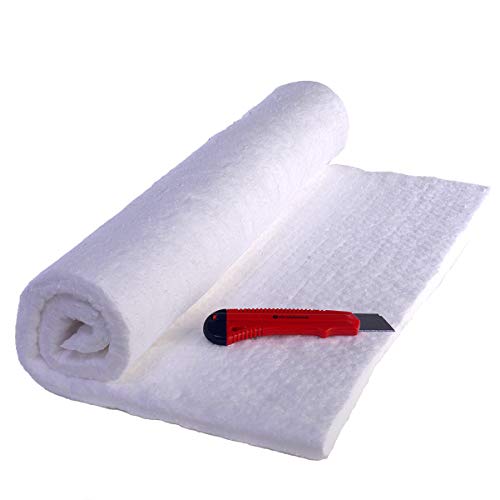
My kiln is made of some wire fencing lined with ceramic insulation, but I was just in Vermont and saw a wonderful little raku kiln made from a washing machine drum lined with ceramic insulation. It had a flat lid with a little chimney, and the potter would take each piece out one at a time with the gas still on instead of having to rush. It was at a craft show and I learned so much watching him.
Step one: Soak the chuck (it should be bisqueware, btw)
Step two: Center the chuck as described above.
Step three: ~~Profit!~~Roll up a short coil of wet clay, preferably the same type as the piece. Don't worry about precision, rolling a small ball between your palms is plenty good enough. Wrap that around the chuck about where you expect the piece to rest - preferably slightly below the rim of the chuck.
Step four: Place your piece (which should be leather hard or drier) on the chuck, resting on the coil of clay. Lightly maneuver it until level (bullseye level is best.) Press down into the wet coil - not super hard, just enough to get it to stick.
Step five: Trim your piece.
Step six: Pull the piece off the wet clay, straight up if you can, roll it around the vertical slightly if you need to. There will be a damp ring on your piece, but shouldn't be any clay; if there is, next time use slightly wetter clay for your coil or make sure your piece is drier. However if there's residue, it'll wipe off with a damp sponge, so don't stress it too much.
These look great! Big time Fenway Clayworks vibes. Can I ask how many coats of underglaze you applied? And did you apply the underglaze on greenware or bisque? I also love the color combo.
If you're looking for fun color inspiration I suggest a book called A Dictionary Of Color Combinations https://www.amazon.com/dp/4861522471?ref=ppx_pop_mob_ap_share
Congrats on making that next step! There's lots of 'advice for craft shows' blog posts online but they all say the same stuff, so here's a few things I learned the hard way...
This wagon is awesome for loading in/out https://www.amazon.com/MacSports-Extender-Collapsible-All-Terrain-Wheels/dp/B087N2WJGJ?th=1
Bring lights. Lots of venues have poor lighting and light can help make your booth look cozy and attractive, even for a cloudy outdoor market. I use these https://www.amazon.com/Clip-Reading-Light-3000K-Brightness/dp/B085HCJLLQ/ref=sr_1_21?crid=18GMS4MOM2I1V&keywords=Usb%2Bbook%2Blamp%2Bclamp&qid=1651332428&sprefix=usb%2Bbook%2Blamp%2Bclamp%2Caps%2C163&sr=8-21&th=1 with an Anker battery pack.
Bring stuff like extra battery packs, charging cords, tape, price stickers, pens, zip ties, binder clips, rubber bands, safety pins etc. All kinds of random issues can be fixed with a good show kit. While you're there, write down things that you need for next time, or things that you want to do differently.
Set up your whole display at home first, and take pictures to refer to on the day of. Give yourself at least 2 hours to set up the first couple times.
Relax and don't stress too much, other vendors are generally very friendly and helpful.
When I make glaze test batches I use a cheap hand blender and run through sieve. Held up for weekly use past 8 years and still going strong. Use a spoon or a stick to get the lumps as small as possible and use the blender.
Silica dust will stay suspended in air for hours. If you can ventilate with window, use a window fan while working and while cleaning. During winter use the filter/fan I mentioned in your other post, I have mine just running 24/7. I have concrete floors, so every other day I do a through cleaning with this.
I've seen people working at the local clay supplier not use masks while mixing clay, they have looked consistently worse each year until they couldn't work anymore. Then there are others who have zero issues after few decades. Last year I was speaking to a customer who gave up pottery because she had issues with mold from the earthenware clay she was using, something that could have been easily avoided.
It just comes down to how much precaution you want to take for your health.
It depends, i see everyone is telling you it should be moist, but that deforms the clay, and the holes may not be as round. Leather hard or a bit before that should work for very clean holes, you can use 2 tools, the first one, made for making holes and there is a second optional to pass through the hole to clean up, looks like pipe cleaner. the little brush you see here hole tool
It’s both. There is something bothersome about the freckle holes, and at first I couldn’t figure it out.
You used a cylinder to create the freckles. A ball shaped stylus would round those out and make it look more friendly. There are packs of them on Amazon, lemme see if I can gather a link.
When a photo of my freckled face is taken with certain uv lens filters from my photographer friends, the freckles look like Pock marks and craters. It makes for a great composition, but is unsettling to me. Maybe that’s why I noticed this in yours? It could be a place where the stains and glazes pool. Seems like something you’d want to avoid.
Give this a try. It's got the basics plus some extra tools for the finer detailed stuff. I have a similar set and those smaller detailed tools come in handy for my small stuff or where I need details. Some tools you may never use, but there's the basics - sponge, trim tools, a rib, plus the apron and case are a nice little extra.
For the price, it's not a bad set to have on hand.
It's really neat! I highly recommend it, but the dilution is key because I often got nozzle blockages the first couple days of use. I found 3 parts water, two parts underglaze to be a good starting ratio, but this of course varies depending on how thick your underglaze is out of the original container.
Best of luck to you! I'd love to see what you make! Here's the link to the one I bought and it is almost entirely silent, so I have no issues using it at my community studio.
Gocheer Upgraded 30PSI Airbrush... https://www.amazon.com/dp/B092D2YB8R?ref=ppx_pop_mob_ap_share
Foot rings aren’t necessary, but they help reduce weight, refine the shape, and can help with firing, preventing things from warping or sticking etc.
Other things that help: - steady support of the tool. Always two hands (when learning) and brace off a leg if you can just like throwing. - trimming clay when too soft or uneven dryness is very difficult. Dry pieces slow and learn the right range of dryness for your clay body. - sharp tools will help a lot, and some tools are much easier than others. A small loop tool with wet clay is not easy to use, for example. Don’t be afraid to use big tools for small features. - trim making a downward pass whenever possible. Pushing up from the side can knock the pots off center. If you do need to trim from the side, use one of these things to make it easier. https://www.amazon.com/Piepenburg-Trimming-Disc/dp/B000OP0XWQ - center your pots well and secure them before trimming.
A little practice and you will be trimming feet like this in no time!
https://i.pinimg.com/originals/34/6a/a8/346aa87d7656d0495bdaccda48f8173e.jpg
Amazon search and I ended up with a Nicety DT 1311. I had to shorten the probe slightly so it didn't bump into pieces in the kiln, that's expected. Trying to find that... it's separate - a loop of dissimilar metal wire that clamps into a metal base and you screw the leads to it. I just poked it through the side of the kiln around mid-way up and it's been working great.
It's best that you just learn to do it properly and consistently, so continue wiring them off.
It's really, really helpful to always remember that it's just mud, you can always make another, nothing is a sure thing until it's finished finished. You could screw up with the wire. You could drop it. Someone else could drop it. It could crack. It could explode in the kiln. Someone elses piece could explode and ruin your piece. Even when it's totally finished and done you could still drop it.
Don't get too attached or be too precious about your pieces, especially if you're trying to learn. It's good / helpful to do the things that you're not good at yet in order to get better at them. Throw so thin that it collapses, then wire it vertically in half and see where it went wrong / was thinner than the rest.
Same with wiring it off: the more you do it the better you get at it. It's better to just learn to do it rather than to avoid it. The studio I go to has these lifters which can help a lot too after wiring off.
If your pieces are causing any dust at all when you trim them they are too dry and should be trimming them earlier.
Do you mean something like this: Matty's Garden DIY Paint Your Own Animal Ceramic Succulent Planters Set of 3 | 3.25 Inch Cactus Pots with Drainage Hole Owl Fox Hedgehog https://www.amazon.com/dp/B082GQ8JP4/ref=cm_sw_r_apan_i_4PNJNN3EXBD9DQ627A9S
Unless you can actually make a profit and still have a low enough price point to actually the item, it isn't going to be worth the effort.
Also, it's not going to be a very satisfying project, unless it's pretty much just for kids. I would look for something less likely to disappoint customers.
I bought my first wheel off of Amazon for $125 of course the quality is incomparable to any of the Brent’s, Shimpo’s, or Speedballs that I have used. I love it, it is great, and for me personally I take classes where I have access to nice wheels so I use so spending a lot of money for classes + a nice wheel at home didn’t really make sense for me. I kinda view it as buying a cheap beginners art set and then as you begin to become a better artist your equipment also becomes better. Don’t feel like you need to come out of the gates hot and get the best of the best, especially as a beginner.
VEVOR Pottery Wheel Ceramic Forming Machine, 9.8" LCD Touch Screen Clay Wheel, 350W Electric DIY Clay Sculpting Tools with Foot Pedal & Detachable ABS Basin for Adults and Beginners Art Craft Grey https://www.amazon.com/dp/B09FJR8SLK/ref=cm_sw_r_cp_api_i_W5DJTF7SG8ZB9XFS2Y6A
That's great thanks.
The areas are only a couple mm wide. When you're talking about sandpaper grits do you mean sheets? I can't seem to see any grit numbers on the Dremel bits like these.
If I go through the grades of sanding would the felt wheel with aluminium oxide be ok to finish then?
It says it can come to temperature, but I don't know if it can be programmed. This is the part where I will tell you I was there recently and I was told I wasn't able to inspect them because he didn't want to go looking around for it because he didn't know where it was in the storage space. I don't have a manual, but this is it:
There are buttons, but I don't know if I can program different stages or what the best temperatures for those are. Also, are you saying that 8 hours of kilning means the clay is at temperature? If I put in the clay at half temperature for an hour or two then crank it to the required temperature for the remaining time, it's going to be water soluble still?
My favorite way to fix chipped mug rims is plumbers epoxy. It's a two part epoxy putty that comes in a tube and you kneed the two parts together. Make sure to get the one for potable water, it's designed for drinking water pipes and is microwave and dishwasher safe.
Something like this. PC Products PC-Plumbing Epoxy Putty, 2oz Stick, Gray (25598) https://smile.amazon.com/dp/B000AAVOKA/ref=cm_sw_r_apan_i_KT49HTKYAW8XH0XH6B1D
Lots of valid advice here. I used pot lifters in school but as I became more skilled and my walls and bottoms got thinner the lifters did more harm than good. What I found works well and quickly is just a ribbed dry pot surface and dry well scraped hands and giving the wheel a turn as you lift the pot. But the real trick is that most wire tools kinda suck for removing pots. They are just to thin and too long and they cut too clean. Mud tools make a wavy wire that works well, https://smile.amazon.com/dp/B0762TJ8NT/ref=cm_sw_r_apan_glt_i_F98YK8G9TV0D080P5ZHB?psc=1
But I've always just preferred a nylon string. No need to add a ton of water and the cut does not reseal itself. And I make the bottom how I want them so in production I don't need to trim much if at all.
Simon leech has a good video about about much he hates normal pottery wires. But to be fair Simon leech hates most things. https://youtu.be/uPYUINtGxtg
I haven’t noticed it becoming loose!
Ceramic Art Repair Tool, Adjustable Pottery Machine Turntable Clamp, Ceramic Art Teaching Turntable Clamp, Can Automatically Find The Repair Center, Suitable for Ceramic Art Beginners https://www.amazon.com/dp/B09J8PTXST/ref=cm_sw_r_cp_api_glt_i_8W8JFTGAMBQBAVGB4CMC?_encoding=UTF8&psc=1
This one I got about a month or two ago, and now of course it’s “not available” hahaha. The one I got was from amazons used program though which is why it was so inexpensive.
actually I just found this on amazon I think this could work https://www.amazon.com/Black-Round-Display-Plate-Holder/dp/B00I66INBI/ref=sr\_1\_1?crid=2YAHC0NXL683J&keywords=wall%2Bplate%2Bdisplay&qid=1646845314&sprefix=wall%2Bplate%2Bdisplay%2Caps%2C83&sr=8-1&th=1
If you dint already have these tools get them! They're like baking tools I think? But so so amazing for tiny detail work that needs to me smooth something like these
Found this! Best price I could find on Amazon. This will be what you need. Do you have a kiln to work with? As these will need firing. Unfortunately there’s not way to do your plan with air dry clay. Anything you could spray it with to make it not just melt when it gets wet would also prevent it from working as a chia pet thing. Chia pets use unglazed terra cotta because it’s porous and holds water, allowing the plant to grow.
I love that shape. I got mine in a big pack on Amazon. Decent quality at a great price Trimming Tools
Thank you! So since I have access to a sturdier wheel at my local studio and I didn’t have thousands of dollars to spare on a “real” wheel, I found this one perfect for at home practice. I’ve only used it once but so far so good! skytou wheel
Sure! They're not super cheap, but for us it's a lot cheaper than trying to repair/replace pipes embedded in the concrete slab. :D
This is the one I have, but there are tons of similar ones:
Ah yes, I’m totally deluded, this is impossible…https://www.amazon.com/Saggar-Firing-Electric-Kiln-Practical/dp/0764362321
Also, I had time to do a little bit more of a more decent google search now that the holidays are over, and found most of what I need to know until I can get my hands on the above book…it is possible, people do do it, and yes you can do it without harming your elements. Coincidentally I also came across more examples of people doing sagger firing in my terra sigillata book…I know that a saggar all by itself doesn’t created a reduced atmosphere, but you can put all sorts of crazy things in there besides sawdust or wood shavings or charcoal…people put walnuts and dog kibble and random plant material…I love working with terra sig but even more now that I see the incredibly creative ways that people use it.
I have these tungsten carbide scribers that I use for both mishima and sgraffito and they are by far my favorite tool for line drawing in clay. Super affordable and will last forever. 2 Pack Tungsten Carbide Scriber with Magnet - Aluminum Etching Engraving Pen with Clip for Glass/Ceramics/Hardened Steel by Fabcell https://www.amazon.com/dp/B0789HX8LC/ref=cm_sw_r_cp_api_glt_fabc_YX48R2H7M4P9DAMJYQHC
For doing more than line drawing, the mini ribbon tool kit by Kemper is fantastic. Just make sure to buy it from a clay distributor like Clay-King or someone local. The one on Amazon is not really Kemper and is crap.
Not a carver, but have heard that a chat with your dentist to see if they have a set of used tools they're happy to part with can be worthwhile. They're pretty fine, yes?
Link as an example, not an endorsement to buy:
There's a whole myriad of other things that could work too - it's just a matter of thinking about what you want it to do, and keeping your mind open re: what could do it.
The nail file that's part of a toenail cutter, the end of a paintbrush, a speedball calligraphy set, cake decorating tools, something from the hardware store (drill bit? nail?), crochet hooks, darning needles.... the list is endless. As far as sgraffito tools, guessing xiem? Check out your regular stores and ask them :)
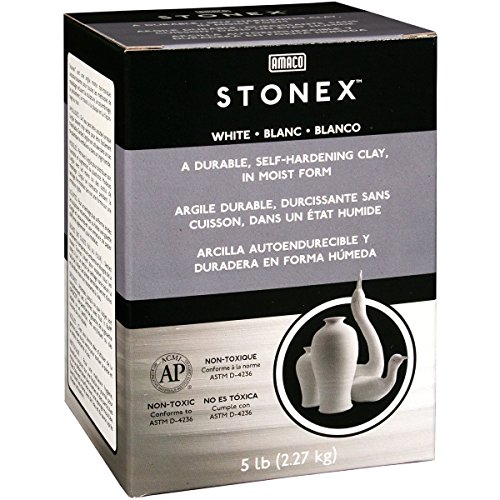
This thrown this air dry clay on a wheel before. It’s pricy for the amount you get, though. It is also NOT food safe and will never be food safe. Can only make decorative items.
If you received regular potters clay that typically needs to be fired, I would learn with that, since you can recycle your mishaps.
From your question I am assuming that you are not a potter at all. This, I’d suggest Zen and the Art of Pottery.
https://www.amazon.com/Zen-Art-Pottery-Kenneth-Beittel/dp/083480221X
There are others I’d recommend if there were more specifics, e.g. on technique or history. But that one is worth a read for everyone.
This air dry clay can be thrown on a wheel. I’ve actually used this to throw a small pot and lid on one of those plastic kids’ toy pottery wheels. The only thing is it’s not cheap, and I’m not sure how you could go about recycling it to reuse if you didn’t like what you threw, so I’m not sure how good it’ll be to start practicing with.
It’s helpful to buy country specific books when you’re starting out. Assuming you’re still in the UK based on yr profile history, I’d be recommending “From Clay To Kiln” by Stuart Carey because it’s uk based and for beginners.
Limited-time deal: From Clay to Kiln: A Beginner’s Guide to the Potter’s Wheel https://www.amazon.com/dp/1454710926/ref=cm_sw_r_cp_api_glt_fabc_dl_XGGGA28GWZ66EEJD5831 fyi: more in advice for beginners:
hope that helps.
I use painters tape sometimes but not for the ones in OP. I get a lot of skinny tapes at japanese dollar or stationary stores (ex. Daiso) and also use Tamiya tape which is really good for curves as it will stretch and remain flat when applied in a curve. 3M and other brands also have craft curve tape - I know some people use automotive tape as it's also good for curves but I haven't tried it personally.
I got this base from Amazon. Just remember you don’t put your kiln directly on top of this. It should be the rolling base, then your kiln stand, then the kiln. Adjust the base so it fits as tightly around your kiln stand legs as possible
I would suggest searching google by image using the photo of just the signature. I tried using the photo you linked, but since it is 3 photos cropped together it skews the results.
Good luck!
Take a look at how the this Ceramics 3D printing Group powering through in improving one of their key projects, the Multi-colour clay printer as a result
It was probably the part where I said "downvoters are sad fucks who get a rush of pleasure from their own disapproval". When those numbers have value I'm going to find guys like this hand have a long long threatening talk with them. Until then I do my best to ignore it. https://www.reddit.com/user/iBleeedorange Will probably do this tonight: https://greasyfork.org/en/scripts/8203-say-no-to-karma/
I have these in my studio over a workbench:
https://smile.amazon.com/gp/product/B08NPLW3HN/
They give off way more light than the 4' 4-bulb shop lights in the same room and I'm considering replacing the big ones with more of these. :)
That’s a very through list. The only thing I can think of to suggest is some plastic bins with a seal for letting work dry slowly without having to wrap it in plastic. I guess it isn’t a very fancy looking gift, but if you’re wrapping everything in plastic, these can be life changing https://www.amazon.com/WEATHERTIGHT-19334304-Airtight-Weathertight-Container/dp/B073XVHFM4/ref=dp_fod_1?pd_rd_i=B073XVHFM4&psc=1
What about a removable bat system? Like this:
Or this (I have this one)
https://www.amazon.com/Potters-Adapter-Removable-Inserts-Throwing/dp/B0764HWBRH/
That would solve your wiring off problem and you could leave the splash pan on!
Thanks! I just got them from Amazon - https://www.amazon.com/Replacement-Resealable-Insulated-Stainless-Tumblers/dp/B08LGGX3JH
Actually, I accidentally bought two! So if you want I’d be happy to mail my extra one to you, because I probably have missed my window for returning it. This is the kit, with its 80+ tools, not all of which came in my kit or some were doubles, but mostly it is what they show. I like the silicone tipped items in particular. I have since bought some Xiem silicone ribs because despite how it seems like everyone else loves metal ribs I’m not that in to them, though I do like wood ribs as well. https://smile.amazon.com/gp/product/B07TJNWFZY/ref=ppx_yo_dt_b_search_asin_title?ie=UTF8&psc=1
Ok, I got these things, pretty quick to find them- searched Amazon for diaper caddy and really like the one I ordered especially because it does have a zip top, more pockets than a lot of the others, and removable inside organizer. https://smile.amazon.com/gp/product/B084G8VB9M/ref=ox_sc_act_title_1?smid=A119ZEG1KHW8YT&psc=1
I also searched pottery tools caddy or organizer and found these for less than $8! They look like just what I want for many of my tools, but I didn’t think one would be enough so I got two, especially because they were so cheap (of course that may mean it will fall apart right away!). But if I like them, I could see myself even buying some more for say glass tools or wax tools etc. https://smile.amazon.com/gp/product/B01IIGLH22/ref=ox_sc_act_title_2?smid=A23ADOZFIJNPFB&psc=1
Robert Tichane wrote a pretty exhaustive book on reduction fired, copper red glazes.
They require a reduction atmosphere. You may be able to cheat with a mason stain colorant.
Is it something like this - Amazon Link?
If you haven't checked out the book from clay to kiln by stuart carey, I'd make a beeline for that:
https://www.amazon.com/Clay-Kiln-Beginners-Guide-Potters/dp/1454710926/
Pretty sure the recommendations are in there - you might be able to work it out from his IG account too.
One thing I wish I understood earlier is that new tools or devices won't make you better at making pots. Time spent making pots will make you better.
Still, there are some basic tools that you need.
- Bucket for water
- Sponges. A big one for clean up, a little one for throwing
- A rib or throwing stick
- Cut off wire.
Those basic tool kits that seem to be sold in every schools book store are great. I've seen them in craft stores too.
Here's a link: Amazon kit
Focus on centering, opening, and pulling up sides. If you can do those things consistently then you are on your way.
Thanks so much for your help!
Pebeo 766303 White Modelling Clay, 17 x 12.5 x 11.5cm https://www.amazon.co.uk/dp/B005SBG91U/ref=cm_sw_r_cp_api_glt_fabc_K33HSKJDEXQQQVBYRYNJ?_encoding=UTF8&psc=1
It was the wind in the willows for sure! But oh how I loved The Owl and the pussy-cat too! Hehe never thought I’d take a trip down memory lane tonight :)
Well, get one where you can see the motor sticking out the bottom then. If it's offset from the wheel axis then it's probably belt driven.
In the side view you can see the motor sticking out the bottom offset from the wheel axis. I doubt it'd be gear driven. Gears that big are expensive compared to belt and cast pulleys.
Mastering Cone 6 Glazes was my bible when I was selling functional pots. Besides having great recipes, it explains what every glaze ingredient does, how to make your own recipes food safe, and how to make glazes fit (so they don't flake off or crackle). Assuming you fire to cone 6, of course.
It definitely would! Do some shopping before though, maybe ask to see what yarns she uses. She might use massive 12"x20" thick skeins or tiny 6" balls
I see a lot of yarn bowls that can't even hold the standard skeins of yarn (like these) and it's super disappointing because I know whoever gets won't be too happy
Laser Level, RockSeed 50 Feet Cross Line Laser with Self-Leveling, Vertical and Horizontal Line, Rotatable 360 Degree, Carrying Pouch, Battery Included, LV1 https://www.amazon.com/dp/B07VRZS44Z/ref=cm_sw_r_cp_api_glc_fabc_jEu6FbYJ7MEB7?_encoding=UTF8&psc=1
Congratulations and welcome back. Since you have access to a place that will have a kiln, I’d strongly recommend you contact them and either get your clay directly from them or get the clay they recommend. Most places are not going to fire an unknown or unusual clay mix as it can cause too many issues. Plus they will likely purchase it in bulk so you can get it a bit cheaper (no shipping!).
I wouldn’t worry about purchasing any glazes until after you have actually sent some pieces to the kiln to be bisqued. You can’t get glazes until you know what cone the clay needs to be fired at and can’t know that until you know what clay they provide you. So save your money. Instead get a potters tool kit with the basic tools.
You’ll need to also figure out a place to wedge clay. And figure out where you are going to rinse your hands and tools. You can’t just use your sink. Look up clay trap or bucket techniques, etc. Last, what are you going to do with your clay to be recycled?
Simon Leach has some great YouTube videos. I’d also suggest you get A Potter’s Workbook. https://www.amazon.com/Potters-Workbook-Clary-Illian/dp/0877456712. As it is the best book for learning and relearning, not how to do something but what to do.
Check out GabrIel Kleine’s clear glaze. It’s SO easy and never had any issues. Thick, thin, I’ve tested it successfully cone 3-6. So so clear every time.
I don’t know if the recipe is published online but it’s from this book https://www.amazon.com/Amazing-Glaze-Techniques-Recipes-Finishing/dp/0760361037/ref=nodl_
I have a workbench (https://www.amazon.com/dp/B07362J8KZ/ref=cm_sw_r_cp_apip_bogzVwqCmWla9) with unfinished plywood on top to wedge, hand build, etc. with pegboard to keep all my tools. I recently saved up and bought a wheel (Speedball Clay Boss for $715 shipped). Since funds are limited you can easily start out hand building. I drop off my work at a studio to fire which I know others do as well. I make my slip at home and typically paint on greenware and do the final glaze at the studio after bisque. It’s a little more complicated but totally doable!
Its these SSRs: https://www.amazon.com/gp/product/B07FVR37QN/
They appear to be 25A rated, and are the ones I found on that Instructable. The guy sounded like he was taking the same precautions I was, but I double-checked anyways. I ordered four of them, just in case, and I'm going to find a couple big-ass heatsinks to affix to them and stick them in a junction box with a fan and some CPU paste that hopefully will suffice.
I'm south of Denver, and there was a weld supply near my old apartment in Colorado Springs that I used while I was still in-work.
Paragons' support left a lot to be desired, they gave me an intranet link (LOL) to their product, but I was able to work around that using the almighty Google. They appear to be well deprecated, the PDF scans of the manual look to be 40+ years old at this point. Hopefully if I need a new element they'll be more helpful.
I've also got a bit of a tight budget, but as one kiln is for the SO and the other is going to be a "teaching aid" I've got a little more breathing room.
By smoking a metric f@&$ton of weed. It looks like a dry glaze, and if you want to go down the non functional rabbit hole “dry glazes” is a great start:
Dry Glazes (Ceramics Handbooks) https://www.amazon.com/dp/0812220978/ref=cm_sw_r_cp_api_fabt1_6siSFbVK71THE
Amazon has high temp wire (kanthal) in gauges from 14-24 and smaller. Look under vape supplies for the smaller gauges.Kanthal is the only one there that sells 14 ga. Have used it, works well over many firings.
I don't think you understand what I'm trying to say. Don't buy something like this: https://www.amazon.com/MindWare-68471-Pottery-Wheel-Beginners/dp/B012TT5KYU It's not heavy enough, the motor is not powerful enough, you can't sit on it, it's rubbish. Nobody says OP should spend a lot of money; just that it's better to buy a good quality wheel second hand than buy a new one of amazon from an unknown maker.
Is it just the blade/heel of your hand that gets scuffed up while centering? What about covering just that area with medical tape? If you put on a piece at a good angle and length so the edges didn't get caught, I'd imagine it would hold up well and leave the rest of your hand free.
This type stuff: https://www.amazon.com/Cover-Roll-Stretch-10-yards-Hypoallergenic/dp/B000GCRWNA
Heck, even a strip of duct tape could do the trick.
I use a printmakers etching needle like this one, but I have one with a slightly wider tip on the opposite end: https://www.amazon.com/Specialty-UJR330A-herramienta-grabado-metálico/dp/B0042SR90K/ref=mp_s_a_1_1_sspa?dchild=1&keywords=etching+needle&qid=1596233669&sr=8-1-spons&psc=1&spLa=ZW5jcnlwdGVkUXVhbGlmaWVyPUFENEpBN1VZRDNZTFUmZW5jcnl...
Hey I saw your post on /r/ceramics too.
They have these moisture meters for plants. This one is just a simple one with not a precise figure but it will at least give you some sort of value that you are looking for. You just stick the end in the dirt with the roots but in this case you’d stick it in the center of your wedged clay.
This one is a digital moisture meter for reading water content in lumber. I think it only reads up to 50% but this will give you the precise figure you are looking for.
Hopefully this will settle your neuroses 😅 but you really don’t need to measure water content as when you fire for bisque you will dry it bone dry anyway.
Was it this tool by chance? The example images are actually exactly what I want to do!
This is probably not the best place to ask. Most people here make pottery and fire in a kiln with glazes that create a glossy coating for the pot. A crafty forum is probably a better bet.
If you google ceramics cold finishing you may find some more info. Or just get a product like this and try it out.
https://www.amazon.com/FolkArt-Multi-Surface-Paint-PROMO830-12-Pack/dp/B00I9WM69O
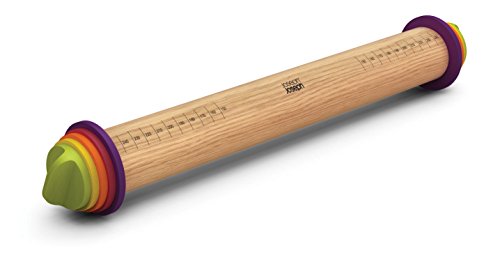
If you're working in a small space, like I do, you might consider this: https://www.amazon.com/Joseph-20085-Adjustable-Removable-Multicolored/dp/B0091QO3RK
I actually use the child's size, because my space is so small, but it works great. The rings are rigid plastic, so the slab is really uniform, and you can press down hard without squishing the rings, unlike the rubber band ones.
I use it on top of a thick plywood board that has fabric stapled to it. That way, I can prepare a slab, then use part of it and wrap the rest for later.