
What are
/r/anycubic's
favorite Products & Services?
From 3.5 billion Reddit comments
The most popular Products mentioned in /r/anycubic:


![[Original]Anycubic I3 Mega 3D Printer Extruder Print Head](https://m.media-amazon.com/images/I/41zsuujPcyL._SL500_.jpg)


The most popular Services mentioned in /r/anycubic:
Autodesk Tinkercad
Cults.
SD Card Formatter
Codeshare
ImgPile
Banggood
The most popular reviews in /r/anycubic:
Not sure about the Zero as I have a Mega S but one of the upgrades for the Mega S is the stepper motor drivers which considerably quiets the machine. I bought these. You can also change out the fans for more quiet ones.
The AMZv1 uses the old "noisy" drivers (A4988's). If you'd like to actually silence your printer AND improve print quality, you'd be better off considering a mainboard upgrade to one that uses the TMC2209 chips instead. A good drop-in replacement for your specific machine is BigTree Technology's SRK Mini-MZ v1.0 which was designed to be both plug and mounting compatible with the AMZ v1 printer.
It would use a different firmware, but someone in the community here already has you covered for that too: https://github.com/kad/Marlin/releases
Here's what I purchased: https://www.amazon.com/gp/product/B07JFGXC5N/ref=ppx_yo_dt_b_asin_title_o04_s01?ie=UTF8&psc=1
$0.50 per nozzle is what it works out to be.
These will work and are multiple sizes. Rustark 30pcs 3D Printer Nozzle kit Brass J-Head Extruder Print Heads 0.2mm 0.3mm 0.4mm 0.5mm 0.6mm 0.8mm 1mm Tools with 2 Pack Spanner for E3D V5 V6 Nozzles Replacement Removal https://www.amazon.com/dp/B07TV137PQ/ref=cm_sw_r_cp_api_glt_fabc_RZYNADRJXTY0WJWHPYND
Anycubic use the Titan j head hotends https://www.amazon.com/dp/B079QTDXMM/ref=cm_sw_r_cp_apa_glt_fabc_S2JCS76BD72P7MP3KW71?_encoding=UTF8&psc=1
Also if your printer is within a year of purchase or less than customer service is pretty good at sending you free parts.
>https://www.amazon.co.jp/dp/B07JL1QYLS/ref=olp\_aod\_redir\_impl1?\_encoding=UTF8&aod=1
oh, you mean the link, however I can access the above link, I guess it might have something to do with the location, the link I gave is from Amazon Japan. if you are from US, you can check the following link. the item is similar one. https://www.amazon.com/Sydien-Coupling-Aluminum-Flexible-Connector/dp/B07H9723M3
https://www.amazon.com/FYSETC-Printer-Accessories-Switch-Endstops/dp/B08B856NLZ
found these... hope they work. :)
So thats the Heater, thermoresistor, heating block and .04 Nozzle. When Cold removing the parts is a PITA. Bad News is you might have to buy it from Aliexpress, good news it maybe time to upgrade?
Maybe consider something like this? I grow a certain plant that has a strong smell. This 100% removes it. It also removes other smells. Makes my basement have zero odor. It can be loud, but it sure works. Just make sure you get a speed regulator too.
The hotend on my Chiron takes regular e3d nozzles. Just got these in and they fit fine.
30PCS 0.6mm 3D Printer Extruder Nozzles for E3D-V5 V6 https://www.amazon.com/dp/B0888Q2JLD/ref=cm_sw_r_cp_api_glc_fabc_FfL6FbNGWRBFD?_encoding=UTF8&psc=1
Are you keeping the filament on the spool holder on the side of the printer? Do you have a hygrometer in the room to monitor humidity? What temp is your hot end, and what temp is your bed?
I have started using dry-boxes to keep my filament in, specifically because I was working with CPE, but have yet to have similar problems since moving to this method as opposed to just leaving spools in the open. I have bowden tubes passing through these boxes which allow the filament to stay in a controlled dry environment even when in use.
And although I can not say for certain yet, a hotend sock might help to keep filament from re-attaching to the hot end and dragging over other portions of the print. Hotend sock for the V6.
After about 5 prints, my Mega Zero's thermistor went bad (I think mine was defective out of the factory, and the repeated movement wore it out). Replacing the thermistor is cheap so that might be worth trying and will likely fix the problem.
I purchased a new pack on amazon that was intended for the ender 3 (on which the Mega Zero seems to be based) and they fit fine, and the printer is working perfectly now (no temp errors).
When I purchased the thermistor I ended up getting one that had a long wire that connected all the way back to the mainboard, but the zero came pre-installed with a connector close to the print head and a male-to-male extension from the connector to the mainboard, so take off the wire ties near the print head and pull back the wire cover and see if you can find one that connects properly to that, if not I'll link the parts I purchased below.
​
https://www.amazon.com/gp/product/B0714MR5BC/ref=ppx_yo_dt_b_asin_title_o01_s00?ie=UTF8&psc=1
I got ya -- these couplings do fail after a while. They will unscrew if you grab individual pieces with pliers and channel locks. If you're in the USA, just order these. They come with a little collar which is also useful.
What the title says. I recently replaced the drivers with these. I also flashed the firmware with this using the 2208 version that allows you to not flip the connectors. I set all of the voltages to 1.15V. All of the movement seems to work fine but when I try to print things it appears to be under extruding (in a very interesting pattern too). And feeding filament in seems slower than with the original drivers. I swapped the old ones and reset the firmware and the old ones still worked. Swapping the new ones back in and setting the firmware again the problem persisted. I made sure to clean the nozzle too. If anyone could help me to get these to work that'd be amazing.
My suggestion, get a cheap Android phone and install octoprint on it
https://www.makeuseof.com/how-to-use-octoprint-android-3d-printers/
Get an OTG cable so you can charge the phone + connect it to the printer like this one
Should work fine if all you want to do is send G-code and not use the phone for long term printer management
This is the answer.
I purchased super thin washers, so I could raise each corner at 0.1mm per washer.
So I don’t have a Vyper, but Anycubic seems to use M3 screws a lot. here’s a link
I can't say I've come across any fans already terminated with JST-PH. If you're going to be doing any tinkering on your 3D printer going forward, it's worth the investment to buy an inexpensive set of crimpers and learn how to do it yourself. These Iwiss crimpers work well for the price. I'd advise against purchasing any of the ratcheting crimper models.
Nice! I will take a look at this video. Thank you!
Do you think this cooler will do the trick?
Aside from that, I have lots of questions, but I will watch the video first. Thanks for the patience so far :D
They're kinda spendy but this 410*410 sheet fits pretty well with the bed and has been fantastic to print and remove on for me. Haven't touched any adhesion promoter just simply some light cleaning between prints. It is textured so whatever prints on it will be a bit textured https://www.amazon.com/dp/B09WN1BBFT/ref=cm_sw_r_apanp_tzVj3L3fccEjT
Personally use and recommend replacing it with magnetic PEI sheets like this one: https://www.amazon.com/dp/B09WN1BBFT/ref=cm_sw_r_apanp_t9PSAw45W2GdB
Doesn't fit perfectly but it's bigger than you're likely going to need (only a few mm on front and back aren't covered by the plate). Love mine soo much after fighting with the stock plate for a few prints, haven't personally used glue or tape on it at all and prints just come off (these ones are textured a little so that does show on some of my prints)
Exchanged this shitty extruder lately as the metal gears are worn and even with a tight spring the filament hasn't been transported good enough.
New one is better by a mile!
Yes. I have converted mine into manual bed levling after all the issues I had with warped beds, but you should know that there's no going back because you have to drill out the holes in the ultrabase (not the bed) to fit m4 bolts moving freely so really m5 bolts and you should be using octoprint bed visualizer cuz otherwise I'm not sure how you would do it since it was never meant to be used this way. If you do decide to do it though, the red ones are too wide, they hit the power cords that you can't relocate, the only ones that fit i've found are these and they just miss the cords by about 2mm. But ya, this was the only way I could get a bed level on my kobra so it does work.
It is not eco, it's this;
https://www.amazon.com/dp/B079GR1L19?psc=1&ref=ppx_yo2ov_dt_b_product_details
Unless that is the eco resin and I am just not seeing it somewhere?
OP trust me on this one, grab the KP5L on amazon that's on sale til 9/15.
VQVM66SR
$200 for that printer is nuts. Double linear rails 330 build volume! Trust me on the linear rails being the much better route/not common in cheap printers.
Just get these instead of springs. Much better. Its what I got on my Mega Pro and I think they're great.
ditch the aprings on the bed an buy some like cococity silicon spring
I have this printer!
Each filament comes with the temps its looking to use for optimal performance for both the bed and nozzle. What I do is setup each filament its own profile and use that when I generate my print codes. Also once a week (at least) I run the auto leveler. Additionally I ditched the glass bed and painters tape and went magnetic flexible board, and have had zero issues since, and perfectly flat bottoms to my prints.
On a side note, I would order additional nozzles, and would not use any filaments with pulp added to them (those have been nothing but trouble).
Invest in a set of PCB drills just for this reason. Some of the nozzles have not been drilled through. Could be why you are having extrusion issues.
Here is a set that I ordered:
https://www.amazon.com/dp/B07C5S3FM2?ref=ppx\_yo2ov\_dt\_b\_product\_details&th=1
If you're trying to use your phone as an Octoprint server (Octo4A), you'd need to get a split USB OTG cable (one goes to power, one goes to your phone and the other goes to your printer) something like this - https://www.amazon.com/gp/product/B09C5BQ7VB
Glad you got it working. I doubt it's part of the extruder though.
It would be more expensive to make one with an integrated connector than to use a product that already exists and just add threading.
They look like this.
https://www.amazon.co.uk/dp/B07DWD42MV?ref=ppx_pop_mob_ap_share
I replaced this whole part had a look at the wiring looks ok. I tried unplugging the green block near the hot end and I'm trying again
I ordered a whole pack of .6 and a whole pack of .8. For some reason, they refunded the .6 nozzles. I guess they ran out, because when i went back, there were no .6 nozzles from that particular company.
Here are the .8 mm nozzles I ordered:
https://www.amazon.com/dp/B08NP1LQGW?ref=ppx_yo2ov_dt_b_product_details&th=1
FYI: The MK8 nozzles are not the right size.
I had the same problem with PETG until I brought this, https://www.amazon.co.uk/3D-Adhesive-Anti-Warping-Spray-Printers/dp/B01HQ4KXZ4/ref=sr_1_5?crid=DJUP58I8JMSA&keywords=3d+bed+spray&qid=1659005385&sprefix=3d+bed+spra%2Caps%2C75&sr=8-5, not had a single problem with bed adhesion since. I've also flipped the bed over and am using the clear glass side, it's much better finish than the dimply finish the main side gives.
they wanted 40 dollars shipping on anycubic's site so i got it on amazon for 31 canadian dollars.
I wasn't the OP but here's some info:
Search "pneumatic fitting" on Amazon, here's an example.
I also really like Triangle-Lab on Ali Express as a source for parts. Their stuff is high quality, not your average clones. Very good quality control.
I used to have a similar issue and bought a couple spare fittings. But before they arrived I figured out I was doing it wrong.
I use a tool (small wrench) to press down on the release collar, then slightly press the tube in then it comes out easily. I was not releasing properly then trying to force pull it out which never worked well.
So I'm still running the stock fittings I got with my printer 5 years ago.
I bought a replacement from Amazon in the end - the part is common.
Jopto 3D Printer Timing Belt 5... https://www.amazon.co.uk/dp/B07NSTGDYL?ref=ppx_pop_mob_ap_share
You will need to buy the clips separately. Hope this helps!
I'm going to go with this PEI sheet as a temporary solution and clamp it down with medium sized binder clips (no adhesive or magnet): https://www.amazon.com/dp/B074XKQNKT
There are also these sheets that have adhesive, but are not PEI or glass (some other material), and seem to have some very good and some very bad reviews:
Note that I saw a page on Amazon for a replacement sheet with magnet for Chiron and it says specifically "Not work with Anycubi Kobrra Max(429x410mm)" – So I think the answer to your question is "No". Sorry that I can't find a link to the reference :/
One of the two plastic thumb screws disintegrated and a piece ended up in the corner of my vat. After a 4-hour print, my vat was scratched and had some deformation in the FEP but no hole( for $50 and even without Prime you'll be printing before me lol. The posting for the vat just showed up this week so I hope there are more 3rd part products to come.
I order a new vat from Anycubic for $25, and shipping from China was over $25. It has been like 3 weeks or so and haven't seen it. As I check Amazon in my desperation I find this new vat for $50 and even without Prime you'll be printing before me lol. The posting for the vat just showed up this week so I hope there are more 3rd party products to come.
Good luck!
I ordered a new vat from Anycubic, after reading this post and a few others. As I am waiting for my new vat to arrive from China (3 weeks now) I check Amazon to see if any 3rd party has made any of these "cartridges" or anything I can use. This result just started showing up a few days ago, and with Prime, you'll have it sooner than me lol... Shit even without prime you'll have it sooner!
Not sure about the Chiron, but my mega X ultrabase was damaged, I have flipped it over and use the plain glass side with this https://www.amazon.co.uk/gp/product/B01HQ4KXZ4/ref=ppx_yo_dt_b_asin_title_o09_s00?ie=UTF8&psc=1 spray and I have a perfect bed, no warping with petg/pla and perfect adhesion and the glass gives a real nice finish on the bottom.
The actual problem is probably that the post isn't tightly screwed to the bed anymore. (if you overtightened then loosened the knob it actually unscrews it from the bed. Unfortunately from experience I can tell you, unscrew all 4 knobs until they come off, lift the whole glass bed up, tighten all 4 posts back into the bed. Do process in reverse. If the reason you landed here is because you had to crank the knob all the way one way or it was too light just to level, I would recommend you upgrade those stock springs like I did. Heck upgrade them anyways, the stock ones are just so bad...... here are the ones I've been using and they made a big difference in levelling experience. https://www.amazon.ca/Kulannder-Compression-Springs-Creality-Diameter/dp/B08FMGCFXL/ref=sr_1_6?crid=1ZC3Q7OYQQJOF&keywords=3d+printer+bed+springs&qid=1655289008&sprefix=3d+printer+bed+springs%2Caps%2C58&sr=8-6 (I don't manual use those knobs ever anymore now that I installed knutwurst and use manual mesh bed levelling)
Who? *looks around* me? Are you sure?
You mean you need a solution where PLA+ sticks to the bed just fine during the printing process, but when you leave the bed to cool down you hear some alarming cracking noise just to find out that you can remove your printed model as if it has never ever sticked to the bed?
Well I buy most printer parts from Amazon. It often happens i have a bright idea in the morning and amazon delivers the printer parts the same day later that afternoon.
Not sure where you are located, but Amazon Germany has all I need.
My favorite PEI sheet is this one https://www.amazon.com/-/de/dp/B09K3FKJ86 (Interesting that this sheet is so much more expensive in the US than in germany)
I know I know, this is designed for Creality Ender printers, but since this spring steel sheet is attached with a self-adhesive magnetic layer in between size doesn't matter - especially since the aluminium bed of the Mega Pro is 240x220, but the build space is only 210x210 or something.
Size only matters with glass beds.
This one and you need to buy the clips to make the ends.
MOTOU 5M GT2 Timing Belt, Upgrade Non-Slip Version, Width 6mm, Fit for 3D Printer and Most Belt Driven Printers https://www.amazon.com/dp/B08R93QQ8Z/ref=cm_sw_r_cp_api_i_FNTH29YQ1NCYYG35BG4J?_encoding=UTF8&psc=1
you don't need to get them from anycubic. they use off-the-shelf stuff; nothing proprietary. you can get them anywhere. do a little digging and make sure they fit the gears, etc
https://www.amazon.com/Kee-pang-Opening-Locking-printer/dp/B077ZT76RZ/ref=sr_1_3?keywords=stepper+motor+belt&qid=1653713322&sr=8-3
Honestly, even just a cut, twist and tape jobwill be easier to do than to unsheath and run it though the proper way. OR Do it the even harder way and grab a Dupont crimper (what I did) https://www.amazon.ca/dp/B086ZG64F7/ref=cm_sw_r_apan_i_SYBNM9FS8Q1GJ67R4GAF?_encoding=UTF8&psc=1
https://www.amazon.com/dp/B07YRWD1LV?psc=1&ref=ppx_yo2ov_dt_b_product_details
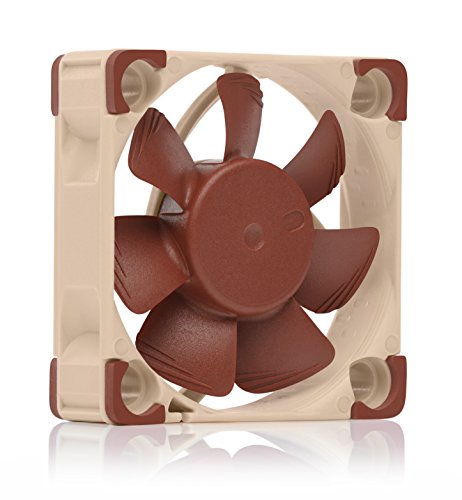
I found this fan and put it in and it works great. I was planning on upgrading and printing the new head but my other printer went down at the same time so I just replaced. It is new and works well. I also put the noctua one on the other side while i was in there.
​
hope this helps
I'm afraid the only fan that fits in place 100% is an anycubic original sparepart....with the same lifespan.
​
When i had to replace the hotend fan i bought this one as noctua wasn't in stock: https://www.amazon.de/gp/product/B0083A0BY4
The is also a 3 wire fan. I cut off the cable of the original fan near the fan case to keep a fitting plug for the socket with cable in a decent length.
Then cut the cable of the new fan with approximately the same length of the cable of the old fan.
Removed the yellow wire and welded the red with the red wire, the black with the black wire using the hot-air-shrink-weld-connectors shown above.
When re-assembling please make sure the fan blows air INTO the case.
Be careful with the noctua 40x40 fan...I heard people have issues with insufficient airflow. But thats the only fan where noctua might not be the best choice. You probably need to cut the wires anyway. i recommend to cut the original fan's cable long enough and weld them together using something like this: https://www.amazon.de/dp/B07WRGBH8Z/
If you order a new stepper just make sure it got at least 16ncm. I used this one: STEPPERONLINE Nema 17 Schrittmotor Bipolar 1A 16Ncm Stepper Motor 42x20mm 4-Drähte für Extruder 3D Drucker CNC Roboter https://www.amazon.de/dp/B06XVM38YW/ref=cm_sw_r_apan_i_4Q8J0R0T7ZHQ9CQZZAV7
And dont overtighten your mk4 dd screws, i destroyed some printed parts this way xD
If you get a squeeking sound on extruding or retractions maybe loosen the screws a very very litte bit. Or just take it as it is and wait for it to get away. I had this on both printers and just ignored it. It went away after a few prints.
This may or may not help, I almost bought a Vyper on Amazon last week, ended up with a Kobra but when I was on the Vyper page, one of the Amazon “people who buy this also buy this” things was a strain gauge for $20 CAD. I’ll put the link below.
your best option would be to replace the stock pneumatic fitting and bowden tube for better ones, but that's the titan clone extruder which isn't the normal fitting.
Collet clips can be found on amazon:
www.amazon.com/WINSINN-Bowden-Coupling-Collet-Clamp/dp/B075XG1QH8
Would this work? Micro Swiss Bowden Dual Gear Extruder Compatible with Creality Ender, CR10, CR-10 Pro, CR-10S, CR6-SE, Tornado https://www.amazon.com/dp/B09K1CNP6L/ref=cm_sw_r_cp_api_i_JAM2MSMDQZPHX8KJ764P
so i was trying this last night. And i was trying to follow guides i had found. but i think i did something wrong. No matter what i did i couldn't adjust the voltage. i used a cheap little multimeter like https://www.amazon.com/Neiko-40508-Digital-Multimeter/dp/B00066ZZO4/ref=sr_1_12?crid=10TWLO7QJ1D2B&keywords=cheap+multimeter&qid=1651159516&refinements=p_36%3A1253528011&rnid=1243644011&s=hi&sprefix=cheap+multimeter%2Caps%2C246&sr=1-12 that one. but man nothing i did to the little screw adjusted the voltage. maybe i did something wrong? im really new to all of this.
any tips?
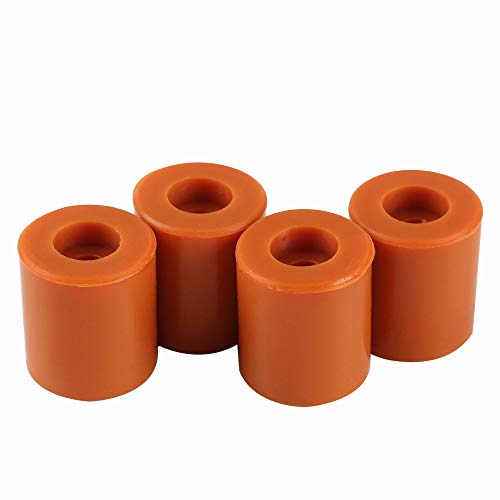
Its a common issue on many printers, not just anycubic, that the stock springs are kinda shitty. Do yourself a favour and get some silicone bed dampeners like this:
Fyfjur Silikon Isolierte Dämpfer Puffer Tube, 3D-Drucker Beheiztes Bett Nivellierung Heatbed Teile Hot Bed Leveling Buffers Teile Zubehör Silikonpuffe für Anet A8 Wanhao D9 Anycubic Mega (8 Stück) https://www.amazon.de/dp/B095S52HV9/ref=cm_sw_r_apan_i_CBXF1SSKZ9M8KXRFJNQJ
Install them, take your time to level the bed properly and then forget about leveling for weeks or months.
I use those on all my printers and usually dont have to relevel them if i dont mess up by accident.
Amazon has one, you it'll be in the same page with a j head hot end, and a chiron hotend
I can attest this vyper hot end does work, you may have to solder the wires or something but that's about it
Amazon shows also this . but to me it looks like it will run reverse when it should extrude...
sorry i am a total novice with bad english skills.
I use Super Lube for this type of thing which I've found to be very appropriate and useful.The Multi Use Synthetic Oil. I believe they have many varieties.
I've got one of these in large.. Willing to selll it to you if you want it depending on if your in the US. I have never put it together or removed it from the box, ended up just not needing it.
Just had this happen to me today. The connector that holds the bowden tube is worn out. It has teeth at the top that angle in to bite into the bowden tube. I had removed mine bowden tube a bunch of times and didn't always push down on the black part of the connector to release the teeth. Today all my teeth stripped out. Bowden tube won't stay in without them.
​
New connectors and bowden tube arrive tomorrow via Amazon.
​
SOOWAY 3D Drucker plattform Heißbett Isolierung Baumwolle Leichte Schaumstofffolie selbstklebend Isolierung Matte Aufkleber Heißbett Thermopad kompatibel mit CR-10S Ender 3 Anet A8 (220 x 220 mm Neu) https://www.amazon.de/dp/B07QM4PPQT/ref=cm_sw_r_cp_api_i_57398F2NRPP7AHXKN7JC
If your still having issues of the E0 not being able to reach past 165*c it is potential that the heater has died, maybe consider replacing the heater cartridge or entire hotend. You are able to buy replacement hotend on Amazon (UK) for around £15.
​
It is possible that the mosfet on the Mainboard has been damaged and is unable to provide enough power to generate the temperatures needed, although this is unlikely.
I got these: (https://www.amazon.com/dp/B07RZKF8MB/ref=cm_sw_r_apan_i_7XNYH30P7HQKC5YECRF8?_encoding=UTF8&psc=1) and it really helped with keeping the bed level and I can print all day every day on my Mega until i run out of filament.
You dont need another card reader ... just an SD card sized adapter - basically an sd card with a micro sd slot. Which is like 3$ in every store... You get these stuff thrown after you if you buy a normal sd card or a reader.
Yeah, there's no need to replace the whole assembly if it's just the hotend that's died. This is all you need to replace.
That being said, this might be along the lines of what you are looking for u/Tuznasova https://www.amazon.com/dp/B074NT4ZR7/ref=cm_sw_r_apan_glt_i_TR8ERPZP52NY54Q6K7TK?_encoding=UTF8&psc=1
Just requires a little coding and possibly a different heater core if the mega X is a 24v machine
I bought this and it seems to help with z-axis
Super Lube 51004 Synthetic Oil with PTFE, High Viscosity, 4 oz Bottle,Translucent white https://www.amazon.com/dp/B000UKUHXK/ref=cm_sw_r_apan_glt_i_ZYT18QJX6JCK7YPFJFFE?_encoding=UTF8&psc=1
Do yourself a favor. On Amazon, order this
Authentic Capricorn Bowden PTFE Tubing XS Series 1 Meter for 1.75mm Filament with PTFE Teflon Tube Cutter and 2X PC4-M6 Extruder Fitting and 2X PC4-M10 Hotend Fitting https://www.amazon.com/dp/B08BHVWNWK/ref=cm_sw_r_cp_api_glt_i_KM3DKMYW0TG3A9RMA0KH?_encoding=UTF8&psc=1
It comes with the fittings and the inside of the Capricorn tube is actually narrower than the original AnyCubic Bowden tube. My prints have improved quite a bit since replacing because there is less “play” of the filament inside the tube.
For PLA you should be fine, though I've got no experience with TPU. I think I recall seeing a post about needing a new bowden tube prior to that because the filament will vibrate around in the stock one and struggle to get through, and I most certainly can recommend Capricorn Labs for that. Again, I would NOT recommend using the PLA that ships with the printer. It gave me all kinds of issues, even after swapping to the second print head that ships with it (The first one had a warped tube from the heat of ABS).
I got it from a company called dobstfy on amazon after searching for a magnetic bed printer. I used to have one that was physically attached and had the "sticks too well problem" too. Haven't had the problem since so i highly recommend it.
Ultra-Flexible Removable Magnetic... https://www.amazon.com/dp/B09KZ62XB7?ref=ppx_pop_mob_ap_share
As far as I know the Creality Ender Hotend uses a different Voltage (12V vs 24V) so using this hotend is not compatible.
Also ...what exactly did broke? You rarely ever need the whole black box. There are fully featured so called V5 Holtends (Nozzle, heatblock, heater, thermistor, aluminium cooler, ptfe tube) that replace most breakable things for half of the price. Replaced in 15 minutes ...
https://www.amazon.com/dp/B08BHRXRTN/ref=cm\_sw\_em\_r\_mt\_dp\_ZQH9Q1NNQKXFM3DEJ9E2
That's amazing.
Well it's a 90° soldered microswitch. "Microswitch endstop" And your good to go.
These will do it as well https://smile.amazon.com/dp/B08B856NLZ/ref=cm_sw_r_apan_glt_i_NZB2SN4FJ2E24DXT8F98
Thank you, so v5 is the heating block model for this printer, correct? Will this fit nicely? https://www.amazon.it/silicone-stampante-Hotend-Anycubic-alluminio/dp/B0991N1QBC/ref=sr_1_1?__mk_it_IT=%C3%85M%C3%85%C5%BD%C3%95%C3%91&crid=3GIHW2EP76UZZ&keywords=v5+silicone&qid=1644497103&sprefix=v5+silicone%2Caps%2C85&sr=8-1
Hey, not sure if it's the same problem, but some days ago i tried to print from sd card on mx mega x. But it didn't show the new file I put on the sd-card. It showed me the old g-codd files which where still on the carc but not the new ones, also if I moved an old g-code file on thd card it didn't show up. I tried formating the card but it didn't work. After some google search I found a thread where someone had the same problem, the solution was, formating with the tool from this site. https://www.sdcard.org/downloads/formatter/
I have no idea why it didn't work with other formating tools, but this solved the isdue for me
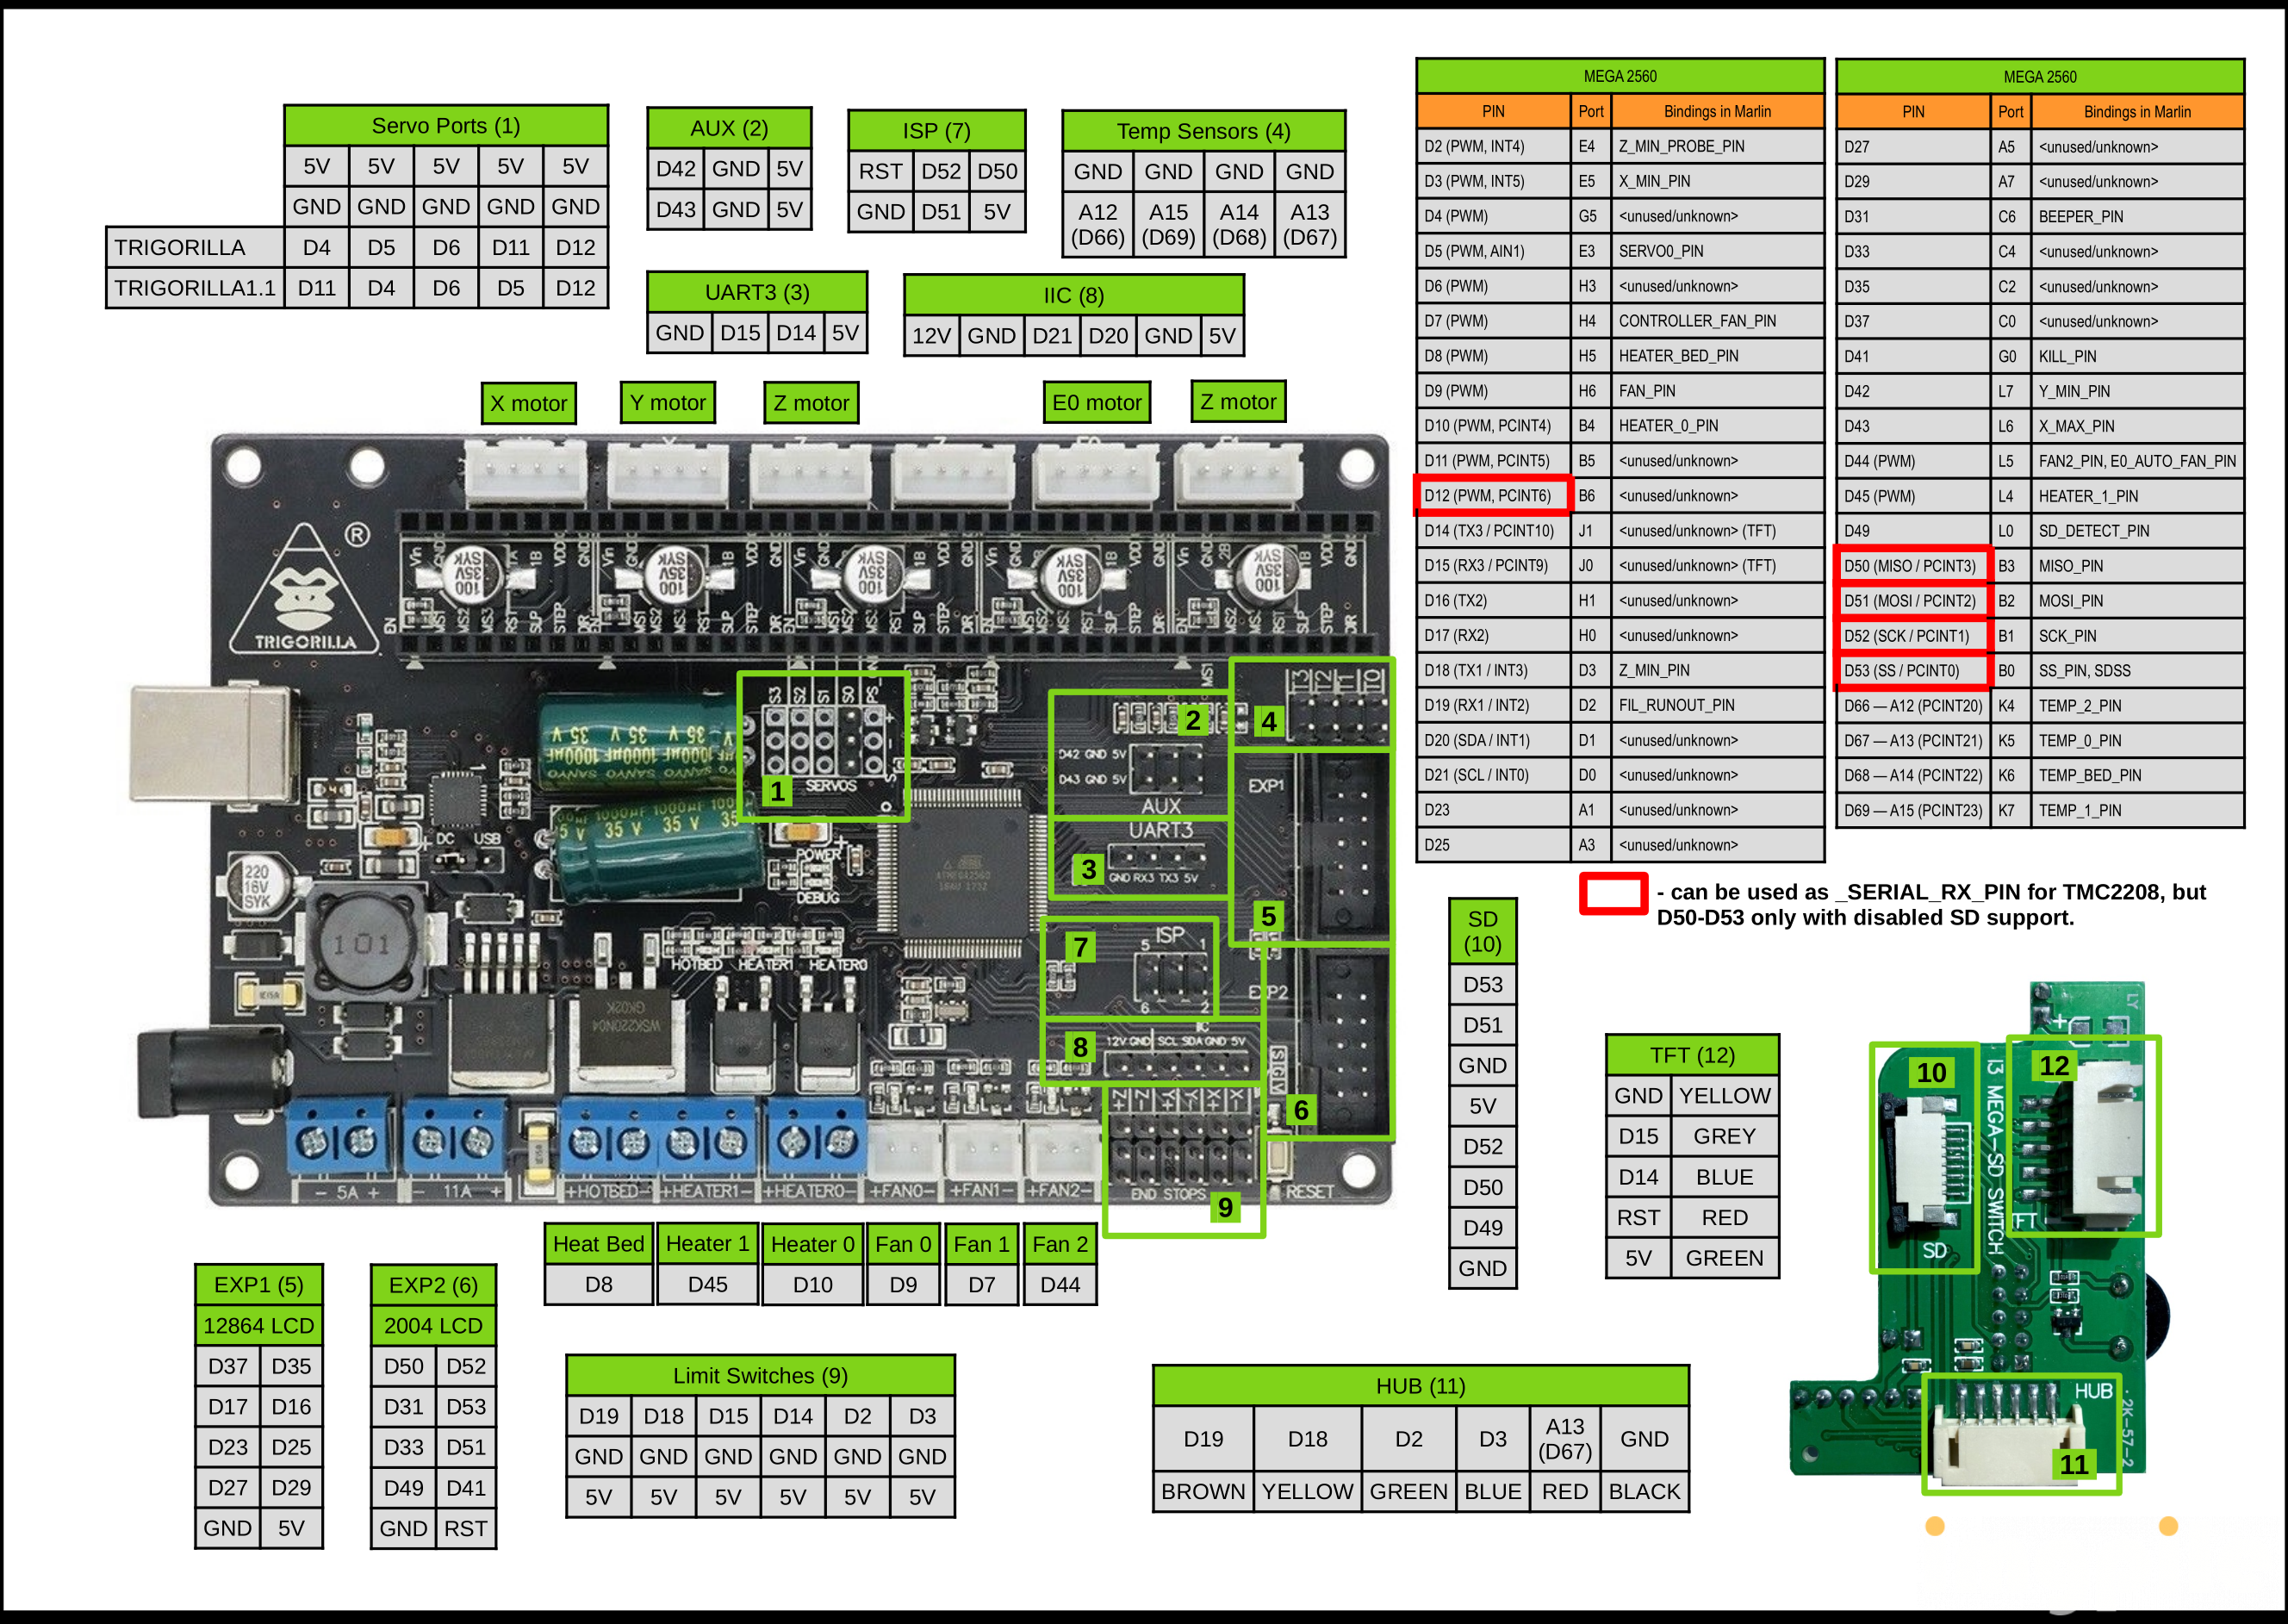
Yeah, motors and endstops should be fine. What you likely need are hotend heater and hotend thermistor (which is very common source of issues because of unreliable connection results in fluctuating temperature readings which result in actual fluctuations as firmware tries to compensate). Just wire both directly to control board bypassing all the mess.
For wiring - is marked pretty well on control board silkscreen, so you can figure it out relatively easily. There is also this picture if it helps.
And be sure to check bed wires while you are at it, not only they are tinned but also lack proper strain relieve bot where they are soldered to the bed itself and at a point where they exit the case. Common point of failure and a fire hazard too because of relatively large current there.
It is the PEI Magnetic Sheet that comes with the Vyper. One for the Ender 3 can be found here. I really like the surface, and I haven't had [too much] trouble with things adhering.
This is the one I have, it's not a perfect replacement for the mega x, but it fits ok and works well.
3DHUB Double-Sided Smooth and Textured PEI Spring Steel Bed with Magnetic Sheet 320mm*310mm for Creality CR-10S Pro/V2 https://www.amazon.ca/dp/B08WPBNFDM/ref=cm_sw_r_apan_glt_i_PS3007FFKWG2B8WJE9BZ?_encoding=UTF8&psc=1
I upgraded my Mega X with this extruder:
Bowden Extruder V2.0 DDB Universal Geared Extruder Dual Drive Extruder for 3D Printer
I did not need to reverse wires.
I did not need to change firmware...it just worked. :) but lots of research on the matter said that I would need to...I plugged it in...turned it on and tried to "extrude" and it worked flawlessly.
I usually keep 1 or 2 on hand for when something happens.
Posting top level in case you didn't see my other comment.
That is going to be your quickest and most permanent repair for this, unless you want to get a whole new hotend. Hope this helps!
This is the thermistor wire, the extra nozzle included by Anycubic is of no help here.
This wire is tiny, absolutely tiny, and attaches to a thermistor bead the size of a grain of rice. I hate this design. A lot of printers use these, and they are beyond terrible.
2 things that can be done:
Buy a replacement hotend that comes with the thermistor attached.
Get one of these, and you'll never break it again:
The Vyper uses the same style 100K thermistor as the Ender lineup. You will have to splice the correct connector from your broken thermistor on this, but it replaces the screw above the broken piece in your picture, and it's self contained to that. Plus, it's a single, spring-reinforced wire going to it.
You will definitely need to do a PID tune after swapping, but this should keep you from ever snapping those wires again!
Nevermind. Yes Prusa Slicer is free. I just downloaded it and am working on setting it up for the Vyper.
Download link for Prusa slicer if anyone is interested.
Also here is the link to the Eryone Silk PLA Filament if anyone is interested.
I have an add-on question: if you have multiple magnetic build plates can you swap out right after printing? Not to pop the print off, but to use the bed right away.
Would these work for the OP (https://www.amazon.com/Surface-220x220-300x300-Creality-Printer/dp/B07VMLDJ9S?th=1)
Yunbotong Bimetal Heatbreak,Titanium Alloy + Plated Copper Bi-Metal Heatbreaker for ANYCUBIC Mega S ANYCUBIC Mega Pro ANYCUBIC Vyper 1.75mm Filament https://www.amazon.com/dp/B09BQGGFQL/ref=cm_sw_r_cp_api_glt_fabc_SG9BP1Z99QT7EK04DHNV?_encoding=UTF8&psc=1
>The clicking sound is what I was talking about. I have a similar printer and at first I was irritated by it, too. Now I'm quite used to it. 😏
>
>It might not look like a shutdown, but that's basically what it is. If you had octoprint connected, it would say something like "the printer reported an error and stopped responding".
tyvm!
Here is today's album. I removed the hotend and replaced it with the spare part that came with the printer. While I was at it, I swapped the stock couplings for these ones (recommended upgrade I saw on youtube). Recalibrated 3x with my feeler gauge at 0.5mm a couple of times.
What hotend are you using now? Sounds like I'm going to be doing this quite a lot... any tips?
I bought a generic glass plate that used clips and it works amazing something like this if you can find it
220mm x 220mm Borosilicate Glass Plate/Bed w/Flat Polished Edge for MK2 MK3 Heated Bed 3D Printer https://www.amazon.ca/dp/B01LFOI2VS/ref=cm_sw_r_apan_glt_i_9TGQ2AFAMJ1Q78FQ221H
Leveling is a serious issue, maybe put a mirror or piece of glass on top if the bed is warped.
https://cults3d.com/en/blog/articles/6-main-factors-for-perfect-first-layer-3d-printing
Sorry that may be the wrong one. This is the one that I'm currently using.
https://www.tinkercad.com/things/48jWYgI1ZPi-mega-zero-cooling-duct
The stock AMZ hotend is called a v5 or J-head, which is the same as the block on the FLSun Q5, I believe. It’s a good quality hotend, but some replacement parts can be hard to find. Be sure to double check the cutouts on the socks and make sure all the holes line up before buying, sometimes some versions expect a different thermistor design. Iirc this is less of an issue for the AMZ style than the Q5 though.
Check your local country’s amazon or AliExpress for v5 socks or j-head socks to find a selection of possible choices. I think either one of these or maybe these will be the right ones for your machine.
I’m using the cr-10 end too fwiw though, as spare parts are easier to obtain due to owning other printers that used them.
It's not a lot of work. My workflow goes like this; (I use water washable resin)
- I load the stl file or model into Prusa Slicer, auto-orientate, autosupports, tweak supports as needed.
- Print in Chitubox
- After printing, soak in hot water (while on build plate) for about 30 secs or so. Slide the entire model off with a scraper.
- Remove the supports (while wearing gloves) by hand and using snips
- Put the cleaned up models into a mason jar of water.
- I have a little spinning uv curingthing. I cure in the jar of water for about 1 to 5 minutes depending on the model. Too long and swords, arrows etc get too brittle and just snap and the model looks frosted.
- Remove from the water. I rinse again, check to make sure model has no glossy spots. and then just let air dry.
I dispose the gross water into a cat litter jug and just let the water evaporate.
Not sure if this is the best workflow but i'm happy with my results.
You can use a Creality CR-10 (aka Mk8) style block and heatsink with the AMZ v1 as long as you're careful about making sure you stick with a 12 volt heater element. The standard CR10 end uses a 24v heater, which won't be able to warm up properly with your lower voltage printer. Fortunately, in a pinch you can just buy a cheap pack of 12v/40w heaters to use, as they're all pretty generic components.
There's also a few other minor catches to fitting this style end on your AMZv1 however. The stock metal fan duct/shroud thing will run in the larger block, so you'll need to swap it out for a printed part, I recommend the eB fan shroud as it both fits, and is a great upgrade over the stock setup, and only requires a pair of slightly longer M3 screws to mount it on your printer.
I run this combination on a couple AMZv1's with really good success. I originally went to it so I could use some all-metal heatbreaks from Ender machines, but I've been very happy with the overall print quality from this combination, to the point I've spent literally hundreds of dollars extra trying to get my Ender-5 to match their print quality.
Here's the Amazon link of the PLA filament that I am using:
https://www.amazon.com/gp/product/B07PDW6X99/ref=ppx_yo_dt_b_search_asin_title?ie=UTF8&psc=1
Just had the same thing happen to me at the end of October. Just order some new connectors from Amazon and you should be good.
PC4-M6 Pneumatic Fitting Push to... https://www.amazon.com/dp/B07Q9Q9JDP?ref=ppx_pop_mob_ap_share
I'm using StrongHero3D dark gray PETG, and I had to play with settings until I got it just right.
First, get this calibration block - I use it to test bed adhesion/warping.
For this PETG, I determined the default printing temperature from a temp tower, and a bed temperature after noticing curling.
Then I played with the initial layer settings - that's the tricky bit.
Printing Temperature: 245 Printing Temperature Initial Layer: 240 Build Plate Temperature: 80 Build Plate Temperature Initial Layer: 90
Fan Speed: 100 Initial Fan Speed: 0 Regular Fan Speed at Height/Layer: 0.5/4
To sum up: initial layer should be printed colder, with a higher bed temp, and no fan. After the first few layers, increase the extruder temp, decrease the bed temp, and turn the fans on.
Once I did this the calibration block turned out excellent, and I had no problems with adhesion or curling. But YMMV with the adhesion, if it's a small footprint then definitely put down some glue stick.