
What are
/r/gigabyte's
favorite Products & Services?
From 3.5 billion Reddit comments
The most popular Products mentioned in /r/gigabyte:


The most popular Services mentioned in /r/gigabyte:
FanControl by Rem0o
Rufus
GPU-Z
CPU-Z
OpenRGB
Winaero Tweaker
Files.fm
HWiNFO (32/64)
SD Card Formatter
SIV - System Information Viewer
3DP Chip
Pangoly
Softpedia
Softonic
TinyURL
The most popular reviews in /r/gigabyte:
FanControl. Free and open source, and works amazingly well with significant customization available. You can use far more sensors than the bios will provide (including most GPUs), and even use mix curves which will take the highest (or average or minimum, your choice) of a group of curves. This is how I have mine set to respond to both the CPU and GPU for the case fans.
You'll still want a baseline configured in the bios that it will use during boot up, and fall back to should the app crash (has never happened for me, but it's possible).
First, yes you download the latest BIOS to a USB drive and use the BIOS Flash buttons on the back of the MB to write the new BIOS revision. Your manual will tell you how or Amazon has a short write up in the product description: https://www.amazon.com/X570-AORUS-PRO-ALC1220-VB-Motherboard/dp/B07STNZF9L
I got mine from Amazon, but I would recommend getting it from an authorized reseller (like HIDevolution). They can do a LM repast for you which won't void the warranty since it is done through them (do not repaste yourself since this voids the warranty and if you use LM you can easily short your device and be out $2300). I was getting temps in the low 90Cs on the CPU so I bought a laptop pad which dropped my temps to the mid 80s (the intake vents on the bottom so this laptop really does need a laptop pad with some fans preferably). You can use Intel XTU to undervolt the core volt offset and Graphic offset by ~.140mv to -.160 mv (mine is set at -.150 with no issues). Here's a guide if you've never done it before.
>As stated before, this metric is only valid during a relatively stable near-full-load condition. That is due to the typical measurement accuracy of the VRM controller telemetry, and also due to the highly advanced and fast power management on Ryzen CPUs, that not only result in extremely low idle, but also in extremely rapidly changing power consumption. A suggested workload to get a stable and reproducable deviation metric is Cinebench R20 NT, with the HWiNFO sample rate set to less or equal to 1000ms.
Go check this thread:
https://www.reddit.com/r/gigabyte/comments/p104xa/x570ftpmsiv_error/?utm_medium=android_app&utm_source=share
"SIV uses the LPC bus to communicate with the BIOS, which is also the same bus that TPM & fTPM communication occurs on (and the debug display if equipped). Makes sense that they could interfere. SIV is cancer anyway, and is very easy to corrupt your Windows install when tuning using SIV, and if you need userspace fan control software, I recommend https://github.com/Rem0o/FanControl.Releases. Way more powerful too."
Uninstalling SIV worked for me, u guys should try it !
FanControl. Free, open source, can control what SIV can and more (without the risk of it resetting the TPM all the time like SIV and Easy Tune are prone to doing). It can control most GPU fans as well, and you can use most sensors in the system including the GPU temp to base your fans off, which is great for case fans that may only affect the GPU. And there's a mix curve ability so you can combine multiple sub-curves and have it take the highest of those. It's slick. I use it on all my builds. I don't even bother with OEM fan control software at all.
Still you'll want to set a baseline in the BIOS because this is used during boot and in the very unlikely event the program should ever crash (which pops an error full screen, happened to me once about 8 months ago with Asus when waking from sleep, and the dev fixed it very quickly). It's never crashed on me or a client (that they've reported) other than that one resume from sleep issue in the 18 months I've been using it.
And again it's all open source and there's even a couple open source plug-ins you can install for it which can tap into like HWINFO's shared memory function (in the pro version, becuase the free version of HWINFO has it only enabled for 12 hours at a time, and doesn't start at boot so that's not ideal for basing fans off of if the sensor doesn't exist to the fan control software after 12 hours or on boot). But the HWINFO plug in is only needed for other sensors that may not be included in the motherboard's SuperIO chip output, like RAM temp sensors (that's what I use the plugin for personally because I've got OC'd b-die that's temp sensitive).
I think the logical limit is 127.
OP, you will hit the bandwidth or power limits before you run out of USB logical devices. If you are shopping for a USB hub buy one that's powered and you should be able to fill each slot.
Here's one that seems popular Amazon - Sabrent 60W 7 Port USB 3.0 Hub; 3 charging ports
That's almost certainly just a C5 or mickey mouse cable (full name is actually IEC-320-C5, but they're just called C5 for short), and unfortunately Best Buy doesn't stock those in the store. Micro Center might if you've got one nearby. But Best Buy would rather sell you the $60+ universal laptop charger (which would come with the cable) or a travel adapter.
But if you've got a working solution for now, and can wait to order a cable, here's an Amazon link for a trusted UL listed cable from Monoprice, or this Google search will bring up the cable type, so you can choose a retailer if Amazon isn't for you.
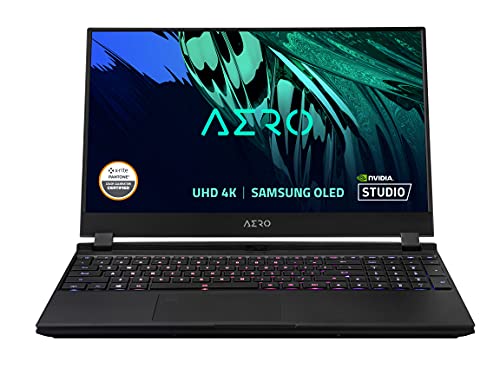
There's nominally one on Amazon right now https://www.amazon.com/GIGABYTE-Aero-15X-BK4-Notebook-i7-7700HQ/dp/B076FLGX9D?th=1&psc=1 -- I almost grabbed it/ cancelled my pre-order at excaliber until I realized that the Amazon listing is also from excaliber so I'm just crossing my fingers.
This seems to be the last batch of the 7th gen cpu ones so if you can hold out until April the 8th gen do sound pretty sweet. I'd personally rather sooner since I've been looking to replace my laptop since last fall, but the 8th gen cpu looks like a nice consolation prize if it comes to it.
A guy in the review of this amazon section said it worked for him.
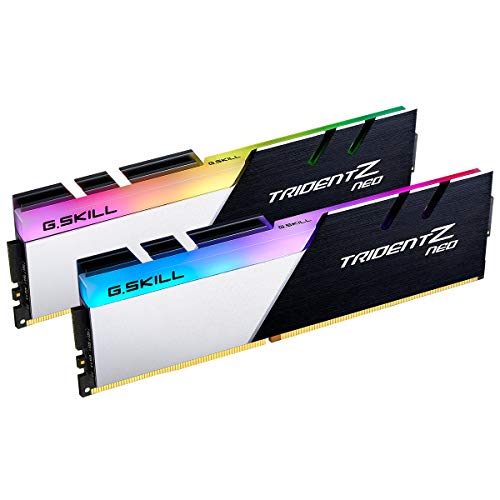
Hurry up. 3 sets left. You don't need ECC. Threadripper doesn't support registered ECC and you won't get any practical benefit from unbuffered ECC (it will just make it more difficult to clock the memory more aggressively, and memory clock does make a performance difference at a much better cost benefit than CPU overclocking which draws lots of extra power/heat).
More specifically, I'm using Mac Studio Ultra (so all ports are TB4) and M28U (firmware F10).
I've tried different cables and same result:
- https://www.amazon.fr/gp/product/B08KSM2FWR/ref=ppx_yo_dt_b_asin_title_o04_s00?ie=UTF8&psc=1
- https://www.amazon.fr/gp/product/B09N36MC2F/ref=ppx_yo_dt_b_asin_title_o06_s00?ie=UTF8&psc=1
Whenever I set a HiDPI resolution in macOS, it changes the refresh rate to 60Hz. I can it 144Hz in low DPI resolution though..
Not really a solution, but plugging into the front headphone jack stopped the crackling for me. Not the first time I'm dealing with crackly audio on motherboards, so I've just come to expect it.
If that didn't fix it, I was just gonna get one of those cheap usb soundcards, like one of these.
Just to post an update like you requested - I got this cable yesterday:
https://www.amazon.com/dp/B0874HH4ZZ?psc=1&ref=ppx_yo2ov_dt_b_product_details
Tested it out this morning, and the KVM switch works perfectly. Thank you so much u/DasHotShot!
If you don't need the webcam to switch, then plug it in directly to whichever computer you want to use it with. If you want to use it with both computers, your options are to either manually unplug/reconnect to the desired computer every time or hook it up to the monitor and have it switch with your other peripherals.
Y cables are used to deliver extra power, they do not "split" the connection between 2 devices like your proposed setup would require.
As far as specs for the hub, mine is a pretty basic USB 3.0 hub. Something like this should be fine: Anker 4 Port USB 3.0 Hub
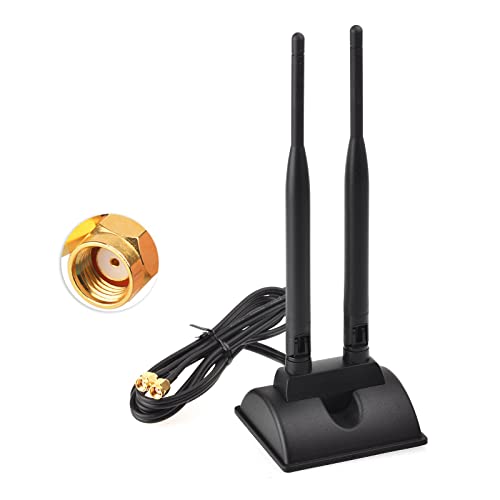
Switched out the factory wifi/bt card with a $15.00 AX200 card, Win10 recognized it without any driver installation or configuration needed.
Had a little trouble with Linux but after updating to the latest firmware, everything seemed to be working well.
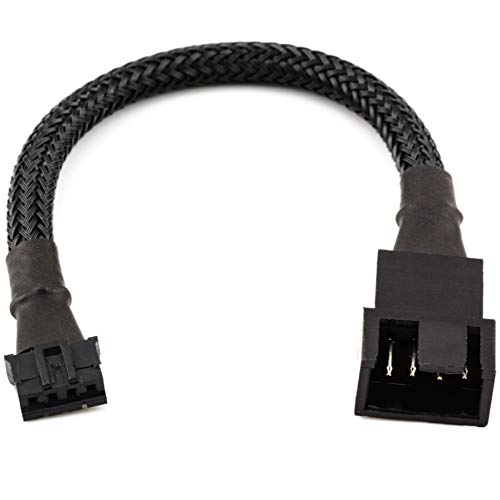
The connector name is officially JST Ph 2.0, but if you just want to buy what you need to connect a standard fan to it, this is what you need. Well, it's actually a splitter, so you can connect up to 2 fans to one header.
My understanding is you can only use the KVM feature with USB-C and then either the HDMI or Display port.
Essentially the KVM feature passes whatever you have plugged into the USB ports on the monitor to one computer via a USB cable that looks like this and to the other PC via USB-C. To the PC with that USB cable plugged in you also need to use either Display Port or HDMI to pass the video signal because regular USB-A can't handle all that data transfer.
USB-C however has such a high transfer rate it can do audio, video, the USB devices and power all at once... assuming you have a cable with enough throughput. Gigabyte makes a USB-C cable but you can get any cable as long as it's 100w and 10gbps at a minimum. If you don't know if your existing USB-C cables are rated for that you can try them but if they don't work find one that does.
Probably "gamer" should have more gpu TDP, MUX switch and be much thicker with "big bad grills on the back where you could stick your finger"?.. (G/Aourus line)
I'm a bit dislike it is on the sale. This probably means they'll ditch this line and I'll struggle to find lap 5 years later (but who knows?)
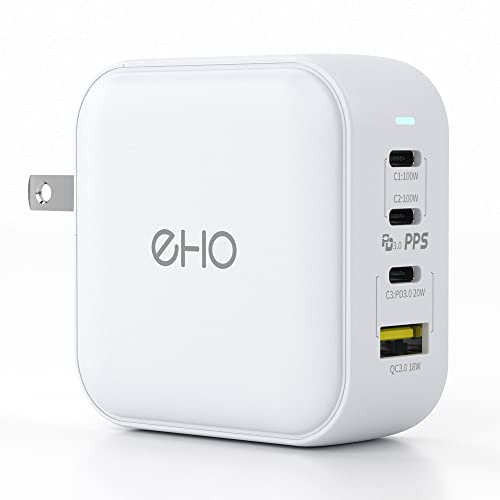
I'm using this one: https://www.amazon.com/UGREEN-Multiport-Ethernet-Charging-Compatible/dp/B07YFWL4HP/ref=sr_1_8?crid=1FYTHHGAQR9CY&keywords=UGREEN+USB+C+HUB+Portable+Type+C+to+Multi+USB+3.0+HUB+HDMI&qid=1669459596&sprefix=ugreen+usb+c+hub+portable+type+c+to+multi+usb+3.0+hub+hdmi%2Caps%2C181&sr=8-8 (bought from Aliexpress). It's overkill though due to VGA but "be prepared".
https://www.amazon.com/gp/product/B0983KRPDP/ref=ppx_yo_dt_b_asin_title_o07_s00?ie=UTF8&psc=1
I bought this one from amazon and it worked just fine. I can't use the other ports when charging the laptop or else it won't be enough wattage for the laptop. I can only use the 2 usb c ports on the right hand side of the laptop and it trickle charges pretty slow.
I figured for whoever this may help, here's the cable I replaced the in box 12vhpwr cable with, and it worked immediately without issue.
https://www.amazon.com/dp/B0B1QHPWKZ?psc=1&ref=ppx_yo2ov_dt_b_product_details
The card is absolutely worth the money, and I hope it gets the credit it's due. It's an absolute beast.
Maybe a USB graphics adapter would work, but I've never used one with these new igpus so I don't know how compatible they would be. https://www.amazon.com/Adapter-Converter-Multiple-Monitors-Compatible/dp/B07RS34B43
You definitely don't have any more options on the motherboard itself, as it is just the single HDMI that is capable of video out, since they ran the USB-C ports off the chipset, not the CPU, so they don't support DP alt mode.
1- Gigabyte A7-X1 gaming laptop 2- Windows 10 3- x 4- x 5- Hi everyone, I'm having some white noise/audio interference problems with my new Gigabyte A7 laptop (A7 X1-CDE1130SH, https://www.amazon.it/dp/B099F1CGTN?ref=ppx_pop_mob_ap_share). I bought this laptop from Amazon in july but did not start using it until a couple months ago or so because of workload and stuff. From what I noticed, when I play stuff like Apex Legends or Overwatch with wired earbuds plugged in while the laptop is connected to the charger (which is a must, since I didn't buy this gaming laptop to play at 30 fps) I hear loud white noise mixed with the game's sounds in my earbuds. Mind that there is no white noise when earbuds are plugged and charger is connected while I'm listening to youtube or spotify, like, every sound except videogames is fine. Another weird thing is that, expecially with Apex, the white noise changes tone based on the menu I'm looking at ... wtf. If I play Apex with earbuds but without the charger connected, the white noise is basically unnoticeable, I can just barely hear it (need to test further this case). Windows 10 says audio drivers are all updated. I tried a different pair of earbuds but the noise behaved the same way. I also tried to disable the mic included with my earbuds, but there was no change from the white noise. The white noise persists both when the charger is plugged to a wall socket or to an "intermediate" socket. This is mind boggling for me, what should I do ? Do you know if there's a fix ? Should I contact support for another charger or to send them my laptop ? My ears (and my gaming itch) are crying. Thank you in advance to anyone that will respond.
Is it this monitor?
It says it's "HDR ready" but only shows HDR 400 which is... No HDR. No local dimming or anything. So it's wigging out like turning on HDR on a monitor that doesn't support it.
And the reviews are brutal, looks like a lot of quality control issues on that monitor. As a Gigabyte G34WQC owner, with my sample size of 1, agree. Turning on freesync causes it to freak out, with 2 different GPUs, and it's got coil whine that would rival a CRT.
I purchased this one from Amazon and am able to achieve 144hz on my M1 Mac Mini. I realized you need to disable the setting "USB C Compatability" for the refresh to achieve 144hz though... took me a few days to figure that out.
Hi Magusten1,
It surprises me that the screw is not long enough since M.2 screws are often paired with standoffs, thus the screws are extremely short. Would you be missing a standoff per chance? If not, Amazon offers this variety set of screws for your motherboard!
For anyone looking to max out performance at the current 5600MHz options for fairly cheap this kit worked out of the box with XMP on my AORUS Ultra z690. CL32-36-36-76 1.2V https://www.amazon.com/dp/B0B3GMF2RR
Pretty good deal at $170 with those timings at today's prices.
For future searches for anyone else, this is the cable that worked for my setup great over USB-C with Macbook Air M1
Amazon, here's the link.
I was getting those oddly specific refresh rate options when it was hooked up via the Dell dock, and would not display over 120hz even though it had the option.
Direct to the USB C input from my Macbook air is full 2560x1440 at 170hz, verified in the monitor settings.
Maybe it's the firmware? Can't tell what version I have, bought it in the Fall of 2021 so whatever it shipped with. I also have no issues with my Xbox series X displaying 1440p at 120hz.
Using this cord now and working great as well. It has a 50% coupon currently at amazon. https://www.amazon.com/dp/B093BHBHQL?psc=1&ref=ppx_yo2ov_dt_b_product_details
Thanks. The motherboard manual says it can support 128 GB, with a maximum of 32 GB per stick. I bought the first kit June 2nd and the second set July 12th. I have no idea how to tell if they are from the same batch.
This is the Amazon item I purchased each time: https://www.amazon.com/gp/product/B09HW6ZJV5
Quoting the manual,
"Support for DDR5 4800/4000 MHz memory modules"
...
"4 x DDR DIMM sockets supporting up to 128 GB (32 GB single DIMM capacity)
of system memory"
...
"Support for Extreme Memory Profile (XMP) memory modules"
Since I have literally zero confidence in Gigabyte ever doing the right thing by their customers, and since I'm planning to skip the next gen of CPU's (I'm really happy with the 5800X3D as all I do is game on this PC) I ended up just buying a teeny discrete TPM 2.0 module from a seller on Amazon who isn't a scalping POS like nearly every other.
Item also on deep 44% discount right now at only $22.39 (far less expensive than the OEM version and all the other overpriced knock-offs on eBay), which is kinda like a few purchased coffees.
I just got so tired of these stutters in games.
Here's the one I purchased for the X570 Master, which also works for X570S and a ton of other Aorus/non-Aorus branded Gigabyte boards:
https://www.amazon.com/dp/B09PDG8FZJ?psc=1&ref=ppx\_yo2ov\_dt\_b\_product\_details
There are no debug LEDs. The board LEDs flashing when you turn on the PSU is normal, since the 5V standby rail is energized as soon as you do this, which is what powers the RGB on the board. So it will flash briefly as the RGB controller is powered up. This has no bearing on the function of the board itself.
You can plug in a PC speaker to the 4-pins in the front panel header area for the speaker and you'll get beep codes for the error.
The drive I'm using is this one https://www.amazon.com/WD_Black-SN850-Internal-Gaming-Solid/dp/B08KFRFL8F
So, the interface capability speed is Gen4 (4 Lanes).
Does it matter if I cloned the new drive from the old NVME drive, which was a Gen3?
There's a 1 star review on Amazon that shows some damage to the board after removing some "hidden audio cable": https://www.amazon.com/GIGABYTE-Z690I-AORUS-D4-Motherboard/dp/B09ZKJ3SQ7/ref=sr_1_4?crid=LSJHQ40ZHKC0&keywords=gigabyte+z690i&qid=1655439469&sprefix=gigabyte+z690i%2Caps%2C104&sr=8-4#customerReviews.
Has this been an issue for anyone else?
Cable arrived. Unfortunately, the answer, for me at least, is no, 120hz @ 4K is not available even when using a thunderbolt 4 USBC to USBC cable (40gbps). I've seen a few people on forums saying they can get 4k/120Hz, so maybe its this particular monitor, or maybe they are using a USBC to Display Port adapter as reported in this thread.
I will see if I can get hold of one and test it out. I've seen 120hz on my PC with this monitor and it does feel incredibly smooth, so it would be a nice discovery.
I feel your pain (and confusion) with the lack of detailed info on this monitor, so hopefully this helps:
Does 4k 60 with usb-c to usb-c cable on an M1 air/pro?
Yes. I am using it via a 10gbps USBC cable (https://www.amazon.com.au/dp/B083JQZ263?ref_=pe_2361882_295287342_301_E_DDE_dt_1) with an M1 Pro, and I am running 4k at 60Hz.
Does 4k 120/144 with usb-c to usb-c cable on an M1 air/pro/?
Not with the cable I have, which is only rated for 4k/60Hz. There are faster Thunderbolt 4 cables that can do 40gbps, but they don't advertise 120hz video either, just more screens and higher resolutions. I have been interested in trying one out, so I'll get back to you if I buy one soon. People say they are getting 144Hz out of their M1s to other monitors, so it could theoretically work:
https://forums.macrumors.com/threads/does-macbook-pro-m1-max-support-120hz-external-monitor.2318154/
Delivers power via the same usb-c (thunderbolt) male to male cable?
Yes. I don't know how much power its pushing down the USBC cable, but its enough that I have never had my power adapter plugged in while using the monitor. Intensive tasks, like rendering proxies for video editing, do drain the battery faster than the monitor can supply it, but day to day usage (ie using it all day in Premiere/Internet/watching Youtube), no problem thus far.
There you go bud:
https://www.amazon.co.uk/gp/product/B076SX73LY/ref=ppx_yo_dt_b_search_asin_title?ie=UTF8&psc=1
I wouldn't recommend it per se as I mostly use Linux and as I said before it works inconsistently (have to remove and reinsert or reboot altogether to get it to work at times). If you're mostly on Windows on the other hand, then I can see it working for you. I use Windows for gaming only so only a single screen and don't need the adapter.
These an oc to 3600 or 3800mhz, but watch buildzoid's guide.
I bought a USB wifi adapter and a bluetooth one for now, and it work like a charm, even though it takes 2 USB port (Amazon France) :
https://www.amazon.fr/dp/B08KH72K3P/ref=cm_sw_r_apan_i_VQNG2TDVYEN31S99RNAX?psc=1
I think I should by something to plug directly on the motherboard, but I don't know what... Of you manage to found something else, please let me know :)
here you go i found them...
https://www.amazon.com/inRobert-PLD08010S12HH-Graphics-Replacement-Gigabyte/dp/B098K8HTDT?th=1
hope that helps
It was a joke... I would recommend the Alienware QD-OLED AW3423DW: https://www.dell.com/en-us/shop/alienware-34-curved-qd-oled-gaming-monitor-aw3423dw/apd/210-bcye/monitors-monitor-accessories
I went with the INNOCN 40C1R for $375 after discounts and coupons: https://www.amazon.com/INNOCN-Ultrawide-Monitor-1440p-HDR400/dp/B09N3G9T16
https://www.amazon.com.au/TP-Link-Wireless-N-TL-WN722N-Networking-Wireless/dp/9800359850/ref=asc_df_9800359850/?tag=googleshopmob-22&linkCode=df0&hvadid=341791824854&hvpos=&hvnetw=g&hvrand=587240813352914834&hvpone=&hvp... This isnt the exact one i used but it will still work the same
i bought this RAM from amazon here
32GB DDR4-3200 PC4-25600 2Rx8 ECC Unbuffered Server Memory by NEMIX RAM https://www.amazon.com/dp/B084D146HV/ref=cm_sw_r_apan_i_4VHZ4PX2GCDF05W621QZ?_encoding=UTF8&psc=1
I tested it in every port and it does not work. and this does not work. is there anything i can configure in BIOS? I have one 16GB working ram so i can enter BIOS.
It looks like this ram similar to Kingston
As far as I can tell it's just the standard fi27q model
Started just doing it when I boot up the PC and the monitor turns on. Only times it does it.
OS: Windows 11 Professional 64-bit Processor: Ryzen 7 3700X 4.4 Ghz CPU Cooler: Corsair h100i rgb Platinum Motherboard: Asus Tuf Gaming X570 Plus Memory: G.SKILL Trident Z Neo 16GB 3600mhz Storage: Samsung 970 EVO 500GB NVMe SSD Storage: 2TB Seagate Burrcada 7200 RPM HDD Storage: Samsung 860 Evo 250GB Sata SSD Video: EVGA GTX 1080 Ti ICX FTW3 Power: EVGA Supernova G3 750w 80+ Gold
I only have the brand new display cable it came with and I worry also that while I'm waiting for one to come in the mail or something I'd end up stuck with another monitor with issues. As the Acer Predator I got a while back not only had the FW glitch on it where if it wasnt OC the screen would act weird on the sides then later developed issues with black colors in color banding that others also experienced and couldn't find a solution for.
I actually found mine on amazon, lower cost than newegg or other computer shop.
What BIOS, what Riser cable?
Your problem is most likely the cable. Consider switching to an overspecced riser cable, keep the length under 30cm. Make sure that the riser card is being powered by a psu cable.
I've been running Gen 4 x8/x8 on the C_payne x8/x8 card since 2020. The two bios's I can confirm work are 11n (5600x) and F16b (5800X3D). RTX 3080.
I use a LOUQE Cobalt RC260 Twinax Gen4+ PCI-e 4.0 Riser Cable. https://www.amazon.com/LOUQE-Cobalt-RC260-Twinax-Riser/dp/B08D88XFDT
It's out of stock right now. Supposedly there is a PCIE 5 compliant version releasing later in 2022. https://twitter.com/LouqeSweden/status/1471778676723396609
Most 2020/early 2021 era linkup pcie 4.0 riser cables were not gen 4 compliant, dunno about linkup cables made after that period. ADT's PCIE 4.0 cable is supposedly very bad.
All of them are compatible. A splitter doesn't do anything outside of allowing use of more power. It just duplicates or more the data signal and allows more products to be added. Power draw is the only thing one needs to pay attention to. IE there are even some 8 way splitter cables out there that can easily allow one to go well beyond a header's power rating which can pop the header depending on how much or what is plugged into it.
These kinds are cheap and effective and better than simple cables because they'll add 4.5 amps to the mix from the PSU sata power cable. You can get them for as cheap as 4.99 shipped at Aliexpress (If you don't mind waiting on average of 3+ weeks for it to get to you since like 95+% of things sold there are coming directly from China) to around 30 bucks on Amazon. I wouldn't pay more than 10 shipped. That link was just the first I found.
So I went through repadding my Gigabyte 3070 Ti Gaming OC (I'm pretty sure these are the same PCB layout as Eagle/Vision) and it would not work with 2.5mm pads front/back of PCB. 2.5mm was also bending the backplate. Also my temps were like 70/72C. If you don't want to redo yours I highly recommend using Nylon washers on the 4 screws securing the GPU die - https://www.amazon.com/gp/product/B092V1YQ3K/ref=ppx_yo_dt_b_search_asin_image?ie=UTF8&psc=1
M3 washers from this kit will fit the backplate holes. Washers decreased my core temps to about 60C.
I changed main front/back memory chip pads 2mm and removed the backplate washers I added and got even better results. My temps are now 48/72C
I had this one from Anker arrive literally today and it runs my M27Q at full res/170hz. M1 Macbook Pro.
https://i.postimg.cc/mkTLb8b9/Screen-Shot-2022-03-31-at-4-54-11-PM.png
Looks pretty similar to this: https://www.corsair.com/us/en/Categories/Products/Cases/Carbide-Series-SPEC-OMEGA-RGB/p/CC-9011140-WW?utm_source=google&utm_medium=search&utm_campaign=shopping&utm_term=%22keyword%22&utm_content=corsair&gclid=EAIaIQobChMIzfKHtK...
Or this: https://www.amazon.com/SPEC-Omega-Mid-Tower-Lighting-Included-Tempered/dp/B07B377194
I got this one from Amazon, KabelDirekt brand. They sell two versions, one is VESA certified which is slightly more expensive but I went with it just to be sure:
KabelDirekt – 2m – DisplayPort cable, DP 1.4, VESA-certified (8K at 60Hz, 144Hz, HDR10 – ideal for gaming monitors, FreeSync/G-SYNC, officially tested to VESA standards, black) https://www.amazon.co.uk/dp/B07HL336L2
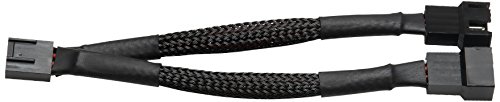
According to the manual you have 6 pwm fan header each w/ 2A (meaning you can use a Y cable as long as your fan is 1A). Certainly no need for a fan hub.
The real question is what are you going to cool the cpu w/. Aio top + 2 front = 4, an extra exhaust like the marketing pic = 5 (one fan header is used by the pump) or big air for silence / one or two exhaust, two intake so should be 6 max incl the ones that came w/ the cooler.
If you live in the EU you could order a Noctua Bundle: 4X NF-A12x25 PWM, https://www.amazon.de/dp/B07P673YTW/ref=cm_sw_r_cp_api_glt_i_HE9HE7ZM5XG1RCF15CGK
What cpu/cooler are you looking at?
I use this
I have the Gaming OC card though, but should work with any card afaik. It's a great anti-sag bracket. Super sturdy and you can't even see it. Highly recommend it.
Cables are generally passive, and can't split 2 ports into 4. You generally need a hub for this.
There's the high quality option: NZXT Internal USB Hub 3 - AC-IUSBH-M3-4 Internal USB 2.0 Ports - 3M Dual Lock Tapes - Magnetic Body - Plug and Play https://smile.amazon.com/dp/B08L8VJS3Z/
Or the low quality option (which you need to mount very securely since any pins making contact with anything metal would be bad): Electop 9 Pin 2 in 1 Internal USB Splitter Cable, 9 pin USB Header Male 1 to 2 Female Extension Connector Adapter, USB 2.0 HUB Connector Port Multiplier (30cm/0.98ft) https://smile.amazon.com/dp/B08N4QVMJ5/
But both of these include hub chips, so they'll support more than 2 devices. However the NZXT one also has a SATA power connection, which is highly recommended unless the devices being connected are just data only and don't draw any power, since it will be easy to exceed the 500mA power limit with the low quality option if the devices get power from the ports.
>G34WQC
Sure! This cable from Amazon will do the trick!
Hope this helps.
I got this one. I think 3.0 should've worked though tbh... unless it was specified it was a certain cable for a certain purpose maybe. This one is deffo working for me though, I think you need to make sure your laptop or other machine's USB C port is able to do it too as I seen online it also depends on your port. But I'm using the Surface Pro Laptop for work which seems to work over that quite well if by any chance your using the same kind of laptop.
​
https://www.amazon.co.uk/dp/B08FXZLHJ9?ref\_=pe\_27063361\_487360311\_302\_E\_DDE\_dt\_1
Make sure you've updated the controllers' firmware via the Xbox accessories app using a cable (or via an Xbox itself), as the early firmware on the controllers was very prone to this. I went through this for months until they finally released the 2nd firmware update for them which finally fixed this. But by that time I was tired if it and had already gotten a cheap Xbox wireless dongle, which is flawless (plus it supports audio transport this way, so you can use the controller's headset jack, which doesn't work with BT).
This is the one I've had since the series X controllers released. I didn't want to give MS money for theirs because it is more than double the price, and they dragged their feet for months without fixing the disconnect issues. So I went with a knockoff and it's been absolutely flawless. Wireless Adapter Compatible with Xbox One Controller for Windows 10/8.1/8/7 https://smile.amazon.com/dp/B08CY14VGD/
That said, it seems that the Intel z690 chipset seems to be struggling with keeping BT functional on some boards, just like some AMD b550 chipset boards. It took a few months and many bios updates to fix on b550, so hopefully it won't take that long on z690 to resolve.
https://github.com/Rem0o/FanControl.Releases
This is another great option, and it's free and open source, unlike Argus Monitor. That's what I use on almost all my client and personal builds for fan control, simply because SIV is very limited in its abilities.
Windows will find most everything for you, and usually the same or more up-to-date versions.
Grab chipset drivers AMD
Grab graphics drivers from AMD or Nvidia.
That's about all you need.
Then you can use https://ninite.com to build an installer for you to load a bunch of programs that you might want all at once instead of manually having to go to each site and download/install them.
https://www.voidtools.com/downloads/
​
At least I found it for myself. I am not 100% that you will have it, but at least try it.
Type LCD and have a look - what comes up
Maybe try a PWM hub with pass thru? This uses SATA power like your NZXT case hub, but it also has a cable that connects to the motherboard so you can control the fan curve (they'll all run the same curve, since you can connect only to one header) via the motherboard. This should provide plenty of power to keep the fans and LEDs running, since these fans seem to be getting their LED power from the same power as the fans, they're more than likely using more power than a standard fan, too, which may be overloading the header when you just use the splitters alone.
>(think it will show audio/mic)
correct, if it´s a combined audio jack if would show an combined symbol. I don´t know any mainboard with combined audio jacks, it´s mostly used on laptops or on the case IO. But in your case you just need a headphone splitter like this one
The BIOS is still bugged with the temp sensor for the 5000G APUs. Normally the Tctl/Tdie temp sensor from the CPU itself is mapped by Gigabyte to the CPU temp port on the SuperIO chip, but for some reason this isn't reliable on the 5000G series and frequently gets stuck.
The only workaround I've found is to use a 3rd party fan control software like Argus Monitor (paid) or the amazing FanControl which is free and open source (and what I use on all my builds).
FanControl or Argus will allow you to set your fan curve to respond directly to the Tctl/Tdie sensor from the CPU itself, not being limited to the CPU channel of the SuperIO chip, which isn't being fed accurate data at all times on the 5000G series. It's a far more capable and customizable fan control alternative to SIV. Make sure to uninstall SIV, because it can conflict with other userspace fan control software.
Then the BIOS curves would only be used during bootup, and once in the OS, FanControl (or Argus) would be in control.
I set the PC power button to place the monitor in standby, instead of shutting down the PC (as I leave my pc on).
This can be done in Windows 10 in the power settings.
https://winaero.com/change-power-button-action-windows-10/
As to whether or not this turns off the monitor light itself I can't say since I do not have that monitor.
My Asus ROG Strix XG49VQ actually has a setting to turn off the power LED in the hardware based OSD itself.
Note that this is not a fairly common option.
Also your monitor actually has an Auto Shut Off option in the OSD, which will turn off the monitor after a certain amount of time of non use.
Hey my friend. I bought a 280mm Pro XT and it's a really tight fit in the case, but it works. I'm noticing that the USB interface to the pump only has a MiniUSB to USB1 style 7-pin header. It doesn't look like our motherboards have this header, though. Can I ask how you got around that issue?
I'm referring to the interface here: https://www.amazon.com/Cooler-Interface-Corsair-Adjustment-Cables/dp/B07SYBMNCW
Your PC has separate ports for mic and speakers, but your headphones have them combined into one cable. So you can reconfigure the port to work as an input or output, but you can't reconfigure it to suddenly support TRRS (the connection that your headphones use).
You'll need to buy a TRRS splitter, like this. https://smile.amazon.com/dp/B073ZDDTH2/
This will split the TRRS connection into two TRS connections, one for the mic and one for the headphone audio. You'd plug the red port into the mic port or line in, and the green into the line out or headphone port.
I think I bought this kit. If it wasn't this one, it was something like this one. I'm 90% sure this is the kit I bought though.
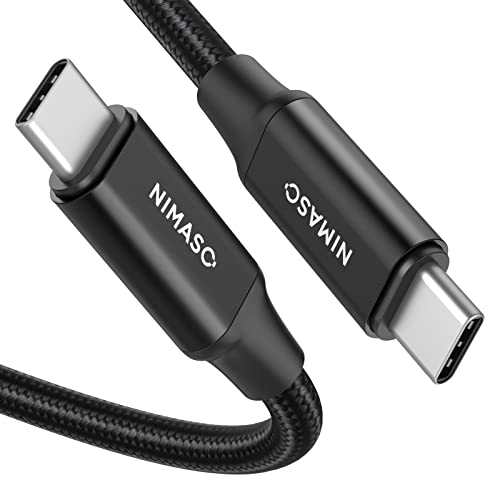
Hi all, i'm late to the party here, but I was trying to connect my M32Q to my 2021 Macbook Pro 14" and I was running in to the same issues. I updated the firmware to the latest release and used this usb-c cable https://www.amazon.com/Transfer-NIMASO-Charging-Thunderbolt-Compatible/dp/B07VCPC8X1/ref=sr_1_11?keywords=USB%2BC%2Bto%2BUSB%2BC%2BFast%2BCharging%2BCable%2B3.1%2BGen%2B2&qid=1639678013&s=industrial&sr=1-11&th=1 and it's working great. I"m running at 1440p@165hz the MBP also supports VRR. which is pretty cool.
CRJ 4-Pin PWM GPU Fan Adapter Cable All Black Sleeved for Graphics Cards https://smile.amazon.com/dp/B07Q5BTTDX/
It uses a CRJ or JST Mini connector, so this cable works. It's what I used to connect a different fan on my x570-I.
And if you really want a 30mm PWM, here you go:
https://www.digikey.com/en/products/detail/wakefield-vette/DC0301012U2B-BT0/11593223
What are you plugging into the front panel to test? Does that device work on another PC?
If the BIOS settings are good and there isn't a problem with the USB devices in device manager, try cleaning the contacts. In your picture it almost looks like there is a clear plastic cap over the contacts but it's probably just the picture.
If that fails you could try connecting this to see if it works.
https://www.amazon.com/LINKUP-Motherboard-Extension-Internal-Connector/dp/B07THC8ZVF/
If it does then the front panel is bad if it doesn't then it's the port on the mobo or the device you've been plugging into it is bad.
I just cut a bit of dowel and stuck 2mm rubber on either end with double sided tape. It's been holding up my 3080 Master for over a year now without issue. I think if your stand has a soft material on the top and bottom the pressure should be enough to keep it in place. If you're worried something like this would also work.
​
1) Yes, this can be done with by editing the fan curve in the BIOS, or using userspace fan control software like the amazing (and free/open source) FanControl.
Gigabyte also has SIV, but it's really limited and not tremendously reliable. FanControl is WAY better and is far more customizable, including the ability to use GPU temp and many other sensors that the BIOS and SIV do not, and the ability to set "mix" curves, where you can combine multiple sub curves and have it take the maximum or average of the two.
This, for example, allows setting case fans to respond to either the CPU or GPU, whichever is higher, and even have different curves for both devices, so it can ramp up more quickly for GPU heat and slower for CPU, or vice versa. Great program.
2) Not as far as I know. I believe it's only compatible with the new Realtek Audio Console UWP app. I don't believe any of the legacy versions will work, but you can search for other gigabyte boards with the same audio codec chip and see if you can find an old version, and try it. At worst, it doesn't work.
Although I've seen that SIV is generally considered good for fan control, it didn't do near enough for me, I use Fan Control https://github.com/Rem0o/FanControl.Releases and haven't touched SIV since.
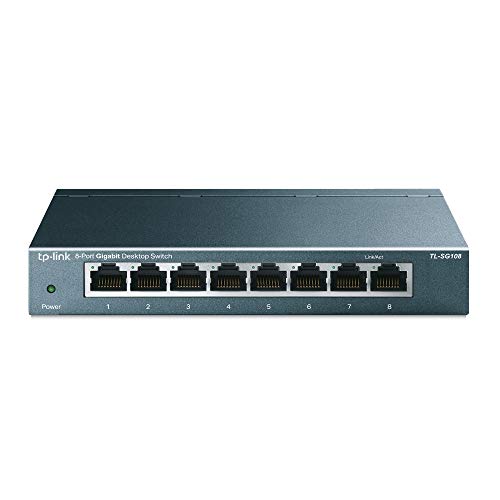
First of all, you need an internet router that supports at least 10Gbit/s. If you don't have that you can't run 10Gbit/s. Instead, it will run on either 1Gbit/s or 100Mbit/s depending on the LAN speed of your router.
You also need at least CAT6 cable for 10Gbit/s and CAT5e cable for 1Gbit/s.
As for setting up there isn't much to it - you plug one end of the cable in your PC and the other end of the cable in your router. See this on how to check for your actual network speed.
Mostly for private purpose you want it off since it makes backup easier. Except you want to play Valorant on Win11 - there you need to have secure boot and TPM activated.
The most easy way is to use the Rufus Tool for a new Install - you can download the normal win11
Thank you!!!!!
Worked for me too! Been 2 hrs and no issues so far
The process was tricky/my brain was slow so adding some links and steps for anyone else doing the same:
- Download freedos from https://rufus.ie/en_US/
- Flash the USB using the above (click FAT32 for format)
- Paste the efiflash 0.87 file in the USB drive and rename it to efiflash (makes it easier for step 6)
- Download the bios zip from gigabyte
- Extract the download zip it and copy everything EXCEPT the efiflash file to the usb drive
- Boot to USB (click delete on boot logo and manually select usb drive as boot drive)
- flash using the command efiflash BIOSFILENAME /x
- Thank Neowarex for this amazing fix!
You can create the Linux USB in Windows and then boot from it. Actually instead of using the program mentioned in that link, try using Rufus, I've used it many times in the past and never had an issue.
The thunderbolt 3 cable you listed should be enough. If you already have that cable and it isn't working, that's rough. If you don't have a thunderbolt 3 cable yet, that probably will solve your issue. https://www.amazon.com/Certified-Anker-Thunderbolt-Supports-Compatible/dp/B076D76DRQ/ref=sr_1_5?keywords=anker+thunderbolt+cable&qid=1638383155&sr=8-5
Is the one that I would buy, just because I trust Anker on Amazon more than Belkin.
I wish I could help you more, but I have a docking station for my laptop so I just use HDMI and usb A to C for the laptop. I use a standard cheap a to c data cable.
My gaming/home computer uses the A to B 3.0 cable (included with the monitor) and display port.
​
Did you try swapping around settings in the Bios at all? If you have access you might be able to select thunderbolt or other USB related options.
i am facing the same issue. I can see the display but Keyboard and mouse
is dead. The system which is connected to USB-C is Dell Latitude 5420. I
checked the manual, its USB C port has display port enabled so i can
see the video. Why doesn't my keyboard and mouse work?? Its working when
i switch back to my other laptop which is connected via HDMI &
USB-B. Another issue is since its my company laptop i cant access the device manager as well. I'll atleast try your way without uninstalling the drivers and see. also does this cable work? https://www.amazon.com/Belkin-Thunderbolt-Cable-USB-C-2-6ft/dp/B0725DW6D3/ref=sr\_1\_1\_sspa?keywords=belkin%2B40gbps%2Busb-c&qid=1638313106&s=electronics&sr=1-1-spons&spLa=ZW5jcnlwdGVkUXVhbGlmaWVyPUEyWlM2QjZGSEpKQzREJmVuY3J5cHRlZE...
Glad it turned out good for you and you're welcome. I liked the carbon look so much I ended up resurfacing my whole desk top in carbon fiber looking vinyl wrap. Turned out great. But then I moved to a new house a couple months later and my new bedroom door was all of 1 inch narrower than my last doorway and I couldn't fit it in even if I popped the door off. lol Murphy's law. :) So I had to get a new desk and junk my old one. I was long overdue anyways.
This is the cable I bought.
https://www.amazon.com/gp/product/B08ZSCD8WS/ref=ppx_yo_dt_b_asin_title_o01_s00?ie=UTF8&psc=1
It works with my Zotac graphics card in my desktop PC but not my laptop (no display signal).
Laptop Eluktronics Prometheus 17. What I'm trying to do is get the full 170 Hz from my M27Q monitor via USB-C. I know that USB-C 3.1 Gen 2 has a bandwidth of 10 Gbps, would that be enough to get 170 Hz 2056x1440p?
Is this your laptop? https://www.amazon.com/dp/B0199XGXK4/ref=cm_sw_r_apan_glt_fabc_KQ0ZTMQZTJ0PXERKF9EV
If so, like your edit says, it looks like it's a standard USB C port without displayport or thunderbolt.
I had the same issue on my fans. lol Spend all this money to make a PC look all snazzy and then having to deal with small details like that was irksome. So I first put black stickers over mine. They're the perfect size for at least 120mm fans. But then I put these carbon fiber looking stickers on. Didn't need them since the black ones worked fine but I was just shy of qualifying for free shipping on my order there so I figured might as well since I'd have to pay one way or another. I like the carbon fiber look.
I'd bet that if you pull those it'll leave at some residue.
https://en.softonic.com/download/gigabyte-app-center/windows/post-download?ex=BB-1845.3
​
just found this link, hopefully this helps.
The system 1 sensor is useless. It's measuring from a random spot on the motherboard, and GPU exhaust can affect the temp significantly.
I personally just set all my fans to respond to the CPU in the BIOS, with a baseline curve used for booting and fallback, and then use FanControl in Windows to set my fan curves in userspace since that software is extremely powerful, with far more sensors included, even GPU temps. Plus the ability to set "mix" curves, which can take the highest of 2 or more curves. I use this to have my case fans respond to my GPU temps, CPU and drive temps, with different graph curves for each, so that if one component gets too hot, that curve takes priority.
Then the bios curves would only be used during boot up and should the software ever crash. But in the 18+ months I've been using it, there was only one version that had any crashing and only with Asus AMD boards when resuming from sleep, and it was fixed quickly. Plus any crashes pop an error in the foreground, plus you'll hear the fan speed change as it drops back to your bios curve. But I only mention the crash to indicate that it's extremely reliable, but you still have backup just in case it should ever happen.
I ended up fixing the problem by using FanControl off Github. The useability of that software is infinitely better than the hot garbage Gigabyte created. If anyone comes across this in the future, ditch AppCenter and SIV. Just download FanControl and set your curves to whatever your heart desires.
Seems like a bios bug as I've been seeing this over and over for the Cezanne APUs. And until they can build new bios versions again, there won't be any progress. They still can't build new bioses after the ransomware attack that caused major disruption and the whole AMI bios repo was encrypted by the attackers.
Maybe try using FanControl in the mean time? It's entirely userspace, so it runs within Windows and you can run any fan off any sensor you wish, including the CPU telemetry like Tctl/tdie which will hopefully eliminate the problem with the CPU package temp sensor (which is external to the CPU) getting stuck since you won't use this for control.
It's also a super powerful program that allows for far more detailed fan control than even SIV, since you can use just about any sensor as a temp source, and even do things like mixed curves where you can take the average or max of 2 or more sub-curves.
I've never had it screw up a Windows install. But RGB doesn't place nice with other vendors' RGB, so the HALs often battle it out behind the scenes, which leads to errors and problems. I'm sure that your original issue was due to all the Asus stuff as you posited.
RGBf it's up to you, if you need it, try it. But if not, just uninstall.
Also for fans, you can use the awesome free app FanControl instead of SIV, which actually CAN corrupt your Windows install if you use any of the other tuning features besides the fans. Note that it doesn't seem to be picking up GPU Temps for AMD GPUs right now, so if you've got an AMD GPU you won't be able to use it as a sensor (not that SIV allows that anyway), but if Nvidia it will be fully supported.
SIV uses the LPC bus to communicate with the BIOS, which is also the same bus that TPM & fTPM communication occurs on (and the debug display if equipped). Makes sense that they could interfere. SIV is cancer anyway, and is very easy to corrupt your Windows install when tuning using SIV, and if you need userspace fan control software, I recommend https://github.com/Rem0o/FanControl.Releases. Way more powerful too.
Case fans generally are best at a steady RPM that's set as high as you can comfortably tolerate noise-wise or just below that, then only ramp up if things get really hot. You'll notice changing RPMs more than a steady RPM even if it's faster.
But that's also why I don't use the gigabyte software, and just set a baseline in the bios that is similar as a fallback, but then use FanControl to run all my fans, since I can use other sensors including the GPU for the temperature trigger. And this way, I set my case fans to run a steady RPM, then ramp up as the GPU gets warmer since that's what's going to be heating my case up the most as my CPU exhausts directly outside. I don't need my case fans responding to my CPU, and my motherboard temp is never going to get hot enough to trigger a change, so that's why I like using FanControl which is wildly customizable.
https://github.com/Rem0o/FanControl.Releases
This is what I use. It does all you want and far more. You can create mix curves that use the higher of two sensors, you can use the GPU temp as a trigger, you can even control the GPU fans for most Nvidia GPUs if you want to do that from the same program. Also can change profiles by right clicking the tray icon, if you like to run different profiles for different scenarios.
It's free, open source, has zero overhead (unlike the memory leak prone SIV), isn't restricted to very limited controls like SIV, and will even allow you to set full fan curves for fans that aren't exposed in SIV like the PCH (chipset) fan.
The only thing about it is that it runs in userspace, so it doesn't run until after login. So you'll want to set a baseline configuration in the bios that it can use during the boot process, and then once logged in, it will switch over to use the profile you set in FanControl.
By default the SYS-FAN1 is set to use the motherboard as the temp source. You have to change the temp source to the CPU if you want it to respond to CPU temp changes instead.
But SIV is prone to problems, has limited options, and is very resource heavy. You can set a baseline configuration in the bios smart fan configuration (make sure to change you sysfan1 to CPU for the source), and then you can use something like the free and open source FanControl within Windows to control your fans with far more granularity than you'd ever thought possible.
Afterburner doesn´t seem to like the 3xxx cards very much.
I had exactly the same issue on my 3080 vision.
​
Switched to fan control through:
https://github.com/Rem0o/FanControl.Releases
Works flawless on both mobo and gpu fans an is massively customizable and very lightwheight
You mean the formatting? Ive done it with the windows formatting dialoge and even the tool from https://www.sdcard.org/downloads/formatter/ . Ive tried fast formatting as well as the unchecked fast formatting. When I press restore device defaults and then format it also doesnt work. I keep getting the error "Windows could not finish the formatting process".
​
Ive already send a ticket to Gigabyte. :(
Yes, that right option.
Hm, that is strange.
I am out of idea then. You have done everything right.
Except did you try what u/zmeul said? Set BIOS (motherboard BIOS) to default/factory settings and then turn 4k ON, ReBar ON and CSM put to disabled manually. Don't forget to put XMP ON ( not connected with ReBar but ppl often forget to do that and lose lots of free performance).
btw. can you check with GPU-Z is ReBar ticked or not.
Download GPU-Z Graphics Card GPU Information Utility (techpowerup.com)
Check the Advanced TAB -> dropdown to NVIDIA BIOS and it should state the correct BIOS in the Message.
This is not a laptop memory module. It's for Desktops.
Download CPU-Z https://www.cpuid.com/softwares/cpu-z.html
Open the software. Portable or after installing.
Click on the tab "SPD" and browse through the slots to see which one shows up the details.
Reply with the Manufacturer, Bandwidth and Part Number.
2400 shouldn't have XMP at all, and should just run at 2400. Install CPU-Z and go to the memory tab. It should show 1200MHz if it is running at 2400 (since it is double data rate, DDR, it operates twice as fast as the actual clock speed).