
What are
/r/photogrammetry's
favorite Products & Services?
From 3.5 billion Reddit comments
The most popular Products mentioned in /r/photogrammetry:


The most popular Services mentioned in /r/photogrammetry:
Agisoft Metashape
Meshroom
Gumroad
ExpireBox
Blender
Unreal Engine
Regard3D
Hugin
RealityCapture
meshmixer
GIMP
MeshLab
Academia.edu
Substance Painter
Photopea
The most popular Android Apps mentioned in /r/photogrammetry:

SCANN3D

Open Camera

DroneDeploy

BoofCV Demonstration
The most popular reviews in /r/photogrammetry:
Replying mostly because I'm not a fan of how reddit likes to down vote comments they don't agree with into oblivion but not say anything. Anyways, the "financial scheme" comment did seem a bit off to me. I've written a bunch of open source and its extremely unprofitable. You can literally write software that the internet is dependent on and no one will want to send a few $$ every now and then. If Meshroom is dying its probably because everyone who worked on it has a job that pays money now and moved on to other activities or their employer won't let them work on it.
Meshroom's git repo appears to be getting a few commits every week. https://github.com/alicevision/meshroom
Hi Mattimus we have developed a multi camera photogrammetry rig with turntable for the museum industry (www.cyreal.com). If you want to simply fire and tether the cameras to a PC I would use software called Smart Shooter https://kuvacode.com . If you need any more information about setup send me a PM.
This is a snap-on magnetic mount for attaching polarizing film to Flashpoint RF-400/Godox AR400 for photogrammetry purposes. It uses 4 magnets 90 degrees apart so that you can easily alternate between polarized and nonpolarized in order to create your specular passes.
The model is designed for round magnets that are 5x1mm but I have included the Fusion 360 design file with user parameters so that you can use different sized magnets.
I would highly recommend printing this in black so that it doesn't show up in reflections on the object you are photographing.
This is based on a design by Erik Christensen and can be seen in this video. https://www.youtube.com/watch?v=Il6LVXqSlRg&feature=emb_title
I tried reaching out to him to ask if he'd be willing to release or sell his design so others could print in but he never got back to me so I decided to make my own.
Great Question! I have done this task professionally for a number of years, the trick is to resolve occlusions and generate good normals (ie extract a mesh) from the raw pointcloud data before blending in the HD photo color data, it's also important not to just average the color from all photos (which is usually grey or brown) instead blend each photos revelant color weighted by [camera position closeness multiplied by camera angle isotropic-ness] also each camera always has differing white balances / exposure settings as they we're taken from different locations and at different times which causes an issue which if untreated causes displeasing visual results; the solution here is to simply enfuse (http://enblend.sourceforge.net/) the color data and extract a spatially diffuse color correction field which you simply apply to the final result. As for how non-programmers can do this: I've been programming independently for the last few months (thanks again covid) and am thinking about opening a website to help 'normal' people who need to integrate / process / enhance their scan data. The technique i describe is very simple and automatic (tho sometimes you need to delete junk points from the laser scan before running the mesher - such as from people walking past the scanner) i would like to try and offer a free conversion service atleast for small scans however that probably wont be viable for the larger scans (with 100+ scan sites) which can take upto several hours to process!, anyway best of luck mate!
It looks great but I'm not sure this is something new? Industry has been using 3D scanning in ergonomic design for about ten years. To an extent that drives 'small scale' scanning technology as much as industrial engineering and architecture drives 'large scale' scanning.
Obviously this video still presents a good workflow, so thank you!
I mean you can use MeshRoom still. You’ll just have to use a lot of work arounds. I’ve been using DraftMeshing and it seems to work ok (not great but since I’m a beginner I’m ok with it).
This will sound weird, and be awkward, but I believe it's possible to do this with Hugin and Blender. Hugin can match features with manual selection and calculate the lens parameters of your cameras. Blender has similar feature matching where it can reconstruct 3D positions in its motion tracking. In principle I think either could do it, but I'm a little fuzzy on how to get the 3D intersection results out of Hugin.
https://docs.blender.org/manual/en/dev/editors/movie_clip_editor/tracking/introduction.html http://hugin.sourceforge.net/
Can you make him take more in-focus pictures? Sharper images will help a lot. If he's stuck with a cellphone, maybe also try taking a video by moving slowly (1920x1080 at minimum), this helps dealing with micro-noise but then again, there is also the transparency and reflection that doesn't help.
Here is a quick result i made with a bunch of in-zephyr filtering http://imgur.com/3rggpnn
STL, although i doubt it's usable https://expirebox.com/download/cb957178d6e75fab5716f3a8774fa31d.html
definetly not the best result :D I can share you also the 3df zephyr file project in case you want to play a bit more with it, but ultimately i'd take new pictures if possible
This is not my project, but I thought it was worth sharing with anyone interested in automating their capturing process.
A few minor modifications I would suggest are:
Add a 940nm wavelength IR LED to trigger the camera directly from the same Arduino controlling the turntable. Code for Canon, Nikon, and other popular cameras is easy to find and simple to add. I would wire the LED into a mono style headphone plug or an RCA style audio plug so I could easily add an inexpensive extension cord to the camera as needed.
I would cover the transparent material with something to avoid problematic light reflections.
I would modify the design to use a much cheaper bearing than the $37 McMaster Carr model they suggest. Here's one from amazon rated for triple the weight capacity for only $6.49
I would swap out the 3D printed spur gear with an inexpensive off-the-shelf steel gear. There's probably nothing wrong with the 3D printed gear, but I'd rather just have a steel version that I know would never give me problems. For me, the ability to buy a gear for $10 isn't worth the hassle of a 3D printed part.
Ah, gotcha. Just a single camera on a tripod with a turntable. I have one of the cheap amazon product photography diffuse box things to make lighting and masking way easier. The whole setup is pretty cheap. Outside of the camera, a d7000 and 50mm prime that I've had for years for normal photography, there's maybe 150 bucks in other stuff. It's pretty much: take part to scan, throw some baby powder at it, slap it on the turntable, rotate rotate rotate, adjust camera position, repeat as necessary.
It looks like you have to spend (at a minimum) €7500 ($8395.13 USD) for a 12-month lease or buy it outright for twice that price to get the command line interface. https://www.capturingreality.com/Product#Download
Unfortunately, I'm just a hobbyist, so I just can't justify it for myself, but if I worked for a big company doing this kind of work I could see how the cost could be justified. The software really is that good.
For me, 3DF Zephyr is the best compromise between price and quality. I'm a paying customer in large part because the makers are contributors to this subreddit who have always been helpful every time I've had a question. I've also been pleasantly surprised by how often they keep releasing software updates. Their software is rapidly getting better with each release.
This.
Also, RealityCapture has a "draft" mode for the pics taken which lets you preview the coverage of the point cloud. They are advertising this feature. Taken from https://www.capturingreality.com/Product:
"Analyze & Continue
Super-fast draft mode which aligns 500x12 megapixel images in less than 10 minutes on a notebook, right at the field. Combine whatever type of data you have - images, laser scans, aerial imagery...
Analyze right in the field and get to what you need efficiently.
Take pictures and add them to a project. Click draft alignment. Verify the result. Repeat steps 1-3 until the desired result is achieved."
Yes Metashape has a perpetual license, 179$ for standard.
"Metashape license includes 12 month of e-mail based technical support and entitles the licensee to free updates of the software up to the version 1.9.x " (https://www.agisoft.com/buy/licensing-options/).
These outline a substance designer workflow for material capture.
https://www.substance3d.com/blog/your-smartphone-material-scanner
https://www.substance3d.com/blog/your-smartphone-material-scanner-vol-ii
Meshroom uses CUDA (Nvidia gpu) for calculating the depthmaps. However, if you use draft meshing, where you create the mesh solely from the sfm point cloud, then you can actually do it with only cpu. It probably will take a while (depending on your laptops specs), but it should be doable. https://github.com/alicevision/meshroom/wiki/Draft-Meshing
Is this closer to what you need?
https://expirebox.com/download/012dd06422876dd80f2e2dc438e6778b.html
I'm sure i could squeeze more detail with Zephyr but understand i'm doing this while i'm doing other stuff :D
It’s a mix, a fairly detailed dragon holding a smooth cup. But it’s dusty and the textures are a sort of niello so there is contrast. I think the problem is the background has enough distracting elements that the software is confused and locks in on them.
I went over the various DIY options and costs/time. So I’m going with the Foldio360 bundle. I’m not particularly handy. I’ll follow up next week with the results.
If you do not want very high quality scans, may I also suggest that you explore mobile based scanning like Qlone. It might serve your purpose better based on the requirement and budget.
I use one of these Lazy Susan's at the moment but again, once I have more money, I'll likely get the Genie Mini by Manfrotto.
Any recommendations for minimum MP counts? I was thinking of an array of these as they might be high enough resolution to work...
​
https://www.amazon.com/Arducam-Autofocus-Raspberry-Megapixel-Resolution/dp/B09STL7S88
Reviving this in case someone bumps into this and expects to find an answer.
In my quest for the ideal camera app on android for photogrammetry, I found this:
Open Camera (https://play.google.com/store/apps/details?id=net.sourceforge.opencamera)
The ui is a bit cryptic but at least it remembers the camera and output settings between launches, can be set to manual shutter speed and gain and has this option where if you hold the gallery icon for a second, you can choose a custom target folder, which is really handy to keep image sets organised.
But things could be better and I am still hoping for an app to exist which can show a ghost image of the last picture, show camera alignment to the ground plane and horizon etc
A photobooth turn table. The surface doesn't move the camera(s) is on an arm that sweeps around it.
https://www.amazon.com/gp/product/B09D6WKRY8/ref=ox\_sc\_act\_title\_3?smid=A2BP1NVTUUGW8Q&th=1
Scann3d its dead (Last update Dec 23, 2017. Reviews its less than 3 stars), and thats the trick with "fake 3d apps", its a very simple "almost kid of 5yo coding", of overlap tracking and obviously crash the memory, if you are luck of this thing make a 3D mesh its a very low poly reconstruction with a ugly "semi-retopology". For that reason Polycam and Reality Capture App use the cloud to process all the photos and return a good quality 3D mesh+texture. I see cars that run with kitchen oil but thats is not efficiency or funtional, the same apply to 3D Scan Apps.
Here some reviews of scann3d for your delighment:
https://play.google.com/store/apps/details?id=com.smartmobilevision.scann3d&hl=en&gl=US
Ah, the gold is reversible. 100% block is great, I use a ring flash polarizer so the ambient light is great for keeping iso low, but then I can polarize again with flash. I really do try to avoid harsh sun, but you never know the timing for some projects so I am trying hard to solve this pipeline issue before it becomes one in a major scan. Really appreciate the help here :)
I swear something like this is purpose built, but the weight: https://www.amazon.ca/Tangkula-Cantilever-Umbrella-Rotation-Hand-Crank/dp/B09JSMD599/
>It's launched for Android!
>
>https://play.google.com/store/apps/details?id=io.spectre3d
>
>Free 7-day trial - you can continue using for free after that, but with a reduced daily scan count.
I also recommend you to try WIDAR. Its free for now and it limited to 100 image per scan. The editing tools is the best I seen for mobile photogrammetry app
Thanks for the reply. Something like this? https://www.amazon.com/Impact-SCS-M18-Mini-Plug-Shoe/dp/B01GSIF6KG/ref=psdc_3346441_t1_B01GSIJ3K0#customerReviews
Pretty clueless about high-end flash photography.
If your subject is overly large, your best bet is to just wait for an overcast day. If your subject is smaller, however, there are some options.
You could always use a scrim, which is just a large piece of white fabric. Put it between the sun and your subject, and it’ll help even out and diffuse the lighting. Instead of the light coming from a single point, it’ll now be coming from multiple angles, softening your shadows.
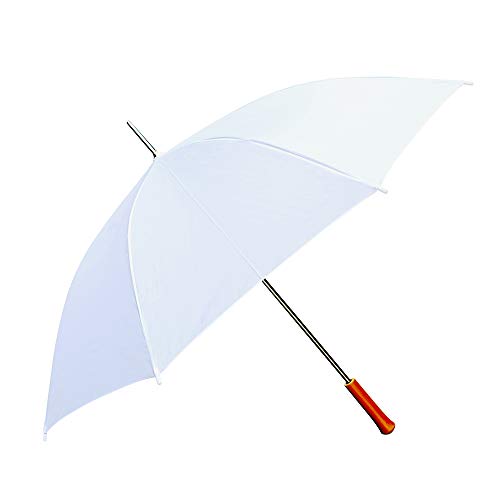
When I’m shooting large outdoor portraits and scenes, I use a big huge ten foot rectangle that requires quite a big and unwieldy frame and a lot of sandbags to help it from blowing over. When I’m shooting something smaller, however, a decent size shoot-thru umbrella works great, and is much easier to manage in the wind. Something like this.
Westcott 2005 45-Inch Optical White Satin Umbrella (White) https://www.amazon.com/dp/B000P855IY/
They come in all sizes, and the cheap ones are fine.
Another option, if you still need to boost the shadows, is to put the subject between the sun and a reflector. I usually use just white foam core and prop them up behind the subject so that it reflects the sunlight back on to the subject. The bigger, the better, so that the light comes from a large diffuse source, and not just another single point. You’ll still have some shadows, but now the difference between the light and the dark will be much smaller.
I use a motorized turntable that lets me do increments. I typically do 32 shots per orientation (4 orientations) for a total of 128 usually, but For this one I did an extra 32 upright bringing it to 160 shots. I have a light box that does most of the illumination work, but I use 2 of these little lights bounced off the walls to fill on the bottom areas. All lights are 6500k for consistency. I also use an inexpensive polarizing filter on the lens.
I shot this in manual at F13 with maybe 1/5 on the shutter and manual focus for consistency. ISO 100.
What you're after is akin to a Photoshop "Action" - you can batch process a series of steps, and indicate that certain steps should be executed manually by the user before proceeding. Eg:
- For each image file in a specific folder:
- Open the file
- Set zoom to 'fit to screen'
- Choose the crop tool with a 3:4 aspect ratio
- [Pause for user action -- set the crop bounds and apply]
- Save the file
- Close the file
This is extremely easy to accomplish in Photoshop. I have not tried this in a free tool, but I believe that <strong>GIMP "Scripts"</strong> is the free equivalent.
If that doesn't suit your needs, I recommend searching for "automate", "automation", "actions", "script" and "scripting" to find other alternatives.
Good luck!
Hi there! Thank you. We use cannon 6d. All props are 1500 triangles each on average, so they are gameready. This video is a real-time footage from unreal engine. In fact we have a camera capture rig, which tracks camera movement in real-time. So I just equipped it and simply walked around this stuff, while recording this video.
We are actually selling them on UE4 marketplace. Here you can find some screenshots of a polygon wireframe if you are interested. https://www.unrealengine.com/marketplace/en-US/slug/rusty-barrels-vol
i personally just use a cake decorating turntable. does what it should, manually tho. https://www.amazon.com/Kootek-Turntable-Decorating-Accessories-Decoration/dp/B082PZ5C8W/ref=mp_s_a_1_10?crid=PILWVKR1UGTE&keywords=cake+turntable&qid=1642634376&sprefix=cake+turn%2Caps%2C150&sr=8-10
thank you! :) the polarization filter for the lens can be anything really, from hoya, tiffen or k&f concept. for the linear polarization sheet just see whats available in your country. im from eu so it was a bit more difficult but just something like this https://www.amazon.com/Polarization-Polarizer-Educational-Physics-Polarized/dp/B06XWXRB75 will do.
It's already on apkpure. Link here: https://apkpure.com/display-land-3d-modeling-3d-scanner-model-maker/com.ubiquity6.displayar
They would likely be a problem once you start slicing in cura or whatever you do use. I'd imagine meshlab has some tools for fixing this, otherwise you'd need some 3D modeling skills to a degree and on that note...
​
I use Blender 2.8 with a free plugin called Machin3tools which has a function whereby you can find/fix these mesh errors with one button and then with another (and a vertex selected) just start filling those polygons where the faces are missing. This is the most efficient way I know how to do this but it does require a little know how. If you go this route I can answer any questions about that as I've recently been learning the new Blender interface and Machin3tools myself
Photogrammetry is essentially dimensionless. If real dimensions are important, the markers are needed. They are placed outside the object but used in the first pass to determine the scale, then edited out for the final.
https://www.agisoft.com/images/photo_tutorials_09.png
Download meshroom, https://github.com/alicevision/meshroom/releases Install it Take pictures of closed book, try to capture EVERY angle Import photos to meshroom Check this fast guide https://youtu.be/RiM3qfwDZ-g
Blender https://www.blender.org has tools for decimation both in sculpting and traditional modelling (theoretical workflow: import raw mesh, duplicate, apply shrinkwrap modifier to duplicate and wrap to original, apply decimate modifier to duplicate. Possibly use sculpting resolution tools on the duplicate to shape vertex density in areas that need it). Then there is instant-meshes https://github.com/wjakob/instant-meshes for generating an organized quad-based mesh of varying density from a high resolution mesh.
For our purposes, the nice thing about Gimp/Glimpse is that it can be scripted to automate your workflow.
https://www.gimp.org/tutorials/Automate_Editing_in_GIMP/
Eventually, I dream of having a completely automated turntable system to capture photos, manipulate them automatically with a focus stacking script and/or a batch script in gimp, and then run them through a script with my favorite photogrammetry software.
Another option is use a tree generator if you don’t want manually buy and place individual trees. I have no personal experience with the tools listed here but it might be a good starting point for your research. I’m interested in hearing back after you settle on a solution.
https://play.google.com/store/apps/details?id=com.lvonasek.arcore3dscanner
I was just trying this one. It's cool but not perfect and a bit limited.
Agisoft Metashape standard is a great perpetual license option. The standard edition has about 90% of the capability of the professional edition, so you're unlikely to find it lacking if you just want to create simple models at home. Educational editions are also available if you're an educator or a student, which can bring down the price a bit.
The generation, texturing, and exporting of 3D models and exporting of those models is identical between both versions. The pro version does not give you any benefit there. However, the standard edition gives you fewer tools to tweak the process or analyze the result of the process.
As a quick overview, manual markers, scale bars, and coded/non-coded targets can't be used without upgrading to pro. Photos and videos are supported as inputs with the standard edition, but advanced sensors are not (multi-camera systems, multispectral/thermal, etc). Python scripting/headless operations are also pro-only features.
A free 30-day trial is for the professional version and the standard version. If you're smart, that means you can 60 days of free trials (first one version for 30 days, then the other). I suspect you'll find that you're not using the professional features unless you're truly using the software in a professional or high-throughput setting.
You can find a complete outline of the differences between the two editions here.
Never used it but yesterday a user pointed out Meshroom. Never tried it myself yet, but it seems like a decent solution - its free (https://github.com/alicevision/meshroom) and as long as you are fine changing your workflow a bit (uploading pictures to a pc which processes the models) you should be fine.
Aw man wish you'd asked in a week or two! XD I'm still writing my whole guide for this. I'd recommend Photoscan, there is a program in closed beta which looks to be better but if you get good with it then Photoscan provides excellent results. As for low poly meshes I did this with a mix of the decimate modifier in Blender and some manual work but it looks as though it's a way smoother process with zbrush or Simplygon (used by many studios). Message me with any specific questions you have ;) Stuff I've done on this: https://www.unrealengine.com/marketplace/woodland-scan-assets
Well on second thought I looked at that frog, and I see your using paper on the bottom. So I suggest for you right now look at /u/Lascaux3 process https://www.academia.edu/24075208/A_Comparison_of_Methods_for_Creating_3D_Models_of_Obsidian_Artifacts ------ slide 8------- and the scale http://www.stporter.com/resources/
My method to get the bottoms is different from above, my rig was made to be pure white for product photography so I can flip objects over and since there is nothing in the background it works.
You can download Meshmixer from here...
http://www.meshmixer.com/download.html
​
You then need to export your mesh in a compatible file format, obj etc.
Import into Meshmixer.
Click on 'Analysis' on the left side bar and 'Units/Dimensions' to see the real world scale.
Click on 'Analysis' on the left side bar and 'Stability' to see Volume/Surface Area.
For fixing up the mesh, Blender is definitely good to learn especially if you want to get into more advanced 3D work. Meshmixer is also a good program for basic mesh editing if you just need to delete some parts and smooth it out.
I have an alternative idea, seeing as it might be more doable:
There is an OBS Broadcast app for iOS. I could set up VLC to grab the stream and save every 5th frame or so to the live session folder.
Then on the app I just have to turn the feed on and off again.
I'll give this a go now, although I think the OBS stream app costs a fair bit, so any alternatives that are good would be welcome, and obviously 4k support would be nice.
UPDATE
BROTHERS I HAVE DONE IT FOR THE GLORY OF THE EMPEROR
I ended up using this: https://www.e2esoft.com/ivcam/ and paying the $10 for the desktop client
That gives you a photo app on your iPhone that will take 4k pictures and sync them immediately. It will also do video.
I'm still figuring out the Meshroom live reconstruction part, it's being a bit funky. I think I need to lock down some camera settings on the phone too (which is all done through the desktop app), but in principle it's working and for not much cost.
The quality is a bit rough but I think that's actually down to settings: https://i.imgur.com/EkVZ87r.jpg
My main problem right now is a lot of the iOS image metadata isn't saved this way, and I can't see a way to force the camera model in Meshroom.
If it is of interest here's the guide but this is a barebones budget setup that I do use for this, just a couple of photography lights, a green screen, a camera and some accessories. https://gumroad.com/products/IuUu :) Any feedback is very appreciated as this is my first guide and I've spent a lot of time refining it
Well, here's the situation:
1) I was under the impression that there was only options to pay for scans one at a time, or to purchase a bulk amount of scans to be computed. This was the root of my "pay to play" comment.
2) I was wrong: https://www.capturingreality.com/Product-Licenses-Overview
Oh thanks for the advice, I'll definitely look into it as I'm doing photogrammetry for my dissertation. I have hosted a copy on p3d unfortunately there wasn't much space for a high res texture so I had to shrink it down to 512! but here's a link :)
EDIT: Sketchfab is too expensive for me at the moment
EDIT2: Still haven't got round to retopologising, just got excited and uploaded a pic :P
Well, projecting displacements is tricky because it goes through the geometry to the other side and the issue around bends. With UVs laid out, you could do the displacement projections for a 1/3 section of the head, bake it out to the UV space, save out that image, and repeat the process for another angle of the head. Once you have enough images saved out to cover all the angles you could merge them back together masking out unneeded areas. It gets the job done with medium precision, but this is kind of a chop shop way to do it.
If you want to be pro about it, you could take the head into a sculpting app and go to town. Instead of projecting displacements you would use the black and white image as a displacement brush and paint it on the surface. If you are broke and need a free alternative to zBrush or mudBox, there is this gem of a scultpting app, also available for standalone version. If you do download the desktop version of SculptGL, you can put your own images in the brushes folder so anytime you open it you have a custom set of brushes to sculpt with. If you aren't getting enough resolution you can subdivide the geometry, this can bring out the details. I have noticed it does max out on polygons around the 7.5 million mark.
As for this new set of images and displacement, I can't help too much technically in Blender, but I do like the new placement of the crack. Sometimes when displacemtents tessalate like that is because there isn't enough geomtry to match the resolution of the image being projected. If you subdivid your mesh before displacing, it could increase the visual quality of the height data. And there are work arounds, like my first example above, to get displacement projections to work, you just got to toy with it and find what works for you.
I'd recommend either Reality Capture, or Agisoft Metashape if you're looking to use CUDA to speed up your processing time.
And yes there's a few image sets from varying sources, here's some commonly used ones:
Metashape doesn't need Nvidia CUDA although it does run faster with it. And your S9 has a fantastic camera compared to almost any other phone. Even my s20 ultra camera sucks compared to my S9.
I've gotten tons of fantastic photogrammetry models from images taken on my S9, don't listen to the purest to tell you that you need a full body mirrorless DSLR etc etc. Like any hobby you're going to get the people that think there's only one way to skin a cat, and it's the expensive way. Helps them sleep at night, given all the money they spent on gear.
I don't know that there's any advantage to 3D scanning these electronics boards, but that doesn't mean you shouldn't try.
You can request a 30-day fully functional trial. Of meta shape, which is reasonably priced already:
It would help to read the manual: https://www.agisoft.com/downloads/user-manuals/
Aligning the cameras creates the sparse cloud. The dense cloud is the higher resolution version, ie. more accurate.
About scanning your friend.... please understand you can't actually stand still. You think you are still, but you are not at all still. Your skin is moving slightly as the blood pumps through it. Your muscles twitch slightly. Even if you are holding your breath, you are still absorbing the gas in your lungs and that is changing your shape. It's enough that is ruins the photogrammetry effect because the algorithms work on a pixel level resolution.
On top of not being able to stay still -- you moving around the room to take the pictures is going to fuck up the lighting and shadows, further hurting your model.
People build those expensive multi-camera rigs because it's literally the only way to accurately capture a living being. It's at least $10,000 to do a passable job. It's likely more than $100,000 to get enough cameras and lights to get something high quality.
Please do some research on this topic before making assumptions about the capabilities of the software.
Incorrect. Metashape does not limit any functionality in the 30-day trial version. In the demo version, one cannot save or export, but there is no limitation on functionality whatsoever. https://www.agisoft.com/downloads/request-trial/
It is possible in the pro version of Metashape, but you need a license for all three PCs. Check the forum and manual on how to set up network computing. Mind, Agisoft is the company, not the product. They have two main products and in Metashape Standard, you cannot do this. Check the comparison here: https://www.agisoft.com/features/compare/
I think I was mistaken earlier, it wasn't Puget systems but the actual metashape user manual that states this.
https://www.agisoft.com/pdf/metashape-pro_1_7_en.pdf
If you open the user manual document and search for "disable CPU" on page two the user manual suggests: " Use CPU enable flag to allow calculations both on CPU and GPU for GPU-supported tasks. However if at least one powerful discrete GPU is used it is recommended to disable CPU flag for stable and rapid processing. " Also, in the actual metashape GUI preferences -> GPU tab it also suggests "Warning: When using dedicated GPU's please turn of integrated GPUs and CPU for optimal performance."
You have me curious though, I will try to run a smaller model later on my machine with cpu enabled/disabled and I will post my results to see which option is faster.
photographer =x= photogrammetry
For right now, photogrammetry is a learned skill, regarding more than the camera hardware. Photogrammetry is for data acquisition, not the emo-feelies lighting effects of photography. In fact, for photogrammetry, you want flat, dull lighting, the lighting of an overhead sun coming through a thin cloud layer, diffuse. No fade focus, as sharp of focus as possible along the length of the object.
Agisoft has a tennis shoe sample set. They deliberately don't go all around or get the bottom. Just try that sample data set, then duplicate the same environment locally.
https://www.agisoft.com/downloads/sample-data/
It is so bizarre to see this "new, no gotz stinking Nvidia GPU, what is bestest app?, gotz iPhone 12...". Uh, shouldn't you be asking these questions in the Apple subs? Kind of funny seeing the AMD Rulez! H8 Nvidia! campaign lasting for so many years.
The Autodesk Recap is a 'Cloud' App, probably doesn't require a CUDA GPU. They charge for export output, same way they are all going. If Metashape runs, then the Agisoft sample data set should produce good results, in preview. The Metashape demo is gimped by a 50K limit on the export output 3D model.
Cool! Have you tried to build model directly from depthmaps? Sometimes it leads to better results (and it is faster).
Also Metashape 1.7 pre-release version can lead to better results (depth maps method was changed and now model from depthmaps is much better in many cases for me).
> I understand with current photogrammetry tech this is not possible unless done professionally
No.
You use markers if dimensional accuracy is critical.
https://www.agisoft.com/fileadmin/templates/images/downloads_04.jpg
Why have software developed to do photogrammetry when there are already several programs? It's not the cell phone, it is the camera inside it, the quality and resolution of the images it takes. For the foot, it is the same problem as all other methods, there isn't a way to 3D scan the top and bottom at once, any easy way. You could cut it off and put it on a turntable upside down, but that might be defeating the purpose...
yeah, you can do it in meshroom by adding some nodes to the geo section I think,
But I'm more an Agisoft guy though
I know meshroom is free but Agisoft is really cheap, and you can get a student version very cheap,
and you have way better tools
​
https://www.agisoft.com/buy/online-store/educational-license/
https://www.agisoft.com/index.php?id=49 This is the explanation from Agisoft themselves. Maybe if you make a mask of the background, then use your DSLR to take pictures in a “turntable method” type of configuration and then use this tutorial, your results will improve.
It’s mostly trial and error, so you are either missing something trivial or there is a minor error that you just didn’t notice.
They are similar to the ones used in the Agisoft tennis shoe demo dataset.
https://www.agisoft.com/downloads/sample-data/
I don't know where Agisoft came up with them but looking at them, it makes total sense. I have used target markers in the past and they did seem to help with scan solution, but this experiment surprised me with how much "smarter" it makes automasking. I didn't know about the zephyr ones, will look at them.
Unfortunately, that would be because such a tool doesn’t really exist.
I have heard of a script for ImageMagick called “magic wand” (or similar) that kind of works like the magic wand selectors in photo editor apps. You script it to start at a certain position and it creates the selection and then you create more scripting to change those pixels to place or transparent.
You don’t need to alter the image dimensions.
If you’re taking the photos yourself, you’ll probably get better results by starting off with better images. See https://youtu.be/Il6LVXqSlRg and https://www.agisoft.com/support/tips-tricks/
Not too bad.
Try shooting “the void” to avoid needing to mask by hand.
Sometimes a photo just doesn’t want to be part of the model and that’s usually ok. Using some coded targets can help speed up alignment as well as align photos that won’t align otherwise. https://www.agisoft.com/pdf/PS_1.1_Tutorial%20(IL)%20-%20Coded%20Targes%20and%20Scale%20Bars.pdf
Here is a prime example of why to use the Agisoft data sample set as a benchmark. Go to samples page and there is an example of a tennis shoe, 6 photos, with 3 markers.
https://www.agisoft.com/downloads/sample-data/
The person taking the photos didn't go all the way around the tennis shoe but the 3D mesh that is visible should have some incredible detail. Not sure what the significance of the markers are, but they really seem to help the point cloud determination, with such few photos.
3D scanning can be benchmarked, versus 3D printing, which really cannot be benchmarked.
The Agisoft sample data is a way to reference the performance of different photogrammetry software on the same dataset.
When I started learning photogrammetry, I couldn't get any original datasets to be accepted. My reasoning was that the sample datasets do get accepted 100%, so started trying them out. One interesting outcome was finding one dataset from one software wouldn't be satisfactorily accepted by another software. It is very informative to examine the camera position solutions for these data sets, and what kind of lighting they were taken under. This Doll one kind of violates all the best practices, dimly lit room, uneven distancing, even going to frames cutting up the subject, but has all the elements to be 100% accepted. One thing though, there is a big hole under her chin, which the camera angle never caught.
Agisoft sample data
https://www.agisoft.com/downloads/sample-data/
https://www.agisoft.com/index.php?id=71
> Agisoft De-Lighter is a free stand-alone tool designed to remove shadows from model textures. The tool is targeted on removing cast shadows and ambient occlusion from 3D models. It requires user input in a form of rough brush strokes marking lit and shadowed areas. All input can be provided within Agisoft Delighter without need for any extra data such as ambient occlusion maps. De-lighting algorithm is optimized for 8-bit JPEG compressed textures and does not require specific image formats with higher color depth.
Check out some of the Tips & Tricks from Agisoft, a photogrammetry software company. Most apply to all photogrammetry softwares but some are product specific to themselves.
A Phantom 4 Pro camera is 20MP and it looks like the D3500 is 24.2MP. So you'll definitely see an increase in times over the Phantom. Metashape is also pretty bad at estimating processing times, so it probably won't be that long.
Double check your settings to make sure that your GPU is enabled in the MetaShape preferences. I'd let the computer run for a full day to see if you get beyond the depth map process. You might actually run into issues with only 64GB of RAM and that might be causing your processing to seize. Ultra-high is really RAM heavy and you might not have enough for those photos, depending on some other factors. It doesn't look like Agisoft has updated their charts, but you can see that the recommended RAM is way above what you're using.
Hi there!
As mentioned above it is not a good practice to use flashes, insted of this you may use Agisoft Texture De-Lighter utility after building the model with texture. Can you please write what kind of error do you have when processing in the Cloud?
https://www.agisoft.com/forum/index.php?topic=7968.0
> You can use spherical panoramas in equirectangular representation in PhotoScan. All you need is to load images, then go to the Tools Menu -> Camera Calibration window and switch the Camera Type from Frame (default) to Spherical for the calibration group that corresponds to the panoramic images.
> Then process as usual: Align Photos, Build Dense Cloud and etc.
> However, I also suggest to apply the mask (could be the same for all the images) to cover the unused area in the bottom on the images
a free alternative to retopologizing your mesh is instant meshes: https://github.com/wjakob/instant-meshes
and also agisoft has a free texture de-lighter available here: https://www.agisoft.com/downloads/installer/
and you can use any 3d program you desire to process the rest.
RC seems to be using a significantly different algorithm, possible more image analysis like Photosynth, than the more standard SFM (structure from motion). There are examples where it can take multiple partial images taken with different cameras at different times and still derive the 3D point cloud. SFM really needs to be able to track the camera path.
Try the Photoscan doll example data. It uses multiple partial object frames, and the lighting isn't good or uniform. Tried it once with Photoscan and it still had a lot of holes.
https://www.agisoft.com/datasets/doll.zip
Better to mask out water marks.
Photoscan has become Metashape, and they have a new pricing model. There is the 30-day trial version, the standard version and the professional version. The standard version is $180, the professional is $3500. The standard version is totally stripped down.
https://www.agisoft.com/buy/online-store/
I did try this although maybe it really is my camera/lighting set up causing the poor performance.
This is the kind of tutorial I was following https://www.substance3d.com/blog/scan-anything-dave-riganelli-and-his-homemade-scanbox
Do you have any other recommendations to improve this?
I'm not trying to do CAD inside the scanning software. I just need to measure inside some software, and I assumed that maybe the scanning software itself might be able to do it. The actual CAD would be done in Fusion 360 because it's free and I'm comfortable with it. I don't know of any feature in it to best fit a curve to a mesh, but that's exactly what I want to do.
I found a piece of FOSS that may be able to do it: MeshLab
>Mean Curvature is what you need, you can think it as the divergence of the normals over the surface and it captures well the concept of characterizing local variation of the surface. There is a vast literature on computing curvatures on discrete triangulated surface and MeshLab exposed a few different methods (and it has also a couple of methods for computing them on Point Clouds).
(https://meshlabstuff.blogspot.com/2010/03/mean-curvature-cavity-map-zbrush-and.html)
At first glance, though, it looks like the author is using it to generate a texture that expresses the mean curvature at all locations on the model and then importing it into Zbrush to drive some ambient occlusion feature. I just want the value at particular point on the model. Maybe that's easy to get, and maybe not.
I guess I'll dive into it and see what it can do. Thanks for talking through this with me.
Regard3D is really good for free software and is available on Mac. I'm just not sure if it uses GPUs because from what I remember it seemed a bit slower than other software.
As far as I know, the best free software available that does not require CUDA is regard3d. It's obviously not as fast as CUDA enabled software, but I really like it a lot. If you have the money and CUDA hardware though, I'd use 3DF Zephyr instead.
Did you add your smartphone to the alicevision list so I knows your sensors details? Alicevision is the part of meshroom that does the hard calculations and reads the meta data. It also dosent often have smart phone details.
When you upload photos is there a green circle next to each one, an orange circle, or a red circle?
Here isnthe wiki on how to do that if you're not getting green data.
Right click a photo and select properties. Then click on the tabs to find your Metadata for your phone. Except the sensor width. You'll need to Google that.
https://github.com/alicevision/meshroom/wiki/Add-Camera-to-database
Mine doesn't have "Load" either. I've read double-clicking on the texture-node works, but it hasn't for me, so far. This is where I found that answer.
If you want to use meshroom there is some information here: https://github.com/alicevision/meshroom/wiki/Renderfarm-submitters but it is not easy to set up.
i cant remenber in this moment but searching that error on forums i think i found an easy solution:
" You can use IrfranView
File->Batch Conversion
or Imagemagick. Make sure you set the quality to 100%. Now you can add the images to Meshroom (assuming the camera is in the sensor db). "
my personal advise, dont use meshroom, try 3DF Zephyr or Agisoft Metashape, also Reality Capture its so much better product and have nice value.
Meshroom is a photogrammetry software to take a collection of 2D photo images, construct a 3D point cloud from them, and export textured 3D models.
Meshroom is open-source.
https://github.com/alicevision/meshroom
Ok, answering my own post here. There seems to be an issue with anything later than meshroom 2018 whereby Windows terminates the DepthMap process due to what Windows thinks are lockups. It's all documented here:
https://github.com/alicevision/meshroom/issues/593
and the fix for me (and others) is to make a registry edit described by Davezap on the 2nd of May.
Hope this helps anyone else having similar challenges with Meshroom!
It's possible to use Meshroom with Google Colab see: https://github.com/alicevision/meshroom/wiki/Meshroom-in-Google-Colab-(cloud)
Ya I deleted and reinstalled multiple times, even tried an older version and got the same thing. Found this (https://github.com/alicevision/meshroom/issues/1093) on the github where a user had a crash and then experienced the same issue but no answer.
You can use Google Colab Meshroom adaptation instead, here's all information you'll need: https://github.com/alicevision/meshroom/wiki/Meshroom-in-Google-Colab-(cloud)
I found a solution by searching for the terms that u/Mr_N00P_N00P suggested in the Meshroom context. In particular, this page was helpful: https://github.com/alicevision/meshroom/issues/236
After the MeshFiltering stage in Meshroom, it is possible to swap out the outputMesh with an edited one. You can then use the edited, re-saved obj as a custom input on a Texturing node.
I duplicated the "Texturing" node, giving it a (Blender-modified) OBJ file for inputMesh instead of the default.
Blender now has a much cleaner texture (as you can see all the background stuff is gone).
A tricky part that I ran into: Meshroom initially complained about the OBJ file that I exported from Blender. It turns out that the culprit was a "Write Normals" checkbox under the Export Settings > Geometry. The box is checked by default; I had to uncheck it to make Meshroom happier. Thanks everyone for your inputs!
You can use Draft Meshing in meshroom without nvidia, https://github.com/alicevision/meshroom/wiki/Draft-Meshing
Thats probably the best you are going to get without an nvidia gpu. Someone could implement a CPU version of depthmap, but its going to be so slow that few people would use it. Honestly even if you did have an nvidia GPU you are going to run into issues with only 8 gb of ram. I have 16GB and it struggles. Even with an nvidia gpu it sometimes takes several hours on a desktop. I use a DSLR and shoot raw, usually end up with 1-2 GB of images or more.
Thanks.. I forgot about meshmixer. I would of course like to find out if Meshroom could avoid it in the first place, but easy fix in meshmixer will be next step. And then I was actually planning to retexture it from Meshroom using the process from here: https://github.com/alicevision/meshroom/wiki/Texturing-after-external-re-topology Then it was the plan to use blender for decimation/retopology and baking of normal maps and such.
So I didn't come up with a solution for combining the two SfM clouds. I found a somewhat related issue on the github page, and got some tips for avoiding the issue in the first place, but it does not seem to be doable in Meshroom at the moment (https://github.com/alicevision/meshroom/issues/864).
However, I did solve the problem though, so I thought I'd share my solution. Instead of loading the images as two sets through augmentation, I loaded all the images as one set. Feature extract only SIFT but preset high. Giving that to the standard feature matching node (even with ImageMatch node tweaked to match by more features) resulted in only 33 of 176 cameras being reconstructed. However, when I turned on "Guided Matching" in the FeatureMatching node, then the SfM reconstructed all 176 cameras, and the cloud looks like the SfM of both side 1+2 as shown in the OP image. So basically a Success! Waiting overnight now to see the results of depthmap and meshing. "Only" caveat to guided matching on this amount of cameras and doing the processing on my laptop, is that the featurematching took approx. 10 hours to complete (and this was only using SIFT and not combining with akaze). So it was automatically combining all images correctly, with no need for manual alignment and merging, but it did take 10 hours. So there are pros and cons here, but it seems to have worked out :-)
>is MaxPoints not the maximum number of input points
There's maxPoints and maxInputPoints, I changed maxPoints. I think you're right that I went too low, I was reading this GitHub comment from the dev and accidentally lowered it to 100K instead of 1M.
However, even when drafting from SfM, there are big chunks missing from the monkey. So I feel like the issue may be from something earlier in the pipeline than meshing.
Have you tried using the draft meshing (https://github.com/alicevision/meshroom/wiki/Draft-Meshing) when you tweak values? Just to get some faster ideas on the final output.
Other than that, I would guess that there could be some trouble with the MaxPoints you changed. I am not totally sure on these parameters but is MaxPoints not the maximum number of input points? (E.g. default value is like 50 million?) So the reduction here seems extreme. Even if it is the maximum number of output vertices, it is still extreme (and imho unnecessary) to reduce it to 100k (which I'd guess could result in missing geometry in the mesh). I'm running meshroom on 16gb of ram as well, and usually I can get meshing done with just around the default value of 5 million vertices (sometimes I reduce it to 4.5 million). Other than that I usually get good help by following the tips on this page: https://github.com/alicevision/meshroom/wiki/Reconstruction-parameters
Also I have found good help from the tweaks mentioned on this site when working with turntables: https://github.com/alicevision/meshroom/wiki/Reconstruction-parameters
Recently, I found the option of "Guided Matching" in the FeatureMtaching node very useful when I had a model where only half the cameras were reconstructed. And if there are problems with too few feature points on the object then turning akaze on as well usually helps me. Finally, if the object does not have that many feature points, I have also had success with placing it on the turntable with a piece of paper underneath it, with different scribbles on the paper to help with the tracking of the cameras.
You want to have 60-80% overlap between images. For a small object like that I would expect 30-50 total images to be sufficient, taken in 2 or 3 loops around from different angles. Typically a yellow icon means that it's got enough data to work, but you could also try adding your sensor to the DB by following the guide: https://github.com/alicevision/meshroom/wiki/Add-Camera-to-database
That usually happens because of one of a couple reasons: the picture may be fuzzy/blurry, or there isn’t enough overlap with surrounding photos for the software to find enough matches to place the photo in space around the reconstruction. Really try to get lots of overlap. It’s not usual to get over 200 photos for a small object.
Also check out this link. It’ll have parameters you can tweak to get better reconstruction, but I’d first look at your dataset.