
What are
/r/SVRiders'
favorite Products & Services?
From 3.5 billion Reddit comments
The most popular Products mentioned in /r/SVRiders:


The most popular Services mentioned in /r/SVRiders:
Facebook Marketplace
eBay
Walmart
TeeSpring
Autodesk Tinkercad
Wikimedia Commons
Google Docs
The most popular Android Apps mentioned in /r/SVRiders:

The most popular reviews in /r/SVRiders:
That ring with two holes is sitting in a groove on the thing you're calling a bolt.
There is a tool to remove it, but just grabbing both side with some sort of picks and move the ring up. Not fun to do it this way but might be possible. Ideally you want to have a tool.
This is the tools you'd use to remove it, just make sure it's the right size. This is just a random one I looked up to get you the idea: https://www.amazon.com/Retaining-KangTeer-Multifunctional-Auto-lock-Internal/dp/B01MU3VGE6
Bike bandit link: https://www.bikebandit.com/oem-parts/detail/suzuki/09409-06314-5pk/b1031026?m=17403
The part number has 5pk at the end, this does not mean you get 5 per package, you only get one. I learned the hard way.
Here is an Amazon link to purchase multiple: https://smile.amazon.com/gp/product/B0150YKKD2/ref=ppx_yo_dt_b_asin_title_o02_s00?ie=UTF8&psc=1
i used:
gsxr main fairing stay
1g side brackets
diy bendy rear lower bracket
hacked up the subframe
made a custom s bracket
some pics here: https://www.facebook.com/marketplace/item/2750377411873830
Here's an '09, four years older but with only 3k more miles and much newer tires... and a DanMoto exhaust (blech) for $490 less. Maybe take a look at that one or use it as negotiating leverage. Pretty much ready to go for $500 less versus having to buy tires and pay for inspection:
This one . There are similar ones out there but this one seemed to have good real reviews. Plug and play for the low and high beam. The white/orange "angel eye" will need to be wired which I haven't done yet.
Sold out heh. But it seems like they made it to amazon https://www.amazon.com/AHL-Mirrors-Hyosung-GT125R-GT250R/dp/B06XPGKJGR/ref=asc_df_B06XPGKJGR/?tag=hyprod-20&linkCode=df0&hvadid=366409820288&hvpos=&hvnetw=g&hvrand=7116309703324680765&hvpone=&hvptwo=&hvqmt=&hvde...
I looked at a lot and wanted to do something a little different, I got this one off Amazon and its 10x brighter then the stock one and had a nice look to it, yeah I'm definitely not done upgrading it, that just might be my next one lol
MOVOTOR Motorcycle Headlight 7inch with Bracket Clamp Red Background White DRL Hi/Low Beam for Universal Motorcycle Harley Honda Yamaha Triumph Cafe Racer https://www.amazon.com/dp/B083YX2J7H/ref=cm_sw_r_em_apa_glt_fabc_EQVGBZD9CAKQ4Q3DK8T1?_encoding=UTF8&psc=1
Any ideas how to match up the yellows, bro? If I order online I feel like I'd have to get really lucky to get a match. Thanks for the link, I'd have to do something like this if I went banana. 😂 https://www.amazon.com/EMC-Graphics-Nicolas-Cage-Banana/dp/B08K57YF2R
Just installed these yesterday. They are low profile and look great. Let me know if you need more info.
[New Version]Kinstecks 4PCS Motorcycle Indicators Flowing Turn Signal Lights Motorbike Turning Indicators Daytime Running Lights Brake Lights 12V for Motorcycle Motorbike https://www.amazon.com/dp/B07SZDDZFJ/ref=cm_sw_r_cp_api_glc_fabc_pbgcGb7AXFDS6?_encoding=UTF8&psc=1
I have one of these https://www.amazon.com/SKTYANTS-Headlights-Housing-Motorcycle-Davidsion/dp/B078MVXJBL/ and am happy with it. There are also reviews on the page by other people that put them on their SVs.
Edit: bolts right into place.
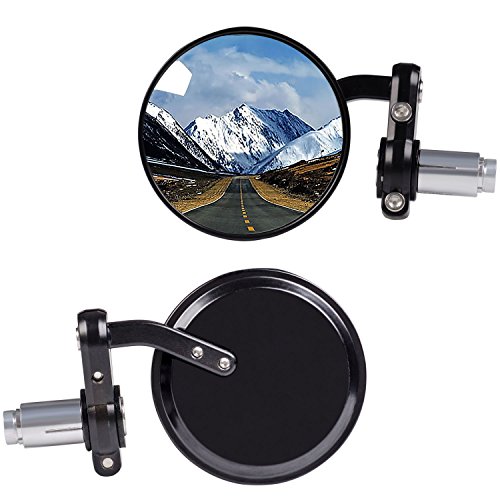
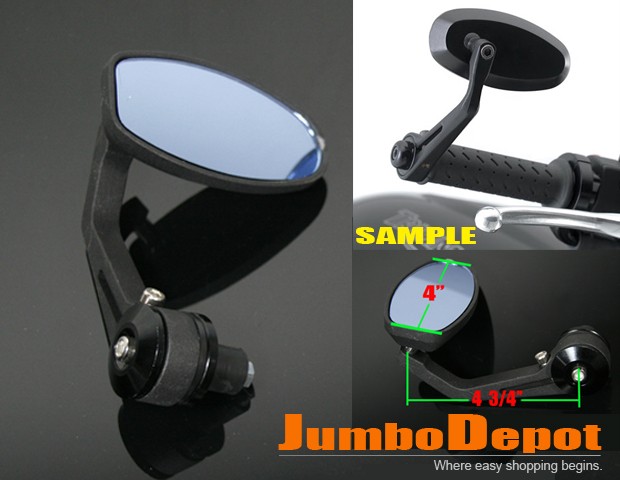
Not sure if this post is dead but I just installed these bar end mirrors and they are working out beautifully: Amazon Link Youtube video I watched to install them
These are the ones I bought. These will not work for you though. I have an SV1000S with a hydraulic clutch, so the clutch lever is different than a 650.
What I did was search on Amazon and find a set with good reviews. You should be able to do the same.
Edit: These look like they might be worth a shot. Mine work great with no fitment issues, but I can't guarantee it with these.
You can buy cheap bars on the Amazon for less... https://www.amazon.com/gp/product/B00KHUB0ES/ref=ox_sc_saved_title_3?smid=A2H6SBQ985X5CE&psc=1
I put one of these on my wreck/rebuild Duc M696, and it works perfect. New pair of Renthal grips, good to go!
I have this yuasa YTX12-BS after my 7 year old motobatt died and it's running great. Only thing is it's kind of expensive now on Amazon. I bought mine for ~$67 just about a year ago.
If you have some cash to spend, you can also look at lithium batteries. They're smaller and weigh a fraction of the regular batteries, but are costly.
I found them on Amazon, although I can’t say that I recommend them. The screws are threaded directly into the (very soft) aluminum clamp, so it’s very easy to over-torque and strip them out. However, they’re cheap, very lightweight, and haven’t given me any trouble other than the flexible threads.
(Also don’t count on being able to use your bar-end mirrors or sliders, these have a funky ID)
I just put in a order for these "FTRT" short levers on Amazon. The reviews look pretty decent for the price point.
​
https://www.amazon.com/gp/product/B07FCSL6VX/ref=ppx_yo_dt_b_asin_title_o00_s00?ie=UTF8&psc=1
Here you go: customTAYLOR33 (All Vehicles) Red High Intensity Grade Reflective Copyrighted Safety Rim Tapes (Must select your rim size), 17" (Rim Size for Most SportsBikes) https://www.amazon.com/dp/B00G6188EM/ref=cm_sw_r_cp_api_i_-q0ECb8F282P5
*disclaimer: I’m not affiliated with this guy but from what I’ve found people universally say that these are the highest reflective rim tape strips available so they really pop at night (clearly). Just a heads up they do have a bit of a lattice type pattern in them, like you see on professional reflectives, which make them so bright and aren’t solid like the pro grip rim tape but I like it better than I thought it would. Kind of compliments the frame of the gen 2s. And you can’t really see it unless you’re up close and looking for it.
Edit: he’s got a bunch of other colors too if red isn’t what you’re looking for
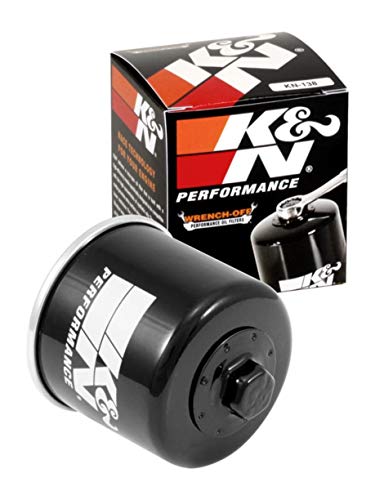
Friends don't let friends use K&N oil filters.
The HiFlo HF138 is the right thing, for $30 you can get a 4-pack on Amazon:
https://www.amazon.com/Hiflofiltro-HF138-Black-Premium-Filter/dp/B008BEUMUA
ooh first hand experience, thank you!
​
I ordered these after measuring my forks (41mm on a 2009 gladius, for those curious). very cheap I think it'll do for messing around
​
https://www.amazon.com/dp/B09X9Y6WTW?psc=1&smid=A3F1EKEMBN6TOA&ref\_=chk\_typ\_imgToDp
oh hey amazon has some cheap ones maybe not a bad idea? gotta go measure my forks tho idk what the diameter is
​
Highly recommend getting a reasonable cost stand on Amazon - I have this really low end one and to be honest, it has worked great for everything I've needed it for including oil changes, fixing a stator gasket leak, adjustments, etc. Totally worth it!
https://www.amazon.com/gp/product/B0036QZ8VQ/ref=ppx_yo_dt_b_search_asin_title?ie=UTF8&psc=1
Tire pump is something like this. But I do need to downsize it some time. Every time I need something it's always a chore because everything has to be in there just right.
I picked this one up on Amazon and it has been working well enough even through the Phoenix summer heat. My only complaint is there is a slight delay before the indicators light up, but its really like half a second so not a big deal.
I like to mount these USB charger/volt meters on my bike, although the naked SV may not have an ideal spot for it.
Anyway, as everyone else said your battery isn't strong enough to turn the starter in this video.
Here it is; BLIAUTO 7" 7 Inch Round LED... https://www.amazon.ca/dp/B07Z5PDTTN?ref=ppx_pop_mob_ap_share
I didn’t end up using the bracket that came with the light, I mounted it on the factory bracket.
i just purchased this on Amazon: https://www.amazon.com/Xitomer-Eliminator-2018-2019-License-Compatible/dp/B07WF7VWXY/ref=sr_1_5?keywords=sv650+fender+eliminator&qid=1656473839&sprefix=sv650+fen%2Caps%2C134&sr=8-5
I haven't gotten it yet, but it was cheap and the reviews were good. i'll follow up later and let you know how it works out. But like you said, the stock fender is ugly and all you really need is something to hold your license plate, light, and turn signals. im hoping this will do the trick. the fancier ones like yoshimura are so expensive and i just don't see the point spending a bunch of money on a tiny little metal bracket that is barely visible to anyone.
Okay, I feel like a moron, but because I couldn't find this on the internet anywhere else, and all part stores seem to completely forget about the right brakes. I'm going to post what I hope will work in hopes someone else doesn't need to spend their entire evening figuring this shit out.
I went into Amazon and got one of each of these.
Left front brake pads: EBC Brakes FA229HH Disc Brake Pad Set, Black https://www.amazon.com/dp/B00666CSDO/ref=cm_sw_r_apan_glt_i_RCEXY27S3J3QRAJ3ME0R?_encoding=UTF8&psc=1
Right front brake pads: EBC Brakes FA231HH Disc Brake Pad Set , BLACK https://www.amazon.com/dp/B002Y0S2GI/ref=cm_sw_r_apan_glt_i_TYTSXNA8GRS5TZ7V1CKR
I'll update asap if they work or not.
I like JB Weld Epoxy
First take the fairing off and lay on flat surface. On the back side, clean, sand, and clean again. Build a lil wall around the crack with layers of masking tape. Apply epoxy. It will be stable within 5-10m. During this time, manually rotate the fairing so that it seems your epoxy is evenly spread. After it’s partially set you can leave it overnight.
Next, once the epoxy has fully hardened, you can sand/cut off excess.
For the painted side, same thing just be more precise/careful about the cleaning/sanding. If you decide to apply touch up paint, use more making tape but leave your boundaries a couple mm outside of the epoxy area. Sand with a medium grit (800) and then fine grit (2000) to smooth out. Then apply paint.
Yeah it was really easy to install I didn't use the brackets that they gave me because they sucked. But it fits well on the OEM headlight brackets. The harness wires were a little tricky to get through their small hole on the bucket and then to route them in a circle in the housing so the headlight fits but it worked out. I also used the OEM bracket bolts to install the headlight on the OEM brackets instead of using their hardware. Took me about 45 minutes to figure everything out and install it. The light also has blinkers in it and daytime running lights but I didn't hook those up because I don't think they are necessary.
First gen or second gen? They pop up on Ebay pretty frequently.
- No get something that fits
- There’s no abs specific brake lines, just different length. Spiegler has them.
- Don’t add halo rings on top of halogen. Get one that was made for H4 connection, and get the (this)correct bracket and should be plug and play.
https://www.facebook.com/marketplace/item/828126477671447/
it's higher up in miles (42k) but runs great and is loaded with rare and expensive stuff :P
I literally just installed this one 2 days ago on mine. So far so good. https://smile.amazon.com/dp/B08RYJ8QK2?psc=1&ref=ppx_yo2_dt_b_product_details
You might be able to find this slightly cheaper on Ebay, where I got a replacement lever for my 05 SV650S. One very important thing to note (or maybe just because I'm an idiot), one of the bolts holding the shift lever on is reverse-threaded...
I have a twenty year old set of Eclipse P38 saddlepacks on my 2008 SV650SF at the moment but they are almost worn out.
http://www.eclipseluggage.com/luggage/105.html
WalMart sells something similar:
https://www.walmart.com/ip/Classic-Accessories-Motorcycle-Saddle-Bags/10802875
I've been working on a 3D print of a design for the gauge cluster mount. My previous prints had issues with stability and so this most recent design is a tad shorter and includes a trimmed down clamp and an additional bracket. If you think you can use this let me know how it turns out and maybe it will inspire me to continue my build. There is nothing worse than a rattle sound on a brand new build; it takes the all fun out of the brand new fork!
https://www.tinkercad.com/things/3lZDO8PiHDA
The stanchion clamp bolts are M4x0.7
The cluster mount bolts are M6x1.0
The CAD file includes a yoke to align everything. If you decide to use it, then you'll need to delete that prior to sending to printer. There are services you can use to get it printed, Shapeways is one that I've used in the past with success. I recommend carbon fiber prints for any final design.
I'm not too much in a rush, so hopefully a good deal comes out from either craigslist/fb marketplace. I found this decent one but sadly its quite far away from where I live :/
Do the n and s model use the same clutch and throttle cables as each other? I converted my n model to 4inch taller handlebars and didn't need to change throttle or clutch cables. Only had to do my brake lines, i went with these. https://www.amazon.com/dp/B0184RBB94/ref=cm_sw_r_apan_glt_fabc_6MSW6PXGGQ3HHJQEMR6Q?_encoding=UTF8&psc=1
If you buy a charger make sure it's a 1A changer and not a car battery charger running at the lower setting (2A), I suggest this ond
Amazon
KATUR Motorcycle Rear View Mirror Motorbike 7/8in 22mm Round Handle Bar End Circular Foldable Blindsight Side Convex Mirror for Harley Davidson Honda Indian Kawasaki Suzuki Triumph and Yamaha https://www.amazon.ca/dp/B01FM3CDAO/ref=cm_sw_r_cp_api_glt_i_N4GS1W634TC0V2YPYV5E?_encoding=UTF8&psc=1
Thanks! I'm pretty sure it is this one from Amazon.
BlyilyB Motorcycle Blinkers Indicator Turn Signal Amber Flowing Sequential Lamp Universal for Honda Kawasaki Yamaha (Pack of 4) https://smile.amazon.com/dp/B07GZLN7L7/ref=cm_sw_r_cp_api_glt_fabc_CTSPMFZX4QVFSFPA61SS
Put these on a year ago and it’s been great. Do need a LED flasher relay though
I have one and its fantastic. Hard to find room with clip-ons, but with a u-bolt base on the left control and the ratchet swivel arm it lights up perfectly over the center of the triple tree.
Check out the head light
MOVOTOR Motorcycle Headlight 7inch with Bracket Clamp Red Background White DRL Hi/Low Beam for Universal Motorcycle Harley Honda Yamaha Triumph Cafe Racer https://www.amazon.com/dp/B083YX2J7H/ref=cm_sw_r_em_apa_glt_fabc_HJ9EF3PJ466RY7EBYHWX?_encoding=UTF8&psc=1
Nelson Rigg CL-1060-R Black... https://www.amazon.com/dp/B07KZCLGXS?ref=ppx_pop_mob_ap_share
I like it. It’s a little smaller than I expected but it does the job. Want to get side cases eventually
You probably need a new one of these
It goes on the front axle nested against the front wheel. It’s notorious for the 4 tabs to break off allowing it it spin freely. It usually has an intermittent period where it works inconsistently before it fully breaks.
The bikes typically claim they are going 5-10 miles faster than they are. There are aftermarket speedometer healers that can fix it if you care enough or you can do a gixxer front end swap as they have a slightly larger diameter wheel which accomplishes the same thing.
If you want it blank, try to buy a cheap piece of vinyl in the same color. Should be ez to match and inexpensive. Alternatively, you could go with your own sticker. I'd suggest this personally: https://www.amazon.com/dp/B07Z4JSXY3
This is the Led bulb I put in my 2018 SV. I tried a different.one at my local motorcycle shop but all the electronics of the bulb stuck out the backside of the bulb housing and prevented me from locking the bulb in and it wouldn't fit the plastic housing on the bike. This LED bulb is so much brighter and has an amazing wide light throw. https://smile.amazon.com/dp/B07SRS9MJN/ref=cm_sw_r_cp_apa_glc_fabc_4XB75CW1GVST9Q2AXJH0?_encoding=UTF8&psc=1
That much I knew!
I did first want these, but according to one of the reviews, " If you buy these grips and you have a 2005 Suzuki sv650 with a stock throttle tube then just know that some modifications are needed."
I definitely do not want to do that.
I bought something similar to this on ebay about nine years ago for my SV and it worked just fine.
It was freshly wiped down before I left...It's an Amazon cheap buy (no name). It cost me $21 and has been more helpful than I thought it would be. I had to run down to True Value and get some washers and larger flange screws to mount it snug though. The edges weren't very clean, so I used some 500, then 1000 grain sandpaper to clean them up. Considering what other windscreens cost that are similar, I think this has been a good buy so far.
Gotta agree with you hands down! I did replace the headlight, here’s the link on Amazon it’s only $34 right now: https://www.amazon.com/Zmoon-Headlights-Wrangler-Motorcycle-Davidson/dp/B07T28C69B/ref=mp_s_a_1_3?dchild=1&keywords=sv650+headlight+led&qid=1602877266&sr=8-3. It definitely changes the whole look of the bike.
You need special tips to be able to test a connector. Ether one that's thin enough to fit into the connector itself, or one that can pierce the insulation. A push pin may work for the second scenario if you don't want to buy anything. Also, you could get creative and use safety wire or some small gauge wire to slip into the connector.
You can buy something like this to backprobe the connector.
As far as the overall issue, if the problem started when you swapped your ignition, maybe it's a bad ignition. Test that too, there is probably some resistance check you can do.
Here is a YouTube video that shows a couple of methods. It's more of a commercial though.
You may have to spend some money but hopefully there are a couple of options for at least testing via multimeter that are cheaper than a diagnostic fee.
How about this, I got it last week only Applied it once so I can’t give a review yet. WARREN DISTRIBTUTIO MAG1 Gal bar/Chain Oil https://www.amazon.com/dp/B01M5CI8EW/ref=cm_sw_r_cp_api_i_SUWjFbFK0VC6S
Picked these up from Amazon. Hell of a lot cheaper than a new visor, but honestly I wouldn't buy them again. Their flimsy and the polarization isn't very good, distorts light at weird angles. I'll invest in a better bayonet-temple pair after these kick the bucket.
You can also get it from Amazon under the name Skytants. They also make a version with integrated indicators and running lights that automatically alternate. I have that on my SV and am happy with the looks but it's not the brightest low beam and the high beam is quite scattered. Good for the occasional night ride but wouldn't recommend for regular night rides on country roads.
That's certainly one way to do it. You'll need to make sure that you can accurately measure the shims so that you aren't relying on the number (which can be off). Additionally, some people say that a micrometer is better than vernier calipers but can't really weight in on that since I used calipers. I can say I did have a few surprises where numbers didn't quite match what I needed or didn't completely match what I thought they were. In at least one case the shim was mislabeled, in other cases I'm not 100% sure what caused the difference. So, having the entire kit was helpful. Also, the kit was $65 on amazon so it was nice not having to go back to a store to grab more shims, they were all right there.
Totally up to you, there's nothing wrong with leaving things apart as long as you can keep debris out of the engine. So a couple rags usually come in handy there. Motorcyclist magazine has a good video on shimming the valves.
This entirely depends on how much time you have to work on it and it's a process that I just wouldn't rush. I'm an amateur and this was my first time doing it so it took me a couple weeks or so because I'd have questions and stop for a couple days to research. It's an interference engine so double and triple checking stuff to make sure things are in time, torqued in increments, and torqued to spec makes a difference.
One thing I remember doing was that I had a shim not 100% lined up in the bucket which caused there to be tons of negative clearance. Be careful with that because you want to torque everything down evenly. Also, the valve cover bolts are really easy to over torque or cross thread, be careful with those too. Stripping those out means you're taking off the cam holder to tap a helicoil (happened to me).
I have a battery tender jr that I bought from amazon and it works fine. I would recommend getting an adapter to attach to your battery so all you have to do it plug it in. With the SAE lead you can run it to the side of the bike somewhere on the side of the bike where it's easy to get to so you don't have to take the seat off every time you want to put the battery on charge.
Hi, Got the bracket from Amazon. For some reason the brackets that state 41mm are too small, so this was the 2nd one I purchased but fits well:
Pair Of Chrome Universal Fork... https://www.amazon.co.uk/dp/B00M264CKE?ref=ppx_pop_mob_ap_share
I have gone for a black widow exhaust as don’t have the budget for an M4 (which looks amazing).
Thanks! They're made by a company called MZS. I guess you could call them knock offs haha but they're actually pretty good for the price. The visibility is good on them, I don't get a lot of vibrations through the mirrors even on the highway. The only problem I've had with them is I have to tighten the screw that holds it to the bars because it starts to get a little loose after about a month, but you might be able to fix that with some loctite or something.
I got mine from amazon: https://www.amazon.com/dp/B079KBDC9Q/ref=cm_sw_r_other_apa_i_WTndEb8XEQK1D
These are the ones I am using on mine.Amazon Bar Ends
They work for me. Sadly a couple weeks ago my bike fell off my stand while replacing the chain and sprocket so my right side mirror snapped, but what do you expect.
I plan on buying them again when I get the chance. The only down side I have had with them is the anodized black on the arms and end plugs turned gold after about a year in the sun, the main mirror body is still black. But then again for 25.00 mirrors its not really a surprise.
It's just the parking light bulb. It's just a t10 wedge bulb I believe.
Here's an LED headlight bulb that should be a lot brighter than the stock halogen: https://www.amazon.com/dp/B07WG1FL6R/ref=cm_sw_r_other_apa_i_sOHTDbTN1XDEV
That led bulb is nice because it replicates the placement of the filament on a halogen bulb so the beam pattern should be about the same, it'll just be brighter. Plus you won't be blinding oncoming traffic lol
If you're going to get an LED headlight bulb then you should get an LED t10 bulb for the parking light too or else it'll look weird having two different colored bulbs. Or you could just take the parking light bulb out and not replace it lol
I have an LED headlight assembly I'd be willing to sell you. I had it on my SV650 originally but I decided to buy a halogen headlight assembly instead because I like how it looks better than the LED. The led assembly is pretty nice though, I bought it from Amazon for $100 and it has Integrated turn signals if you decided to use them. It's still in good shape, I'd say $50 would be fair for it. Here's what it looks like on my bike: http://imgur.com/a/xraOlqr
Here's also a link to it on Amazon: https://www.amazon.com/dp/B078MVXJBL/ref=cm_sw_r_other_apa_i_g.RADbQ49QRX4
Not recommended.
​
1.) Remember that most motorcycles share their engine oil with the gearbox. Running low on oil can cause damage to both.
​
2.) A motorcycle is light weight and had limited traction. Having the engine or gearbox seize up is a good way to have the rear wheel lock up as well. This could result in a crash.
​
3.) Running an engine low on oil can also cause it to throw a rod. This literally means parts can be ejected from the engine at high speed... There is little between your leg and the engine. This can cause injury. Also what oil is left inside the engine will drain out onto the road where the rear wheel will roll through it. This is a good way to have a crash.
​
If you're concerned about the cost of repairs, you can get the Haynes Repair Manual for the SV and test or rebuild the engine yourself.
​
[https://www.amazon.com/Suzuki-SV650S-Haynes-Service-Repair/dp/1785210416/]
How does that compare to this brand BlackPath - Suzuki Adjustable 0-4 Rear Lowering Link Kit SV650 + SV650 Gladius + V-Storm DL1000 Motorcycle Drop Links (Black) T6 Billet + Steel https://www.amazon.com/dp/B00RYCQEF2/ref=cm_sw_r_cp_apa_i_v9VLCbD8V63BQ
I did some research and found you are right! Anything but oem seems to be garbage. I found the oem fork seals on ebay. Is it fine if I use all balls for the dust seal?
When I did the swap, I did about a week's worth of research prior as I was waiting for the springs to arrive, and everything you mentioned is advice I would give as well. I'm not sure what else there is to add that would be helpful. I personally would have replaced the seals because they can get damaged when removing/reinstalling them, plus they're probably old. But I'm just paranoid so I replace them if I'm already there.
For measuring the oil level, you can use one of these with a short hose that fits at the end where the needle screws on. Works great and it's cheap. This method also works great as a makeshift fork seal driver.
a really useful thing to get also is the bleeder banjo for the master cylinder. that way you can vent the air at the top as well
https://www.amazon.com/Lefossi-1-25mm-Motorcycle-Cylinder-Kawasaki/dp/B073W77ZFT
Im currently on the last leg of a trip around Scotland and don't think I could have done it with the stock screen, I bought this, it's still supposed to be quite racing focused but really helped a lot.
https://www.amazon.co.uk/MRA-Windscreen-Windshield-TYPE-Racingscheibe/dp/B00BRXV5GM
KAWELL Rear View Side Mirror Round Bar End Convex Hawk-eye Motorcycle Mirror For 7/8" Handle Bars Fits Most Harley Davidsons Suzuki Honda Kawasaki Cruisers https://www.amazon.com/dp/B002GTKAHQ/ref=cm_sw_r_cp_apa_i_kqkiBbB1DB5X1
I just grabbed some generic ones. They're ok, I like them better than bar ends since I'm not taking my eyes off the road as much. However, you gotta bend your arms in a bit to see directly behind you. If I were to do it again I think I'd get the ones with integrated turn signals.
https://www.amazon.com/Hoosier-Garage-Quality-Motorcycle-Kawasaki/dp/B016DRCZ6K
Figured I would put this up here to show a different way of mounting a RAM mount on your triple tree.
The base so far after a week or so of riding is still secure. If it starts to give me problems I will update you guys!
As you all know there isn’t much space on the right clip on and I didn’t want to mess with my triple tree nut.
RAM Rail Base with Zinc Coated U-Bolt, ATV/UTV Strap & 1"" Ball for Rails to 3.15"" in Diameter https://www.amazon.com/dp/B007AM1PXW/ref=cm_sw_r_cp_api_i_XPK6AbDRW6C4R
I have a set of these on my 02. They work great.
Chrome Steel Side Mount Headlight Clamp Fork Ears Brackets Motorcycle 35-43mm Fork Tubes Universal https://www.amazon.com/dp/B01FXIRBAA/ref=cm_sw_r_cp_apa_i_zzm4AbW9YSE4G
i had to make a custom bracket for my 7" headlight that i bought. it was plug and play, but not necessarily for the installation
https://www.amazon.com/gp/product/B01M63N6PJ/ref=oh_aui_search_detailpage?ie=UTF8&psc=1
So something like this or the ones for jeeps should work? I don't really care about it changing colors, this is just an example I found on Amazon.
I went to the iron pony in Ohio recently and purchased this ram mounthttps://www.amazon.com/dp/B006X387ZS?psc=1&smid=A2XENS8LQP1A6D I really didn't have much knowledge of these but I figured there was a place I could mount it. It turns out that theres really not, i moved the clutch and brake levers all the way in an attempt to gain a little room for the mount and I probably could have squeezed it in with a Dremel but I really didn't want to do that.
Anyway after fighting the U bolt version for about 45 min i eventually decided that i was just going to mount it on my mirror, which...worked, and honestly worked very well. I tightened the mirror screws about a quarter turn more to ensure tightness and mounted this mount. It works very well. it doesnt vibrate much and its almost at eye level which is really nice.
Im only posting this in case someone was wondering which mount to purchase. I'm not telling to to buy this mount this is only what ive discovered using this. hopefully this gets archived until someone eles has this question.
I had the same issue and used these to solve it
Bikemaster Universal Ultra Small Mini Stalk Turn Signals - Black/Amber https://www.amazon.com/dp/B000VSCDWO/ref=cm_sw_r_cp_api_yYofzbQF16R6N
I'm not sure if they will still be 9" apart though, NC doesn't have that regulation.
Do you happen to know which terminal/connector are commonly used for batteries? It's not for an SV but for a dirt bike and it's connected to a battery pack
Yup it was really simple to install. I just had to connect the halo light to low beam wire but after that i was just plug and play .
I bought this headlight from amazon and i also needed to buy a rim ring to hold the led light. (i am at work, ebay is blocked. I will post the link later if needed)
Is this the rotella people are using? I ran out of my current oil stock so I'm thinking of swapping to this.
Shell Rotella 550019914-6PK T6 Full Synthetic 5W-40 Motor Oil - 1 Quart (Pack of 6) https://www.amazon.com/dp/B006A49TAM/ref=cm_sw_r_cp_tai_Xjl4yb181BYDE
Nice. That would work with an extension cable. I was thinking more this.
Took me about 5-6 hours, but I purposely went very slowly 'cause I'm still a noob, too. Some of that was just cleaning parts and waiting for the internals to drain. I can do general maintenance stuff like wheel removal, bleeding the brakes, chain n sprocket replacement and the like. I just looked at a lot of forums and Youtube videos before going for it. If you're more confident than me, it's probably more like a 2-3 hour job for a first try. I'd suspect it'd take a pro less than an hour.
There are a couple "specialty" tools that you'll need to buy/make, but they're not anything crazy (see link below). You will need some way to hold the front end of the bike up by something other than the wheel, though. I have this. A vise would be very handy (for other stuff, too), but I made do with a folding table and some clamps. You might need an impact wrench (also handy for other stuff) - the bolts at the end of the forks and the fork caps were kind of a pain to break loose. Just make sure you have the correct sized sockets and adapters. I had to make at least one run to the hardware store that day. =P
Here's a link to a fork oil replacement walkthrough; it helped me fill in the gaps where the emulator kit instructions were lacking (step by step, but no pictures).
Sorry for the rambling... Hope it helps!
You can actually buy battery tender-to-USB connectors.
On Amazon here. I have one and I just run it to the space under the rear seat, where I charge spare phone batteries.
I'm using this battery charger:
https://www.amazon.ca/Yuasa-YUA1200901-Smart-Battery-Charger/dp/B000GZL29M
I'm not installing a new battery at the moment. Just charging it and then will be checking it with the multimeter and doing a load test when it is fully charged.
And turning it in the lock handlebars position will not make the batter run right? But turning it into the "P" position will drain the battery? It's my first bike so I have very limited knowledge.
I bought this. There is a Motion Pro one also that has no grip included. I think they're the same thing. You have to file down part of the cable routing thing I think around 1/8'' to be able to open the throttle 100%. I just matched it up to the old tube I pulled off.
The grip that comes on the one I linked is a piece of shit and made my hand fall asleep in like 10 minutes, even with a fairly light grip.
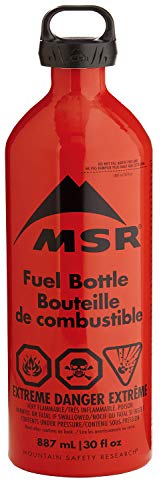
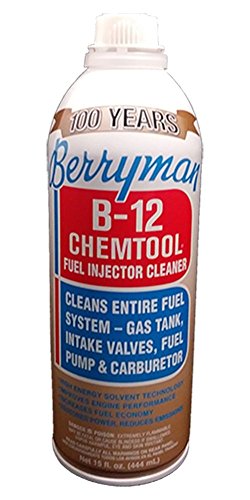
It cleans shit out and burns varnish and all that.
Seafoam these days is more of a fuel stabilizer (slightly) and a valve lube. as well as burns carbon :P
b12 burns crap out of passages.
seafoam es smokeh.
yes you put it in the gas.
I use seafoam when I buy a new vehicle to lube the valves as well as I like smoke :P
be careful how you mix. sometimes they don't play nice with cat converters
I made my own tank grips out of this stuff. one sheet is enough to make 2 pairs and they still look good after 2 seasons and grip very well without ripping up your pants like the ones with the nubs.
it's a bit more involved. nothing complicated, but definitely time consuming. i have front end steering stem stand similar to this one, that makes lifting it a snap, but you could run straps through the triple from a ladder or ceiling joists if you don't have one of those.
I swapped the stock springs for heavier ones rated at .96 and added cartridge emulators and heavier oil. I had to get a big hex bit for the front axle and a big socket for the fork tops. you also need a drill press to drill out the damper rods to incapacitate them since all the damping is now handled by the emulators. I think it was 250 total and maybe 6 hours of work.