
What are
/r/crafts'
favorite Products & Services?
From 3.5 billion Reddit comments
The most popular Products mentioned in /r/crafts:


The most popular Services mentioned in /r/crafts:
Instructables
Etsy
eHow
wikiHow
Payhip
BuzzFeed
Freecycle
Pepakura Designer
Allrecipes.com
Quora
Google Sites
Walmart
CircuitLab
HackADay
The most popular reviews in /r/crafts:
Made with dark blue synthetic felt, 6mm safety eyes, and DMC embroidery floss. Glow thread is DMC 317W-E940, bought it on Amazon.
Keeping a straight line is so hard! I just use a laser level & it’s helped a ton. Here’s the link to the one I use:
Johnson Level and Tool 9250 Laser Line Level (Mouse) https://www.amazon.com/dp/B001C3C0HK/ref=cm_sw_r_cp_api_i_skk1BbKNRZ26D
No, the kits get too expensive to justify doing them. I use things like this to keep costs down. https://www.amazon.com/gp/product/B07CTK81LS/ref=ppx_yo_dt_b_asin_title_o02__o00_s00?ie=UTF8&psc=1
I love this but no way is custom made. I bought one for my husband on Amazon : Licensed Fender Jack Rack- Wall mounting guitar amp key holder, includes 4 guitar plug keychains and 1 wall mounting kit. Quick and easy installation. https://www.amazon.com/dp/B07RMV1J53/ref=cm_sw_r_cp_api_i_BhGGDbBNDSV30
So cute! I recently read a book with my son about getting glasses. I thought it was really sweet.
She kind of just went for it after seeing a picture of one. /u/Pooma__ did link to a wikihow that looks to follow a very similar process.
https://www.wikihow.com/Make-a-Folded-Star-Christmas-Ornament
I love it.
Do you have a small galaxy like piece you could pin to the center of the v?
Like this one perhaps?
2017 Fashion Galaxy Brooch Nebula Art Picture Badge Simple Design Triangle Glass Cabochon Dome Pins Trendy Jewelry https://www.amazon.com/dp/B07RHD6Y7Z/ref=cm_sw_r_cp_api_i_wdI7CbWCV5ZDM
Thank you! The blue base is upholstery suede and the thread is doubled up gold rayon. I recommend using thinner base and thicker thread, tbh. There’s quite a few patterns available online but I find this book to be most valuable because it shows the underlying grid and recommended stitch order. I then fused a thin interfacing onto the back juuuuust in case there’s a thread break so it wouldn’t unravel.
Not OP but I've come across these before, will update with links!
Frame on the left: https://www.amazon.com/Isaac-Jacobs-Octagon-Floating-Sliding/dp/B07D2L1XXX Frame on the right: https://www.amazon.com/NCYP-Certificate-Geometric-Ornament-Specimen/dp/B01N8UC3EP
I believe the frame on the right is a different frame than the one OP has, though (there's a loop on the door latch, though OP's could just be pushed back at an angle we can't see.)
When I search for these I usually use "glass display frame" as my keywords :)
110 lb (199 gsm) cardstock. Similar to this
e: thank you!
I didn't know they came in cool tins like that. I don't want to encourage your snuffing, but the tins are neat.
Anyway, I love Pinterest and here is a link to things you can do with Altoid tins, which might be a little bigger than what you have but it gives ideas at least.
Shop: Land of Misfit Knits
Short Description: I knit a lot. More than I can wear. I just want to give my handknits a good home to someone who will love them.
Types of items I sell: Sweaters, scarves, baby items, and a few other things such as costumes and photos.
Price range: $2-$100, but most things are in the $20 range
Ships from: USA
International shipping?: Generally no, but convo me for details
I believe the flower might have to be dried before you can put it in resin (I could be entirely wrong but I've never seen it done with a fresh flower?) I'd get a silicone mold (usually find these in the baking section or order online) and of course the resin. Your flower sounds pretty big so you might want to trim or take that into consideration when looking for a mold. Maybe something like this would be ideal? https://www.amazon.com/dp/B00IVWEZRS/ref=cm_sw_r_awd_n9PTub1M3H3S0
You pour a little resin in and wait a few hours for it to harden so when you set your piece in it doesn't sink, then set the piece facing down or on its side as the bottom will be the top when you're finished. Pour more resin over it carefully just to cover it. Wait a few more hours for that to dry and pour a final layer.
That's how it go about it. Hopefully that helps or gives you an idea. Just make sure to have (non latex) gloves, well ventilated area and a mask when working with the resin.
I wondered the same, and my google-fu brought up this: Wikihow Folded Star Christmas Ornament Actually looks pretty doable, going to try my hand at it if i can find those foam balls.
I bought it off Amazon. You'll see I took a couple liberties to hide some mistakes lol
CUTEBEE Dollhouse Miniature with Furniture, DIY Wooden Dollhouse Kit Plus Dust Proof and Music Movement, 1:24 Scale Creative Room Idea(Blue time) https://www.amazon.com/dp/B078PGMYZH/ref=cm_sw_r_cp_apa_i_eJXeEbHT5ZTVP
Well, I'd say, the embroidery floss knotted bracelets, aka "Friendship" bracelets might be an option. I've seen them made with names in them, you can put a word or two, I'm sure. I found this simple tutorial that would be a good start.
The other option would be a Kumihimo braided bracelet with a charm. Another pattern page
Hope this helps.
I saw this done before with the Starry Night print. Take your beads and use them to go over a print or a painting.
This is done with quilling http://pinterest.com/pin/44050902575393614/
But you could use your beads.
Sometimes amazon ships using packing paper instead of the air bubble protectors, I save those and use them as wrapping paper.
And here’s a 30” roll on amazon for $20 https://www.amazon.com/Kraft-Paper-Roll-150ft-Brown/dp/B01N6584SD
Thanks! I bought it on Amazon. it’s really overwhelming at first but once you get going it gets easier. The instructions are great, I checked out a video on YouTube of someone assembling it so that helped a lot.
There’s so many other mini houses/rooms as well. Search CuteBee Dollhouse on Amazon and lots will pop up.
Haha! Yes, definitely use your resources 😅👏 I used the pulls that were leftovers from a previous project and I spray painted it Oil rubbed bronze. Here is the Amazon link and it’s a pack of 14 😬
That ring looks a lot like the instructables wire ring that I've been failing at making for years. I'll have to try it and see if this method is more exact.
Everyone is getting home made irish cream. I'm putting them in swivel top beer bottles bought from the local home-brew supply store and adding tags with the recipe.
It is a little jewelry holder (for rings and such) and I got it from Amazon! Here is the link: Creative Co-Op Ceramic Dog Dish, White https://www.amazon.com/dp/B00BWZH6R2/ref=cm_sw_r_awd_aHtrwbH5DA10W
Some context:
Felt letter board from amazon with a seasonal quote.
Beeswax taper candles from Etsy. 1 candle in memory of each loved one who has passed away.
Wooden pumpkins from Homegoods.
I just bought some cheap bulk Rubik's cubes from amazon. I got 36 of them for like 20 bucks. In case you're interested: https://www.amazon.com/gp/product/B0814KFRQS/ref=ppx_yo_dt_b_asin_title_o01_s00?ie=UTF8&psc=1
How are you at sewing? It's pretty much just gathered fabric so it would be easy to make, but it seems like it would also be really quick and easy to up-cycle from an old skirt that has an elastic waist band.
EDIT: Here's a how to with gathers done by hand. The one it explains uses one gathering thread, whereas the picture you posted looks like it gathers from multiple threads. Before you gather the fabric, do the stitch part multiple times (in lines spread out over the area you want to be flat), then pull all the threads together. Hope that makes sense.
Instead of putting tutorials in the photo frame, put pictures of the finished products. Craftgawker and Pinterest have awesome ideas/pictures. Don't forget to have the links ready for her! :)
Some ideas I've searched and found
*Gift Boxes *Flower Arrangements *Wall Collages like this
I would use it to store small candies and such in cupboards. Also small flower pots are a good idea, especially for those with little space outside.
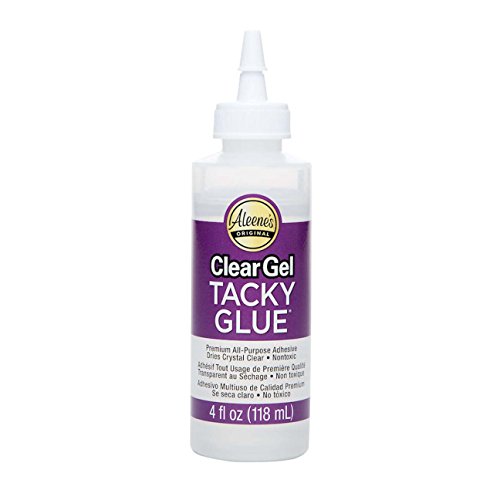
Really good question! There’s a couple of engineering factors involved for me because that was a concern of mine, too. 1)stitch tension from density of stitches and canvas. Lots of stitches in a strong canvas means that the tension between the canvas weave and the stitch density keeps them together surprisingly well (best demoed really in the swallow pillow...SUPER DENSE! It even curled into itself, the stitches are that dense) 2) straight up generosity with high quality fabric glue under the canvas when done stitching. Especially because I wanted longer stitches with the teeth for the lips so I wasn’t getting that sweet tension action. Currently using Aleene’s STOP FRAYING permanent fabric adhesive (https://smile.amazon.com/dp/B00114RDVI/ref=cm_sw_r_cp_api_glt_fabc_HGZJW0XYTHYYZJH40JKC ) Dries clear and flexible without losing grip.
That all be said! I haven’t tested these pillows on a toddler yet and I don’t think I’m brave enough at this time to do so! 😅
Nope lol. Shrinky dinks are basically sheets of heat responsive plastic. Parchment paper is just paper.
If you look at the back of the package on the Amazon listing you will see “5+” on the right towards the bottom. This means Shrinky Dinks are made for children 5 years old or older. Yes for a 5 year old it says to have an adult put them in the oven but that’s it.
There is literally nothing dangerous about Shrinky Dinks other than that you put them in the oven for a few minutes at 325F. They are meant to be a childrens art project (but of course have cool applications anybody can enjoy). We made fun keychains and stuff with them as little kids. Just color what you want, cut it out with normal scissors, and put in the oven. If you have a toaster oven that works too (like the kind with the little door, not the normal toaster with slots for bread). We used to do that part on our own as young as probably 8 and my parents were pretty strict and sheltering but at 8 a kid can safely put a drawing in a toaster oven without supervision.
If you leave them in too long they get a bit brown. That’s it. Not toxic, won’t explode or catch fire, just need to redo them.
Use spray mount to ensure a nice even coat and no weird bubbling. Any shop that carries art supplies will carry it. If you plan on really manhandling the paper after you stick it, I'd suggest this
Unfortunately it’s not available from the seller I got it from on Amazon anymore, but maybe it’ll come back or you can find it elsewhere. Hope this helps!
Wandafull Green Peacock Handmade Ribbon embroidery Kit flowers(No frame) https://www.amazon.com/dp/B011TX0TFM/ref=cm_sw_r_cp_api_F3BIAbRY0VZS5
Okay so the prices of name brand "Shrinky Dink" literally disgusted me (at least on Amazon) so I bought "Dabit Shrinky Art Paper" on Amazon in a 25 pack.
See here: https://www.amazon.com/dp/B072Z7KFB5/ref=cm_sw_r_cp_apa_LBJGBb8WWAXTC
I did enough research to find out that for this brand and other clear shrink films you need to sand them with a high grit sandpaper (I used 600). It doesn't take much. I wanted to use colored pencils so this was the only way you can, otherwise you are limited to markers but unsanded they still are very streaky.
Even after sanding i still have some difficulty with lighter markers being a little streaky so I was looking into trying out a small pack of "Shrinky Dink Frosted Ruff 'n Ready" paper because it is already sanded and from others' pictures looks like it holds color better - and saves you a step.
I'm going to try that next, but this was an inexpensive pack to test with a variety of methods.
I've had good luck with duck brand carpet tape and just the tiny tube of liquid nails. Liquid nails takes about 24 hrs to cure but I use it for interior design presentation boards - it holds up well (definitely test it on scraps, though!) Amazon links below! :)
Carpet Tape: https://www.amazon.com/Duck-392907-Indoor-Outdoor-1-41-Inch/dp/B000BO4QZ0
Liquid Nails: https://www.amazon.com/Liquid-Nails-LN700-Projects-Adhesive/dp/B000BQYHSY/
I got this one on Amazon:
https://smile.amazon.com/gp/product/B076Q4F7Z3/ref=oh_aui_detailpage_o04_s00?ie=UTF8&psc=1
I also don't like the look of partial. Search for full drill to get results that cover the whole canvas. Keep in mind a lot of colors add to the difficulty. The first one I got was only a few colors, but this one's taking a lot of time!
This is the one we used for it - worked incredible, and this is one of the more intricate designs I have done in a long time. The stabilizer made it so much easier. My advice would be to cut away as much as possible before rinsing it off, and then run it under the faucet upside-down to get as much as possible off without it becoming sticky.
I found this on Amazon. I’m considering getting it, myself.
https://www.amazon.com/dp/0804846324/ref=wl_mb_wl_huc_mrai_2_dp
Here’s the kit for the penguin:
Sure! This link should help, just follow the steps. Very simple once you get the hang of the origami, which won't take you long. You'll have it down pat after a couple of tries.
We used 8.5 x 8.5 paper - so essentially we just cut 8.5 x 11 paper down. Your paper size just needs to be square with the same length on either side. That's about it!
Shop Name : Micro Mill Works
Site for selling : https://www.etsy.com/shop/MicroMillWorks
Site for just looking : https://www.tumblr.com/blog/micro-factory
Short Description : I sell awesome stuff. Nautical things mostly. All handmade. Simple to build ship kits (great for kids), Signal flag art. Half hull displays.
Types of Items : Easy to build kits, and one of a kind art works. Oh, and picture frames too.
Price Range : $5 - $50
Ships From : USA
International Shipping : I would need an international buyer first.
Shop Name: Katie Crafts
Site: Katie Crafts on Etsy
Short Description: I blog about stuff I make, then I sell it on Etsy!
Types of items you sell: I sell jewelry, crocheted items, prints (both digital and physical items), destash supplies and more.
Price range: $1-$30
Ships from: USA
International shipping?: Yes (for most items)
Magnetic Silly Putty is pretty awesome. Careful when you order the iron oxide, I guess it's used in explosives. (My husband kinda freaked out when he saw that I'd ordered it.)
Chocolate cake in a mug! Christmas mugs from the dollar store, with the dry ingredients pre-measured from the recipe and a little tag with instructions on the remaining wet ingredients, cook time etc.
P.S. Before you choose a brand or line of polymer clay, check out my answer to this question over at Quora (as Diane Black):
https://www.quora.com/Which-clay-is-better-Sculpey-or-Fimo
Have fun! (and show your results in /r/polymer clay)
The Silhouette Cameo machine comes with software for cutting, and their program will accept SVG file formats (and others).
You can draw and create SVG Files in a free program called Inkscape: https://inkscape.org/en/
A fused glass tutorial about GAP:
No basic glass cuting or fusing knowledge are required. The single tool you need is a kiln and a few materials. In this book I show how to create different pieces and how to create your own design.
In this tutorial you will find 48 pictures regarding 6 projects, 1 Video - how to - firing schedules for System 96, informations how to do your own project. Those who have difficulty understanding the tutorial can send me an e-amil or contact me at the messanger.
Yes, rock hard & it comes in varying open times. I first ran across it when talking to someone doing cosplay. They made their armour with pepakura and hardened it with smooth on. It worked great.
Your stuff's really cute! I do have a couple suggestions, though.
You might want to up the price a little bit. $6.50 for a handmade bracelet seems cheap. As a customer, I get the idea that if you, the seller, don't think it's worth much, it must be cheaply made. But maybe that's just me. Also, what is it about the $22 bracelet that makes it worth so much more than everything else?
Your pictures are good (something beginning Etsy sellers (including me) usually fail at) but could be better. The pictures with the white backgrounds need better lighting. I'd suggest either taking them outside, with natural light, or making a DIY Lightbox. Plus, Etsy seems to have a huge boner for pictures taken out in nature. Note: I haven't tried making a lightbox, so I don't know how well that link works. It's on my to-do list.
And one more thing- Do your items come from a smoke free/allergen free home? If they do, you should say that in your bio or your shop description or something. If not, you should also say that somewhere.
And make yourself a banner. You don't have to get fancy-I used Picnik and it worked perfectly fine.
well, I was trying to just print the images to over lay some card stock or something, to make them look a little nicer. I'd also like to just print a few to be laminated without any extra frills (like the tardis). However I'm really just trying to print and layer stuff. i don't mind cutting everything out but I was afraid to print stuff and waste a of paper or ink if I didn't at least try to resize everything.
I was looking for something like this, https://pixlr.com/ it keeps the general shape unchanged but I can stretch and resize within the frame (if I'm making any sense). I'm not sure of the dimensions but a 1.5/2" by 5" seems decent right?
I will try making a rectangular shape and putting the image inside that, thank you :) Not sure if I understand it though to make it work the way I'm hoping but it's something I haven't tried yet.
On my pinterest page, I've been collecting all kinds of art transfer ideas. You can look through and see if any will work in your application. I see that the shoes you are looking to paint are a lot smaller than all the transfer ideas in my pinterest board, but it might be worth looking through for ideas. Good luck! http://pinterest.com/sewdivineann/transfer-art/
Scrap booking is a lot of fun, you could have them bring over some pictures, maybe even pictures of you guys as a group so it could be a friendship scrapbook of some sort ? :)
Another idea is baking, maybe even a fancy cake with fondant ? Possibly have pre-baked cakes for them.. and just tons of icing (royal icing is best for decorating with) and different colours of fondant and sprinkles and things like that :)
But if those doesn't tickle your fancy, I suggest you check out this website also here's my craft board TONS of crafty ideas on that site :)
Also ! Happy Birthday ! :)
I just bought some of the ones with the adjustable heads for the lights that have a timer and different colours for the light. About $60 CAD. I’m planning on buying a couple more after I move in the Spring.
Have ypu tried using the larger handled crochet needles for arthritis and low dexterity? My MIL has very low dexterity and she is able to use them.
I got this stylus pen ( looked something like that but I didn't buy it on Amazon) but it did not work on my computer so I started playing around with pliers and when I bint it looked like a chips bag so I printed out the label and got some acrylic paint to paint the sealed.
I have the mould and deckle shown here: https://www.amazon.com/dp/B08L3FR7J3/ref=cm_sw_r_cp_apa_glc_fabc_NDRS5MGF80DWVWH9R38D?_encoding=UTF8&psc=1
I press a mesh screen I got from the kit to transfer it from the filter, put it on some felt, and press down with a sponge.
I'll try to make a post later on and tag you if you'd like about how I do it.
Amazon. I have this one in particular. It's ok for my purposes, but it's not great. It takes very little effort to stop it from spinning, less effort the closer to the edge of the wheel. And I managed to jam the bigger wheel on there, so I can't get it off again. And that's fine, really.
>Cottonvil Mallangluna
That took me a lot of searching, so for everyone else, here is the link:
FYI it is quilting cotton
I used only monster clay And some sculpting tools . And then painted it w those 50 cent Apple barrel paints u can get from walmart :)
Thank u! I used my sisters supply of clay but she said it was called monster clay off of Amazon! She also bought this sculpting tools kit sculpting tools
That was just a thought, I was thinking like a rail road spike. https://secure.fltgeosystems.com/wood-stakes-rebar-pipe/accessories/railroad-spikes-100-lb-barrel-fltrr-spike-100/
Or a stake, basically remove as much material and tap in the spike/stake to form a square through slight compression of wood rather then fully removing it. You may have to tap it in, drill out material and repeat from both sides to avoid cracking.
I guess they were slightly ahead of me on this concept.
I wonder if something like a Silpat would help with the sticking/dragging issue.
~~Will find a link to explain the item better for those that may not know what a Silpat is.~~
[https://www.amazon.com/dp/B00008T960/ref=cm_sw_r_awd_H6fOvb8G8WD8X]( Amazon Link - Silpat AE420295-07 Premium Non-Stick Silicone Baking Mat, Half Sheet Size, 11-5/8-Inch x 16-1/2-Inch)
Do you mean needle felting? If so, yes! It's super simple. In the past few weeks I've taught a few tween and teen girls how to needle felt, and they've gone on to make very cute, very creative things. It's more like sculpture than anything else, and it's a strangely therapeutic craft.
To start needle felting from scratch, I recommend buying a simple kit that includes a needle, a foam mat, a pattern, and the felt for that project. I started with this one for less than $10. After that, you can look for project tutorials on youtube or pinterest. You'll just need to buy the felt, which you can do on Amazon or Etsy, and you can reuse the needle and foam mat from your original set.
It's lots of fun. I hope you like it!
There are special packs of filling you can buy for weighted blankets (such as link). A bit expensive on amazon, but if you look in local craft stores you might be able to find a deal.
How about using burlap ribbon and gluing it down with hot glue as you wrap it around the container? You could also get a similar look with rope glued down the same way.
For a pre-made option, you can get these burlap bags off Amazon, cut the length down to fit your planters, then restring and tie off:
https://www.amazon.com/dp/B00JAVJUGA/ref=cm_sw_r_cp_api_VlirzbTH8Z2W4
You could try polymer clay or a product called Apoxy Sculpt that I found on amazon. I've used this with great success. Apoxy Sculpt
Thanks! I am eventually going to remake him but for now I like him well enough. And my son likes it so that's the important part. Haha. As for the eyes. They are called safety eyes. I used to buy them at hobby lobby in the doll parts section but now I buy from amazon https://www.amazon.com/dp/B01KKG0XJQ/ref=cm_sw_r_cp_apa_kYEKzb690WNRS
I bought this Stardust Mica pigment pack on Amazon. While I did use the red in this, I actually combined it with Nuture Soap's Raspberry Red Mica because I'd already had one bad experience with the Stardust Mica red not staying true. I've heard WONDERFUL things about Nurture Soap's Really Red mica if you're looking for a true red. It's on my list to try out. :)
You can buy thin sheets of magnet and cut it to whatever size or shape you want. Now as far as affixing the photos I would try a few things and see what works best.
Edit: found an Amazon link if you like that sort of thing. I get bored at work some one should benefit.
https://www.amazon.com/dp/B071L97W57/ref=cm_sw_r_cp_apa_i_RJ26Ab031R35N
Thanks for looking at my instructable!
My best advice is to take a class somewhere first. This way you know if you like it before you go out and spend money on tools and glass. I know in my area (Kansas City) there are several stained glass specialty shops that sell tools, glass, classes. Also ask your local Hobby Lobby as they have classes occasionally.
After you take a class and determine if you like it or not then I’d look into tools. Again those specialty shops and hobby lobby are good place to look for tools. Another option is to look up reviews on products online and purchase that way.
Also I know most people who run the specialty shops are super nice and more than willing to point a novice in the right direction. And even cut out a difficult piece on a project if you get stuck (I’m speaking from personal experience there).
If taking a class isn’t an option I know there are some stained glass kits. Some even coming with the basic tools you need. Then you can watch YouTube videos and use other resources like instructables to help you out from there.
Here’s a couple kits. I’ve not bought either tho
TL:DR Take a class, and maybe look into buying a kit.
Hope this helps!!
I found white and black on Amazon.
Brother Sewing Machine, XM2701
Great starter machine. Only posted link from Amazon because that was the easiest way to find the different sewing machines in one place. Once you’re solid in sewing and if you have a separate sewing room because you’ll be sewing/designing a lot - you can upgrade. I like this model because it’s lightweight and easily portable - good for those with no set area for sewing and/or good for those whose sewing room doubles as an office or guest bedroom.
Enjoy your journey!
Look up "(type of desired metal) flat stock" on Amazon you'll be amazed!
Maybe this is a good start for you
1095 Steel barstock for Forging and Knife Making 1/8" x 1-1/2" x 12" Knife Blade Steel USA Made https://www.amazon.com/dp/B075J4WZHN/ref=cm_sw_r_cp_apa_i_S4whDbGFS7K0G
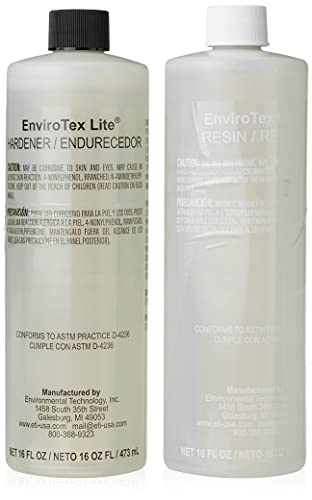
Hey there, basically you are going to need a clear epoxy resin- it comes in two parts and you mix only what you need right then. Lots of tutorials on the web for that. Here's a link to a popular one on Amazon. https://www.amazon.com/dp/B07BM9LHRB/ref=cm_sw_r_cp_apa_i_fnomDb01166D6
I’d say make a round fabric form and stuff it with whatever you’re comfortable with or you could use kids’ hula hoops as forms. For the square one, find a suitable sized box, cut your head and arm holes, then cut the box vertically on one corner, cover with quilt batting, put Velcro on the corner for an easy in and out, and then add fabric. I’d leave the bottom open on both, but definitely the round form for easy access.
Edit to add: This costume is so inexpensive, you could cover it in a yellow fabric.
https://www.amazon.com/dp/B074SKY8J4/ref=cm_sw_r_sms_tai_ZjRzFbBZAMCTT
Not sure from you’re description what you’re looking for, but maybe Velcro strips like this might be what you’re looking for?
Here is the link to the colorant set I use - dye - they are easy to work with and actually really easy to achieve the color you are wanting based on how many drops you use, it actually has an example on each bottle of what the shade should be like whether you use 1,2, or 3 drops! I hope this helps :)
I would skip the drill and just buy a glass cutter like this one
It scores the glass and glass being crystalline want to break straight. Then just sand the sharp edges.
i would suggest using red tape instead. scrapbookers use this a lot and it’s very strong. there are different brands of course and can be easily found on amazon. Double Sided Tape Heavy Duty-1/2"10' Acrylic Strong Adhesive Removable Double Sided Mounting Tape Clear for Carpet Fix/Home Office Wall/DIY Crafts/Poster/LED Lights/Car Glass Decor https://smile.amazon.com/dp/B07Z1WPB77/ref=cm_sw_r_cp_api_i_b4EFFbW9SS17S
Sure, I bought it on Amazon: CUTEBEE Dollhouse Miniature with Furniture, DIY Wooden Dollhouse Kit Plus Dust Proof and Music Movement, 1:24 Scale Creative Room Idea(Blue time) https://www.amazon.com/dp/B078PGMYZH/ref=cm_sw_r_cp_apa_i_eJXeEbHT5ZTVP
Thank you!! I bought it on Amazon: CUTEBEE Dollhouse Miniature with Furniture, DIY Wooden Dollhouse Kit Plus Dust Proof and Music Movement, 1:24 Scale Creative Room Idea(Blue time) https://www.amazon.com/dp/B078PGMYZH/ref=cm_sw_r_cp_apa_i_eJXeEbHT5ZTVP
I think I know what you mean. Maybe try a cartoon picture converter like this one - ( https://play.google.com/store/apps/details?id=com.gamebrain.cartoon ) - then I would print the picture at the size that you want to make it. If you have to print it on a few different pages it really won't matter. Once it's all printed, I would tape it together, trace out the sections that are different shades and colours. Cut them out. Then you can trace and draw on extra room on the pieces where you might want to lay a piece on top, like making the head a whole piece and adding the features on top.. You can print multiple copies and use another picture to trace the full section you want. (Hope this makes sense lol) Then once you have all your individual pieces laid out into the shape you want it, trace it all on the wood, cut the pieces, paint them and glue them all together.
Cutting it cleanly is not easy!
I used this bottle cutter that scours the glass and then I dip it in boiling water and ice water to get it to break apart. Every cut is different, but having really cold water and really hot water helps. Then sand the edges down to make them a little bit smoother.
If it's not resin, I'm guessing it could be TLS or some sort of liquid polymer clay for the water, such as http://www.amazon.com/Fimo-Liquid-Decorating-Gel-1-69/dp/B002PNNJ9Y. There's a couple kinds out there. You can mix it with clay for a different consistency or mix it with paint to color it. It's very addicting when you get your first bottle.
Edit: a few words
Made using this kit, though I made some adjustments to the design. Enjoy the pictures of my cat Boombox abusing the poor thing once it was finished.
You may just need to make it thicker. I once made a box with paper mache so strong you could stand on it. The sides were over a quarter of an inch thick.
Maybe you could try a layer of plaster on top? http://www.amazon.com/Rolls-Plaster-Cloth-Bandages-Scenery/dp/B00MZHI5T4
I would probably mount it securely on a base and put a fishbowl type snow globe over it. That should keep it dust free and somewhat secure while looking good with a goldfish!
You could also construct some detailed ornamentation to suit such a beautiful fish, and if you mounted it slightly off center it would look like it’s swimming laps.
Amazon has some bases for cheap because of course they do.
If the ballerina style rotation better suits your actual needs for the little guy, you can find those in a huge array of prices with and without the box. If you just want the mechanical bits, look for a “movement “
See if you can find a larger version of this: https://www.amazon.com/Balloon-72inch-Birthday-Inflatable-Decoration/dp/B0919G4HXQ
Inflate, coat with an epoxy type resin, or something to give you the shell, and go from there.
25 Open Circle Hematite Beads 8mm x 3mm - Assorted Frosted Colors - BD1377 https://www.amazon.com/Open-Circle-Hematite-Beads-8mm/dp/B08BVXYFBD These look like what you have in the first picture. If you want more sizes, more choices, or something different, having the name of the type of bead will help you google them.
We have similar taste, I have read several of those!
Have you read Something Fabulous yet? It’s hilarious?
Hmm, the back surface looks pretty smooth so I think this would work. I’m still thinking the vinyl route since it tends to be pretty water resistant. They have double sided vinyl tape that you could try? Could stick the patches on the tape and use like an exacto knife to make clean cuts around the patch.
Here’s a link to one that I think might work out:
there are silicone mold making kits you can find, it’s basically just mixing equal parts of two liquids that will solidify into silicone. if you have a mold for the gaskets you want, you can just pour it into the mold and it’ll solidify to the desired shape. something like this
Just a tip: a tiny drop of oil at the rivet and a cheap ceramic scissors sharpener can help with her current pair. But "arthritis" scissors (suggested by others) are a good bet.
https://www.amazon.com/Fiskars-SewSharp-Scissors-Sharpener-98547097/dp/B0002JT0PK
Another option is mica powder mixed with clear Mod Podge over your acrylic layer: https://www.amazon.com/Eye-Candy-Pigment-Multipurpose-Additive/dp/B085WTLJ3R. Natural mica (I doubt the product in my link is natural) is basically mineral dust and is really good at giving off that metallic sheen that you’re looking for once you apply it.
I like synthetic sponges that let me dab it. Usually I’ll squirt a little paint on a paper plate, dip the sponge in and then press the sponge against some paper or the other side of the plate to get some of it off/get an even coat. I’ll also cut the sponges sometimes to be shaped in a more useful way, but I try to leave the premade side the one going into the paint. I don’t like the rollers because I think it’s too hard to get it properly wet and applied thin enough.
These have been working pretty well for me.
Sweet. I've had my eye on a very similar Amazon listing for about a year but never committed because I could "make it myself" if I really wanted... Yours are cuter.
Are you looking for a box like this?
You need the Mona Lisa Gold Leaf kit
You'll also need the gilding brush ( the gilding brush is essential) and two small paint brushes, one for the sizing and one for the sealant.
The kit comes with an instruction manual but it's pretty easy. As long as you give the sizing enough time to dry before you put the gold leafing on there should be no problems