
What are
/r/papercraft's
favorite Products & Services?
From 3.5 billion Reddit comments
The most popular Products mentioned in /r/papercraft:


The most popular Services mentioned in /r/papercraft:
Pepakura Designer
4Shared
Blender
Instructables
TinyURL
MEGA
Discogs
BitChute
GIMP
DeviantArt
MediaGoblin
ScummVM
Blender Game Engine
Rasterbator
BugMeNot
The most popular Android Apps mentioned in /r/papercraft:

The most popular reviews in /r/papercraft:
That is totally awesome! I used to do that as a kid too. His creativity is off the charts. I found this when I was older but it would have rocked to have it at that age. Just thought I'd share in case his birthday is close (or not 👍)! The link is to Amazon but you can find them at most hobby stores.
Any printer will do, I got mine at Walmart for $30. As for paper, it really depends on your experience and the model. For small parts, I find it a lot easier to use regular printing paper, as it is easier to fold small flaps without risk of tearing. If you are making a medium or large model, card stock is great! I use 110 lb. paper, but it is a little tough to work with. Most people will suggest around 80 lb. so it might be a good idea to start there.
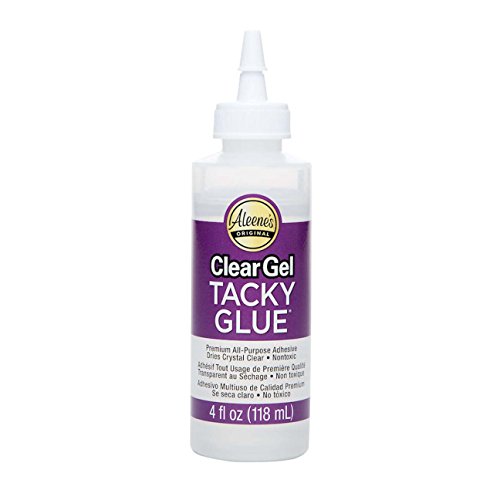
I use plain Elmer's white glue from a bottle. I squeeze out a little at a time onto some scrap paper and use a toothpick to spread glue onto the tabs. with liquid glue, you need to hold the pieces together for a few seconds for the glue to start drying, and if it is taking too long, try using less glue. Another method of gluing is with gluesticks. It does dry a little faster than liquid glue, but I like having the precision of liquid glue better. Again, that is just what I am accustom to.
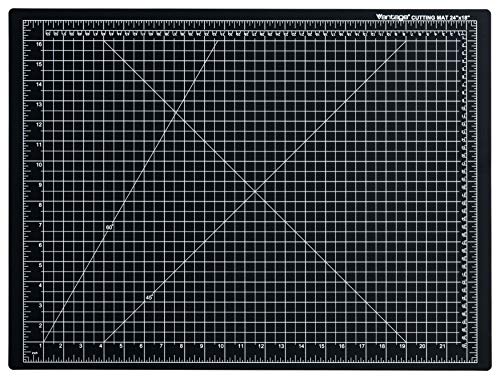
To cut out the pieces, I use a good pair of scissors. Many people prefer x-acto knifes, but all of the times I have used them, I never can get a clean edge. I feel a lot more comfortable with scissors, as long as they are tight and straight. If you do decide to try x-acto knifes, you will also need a self healing cutting mat.
Definitely get PePaKuRa. There is a free viewer in the downloads section. This program will take .pdo files and show the 3D model and the 2D pieces side by side. It is not too hard to learn how to use it, and there are plenty of files out there on the internet. I suggest looking at Nintendo Papercraft. There are tons of .pdo files from a lot of Nintendo games. You can ever sort by game genre on the right.
Start of easy, but always try to push your skills. The only way to learn is to try, and the only way to get better it to never give up.
Good luck, and happy crafting!
You could try this?
http://www.instructables.com/id/How-to-make-a-TARDIS-model/
it's not exactly a papercraft print-and-assemble model but it seems much more detailed
I made it: https://drive.google.com/open?id=0B6Z4XWeI8ozwVnBEUnYwRFpsUTQ
(There are no instructions, though, so you should study the pictures to understand how it comes together. Here's another one, of an earlier build: https://www.deviantart.com/art/Panzerhund-Final-Build-451922728)
It's about 40cm long. Here's the link to the files.
The internal bits are kind of tough but after that the build is pretty straight forward.
Sorry for the delay because I thought that I didn't have it, but it turns out that I do have it backed up from 2011 so enjoy.
This is a little heavier than what you're looking for but I get Recollections brand card stock at Michael's that's 65lbs and 8.5 X 11. I mainly buy their $2 50 sheet packs of 4 colors (comes in a bunch of color combos) and they have some smaller/larger packs that may be be a little less/more price efficient.
A little lighter than what you're looking for, but this was on Amazon.
Thanks!
Here's the scheme: https://drive.google.com/file/d/0B6Z4XWeI8ozwVnBEUnYwRFpsUTQ/edit?usp=sharing
(Sadly, not very well documented, so you'll have to just study the photos or ask me when in trouble.)
In 3d modeling terms, this is an extruded face. To go about making such a thing, you could use 3d software (such as Blender) to make a face of whatever design you want, then simply extrude it. Next, pull it into Pepakura Designer to unfold it.
If you prefer to do it manually, draw a design, stack 2 papers, then cut them out together. Next, you will cut out a rectangular strip of paper for the sides. The long edge of the strip should be equal to the peremeter of the shape you cut out. The short edge of the strip will equal the height of the shape, a wider strip making the shape taller. Next, you will need to attach them with some sort of tabs. The simplest method is to just glue a bunch of small bits of paper to the edges of the design. Glue it all together, and you're done.
Ok, I have a few answers here, I suggest trying it out for yourself to see if you like the flow.
You have a few pointers on the site that explain the basics.
You need a 3D design software. They suggest Metasequoia which has a help file that could prove very useful. It can save in the formats that Pepakura Viewer/Designer can work with.
Unfold and position all pieces and finally
Print and build. I'm going to be working with it for the next few days and see how I like it myself. If it works, I'll post caps of my progress along the way. Going to have to start it Tuesday though. Long and early day tomorrow. Let me know if it works. Happy Pepping
For those interested, do consider downloading the test fit pdo file to build a test helmet before building the actual helmet :)
There are a few options - double up the cut layers = more work, cut up some cardboard to make spacers - but then you have to glue them in.
I've used foam squares similar to https://www.amazon.com/Adhesive-Foam-Square-Mount-Dual-Adhesive/dp/B07GZJ8TVN and just cut them if I needed them smaller (I was working on a xmas ornament)
Excel Blades #6 Stencil Edge Scoring Blade https://www.amazon.com/dp/B0006O5JQA/ref=cm_sw_r_cp_apa_tUyOBbM89NWD9
Excel Blades #16 Stencil Edge Scoring Blade https://www.amazon.com/dp/B0006O5JS8/ref=cm_sw_r_cp_apa_-VyOBbX85BXYJ
There are a few. Not the exact same blades but close.
Click on the image for the full imgur gallery and details. I printed through KDP and kept the price as low as possible at $9.99 which covers the listing, printing, and shipping. I only make $0.38 per sale so it was more about the fun of making a book than selling something. But if you're interested in making some paper crows, it's listed on Amazon. If you like it please leave a review!
Link to purchase here
https://www.amazon.co.uk/dp/B081BJG3PX/ref=cm_sw_r_apan_i_SWNJ4QG0YC222BK8J420
Same as you can't find the correct tool that I have bought for my office, it was similar to the olfa/silver line rotary cutters but came with a creasing blade too, it's a rounded off non-edged rather than a cutter.
Apply the crease the opposite side to the fold the creasing will create a ridge that will extend into the V of the fold, although, you can get different effects on your final.piece depending on which side you apply the crease to and to what depth/pressure.
I'm not a Photoshop user but it seems you can import pdf files as images. If not, you can download the free software GIMP. I've used that to import pdf files into images that you can then edit.
You can get it REALLY cheap at cheap shops a. You could get primary colours, black and white and some paint brushes easily at cheap shops or online
If it's anything like this back to front printer that I found on amazon UK, then it's fine.
I know that I mention back to front printers being better than front to front printers (to avoid warping), but the canon that I'm currently using has not shown any warping on my 65LB/175GM Letter paper.
okay first off you need "pepakura Viewer" in order to print the parts out...its a free program :D how ever if you want to change the scale of a project or even change the parts layout, flap types etc. you will need the "pepakura Designer" which is like 30$ or so... http://www.tamasoft.co.jp/pepakura-en/download/viewer/ when putting them together i use 110 lb card stock paper and glue (i use superglue but most only use white glue sticks)...if you need anything else, like hardening, painting, sealing ect.. feel free to ask :D
To elaborate, pepakura is a program for Windows that allows you to make 3D models and alter ones already made. With pepakura you can also scale your creations (or others creations) to any size you want. There are two versions of pepakura, viewer and designer, viewer is for viewing others creations and designer is for designing and altering.
Here is a link to pepakura's website: http://www.tamasoft.co.jp/pepakura-en/
The model for R2 was updated and tweaked as I made Darth D2 so the photos of Darth D2 are more representative. He is also printed on better stock than the original.
Models created on pen and paper, scanned, outlined and decorated in illustrator.
I have since discovered the joy that is Pepakura designer.
Both were made as part of my one fictional character a day for a year project that finished in June last year.
I had hoped to get some more papercraft pieces done as part of the project but I have not yet completed the few I started.
Crits are welcome, but please keep in mind that these were my first ever complete papercraft designs and each was done to a daily deadline.
Enjoy
Maybe could MediaGoblin be the solution to what you are looking for: http://mediagoblin.org/
However, someone should ask the developers for enabling PDO file upload. However, uploading files on any website that we don't own is unsafe from deletions and DMCA reports.
in it are Iron Man Mark 4 parts, Mark 6 parts, and Ultimate Iron Man parts. I should have the War Machine pep files and a few others....
I havent fully edited and organized everything.
EDIT: NOPE! Ultimate Iron man parts are not in this file, I apologize. they were somewhere else entirely.
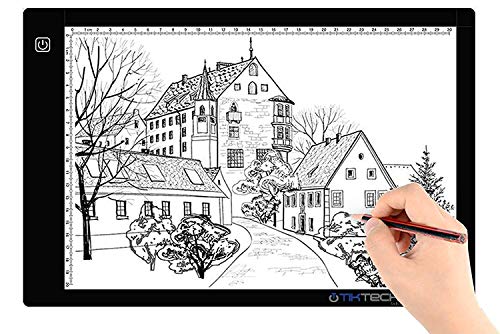
Thank you! It’s just sitting on my light table, something like tiktecklab A4 Size Ultra-Thin Portable Tracer White LED Artcraft Tracing Pad Light Box w dimmable Brightness for 5D DIY Diamond Painting Artists Drawing Sketching Animation, Black https://www.amazon.com/dp/B01M26S3VY/ref=cm_sw_r_cp_api_glt_fabc_CGRHSX0X36M6M2RZAVN6 It’s thin enough to frame, but I’m sure there are cheaper options.
300 LSE tape. They use it in cell phones. it is SUPER sticky and comes as thin as 1 mm. and as wide as 1.9 cm or you can even find it by the sheet here is a link: https://www.amazon.com/3M-Transparent-Adhesive-Attaching-Digitizers/dp/B01A7SG88W
https://play.google.com/store/apps/details?id=com.TheArmoredGarage.ArmorsmithViewer
So this is an android app that can open .pdo files. It lets you highlight the part either on the model or the parts sheet so you can see which pages to color.
Give it a try but i can still get you the page numbers tonight if you need them.
Use cardstock! Regular printer paper is generally 20lb bond stock or 75 gsm. I would recommend looking for this rating as the pound rating can be confusing since there are several different scales that use pounds (i.e., 65 pound cover stock is heavier/thicker than 90 pound index stock). The weight of the paper for a project is selected based on the requirements of the build. Lighter paper can be easier to fold when making small components but, as you said, can be quite flimsy when building larger things. The opposite is true for heavier paper. I think around 150 to 160 gsm might be a good “mid-weight” paper that isn’t to heavy but is still plenty rigid.
For other tools, I would suggest using a hobby knife with a #11 blade. Also, don’t forget to use a self-healing mat like this one.
Another thing that really comes in handy is a pair of tweezers. I bought a small set that has different pairs in different sizes/shapes but that’s not really necessary.
This was a pre-cut papercraft project I bought off Amazon, pretty good quality overall. Easy to punch out the parts from the pre-cut cardstock. Scored and then taped and assembled. Bit pricey but I had to buy it to check it out. Would recommend if you don't like the cutting phase.
TOOLS USED: Scor-Pal Eighths, 1/8" Scor-Tape
SOME HANDY TIPS: https://scor-pal.com/store/3d-papercraft-tips-ezp-23.html
WHERE I BOUGHT THE TEMPLATE: https://www.amazon.ca/Paperraz-Dinosaur-Trophy-Complete-Building/dp/B07JB1755L?th=1
I own a copy of Pop-up Design and Paper Mechanics by Duncan Birmingham which seems quite comprehensive. He also has a Youtube channel with tutorials that cover all the basics.
You might look into dry transfer letters. you can usually get them at craft places. Its a bit of a hassle since you have to do each letter individually but at least your font will be consistent. https://www.amazon.com/Lettering-Transfer-Decals-Woodland-Scenics/dp/B000BRFD6I
You might already have these things, all basic stuff and it's just gonna be a rehash of what I previously mentioned :
Get an xacto knife, basic and you should be able to get it at the local hobby shop or at amazon, very straight forward.
You might need craft tweezers. I have this kit but haven't started on it, but the tweezers can be really help for in tight spots. I have a needle nose kind (not sure that's what you call them) and the curved kind.
Glue, any one glue (like elmers or scotch) will work. There are craft glues you can buy but it's not really necessary
Painting Kiki, brush pens should achieve what you see in the picture. I haven't gotten a set yet so I can't exactly give recs. I have just been utilizing my fine point sharpies and the Sakura brand micro pens
Don't know if it's too late but this book pretty much covers the techniques you need to know to make things your linked images.
They sell the kits on Amazon as well. I am working up the courage to start this one haha. http://www.amazon.com/Fascinations-Metal-Earth-Laser-Model/dp/B00JMQPIA0/ref=pd_sim_21_2?ie=UTF8&refRID=0JFP9XNAJZHM4072YVAD&dpSrc=sims&dpST=_AC_UL160_SR160%2C160_
I am most likely going to use this
The visor I bought for my first helmet (back in 2013), they no longer sell.. and it was a STEAL at $8...
i wonder if you could magnetize the pliers to aid in holding pieces in place!
i bought this magnetizer/demagnetizer recently for magnetizing screwdrivers to pick up or hold screws. and it totally works.
Many people have been happy with the Silhouette Cameo (Amazon best seller). It's a good machine.
The Cameo does allow you to make your own designs. The machine comes with the basic version of Silhouette Studio Designer. You can upgrade to the designer addition for $50. The designer edition basically lets you import designs in other file formats. You don't need it though to design your own. If you don't want to design your own, you can buy designs for 99 cents, which is pretty reasonable.
What's neat about the Cameo is that is comes with Pix Scan technology. You can actually take a picture of a design, upload it, and make cut lines. The Cameo is cartridge free. But, if you want more portability, you can always upload saved files from a USB drive.
There are other brands out there. Here's a site with a lots of other electronic die cutting machines you might be interested in http://personaldiecutting.com/guides/digital-die-cutting-machines/