
What are
/r/resinprinting's
favorite Products & Services?
From 3.5 billion Reddit comments
The most popular Products mentioned in /r/resinprinting:


The most popular Services mentioned in /r/resinprinting:
Cults.
Youmagine
Autodesk Tinkercad
MagicaVoxel
Temp Mail by Privatix
PrusaSlicer
MoI - Moment of Inspiration
Hackster
The most popular Android Apps mentioned in /r/resinprinting:

The most popular reviews in /r/resinprinting:
No... just use any small craft or electronics cutter. I got these - https://www.amazon.com/gp/product/B087RHJ6D7 - which are a knock off of the popular Plano brand, but their great. Anything similar will be fine.
it cured, you must have left it exposed to the sun or a UV for long enough for it to harden. use a razor or whatever has a sharp enough blade to just peel it off. personally I find a razor paint scrapers work best. https://www.amazon.co.uk/Stanley-593Oc-Window-Scraper-590/dp/B0001IWDBK/ref=sr_1_6?dchild=1&keywords=paint+scraper&qid=1601591357&sr=8-6
I had this problem as well with normal nitrile gloves and cured print handling, especially when it came to stinky resin brands, my hands would just smell for hours no matter how much cleaned them. Swap to nitrile gauntlets. You can reuse them for quite some time before they wear out and can be slipped out of easily, not like the normal gloves which roll up. I run a small print shop so I am putting these gloves on atleast 20-30 times a day, if not more. Personally I like to keep a pair for my cleaning station and another pair for general print handling, set up and other bits that are not as messy. Basically you should have your gloves in for every stage until you soap washed you cured prints.
https://www.amazon.co.uk/dp/B000LFVQYS/ref=cm_sw_r_cp_apa_glt_fabc_DR28Y1NFEQN69NV7Y3SN
not OP, but I use a multi tool paint scraper, the metal one is really good for getting under the print and between the bed. Since getting this tool my support layer is literally paper thin.
Also, the plastic one doubles as nice way to not damage plastic LCD screens when scraping cured resin off of them.
12 pack not 16 sorry https://www.amazon.com/gp/product/B089JBJVQR/ref=ppx_yo_dt_b_asin_title_o05_s00?ie=UTF8&psc=1 I just slide this really fast along the plate and slam it under my print until it lifts.
If the model is directly on the plate and adhered strong. The spatula will take a beating, but hey you got 11 more when it gets bad enough.
Make sure to follow the directions on the can. Spray cans are very susceptible to temperature and humidity. I'd also suggest practicing on a few test models before going at a project you care about.
Might want to look into one of these handles also,
https://www.amazon.com/Rust-Oleum-241526-Comfort-Grip/dp/B0015RJ41I
I have one that I bought 5 or 6 years ago that's still in service and makes spraying with spray cans go much smoother. All of what I suggested should be available at Lowe's or Home Depot.
​
Thanks for the stl. Need to look into some of that clear resin since they look really good.
My print tent has a 24x36" silicone baking mat on the table. Its big enough for the printer, the cleaning station, and work space around them.
https://www.amazon.com/gp/product/B08DJ563FR/
That one. I just hit the area with a UV light to clean up, and the cured resin flakes off easily.
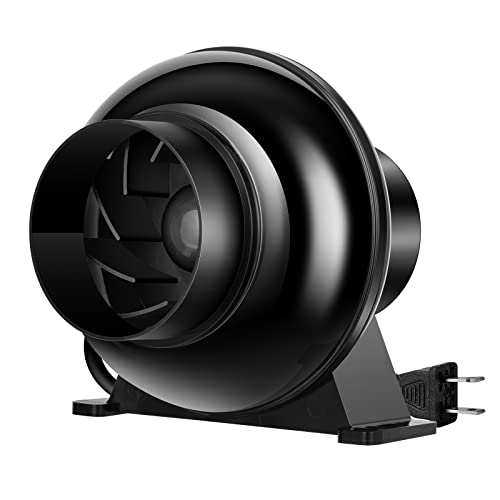
My partner and I are both sensitive to the fumes both from resin (printing & curing), as well as the smell of the IPA I use for washing. Besides wearing a mask, I ventilate my station with a fan that exhausts the air outside.
I have a 4" inline duct exhaust fan set into my apartment office window. I made my own window insert in tinkercad and it's designed so I can vent my printer's enclosure, or I can take the tube off and ventilate the whole office. It helps a TON.
The support chamfer under the mounting arms interfered with the fit. This chamfer has been removed from the model. The interference resulted in a ~1mm gap between the FEP and the LCD protective glass. The marks of the FEP are from the build platform corners, as they over-tensioned the film to reach Z0.0 Despite that, the print was successful (old file from USB stick).
https://www.prusaprinters.org/prints/66499-voxelab-proxima-resin-vat-body
The strongest bond you will ever get is from a flexible superglue or flexible epoxy, this is what I use. Also, I use this superglue activator to speed up the bonding process.
Normal superglue is alright too but understand that anything less flexible then your original resin is not going to be as strong and cause weak points along the connections.
If you do go with using the original resin + UV torch then also be aware that you will only be able to cure the surface of the joint, anything bellow the surface will still be uncured as UV will not be able to reach it.
I dont have a tape measure on hand, but if a grow tent fails to be found, Ikea kitchen cabinets can be modified to become enclosures. With a router you can make the fan holes to run flex tubing. And seal off the gap between the swinging door and cabinet with rubber. I have a mars 3 coming and a phrozen 8k which needs a new enclosure. But I have used cabinets for my cure chambers and arriving soon mars 3 and it was very cheap.
Edit: https://www.amazon.com/dp/B07JNK6NRH/ref=cm_sw_r_cp_awdb_imm_Y4EA09PY59K77A67P77Q
Grow tents on amazon, but I do not know how they would accommodate printers. Feels very flimsy to look at.
I have a Voxelab Proxima which uses the same screen as your MP2 and I got these:
https://www.amazon.com/gp/product/B08Q1TNV6J/ref=ppx_yo_dt_b_asin_title_o02_s00?ie=UTF8&psc=1
but haven't installed yet so cannot speak to their efficacy.
https://www.amazon.com/dp/B07X5VT56K/ref=cm_sw_r_cp_apa_glt_fabc_F455B7X4ZKDXXJZNGDTW
This is the light I use and it depends on the print, if there is a big area that makes sense to hollow then I do but the prints I just finished are solid bc they're smaller.
Get a hand pump siphon. They are really fast once you get them going. https://www.amazon.com/TRDP14-Siphon-Manual-Liquid-Transfer/dp/B00APU2YLI
Best bang for buck printer at the moment is Voxelab Proxima 6.0, matches Photon Mono and Mars 2 performance wise.
> The black box goes on top of the printer during the print, and on second photo, the exhaust is attached to the black box that sucks up the air from the box.
That was clear, but when you lift the box off it’s no longer drawing air from around the printer so when you open the lid all that stink drifts out into the room. The air filter is actually causing the air to move more and spreads it out. If you have a cabinet then you can open the door with the fan still running and so it will continue to pull the air out around the printer even when you open it’s lid.
Here’s an example of a centrifugal fan. The blades are parallel to the side of the fan and scoop the air in such a way that they overcome pressure better than a standard fan. They’re sometimes called Squireel Cage fans because the blade mechanism looks like the exercise wheel you get for a pet rodent.
The Anycubic!
ANYCUBIC Wash and Cure Plus, Largest 2 in 1 Wash Cure Machine for Mono X Large LCD SLA 3D Printer Models with L-Shaped Strip Curing Light & Rotary Curing Platform and Washing Size 192mmx 120mmx 290mm https://www.amazon.com/dp/B08YVV7V7G/ref=cm_sw_r_cp_api_glt_fabc_RWM4TBR1KCBXEAJRVDS5
Also, just to add to my previous post, the reason I went for a plastic shed instead of metal or wood was because of the rainy/cold seasons in the UK. Metal sheds just get really cold and in general rust within a couple of years. Wooden sheds quickly get effected by rot from the ground/rainfall or even bugs/wildlife which can be a massive pain in the ass to maintain. Plastic may sound flimsy but once setup it's a tank. 2 of my neighbours metal sheds flew away last winter and my one took it like a champ.
https://www.amazon.co.uk/dp/B00AFSTZSU?ref=ppx_pop_mob_ap_share
Remember what Norm always said... https://www.youtube.com/watch?v=uDV981jB5J8
I'm using these when doing anything with a splatter hazard, including soldering after having a freak flux pop sending molten solder several feet directly in to my eye lid.
Cheapest I've seen the Voxelab Proxima on Amazon. About $160. Leaves plenty in the budget for resin and PPE. Solid no frills machine.
https://www.amazon.com/Voxelab-Photocuring-Monochrome-Off-Line-Printing/dp/B08T1XV819
I really like this container for washing lol 😅 and my dremel is great for sanding or cutting off small pieces
I mean, besides the fact I bought priter resin rather than printer resin? :) Is this a knockoff bottle or what? I bought it from Amazon.
EDIT: I see the priter typo in the description pics. I guess I'll find out if it really needs an alcohol wash or not tomorrow, lol.
I got this DZS Elec DC-DC Step-down Constant Current Regulator Module 4-38v Input to 1.25-36v Output Adjustable Large Power 5A 75W Converter for Charging or LED Driver Module https://www.amazon.com/dp/B06XT6KMPX/ref=cm_sw_r_cp_api_glt_fabc_VAGPH37HFS18JTSNNB7Q?_encoding=UTF8&psc=1
If you are referring to the tape, I got it through Amazon:
https://www.amazon.com/gp/product/B01LZRMJVR/ref=ox_sc_act_title_1?smid=A1RYF7WY9L3HL5&psc=1
If you mean the LCD screen, I contacted Creality support and after some back and forth they agreed to send me a new one.
Awesome, thanks much for the detailed read!
Question, are you keeping your resin warmed in the bottle by placing it within the hood, just keeping the vat filled, or keeping it warm elsewhere? Using these on the resin bottles has worked well for me in a similar kind of setup.
Everyone should get these. They fantastic and won’t scratch if you’re not aggressive.
If it's the sticker scraper I'm thinking of, I have one right in front of me and it's plastic and shaped kind of like a thumbnail:
I'm thinking of these plastic ones
which I've had for like 20 years since I worked in retail they're awesome.
I coated the FEP with a liquid form PTFE (Teflon) lubricant by softly rubbing it on with a microfiber cloth. This stuff specifically. It's safe for the resin, FEP, and aluminum vat - same stuff non-stick pans are coated with. It helps the resin not stick to the FEP on peel, shouldn't affect the resin's ability to set up each layer, and makes the vat easier to clean. Youtube printing channels like Uncle Jessy and True Elite Geek recommended using it. Most info I've found on coating the FEP says it can help but isn't required. I'm always open to more input if anyone disagrees.
I know this won't help what happened but if you have to replace the screen add some Kapton tape on the outside of the lcd so if you get a resin leak again it'll help stop it from leaking down onto the boards. Also these plastic razors are a must have for resin printing they are phenomenal for getting things off the build plate without scratching it and might work for trying to scrape some cured resin off the lcd. Hope you get it cleaned up and working.
I use the the recommended settings on the resin bottle, I use this for the wash and cure, ANYCUBIC UV Curing and Washing Machine for LCD SLA DLP 3D Printer Models, Wash and Cure Box for Mars Photon Photons and More https://www.amazon.com/dp/B08CDNW7W3/ref=cm_sw_r_cp_api_fabc_GMDTFbK2K0MJ4?_encoding=UTF8&psc=1 and I use denatured alcohol for the washing.
I did two things to mine, main one is hot glue on all the corners on the inside, because rubber bands for structural integrity... ehhh. Bonus is that it keeps the smell inside better, and related to that I got a mini air purifier to put inside the printer to improve things. While it's off and closed it won't smell, but while working the cooling fan outputs part of the air inside, spreading the resin's smell. Didn't get a chance to print while the purifier works, but hopefully it will help with that.
One cool thing to have is a TP-Link Tapo C200 https://www.amazon.it/dp/B07XLML2YS/ that will allow you to see how it's going! Somewhat solves the lack of Octoprint lol
I've used a couple different ultrasonics, and I loved both! The first one I got was very very cheap, and I won't recommend it here because it literally vibrated itself to pieces after a few months. But it definitely got me hooked on the ultrasonic, so I got this much better one, which is just under $100. I like this one because it also has a heating function (don't use it with IPA!) which I use to clean my airbrush parts. I have the tank filled with water and put a takeout container with IPA + prints inside to agitate: https://www.amazon.com/gp/product/B07ZNNXMZR/ref=ppx_yo_dt_b_search_asin_title?ie=UTF8&psc=1
I don't think you have to get that exact one, but something with a metal body (vs plastic) is much more durable, especially if you plan to use it frequently. I wasn't even printing that much stuff honestly, maybe 10-15 times per month for very short periods (30s-1m).
In terms of it being better than just a soak, I never tried soaking, just hand agitating. And of course an ultrasonic is much faster and better at agitating than me doing it by hand.
This is the ultrasonic cleaner I purchased for use with my Epax X1 resin printer. I have only used this device to clean my prints. the lid doesn't seal on tightly, so if you're moving the ultrasonic cleaner while water is in it, it can slosh around a bit. There's a built in heater I think but I don't use it. I really much volume there is inside the cleaner.
What I do is I'll use a mylar baggie (they are tough, opaque and can stand up on their own) or little plastic cup from home depot filled with the 91% IPA. I'll put the model in there put that in the ultrasonic cleaner which is filled with water. I run it for around 280 seconds. The IPA gets really murky with the liquid resin, so you know a lot of uncured resin is coming off your print. I fish out the 3d prints with some dentist picks (chop sticks would probably be ideal). I seal the mylar baggie up for later, since it can still be used for more prints. Then I cure the model in water filled clear plastic cup that rotates on a little turntable.
They'll keep curing whenever exposed to uv. They'd eventually get brittle because of it.
Though, ether way they look great and I now want a set.
*Something like this,
https://www.amazon.com/Krylon-K01305-Coatings-11-Ounce-UV-Resistant/dp/B00397STRW
should work. Though I'd go with satin not gloss.
I use a distiller for my contaminated water, and then recycle it. Water comes out crystal clear, then scoop out the resin sludge left in the distiller and cure it till dry and dispose of it.
This is the one I got: 4L Countertop Stainless Steel... https://www.amazon.co.uk/dp/B08W9S29J9?ref=ppx_pop_mob_ap_share
Remember to PPE up as usual.
Here is the distiller I use: https://www.amazon.co.uk/gp/product/B08W9S29J9/ref=ppx_yo_dt_b_search_asin_title?ie=UTF8&psc=1
Works great, water is crystal clear and can be reused to clean prints. Resin sludge left in the distiller I scoop out and cure till dry for normal disposal.
Note that the water is not safe to dispose of, even if is distilled. Still needs to be vaporized or taken to a waste facility when you don't want to recycle it anymore.
Do you mean something like this?
Amazon: https://www.amazon.com/gp/product/B08LYP2VTT/ref=ppx_od_dt_b_asin_title_s00?ie=UTF8&th=1
Bought this exact one (135x80). Fit is pretty much perfect and even though the Mono 4k isn't listed as compatible, the actual build volume for the Mono 4k is 132x80 so it's really very close and I haven't had any issues with the tiny overlap.
Only issues I ever had was that the plate is very slippery and I had to take sandpaper to it to get prints to stick, and after a while the first magnet started to come loose from the build plate so I had to install the 2nd one that came with it.
IDK why you're mixing IPA with water... Nobody has recommended that you do this. IPA is already mixed with water unless you are buying 99% stuff but chances are it's 70% which is already 30% water and then you're mixing it 1:1 with more water. There's barely any IPA in there and the resin is not water washable...
So first order of business is to just stop doing that.
This seems to be an issue for you, and I think you particularly would benefit from a wash/cure station. It makes the process very very simple. They can be purchased for around $100 and they are worth it. I like the Elegoo Mercury Plus. You fill the container with IPA (you can use 70%, but do not mix it with additional water...), turn the machine on, let it spin, take the container off, pull the parts out, let them dry fully, put the spinning plate on, and cure it for a few minutes. Hard to mess up.
If you're dead set on not doing that, at the very least purchase a pickle jar that has a built in basket. Fill this jar with IPA (again, 70% is fine, but do not make your own mix of IPA and water). Place your prints inside it, dunk them in and out of the IPA a bit, use a soft paintbrush to rub additional resin off, and let fully dry before curing.
The white spots you see are places where your print wasn't dry all the way before curing, and the gunky parts was uncured resin on the surface mixed with water and IPA.
Most importantly you need to eliminate water from your washing procedure and also let your prints actually dry all the way.
Out of curiosity, what have you been doing with the IPA/water after you wash your print in the cup?
https://www.amazon.de/Joytale-Non-Slip-Silicone-Feeding-Waterproof/dp/B085FWN7HG/ref=mp_s_a_1_26?keywords=silikonmatte&qid=1671211329&sr=8-26&th=1&psc=1 yeah I just found this on Amazon. It’s much larger than whambams largest and half the price
this is the resin I use:
https://www.amazon.com.br/gp/product/B097TSB8CM/ref=ppx_yo_dt_b_asin_title_o02_s00?ie=UTF8&th=1
the 2.5 seconds is the default that chitubox put it there, should I change it? if so, how many seconds?
I don't know what UVtools mean, can you elaborate please?
I do understand that the taller the print, the longer it takes
thank you for the response!
I run an air purifier with a carbon filter in the room with the printer(I use this one: https://www.amazon.com/Coway-AP-1512HH-Mighty-Purifier-True/dp/B00BTKAPUU?ref_=ast_sto_dp&th=1&psc=1 ). Also, make sure you removed the plastic wrap around the carbon filter inside the printer itself(the one that plugs into it directly). Run your air conditioner as this helps ventilate the room. Open a window if you don't have one.
My printer sits directly on my desk and during printing there's a light odor. When I pull plastic cover off it's very bad for a few seconds, but I wear a mask and it's fine after about 10 seconds.
No real issues other than that for me. ABS-Like Standard Grey resin, if that makes a difference.
You my friend need a Bondic pen. This thing is amazing. Not only does it work really well for gluing resin parts, but it will also plug your drainage holes and fix blemishes left by supports. Sands easily too for a good finish.
As mentioned by others powders tend not to perform well in printers, I don't know if these are just powders suspended in a liquid or really liquid pigments, they claim to be usable in uv resin, you could try them.
I use a fermentation belt in conjunction with a thermostat with temperature probe.
It works better if you have a metal resin vat, since it will transfer the heat more efficiently.
rustoleum rust converting primer sounds silly, but drys super fast, its thin, and provides super adhesion to anything you spray over it, and if you just prime it, its a really hard to scratch surface.
I use water washable exclusively and bought a distiller for the contaminated water.
When the water is too gunky I distill it, comes out crystal clear and is filtered through active carbon. I just reuse the water and top up as needed as some vaporize when distilled. Then I scoop out the resin sludge left over in the distiller, and cure it under a UV lamp. Dispose of it when its all dried and cured.
This is the distiller I use: https://www.amazon.co.uk/gp/product/B08W9S29J9/ref=ppx\_yo\_dt\_b\_search\_asin\_title?ie=UTF8&psc=1
heat up the tent with a small space heater that can control to roughly room temp.
Put a chamber heater into the chamber and control it to 28C. Some folks use brew bands wrapped around the vat - that doesnt work well on plastic vats and typically they use mains power. I did see a DC band specifically marketed for resin printers but the chamber heater works very well.
I made a box out of XPS insulation foam and hung a terrarium heating mat in it. It maintains a good 30 °C in German winter. All up it cost me €25 and an hour of my time. I drilled a hole in the back for an extraction fan.
https://www.amazon.de/dp/B01MSQOHKD?ref=ppx_pop_mob_ap_share
my apologies for the late reply bud. I got these. they work as intended, but as one of the gents below mentioned, it's imperative that you make sure that the build plate fits the magnetic ones perfectly. all the best!
As an owner of the basic Saturn I can tell you that it holds a whole bottle of 500g/ml resin.
Maybe someone in /r/ElegooSaturn can help with exact info.
it holds something between
- 400ml,
- 500ml and
- "the better part of a liter bottle".
*(you see why I don't recommend to trust those users)
What I've done, and what I recommend to you and others, is to get some sort of air quality meter that will measure VOCs, and set it up near your printer. Just because you can or can't smell an odor from the resin, doesn't mean it's dangerous or not dangerous. With an air quality meter, you can see quantitative measurements of the air in that room. I bought this one, and seeing the numbers made me realize what kind of ventilation/air filtration I needed, and that the printer really needed to be in it's own room/space, with a door that can be closed.
Other comments have mentioned getting a grow tent + fan + ducts, and I can confirm it works really, really well. The VOC levels in my apartment are lower than in my friend's house, and they've never had anything like resin- UV curing or otherwise- in their home.
If you really want to be safe, you'll really want to get something like this to measure your TVOC levels. That one in particular is really solid, and I've tested it more than a few times with stellar results (plus it checks radon levels, and that's a plus). I'm probably at the higher end of safety with all of this, but if you print a lot it's nice to not have to worry about it.
Alright, got the Cones of Calibration Model printing at the moment, using the settings you recommended. Currently trying it with Elegoo ABS-like Resin should be done within an hour
mono x --still-- frequently ships with a warped bed, has worse AA, worse support for third party slicers, and worse firmware in general. including forced transition layers that stop you from printing anything directly on the bed without an elephant's foot. and as others have noted the wifi is worthless. the only advantage the mono x has is more build height, which for most of us rarely if ever comes into play.
Between the two you've selected the elegoo saturn is a clear winner. But i would like to also suggest Flashforges' variant which is for almost all intents and purposes the same printer as the elegoo saturn, but is currently available at $220. Also note on that page if your itnerested is a 6k 9" printer for the same price as the saturn s.
At 2:30 in this video you can see the cable plugged into the printer, it is an standard IEC320C13 plug which you can buy easily with a BS1363 (UK mains plug) moulded on, e.g. https://www.amazon.co.uk/C2G-Metre-Power-IEC320C13-Kettle-Black/dp/B002CZQ3G6.
This printer has a switched mode power supply inbuilt which accepts a wide range of input voltages so there is no danger of damaging it from the slight differences in supply voltages across Europe.
In fact the inbuilt psu will accept voltages from 100-240v ac 50/60hz.
Does it come with the UV/Dust cover? looks the the environement it lived in they might have tossed it.
Besides keeping UV out during a print and dust out during storage it also does a lot of work containing fumes/smells during a print, particularly on the monox that doesn't have a vented chamber.
if it is included it's a good deal, see if you can get them to toss in a spare FEP, they look like they've probably got a ton around.
if the cover is not included, I'd personally be a lot more torn. it would end up depending on where you are planning to set it up.
That being said I also have a long list of complaints about the mono x, and while none of them are by themselves deal breaking I would recommend a basic chitu-hardware based printer like the $220 new Flashforge 8.9
I've had the idea of using a Pi Zero with a male USB plug (something like this). I'm not sure if it would actually work, but my plan is to make the Pi Zero appear as a storage USB device (which should work) and then add a SMB server so I can move files wirelessly to it.
cure gloves after cleaning, you will get several uses from them depending upon how gunky they get with resin and how much UV you have to cure them with.
I use anycuibic water washable plus exclusively these days and it works great. I do think it requires a bit more careful attention during the cleaning and curing phase, as it seems people on here have issues with their models cracking after a while and blame it on WW. I also hollow with drain holes and use a syringe to inject the water through one hole and out the other, then cure both the outside in my wash and cure plus, and the insides with snake UV LEDS through the drain holes. Laborious but I prefer knowing my models don't have uncured resin inside of them.
I only had one WW model crack, and that was after deliberately not cleaning it carefully and not curing the insides to test it. YMMV.
Not sure how much of the IPA would survive being distilled, the active carbon is just part of the distiller itself. I still use a little IPA now and again, but I prefer not having a 8L tank full of it sitting around.
This is the distiller I've got: 4L Countertop Stainless Steel... https://www.amazon.co.uk/dp/B08W9S29J9?ref=ppx_pop_mob_ap_share
https://www.amazon.com/gp/product/B09JG2RT8F/ref=ppx_yo_dt_b_search_asin_title?ie=UTF8&psc=1
is what I have, goes on sale for $40 every couple of months.
Do you have to insulate the whole printer? I use a reptile heater mat. I stuck it and a thermometer to the inside of the cover and it heats it up perfectly. You can control how high it goes.
It should, as long as it's not too long. I think that about 2m (6ft) long, USB extenders are expected to lose some accuracy and power. But with a short one such as this one there should be no problems at all.
slap mat - buy a cheapuv flashlight or flood light from amazon and cure it. takes less than a minute.
you have no need for a blower that big nor speed controller. For odor control of the enclosure, a 120mm 50+cfm fan mounted on a 120 to 4" round adapter is fine. Also, the single layer Al flex duct is a PITA, this works better. my recommendation is my exact setup. Most people use an fan or blower way to big for odor control.
I don't use a torch for either use. I have a nail curer for a quick cure of a small part.
For waste I use clear bags and leave them in view of daylight unlit it cures.
That said, either of the torches recommended would do, I personally would use a more powerful torch , something like this.
Don't get too hung up on the wavelength, any lamp from 365-410nm will cure resin.
So it looks like what he's using is an engraving / grinding bit. If you search for Dremel Fine Engraving Bit you'll get something like this bit which seems close. His seems more straight and coarse but you get the idea. Engraving stuff can tend to be finer for details and may be what you're looking for, though technically you're sanding/grinding the nubs on your model.
Just went to look up the one I bought on Amazon about 2.5 years ago, that has been serving me quite well in that time, but for some reason the listing has been removed. (Still shows up in my order history but the product detail page gives a 404.)
Little searching shows one that looks almost identical though: https://www.amazon.com/dp/B08CB51WY8/ From the case to the internal components, the images appear to match mine exactly except that the brand name is different (mine says "DULEX" instead of "UltraFire"), and this one seems to have some sort of "zoom" functionality that mine doesn't have.
Anyways, the one I got is all metal and super rugged; assuming this listing is just a rebranded version of basically the same thing, it should be what you're looking for.
Phrozen Cure Mega: https://phrozen3d.com/products/phrozen-cure-mega-post-curing-uv-lamp
For washing I'm using this 30L Ultrasonic cleaner with undiluted Simple Green
My batches are about 2.5 liters each. 2.5 liter of "clean" IPA in my WnC, 2.5 liters of "dirty" IPA in my first wash bucket, and two more batches of approx. 2.5 liters in 2 glass jars going thru the curing / settling process. I change out the "dirty" IPA once every 2 weeks or so. You can let the IPA get quite dirty before changing it out but if it becomes too saturated with resin, it will just cure into a messy blob that renders the batch unrecoverable so don't overdo it.
When I first started out, I tried filtering using various methods. Net net, it just took too much effort and cost. Filters need to be changed and cleaned out, and they costs money as well, so actual savings is minimal since 99.9% IPA is not particularly expensive where I am (around US$2.50 per liter).
With the method I am using currently, there is no additional costs other than the IPA loss (which is unavoidable even if you are actively filtering). Other than the waiting time, the IPA swap is quick and requires minimal effort. The stainless steel oil pot (something like this) is reusable and easy to clean out. It's good to enough to filter out the large resin blobs that have cured and settled at the bottom of the jar.
You don't have to guess if its safe..
Buy an air quality monitor that tests Formaldehyde, VOC's and other particles.
They are 106.00 on amazon. This little device convinced me to build a true enclosure with carbon filtration. And that is just for normal PLA printing!
https://www.amazon.com/gp/product/B07B7KLMVW/ref=ppx_yo_dt_b_search_asin_title?ie=UTF8&th=1
This is my simple setup: https://imgur.com/a/ydoeZxP
I'm actually not sensitive to the fumes at all so I can't tell you how much of an improvement it makes in terms of the smell.
This is in my office, and I'm often working from here and printing at the same time.
The tent itself is a called a Grow Tent. Buy one that fits your printing setup. This is the one I bought.
I used a 12" PC case fan, it's pretty weak but enough to create a small vaccuum in the tent (the walls get noticeably sucked in) so I imagine it's doing enough work. You could buy something stronger if you want.
Then there's just standard tubing running from the top (there are multiple holes in the tent so you can connect the tubing at the location you want), running into my loft space.
Currently I have my old Mars 1 outside the tent, but I don't print a lot with that and it's smaller so I'm not too concerned right now. My worktop space is very limited so can't fit a bigger tent.
I'm sure if you had something like this, with your air purifier, and using a mask when opening the grow tent, you'd be pretty much set. Hope that helps!
amazon its gone as low as 110 (in wearhouse deals) but currently its going for 170 if you see it for 150 i would pull the trigger. even now 170 isnt a bad deal for what you get its a great printer i use it to print DC statues and only just got a larger one because i wanted to print a warlord titan.
I've been using this one, but I'm not going to claim that it's the best solution or, for that matter, the best solution in all cases. I certainly haven't tried everything! If you have a model glue that already works, why spend more money?
Yes, that's another must have item! I have a silicone squeegee that was designed for scraping dishes. It's a little bigger than I need for my Phrozen vat but it's perfect for my E10. It works so well for stirring up the layer of pigment that settles against the FEP. It's very soft and flexible unlike the harder rubber ones I had before. https://www.amazon.com/AM-Conservation-Group-Silicone-Squeegee/dp/B01EVL2CGI is the one I bought but I bet a dollar store spatula with the handle removed so you can turn it sideways would be just as effective.
Yeah a mat but with the shape of a tray. The silicone makes the resin easy to remove, the tray contains it.
I used one of these. It was repurposed from a computer related environment which is why I got the 4-pin version (for just printing a 2 pin fan ought to be enough). It doesn't move as many CFMs as I'd like but it's decent and not too loud on lower speed settings.
I dont know of apple apps that do the same, but these are the one I use.
The FEP for the Saturn 2: https://www.amazon.com/dp/B09ZXLQWWH
If for some reason it's unavailable, I can confirm I have been printing without issue using this FEP on the Saturn 2: https://www.amazon.com/dp/B09MRGRF4M
I use these inside my printer for my camera. They don’t cure anything (so far including multiple ST resins). I did test it prior to installing to make sure. PAUTIX DC24V COB LED Strip Light... https://www.amazon.com/dp/B0B1J8TQ8Q?ref=ppx_pop_mob_ap_share
These work great on my Mars 3. Large one is probably ideal for the Jupiter.
So resin fumes are not toxic, they are annoying and if you are sensitive to them, a better solution is to vent the fumes outside if possible.
Masks become very expensive as the cartridge's need to be replaced monthly and you need to store them properly between uses. It is highly recommended that if you are that concerned about fumes, you should get fit tested and have your doc get ya a spirometer test to make sure you dont have underling conditions as a mask really stresses heart and lungs.
Please consult the SDS for your resin, MANY sites are alarmist and overstate resin hazards. Gloves, goggles when poping stuff off is the PPE you need, if sensitive to odor, vent the fumes if possible, else print in an enclosure with a big ass carbon filter recycling the air should resolve any issues.
I recommend airbrushing! You can hand paint with thinned acrylics, but seems like youre concerned about flooding.
This is the starter airbrushing kit that I have and I can't recommend it enough. You can always upgrade the brush itself as the compressor is really great and has everything you need.
you can buy 100 of those for like 5 dollars just go ahead and replace them or you can get brand new carriages.
https://www.amazon.com/gp/product/B015RKOZ7G/ref=ppx_yo_dt_b_search_asin_title?ie=UTF8&psc=1
I believe those are the ones that it uses but double check and order the correct ones
What I do to deal with support marks is three things:
- I use small, densely packed supports. 0.5mm contact diameter, 0.3mm contact depth, upper diameter 0.3, lower diameter 1.2, connect length 3.75, 2.0mm bottom, 2mm tip spacing distance. These hold well and come away easily and work on smaller prints as well as gigantic ones (IE, life-size skulls on my Jupiter).
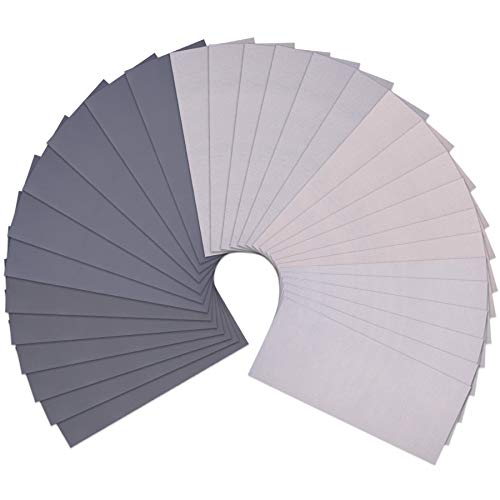
- Once the print is cleaned up and fully cured, I hit the support pits with a Dremel sanding puffs. One pass with a coarse puff, then another with the fine. I do this outside and use a respirator when I do it.
- The last step may be optional depending on the type of print. I'm printing very textured things, so I then take a carbide point scribe on the Dremel and make random patterns. The scribe doesn't bite in far enough to throw the removed resin, so it just sits next to the marks. Then I use a piece of paper towel (while wearing gloves), very lightly dampen it with liquid resin and tamp it down over the processed surface until I have a decent approximation of the rest of the surface texture. From there I do a first pass cure with my UV flashlight, wipe it down with a dry paper towel, then stick it in the cure machine for 3-4 minutes. If it's still a little tacky, just wipe it down with IPA and cure for another couple minutes.
I don't recommend using powders in resin printers as they tend to drop out of solution quickly and will give a laminated finish.
I do recommend https://monocure3d.com.au/product/3d-pro-glow-in-the-dark-resin/, it's designed for the job.
Not tried them, but these should work in combination with clear resin, https://www.amazon.co.uk/Epoxy-Resin-Colour-Pigment-Transparent/dp/B07ZKK3ZYB.
What you can do is use a thermostat socket such as this one from inkbird (Amazon.com) (amazon.co.uk). It will turn on the fermentation belt when it drops below a certain temperature.
I ended up buying this one from Amazon:
Sovol 3D Upgraded Platform 2... https://www.amazon.com/dp/B08XW13XF4?ref=ppx_pop_mob_ap_share
It fits in one dimension, and I have access to a shear at work. I just measured it out, and cut it down. You can probably cut it down at home with a jig saw or something similar, but I’m no expert in that regard. I did see some complaints about it not sticking well, so I cleaned everything thoroughly with isopropyl, heated it up with a heat gun, and then put some weights on it overnight. Been stuck tight so far!
I run a large ultrasonic cleaner for my Jupiter prints - ziplock bag would work for small, non-pointy prints. Last thing you want is some pokey bit dumping a bunch of resin filled IPA into the water bath.
What you really want is a mylar bag - i bought a bunch of different sizes: https://www.amazon.com/gp/product/B08NDBJN25/ref=ppx_yo_dt_b_search_asin_title?ie=UTF8&psc=1
they are 10mil thick - tough as nails, and extra bonus they stand up themselves in the water bath.
don't need to pull anything off. get plastic razorblades and gently scrape awa with IPA 91%. Uncle Jesse recommends also.
Link to razor blades:
The BIGGEST impact to getting to successful prints for me was keeping temperature at 30-33 C. I’m in California so it’s never too cold, but this was key for me (using Elegoo Plant-based, but presumably applies to many more).
I used an old, small, portable fan heater pointed at the covered printer from a short distance, connected to a temperature sensor-triggered outlet (VIVOSUN Digital Heat Mat... https://www.amazon.com/dp/B015F4VFGI?ref=ppx_pop_mob_ap_share), and then carefully draped a thin blanket over the printer and edges of heater (so as not to block intake fan and start a fire) to create a cheap “enclosure” but a proper grow tent may be safer.
It kicks heater on whenever temp is below my set point. Worked wonders for me.
well, ya gotta open it up eventually. If you dont want to vent, you can filter - lots of grow tents come with big carbon packs to keep the pot smell down for pot growers. Those would pull 90% of the fumes from the air, but you will eventually spend the carbon. I have no experience with them, but if they have a pound or two of carbon in them, should last a long time. I am ignorant on them, and an issue could be if they add too much back pressure to a small fan, it may not be effective (like the 120mm one I linked). You may have to use an inline fan (target cfm at 80+CFM), but those are sort of loud.
I got one of these guys for 20 bucks: https://www.amazon.com/Personal-Heater-Portable-Electric-Desktop/dp/B07ZTQ8L7V glued a couple of magnets to it, and stuck it to the inside of my cube with some steel washers. It keeps the unit nice and toasty.
We'll see how it fairs come Dec!
So, I'm now home and have had a chance to try something out.
I haven't used the pure Aluminium Sulphate, but instead gone with a liquid pool flocculant I found on Amazon:
https://smile.amazon.co.uk/gp/product/B002OENW5U/ref=ppx_yo_dt_b_asin_title_o01_s00?ie=UTF8&psc=1
I saw that this product, while being liquid, only required minute quantities, so would not dilute the IPA overly. In fact, it's practically impossible to accurately measure a small enough dosage given the amount of IPA I was testing with. I'm testing on 1L of IPA and have used 0.2ml as that is the smallest marking on the little syringe I have, but this is 10 times the 13ml per 600L recommendation for an initial dose on the bottle. Obviously should this work, then there is plenty in the bottle to clean IPA for years to come.
Now, there ARE warnings on the bottle about mixing this with other chemicals, and I made sure I did this outside slightly up-wind while wearing a mask, gloves and eye protection, but saw no evidence of any adverse reaction. I am fully aware that there may well still be an adverse reaction that I cannot see though, so will continue to take the same precautions in the future, but no; it didn't bubble and fume and burst into flames.
After treating the IPA, mixing thoroughly and leaving to settle, I'm having quite a bit of success, sadly, I will have to post pictures later as I disturbed the container and it's all cloudy again.
Again; watch this space.
Have you tried something like this:
I am going to order some. Your post reminded me I needed a solution, lol
This has been serving me very, very well on that front.