
What are
/r/AfterEffects'
favorite Products & Services?
From 3.5 billion Reddit comments
The most popular Products mentioned in /r/AfterEffects:


The most popular Services mentioned in /r/AfterEffects:
Dribbble
Vimeo
HandBrake
Gumroad
Shutter Encoder
Adobe Color CC
Blender
ezgif.com
Behance
Blackmagic Design Fusion
TutsPlus (Tuts+)
Shutterstock
Sellfy
itch.io
Screenlight
The most popular Android Apps mentioned in /r/AfterEffects:
The most popular reviews in /r/AfterEffects:
I break the script out into lines. Then I read the script and write down notes of what I think could be on screen during those lines. Then I print out a storyboard (I use this site) and sketch the story out roughly. Once I think I have a good flow I do the final storyboard.
As always if you wanna know when I post these follow me on instagram!
https://www.instagram.com/jacobrmotion/
The project file can be downloaded here: https://dribbble.com/shots/5690286-Particles-with-Trim-Paths
https://dribbble.com/shots/2519024-Tow-truck-rig
Here's the original rig, tried to recreate something close to that. The creator also posted AE project file that's available to download so that might help you a lot.
Yeah of course. I owe this mostly to the guys at Panic who made this tow truck rig and released the files. I wanted to see if I could build something using their techniques.
I would love to do a more detailed write up or video even, but I've gotta run here in a bit so I will just be brief.
Essentially I laid out my illustrator file like this after doing those little color tests on the bottom and imported them into after effects. Then everything is pretty much parented to the main side layer and then the "far" points are corner pinned and you set up expressions to control their positioning in the y axis then the x axis is controlled by scale. The angled surface is set up a little bit differently and was something I had to figure out how to do since the junk yar rig is all 90 degree angles.
I'm not the greatest with expressions and everything so it took me a bit to dig around in the junk yard rig to figure out how it all worked.
Again if that's not enough information I can probably do a better job explaining it tomorrow or something if anyone is still interested in more.
Kind of. This all started out as a failed attempt at doing some light cell work, which I have almost no experience with. After seeing this awesome post yesterday I wanted to try but on a much more attemptable scale, but it still came out poorly.
So, I tried to see if I could develop a better version of the classic quick and dirty liquid look that there are 1,000 tutorials of.
So this is a combination of using multiple techniques. The blur/levels adjustment layer effect happens over pretty much everything. There is a little bit of actual cell, which is just the "connective liquid" that gets stretched out between each pair of circles. And when I say cell, I probably mean rotoing because I didn't have a tablet with me so I just keyframed a mask frame by frame. Particular is being used for the gooey bits that kind of "explode" out. I threw a little bit of wave warp on the actual circles themselves. And the stroked circle elements are just shape layer paths with a bit of roughen edges.
It came out better than I initially thought it would. But it still lacks that really beautiful fluid quality you see in the dribble post I linked.
I'll post my .aep file when I get a chance later today.
This isn't entirely After Effects btw, there is some traditional animation in there, you can see some break downs from Hendrique Barone on his Dribbble: https://dribbble.com/henrique_barone Great animator
hey there, It's Jesse. I wasn't sure if you had a specific question about my process. I use AE for 99% of it and then jump into Photoshop to cut mattes (if it's a still). The compositing techniques are the same whether for stills or video. For example, here is a before / after video of a project I composited which, although it was a short film, also uses layer upon layer to create the final look: https://vimeo.com/36067515. For my print work, the much larger canvas allows for much more complexity (realized through an expanded use of use of nesting compositions via pre-comps).
If you want to see more of the process for Rebirth of Gaea... https://vimeo.com/94244707. I'm an open book, so I'll try to answer anything I can. Glad you like it. :)
Holy shit, I guess you can just buy it from Amazon. I mean it's called "Fantasy Rifle Cosplay Costume" but 70 bucks for a foam replica ain't too bad lmao. I always look forward to seeing your commercial breakdowns and behind the scenes, eagerly awaiting your next one!
I use Keynote for presentations instead of Powerpoint. Compared to After Effects it's still like animating with oven mitts on, but 1000x better than Powerpoint nonetheless.
Edit: oh and you can also embed H264 .mp4/.mov files and have a fair amount of control over the asset.
My pleasure! If you are a total beginner, some of the videos won't really make a lot of sense. However, I can tell you that one of the best ways I went about learning After Effects was by just soaking up as many tutorials as humanly possible in the beginning.
You will be very surprised how you can learn something that has no real use to you, and then 5 years later you are on a project and your brain recalls some tidbit that saves your butt.
One of my next big project for the site is to develop an After Effects curriculum to get beginners up to speed really quickly, and to NOT FOCUS ON THE SOFTWARE SO DAMNED MUCH!!! My biggest gripe with Lynda.com and the like is that they tend to ignore basic design and animation principles. Without those, it doesn't matter how many tricks you know, your work won't be great.
I'd suggest checking out the videos, seeing what sticks, and filing the knowledge in your brain.
I would also HIGHLY recommend checking out my buddies at Mograph Mentor. If you can't swing the cost of a 4-years program like Ringling then Mentor is an excellent, excellent alternative.
joey
I used to make weekly YouTube videos and wanted to add some spice to my videos with VFX and animations, so I picked up After Effects. After a little while my group of friends who made videos also wanted intros and titles for their channels. They came to me, this was the start of something.
I spent a couple years just making nonsense that wasnt good. Then in 2012 I randomly shot an email over to Owl City's manager asking for permission to make a kinetic type to a song. This lead to me not making one for an existing song but for their upcoming release instead, which I still think was a huge risk. That video ended up being the "Good Time" video and got a good 20 million views on the internet and aired on TV a handful of times. I've been working with Universal Music since creating motion graphics for pre-roll ads, instagram posts, and lyric videos. Basically all of their promotional material. Its been a fun ride.
My next step in my career is actually happening in a month or two. I have to opportunity to move out to LA with some friends after this semester. I think I may take it up just for a fun change, and hopefully it'll bring more opportunities than what I can do here in Michigan.
Here's my current showreel if you guys are interested. https://vimeo.com/88852503
Each color blue is just a shape layer with the Wave Warp effect set at different speeds :)
​
Here's what I based it on https://dribbble.com/shots/3774867-Waterfall
I started out as a video editor (which I still am) but picked up skills in Photoshop and After Effects as the situations demanded. I've never worked as part of a creative team, so I've never had the pleasure of being just the editor, or just the motion graphics guy. I pretty much have to be a producer, editor, graphic designer, motion graphics animator, 3d animator, audio guy and engineer for each project I work on, which means none of my stuff is spectacular, but I know enough about everything to complete any job on my own.
I have more of a corporate type position for a single client, so unfortunately I do a lot of the same types of projects over and over. I'd like to branch out into a wider range of work, but it's hard for me to find work in my area that pays, and hard for me to find time to work on extra projects after my full time job.
In ten years time I wouldn't mind still being a corporate producer, as long as I can work on more varied projects.
Here's some of my work if you're interested. As you can see it's all military related, since that's my client, but I try to explore new styles and vary my work as much as possible. I'd love feedback.
The body rocks back and forth too much, and the keys are a little too evenly spaced. There doesn't appear to be any weight to the character. Still nice first go at a walk cycle, I'd even recommend studying some gifs on dribble to help get a better understanding.
Here's one of my favourite animators: https://dribbble.com/shots/2233082-Elephant
BlackMagic Fusion can do it. It's very different than AE though so there's a bit of a learning curve. It's similar to Nuke if you have any experience using that.
Here's a tutorial I found that gives a little bit of a glimpse at its graph controls: https://www.youtube.com/watch?v=ZCcraESLZ80&list=PLK7mnWQu_739DojuEhI7HRrrh_SpDP9-E&index=23
Check this out: http://aescripts.com/bad-tv/
I made a Skrillex video for shits'n'giggles a while back to look like old vhs: https://vimeo.com/33109143
I used the script up top, a few tricks I made up with masking, and downloaded boats and trains-worth of vhs noise from different videos and composited them into the thing.
Let me know how it works out!
How about "Fake Rock song", "Born to rock", "Rock the Town", "Rock Guitars", "Rock from a tube" or "Hard rocking man"
You can find them from the song licensing list easily:
http://www.soundclick.com/bands/page_licensing.cfm?bandID=1277008
Neuron art (with alpha between the synapses), repeated at several positions along the Z axis, furthest ones blurred to simulate depth of field (or maybe just enable DOF of the camera itself). (2D) Adjustment layer masked like a vignette to simulate near DOF around edges of frame if the former.
Possibly use Displacement Map to get more of a 3d illusion.
The lights could probably just be white solids whose opacity is something like
50-(50*Math.sin(time*20))
following a path, with either a few different directional blurs or Trapcode Starglow if you have it to get the flarey bits.
The little floating particles that help sell the "floating in fluid" look can be faked with more 3d layers & creative blurring, but there's also Trapcode Particular for that.
I'm not an expert, started just 1 month ago and i guess it all really depends on what kind of animation you want to achieve. I think AE is better for making infographic animations, like statistics or something similiar to Kurzgesagt - in a nutshell (youtube channel). Here is my favorite guy who's doing these, you can check out his work and decide yourself if you would like to learn animating 2D in AE.
You can. Some people prefer other programs which have native tools like bone rigging, which doesn't come in After Effects, but there are a slew of character rigging plugins like Rubberhose or Duik which are meant to simulate certain rigging methods and work extremely well. I recently recreated the classic Steamboat Willie scene with Mickey Mouse using shape layers and Rubberhose for the limbs, though I didn't need to use Rubberhose at all to do so. In my opinion, bones and similar tools aren't necessary because you can simply create your own reference bones out of shape layers and animate your character around them with shape layers parented to nulls relatively easily. It's much more a matter of preference, certain people are more comfortable working with bones, but in the sense of the classic cartoon method where every frame must be drawn out and there are peaks, valleys, then in-betweens to fill, no modern program (or every single one, depending on how you look at it) really facilitates that. It's much easier for us to do with glorious software like this and be able to retain all shapes without needing to redraw every time, I'd recommend just searching around, testing things out, seeing what sticks and what methods/programs work best for you. There's no shortage of people who do it in completely different ways and no real answer to what program is best, it all comes down to your preferences and personal style.
For me, AE is extremely hard to beat due to cross-compatibility with other Adobe programs and how easily you can juggle assets. It's definitely an advantage, but not every one needs that particular advantage.
It's Trapcode Shine on the window cut outs. And then this free footage https://pixabay.com/videos/zombies-horror-scary-blood-65691/ using the Shine layer as a luma matte.
The beginning is awesome, but, after the drop and the A rises the rest doesn't match. Timing is of, all the letters come up too fast and almost at the same time,. Finally the last little part comes out of nowhere.
As to how to fix make it all one unified motion and have it make sense to the theme of the company.
Great start but needs polishing. Here is a good example of a polished one.
Looks great. With some cleaning up this could be an awesome promo. A couple suggestions.
-Continuously rasterize. Your letters are very rough in the last frame.
-Personal choice: at the beginning when you do the movember is november with an m, I wouldn't have had the M revealed beforehand. It causes distraction and it looks like a W.
-The Cafe sign could benefit from a bit more animation (like swinging) so it doesn't look so rigid.
Other than that, love the piece. Keep it up.
I'm not master myself, it's just one of those things that I think is a simple way to set your work apart. If I'm looking for inspiration I go to Adobe Color CC . You can start with one color and play with variations on that color (shades, tints, compliments) . I have Adobe CC so I honestly can't remember if the service is free or not anymore, I'm pretty sure it used to be. But like you said, looking at other people's work is always a good source of inspiration. I know you can search work on Dribbble by color as well and check out people's palettes. I've also seen people do photo color tests, where they take a photo in the real world and extract the colors from that (I believe there are a few phone apps that do this.) It's just something you constantly have to practice like anything else, I just think it's talked a lot less than the usual 12 principles of animation.
Also, it's sometimes fun to step outside of the box and experiment with color. Looking again sometimes the colors are a little expected (trees are green, sky is blue). When you start playing with your palette or simplifying it you can flip the script on what's expected (sky can be pink and trees can be white or something, i dunno).
Maybe you mean something like adobe Color CC.
Click on camera icon - you can upload a photo, and select colours from it. You can then same the colour scheme, then load the bastard up in After Effects; go window/extensions/Adobe Color Themes.
Kerpow. It's on.
Hi, if you are using Fractal Noise, then just open "Evolution Options" and check "Cycle Evolution".
I love this animation. The transition from the Bow to the Hookshot is especially stellar.
A lot of the techniques here aren't that complicated on their own. The real complex stuff here is the timings and planning of seamlessly transitioning from one asset to the next. I really think that a firm understanding of the basics is enough to pull off a majority of the movement. A majority, but not all. Don't take that as a knock to the animator, because it most certainly is not - this is amazing stuff - I just mean that if you are vigilant, you can learn to do similar things.
The guy who animated this started with well designed assets from another artist.
https://dribbble.com/shots/1590322-Zelda-Minimal-Essentials
This is important to note because it shows that a well crafted and consistent design is just as important to pulling this off as all the amazing animation techniques on display here.
For the most part, this is largely just shape-layer animation with lots of attention to small details. For instance when the Sword appears, a shine slowly rolls down the blade. When the hookshot appears, the handle springs. When objects twirl, they're given speed lines, and drag to form a custom "blur" effect instead of resorting to automated blurring.
The consistency between each element allows for the transitions to also be consistent. The only transition in there that doesn't borrow elements from the previous asset is going from the Bombs to the Rupees.
This animation is amazing. I think that half the battle for this was having good designs to start with. An excellent collaborative effort between two very talented individuals.
It may sound a little complicated, but I just learned other tools, really. I still stuck with Photoshop, since that is the only Adobe product that is fairly irreplaceable, though it’s much cheaper for just that. If you need to go free, though, GIMP is the way to go.
To replace Premiere, I tried out a couple things. DaVinci Resolve 14 was probably my favorite totally free version, though I didn’t use it for very long before I got Vegas, which is now my main editing software (it’s also on sale in the Humble Bundle right now for super cheap!)
For some VFX-type stuff that you would do with AE, I was able to learn Blender, which basically replaced a lot of it. It, of course, has great 3D stuff, but also some good editing and compositing tools, which makes it a pretty damn amazing free piece of software. Now, it definitely can’t do everything AE can, mostly just 3D stuff, and it has a pretty huge learning curve before you do anything cool, but it’s extremely worth it IMO.
I’m not a professional or anything, so if you do anything with CC for work or something this probably won’t help you. I also didn’t use CC for much other than Premiere, Photoshop and After Effects, so those are the only replacements I have.
It's hard to be specific, but I think if I were to tackle that, I'd export the background footage you have in a lossy format from After Effects first and then import it back in and use that exported file as the background.
You could potentially match the codec and compression from the camera if you know that to get as close as you can. The Canon 600D/T3i uses .MOV files with variable bitrate MPEG-4 AVC / H.264 compression. You could transcode using Handbrake (https://handbrake.fr/) if required.
The other thing I'd consider is simply blurring the background/fake DOF so then it's somewhat less relevant to match those artifacts.
It's a rather clumsy way of padding the zeros, i.e., formatting the time so it looks like 02:01 instead of 2:1. This method also doesn't work with hours.
I would forget that code and try to a better method, for example: https://stackoverflow.com/questions/6312993/javascript-seconds-to-time-with-format-hhmmss
I struggle with doing completed projects. The most I get done is stuff like this on my vimeo. You can see the disconnection in quality between my mograph work and my other work. Getting there though.
I'm looking for some sort of AE contest site but no luck yet.
Check out Diffuse Glow from Red Giant:
http://www.redgiant.com/store/universe/products/tool/glow
Here's a walkthrough tutorial:
It's one of the many free tools in the library.
So, like I said, this is only my second (really first) time trying this so I'm pretty unfamiliar with it at this point. So...I don't really know free alternatives. I'm sure you can download trials of both Modul8 and MadMapper and figure out some way to...make them work longer for you.
Here's tutorials on Modul8 https://vimeo.com/channels/770317 and MadMapper http://www.madmapper.com/tutorials/ Good luck!
You mean something like the Choros video?
I think you want to duplicate prekeyed footage with frame holds at specific position on a screen blending mode. May not need keying but if you want to colourise it I think you'll need to.
Then just the matter of animating a Hue/Saturation effect wheel.
You're better off finding something similar on a black background, like this:
https://www.shutterstock.com/nl/video/clip-33529222-rain-on-back-background-effect-animation-hd
BTW. it takes about 1 minute to make if you get to know a bit of Fractal Noise and blurs.
Not really a thing. Basic math in this case 15 seconds x 12 cycles = 60 seconds total length in seconds. These tuts may help you understand loop expressions a bit better.
https://www.schoolofmotion.com/blog/loop-expression-after-effects
https://www.shutterstock.com/blog/loopout-expressions-after-effects
Just multiple shape layers with the wave warp effect at different speeds. Super simple :)
​
Yeah, I’ve seen a few variations popping up on dribbble lately. There was a star wars one that was pretty cool.
Switch to The Dark Side (Star Wars Toggle) https://dribbble.com/shots/3268909-Switch-to-The-Dark-Side-Star-Wars-Toggle
I've always wanted to do something like that thru After Effects too. There is a plugin called Data Glitch which does some of the glitch block and compression stuff but the datamoshing/pixel distortion effect has to be does outside of AE I did it a while ago for my band's music video The Animals Will Come and it took me ages as I wanting to happen at specific points and go with the music. I can't remember the software I used but it was basically all about converting i-frames (keyframes in the footage) to p-frames (whatever the rest is) haha. hope that's helpful.
Putting a VERY slight wiggle expression on the position of the footage/still can give it a nice flickery effect. Might need to extend the edges of the frame with Motion Tile or CC RepeTile. Then overlaying a film grain layer on top would work pretty well.
Found this free film grain with a quick search, might have to play with the blending modes and coloring. Bit low res but goes with the look :)
I do the same thing for the channel I run! You only got one video so far but it looks pretty appealing for your first try! The best way to learn is to practice. I know that sounds cliche but it's the truth. Also, looking back at you old work and seeing what you could have done better is a good way to think. If you are trying to do something in a video you don't know how to do or not comfortable with, just watch tutorials and learn! Then take what you saw and apply it in your own fashion. Some criticism on your video, I know it doesn't seem like much but a proper fade in/fade out can really make a video feel "complete". I would also suggest taking more time using the music to your advantage as queues for your text. Other than that, good job.
Are you using a Mac or PC?
ProRes is a proprietary Apple codec. You won't be able to encode to it unless you're running a Mac.
If you're on a PC, a great codec that combines quality with compression is DNxHD. You can grab that here : http://avid.force.com/pkb/articles/en_US/download/en423319
Remember that .mov and .mp4 are just containers. They don't designate codec. .mov itself can be a ton of different codecs.
I see a fair number of questions in the sub that end up being about codecs, so I definitely recommend people take a quick primer on them. Here's a decent article to get your feet wet : http://www.makeuseof.com/tag/all-you-need-to-know-about-video-codecs-containers-and-compression/
I'm not sure you would get the same style, hand drawn character animation and AE character animation give pretty different results. Depends on the style you want though I guess!
You can have flat 3D layers, and have a sort of 2.5D animation. You can also extrude shapes to make them 3D. Like I made this guy (shameless plug)
Thanks! I drew the waist (and the whole character) as paths with fills/strokes, did frame by frame adjustments to match the original. If I were doing an original piece, I would create bones and reference geometry then animate around the bones when I have the motion in place.
It's a sly change of perspective with this three quarter view here, but the waist and head of Mickey Mouse are always the same size. Animating a similar character, I'd create the waist and head circles with a line for the spine between them, work on the double bounce (movement of the hip shown) and then start building the body around the reference.
No tricks to the above, just meticulously replicating frame by frame. But the most important part is to create bones as a reference instead of trying to tackle the full character as shown, in the sense of traditional cartoons.
I actually figured it out!
https://dribbble.com/shots/3263780-Campfire
There is a setting on the stroke effect at the bottom called pait style. And after the first stroke effect all others need this to be set to: on original.
That lets the stroke effects stack. So i made one stroke effects for each mask the auto trace created. Then to keep the stroke from appearing when there was no orange. I set parented the strokes effects opacity to the opacity of the mask.
Works like a charm!
Cool! Reminds me of Daniel Gies who does amazing stuff with AE. His process might help you figure out how to make this...but it's probably not the same process. I believe his technique uses a lot of strategic layers and the puppet tool. https://vimeo.com/69355148
Export a frame with post it note, cover it up in photoshop with clone stamp or anyway you want, track note and then apply track to frame with erased note.
OR
If you got mocha pro you can just remove it there
Thank you! Yea I go back and forth on that topic a lot. I tend to do more varying styles, it's just the stuff that is in "my style" always ends up being just a bit more rewarding and a bit better.
When I first started I thought it was really important to show as much variety as possible, but the catch to that is you don't necessarily become a master of anything. Then I started following animators like Scott Benson and Alex Grigg, and those guys obviously have their own style. Basically what I'm saying is it's a good point to bring up and thank you for liking the work!
CS6 also predates Adobe’s native ProRes and DNx encoder and decoder. And you’re on Windows, so you can’t access a ProRes encoder via QuickTime.
Select QuickTime, then click the Format Options button, that brings up another dialog with various QuickTime codecs. Pick Animation.
Consider saving this as a output module template and making it your default. For CS6, QT Animation is your best bet. Don’t export directly to H.264. I understand it’s easier and skips making a huge uncompressed file, but often it’s actually slower to render and error prone (which is why Adobe removed it).
I recommend skipping Adobe’s H.264 (and H.265) encoder entirely and using Handbrake to make deliverables. Faster and higher quality encodes with smaller file sizes compared to that older MainConcept H264 encoder.
I'm not sure if you're using it, but my recommendation would be to use the browser addon Reddit Enhancement Suite. It's available for most common browsers.
Check through it's configuration possibilities and be amazed.
Good luck!
It's a paid plugin. Here is the link to get it, you can pay whatever you like for it.
Edit: Actually looks like you can get it for free if you want to. I didn't know that and gave the dev some money, totally worth it though.
Looks great. One thing that stood out for me is the colour of your hair, you've "crushed the blacks". It's cause those blocky patchy artifacts in your hair because the brightness of everything there is too low.
In your S curves, move that very bottom point up a bit so they dont crush down to nothing.
Unless...Maybe you were going for a film look as pointed out here: https://creativemarket.com/blog/how-to-achieve-that-crushed-black-film-look-in-photoshop-and-lightroom
Otherwise, looks pretty dam good!
Yeah! Well I guess I'm not 100% sure, I was thinking something along thelines of https://dribbble.com/shots/1486997-Vintage-camara and https://dribbble.com/shots/1590644-Building . I think trying to add some depth by using shadows would help immensely.
Very neat. You can do something more intricate with the body copy though. What id the blue went through the previous two dots before landing in the middle? What if the other text on the other slides were swiped through then landed on the middle section? Go follow some UI motion designers on dribbble. Google has a bunch of them and they're great for inspiration. https://dribbble.com/google https://dribbble.com/johnschlemmer
If you're referring to how the entire shape has a small amount of "wiggle" to it, as if the outlines are in constant motion, I believe that can be achieved using wiggle paths.
If you are referring to how the spikes move slightly behind the shape rotating, you can achieve this using puppet warp pins, but it'll take awhile. I just learned how to do it to get the finger to bend in this shot.
Basically you precomp your entire shape. In my case, I precomped the finger. I moved the precomp around and used position keyframes and the graph editor to make the motion appear smooth.
Within the precomp, I applied a puppet warp to the finger and added 3 pins. 1 on the tip, one on the middle, and one on the end. I played around with it a ton and basically manually animated the finger within the precomp with the puppet warp pins and got it to align with how the finger was moving in the main comp.
The reason you have to precomp the puppet warped item is if you move an actual object that has a puppet warp applied to it, it'll break the mesh and won't animate.
In the case of this animation you posted, she probably precomped the entire virus, added a rotate animation to the precomp, and then within the precomp added a puppet warp to the virus shape and a pin to each spike and animated them to line up with the motion of the spinning in the main comp.
Let me know if this makes no sense and I'll try to explain better/use pictures haha
Looking for free content like photos is difficult, even more so to find footage. Most free websites have a limited amount of free content or the content they give away is not high quality.
One place I can suggest that is free and has all creative is Unsplash. These are photos are usable in commercial environment. Here is the license if you are wondering.
Hopefully this gets you part of the way.
Try a google search for datamoshing and you will find some things that will blow your mind.
Now, while I know of no plugins for AE that do that, a bit of that Google search should turn up a few tools for you.
If you don't want to be too specific about it, you could just open your video file in a text editor and start changing things here and there then save it. I'd suggest doing this to a copy of your footage...
I have a friend who's very artistic and he likes very distressed, torn up, destroyed, modern art and he would make experimental video projects that way - projects like this one.
No indeed, avi shouldn't be causing that regardless. Looks like a colour depth issue from the screenshot. It'll probably depend on what player it's watched on.
The quality should be the same between the mp4 and avi considering it's the same codec. I just tend to recommend mp4 because of its broader browser and player support but avi will do just fine on YT.
Right, got you. Short answer is no easy way other than what you said: trace the shapes to “fix” what should be the paths! It can be luck of the draw when downloading icons from the net. Why people outline the artwork like that I don’t know! There’s a fantastic site I use called https://thenounproject.com but again some are outlined. Sorry no good answer!
You can purchase and even acquire free fonts from there( as well as other font sites like Dafont, fonts.com, 1001 fonts, etc....) You need to install the font file to your fonts folder on your computer system in order for it to be available for use. Also https://www.fontsquirrel.com/matcherator is a good place to search for unknown fonts.
I would knock out a rough 3D proxy shape using a free 3D modeling tool like Sculptris or SculptGL. Use a still frame of your statue as a background image reference and rough in the geometry to approximate. If it doesn't match up perfectly to the outside silhouette, it's ok if the model overshoots the edges a little because you can always do a more precise mask in AfterEffects. You can then export that model and bring it into AE as an OBJ either using Element 3D or the Cinema4D/Cineware workflow.
You'll set the materia to receive shadows only, add an After Effects light, and animate a solid to move between your object and the light.
After Effects is not very good a cell animation. I've seen people use Photoshop or Flash. There are also software specifically designed for cell animation. EDIT: Here's one I've seen cell animators use. http://www.tvpaint.com/
You couldn't do it exponentially or infinitely, but if you just want to up-res an existing picture by about 200% or so, there is an online AI tool you can try: https://letsenhance.io/
I did some fucking vegas billboard with a similar output and I ended up going with http://www.squared5.com/ to get the size/codec export I needed.
Where you getting the little yellow exclamation mark in AME?
Yeah go for it.
The only good point in AE plugins is Limber's knee pop remover. Wish Moho had that. But you can find ways around it.
Also wish Moho had better motion paths, but I expect it's a future feature to be implemented. Nothings perfect... hence you end up learning all the tools you can get your hands on.
Here's my tip, export as mov pro res 4444, just for the simplicity of having one .mov rather than a bunch on pngs. Then in AE put the fx on the mov: channel>remove colour matting. And set colour to white. Export at 4k/8k if you need to have something to zoom in and out of within AE.
Some nice behind scenes:
https://moho.lostmarble.com/blogs/news/moho-featured-artist-animwood
Hmm... I used this plugin at work on a project where we were sent some really badly shot greenscreen footage. I was a few years ago, but I seem to remember that it helped a bit... http://aescripts.com/screen-equalizer/
Also, to piggyback on the Primatte suggestion... I just saw the other day that the Primatte keyer is bundled in with the free version of Blackmagic Fusion 8: https://www.blackmagicdesign.com/products/fusion/vfx
Fusion is a separate program than After Effects... it's a node based compositing program that Blackmagic acquired about a year ago. I haven't messed around with it too much yet... but Primatte for AE costs around $500, so Fusion might be worth taking a look at.
Aegisub
You're welcome.
Bonus,..
Even better, aegisub can do more than that.
https://youtu.be/CadvKYaUcsc?t=27s
Yes, all the effects is real time effect (well actually depends on how heavy the effects is used)
Well I do not know if it is lighter but Davinchi Resolve(for Premiere) along with Fusion (for AE)Both from Black Magic Design Maybe Hitfilm. But truthfully if your system can't handle it as it is now I think you are still going to have issues.
Adobe software has a weird glitch that causes a gamma shift on video encoded as .mp4. It's pretty well-documented by the community even though Adobe often fails to acknowledge it. Try converting using a different software than Media Encoder. I recommend Handbrake. It's free and quite easy to use.
So you can use an expression called sampleImage() and give it a position. What it does is looks at a spot and gives you the RGBA value. Then you can do something like change the opacity of a layer based on the brightness of the pixel you're looking at. And the source layer that it looks at can be hidden, too.
In my case I took an image like this: https://musescore.org/sites/musescore.org/files/partial_0.png
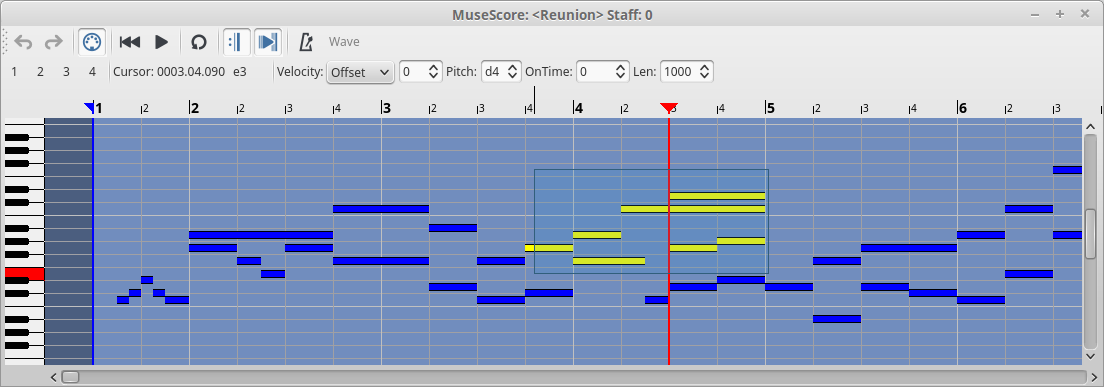
And did some photoshop to clean it up a bit and cut out the background. But then as it animates by, my piano keys (each their own layer) looks at the color passing underneath and if it's transparent, the rotation is 0, but if it's black, the key layer rotates to like 20 degrees or whatever to look pressed in. I ran a directional blur to fuzz the incoming and outgoing edges so it wasn't just on/off but would actually animate from 0-20 so you get a more realistic press.
Hmm, probably to export out filtered versions of a song to get different keyframe value ranges instead of trying to do everything with just the regular version's generated keyframes. This way you can have different elements or attributes keyframed to different frequency ranges to really pull it together. For example, you'll normally find a much greater dynamic range with something low passed at about 800 - 1000hz which would be good for an element you want to react more violently to the amplitude changes. Here's a waveform comparion between a low passed audio clip (top) and the regular version (bottom), note the more noticable peaks and valleys.
This isn't a golden rule by any means and really depends on how the piece was mastered, but you can get some interesting results playing with filters/eq. I usually just use Audacity and it does a good job. Also I always smooth out the keyframes so motion doesn't look jittery and jumpy, you'll have to play around with how much smoothing it takes to look good.
Feel free to ask any more questions if you like!
Hey there, Ive shot a couple of dots on my wall while holding a camera. I then tracked it into a null object.
Here is the after effects project with the null, hope its useful. AEP file
Hi, thanks for your feedback! I've made a behance project page including all animations in full length. I wouldn't do so if it was not your comment. Thanks again.
Link: https://www.behance.net/gallery/17150725/Channel-Identity-4-show-openers
I do :) All the time. There are plugin Expression libraries, where you can store your expressions in AE.
Or you can use Notes on Mac, Trello cards. Or my fav Simplenote - free and syncs between devices.
Life is too short - don't sweat at remembering all the expressions. Just understand what they do and what you need to tweak to your needs. Copy pasta all the way ;)
After playing around a bit, I figure out what it is. I recently got NordVPN, so I figured that's the only thing that changed. So I disabled the VPN and reset AE and it works as it normally does. Enabled VPN and it does the same thing. Weird that the VPN would cause that problem. I Haven not updated to the new update. Maybe that will fix it. Maybe I need to make sure Adobe can access the internet though the VPN. I am going to play around with those things and see if I can get both the VPN and Adobe programs to run together without issues.
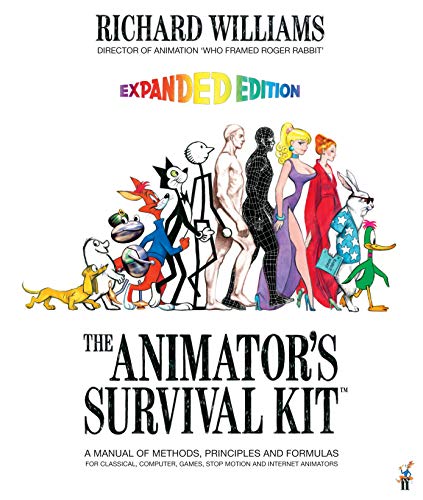
- Animators Survival Kit by Williams
- The Illusion of Life by Thomas and Johnston
- Timing for Animation by Halas, Whitaker, and Sito
I would also recommend studying some physics. 35 years ago I was using Sears and Zemansky's undergraduate physics text.
Books on design and color are legion. I can recommend:
- Creative Illustration by Loomis
- Logo, Font, and Lettering Bible by Carbarga
- Color and Light by Gurney
You'll note that not a one of these books has anything to do with computers and a couple are over half a century old.
Learning to draw is very useful for any kind of designer, artist, or animator. This has little to do with producing drawings, which is an often useful residue of the process, but everything to do with learning to see. Drawing on the Right Side of the Brain is a pretty good place to start.
it's nowhere near as hard as you think. just buy the book Drawing on the Right Side of the Brain, skip past the parts trying to convince you it will work (3/4 of the book) and do some exercises. Notice major improvement, do some more.
if you're getting all whiny about too much work this early, you're in for a tough haul. learning animation is an infinity of shit you don't know. get used to it.
This doesn't solve the problem with the existing video but these apps have helped me in situations like this...
https://play.google.com/store/apps/details?id=com.webnetmobile.android.motiontrackingmarkers
https://play.google.com/store/apps/details?id=com.batchframe.trackpoints
That's because I'm stupid, Rewind is the YouTube thing at the end of the year, Spotify's one is the Spotify Wrapped
https://www.spotify.com/es/wrapped/
It was a hell of a project, so I think it's just my brain protecting itself from that memory
I'd get rid of the black strokes around the cabinets and knobs, slow down the steam animation, and maybe only have it show when the coffee is done pouring.
Here's a Dribbble search with some good coffee inspo.
I think this was kinda my inspiration. https://dribbble.com/shots/3663030-Blend-Tip-004
I like how you are aware of your eyes during the video, but only at the end of the video.
huh I think i kinda understand what you meant but not exactly, as I don't have prior actual experience but I do know how green screen work so guess it won't be way too far off.
found this on steam and maybe I can exploring it a bit for now to know exactly what I need to do https://store.steampowered.com/app/755540/LIV/
This new script saves time and speeds up your workflow when duplicating and offsetting layers and animations. Check it out here and support a fellow AE user! :D
Thanks!
My recommendation would be to create something new instead. Kinetic type is pretty passé, and it would be good to build your skills with something else, wouldn't it?
However if you're bent on re-doing it, get friendly with the graph editor and work on smoothing the motion out. Your movements are super linear in the original. I like the color scheme and font choices, but add in some different graphics and animation to break up the text. Here's a good example of mixing text with graphics.
Put the twitch on an adjustment layer than link the opacity to the audio. that how i screwed with the footage on here. I don't think I used sound keys. it's been a second.
Creative Director is named Paul Mitchell, the piece is made while he worked for the VFX studio The Mill.
Software used: The Mill is a mix and match of various designers and artist so the exact software can not be determined unless you contact Paul or other affiliates individually.
Credits:
http://www.themill.com/work/gatorade-gatorade_fierce_combined.aspx
There is no specific software here that can do this exact thing...
Any 3D tracker and fluid simulation software can do. The important part to know it that this is made within a defined production pipeline so strong rendering power with very good planing for the VFX at the set is more important than software...
Personal Note:
None of the comments here take note on the animation properly. The fluid animation works after determined paths - most likely particle event driven animation as the particles don't collide when interacted with the balls.
So I would suggest too look up ThinkBox Frost, supports Maya and 3ds Max...
Would this be a good choice of CPU to upgrade to? LINK**
A full-sized mac keyboard should have the Home key on it. If you're on a laptop or using one of the compact keyboards you can use <code>fn</code>+<code>left arrow</code> for home.
So, command + option + fn + left arrow should be your shortcut.
Also note that in Edit > Keyboard Shortcuts there's a really nice GUI panel that will show you what keys are what and allow you to re-bind.
Hope that helps!
You're right about that on average laptops, but there's something with the M1 that makes it run pretty fast xd
This might be your best
Additionally, would it be possible to key out the green in this sample?
If so, would it be realistic to get a true light-only view, or would there still be some bleed with the green and/or lose some of the image details?
this book has very good and in depth lessons on walk and run cycles, as well as other animation principles
this book will help a lot
Oh yeah well you won’t have many options lol. Most laptops that operate at a reasonable speed in AE are $1600-$2000. This might be your best bet https://www.amazon.com/Acer-SFX14-41G-R1S6-Creator-LPDDR4X-Backlit/dp/B093TK1PXF/ref=mp_s_a_1_1_sspa?crid=GGWH45QSR6UF&keywords=acer+swift+x&qid=1659271884&sprefix=acer+swift+x,aps,59&sr=8-1-spons&psc=1#
Ask r/builldapc as well
you may want to look into one of those After Effects classroom in a book https://www.amazon.com/Adobe-After-Effects-Classroom-release/dp/0137623925/ref=sr\_1\_2?crid=2LJC6CFZ0ID1Y&keywords=after+effects&qid=1655683417&sprefix=after%2520effects%2Caps%2C138&sr=8-2
Thanks for the reply!
Oh, interesting. Yeah portability is not really a big requirement on my end. Would This be what you have? Novice here, what are the benefits of going with a laptop over a desktop with monitor setup? Any difference, or not really?
I've also been recommended this but I don't know if it would be a comparable machine..
Adobe make an excellent series of tutorial books that start with the basics and build upon it in a logical order. I cannot recommend it enough.
https://www.amazon.com/Adobe-After-Effects-Classroom-release/dp/0137623925
Here's one card game app that is made based on the popular card game Yaniv.
I'd like some suggestions to make it a better one. Thanks.
https://play.google.com/store/apps/details?id=com.zzqq121.yaniv003
I never liked roto brush… it’s always so finicky. One thing I would say is in the preferences, make sure you’re using as much ram as you can (you can specify how much ram to use for each app in the memory and performance section) I would suggest a different approach, if you can find this tutorial (yes, I’m as old as when tutorials were sold on DVDs) it might help you. Basically, you use trackers on your subject, attach solids to said trackers and refine the shape using masks every 10 frames, once you have it all covered you can use those as track mattes
https://www.amazon.com/Advanced-Rotoscoping-Techniques-Adobe-Effects/dp/B001I0HQGC