
What are
/r/AskPhotography's
favorite Products & Services?
From 3.5 billion Reddit comments
The most popular Products mentioned in /r/AskPhotography:


The most popular Services mentioned in /r/AskPhotography:
darktable
Hugin
GIMP
Magic Lantern
Affinity Photo
digiKam
SmugMug
ExploreCams
Shutterstock
Flickr
Photopea
Capture One
XnView MP
PhotoStructure
qDslrDashboard
The most popular Android Apps mentioned in /r/AskPhotography:

Sun Surveyor Lite

PhotoPills

Open Camera

ND Filter Calc (DSLR)

Snapseed

Manual Flash Calculator (Free)
HyperFocal Pro

DSLR Remote

Solid Explorer File Manager

Bellow

PicPac Stop Motion & TimeLapse

ProShot
Manual Camera

LunaSolCal Mobile
Clear Outside
The most popular reviews in /r/AskPhotography:
That should be fine. You touch on the outside of the bag so that's what gets dirty.
This is what I use: https://www.amazon.com/OP-TECH-USA-9001132-Rainsleeve/dp/B000PTFDYO
They're cheap enough you can throw them away later. Though rinsing them works too.
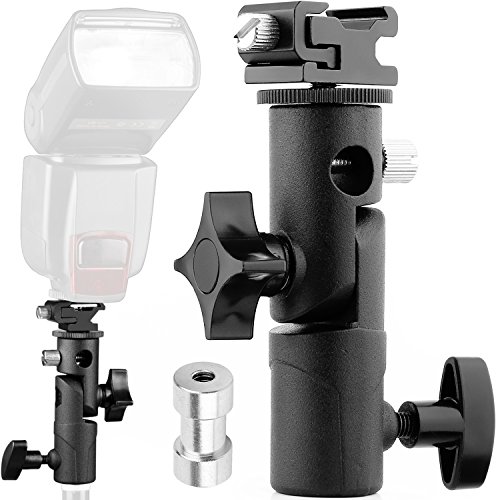
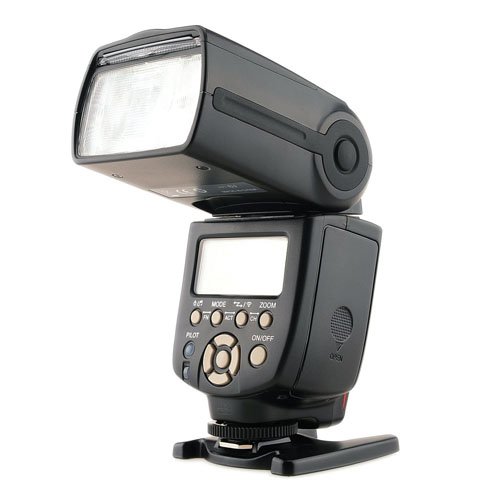
I am going to tell you to go godox and pay a slight bit more, because it will save you money in the long run. When you are buying godox you are buying into an entire ecosystem of lights. You have mini flashes, you have full size speed lights, you have mini strobes, you have wireless strobes, you have full size strobes, you have remote heads, ect, all under one wireless system.
I use Godox TT600 - https://www.amazon.de/Godox-TT600-Speedlite-integriertem-Panasonic/dp/B01937BNA6/ - so 66 Euro each, so two would be 132 and then https://www.amazon.de/Godox-Wireless-Transmitter-Funkauslöser-LETWING/dp/B017XKPTNC/ for 39 takes you to 171. So yeah, thats 21 euro over, but you have the foundation for a much better lighting system and don't need to worry about separate receivers for each flash.
As far as the accessories go, you can buy dome difusers for a couple euro each shipped from china if you really wanted them.
Just buff it out with a dremel tool!
> Rocaris 40 Pack 1 inch Abrasive Wheel Buffing Polishing Wheel Set For Dremel Rotary Tool - 25mm by Rocaris Direct Learn more: https://www.amazon.com/dp/B075C72PGK/ref=cm_sw_em_r_mt_dp_WnUSFbQCDJNK0
/s (OP please don't do this)
My best buddy ran into an issue with them as well.
But, if I'm hearing right, they refunded you the money you got to keep the accessories? That's a big silver lining!
The pricing is still the same ($1,998) on B&H and Amazon, FWIW...
https://www.bhphotovideo.com/c/product/1394217-REG/sony_ilce_7m3_alpha_a7_iii_mirrorless.html
Here’s a link to an external charger
Powerextra 2 Pack Battery and Charger Compatible With Olympus LI-50B and Olympus SZ-15, SZ-16 iHS, Tough 6000, 6020, 8000, TG-630 iHS, TG-820 iHS, TG-830 iHS, TG-850, TG-870, VR-340, VR-370, XZ-1 https://www.amazon.com/dp/B01IN1P07K/ref=cm_sw_r_cp_api_glt_fabc_1WFRAPSMFSFJATXN7Y8B
Or just go for the Hero 7 Black for the extra $30 over budget. Totally worth it for the stabilization alone.
Well, some folks use a variety of papers, and the ICC profiles are different for each one, so leaving soft proofing on all the time only works if you never vary your paper and only use one kind.
For example, I often make tons of super cheap letter-size test prints with Canon's basic matte paper and I only bust out the more expensive papers if I'm making a larger print for the wall or a gift for someone. But each paper requires a different ICC profile and will appear different under soft proofing, so you need a different virtual copy/softproof in Lightroom for each paper type you're printing on.
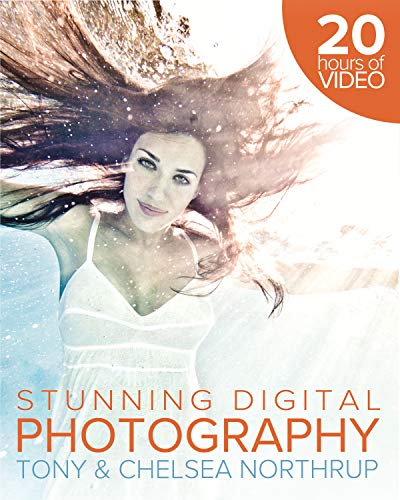
I will recommend this book to you - The Photograhper's Eye by Michael Freeman. It is wildly helpful in explaining photo composition and does a great job quantifying why humans do or do not find photos attractive.
Edit: I can't recommend that book without also recommending The Photographer's Mind. They go hand in hand as some of the best "how to compose pleasing photos" books out there.
Last edit, I swear: Just check out all of Michael Freeman's stuff. It's all great.
>I'd stay away from the XSi as it's too old, originally released back in 2008.
As a current owner of the XSi, I must agree.
In good lighting conditions it is a good camera even in this day, but when paired with the 18-55mm lens it requires a lot of light and I find myself having to shoot at max ISO to capture a clean image.
Additionally, It also is one of the very few older Canon DSLRs that used the dual processors and is not well supported by magiclantern.
I'd at least look to see if you can afford a slightly newer model a t3i or something similar. Even the T1i I think has video which the XSi does not.
Although, if you could increase your budget to get something like the 24 f2.8 (~$150) lens or something similar that might change my recommendation as the lens will allow in so much more light and focuses way faster. Lenses are really what drive your image quality once you go to a DSLR.
Additionally, I'm finding the Canon 60D for about $195 on Craigslist. Something to consider of course.
Not trying to be a dick, but a spotlight would work.
I've said in the past, the best camera accessory i have purchased is a sling strap.
Example https://www.amazon.ca/BlackRapid-Cross-Sling-Camera-Strap/dp/B00LFW69DE
I've heard great things about Olympus Tough series. The newest model TG-5 costs more than your budget, but it's predecesor TG-4 cost 300 dollars on Amazon for example.
Definitely don't buy it, it's not worth it. The lenses are crap glass and the camera itself is more than 10 years old... that's very old for a digital camera, considering how fast things move.
​
Might be PhotoPills: https://play.google.com/store/apps/details?id=com.photopills.android.photopills&hl=en
At least is very similiar to one of its tools.
I don't own this lens but every review I've read says it's as good as the Nikon version. Tamron 70-200mm F2.8 G2. It's about half the price of the Nikon.
Network. Network. Network.
A web site is good, but is a landing page to direct traffic.
Do you have a free facebook business page? A www.google.com/business page?
Yelp page?
Capture One. I moved away from Lightroom nearly four years ago. After taking time to learn the nuances, it's my main RAW editor. I only use Lightroom for my older photos or non-professional work.
There's a free trial https://www.captureone.com/en and you can also go visit r/captureone
ImageMagick's convert command may help. You could write a bash script that does the following:
- Find all files in directory.
- For each file: convert -transparent white <input-file> output/<filename>
I have never used ImageMagick, but let me know if it works for you.
I use Instagram for "hey, I am here" or "this is what I'm doing today" kind of shots. I do duplicate my Instagram shots to Facebook because most of my Facebook friends do not use Instagram. (I use IFTTT to duplicate the work). These are always taken with an iPhone and always uploaded at the moment, or shortly after the moment.
I will also post extra stuff to Facebook that might be more personal, directed to family or people I know, and which has less interest to the general public. My kids playing in the school band or something.
I use Flickr for more thoughtful, artful work, and for more comprehensive documents of my travels. These can be posted weeks or months after they are taken.
Hope this helps.
I consider anything I upload as 'lost'. The Internet is basically just a huge copying machine when it comes to pictures. I slap a Creative Commons license on them in the hope of at least getting attribution.
To answer your question, the best way to protect images online I've found is basically limiting their size. Big enough to see it, but not so large that it's useful for anything practical.
I'm scanning a lot of 35mm ektrachrome and kodachrome slides with the canon 9000f. (I'm sure there are others equal or better; flatbed scanners are remarkably good and remarkably cheap.) It has ample resolution to resolve the grain in ektachrome. I drive it with VueScan. Once you have your image in digital form you can do anything with it that you could do in a darkroom.
I have over 10k shutter count and still going. Yes, you got a good deal. If you like to tinker and you want some added features (like turning the audio limiter off and having VU meters) go to magic lantern https://magiclantern.fm/index.html - I did and was grateful for the added features.
This is the software to get, and it is free. You also need photorec. Testdisk will recover a partition, and photorec will recover the photos from the partition.
Sounds like you need to look into getting a better monitor. Most gaming/work monitors won't display things how you want. Get yourself a decent photo editing monitor, something like this https://www.amazon.com/dp/B01LW8JU15/ref=emc_b_5_t
You should be able to edit freely on your computer, send to your phone and then calibrate your monitor by comparing them side by side until they look the same
I use a program called PicaGeoTag (from https://www.picageotag.com/en/) on my windows computer. It works in conjunction with an Android app called GeoTrack: GPS tracker, viewer, Image geolocation (on the Play Store at https://play.google.com/store/apps/details?id=com.panaustik.geotrack). You can't just search for "GeoTrack" because there's are only about a thousand clones.
After installing GeoTrack on your phone, make sure it is allowed to run in the background, even when it is not active, or it will lose track of where it is. Fire up GeoTrack on your phone. (I'm not gonna repeat the entire instruction manual here.) Start it tracking your path. Go to the Calibrate menu item, which displays a changing QR code. Take a picture of that screen with your camera. Go take pictures, carrying your phone with you, of course. When done, stop the tracking mode. Ingest all the images, including that picture of the screen into a separate folder. Export a .GPX file from the GeoTrack Android app and put that in the folder too. Now, run the PicaGeoTag software on your computer, giving it that folder. It will automatically adjust the time in the pictures by the offset between what time the camera thought it took that Calibration picture and the time indicated by that QR code. Then, it will set the GPS coordinates for each picture based on where you and your phone were at that exact second.
Finally, I also use a program called IMatch (from photools.com). It has a feature that lets me manually fine tune GPS coordinates and even set the direction the camera was pointing. Then it uses the Chicago length of the lens to show you the cone of the images coverage on the map.
This technique works with any camera.
https://www.amazon.com/OP-TECH-USA-Comfort-Strap/dp/B000928KII/
Simple, comfortable, no garish branding, several colors to choose from, one-piece (none of that buckle bullshit that OP/Tech is usually pushing).
This reminds me that I need to get another one.
(Replace .com with your country's Amazon domain, for example .co.uk, it will lead you directly to the corresponding listing.)
If your camera doesn't have built in WiFi, get one of those SD cards that lets you beam photos to your phone. I regularly photograph college sports and they are so useful for getting photos of big plays on social media as fast as possible.
You pretty much want to jack up your ISO. And you have to get away from those street lights. It's like how you can only really do astrophotography on moonless nights because the moon overpowers the stars? Bioluminescence is really low-level light and nearly anything else will overpower it. Shutter speed adjustments won't help, because they'll make both sources of light brighter in lockstop, and the street lamps are still overpowering the fireflies.
I don't have fireflies near me, but shooting a blue red tide was damn near impossible for me until I found a dark cove without street lights hitting the beach.
Consider getting in the car and finding a less light-polluted spot with fireflies to shoot; google or Flickr may be your friend on finding local good spots for these types of photos.
See also: https://www.shutterstock.com/blog/hristo-svinarov-photos-fireflies-tips.
I'll tell you a secret. Probably the image that you're thinking you can get based on pictures in magazines or ads is mostly (if not completely) rendered in the computer, with no concept of reality that can be done with "practical" lighting.
That said, here are a few tips.
- Learning off camera flash will show you that you can make dusk into night, or late afternoon into dusk.
- To define the care more you'll want some other light around it to help define the shape. Remember shadows create interest, so use the other lights from angles.
- If you shoot at night, you can do a 10 second exposure (or more with the right settings) and then simply walk quickly and pop a flash a few times at various angles before the shutter closes.
- Put a flash inside the car to show that it's not just a black hole.
Doing "good" car photography generally involves a huge studio, massive softboxes, and thousands of dollars in gear. You can get some great shots with a zoom lens (~100mm) and isolating certain interesting details.
Practice tring "new" edits. Or try to imitate your favourite photographer/cinematographer's edits.
Also helps to use the colour wheel to check which colours go well with each other. Usually people add colours in split toning section or change the hues in the actual individual colours.
Photopea is AMAZING. It's relatively basic.... but it's a browser based photoshop clone. For simpler stuff, it's great. And it was all created by a single guy as a passion project. Check it out
Lightroom / Photoshop is the professional standard, and well worth it if you're a serious hobbyist or pro or semi-pro. It's the kind of thing you can put on your resume. However, there is a subscription payment system and it's a big suite to learn. On the plus side, there are a ton of free tutorials online. If you're serious about photography and can afford them, it's worthwhile. (I recommend Lightroom Classic, not Cloud version)
But if you're just starting out, I think a great entry point is Affinity Photo. Normal price US$55, no subscription, full-featured for one by one photo editing. Last year it was half price between November and February, and I wouldn't be surprised to see discounts again in about a month or so.
I don't really see how it has a cult following, but you could also take a look at RawTherapee.
I've heard good things about Affinity Photo, but I've never used it.
Put your SD card directly in a card reader (don't do it through your camera -- if you are). Then see if you can get the photos. If you still can't, get PhotoRec (the best photo/file recovery software I've used -- interface is a little weak, but it's pretty easy to work through).
I got this for starting ~3 years ago: https://www.amazon.com/Canon-Rebel-T7-18-55mm-II/dp/B07C2Z21X5 it's the same camera and I got a SD card and cheap (~20$) bag separately.
The bundle you're showing itself seems full of junk, but the 2000D / Rebel T7 is a very good starting point, even with the stock 18-55 lense. It's not the best in the world but has been designed with beginner in mind and I think is very good for this. You can always latert upgrade the lense and/or the body based on what you'll see you use it the most for.
Get/learn Snapseed. Saturation and contrast are probably the settings you want to mess with.
Pay attention to your lighting. Avoid shooting things that are lit from the back and try to get them lit from the front (and probably a little from the side). Consider taking pics in the shade, rather than in full sunlight. Watch your composition.
In the Camera app itself, tapping at any specific point on the screen will set the point for focus and for metering. Tap somewhere light, and the image will get darker. Tap somewhere dark, and the image will get brighter. Once you've tapped, sliding your finger up/down can adjust the exposure (exposure compensation).
Not sure what you mean by "serious" mobile photographers (I mostly just fuck around with my Huawei P20). But for Android, I use Open Camera. Basically gives me more manual controls than my Huawei has.
It's got some interesting features for video like picking codecs, control over bitrate, FPS, and a few "log" profiles (which I think is simply a filter because anything I shoot using this setting ends up noisy).
As for photos, it works just like your run-of-the-mill camera app, but with control over shutter speed, ISO and focus distance.
I think it depends on what she's trying to do. Rather than an SLR kit which is bulky and hard to carry around, she might benefit more from something like a Sony RX100 or Fujifilm X100T
They're quite pocketable and have full manual mode she can both learn about the basics of photography, learn to take great shots and would actually want to carry her camera around since it's not a big deal.
Really good guide here:
https://medium.com/get-outside/how-to-photograph-the-milky-way-5b49125c47dd
How to do this even when you have a polluted sky (close to cities):
http://www.lonelyspeck.com/the-milky-way-in-los-angeles-light-pollution/
Unfortunately, this is only possible on light field cameras. On a regular camera, the shot must be in focus, as there are really no major adjustments you can do later.
I don't know what you mean by "real". They are real photographs. But with essentially all quality photos, they are edited. Though probably minimally, since it is a time-lapse sequence.
Astrophotography is an intricate and difficult area to get into. It requires a lot of technical know-how, patients, and equipment to back it up. Then to get "video"/time-lapse of it, it's quite impressive (and requires even more equipment).
There is a lot of great astrophotographers out there, like Luc Perrot, who I follow.
I've tried to get into it myself, but there aren't dark enough skies around where I live, so I only have opportunities on vacation.
You may luck out with a used dslr. I would try to find a nikon d3300 or similar in the series. They are inexpensive when sold used. A canon rebel would be a good one as well. You will have to search a bit, but there are sources. If you are are nervous about buying used, check out the advantages/disadvantages on this site: http://www.makeuseof.com/tag/never-buy-new-dslr-always-buy-used-dslr/
In the absence of a light meter you can also use an app on your phone. I have used Fotometer Pro successfully when shooting with vintage cameras. I have also compared the readings to the light meter of an Olympus OM-G and found them to be similar.
What model is the Nikon?
(and, as mentioned, lock in the ISO for correct meter readings)
If done in very subtle way, and adds to context/story it can work out.
However, 99% of the times it's not. It doesn't make the picture stronger, does not add to its story. Then it becomes just a gimmick. It aims for that color contrast effect. Nothing more, nothing less.
Why not having a discussion? Show examples. Ask them, "does it (for you) make this a better picture?".
Some reference: http://www.pxleyes.com/blog/2010/03/50-outstanding-examples-of-selective-color-photography/
Or have the same picture; in color, with selective color; in B&W
​
​
There is probably better options but I just want to share my experience.
​
I'm using a Canon 50D and it's doing pretty good job. By default you can't record videos even if the hardware have video recording capabilities - that's where the Magic Lantern come in.
hahaha yes, that always works... but then you'd have to deal with an external recorder for sync sound.
Magic Lantern will allow you to have a little more control over your recording settings on a Canon, but you're still limited by the size of your media.
> I don't know if this is the place to ask this but help me please.
you have a photography question, so this is the right place.
> I want to know how to make selfies like this photo with dark/black face, so your face can't be seen.
That would be a "silhouette".
Basically, you need to have light on the background, not on the subject. Then you need to expose for the background. You will need to be able to set your exposure manually, or otherwise override your camera's auto settings.
https://www.eyeem.com/blog/10-tips-for-taking-stunning-silhouette-photos-with-your-smartphone
https://digital-photography-school.com/how-to-photograph-silhouettes/
Not sure about that lens, but I use PTGui for stitching, and a Nodal Ninja tripod head (my spherical panos: www.panoramiceye.com). Might want to try /r/panorama too.
Unfortunately both the other guys are correct: You've reached the limits of how much you can push the images. Lately I've come across similar situations with the Leica Q / SL sensor - though admittedly at ISO / exposures that would demolish the Canon.
There are plugins that do attempt to reduce banding and other common pushed artifacts but I've found it very, very hard to get extremely pushed and banded images to a state I'm finding anywhere near acceptable.
Most professiona's workflow uses Adobe Lightroom to sort large numbers of camera RAW files, and make mass adjustments. Then they use Adobe Photoshop to make fine adjustments, retouching and major digital artwork.
Capture One is probably a better RAW editing tool overall, it also is vastly better for tethered studio capture. Lightroom only offers rudimentary camera control. But Adobe provides a comprehensive set of tools for the entire design process. I'm not an Adobe fanboy, and I don't want them to achieve a monopoly on the design software market. But if you're setting up a multimedia production company, the Adobe suite is everything you need for one high monthly price. It has a somewhat consistent design language in the interface, and most professionals know how to use it. Their stuff is far from perfect, but it is a complete system, and you can expect freelancers to understand it by default.
If you are a command line junkie, ImageMagick is the way to go.
mogrify -path [output directory] -resize 1024x768 *.jpg
It will preserve aspect ratio and make the images fit in the box. Be sure to specify the -path option or it will over-write the existing images.
If your work flow is jpeg>adjustment>jpeg no software made will preserve image quality.
If it is RAW>adjustment>lossless format, virtually every app is pretty good.
The reality is that every adjustment you make compromises image quality. Every adjustment comes down to mapping a range down to a subset of that range and/or mapping a subset to the full range, both lose information.
For free and simple I like this one best: http://www.xnview.com/en/xnviewmp/
well if you havent touched the sd card since you deleted it you may be able to recover using some recovery software
I dunno which one is good but this one I found on google
Why the little packets of silica that come with a lot of products, especially electronics items are worth keeping and reusing for purposes like this. I keep them in my camera bag or in anything else I store my camera gear in. One can buy them online too.
https://www.amazon.com/Dry-Premium-Packets-Desiccant-Dehumidifiers/dp/B00DYKTS9C
This is the one I have. I'm pretty sure it's an Amazon exclusive model. It doesn't look like this model has the matte screen, but I could be wrong, I didn't read the description that in depth and I've never noticed anything like that on mine. I absolutely love the screen and colors on this though. It's really taken my editing up a notch.
When you buy the 2CR5 battery, it will look exactly like the battery in your hand - take a look at this link from Amazon:
The picture had me scratching my head because the batteries I recall using roughly 25 years ago didn't look like two separate batteries in a case. For good measure, hold onto what you have until you have a working battery in your camera.
Everyone's got good advice in here, but i bought one of these and have used it in sleet, snow, rain and sand and love it. It has a minor insulating factor too, so helps a tad with battery life. As a side bonus, i use it to wrap up fragile stuff when throw in a bag in a hurry. It takes a little bit of getting used to, but i think it's worth every penny. https://smile.amazon.com/dp/B017KOJWMU/ref=cm_sw_r_cp_apa_fabc_zBf-Fb9XFE8AZ
The lens I got off ebay came with a non-chip adapter that I tried out initially. I first learned photography on a Canon AE-1 so I have experience with manual focusing but the DOF is too shallow to not be completely confident. I ended up buying this chip adapter off Amazon and it has been working out well.
Edit: Here are some images I have taken with it.
Bro just buy a cheap camera with a macro lens adapter. You can get a bridge camera for a few dollars and a piece of glass that you put on the end to convert a normal lens to focus closer.
If you want fast just amazon a cheap new or used model. Or wait a while and grab on ebay for really cheap.
The cost of a phone with a decent camera will be the same and shittier quality.
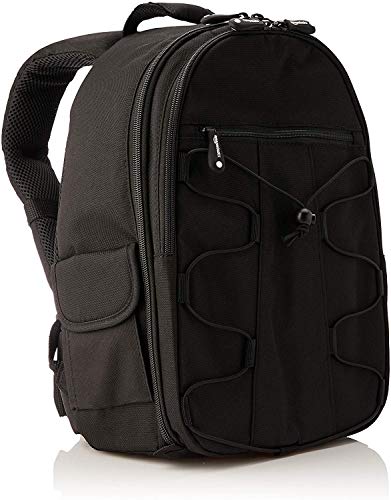
First off, its a running joke in photography that you'll never find the right bag, its an endless search, so welcome to that.
If already have a good laptop bag you like look at inserts especially if its just for a camera + one extra lens. I have one like this that I use in a regular Chrome shoulder bag and really love it or in my hiking backpack. You can find all sorts of shapes and sizes. They work best in messenger style bags but can work OK in backpacks if the zippers come really far down the sides.
Honestly, in the $50 budget range that is probably your best bet, good camera bags (like good bags in general) are pretty pricy. I have an large Incase backpack that I like that was $250. To answer you question about Amazon basics ones, I got a free one when I bought my camera from them and I just gave it away, I did not like it but that was based on size and functionality, not quality.
People are downplaying the utility of inexpensive cameras. Your iphone has a fixed focal length lens, most cameras will have a zoom lens. I have no idea about this camera it was the first one which came up on amazon https://www.amazon.com/Canon-PowerShot-180-Digital-Silver-Accessory/dp/B01B6YDD1G/ref=sr_1_3?s=photo&ie=UTF8&qid=1544206439&sr=1-3&keywords=camera&refinements=p_36%3A-20000 but it has an 8x zoom. You can get much closer to your subject when zoomed in, letting you fill the frame and have more options with composition.
That added flexibility, even if the optics and features of entry level cameras are not amazing, I think, it pretty useful.
Oh I am sure brand doesnt matter that much. For example https://www.amazon.com/Neewer-43-inch-Collapsible-Multi-Disc-Reflector/dp/B002ZIMEMW is a good choice. If you dont have a third person to hold it just get any stand or tripod and you are good to go. You can also make the model hold it if you are shooting face/chest portrait ^^
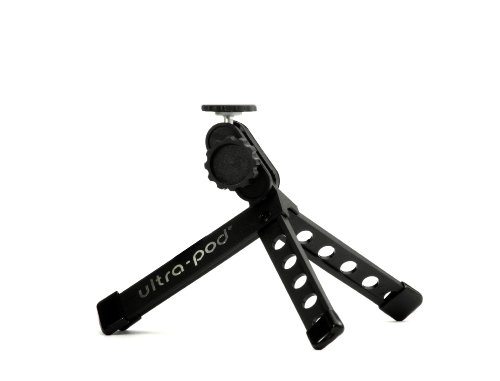
Don't buy a cheap tripod unless you want another "screw to break" and to buy a replacement in a year anyway. Buy once, cry once.
I picked up a Manfrotto about a year ago and it's been amazing. Very solid construction, and small/ light-weight. There's a "small" and "large" version. For your camera you could probably get away with the "small".
https://www.amazon.com/dp/B01N8XH4U1/ref=twister_B07TGP4TWQ?_encoding=UTF8&th=1
Start shooting about 3 hours before sunset. Use an app like fotocast to get photography suggestions based on the weather and time of day, or golden hour to plan the right time to take photos. Use a fill flash or reflector to fill in shadows on their faces and balance the lighting with the scene around. Personally I find flash better and easier to use, but make sure you have it off camera on a stand, about 45 degree angle. Use a portrait lens (minimum of 50mm, but better 85mm+). If you have nice scenery, use F/8 but if the scenery isn't the best use F2.8 to add bokeh to the background. In your case based on your lenses I would use the 55-210.
Tripod is not really necessary for portrait photography because outdoors during the day it would be very rare for you shutter speed to drop below 1/500.
If you have a really powerful flash you might be able to get away with putting the sun behind your subject which is optimal so they don't squint. Otherwise, try to keep the sun about 30 degrees in front of them, so it helps to light to their faces but not directly behind you so they are blinded.
Last but not least, make sure they take their cell phones out of their pockets unless you are doing headshots only.
Click number is probably the number of photos taken with the camera. There's some mechanics inside camera which will eventually wear (except in mirrorless cameras).
> 50mm 1.8
This is only 90$ as new, very good quality lens for the price: https://www.amazon.com/Canon-50mm-1-8-STM-Lens/dp/B00X8MRBCW
Most cameras use these day CMOS sensor (as well as phones). Only color issues I can think now is chromatic aberration, caused by the optics. It can be corrected by using better lens or in post processing. Anyway, even the cheapest DSLR camera has much bigger sensor than any phone, which means better image. Modern phones do magic in the processing and of course newer sensors are better than ancient.
Here's some information: https://en.wikipedia.org/wiki/Image_sensor_format
iPhone 6 sensor is 17.3 mm², smallest DLSR format ("micro four thids") is 225 mm² and the sensor in the example Rebel t2i is 332 mm².
Just saying.
This cable release with a lock is listed on Amazon for $11. So, the "can't afford one" issue may not be as big as you think it is.
I haven't personally photographed an eclipse yet, but I can recommend the LunaSolCal app, which has helped me to have a better vision of both sun and moon risings and settings. It also gives you a heads up about eclipses.
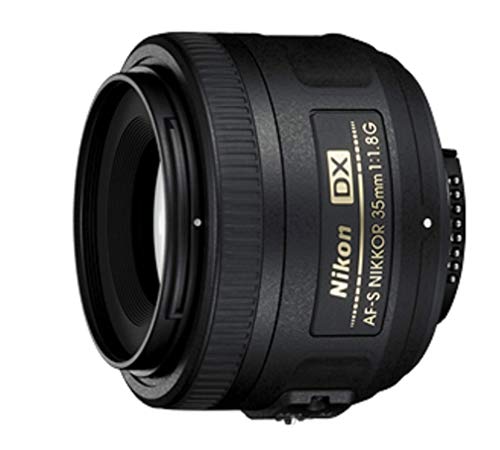
I love that lens. Used it forever on my Nikon D90. It can take fantastic Milky Way shots as well:
https://www.flickr.com/photos/jeffreyabong/sets/72157643230197503/
Most of my photos up until this year were taken with this Tokina lens.
One small cool thing is even though it's a DX lens and I've upgraded to a full frame D600 it still works at 16mm with some small vingetting. Not sure if this applies to the Canon version though.
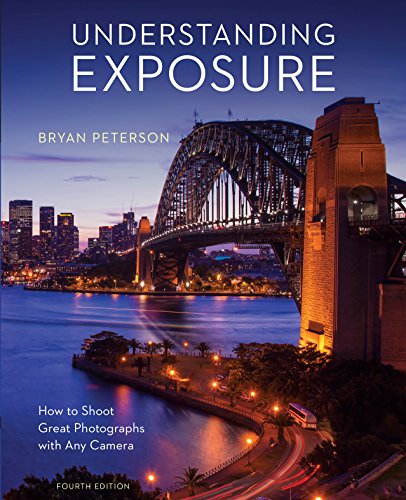
Youtube has zillions of good free tutorials. If you have a question in your head, put it in the Youtube search bar. "How does shutter speed work?" "What does aperture mean?" etc. Those will get you started. I also used the Scott Kelby books and the Bryan Peterson book.
Mainly, start working with your camera. Shoot around. A lot. Every day. You need to learn how it works because photography is about choices and moments.
If you want to get a solid start, look up "DSLR how to shoot in manual mode." Sometimes, if you put in your camera's make and model number, some kind soul shows you exactly how to do it on your very camera.
I'm new at still photography. I've been working at it about 18 months now. I'm still struggling, but I've learned a lot just by browsing around and watching tutorials and reading books in my spare time. Here are a bunch of my photos.
https://www.flickr.com/photos/papatonepictures/
Once you get started, you'll see that getting a great image is a craft. There's no easy way. Oh, and I've had several people recommend taking classes...but so far, I've never found one that could get me to spend the money.
Finally, seek out truly experienced photographers that you know. Ask them to take you to the park for an afternoon and show you how a camera works. I did that, and it sped up my learning process exponentially. BUY THEM LUNCH FOR THEIR TROUBLE.
yeah like folks are saying probably a novelty filter or mirror installation thing
but ill just throw out that ive gotten some good similar kinds of effects shooting like everyday objects like decorative glass plates or cups or what have you. take a walk down the housewares aisle at goodwill or something and see what you find
i dunno stuff like this https://www.flipkart.com/glassbar-handicraft-glass-plate-bowl-design-home-decoration-ii-decorative-plates-restaurant-diwali-gift/p/itm46219d831a788
Do not forget the most important part, the licensing rights! They decide what the buyer can do with the pic. A vague permission can allow them a lot more rights than you intend.
The Creative Commons license chooser is a good starting point if you don't know how to write a license (trust me, unless you're a lawyer specializing in this particular area, you probably don't) and IF you want the person to be allowed to distribute your pic further (that's the basis of all CC licenses). I would pick something like "no adaptations" and "no commercial use". I'd also add something like "in exchange to your payment of $15 on the date of so and so, I grant you the enclosed license for the attached picture" – and copy/paste the full license text that the chooser gives you.
Please not that I'm not a lawyer either. Talk to one if you really care about the fine details, or if you want a license that allows more specific rights.
Thank you for your really helpful reply! Did a quick skim to estimate out what it would cost for me to try and create something like this myself. Do you think this kit from Amazon + a beauty dish could achieve a similar effect? r/https://tinyurl.com/ydg2g23n
For my camera, I currently have a Nikon DSLR
Flat lighting is super flattering on portraits. The sky acts as a giant softbox; wrinkles get filled in, skin looks smoother, all that. It also becomes easier to overpower the natural light with flash if you want a more stylized look, plus the ambient light serves as ultra-soft fill so it's hard to fuck up the lighting.
Rain works great with cityscapes around blue hour through till nighttime. You get this great mix of natural light in the sky and filling in shadows, strong highlights from street signs and windows, and some gorgeous reflections.
Besides that, take a look at any photographers from the Pacific Northwest and British Columbia for inspiration—here's a great example (plus more from the same photographer).
>Unlike the G2, though, the G3's remote connector doesn't serve double-duty as an external mic connector; there's no support for external microphones in this camera.
so as far as I can tell, there is no way to do this in camera. but... it's usually easy to sync up video and audio by clapping your hands or using a clapper board....
I don't use macs, so I can't advise exactly "how to" do this in person.. but it's usually easy to find the audio SPIKE in the wave form on the recorded audio and match it to the "hand clap" frame (or to the same SPIKE on the in-camera mic audio)
If you find the audio gets out of sync over time, do the CLAP every XX minutes and chop the audio file / trim to match.... (then of course edit out the claps later :)
if imovie makes this hard there are alternatives to this : https://alternativeto.net/software/imovie/
So, I'm pretty conservative and based in the US. I stick to a few stores I trust: B&H, Adorama, Cameta, my local shop, maybe a few others.
To be honest, I would not buy from this place. Looks like it's in the UK or something? Personally, I'd wait till mid-November and see how "black Friday" sales pan out at Jessops or somewhere reputable.
That's not to say there's anything wrong with that store. I just don't know it. Here's its ratings page at resellerratings.com:
I'm going to echo the points that /u/kickstand made in a slightly different way.
List the items that are important to what you wish to shoot. Something like dry, no clouds, etc. Then pull up the weather statistics for that area - and find the "best" time frames.
I'll use the milky way over landscape elements in Arizona for an example. I want the milky way season - March through October. I want no moon (the photographers ephermis) - so during the new moon periods. I would select the landscape elements I want to shoot and use some astro software (stellarium) to figure out the months. I would list all of that and then use the weather almanac to figure out the best weather - clear skies, etc. ---- https://weatherspark.com/y/2460/Average-Weather-in-Phoenix-Arizona-United-States-Year-Round
Even if you are somewhat local to an area there are things you can do. For instance for Fall colors up in Sedona - there is about a week window to catch them. Rather than drive 2 hours to find out if you are too early or too late, I call the forest service and they will tell you if the colors are in the window or not. Also, before I leave to go somewhere to shoot, I look for some webcams local to the area to check for clouds or whatever I need or want to avoid. You need to adapt your thinking to how the information may be available.
There are lots of informational sites on the web that are tailored to specific types of need. You just need to search them out.
How about a Pentax K-50 -$419 with memory card, lens, and flash?
The camera is weather-sealed, as is the lens, so you don't have to worry when shooting in a wet or dusty environment. Shake reduction is built into the body, so it works with any lens. And the camera is compatible with any K-mount lens ever made going back nearly 50 years.
Also available at Costco as a 2-lens kit for $599.
The 55-300 is okay. As a disclaimer, I didn't buy it, I got this bundle as a gift before the trip.
It gets a little flat out at the far end, but it's a relatively inexpensive way to get decent range. I'd prefer something that opens up a bit wider, but you've gotta take what you can get if you're working with a budget.
I've never used any teleconverters. But like I said earlier - without a tripod, you're going to run into serious camera shake issues beyond 300mm on your body. I know that extra range is tempting, but do the following exercise for me.
Take your 55-200 out to your local dog park or somewhere with birds in anything other than blazing sunlight. Zoom all the way out to 200mm. Try to take handheld pictures of moving animals. You simply won't be able to get your shutter fast enough without bumping your ISO.
300mm on a crop factor is a LOT of zoom. You should be fine with that. If you throw a teleconverter on there, you're going to miss out on a lot of shots because it will be impossible to expose them properly.
The photography plan with Adobe is great for 10 bucks per month. Comes with Lightroom and Photoshop. A great alternative to Ps is Affinity Photo. Also
https://www.adobe.com/creativecloud/photography/compare-plans.html
I wouldn't say Sony colors aren't imperfect, they are more or less a little different. If you're using Lightroom, Out of camera Sony colors look terrible and that just makes color grading more difficult. Just use your histogram, it isn't 100% accurate but it gives a very good representation on your exposure and the more you use it the more comfortable you'll feel during times that you rely on it.
Start using https://color.adobe.com/ and color grading. Also, highly recommend giving Capture One a try. Other than cataloging, it is better in pretty much every way for Sony
As mentioned "split toning" is a form of color grading done in post processing. Also like mentioned, this is done in camera using gelled lights.
If you're going to set up a shoot similar to this I would suggest looking into color theory so your coloring/gelling doesn't end up looking like a mishmash of colors.
This photo is along the lines of an analogous scheme with blues and magentas (they are next to each other on the color wheel)
Generally speaking "complementary" grading is the most common but there are a lot out there. Here's a brief overview of color grading schemes for film but can work for stills as well
Adobe also has a pretty cool website for picking colors for grading or determining colors.
Resolution vise you are absolutely covered 300 dpi is kind of maximum what printing machines are capable of. But really even 180 doing usually looks perfectly fine.
Use this (or any other) calculator to find out, what you can.
There are sites that will allow you to do print own demand with their API, which sites like shopify have plugs in for, but if you are just getting started you can keep you budget down with just placing the orders by through the printers and using static website which can often be hosted for free, and shipping them with a white label, which means with out the printer logo on it.
​
The key things you need to research are platform like static site, shoppiy or wordpress, and on demand print services mostly to see plug-ins for platform and costs like printing but the major one is shipping to your areas you think you will be selling in.
​
The last thing you need to do is work on SEO (search engine opimization) and come up with a general social media marketing strategy which sites like moz.com and hubspot.com write about in their blog
Search "nikon coolscan" on ebay, I see the ls-5000 there for about $500. I have one that's several years old, scans 35mm at 4000dpi, you get a 12MP, 24-bit image from a slide. Has infrared dust removal and other features. Downsides: 1, it's a firewire interface, but you can get a dongle to connect it via thunderbolt or usb3; 2, not the fastest thing, but if you actually look at each scan in photoshop (and you should), it will typically be finished with slide B before you have saved the preceding scan A; 3, the Nikon software driver was crap and no longer works on current MacOS -- but VueScan supports it perfectly.
I don't have experience with real batch processing, I've always done it one at a time, and worked on a previous image (or something else) while the scan ran. But I see in the VueScan manual that it will do this. The directions for how to set up the automatic filename and folder are here. It looks like you could save one batch (from a stack loader, say) into folder "carousel_20" with the starting filename "carousel_20_01+" to get a sequence of names.
There is probably other software for doing this than VueScan, look/ask around, it just happens to be what I know.
It's possible through the command line using ExifTool. Here's a similar question on StackExchange. Since you said you already added the Date, all you would need to do is run the the second command. But you would need to figure out what is the actual date tag you set.
If you decide to go this route and need more help, let me know.
I use indexhibit, it's pretty simple and faily customizable. Their website links to a lot of examples of sites that use it, and here's mine.
EDIT: also, it's completely free.
Here is a site I go to for my specific camera and lens'... I think you can enter your camera and lens also
There are a LOT of pictures and when you click on them, it will tell you the camera seetings used for that particular picture.
It helps me a bit since I am new to all this...
Hope it helps:
I see a small issue with both photos and the solution is the same thing.
In the outdoor photo, the horse is quite clear! But so is the sign behind the horse. That's distracting and not optimal.
The indoor photo is actually a much better photo in my opinion because it has a nice background and the subject is the dominant component in the image. I see what you mean about a little grain, however.
I also know what you mean about motion.
The solution to these probably isn't flash. Using a wireless strobe at an event like this is VERY VERY difficult and I don't think would be practical for this kind of event. Using an on-camera flash might help a little as a fill light, but you don't want to use it for primary lighting and therefore motion blur will still be exactly as much an issue as it is today.
The solution is this:
1) Wider aperture - This both increases shutter speed by allowing more light, AND it increases background blur ("bokeh") allowing you to isolate a subject.
2) Faster ISO - You can also use a faster (higher number) ISO to get the best possible images in dark scenes.
The problem with both of these options is that they require new equipment. And some of it will NOT be cheap.
Here is a similar photo with professional-quality equipment:
https://explorecams.com/photo/8606879/
Now, this is almost $10,000 in gear, so you might not reasonably expect to get here.
However, if you were to look into a 300mm f/4 lens or a camera body that does better low light (higher ISO) performance, you might cross a threshold of "acceptable" for only maybe $1,000.
Which lens are you using today?
If I had to guess, I would say it's a 200mm or 300mm at f/5.6.
The problem is Canon and other companies keep changing their software, so those applications that claim to capture your camera over USB are mostly irrelevant and don't work. qDSLRDashboard (https://dslrdashboard.info/) is one of the few I trust that should work well to actually capture and control your camera, but it's not designed for live streaming or using as a webcam. It's more of a "tethered camera" application. I'm only mentioning this to highlight that yes, capturing strictly via software is possible, but for use as a webcam is not likely this way.
For hardware, you can just search for "PC capture card" or similar in your searches. I haven't had to buy one in a long time, haven't kept up with what's good/bad. But Elgato is one of the better companies out there for these devices. Most of their products are targeted towards video game systems to the PC to record gaming sessions, but there's literally nothing in how you connect these things that says it has to be used for gaming.
However, not long ago, Elgato did release a compact version of their capture box called the Elgato Cam Link. Here's a video showing how the Elgato Cam Link works to make a camera a webcam - https://youtu.be/GMEZHvAgV6c
Just make sure you connect to a USB 3 port with these devices. USB 2.0 is too slow.
sure, i posted around 900 till now in a photography profile. here is the link. this profile. if you wanted to see all the pictures i took , you'll have to pay a visit to my place , because i usually don't have a habit of posting online often.
Glad to hear you're enfusing! A quick free polishing tool (and photoshop plug-in) is Nik Collection's Color Effects Pro 4. Specifically the 'Pro Contrast' tool's 'Dynamic Contrast' slider. It does an awesome job at leveling out darker areas of the image without blowing out highlights and adds punch.
Definitely stick to manual exposure: keep ISO at 100, and shoot f8 for most scenes. The only thing that needs adjusting is the shutter speed and focus. Shutter speed is easy, as 95% of the time you're just scrolling the shutter wheel until the meter evens out at 0 EV. (Evaluative Metering Mode) For focus at 24mm or less, you can practically leave it at 3 meters throughout the entire shoot...possible closer to 1.5 m in tiny rooms, like half-baths.
Hope this helps!
If you don't mind paying, the Basic (cheapest) SmugMug plan is $7/month or $55/yearly. It can store unlimited full resolution shots that can be downloaded by clients through a public or private link. They can also just view. The filenames/metadata can be visible or not and you can also add comments to your shots. Check it out here:
https://www.smugmug.com/pricing
They have a 14 day trial.
Some film has greater dynamic range than most digital sensors, meaning you have the ability to capture more detailed light/color values. Additionally, the chemical composition of the film has a significant role in determining how an image is captured. VSCO offers plugins for those wishing to mimic a specific film.
Actually, photographing it might be your best bet. The main problem is that without a copystand, it's going to be hard to get the camera exactly perpendicular with the photo lying flat, so there may be some keystoning. So, perspective correction in post may also be called for, as well as cleanup of scratches/dust/colors, etc.
The f/1.4 probably caused vignetting (where the corners/edges of the frame are darker than the center). It tends to be less evident at smaller aperture settings. You can fix the vignetting on the individual member images before stitching, or use a stitching algorithm that uses enblend to minimize the effects.
I'd recommend stitching with something other than Lightroom/Photoshop's Photomerge tool. Hugin is open source and ICE is free.
Yes, this is probably your best bet. Check out http://hugin.sourceforge.net/ for stitching. Definatly search around for linear polarizors, you will need large ones for the light sources and a good (tiffen) one for your lens
Probably worth computer control to automate it, so you could just put the camera on the rig, press a button and a while later you have the finished file.