
What are
/r/Blacksmith's
favorite Products & Services?
From 3.5 billion Reddit comments
The most popular Products mentioned in /r/Blacksmith:


The most popular Services mentioned in /r/Blacksmith:
TeeSpring
Facebook Marketplace
HackADay
Google Photos
Imgur
IFTTT
Instructables
Alibaba.com
Pastebin.com
Microsoft Bing
Wikiwand
wikiHow
ResearchGate
SemanticScholar
IGTV
The most popular Android Apps mentioned in /r/Blacksmith:

The most popular reviews in /r/Blacksmith:
That's really good, don't be discouraged. Based on that, you have some of your basics down pat. I might recommend getting a book or two on blacksmithing. The Backyard Blacksmith by Lorelei Sims has a lot of good information on setting up a shop and learning the basics. The Home Blacksmith by Ryan Ridgeway has a lot of great project ideas with step-by-step instructions and high resolution color pictures to match.
Keep making stuff. Every project you make teaches you more of the basics of smithing. You have to suck for awhile before you can be good.
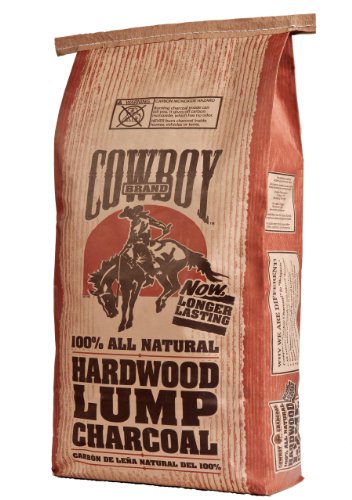
It looks like you are using briquettes, what you'll want is hardwood lump charcoal (i.e. something like this https://www.amazon.com/Cowboy-24220-Lump-Charcoal-20-Pound/dp/B00ABYB9JG) briquettes won't be able to get as hot. Congrats though, I've been trying to find one too but I'm stuck with my brake drum+hair dryer forge for now.
Also see New Edge of The Anvil, also by Andrews. I believe it contains most of the same information with some slight revisions and updates.
Amazon (UK) Link: New Edge of the Anvil: A Resource Book for the Blacksmith https://www.amazon.co.uk/dp/1879535092/ref=cm_sw_r_cp_apa_i_GHFUCbR6D5GG9
Three things:
Mash paddles (they'd sell with the homebrew crowd),
Taster glass flight,
Some sort of 'holder' for a growler.
Here's a mash paddle I made and posted awhile ago
https://imgur.com/a/gh9sc.
There's lots of room for improvement here, but a few people messaged me looking to buy one. You could easily do a waaay better one.
Go get yourself the two biggest brake drums they have at your local junkyard or recycling yard. You also need a couple 18" long, 2" pipe nipples, a 2" end cap, a 2" floor flange, and a 2" tee. You're going to also need a steel drain grate as a clinker breaker and one of these:
https://www.amazon.com/dp/B00H7YL5W4/ref=cm_sw_r_cp_awdb_t1_oPyfDb2TTM2J3
Put one drum on the ground, open end down. Screw the cap onto the first nipple. Use some scrap rod or bar to hold the cap centered on the wheel side of the drum. Put the tee on that nipple and the other nipple on the other side. Take the Amazon bit and screw it into the odd side of the tee. Screw the floor flange onto the top of the second nipple and weld the second drum, open side up onto the flange. Grate gets welded into the inside of the drum and weld up the holes for the lug nuts.
Your blower hooks up to the odd Amazon fitting. Coal or coke goes into the grate side drum.
I briefly looked online at their hammers, and I'm fairly certain that all of them are cast steel. That isn't necessarily a bad thing, as most cheaper to mid range hammers will be cast steel. I would compare the prices to what you can find on amazon. I would say it would compare to a Picard or Peddinghaus hammer, both of which are cast steel.
I guess the reason I point out how they are made is because one would think if their axes are hand forged by an actual blacksmith, that perhaps their hammers are made that way as well. Seems to be not the case.
Here is the hammer I recommend to most new smiths.
If you want to try a rounding hammer, you can buy this hammer and then shape one side into a dome shape. Most rounding hammers start to get pretty spendy otherwise
Anytime you are grinding something, you definitely need a respirator. If you have a coal forge you might want to wear one when forging just to avoid the coal dust and ash. Here’s a good one on amazon that’s decently cheap for the quality https://www.amazon.com/dp/B007JZ1NIM/ref=cm_sw_r_cp_api_gD1YBb2QPA7WW Just make sure you replace the cartridges every month or two.
I found a five piece set on amazon for $15
FPPO Brass Wire Wheel Brush Kit for Drill,Crimped Cup Brush with 1/4-Inch Shank,0.13mm True Brass Wire,Soft Enough to Cleaning or Deburring with Less Scrach https://www.amazon.com/dp/B07QMK64WS/ref=cm_sw_r_cp_api_i_2PfMEbVZ47HDE
It appears that it does not, though it was believed to be so for a long time. There are a number of theories discussed in the linked paper, with Greek origins being proposed. The Greek being "smi- "to cut, work with a sharp instrument" (source also of Greek smile "knife, chisel)."
The Semitic loan word for "strike" is not etymologically related to smith, and there seems to be a great deal of muddiness in how that word was originally sourced.
Don’t want to knock you down, but that is the wrong kind of brick.
Here is insulating fire brick, but you can likely find them at a local pottery/kiln supply, which are amazingly common.
That said, you’d be better off insulating it with kaowool.
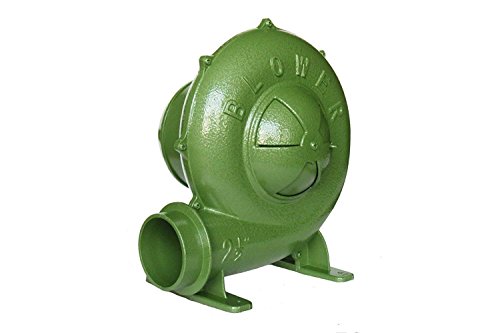
When you can buy a centrifugal fan on Amazon or Ebay for $75.00 to $100.00, why would you want to build one? It seems that a lot of people are having success using blowers intended to inflate jump house type inflatables. I can't see any reason that wouldn't work as long as you build an air gate to control the air flow.
Here's one that is less than $40.00:
If you would like to build your own the sequence of parts is:
Tank > POL Fitting > Regulator > Hose > Needle/Ball valve (optional) > burner
In order to not have to get adapters and stuff, check the male/female connections on each piece. For example, the POL fitting should have a male end and the regulator should have a female input. The hose can be bought with different type of connectors, so check your burner hookup as well and buy the correct hose. Also, make sure you connect the gas fittings using yellow pipe tape.
The big difference between a grill regulator and a 'proper' regulator is that a grill one is usually only rated from 0 - 5 psi. You will likely be operating above that level in order to forge weld or get things hotter.
Here is an amazon link to the regulator I use, which is very well built and goes up to 30 psi. You can get a pressure gauge like this to put on it.
You are going to have a very difficult time sourcing those locally. I live in the states and checked MANY stores.
The top plate looks super rough.
In this price range you can consider the 66 lbs new anvils you can find @ Amazon - they look just like this picture: https://www.amazon.com/Happybuy-Single-Blacksmith-Jewelers-Metalsmith/dp/B075YSCQ4Q/
Mark Aspery and others have reviewed it and I suspect it's good to go for starting out without the terrible face and edge issues. Mark's review was written on March 20th.
Alright here we go
- The acid can either be muriatic ferric chloride. Ferric chloride being far safer and much much more common. Dip it and let it sit in the acid for 30 minutes. Take it out and spray it with windex or something else to neutralize the acid. Sand it lightly after with very high grit if you’d like a lighter finish don’t if you’d like a darker finish.
2 i get my ferric chloride off Amazon Here’s the exact stuff I use MG Chemicals 415 Ferric Chloride Copper Etchant Solution, 945mL Liquid Bottle https://www.amazon.com/dp/B005T8Y20W/ref=cm_sw_r_cp_api_i_cw1lDbFSXD42R
3 usually people use ceramic “pellets” but basically anything hard will work the bigger harder and sharper the stones or bits are the tougher the finish.
4 for the stoning part take the blade and stick it into a vibratory tumbler or a rock tumbler I believe with some water for how ever long. Longer is more scratches less time is a less scratched look. The tumbler can be found for about $55 at harbor freight https://www.harborfreight.com/5-lb-metal-vibrator-tumbler-67617.html
- Cut the deer antler length wise to get two sides that you can then epoxy and pin onto the handle
A fair price for that would be about $250-$300 but if you get some good fishing spots and because it’s for a buddy I’d charge $200-$225 probably up to you
Hope this helps
Are you doing this at your house?
http://hackaday.com/2012/04/08/build-an-induction-heater-and-become-a-metalsmith/
Here's an article that has a little one. It's still 50A @220 ~ 11 KW of power.
If you're not familiar with high voltage safety and what not this is quite a project. Also, remember that your home wiring is probably going to not like this at all. Unless you have the cash to have something big installed I don't know how safe this is.
Definitely. No question at all that it will work. Coal / coke is very very recent in the whole timescale of forging fuels. And many professional smiths still use it (my personal favourite - http://www.spaco.org/latane/TCLatane.htm)
As for looking for fuel... So I've seen these before and I've been wondering if it might not be possible to use some of the higher grade versions of these for forging. I know they are essentially a briquette like "Kingsford" but some are charcoal based, some coal based and with varying amounts of fillers. Anyone ever give these a shot?
http://www.alibaba.com/countrysearch/KR/charcoal-briquettes.html
Check out page 13: http://issuu.com/reactivemetalsstudio/docs/rmscatalog4-23-15sml
That stuff is pretty expensive though. Mokume-gane is pretty neat stuff. I considered it for a watch part that I have been making out of Damascus. If you want to chat, shoot me a pm.
Hi there,
This is my first post, so take it with a grain of salt.
I googled a bit and found not a lot of specific information. I did find the following links:
http://sbgswordforum.proboards.com/index.cgi?board=swordmaking&action=display&thread=15806
http://www.alibaba.com/showroom/railroad-steel.html
The first one is a discussion where the only real conclusion (if you trust the internet) is that it varies greatly.
The second one shows purchasable steel (for industry, not retail) and the details of what they're selling.
I have a friend who works in the Bombardier rail division. I'll ask him and see if he has access to the specs of what Canada uses.
Nothing in particular anymore. As I said the end of the blade is supposed to go the other way. Like this
Dexter Russell Sani-Safe Green Handle 6" Produce Knife https://www.amazon.com/dp/B0071NW16K/ref=cm_sw_r_cp_api_glt_fabc_BHGV5TZ8N6CP5B118JZ6
[Mr Volcano Dual Magma - Double Burner Portable Propane Forge (Complete Kit) Large Capacity for Professionals Artists Hobbyists Knife Making Tool Making Farrier Blacksmith https://www.amazon.com/dp/B07S9T8QNH/ref=cm_sw_r_cp_api_glt_fabc_H0XRXPPJHP69N1EWKC8F]()
Sorry but it's just part of the game. Just like any work gloves the gloves you use in the forge are consumables and will need to be replaced. I use these, just enough protection to do but not enough to let you get careless. Just don't get them wet, lol - no protection at all then. They're ambitious so I don't end up with a pile of hammer hand gloves I'll never use. I go through 2-3 pair a year. https://www.amazon.com/dp/B00CB3N7K4/ref=cm_sw_r_cp_apa_fabc_KQET72QBN3NQ5B050R5Y?_encoding=UTF8&psc=1
Using a regular barbeque regulator is an issue. They will usually run at only a couple psi(or only 1 psi). This regulator, which is similar to the one I use, is adjustable and can go up to 30 psi. You would usually expect to be using ~15-30psi.
This heat shown in the photo, in the middle of the burner indicates low pressure because the flame is burning inside the burner. The flame should be outside of the burner even sometimes separated a short distance in front of the burner.
I would expect that replacing the regulator would fix your issue.
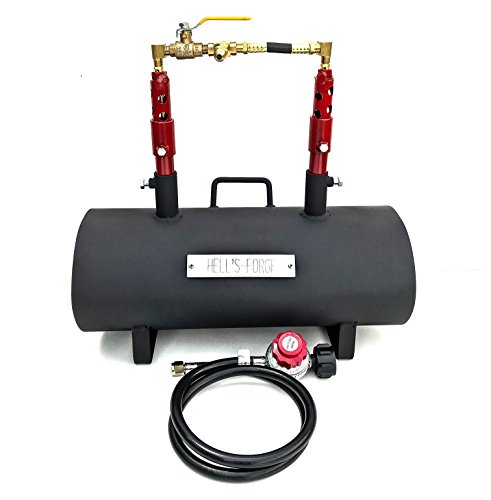
Honestly, I don’t know how helpful my suggestions are (since this is the ONLY one I’ve ever owned), but my Hell’s Forge portable double burner model has performed wonderfully. As an added bonus, the customer service is heavenly (ironic) and will send you free replacement parts even if YOU happen to break something. Here’s a link: https://www.amazon.com/Hells-Forge-Portable-Propane-Capacity/dp/B07DJYMB2D The whole thing is about $300. I don’t know if 600 is your absolute maximum or your desired price range, but I hope this helps!
Not really on the pump... They are reasonably priced, around $100 for a generic one on Amazon... The valve is internal, and works automatically based on internal pressure as resistance rises. I'm not sure there would be an external add on, but if there were, it would almost certainly be more expensive than a replacement pump.
I bought my 5x12 cylinder on Amazon for $155 Check this one out:
https://www.amazon.com/dp/B005CWJSUO/ref=biss_dp_t_asn
It takes a lot of looking, searching and sorting through things, but you can find deals and keep costs down.
I wanted to go bigger on the cylinder, but ultimately decided that from what I've read & saw on various youtube videos that a 5" 28 ton will do everything I want so pulled the trigger on that cylinder & hopefully my build will start this weekend or next!
Good luck!
I doubt the 3/4" will make a big difference, at least not inside the forge but that's just a guess. The mixing tube length is important because the air/propane need time to....well...mix so they can burn.
Mig tips are threaded to match the welding gun. Different welding guns have different threads. Some are 1/4-28, but some are metric. I can't tell you which are which, but I can say that
I ordered my mig tips from a place called Welding City. They sell mig tips on Amazon in 10 packs, but I ended up calling and buying from them directly (I can PM you the details) - for the same price (less than $10 delivered to the US) they were willing to make me a mixed pack of different sizes and I'm pretty sure they confirmed the thread-size for me too.
You should be able to buy a metal file at any hardware store, or on amazon. They aren't exotic or anything. Here is one on amazon
Re: Quenching - you can't harden all steel, you need carbon steel. Rebar is "mystery" steel (it doesnt have a required metal type, so its made from whatever). If you're getting started then I suggest you read up on metallurgy. This is a relatively easy textbook targeted at blacksmiths that's free online.
To just get started, I bought some wolf jaw tongs. They are basically like multi-purpose tongs good a lot of things, but not great at anything. Here is a link to the amazon website. I've been pretty happy with them and they got me started. My next tongs are going to be self made out of rebar (when I can find some rebar somewhere).
I would spend a smidge more on the grizzly version with built in disc sander. I think I paid 95 for mine. Yeah it won't chug through 1/4 stock but for small knives and such it works well enough to learn. 1x30 belts are easy to find on Amazon for a buck apiece or even less, and each belt will probably last at least onr knifes work. 5" sanding discs are even cheaper, and having that large flat area to sand on is hugely helpful for beginners. The whole machine might take some fiddling to get thr belt to run straight or to not have a nasty rattle, but with some tweaks here and there it can run nicely. There are several really high quality knife makers on reddit that use little 1x30s.
Edit: realized what sub I was on so figured I'd ask what you need a grinder to do? Depending on what kind or work you want it to perform should determine if this is a good buy or not
This one is probably the closest to what I have used
Looks like the price on the grizzly model has gone up significantly, but all of these 1x30s are pretty much the same, probably made in the same Chinese factory.
Was thinking of buying a couple of these https://www.amazon.com/gp/product/B003E7E3CW/
to weld in place on my shank.
The bottom place has 1/2" bolt holes spaced all over. Considering cutting a square into the center so I can drop in hardy tools
Just about any hardware store would have them, ask the clerk if they don't know, who might have them.
Also if you have access to Amazon, they have them.
I use this tapping oil I found on amazon but anything will work honestly. Here’s the link: Premium Metal Tapping Fluid - 16 FL. OZ. Threading and Cutting Oil https://www.amazon.com/dp/B01MDS7XQI/ref=cm_sw_r_cp_api_i_ckNxFbEYK7DA3 I know it’s pricey but it’s great, here’s a cheaper option that would work (probably) too: Ridgid 70830 Dark Thread Cutting Oil, 1 Gallon of Dark Pipe Threading Oil https://www.amazon.com/dp/B0002YPMUM/ref=cm_sw_r_cp_api_i_zlNxFb4XCV0RD
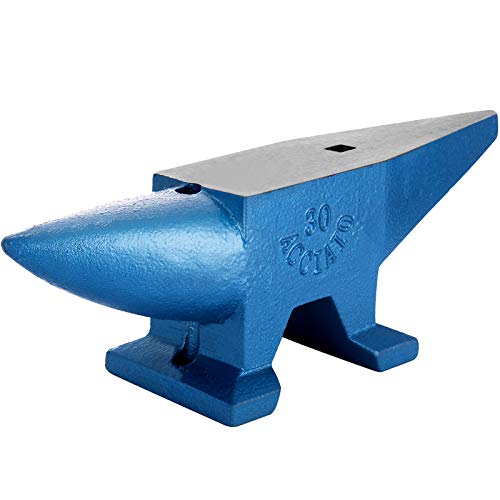
If you're looking to save some money on anvil buying, the 66lb accacio on amazon and ebay is really popular. Prices vary between 130 and 200 or so. There's also a 110lb that shows up occasionally
https://play.google.com/store/apps/details?id=com.pixelsdo.metalweightcalculator is the one I use right now. You can change material, shape, and units to figure out weights and sizes. Other than the standard hammer weights, to figure out something like a tong rein, find the weight of the finished product (3/8" round x 15" long) then recalculate for your parent stock (3/4" square using the same weight).
I'm still going to remove the bit on the back.
The commercially available tools usually look like this: hoof pick
For like 25 bucks you can get a file guide that makes you plunge line perfect. Highly recommend this. it’s great for the money
Nice
They're like those tiny cleavers in those gift packs of sausage and cheese- but even smaller.
https://www.amazon.com/Hillshire-Farms-Sausage-Cheese-Cutting/dp/B01N08MKKV
How much would you price a small knife of that size?
I worked briefly under who you’d consider a master smith. He made his own suit of historically accurate plate armor and laughed when anyone asked him to show them how he did it. His response was, “if you have 400 hours to spare, let’s chat.” This wasn’t including the hours he put in learning the proper techniques and methods. Just 400 hours of labor hammering steel. If your serious about the commitment I recommend picking up this book.
Your best bet if you *really* need a packing material there will be something like the fiberglass rope gasket used in wood stoves. Provided your forge is working correctly it should last ok.
Ref: https://www.amazon.com/CeraTex-Rope-Seal-Ceramic-Temperature/dp/B07QQLTZW5?th=1
A brilliant beginner blacksmith book.
And if anyone else ever wants to write a book on blacksmithing, they should read this first and get a feel for how Lorelei Sims wrote and conveyed the techniques. Too many books get written where it was written like "I knew what I meant" leading to disappointment.
Also don't forget to check out Gutenberg Press and the like. Many of the training manuals for blacksmith apprentices from 100+ years ago are available for free on there.
eg. https://www.gutenberg.org/files/53854/53854-h/53854-h.htm
Look at the regulator closely too... I got one of the single burner Mr. Vs and the regulator leaked. Ended up buying a 30psi one with braided line and it's a beast now. https://www.amazon.com/gp/product/B07ZGHCR2M in case you're interested.
If you've got a big box store around you, buy a box of this stuff. It acts the same and is probably cheaper than ordering it, paying for shipping, waiting for it, etc.
CAUTION Borax will absolutely, beyond a shadow of a doubt, DESTROY your ceramic wool in a propane forge if you're using one. It will find any cracks in the refractory cement and you will literally watch it melt away like boiling water getting dumped on cotton candy. To prevent this, use a fire brick as a shelf (good) or even a stainless steel tray (better) to catch the borax and prevent accelerated deterioration of your forge lining. You can get these and it'll work fine.
Stainless steel doesn't forge weld at the same temps/technique as your other steels do, so you don't have to worry about your work getting stuck to the trays. It's why you'll sometimes see people use stainless steel foil in canister damascus to act as a separating agent between the canister and the billet they're making.
Honestly, I would just link to the Amazon listing for The Art of Blacksmithing.
Written by one of the founding members of ABANA, and one of my predecessors at Historic Westville, and usually goes for ~7$. It's an invaluable book for the early blacksmith.
https://www.amazon.com/Art-Blacksmithing-Alex-Bealer/dp/0785803955
Here is a good video on how to fit a hammer handle. Contrary to some of the opinions here, there is nothing fundamentally wrong with the eye as it is, you just need to fit the handle better and wedge it properly.
https://www.youtube.com/watch?v=yH4SiyTKk4k&t=180s
Also, a conical wedge might be helpful:
https://www.amazon.com/Super-Safety-conical-Handle-Wedges/dp/B07SHJ7KY2.
Pictures of your setup would help. But I can tell you when I got my Mr. Volcano the hose & regulator were pretty bad. The regulator leaked at the tank, and upon trying to tighten the lug inside the whole thing sheared off. So I went with this: https://www.amazon.com/gp/product/B07ZGHCR2M
It's longer, higher PSI regulator, and steel-braided hose.
ALWAYS leak-test your connections as well. Windex spray, look for bubbles, tape/tighten as needed. What I would assume happened is there was a micro crack in the hose and it allowed a minuscule amount of gas to escape, and that part was close enough to the heat source to ignite the gas.
Did you smell anything before it happened?
This is one of those reasons why you should always have a fire extinguisher nearby when forging. If I were you I wouldn't even bother trying to pinpoint what happened and where, I'd scrap the hose and go with something a little more high quality.
Please please please make sure you do a leak test when you hook up the forge. Spray some windex or some soapy water on everything. Regulator, hose, connections, all the way up to and including the solid piping on the forge itself. See if anything bubbles.
I ordered a Mr. Volcano and the regulator leaked like a sieve. As soon as I turned on the gas I could smell propane. Tried to tighten up the internal nut and the regulator broke, so I bought this one: https://www.amazon.com/gp/product/B07ZGHCR2M/
Braided steel hose covering and a 30psi regulator (up from 20), plus the hose is nice and long to make sure your tank is away from your forge for safety.
I used diamond plates to put a razor sharp edge on a cheap HF hatchet.
I also used a piece of rubber shelf liner to keep it still, some windex to float away the metal grindings and a piece of leather charged with green CrO2 to strop the edge.
Anti-Fog Spray | Prevents Fogging... https://www.amazon.com/dp/B07PBCZ7C6?ref=ppx_pop_mob_ap_share
It’s $8 but you hardly need any so it’ll last, but not as long as the scar on my nose. The Vermont plastic team saved my beard (I really expected to be shaved)though so I have not idea about the chin.
So I have told this story many times on various Reddit posts but I want to reshare it with you.
Last year I had to have emergency plastic surgery to unsplit my face and nose when a chainsaw kick back smacked a running saw into my face.
I was wearing chaps, steel toecap boots, Kevlar gloves, a helmet and dewalt z78+ rated goggles.
When it happened I only realized after the event because it was so fast. Anyway after the event I returned to the scene of the crime to find that my helmet was in scathed and it was the goggles that stopped the chain. The wrap around polycarbonate lens had 3 deep gouges in it right over my left eye, had I not been wearing the goggles I would have lost the eye, some teeth and required reconstructive bone surgery.
The cost of the Googles is $12 each (DEWALT DPG82-11 Concealer Clear... https://www.amazon.com/dp/B07G3K2KF4?ref=ppx_pop_mob_ap_share)
It’s not worth the risk, you won’t be able to react fast enough, just get the goggles and some $3 spray on anti fogging stuff.
I thought that the saw hat hit the brim of my
Oops sorry google messed up my link... This is what I meant: https://www.amazon.com/Jewellers-Tools-Cobblers-Shoemaker-Cobbling/dp/B07JMCRHNP# And Facebook marketplace don't have any listings for anvils locally...
Came with a kit, here
Forge itself is wonderful, but the fire bricks are a bit shit so i bought some from my local concrete company.
Ya know lots of people over the time of these youtube mini forges have come here. Yes the forge gets metal hot, but that is not that hot. It will take a long time between heats to get the metal just hot enough to hit it a few times then back into the fire in too short of time. The air/gas mixture is way off that's why your flame is sputtering. and i would be scared of a gas buildup in the forge with that small opening. Which can cause a boom.
With the cost of that torch and the plaster you would be better off spending 20 more bucks for a real forge. With a real forge you put a piece of metal in it and in no time its up to forging temp. Which means you can hit the metal way more times before you have to put it back in the forge.
This one on amazon works. There are a ton of you tube videos on how to set it up and improve it. Save yourself a ton of time and be able to learn how to move metal much more efficient.
Are you aware of the website https://ifttt.com?
After you make a free account, you can make a really easy little applet that will, email, or text you when a search on Craigslist shows up with a specific thing you're searching for.
I was in the market for a couple different cars I wanted as a kid and set the searches up, and probably received 2k emails over a couple of years for craigslist posts with cars and parts related to what I wanted. I just recently turned those off and have alerts set up if anyone posts ads relating to anvils as texts right to my phone.
It's pretty easy once it clicks and there's tons of ways to build simple applets for your needs.
No. Cast iron makes a horrible anvil. It's too soft, and you'll dent the face of the anvil as you strike the metal. If it's all you can afford, it'll be enough to get you by though.
I have this anvil: https://www.amazon.com/Happybuy-Blacksmith-Equipment-Jewelers-Metalsmith/dp/B075YSCQ4Q/ and a lot of people will agree that for a beginners anvil you 1) won't find a better price, and 2) it's more than enough for getting started. There are some YouTube reviews on it and they're almost all positive.
It's a loud anvil though. So if you're in a subdivision and don't want to piss off your neighbors, you'll need magnets or a chain to deaden that ring.
I have this one: https://www.amazon.com/Volcano-Hero-Stainless-Professionals-Blacksmith/dp/B091SFMK9C/ and I know others on here do as well. It's fucking awesome for a little forge. I bought it to replace(ish) my 2 burner Hell's Forge that I have for when I'm working on smaller pieces. Figure with two burners I'm burning a bunch more fuel than I need to.
Be warned though... The regulator I got with it was cheap and was leaking, and when I tried to tighten the fitting it snapped. So I bought this: https://www.amazon.com/gp/product/B07ZGHCR2M to go with it and it's working a treat. 30psi regulator, longer hose, definitely worth the extra $35.
Now, to get my shop area taken care of... Another project for another day.
You could probably bag it during off-use.
A heavy duty construction site style garbage bag, tied and taped, would probably be sufficient to keep humidity relatively low. You could also bag it with something like this to help if you're concerned.
Or just take the burner off, stick it in a rubbermaid tub or a plastic tote box, and you'll be fine.
Would something like this work? I’ve been using a hair dryer but I think I need more air.
SparkFun Blower - Squirrel Cage (12V) https://www.amazon.com/dp/B00LPUXVWS/ref=cm_sw_r_cp_api_i_BG1XKAQCWCFRDKFSR3VW?_encoding=UTF8&psc=1
Just set up my MRV forge today, and decided to see if I could push it to forge welding temp. Grabbed a few pieces of mild steel and stuck them in there.
Now, the reason I posted this: People always say don't rely on color because we see color differently person to person. But a good measure of when steel is ready to forge weld is when the surface "looks like liquid".
This is what I saw, and it's the first time I've ever seen that in person. So for people who are wondering what is meant by the surface looking like liquid, there you go. I pulled these bars out just after filming this, gave it a few whacks (sprayed my hoodie with slag, which now has holes burned in it) and repeated the process a few times.
The weld is super solid, and there was no flux involved. So it's probably a dirty weld, but it's mild steel as a test run, who cares.
Hope this helps others just getting started to help de-mystify a bit. And before anyone asks, this was done at 20psi on the gauge. Probably could have done it lower, but I wasn't going for fuel conservation, I wanted to see if this little beast could handle it.
I highly recommend this forge for starters. The only thing that's not stock is the regulator/hose (mine had a leak, tried to tighten it, and it snapped, so I bought this replacement and the satanite included with the forge has a topcoat of Plistix 900F.
Portable Propane Single Burner Forge, 2600F Rated, Gas Forge for Forging Blacksmithing Tools Equipment Farrier Knife Making - Stainless Steel Oval Shape Forge https://www.amazon.com/dp/B07GRYTLJQ/ref=cm_sw_r_apan_glt_i_4B3PSDNHWVASFT7E469W
If you need a door stop, sure.
As a usable anvil, that has definitely reached the end of it's first life. I'm sure someone with refurbishing experience and equipment MIGHT be able to resurrect that for a second go-round, but for $200 you're better off getting this guy that many of us here have and are quite pleased with it. You'll have to do a little work on the edges to round down that sharp transition, and maybe thin out the horn if you're really feeling adventurous, but it's a damn fine anvil.
Well I don't remember saying anything about that hook, but that hook would also pull the screws out, yes.
Now consider this kind of hook:
You see how the weight is applied close to the wall and the screws are above the weight with a short lever arm? These screws are going to be feeling more shear forces from the weight than lever (moment) forces from the design of the hook.
A Dirt Box forge is far cheaper and easier to build. I'd also recommend gettung a book such as:
https://trentontye.com/product/trentons-guide-to-love-riches-and-blacksmithing/
Or
Blacksmithing Basics For The Homestead https://www.amazon.com/dp/1586857061/ref=cm_sw_r_apan_glt_i_6F1DNPQJ9NAFZHVQ8H8T
The price of an anvil really depends on WHERE you are. Here in the north west US, used ones are a LOT harder to come by and, thus the price is up. Decent cast steel anvils are running $5-9 per pound depending on source and condition.
A decent deal on any tools will require a lot or research and staying on top of the look out. Probably even knocking on people's doors and asking. Worst they can say is nope not for sale or I don't know anything about that. Most will point you in the direction of someone who might know more about it or that used to blacksmith. Yard sales, estate sales, FB market, ebay, local farriers, maker spaces, welding supply stores... hell, one of the guys that works at where I get my vape supplies is a Blacksmith. Just need to put it out there and you'll find something.
As has been said already, the magnet is a bad idea. I doubt you could weld it.
The best forge floor I have used is kiln shelf. It is thin and has low thermal mass so it won't suck heat out of your forge like a hard fire brick would. Soft fire brick is totally unsuitable for a forge floor. It will start wearing away the first time you put some steel in and that abraided surface can be blown out of the forge and into your lungs. If you cannot find kiln shelf or if you find it to be too expensive, 1/2 thickness fire brick is the next best material. It is harder than kiln shelf and has more thermal mass but it is better than most cast refractory or full thickness brick. Make sure you put Kaowool under the floor too.
I don't much like your door arrangement. While it may seem slick to you, you will not have any easy way to adjust the size of the opening. Heat loss out the front of the forge is the biggest issue with gas forges. To minimize this, you need the smallest opening possible for whatever item you are working on. The easiest way to achieve this is to have a shelf in front of the forge and stack either soft or hard firebrick across the opening, leaving just enough uncovered to put your work inside.
I don't know if I can link to this video that shows my own propane forge, but I'll try it and see:
https://photos.google.com/photo/AF1QipOQLgiS-i3QLp6_4wbmSAEAT-KdMxw3xekUm2IA
And I found a still image as well:
I can't remember for certain why I made this short video but it illustrates how I deal with the front opening on my own propane forge. I have a top hinged door at the rear so that I can push long stock through when necessary.
Someone should show the fella about IFTTT so he can make a search and alert recipe (or 20) for Craigslist. You definitely do not have to sit and watch a website 'like a hawk' to find deals. Let the modern world do the drudge work for you.
okay be careful, if the folks from /r/Sharpening hear that they might actually try and assassinate you. ive got a set like this and frankly if you get good enough on holding your angle you can get sharp enough for basically any cooking application. diamond plates are so fucking nice plus with a 300 and keep a bunch of water on it you can set a beautiful profile and even primary bevel super fast.
Same brand i just didnt buy mine from amazon https://www.amazon.com/Ultra-Sharp-Diamond-Sharpening-Stone/dp/B00SK3LDBE/ref=sr_1_5?keywords=diamond+sharpening+plates&qid=1643346693&sr=8-5
If you haven't read it, it's a great reference for a beginner willing to get their hands roughed up.
I have seen some good reviews of this particular forge.
Some of the construction is not ideal and could potentially come apart over time.
Overall - should be a great way for you to get started.
I would also suggest buying some extra fire bricks so you can close off the ends of the forge as needed to preserve heat.
Out of the box, it's a functional forge, though.
https://www.amazon.com/Volcano-Hero-Stainless-Professionals-Blacksmith/dp/B091SFMK9C/
I'm not a blacksmith, I'm a welder, but if the scale you're referring to is the same scale as comes on hot rolled steel from the metal store, the suggestion that "sounds like something grandma would recommend" is by far the best method. A few hours in vinegar and you can literally wipe the scale off with your finger. Way cheaper than any mechanical means, with less work. I will never waste my time or energy grinding mill scale again. That said, if you don't have a few hours to spare and just have to have it now, the best wheel I've found is here:
Scotch-Brite Clean and Strip XT Pro Disc - Rust and Paint Stripping Disc - 4.5” diam. x 5/8-11 Quick Change Thread - Extra Coarse Silicon Carbide - Pack of 1 https://www.amazon.com/dp/B07L1CXBRZ/ref=cm_sw_r_apan_glt_fabc_H8BE59X6DFKTR5Q2PQN2?_encoding=UTF8&psc=1
GBL Heavy Duty Retractable Workbench Castor Wheels + Screws - Pack of 4 Castor Wheels up to 225KG - No Floor Marks Castors for Portable Furniture or Work Bench https://www.amazon.co.uk/dp/B07L11DV2N/ref=cm_sw_r_apan_glt_fabc_MN5BNFFVA7ZBK0T9X5HB?_encoding=UTF8&psc=1
Similar here GBL Heavy Duty Retractable Workbench Castor Wheels + Screws - Pack of 4 Castor Wheels up to 225KG - No Floor Marks Castors for Portable Furniture or Work Bench https://www.amazon.co.uk/dp/B07L11DV2N/ref=cm_sw_r_apan_glt_fabc_MN5BNFFVA7ZBK0T9X5HB?_encoding=UTF8&psc=1
I actually found Carhartt ones cheap on amazon that have a anti-fog coating about a year ago. Fucking amazing for like $3 each. Just buy 10 pair. Throw away when too scratched.
​
https://www.amazon.com/dp/B002RM0PAE/ref=twister\_B07CVTSP3R?\_encoding=UTF8&th=1
So as someone new to the hobby, thank you! I ordered a 3M half mask and P100s after reading this.
The forge I ordered is similar in design to the Whitlox wood forge, and uses Kaowool to line the metal forge between fire bricks. Link: https://www.centaurforge.com/mobile/Centaur-Wood-Forge-with-Active-Hand-Crank-Blower/productinfo/WFHC/
I ordered some rigidizer (https://www.amazon.com/dp/B0816PXG52/ref=cm_sw_r_cp_api_glt_fabc_J33RDYFZZ7Y6QXEB4D48) off Amazon as well, as the forge didn't say that it came with it. I assume I still need to use it on the forge I ordered, even though the wool is not going to be in direct contact with flames/abrasion, correct? I just want to be safe and start this hobby out right.
My wife got me one of these for my birthday about 6 weeks ago and I've used it probably half a dozen times and didn't know this needed to be coated. Is it too late to coat the inside? For the image above, what is the exposure duration on the forge? Late teen to 26 is what 7-9 years? Thanks for sharing this!
Amazon sells "Elbow grease"
B. Cumming Elbow Grease Original Lubricant Cream, 15-Ounce https://www.amazon.com/dp/B001BSJ1F0/ref=cm_sw_r_apan_glt_fabc_4CF5N96XQNGHYN9KBKEJ
FYI: this is a joke post and not what we mean when we say "it'll take elbow grease." I do not recommend this product for rust prevention.
imo video game kids think this way because they've been trained to type things into google instead of speaking to humans. Google interprets that term "no expression mask" as this:
https://www.amazon.com/Disguise-No-Face-Chrome-Mask/dp/B007S016WQ/
I'd suppose that OP saw that, said "Plastic!!", and thought to himself that it seemed like something that a video game blacksmith would make, so went to the socialiest of social media and posted in the blacksmith sub about how much a REAL METAL one would cost.
To me this says a lot of things, but the saddest is the focus on not the artisan, craftsmanship, or art, but simply on money and commodity.
This book comes highly recommended.
I second the airgate. I put one of these on the coal forge I recently built and I really like the amount of control I get with it.
You may find it cheaper but here is what we’re talking about: BLUEFIRE Pearl Metal Handle Turbo Torch Head, Multi-Purpose Auto Blowtorch fuel by Propane MAPP MAP PRO, Great Cooking Gadget for Chef,Welding Brazing Nozzle for Professional https://smile.amazon.com/dp/B07XH73MDF/ref=cm_sw_r_cp_api_glt_fabc_7XWHFFR3FEA6KNH2XQZ6
Look around different forms of selling. Heavy stuff cost lots to ship so e Bay et al won't be your go to. Local auction houses or house clearance or scrap yard prob good bet.
Dunno how much a cwt is but here is an example
https://www.gumtree.com/p/other-hand-tools/blacksmiths-anvil/1378467986
Just shy of 102 kilos so about 15 stone
Walmart. They sell through an online industrial house called Zoro. Free shipping and only $94 for 2"x24"x12.5' 8lb.
Here is something I have done to make it more effective. You can concentrate the normal drug store peroxide pretty easily. Here is a discription i lifted from here(http://hackaday.com/2013/02/03/making-high-concentrations-of-hydrogen-peroxide-at-home/) The concentrating procedure is pretty simple: pour about 500 mL of the 3% solution into a beaker and heat it, forcing the excess water to evaporate until there is a tenth as much liquid left (peroxide boils at 150 C, compared to 100 C for water.) There are only a couple of tricky points: the liquid must NOT boil, only steam – if it starts boiling, the peroxide will decay. Bits of dust and dirt will also cause disintegration, so the equipment must be kept very clean and free from scratches. obviously you have to treat it with respect because its quite caustic at this point. By my does it rust things like the dickens.
Yes! I want to make one too. Here are some detailed instructions:
http://hackaday.com/2010/06/04/1000w-induction-heater/
The owner of Monster Metal in Seattle uses one of these sort of units for real production work. It's really cool to watch.
https://www.facebook.com/marketplace/item/387478088861107/
That’s the direct link. If it doesn’t work then I’ll look at imgur. Problem is it’s a long long way away - though I can potentially go past on the way to Edinburgh next month...
It may be ok but you won’t really be aware of when it breaks down to expose the fibers. Easy to damage with a bar or wide piece of work and not be able to tell. Get this Rutland Products 25 lbs Castable Refractory Cement, Taupe https://smile.amazon.com/dp/B008BQQASQ/ref=cm_sw_r_cp_api_glt_fabc_62XR58EP6W6JK7XMWNDD?_encoding=UTF8&psc=1
Goede Stainless Steel Foundry/Forge Burner https://www.amazon.com/dp/B019X6E7L4/ref=cm_sw_r_apan_glt_fabc_964W08MH105XD3QGP89N they are sold out of the one I was talking about but this one is a little better it is thicker
One of the generic Chinese knock offs on Amazon. Mine was called a "Nasum 2028", but it isn't listed there anymore. There are half a dozen others there now, though, I just checked. This one appears to be the same as the one I bought. This one is cheap but I can't vouch for the quality.
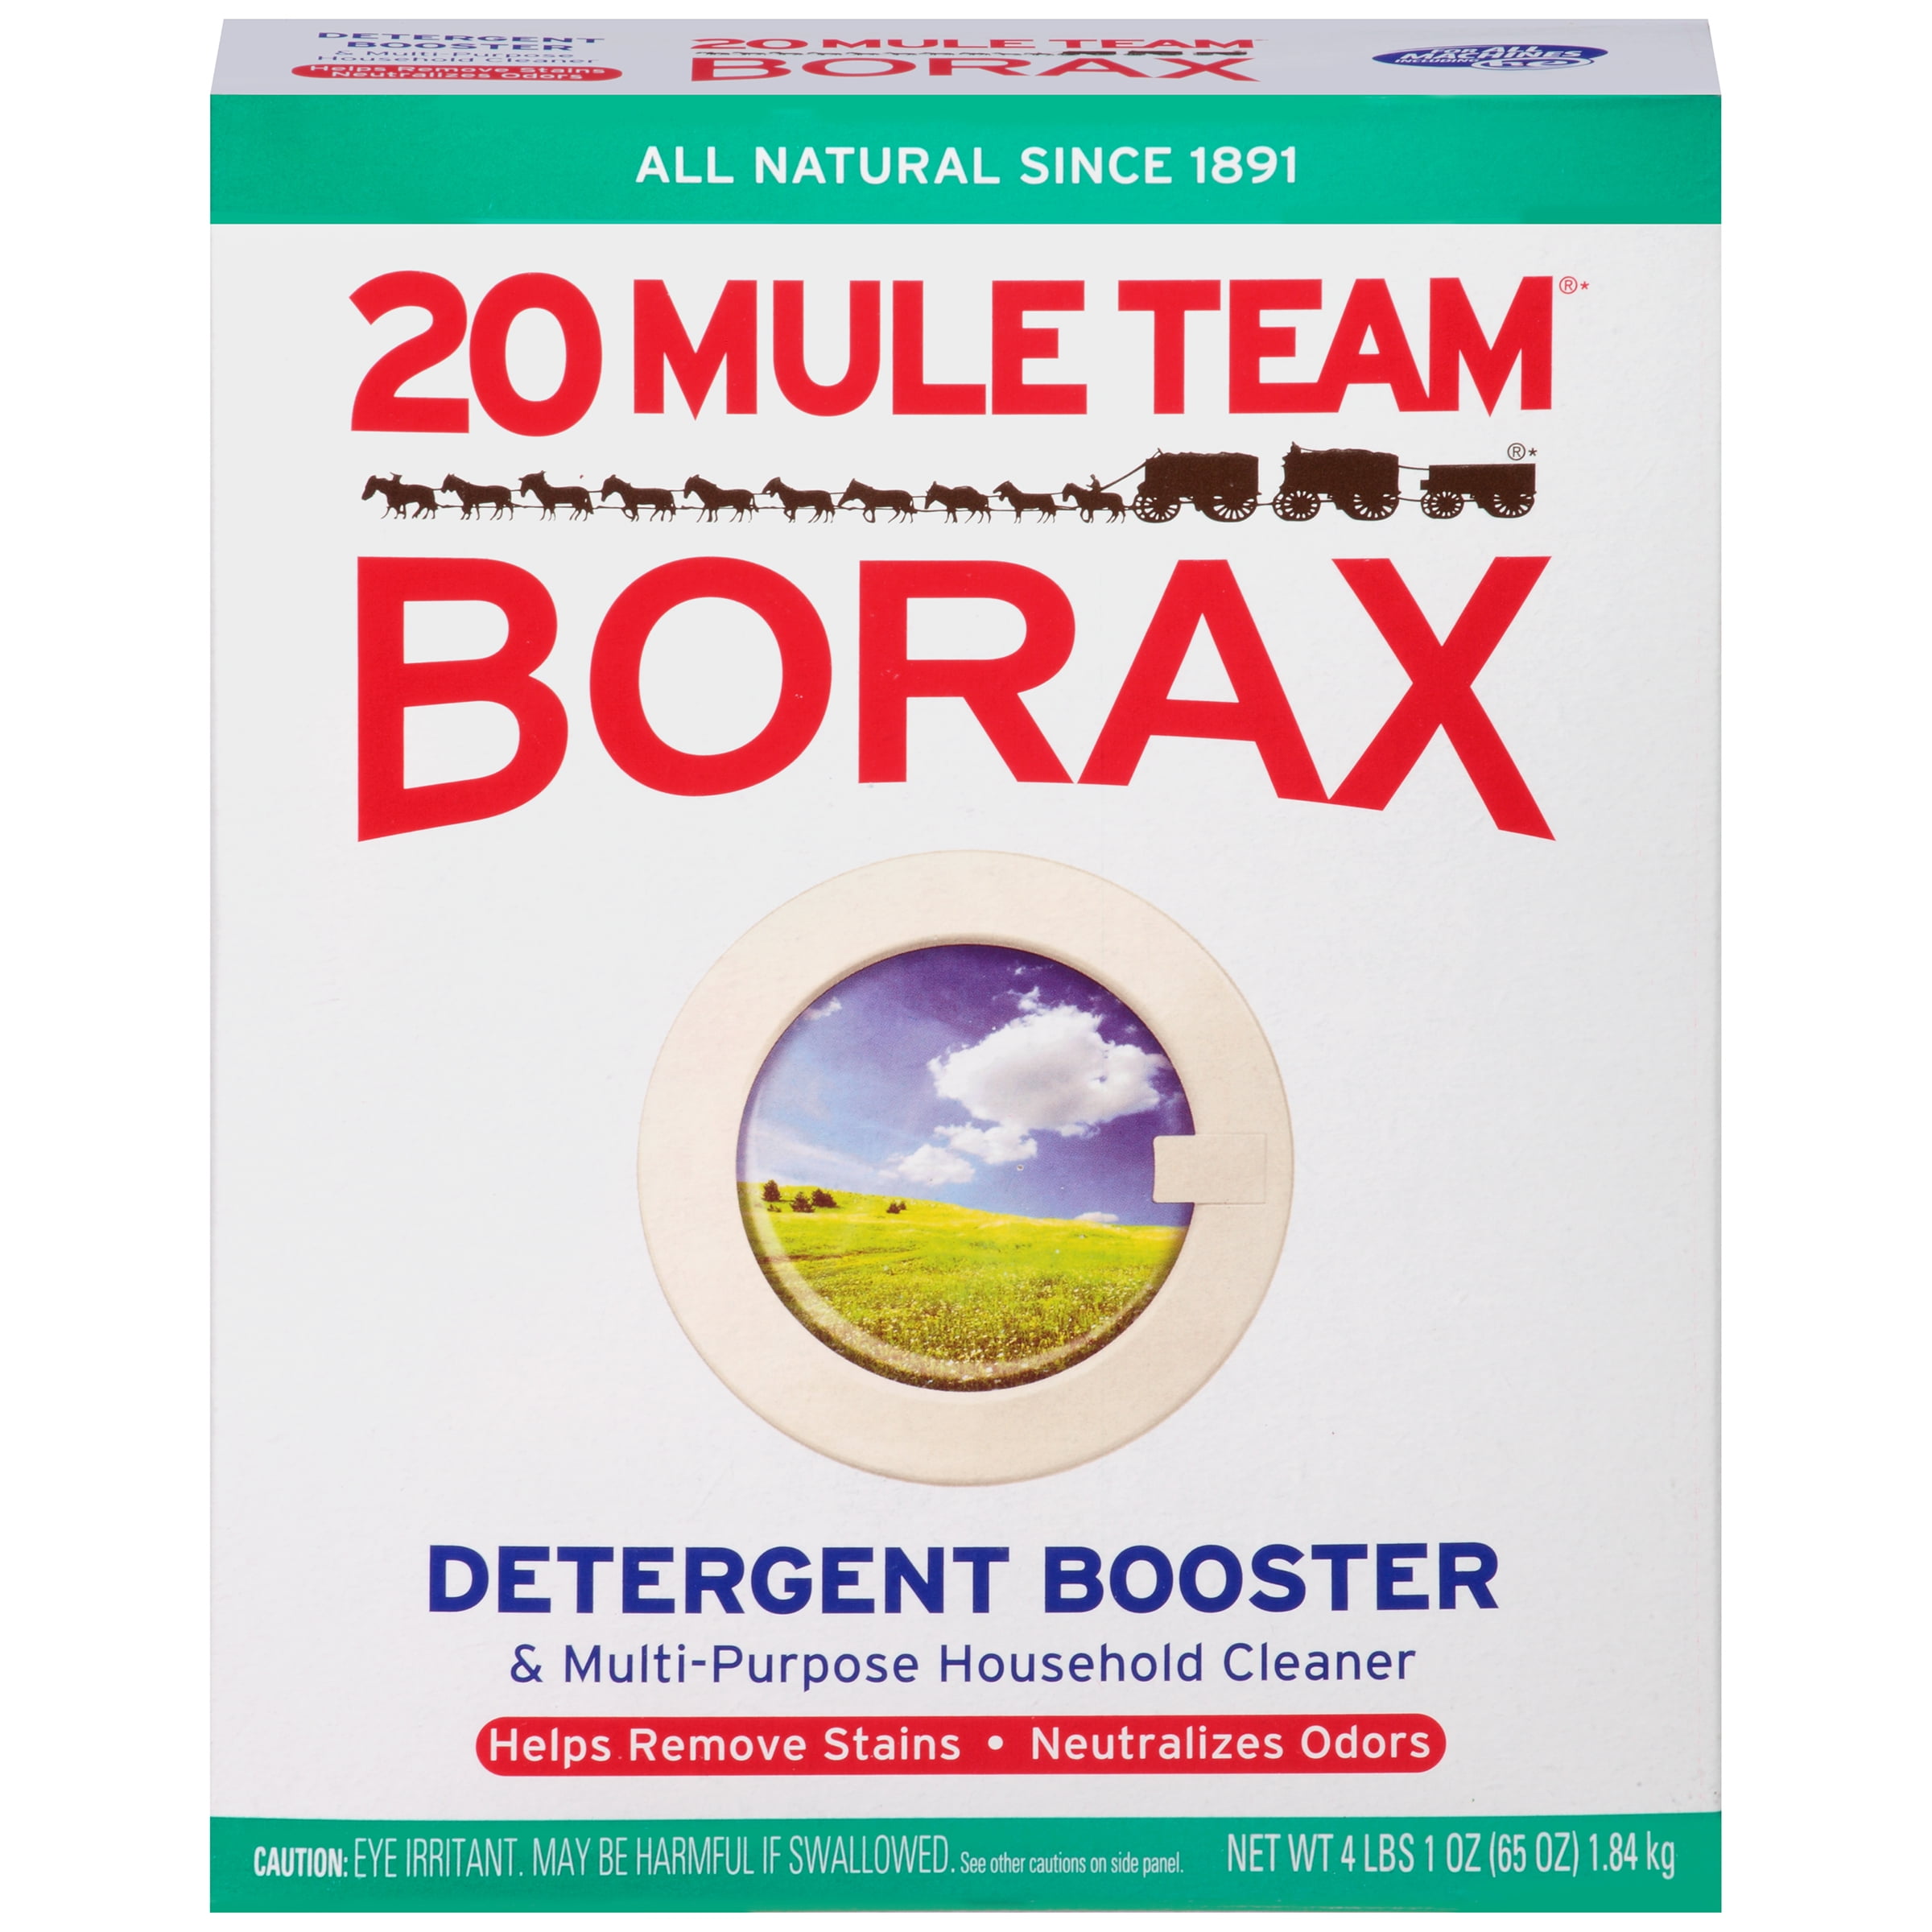
Are you in the U.S.? If so you can get conventional borax on Amazon, 3 lb. for about $16.00.
Better that conventional borax is Iron Mountain flux, also available on Amazon. It is much more expensive though.
Blacksmiths have, in the past used sand or coal dust as flux and in the days of wrought iron, they used nothing at all. British smiths still often use no flux at all for their forge welds. Japanese smiths wrap their work with rice paper or cloth and saturate that with clay slip to exclude oxygen and scale from their forge welds.
I use iron mountain and because I rather suck at forge welding, I pre-weld everything with my MIG before I set the weld in the forge. Mostly I only forge weld reins on tongs I make. It is easier than drawing out long pieces of steel by hand.
A local ceramics supply house will carry ceramic wool. Kaowool and Inswool are two brands. Make sure you get something rated for at least 2400 degrees. Firebricks can be had from the same source.
Both can also be had on Amazon. Here is the best price I found with a quick search on 1" x 12"x 24" at 2400 degrees:
I couldn't find any hard fire brick on Amazon. There are, however, many on line ceramic supply houses that sell them. I do no recommend using soft insulating brick, even though it does insulate better. They break too easily for use to block up the ends of a forge. You will regularly move them around and bang into them with your stock and they will break in pretty short order.
I have mine on a heavy plywood base with some nice locking casters. Works great as I do my blacksmithing in the driveway for now. Wheel everything back in the garage when done. The casters I am using are some kind of standard ABS wheels. I don't think you need to go this heavy. Something like this. Mine were used tho: https://www.amazon.com/CoolYeah-Industrial-Premium-Casters-Without/dp/B07V546K6H