
What are
/r/Maya's
favorite Products & Services?
From 3.5 billion Reddit comments
The most popular Products mentioned in /r/Maya:


![UtechSmart Venus Gaming Mouse RGB Wired, 16400 DPI High Precision Laser Programmable MMO Computer Gaming Mice [IGN's Recommendation]](https://m.media-amazon.com/images/I/41R-omAfZzL._SL500_.jpg)


The most popular Services mentioned in /r/Maya:
Gumroad
Vimeo
xNormal
Houdini
Quixel Suite
Google Drive
p3d.in
Gyazo
Creative Market
MoI - Moment of Inspiration
Snipboard
FileDropper.com
Krita
MakeHuman
Unreal Engine
The most popular reviews in /r/Maya:
Some pictures would help. Not just because I want to look at the tits you're rigging, but for science.
Show skin weight map and what issues you have. But generally speaking - just don't skin underneath them?
And once you get them rigged you may consider using BroDynamics to simulate their bouncy movement instead of building a complicated dynamic rig system for that.
It all looks great to me except those curtains!
Take the rope-rings holding open the curtains and rotate them 'downward' a bit - say 15 degrees.
Then model the curtains to drape more naturally from those rope-rings - and maybe more tessellation - they look a bit angular/not like drapery.
https://www.shutterstock.com/search/curtains+sketch
Otherwise it looks great!
Have a look at https://quixel.com/
They have tons of great quality scans. Also a lot japanese once.
They come in an game LOD. The edgeflow is not what you want to do, but it could give you a nice idea what to model and how it should look like.
Render a sequence of images (png is quite good) and use virtualdub (search for good tutorial).
If you render directly in avi or mov file, you will need to render your whole animation if one frame fail. :(
Thanks for sharing! I've looked a Guilty Gear slide(Japanese) and articles on books but for some reason I missed that one. In the end, I'm a one-man band and I call myself an animator so no time for super duper rigging. I'd like to animate "next fucking level" rigged characters though!
you'll probably want to have an animated figure, which you turn into nCloth and then paint the input mesh attract:
(google some videos i'm sure there are quite a few examples around)
ideally you'll want a low value of attract so that the mesh deforms naturally. The nSolver is a tough cookie. If you reallly need help, try posting on the Maya Highend3d Google Groups, Duncan Brinsmead (one of the main person behind the nSolver) and a lot of other gurus help around, very good signal-to-noise ratio.
The others pretty much covered everything, but I would highly recommend checking out the Body Mechanics rigs at some point. It's $40 but you get 12 high quality body character rigs to play with. They're compatible with 2014+, but I can't be sure about 2016.5+.
https://gumroad.com/joedanimation
There's also a free juice box and flour sack ;)
After a long time of trying to figure this out, I've settled on a combination of two applications - Fast Picture Viewer Codec Pack ($9.99) and Sage Thumbs (Free).
I tried out quite a few other options including special viewers like xnview but I really just wanted to use the native Windows Explorer with as little bullshit as possible. The above combo got me there with the least amount of hassle, and it's rock solid. Previews every format under the sun with metadata,
The exception is, unfortunately, all 3D formats including OBJ, FBX and MA. As far as I know, C4D files are the only 3D files that have built-in thumbnail previews, and even then only on OSX.
No idea how legit it is but you could try an online converter, like this one...
http://www.greentoken.de/onlineconv/
I could do it but due to network security restrictions I can't upload anything at work.
Get a monitoring program like HWMONITOR and check your CPU's temps while you render. The CPU should heat up to its max temps very quickly. If your CPU approaches 85 C within a few minutes (and it probably will), that's no bueno.
​
There's not much you can do with a laptop's cooling. The system is spatially restricted so airflow suffers. If you wanted to, you could open the computer and either replace the stock thermal compound with something better, or even delid the CPU and replace what's on the die itself (advanced, risky, not recommended).
​
I suppose your best bet would be to underclock or undervolt your CPU until you get comfortable long-term temps. If you let the CPU, MB, and VRM sit at 80 or 90 C for a long time, I think your motherboard will die and you won't be able to replace it without spending hundreds of dollars.
Well...
I study design multimedia at my school as a subject alongside my other ones, high school. And this year, being year 11 the second last year in high school we had to do something for our 'mini-major', sorta like a big project that is worth a lot of marks in the end of year report in other words.
And people get to choose what they want to do for their project. Me, outta the blue chose to fidget around Maya just because it seemed rather interesting judging by myself have previously seen it as a prerequisite in many job applications (DICE for example).
And after browsing the web for a little while I came across this challenge and thought it would be something fun to do. With no experience at all in CAD designing, the past three months has been quite an amazing ride for me. (no experience as in never touched a proper CAD program before, except Google sketch-up)
Talking about the picture, featured is my own variation of Grabby the bot. Which I designed almost from ground up from sketching, then modeling, UV map + photoshop texturing, brief bumpmapping, basic rigging (for the arms haha), messing with rendering, and photoshop post touch-ups. Being a first timer, and with no teachers being able to help me (they haven't used Maya before... only 3DSmax), the internet has been a great place to learn.
So ya that's my story :) Thanks for reading (if you did :D )
And remember! It's never too late to learn!
Oh and the GrabCAD challenge... If you are really interested in browsing some of the designs that went in (which obviously does not include mine as I missed the deadline derp), go to http://grabcad.com/ and at the top click 'challenges', then tab 'selecting winners'. There :)
Have a nice day.
CAKE DAY :D
Have you ever heard of xNormal? It's free and it bakes all sorts of maps, including vertex color. You'll need your high poly and low poly to be .obj though. (If you're using a Mac, disregard this entire comment, because xNormal is only available on Windows.)
As long as you have a low poly with UVs (in 0-1 space of course) that has the same x,y,z coordinates as your high poly, you should be good to go.
xNormal is super easy to use. Here's the website, and here's a beginner's tutorial.
xNormal is great, free and is a well featured app to convert b/w height to normal maps and many other useful things. It's basically industry standard at this point despite having an interface that make me want to shoot myself. It has a photoshop plugin too.
It will also bake a matching high res surface into a normal maps for a corresponding low res surface. This is a common thing for games, but I use it quite often in broadcast tv work for making speciallty normal maps. Maya can do this as well with the transfer maps tool, but is slower and generally a pain to use.
Crazybump is another one that can convert photos to normal maps and other map types as well.
Generally both of these, especially xNormal have replaced the nvidia plug-in. I've not really heard of anyone using it except when someone finds a really old tutorial.
The last thing that I'll add, is that unless you specifically know that you need a normal map, i.e games of some other reason such as exporting maps from zbrush, then a bump map is going to work just fine under most circumstances and renderers and really isn't going to be some magic ticket to awesomeness like a lot of people think.
I'm a big fan of Xnormal for baking.
I find it quicker to export to Xnormal, in the long run.
Be warned though, it's pretty picky with it's geometry. If you've got any nGons, it'll reject the model. Overall though, the quality and control of the output (IMO) tends to be much better than in Maya.
That is so fricking sweet. There are some other threads about this for other 3d packages, for example Houdini can't do it either (as of last year so they might have fixed it). That's a pretty amazing feature. Do you by chance know if it's recent?
>I think Perry simple asks how to see anything but raster texture in a viewport, and the answer is you can't. Houdini's viewport doesn't support it. Because procedural textures are defined by vex code, they are hardly accessible by OpenGL. So unless you pre bake procedural pattern you won't see it ( except for a shader view which executes shaders via Mantra).
And from the blender link there's this. So it seems like Maya has some cool stuff going on under the hood there!
>No.
>This is because the procedural texture is actually calculated by the render engine. The closest you can get is by "caching" the texture to a conventional raster image via texture baking, then using that as you would any other image texture.
-I guess softimage couldn't either. Maybe that's why they whacked it!
>Hi, >We can't really display procedural shaders in softimage ... (unless you are using the high quality glsl shaders thing who is all but reliable), but we have fast preview via connecting the procedural shader directly to the surface output, just like in houdini no ?
Quixel Megascans has really excellent environment assets and textures, not only do you get the models, but also several LODs if you want too, its not free however.
Gimp is pretty good. Also i've been using the Pixlr Editor which is actually quite decent for being in browser. But alas I also suggest you get a copy of photoshop. I'm sure someone from your class could help you with acquiring it if you are unsure on how to do so.
Watching the video, he claims the keys are part of the timeline and can be retimed like any other key. This is very different from the old grease pencil tool by Jason Schleifer.
There is another short video on Vimeo: https://vimeo.com/44327630
I recommend creating something in Unity. Assuming you don't need insane poly counts, you could have a cross-platform model viewer functioning in minutes, and you won't have to depend on clients having the proper software installed.
> Ok is there a reason why I should get it dedicated and not integrated?
integrated gpus are often low powered and poorly supported by 3d software. if for example you had designs on gpu rendering, you'd hit limits super fast. many of the programs you'll use in 3d work best or only with a dedicated gpu. in practice it's easy to tell when shopping. most sellers list a laptop with integrated graphics as "integrated graphics" and dedicated gpus as whatever the model of the gpu is. so if you see a gpu model name like GTX _____ or RTX _____ then it's fine. with the specs you're aiming for, that's probably all you'll see anyway
> And then tablet wise are you saying just get a cheap $200 Wacom
i mean a graphics tablet, like this one. easy, light, and cheap. some people assume they need a cintiq like device but unless you're willing to increase your budget by quite a bit this is imo somewhat unrealistic. you can easily do all your sculpting with a regular tablet and there are cheaper brands out there than wacom like huion
That looks really good! As someone who is been doing the same I'd recommend you to check out polycount if you haven't already, good place to get critique, read a lot of cool stuff and maybe participate in the 3daily if you're up for that (it's a great way to getting yourself to practice even in days where you're lazy). What are you using to learn coding? Unity specific stuff or more general? Cause I've been learning C++ in general (Programming principles and practices using C++, amazing book, should finish it in the next two months and then I'll start with Code Complete and Effective Modern C++)
That didn't seem to fix the problem unfortunately. Still the render window screen turns white as usual now :(.
Current render settings if that shows anything unusual.
I would but they are heavy and have bad battery life. I was looking at this though. Not sure if it solves the issues I was talking about though
https://www.amazon.com/ASUS-i7-1195G7-ScreenPad-Celestial-UX482EGR-XB74T/dp/B09LYJPL38/ref=sr\_1\_5?geniuslink=true&keywords=asus%2Bzenbook&qid=1649810970&sr=8-5&th=1
Most resources are going to be in Python now. I recommend learning Python instead of MEL. The userbase and resources are way more common.
I learned MEL first, because Python wasn’t an option back then. It’s not as steep of a learning curve as Python because you can copy and paste MEL from the script editor, but MEL is also much more limited compared to Python.
If you have your heart set on MEL, the books I used the most are:
https://www.amazon.ca/Scripting-Maya-Animators-Mark-Wilkins/dp/0120887932/ref=nodl_
These books are quite old, but they are in MEL and still very much applicable if you want to go that route. I am not sure if there are more modern books for MEL.
I see, well I’ll take that into consideration.
Would this book by Kelly be your first choice?
I am working from home and sometimes staying productive is really hard but I have some tricks;
-When I can't start a job, I say to myself "I will only do 3 minutes" and it makes easier to start any job. When I start work i usually work more than 3 minutes:)
-I use customized Pomodoro Technique (like 35 min work - 10 min break)
-While I creating to-do lists and daily plans, I thin 80-20 rule and focus the most important 20%.
-I have daily plan and when my tasks are done, I just stop even I have a time.
-I think know yourself is the most important thing because it is the only way to create self discipline system. For example if you are a morning person, you have to do important things at mornings etc.
By the way, I wrote a book recently about this, maybe it can help: https://www.amazon.com/dp/B09SZB1CTL
P.S. I am not the best about writing.
I can recommend GIMP as a photoshop alternative. But I would see if you can get a Substance Painter student license, which you should be eligible for as a high school student. Substance Painter is a texturing program built for 3D work, and you can do photorealistic textures with it easily. You do have to provide proof of being a student, but all you need is a school ID with your name and current year. If you don’t have that, you can try to submit some other proof of enrollment.
I know houdini has a tool to generate hair cards from a "normal" grooming with curves
https://www.sidefx.com/docs/houdini/fur/haircards.html
Maybe there is a plugin in Maya to do it too or just export xgen curves to houdini
there is free stuff about but it really depends what you're looking for as to where you'll find them.
A lot of the rigs freely available for maya are cartoon like rigs/characters for practicing character animation . Finding realistic ones can be a little trickier, I suspect because the maya userbase is mostly people who are either learning for industry or already in it, but you can try rusty animator they have a pretty good collection and some links to other sites.
I know its not what you want to hear but if you're willing to pay around even $20-$40 on turbosquid etc, then theres a lot more options, its hard to argue that you learning new skills and getting perpetual use out of a product isn't worth less than a video game tbh.
with models/textures though, in most cases theres obj/fbx files included which you can use in maya even if its on a site generally for another software (also blender being free, you could just export the geometry to fbx).
afaik a lot of stuff for unreal is usable in maya, maya tends to be supported because the animation is typically done in Maya then exported back to unreal, the entire megascans library for example, as well as Quixel Mixer, have the ability to export straight into maya, metahumans will also when it eventually comes out of alpha.
perhaps this will do?
http://www.thingiverse.com/thing:212571/#files
edit: or ask this lovely person:
shrug Quality vs Time / target system as always.
You could get away with it with lighting and good bump maps I guess but using an instance / child rather than duplicated polygons would mean you only have one tread technically, but i havent played around with instances / children in ages to remember the exact technical advantages.
If you're going for a simple polygonal style it's fine, but a more harsh design like the Warthunder tanks, bump maps and lighting fix alot. http://warthunder.com/upload/image/!%202015%20NEWS/September/T26%20M99/Untitled_000003.jpeg
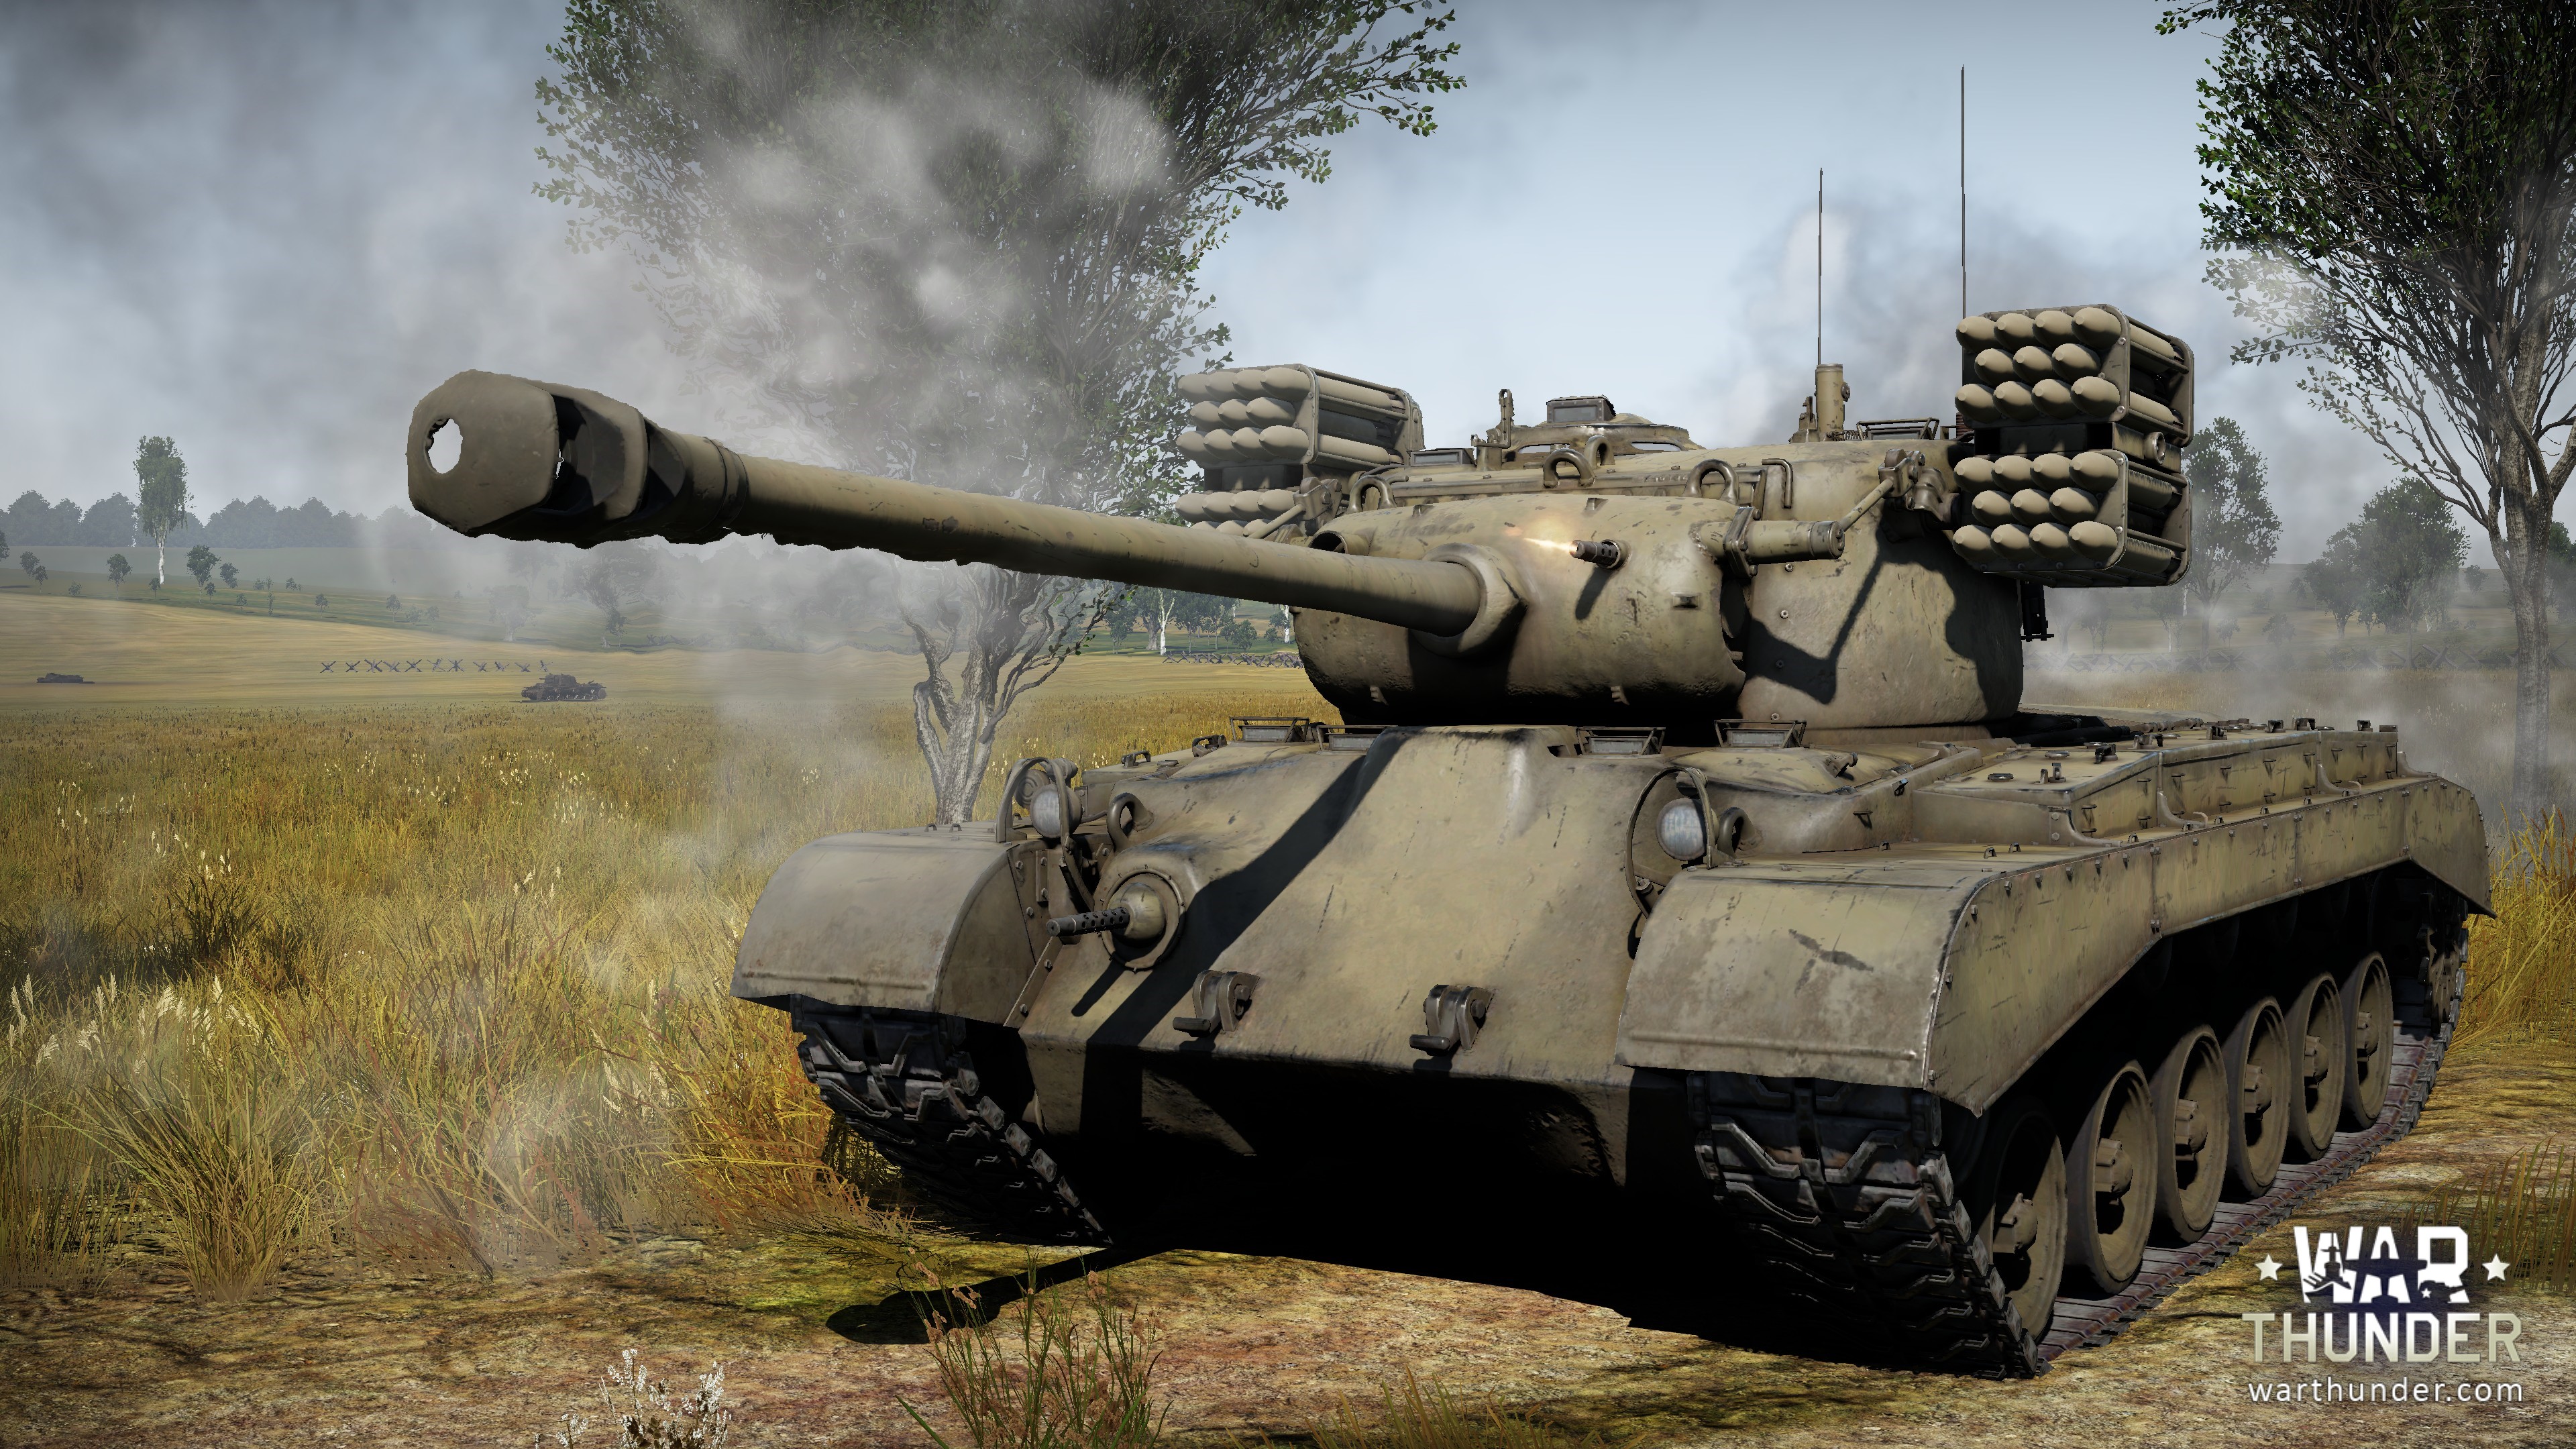
But if you're doing it for animation and not game development, sacrificing detail in your smoke launchers and tread will get away with for a moving shot, but a stationary pan of any low angle will prob bite you in the bum.
Your MG is to a pretty good quality though.
Ok I think it is defiantly something to do with the duplicate names. I followed more closely the example here (http://download.autodesk.com/global/docs/maya2013/zh_cn/PyMel/generated/functions/pymel.core.rendering/pymel.core.rendering.psdEditTextureFile.html)
And noticed that it creates a LayerSet1 layer set AND sets the tex1 (green image) on a sub layer named 'Layer 1'. (Here is the code)
# Create a Photoshop file with an image layer from a disk image file pm.psdTextureFile(xr=512, yr=512, ifn=('C:\tmp\tex1.jpg', 'layerSet1', 1), psf=testFile)
I can then add another image to the same layer set, except I have no control over what to name that layer. This results in providing a default name "LayerSet1_Layer". Although, as I say, this image comes out correctly (tex2 == red image)
pm.psdEditTextureFile(aci=('layerSet1', 'C:\tmp\tex2.jpg'), psf=testFile)
I proceed to add a third image (blue) to the layer set and the problem I originally posted about happens again. The blue image overrides the red image and I am left with a blank layer AND a blue layer.
pm.psdEditTextureFile(aci=('layerSet1', 'C:\tmp\tex3.jpg'), psf=testFile)
Here is the result in photoshop
https://gyazo.com/0d8025c419b700421385a7a8ee03ec28
I am also aware that it is duplicating the BG layer set also, with nothing inside of it. Not sure what this is doing though.
looks like you got some help but here is a cool video for your next step in the process. Using cycles for character animation.
it also shows his graphs for a tick so you can compare to see what you did differently.
cheers
Can you post a link to those guides you followed?
You should work with the least amount of polygons possible and only increase the number when/if you need them, high poly counts are a nightmare if not impossible to manage, that´s why you add them when the base is already established.
You can tweak the profile of the soft selection in the tool settings (double click on the tool icon).
You can also select the back vertices and create a lattice deformer.
You can also use the sculpt tool and use the buldge brush for example and combine it with holding shift while dragging to smooth the mesh.
​
But honestly you should start again and use much less polygons, it will be way easier to work with.
Undercuts look like the first fig, and pose an issue when making molds of things. Ultimately I want to get this result. My current plan of attack involves extruding the edges of faces visible down Y. Then merging the objects. It's inefficient, but it looks promising.
You can look on upwork.com . All sorts of projects there - its hard to get first one because you don't have any reputation, but its worth it if you keep trying. Dont get desperate - it took me like a month to get first project. Then if you are successfully finishing jobs it gets easier.
Mostly people don't care in what software you were doing modeling. It has to look good.
So I copied the barrel you can see on the right hand side over to the left hand side. However, it's darker and the shading looks much stronger for some reason, and I have no idea why. It's even visible on other 3D viewers. Any ideas? Same thing from another angle, darker barrel is pretty obvious here
V-Ray 3.4
If I go to the attribute editor editor theses are the ones that gets added if I enable the Texture input gamma. https://vgy.me/2UFGYW.png
Maybe all of them needs to be removed at once for the attribute to be disabled?
make a base mesh in maya, bring it in zbrush or mudbox, add extra sculpting details, export your maps, add extra maps in substance painter or photoshop for colors and other channels, then have fun setting up shaders and rendering it inside maya.
or like the guy in the video, take plenty of pics of a real seashell from any angle, put them in a software like photoscan and you have your seashell ready
Do it! There's really not much to it! Do you have adobe illustrator? If you make the graphic somehow you can put it into something like xnormal and get something pretty fast. You can make a simple cylinder look exquisite from textures alone; spec map, bump/normal map, texture map, emission map. Play around in the source film maker to see how you can use different images plugged into different places, that's where most of the effort should go IMO. Just dig in, do some looking online, and before you know it you'll be on your way and know all about it :P
-feel free to ask if you had any questions, but some looking around will help you a lot!
If ambient occlusion is what youre trying to accomplish, you can use xnormal to bake it out. Its free. http://www.xnormal.net/1.aspx
Tutorial for AO http://www.donaldphan.com/tutorials/xnormal/xnormal_occ.html
UPDATE: I have fixed my issue!
I found a program called Moi 3D that specializes in exporting 3D files to FBX or OBj, specifically built for CAD files. You can find it here.
The file I have been working with is built in tris. Moi let's you convert to quads, so I did that with Moi (quads are much easier to work with and manipulate), then I just exported from there to an FBX. Now all of the textures are retained when I open it in Maya, the objects are still separate from one another, and I no longer get the issue with the right-click shortcut menu.
Shoutout to u/blueSGL for the help. Thanks!
modo is priced way too high for it just to be a the goto hard surface modelling app. The place I work at can afford plug-ins for maya, but not full apps that are middleware.
TBH the modelling doesn't seem that heavy, and if booleans+bevels can be done with polys in maya it's nice (we sometimes use MoI but we're not CAD people so it's hard to use)
I'm more of a houdini person now but you could try finding the skeleton from your meshes and assume they're all a bit similar, from there move your bones (i'm assuming you have a fairly good auto rig and are just looking for proper bone placement)
https://houdinigubbins.wordpress.com/2017/07/22/fiedler-vector-and-the-medial-axis/
https://www.sidefx.com/forum/topic/65716/?page=1#post-281938
There might be a similar implementation in maya.
Sure, you can use the file formats schmon mentioned (alembic and VDB), or you can take a look at Houdini Engine.
This lets you create a tool in Houdini, package it up, and use it in other software like Maya.
Shading is always a pain, especially if you have thousands of objects. You should be using Arnold shaders, but carrying data from Maya, to Houdini and back again, all while retaining your shaders is the hard part. Take a look at this to get started.
In the mixer's website they say this
" Mixer is a complete and constantly evolving 3D texturing solution, extremely easy to use, and free forever, for everyone. But that’s not all: Unreal Engine users now have unlimited access to the entire Megascans library for free right within Mixer. The creative revolution is here! "
Quixel Megascans has a number of assets for free to use like grass and rocks and dandelions, etc. It also has a nice exporter tool so it will import it into whatever engine and renderer you want too so you don't have to set up materials.
I've used makehuman to get some human base mesh. It's free and the topology is a decent starting point. As far as rigging, depends on what you need. you can start with an auto-rig in maya humanIK and work from that. You wont get rigged fingers or toes, but it will give you a reasonably accurate rig with IK/Fk to play around with.
A solid wing like this would be okay for a minor character, like critters in the background. But if this bird is meant to be a main asset that will be seen up close, this wing won't deform well when folded.
Ideally, wings are modeled just like any other arm, since anatomically they still have the same structure (upper arm, forearm, "hand"). Example: https://www.sketchbook.com/blog/wp-content/uploads/2017/02/how-to-draw-wings-bones.png
The feathers themselves are usually just individual planes, arranged along each joint so that they can fold properly when the arm closes. For the sake of performance and joint count, you don't necessarily need a joint for each feather, but you'll want enough so they can rotate as the arms close. Here's a quick doodle to get a general idea: https://i.imgur.com/XiLtyqQ.jpg
No, After Effects costs money. If free is important, check out BlackMagic Fusion - it's free to use and extremely powerful, but not as intuitive as After Effects.
the way to calculate a distance in 3d space is the root of (x2-x1)² + (y2-y1)² + (z2-z1)², it gives you the length of the vector (which is what distanceBetween is measuring)
https://brilliant.org/wiki/3d-coordinate-geometry-distance/
good luck
don't try to reinvent the wheel ;)
Something simple like WeTransfer is probably a good one. I've not used 2016 so let's hope it's similar to 2015!
What's the setup like in your scene? What lights do you have? Are you using GI? And have you changed the camera settings at all? If we can rule those out then it'll be the render settings (or maybe the materials).
Check out FlippedNormals. Very Maya centric and up to date. As for some stuff, I don't recall how deep I got into Maya specifics (I do use it these days) but you can check out my wiki. I know I put some modeling and UV unwrapping sources in there. FlippedNormals has a great tutorial in it though, as does Gnomon.
other people have put it forward but yah you are pushing details too early before establishing a decent general form, the cartoon you're trying to use as reference has a very squared off face shape, but at the same time you could draw a skull under it and all the muscle and then fat and skin forms, same goes for the hair, you're better served by adding the hair on top of a skull and face form even if it's not a "realistic" skull
also not sure what your history is but it's 100% better to learn to model / sculpt realistic forms before you do cartoony ones, and also REALLY important to have a good knowledge of all the forms "underneath" what you're sculpting
if you want some cheaper anatomy books I recommend peck's anatomy for technical and much more accurate knowledge https://www.amazon.com/Atlas-Anatomy-Artist-Stephen-Rogers/dp/0195030958
and Bridgeman for more simplified but form focused https://www.amazon.com/Constructive-Anatomy-Dover-Artists/dp/0486211045
also, finish projects get some second opinions and move on! nothing beats practice and trying the same exercise multiple times!
Vertical Ergonomic Mouse Link Amazon
Worth every cent. I use this on two computers daily Maya, Max, Photoshop. 1 button on the bottom of the mouse switches between your different devices perfectly. greatly has reduced stress on my wrist fingers and arm. Highly Recommend it 👍
hey this is a large mouse with a comfortable grip. ive had it for around 4 and a half years.
its a pretty budget mouse compared to the razer one suggested below.
I’ve done many of the maya tutorials on Pluralsight, Lynda/LindedIn, Udemy and the best Maya tutorial I have found is a book that is 5 years old but still applies to most of Maya basics (does not cover MASH, Arnold... - but there are plenty of good online tutorials for those):
Dariush Derakhshani , Introducing Maya 2016, Sybex
looking at: https://www.amazon.com/Bescon-Polyhedral-Sides-Sided-100-Sided/dp/B06Y2BJR2L and the way a lot of the sides have different surface areas I'd say trying to make one that's 'fair' is impossible.
The way I've seen it done before that is fair (well at least a lot more than the above) is two 10 sided dice. one 0-9, one 0-90 in steps of 10
00 is 100.
i would highly recommend getting a hold of this book to give you a nice crash course in all the relevant modelling techniques you can apply to any 3d program or an easy straightforward reference book. theres also a texture/painting and render/lighting companion books that will cover pretty much all bases.
A good book to get for beginners is this one it's for 2015 maya and may not have all the bells and whistles as the newest maya but it's a great starting point and teaches you allot. Introducing Autodesk Maya 2015: Autodesk Official Press https://www.amazon.com/dp/1118862848/ref=cm_sw_r_cp_apa_B6jjAbQCGKR6R
This is the one you want if you're OK with wired.
Scroll wheels suck when navigating around the Maya interface.
In case anyones looking for it... this is the HP DY651A
I snapped up three of them!
Honestly, although I have a beefy home computer, I end up working from my old 2009 macbook pro most of the time because I prefer to work from cafes. All I did was upgrade the RAM to 8GB and give it an SSD boot drive and it works like a charm.
I'm modeling for games though, so I don't really render anything. I'm sure if you were rendering out whole scenes of animation, you'd need a render farm with more processing power, but for my purposes these specs do me fine:
2.8GHz Intel Core 2 Duo
8GB 1066MHz DDR3 RAM
NVIDIA GeForce 9600M GT 512 MB (Discrete)
Samsung EVO 500GB SSD boot drive
I bring my Wacom Bamboo Tablet for the stylus advantage that you mentioned wanting, which was another $50. This is a super cheap option if you don't want to spend $2600 ;)
You could grab a 2014 macbook like this one for around $800 and do the same RAM/SSD upgrades that I did, and you'd still end up spending only about $1200. This model is upgradable to 16GB of 1333Mhz DDR3 RAM, with a discrete 1GB card.
I dunno, for someone just starting in character modeling, this might be sufficient, but you make the call. This kind of setup with far less specs is sufficient for me.
I had a computer ready to go but it was having HDD issues I couldn't solve at the college, so my parents found this toshiba model. Granted its unavailable if you look around for those kind of stats this works out pretty well. Of course its a laptop so it will get hot, and ive had her in the 80* C temp wise on the gpu while rendering heavier images (thats dam hot). If you are looking more for maybe a custom PC try /r/buildapc its where i went for help on mine.
a post i made gave me help on some graphic cards. I ended up buying a 980 ti sc anyway lol.
I can't give you to much more advice because idk your budget or things like that. Just look at good cpu's for rendering and gpu's for viewport. I'm a senior in college for Digital arts with 3D animation as my focus.
Been using this mouse a couple of months Vertical Mouse Really awesome, took a week or 2 to get used to but has helped relieve wrist pain. Also I use x-mouse to map the thumb button to MM while using maya as clicking the wheel was causing me some wrist pain as well.
Yes you're going to have to go the baked final gather map and render in layers if you want to go that rendering route. I would recommend doing some research on alternative lighting and rendering methods based on the needs of your scene. Jeremy Birns has a GREAT book based on SL&R in Maya.
Me too!
This book isn't specifically about lighting, but it really gives you a solid understanding of the basic math and science involved in compositing, which goes hand in hand with lighting. It is slightly technical but very easy to understand, and it is also software independent.
This book is generally considered a good resource on lighting I believe. I found it helpful at least.
Here's Another Book that is pretty helpful.
I just bought this laptop (for gaming, I'm slightly but not really ashamed to say), and conveniently it also seems to be able to handle maya and zbrush running at the same time. I'm extremely new to 3D modeling though, so I haven't done any extreme rendering on it. The only problem I can really think of is that it's kind of a tank, almost 10 lb. So it might be a pain to lug around to class all the time.