
What are
/r/analog's
favorite Products & Services?
From 3.5 billion Reddit comments
The most popular Products mentioned in /r/analog:


The most popular Services mentioned in /r/analog:
Flickr
VueScan
Thingiverse
Behance
500px
GIMP
darktable
IGTV
Dribbble
Google Nik Collection
Issuu
Google Sites
Tumblr
Instructables
The most popular Android Apps mentioned in /r/analog:

Exif Notes
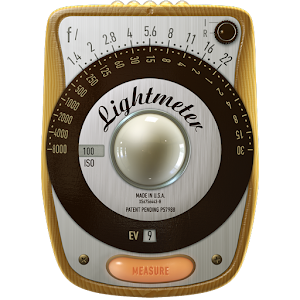
LightMeter Free
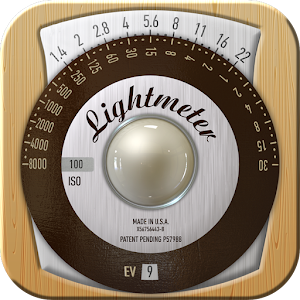
LightMeter (noAds)
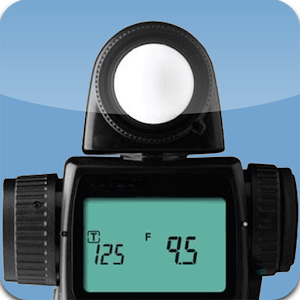
Pocket Light Meter
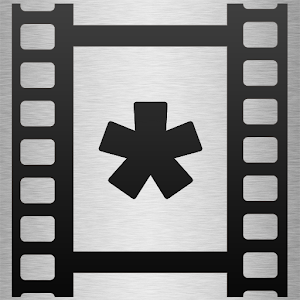
Exif4Film

Dev it - darkroom timer

Exposure Calculator
The most popular reviews in /r/analog:
The glass is just standard single-strength (1/8") glass from the hardware store. I buy them in sheets size 12x30 and then cut them down to 4x5. I used to make orders for the hardware store to cut them in 4x5 size, but they started getting sick of it and charging me a premium. I use this glass cutter and I'm pretty happy with it.
The glass doesn't quite fit into film holders, but I've managed to find a few old glass plate holders on eBay that work pretty well. I've got a 3d printed one too, and am looking to finalize the design and release it pretty soon.
Beyond that, it works in a normal 4x5. I have the ground glass in mine reversed (foggy side away from the lens), since autochromes need to be exposed glass-side first.
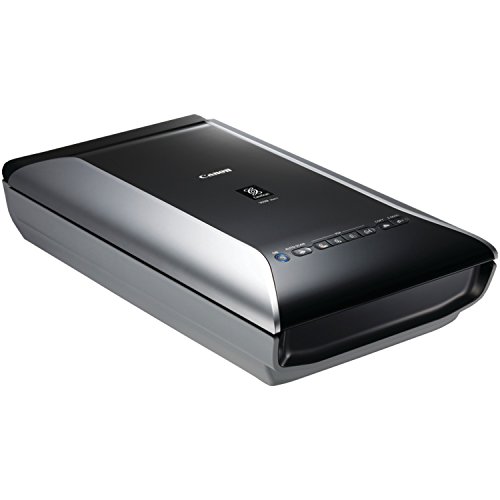
I used a Canon 9000F markII flatbed scanner https://www.amazon.com/Canon-CanoScan-MKII-Negative-Scanner/dp/B00AGV7TQG/ref=sr_1_1?ie=UTF8&qid=1520995242&sr=8-1&keywords=canon+canoscan+9000f+mark+ii
Kodak EIR; It was a military grade aerographic infrared film that turned any live foliage into a blood pink/red color depending on the filter and development process used.
Here are two of my photos shot with this film:
Got my first roll of film back last week from a Canon AE-1, with a 50mm f1.8 lens - used some cheap Chinese film, (I believe it's called 桑尼100). Some results here. Feedback or start-up tips are welcomed!
oh they're all over the place
After a lot of looking, I found a quite nice filter wallet from Amazon. Available in multiple sizes, price is right. Been a lot of filter chatter here, thought I'd share. Wallets like this will really speed up filter use vs. unscrewing individual plastic containers.
Why I likee:
Mesh sleeves - I have one with clear plastic, and when it's warm, the filter rings kind of stick and you have to fight 'em out.
Neutral interior color - yeah, why so many traffic-orange filter wallets? With white or grey, you can see at a glance what filter you want. With black, you can't see a thing. I like seeing if it's warm or cool, what level of ND, etc.
And here's a hint - next time you're shopping, hit the ladies makeup aisle and get a, I dunno, "paintbrush they use to put blush on" - it's like an artist brush but very soft and the quality is good as far as shedding hairs. Get a stubby one (like 4") with a nice soft fat brush end and keep it in the wallet - just the shiz for getting dust off your filters before you screw them on. No more blowing on the damn things! (Stick a small microfiber in there too).
My first roll in about 5 years. My digital set up was just stolen, and I'm almost glad it was.
This was a test roll, because I really wasn't sure the metering was right. I guessed it was about a stop fast, and I was close. Contax 167MT. Zeiss Planar T* 50mm f1.4. Expired grocery store fujifilm 200.
I'm really looking forward to seeing the roll of Ektar 100 that I'm shooting now.
All the existing models of this type of scanner are pretty bad, they are usually just tiny smartphone sensors with a crappy fixed focus macro lens setup, low dynamic range and poor colour rendition, which is important as these are saved direct to jpg.
Considering the price of this thing i will hope Kodak have actually put some better guts in it, but if you look around Amazon at similar devices the Kodak one just looks like a tarted up version of one that's $100 less, https://www.amazon.com/dp/B076T7CD3G/
A Fuji Instax 210, it’s old, big and ugly. The battery compartment broke so I have a bunch of electrical tape on it 🙈 Here’s the Amazon US link.
I use Exif Notes to collect metadata and then exiftool to apply it to the scans. I keep the film images in separate folders by roll (numbered in the order that I finished them).
I use the app Exif Notes, I'm mostly interested in the time, location and which lens I used, but I record the shutter speed and aperture too.
Thanks! The lighting setup was a pretty huge softbox but with some black cards on either side of the set to help add contrast and add dimension. Pic from my instagram
I'm literally, right now, stapling my latest issue together! Drops tomorrow. It's a complete mix of various creative endeavours though. Some analog photos, some digital, interviews, a short story, comic etc... Things I like.
Tomorrow I'll post some of the analog shots from the latest issue on the sub, along with a link to the online zine itself.
The front cover design on yours is real cool. I like it. Did you go out with the theme of your zine in mind or did it just come together?
I ended winning a bid on a Nikon F2 with a Nikkor-S Auto 1:1.4 50mm Lens. The seller said he bought it from an old fellow and that it had been sitting for some time. He described it had no visible mold, oil free, and some dust inside of the sistem. The outside itself has some scratches but nothing serious. I got it for $120 but with shipping and import tax it comes up to $190. So.. did I get a good deal? What things do I have to be warry of when I get it?
pic1
pic2
To meter something complex like this, if you don't want to buy an incident meter, use a gray card or a cheap pop-up gray card. Rest it in front of the subject and take a reading - that will give you your basic exposure for the lighting you have going on. From there, bracketing will help.
Keep in mind you may want some reflectors to fill in things (just white foamcore propped up on a brick or a book will work).
If you use flash for something like this, you can do things like hang a sheet of ripstop nylon or even just white bedsheet as diffusion to blast the flash through; but a cool trick is setup for a long exposure - when you hit the shutter, the flash will do your main lighting, but if the shutter's open a full second, stick a diffusion filter in front of the lens for the rest of the time the shutter's open (just hold it over the lens - you can also do things like take a clear CD case lid and rub some oil from your forehead on it for mild diffusion) - that will make any LED lights "glow" in a cool way (you need the room to be very dark to do that). You'd probably want a DSLR to test something like that, unless you have a flash meter.
I built a hot water bath using a temperature controller and heating element I got from Amazon. Whole thing cost me $70. Mounted the heating element in a plastic tub, wired up the temp controller, added a small aquarium pump to keep everything mixed well.
Tenba wraps are great for this. Many sizes and they'll cover most any shape.
Search "camera case insert" on Amazon and you'll find all sorts of handy things, you just wade through them and see what fits your gear.
Self-developed my first roll!! Taken with Leica M3 and Zeiss 50mm Sonnar T*, on Ilford Delta 400.
Please excuse the quality - I've yet to get a film scanner so I jerryrigged a light-table using an iPad and took a photo of my negatives with my iPhone. (The little dots you subtly see is the LCD array showing through.)
Found my Grandpa's AE-1 Program, Canon 50mm F/1.4, and an old roll of Kodak Gold 200. I had no idea how old the film was but I decided to test it out anyway.
I went to Stillwater, MN and hoped for the best. I guess the roll wasn't that old because the images seemed to turn out.
Here are the results. Now all I want to do is go shoot more!
My instagram — I'm trying to hit at least 75% analog content, which has been lots of fun thus far. I'm headed to South America next week for 7 weeks and loading up on tons of film! It'll mostly be Rollei 80S and Kodak Tri-X for 35mm, more varied rolls for 120.
I also didn't expect this to succeed but I'm very excited!
I've shot the original Type 55 which was magical stuff - beautiful negatives and prints.
However the original Type 55 had different ISO for the print and the negative. Typically I'd shoot a print first to check composition, exposure, etc. then do a second shot for the negative. According to the video the New 55 folks have managed to get both a usable print and negative from the same exposure - no double shooting!
I have CAD on my computer, so if you need a model, just PM me.
I've modeled and lathed other hard to find spools before, so modeling 620 should be fairly easily.
Edit: A quick check on Thingverse reveals this spool made on a makerbot. You can also download the model file.
Once a year for the last 3 years I've made a zine just about stuff I like. Not all photo's are analog, but a fair few are. You can view it in full here - http://issuu.com/oscarfehlberg/docs/think.sans_issue_03
Let me know what you think!
This is the design I used (not mine): https://www.youmagine.com/designs/35mm-film-on-120-spool
Pretty sure it will fit most cameras, but as far as shooting it you might run into different problems. I had to use a wooden skewer to wind the wheel that counts frames after loading the film in order not to wind up the length of the paper attached to 120 film, and remove the tray and redo the procedure when the counter reached 15 frames, as the camera won´t let me do more frames than that.
I could print some for you guys, but shipping would be expensive, $45 is the cheapest I could find online for shipping to the US (I live in Sweden). I would recommend going over to /r/3dprintmything and ask for someone located closer who could print it. If somebody want me to print an adapter I guess I could do it for something like €10+shipping, about half the price on the other site linked.
Edit: Found this, that seller is the designer, so I would buy it from him.
Also paging u/justbonjo and u/Zenzanon
Also see the [online Adobe color wheel], which allows you to experiment with different color relationships. It's best viewed on a desktop.
EDIT: Helps if I link properly https://color.adobe.com/create/color-wh
Wow. These are really fantastic. I really like this one since it is a pretty unique perspective. Is it Cape Cod light?
What films and focal lengths did you work with?
I have not developed HP5+ in Rodinal, but I have developed Delta 400 with Rodinal and gotten pretty good results. It does increase the contrast and the grain though. You could always give it a shot--I like 1:100 for pretty much everything.
That looks like it's under the front element. With a spanner wrench, you should be able to get the element out and clean it - hydrogen peroxide, then lens cleaner. There may be spores lurking in there, some people say they can get into other gear (but then, the air is full of spores). Some people say that putting the lens in full sun for a few hours so light (UV) is getting all through the elements can kill it.
Fungus can eventually eat into the lens coating (called "etching") and that can't be repaired. You'll only know when you clean it. OTOH, lens probably is only worth a few bucks?
Will it affect images? Good chance, especially in situations with lots of flare (sun or light sources in the pictures), only way to tell is to test it. I have an old canon lens that was really etched by fungus, but it looks gorgeous, sort of old-school diffusion look.
Assuming we're talking about a Spotmatic II, you can use an Energizer 387S or equivalent.
If you order from Amazon, order from Amazon direct and not a third-party seller or you're liable to receive 20-year-old batteries (speaking from experience).
(The Spotmatics were designed to take a 1.35V Mercury cell that's banned because environment, but the cameras have voltage regulation circuitry so they can take any battery in the 1.35-1.55V range that'll physically fit without altering the performance of the lightmeter. Fancy zinc air batteries (Wein cells) exist that provide the originally expected 1.35V and are marketed very well but don't waste your money. They don't last very long and they're not necessary for this camera.
Amazon has several, here's one for under $25. They're really worth the bucks, or get on eBay and you might find an older flo tube model, but the LEDs are nice. I know sime guys stick a white photo in their iPads and use that, too. If you're shooting film, you really get to the point where inspecting your negs is needed, and it's handy to keep by your scanner to check for dust (well, mine's by my enlarger!)
I bought them at Vivid Sydney 2017, but you can probably buy them online. I've seen them on Amazon as electroluminescent glasses. EDIT: https://www.amazon.com/Fronnor-Glasses-Fashion-Shutter-SunGlasses/dp/B01FCX8R0Y/
I have one and do carry it internationally. They are very large and heavy but work well if you are good with judging (and measuring) light.
I use a hard case. I got it from Amazon. They are $140 but indestructible (Amazon basics hard camera case large). https://www.amazon.com/AmazonBasics-Hard-Camera-Case-Large/dp/B01L0LVLLYref=sr_1_1s=electronics&ie=UTF8&qid=1516007362&sr=1-1&keywords=amazon%2Bbasics%2Bhard%2Bcase+large
If you can find one, a 4SR44 is the correct battery, but a 4LR44 battery may be easier to find, and also works.
Edit: here's one on amazon.
There are lots of apps available for your phone that do a great job. I'm sure people will be able to recommend some. I've heard of Lux for iOS and I use 'Light Meter' for Android 'https://play.google.com/store/apps/details?id=com.willblaschko.android.lightmeterv2.pro
You could look at a dedicated handheld meter, lots available second hand, or read up on using sunny 16.
From my understanding the need to meter every shot isn't exactly required. If lighting conditions are similar then you can rely a little on the film's ability to cope with over / under exposure.
https://play.google.com/store/apps/details?id=com.dq.fotometro&hl=en
https://itunes.apple.com/us/app/mylightmeter-pro/id583922375?mt=8
For simple light measuring this app worked just as well as the $200 Sekonic I'm using now. The $3 or $4 paid version is well worth it.
I use an app called "Reciprocity" but it's not got a lot of films in it. There are a few others but I haven't had a deep dive doing night long exposure so I am "happy enough" with the app.
The timer on it sucks though, which is why I can't wholeheartedly recommend it, but it's a start.
I have a question for using smartphone app lightmeters. For reference the app I'm using is LightMeter Free on the Google Play Store.
Are the readings I'm getting from this app for 35mm systems? If the app tells me to shoot at 1/125 for f/3.5 and ISO 400, do I set those exact settings on my TLR? I know that aperture sizes and focal length are different on medium format, do I have to account for this difference or can I just set it to f/3.5 and 1/125 and it'll come out okay?
Thanks in advance.
I think it's a Kalimar B3. Here's an article from Popular Photography in 1996 which mentions them.
Here's an instructable I wrote about how to fix a broken transport mechanism for a 120 SQ-A film back. It could also be used as a disassembly guide for other film back problems.
Its the thing they have here: https://www.kickstarter.com/projects/wanderlust/travelwide-45-camera
Looked similar in my mind but now seeing it fresh here its completely different.
Found it: http://camerapedia.wikia.com/wiki/Blik
Caption included with this photograph says:
"Sekonic LC-1 and identical Anglo
The Anglo meter on top of the picture is identical to the ASA version of the Sekonic LC-1 (or L12) exposure meter. The DIN version of the LC-1 has a mirrored dial scale. 1955/56"
Having fun with instant film recently. Anyone else submitting photos to Polaroid Week 2014? I'm not really sure what it is to be honest but I've found some amazing photographers and techniques in the Flickr pool
Lately, I have been looking a lot at the work of Davis Ayer who's also an analog photographer, and he does some great shots with surreal colors, like in this one. How do you think it is achieved - and with or without the use of photoshop?
Hey,
I have been using a Minolta SRT-101 for two years and it has accompanied me on two over seas trips to Japan, the battery has yet to run out and it has been in the rain/snow. It's a heavy duty camera, and has an easy system for focus.
My Instagram contains many photos shot with my camera. Feel free to take a look.
Probably in the next month or so, the band is Blisses B. Like them on FB as they update that stuff. Alas, I am just a humble engineer. I will say this though, those may have been the best drum tones I've ever heard, and definitely one of the best drummers I've ever worked with. Here's a behind the scenes with a 3 minute drum solo :) https://vimeo.com/89734768
Here is a version with the dates / locations stripped out, but you can see any notes I added, cameras used, etc. Since I also get prints, you can see that I mark down which box I put them in and what # they are. I also store the negatives in a 3 ring binder and keep the # from the lab with them (negative #) so I can find them as well.
500px provides Portfolio if you upgrade your account, and it has better CDN than Squaresquare globally. If your website can't load after 10s I doubt many people will stay.
edit: two down sides are the inability to scan slide film (technically you can but you have to invert the image in photoshop or similar software), and less image resolution than my v700 but it's more than sufficient for posting to flickr / reddit / anywhere online, or even prints up to 8X10, but I'd probably just send out for negative prints anyway.
here's a link to the pakon 135 flickr pool: https://www.flickr.com/groups/2426828@N22/
and here's a link to where I bought the scanner if anybody's curios: http://www.aaaimaging.com/kodak-pakon-f135-film-scanner.html
No batteries left in it. I put some in and ran some film through it and it turned out great! Everything works flawlessly. The zoom lens it came with is a Shakar 80-200mm or something like that and it doesn't seem to perform as well as the 50mm but the camera feels and functions really well.
I scan all my home developed B&W negatives with a DSLR set up. I posted this recently, showing my DSLR scanning set up. I scan in raw and then just invert and adjust in Ps. It works really well for B&W. I recently tried colour negative film and it was a massive pain in the arse to get right in Ps. Here is the result of that colour scan attempt though. It would take a fair while and a lot of mucking around to scan a whole roll of colour with a DSLR.
I don't find it detracts from the analog experience with my B&W work as I don't find I need to adjust much and the adjustments I do make are the same as what would be done if I were making physical prints.
Call me blasphemous but on my last batch of photos I actually applied a simple VSCO preset to them.
I see it like this. They get scanned by my lab and they apply a few general tweaks to the shots. These are generalised and not ‘customer specific’ so I don’t mind coming in and making them a little more punchy or a little more in tune with how I remember the scene looking as of course my lab was not there at the time of shooting.
Feel free to tell me it’s too much but I think that my recent shots are in keeping with the colour palette of Portra 400.
Here's my 500px, all analog photos, so far all 35mm film, some slide film, some colour negative film and some home developed black and white.
My digital camera broke a year or so ago and since then I've been using my father's old Olympus OM2-n and my Ricoh KR10. I've only recently started posting my photos to 500px and I've tried to keep it to only the ones I've thought are best.
Edit: hurrdurr spelling.
I'm open to any feedback positive or negative, let me know what you think.
My insta is @jugglernorbi which is mostly DSLR but recently some 35mm and Polaroid.
I also post to tumblr with sometimes some more info.
Unfortunately I'm on tour in some remote places and the internet resembles dial-up so I'm not super active at the mo.
Costco?
Not exactly a pro lab but I find the minilabs at Costco are generally well maintained and under utilized. I've never gotten scans but have used them for "process only, do not cut" in a pinch. It's less than $3 per roll for just processing and you get standard minilab output. Nothing wrong with that as long as the machine is clean and chems up to date. With scans your biggest risk is the operator manhandling your negs that's why I don't get the scans or let them cut it, pick it up off the dryer and hand it to me....
You can always send out in a mailer... Richard photo lab in Los Angeles does a great job. The darkroom will also process and do a basic scan for $10 / roll although their quality has gone down over the last year or so IMHO. I've also heard good things about indie film lab.
Schwarzschild Compensation Chart
...and: depends on your camera and what you mean by night? Night at time square or night in a desert at new moon?
It's awesome that you gave this a try on the first roll. Film is great for star trails because you don't have to worry about sensor overheating, or frame stacking or anything, and you just open the shutter and go back inside to grab something to eat.
I'm jealous of your clear night sky! I live in NYC, where you'd have to drive at least a few hours to get far enough away from the lights for stuff like this. Here's one I did on a trip to Maine. It was also done on Portra 400. I would rather have used a slower slide film, but this was just what I had loaded in the camera at the time.
just got my pentax 6x7 w/ a 150 f/2.8 in the mail from keh and shot some modeling light portraits while i was assisting.
hp5+ pushed 1 stop
I got that camera a few days ago! Totally 80s! Can you even hear the shutter activating? Also Check the 5 gold terminals on the lens to see if they could be dirty.
Found this link: https://www.quora.com/Why-would-my-film-have-developed-blank
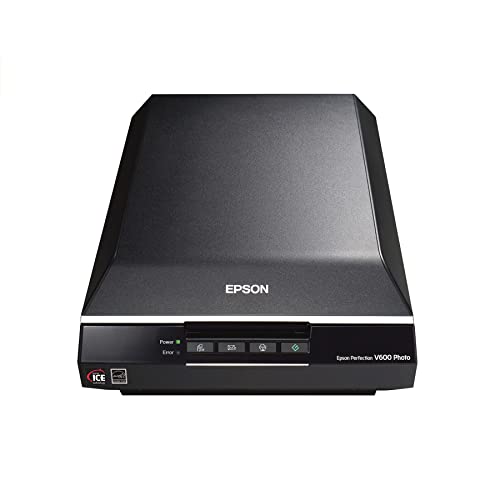
First, I would check out Vuescan instead of using the Epson software, as that program sucks. I used a v600 for a few years often. 35mm never really gave great results, but I got my best stuff by kind of rigging up my own film holder by taping the negative carefully to a piece of glass and sandwiching it against the scanner glass. With 120 film, it was great for scanning with the included film holders. It won't get close to v750 quality, but good enough for web use and small prints.
oh boy, this is gonna be fun!
i did something similar to get an old dedicated film scanner running.
software side, easy, vuescan can do it.
hardware side is more interesting. you need to connect the scanner's old SCSI port to whatever you're intending to use as a scanner input on your computer. there are USB to SCSI adapters around, give it a look on amazon. most of these are 25 pin ports, so you might also have to get an 25/50 adaptor to make it work. and it will work, you just need to be prepared for some fiddling.
on my mac i needed to use firewire, so for the minolta multi ii that i was using it went
scanner -> 50pin to 25pin SCSI adaptor -> SCSI to Firewire 400 adaptor -> firewire 400 to 800 cable -> mac
what i also needed was a 9V power supply for the firewire adaptor but i kid you not it worked!
in any case, yes it's certainly possible, good luck!
Scanning to me is an ordeal. I started with the epson software, then used vuescan with the colorperfect plugins, now I'm back with epson. It all depends on the negatives I reckon.
I have silverfast for 35mm and that's pretty decent, pricey though unless you get it bundled with your scanner
Yes! You definitely should!!
A flatbed scanner like the Epson V500 or V700 does a good job. I highly recommending using Vuescan over the provided software, though. A bit of learning curve to use, but it gives much better results.
If you're only doing 35mm, try to find a Minolta DiMage 3. They're discontinued now, but they turn up used occasionally. Excellent dedicated scanner!
I actually had a similar problem and unfortunately, I still haven't got it exactly down but these certainly get me in the right direction
-make sure you are just highlighting the frame you want.
In the preview mode, right click on what you think is your 'grey' or mid point between the lightest and darkest areas within the frame. This should adjust the colour balance
lock the film base colour...
This seems like something you could easily 3D print if you can't find one and insist on having a holder. You can design one here with no prior knowledge of CAD, and find somewhere local to print it.
Here are a few taken with an old Nikon 20 mm lens:
https://www.flickr.com/photos/oscar-carlsson/11714702555/
https://www.flickr.com/photos/oscar-carlsson/11714955213/
I really like the focal length, although I don't use it every day.
I had the Pro, but sold it after I bought the Mamiya 6. The three films I shot with it were okay, but I never really trusted the camera. I just pointed where I wanted to focus, pushed the trigger halfway down, recomposed and done. But I was never... sure.
I have a GA645i, not the zoom. It focuses like a rangefinder. Put your subject in the center of the frame then reframe. It gives you a distance readout in the viewfinder. So if youre shooting a portrait and the focus says "INF" for infinity, you know something is wrong. It's a big point and shoot really.
Here is my set. https://www.flickr.com/photos/csmcglaughlin/sets/72157631524960115/
these are from the first roll and second roll on a bday present from a friend -- exakta varex iib, zeiss jena tessar 2.8/50, and the negatives are being scanned/don't remember the film off the top of my head.
fun fact: these 35mm shots were all taken using a waist-level finder!
I'm glad someone likes it! We tracked the last 2 weekends, here's some more photos, all shot on film. Whole band tracked to tape. https://www.flickr.com/photos/63783647@N00/sets/72157642816032415/
Looks like a leather case for a Fuji X10 might fit. Here's a link to someone who did just that HERE
You could ask someone on Etsy to make you one. I've had good luck dealing directly with makers there.
edit: I may have misinterpreted. Did you want a formed case like the one I posted, or do you want a hard leather bag that isn't formed to the camera?
I do this on my M3 a lot. With the half frame I am usually able to get 39 frames on a 36 roll - its good because I like to maximize each roll I have. Here's a pic I did recently on Tmax 3200!
Here's my Flickr and my Behance.
My work consists basically on every day life. Where I am, my camera's with me. I don't plan too much on where to take photos, who to take photos, etc. But I want to accomplish some projects, try and get some ideas into film and get out of my confort zone.
Bought my Canon AE-1 ~2 years ago and been in love since then. I've been experimenting with expired black and white film recently. Some cheap Maco Eagle.
All the films I've used are expired, maybe because it's a tendency here to buy cheap Superias (3 rolls = 5€). Mostly broken college students who want to shoot.
I've deleted most of my shots from earlier years because I've grown out of them. I don't know how to explain! Didn't like them now compared to my work currently.
Any feedback is appreciated!
there is the free online cad design/program place called OnShape, just register a quick account there and then search for "6x12 Pinhole Camera"
the whole design program runs in the browser too so you can access stuff there from anywhere
If you have an iPhone, I’d recommend the Lightmate film exposure meter app on the App Store. I’ve used it and really like the simple user interface, accurate, free has the ability to set one of the big three (aperture, shutter speed, iso) as priority, and how you can choose around the image to check for highlights and shadows with the exposure. You can also use it with one hand pretty easily which helps you juggle the phone and the camera when metering. For android phones, I’d recommend the LightMeter app because it is easy to use, has a cool vintage interface, accurate, and can be calibrated but is $2. Hope this helps!
Not op, but I don't own a light meter and to be honest haven't thought to compare that app to the built in light meter on my F-1. I only use the app when the lighting is too low for the camera meter, and it has worked ok for the few shots I've used it for. There's quite a bit of forgiveness in color negative film so it doesn't need to be super accurate.
https://play.google.com/store/apps/details?id=com.willblaschko.android.lightmeterv2.free
That's the app I use, I don't know if it's the best, it is a bit glitchy but it hasn't been bad enough to make me want to try others
I personally use this app https://play.google.com/store/apps/details?id=com.dq.fotometroNa&hl=en&gl=US (on ios https://apps.apple.com/es/app/mylightmeter-gratis/id578970826) but there's many that do the same thing and don't cost money.
i wouldn't recommend either one of those cameras if you are truly interested into getting into film photography... film is two parts... light & controlling that light... neither of those cameras allow you to control the light... goto a local pawn shop or ebay and get a cheap 35mm camera and grab a technical book (https://www.amazon.com/Camera-Life-Library-Photography/dp/0709330219/ref=sr_1_1?dchild=1&keywords=the+camera+time+life&qid=1623777817&sr=8-1) - this is the one i learned from but picked it up at a thrift store for much cheaper... and shoot a roll taking notes of every shot: shutter/aperture/focus distance etc. i knew nothing about film when i first started... i thought you set aperture by eye... who knew there was an actual science behind it ;)
This isn't the correct one, but they make machined adapters like this to adapt battery sizes. But it won't do anything about voltage.
https://www.amazon.com/Acxico-Battery-Adapter-Converter-Exposure/dp/B0836TCPBT/
I googled swift led panels and nothing really came up. Is there a different term?
Something like this? https://www.amazon.com/dp/B08FSTKPS3/ref=cm_sw_r_cp_awdb_imm_t1_601XPG71QVMQP7F3VEGN?_encoding=UTF8&psc=1
i used this one.
in terms of quality and convenience, it's great, it's just really buggy where random rolls of film will just not scan properly and it will just slowly get more "off" as each frame goes, and it will eventually be scanning half of one frame and half of another. then i have to take the film out, put it back in, and manually line it up with the little adjuster buttons. it just doesn't read the frame edges well sometimes.
it's really random, i could use the same exact roll of film and take it out, and put it back in, and it would scan the whole roll perfectly. it really is annoying. but i still think it was worth it, because 90% of the time it works great and i put it in and it scans the entire thing and i don't have to touch anything. it's still a huge time saver, even with the bugs.
It had since changed a bit. Here’s a link. I’m a fan of this tripod. Solid performance, sturdy, and light. Perfect for backpacking with.
K&F Concept 62'' DSLR Tripod, Lightweight and Compact Aluminum Camera Tripod with 360 Panorama Ball Head Quick Release Plate for Travel and Work (TM2324 Black) https://www.amazon.com/dp/B015CGRREI/ref=cm_sw_r_cp_api_fabc_m4xRFbY7YKCAP?_encoding=UTF8&psc=1
It's just a cheap rubber ring off Amazon. She wanted something that color and this was all we could find, but she loves them. I ordered a set in my size too and I wear an orange one.
Your doing something wrong at B&H as the prices are nowhere near that high for single rolls. I live in Ontario and am constantly searching for good prices on film given the poor Canadian $.
Given that, currently the best deal is from Amazon US for a brick (5 rolls). It's $45 including shipping to Canada. Converted to $CAD it's going to cost you about $12 per roll. The trick with BH BTW is to make sure your minimum order is at least $100 to get the free shipping.
If you don't mind Portra 160 you can get it for $50 a brick in the Canadian Amazon without the extra shipping fees and the price is already in $CAD so about $10 per roll
Now Adorama shows it as temporary backorder and Amazon has some. I doubt it's anything to get worried about. Probably a temporary delay.
My favorite tip:
Get a 100ml graduate (very small one) and a plastic syringe with a couple inches of tubing (these are often sold to mix oil & gas I guess?) or find some tubing that will fit over a syringe (you don't need a needle and you can buy them online or ask your doctor or dentist, show them a print or whatever if they think you're a junkie - but junkies need needles, you don't).
Use the syringe and tube to draw the syrup from the bottle, then squirt into the graduate - since you're dealing with tiny amounts, like 6ml - this makes accuracy really easy. And accuracy and consistency are they key to dialing in your developing.
You also need photo flo, and film hanging clips, and a packet of negative storage sleeves and some decent scissors. If you don't have a dedicated film drying cabinet - while your film is having its final rinse, run the shower on hot in your bathroom - steam it up good. Rig up a way to hang your film. Turn off the shower and hang the film, and leave the door closed for a couple hours. The humidity will settle the airborne dust down. Trim and sleeve your negs right there in the bathroom. this has been a big help for me, and I do 16x20 prints with a condenser enlarger, so dust is the freaking enemy!
EDIT: Syringe and tube from Amazon (I'd trim the tube to a suitable length). This is for one-shot developers like Rodinal and HC-110, that you mix (just one dev tank's worth) before use. Why the graduate? Because a syringe is kind of hard for accuracy to the ML - do you add the cone-shaped end? But that's like another ML or 2... or 3? Just use the syringe to get the syrup from the bottle.
Walmart by me has the 3 packs of kodak gold for $12.
You can sometimes score cheap rolls of film on amazon if you're willing to buy in bulk; eg: https://www.amazon.ca/Rolls-Kodak-Ultra-135-36-Color/dp/B013KE71P4/ref=sr_1_68?s=electronics&ie=UTF8&qid=1485202016&sr=1-68&keywords=film
Are you putting the film in the negative carrier and using the enlarger's lamp to backlight the film? Interesting idea. Not sure it would be easy to align everything and get it focused. I'd imagine that having a cable release and a tilting LCD would be must haves.
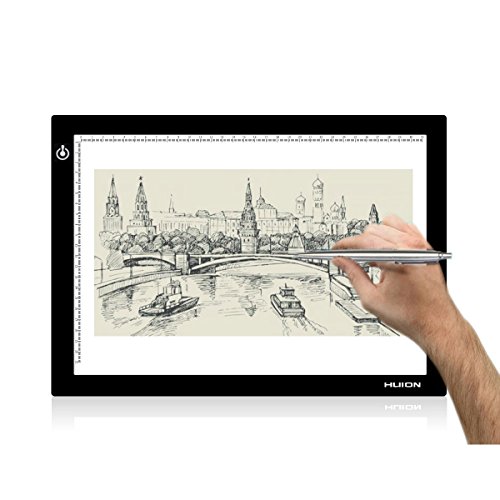
You can get cheap LCD light panels from Amazon and shoot down at the negatives from a copy stand or cleverly rigged tripod.
The process is time consuming but the results are better than flatbed scans. I'll do that with tricky negatives to play with crops and contrast before turning on the enlarger. If the negative carrier is flat you can use it to hold the film. Sometimes that gets it flatter than just holding it down.
Funny you mention this, I was recently in a similar predicament where I had more gear and "outgrew" my small-ish camera bag (ThinkTank Urban Approach 5). Keep in mind this is for my "street shooting" or "hike" setup, where my kit includes a film body (Minolta SRT or XE), lenses (50mm + 28mm), mirrorless adaptor, mirrorless camera, extra batteries and a TLR plus 13" laptop and charging brick.
I ended up just getting a regular backpack and buying an insert on Amazon. I think your best bet is to get something for the carry that you like and add inserts to customize to your liking, but maybe others have a different opinion.
Hey, that's slick... I learned the basic of sketchup to make a pin-registered negative holder for an enlarger. when the part showed up, I was like "this... is the fuckin' future!!!"
For doing stuff that attaches to cameras and has to be aligned with the lens, and be able to slide back and forth - look at cinema-style rail setups. They've gotten so cheap these day if you shop around (here's a good quality one from Amazon but there are tons out there). On eBay there are Chinese vendors selling literally hundreds of special little parts, cheap. It's standardized, 2x 15mm rods centered 60mm apart, and you attach things to one or both rods. For video we stick follow focus, matte boxes, lens supports on 'em, but if I ever get the big 360mm lens for my RB, I'll use one of these if I can't find the lens support (which can be rare).
u/xnedski makes good points. Also, if you're using a shoe-mount flash, a diffuser often makes a big difference in red-eye, and your shots will be much less harsh to boot. The various Fong diffusers are what the pro event shooters use (but they're stupid overpriced), but just an Amazon search for "flash diffuser" will turn up a mountain of various takes on softening flash. Or even pointing the flash up a bit and sticking a white reflector card with a rubber band is better than nothing.
I got a lightbox on Amazon that is supposed to be used (i guess) to view and trace flash for tattoos.
https://www.amazon.com/ITingjoy-Ultra-thin-Powered-Adjustable-Illumination/dp/B01K1OLCMO
Works great.
I have this cheap light kit from Amazon: https://www.amazon.com/Photography-Portrait-Umbrella-Continuous-LimoStudio/dp/B005FHZ2SI/ref=sr_1_3?ie=UTF8&qid=1517634363&sr=8-3&keywords=light+kit
I use it for taking documentation pictures of art. It's pretty good, the bulbs that come with it aren't particularly bright, so I bought some of the same brand's larger bulbs. They're daylight balanced.
Depends on what kind of photography you'll be doing of course, if you plan to be hand holding, shooting people etc, you'll probably still want to use flashes (maybe as supplements to the light kit) or brighter lights.
I got a $14 one from Amazon; people pooh-pooh that and say you have to get the micro-tools one, but it works just fine, esp. if you'e not repairing lenses 24-7. I really can't see how one could be significantly better than this one, at the same size, etc.
The amazon basics flash for everything:
It doesn't have to be huge, or expensive. Here's a fire-resistant lockbox on Amazon for $20. There's a bigger version on that same page for $30.
If you want off-site storage, call some local banks and ask what their lowest rate is for a safe deposit box and how big the box is. Most are around 3x5x12", enough to pack a lot of negatives in. You can sometimes find smaller banks that will rent them for $40-50/yr, but pricing varies a lot. You can sometimes negotiate a lower rate if you pay multiple years in advance. Just make sure to pay the annual fee, or they'll seize the contents, obviously.
You can back up your scans for free on Google Drive or Dropbox, up to a certain storage limit.
I find that the book "The New 35mm Handbook" by Michael Freeman breaks down every possible element of shooting film (especially 35mm, obviously) that you could ask for. I'd find a used copy (I got my last copy for 1¢ on Amazon) if you can.
As much info is on the internet, this book boils it down into one easy to follow and in-one-place reference.