
What are
/r/cider's
favorite Products & Services?
From 3.5 billion Reddit comments
The most popular Products mentioned in /r/cider:


The most popular Services mentioned in /r/cider:
Google Groups
Dictionary.com
FatSecret
Project Gutenberg
Google Play Books
The most popular reviews in /r/cider:
Here is a book from 1762 on Cyder making!
https://www.gutenberg.org/cache/epub/15407/pg15407-images.html
As you will read, the instructions aren't all that precise or scientific. Still I think there are a lot of good tips in there.
Hope this helps.
Wait it gets better I found you the same brand but in bigger sizes on amazon https://www.amazon.com/Fruit-Gallon-Basket-Berries-Making/dp/B0777VKQPK
Try using the honey chrome extension for coupons too.
I actually get over double the yield with my champion juicer than from any press I've used. 80 lbs of apples got me 5.5 gallons of juice in about 4 hours with my juicer whereas 220 lbs only got me 6 gallons in about 8 hours with the first press you linked (https://www.amazon.com/Weston-Fruit-and-Wine-Press/dp/B000JL0G4K). I used a home made drill-attached grinder in conjunction with that press as well.
Another gripe about that first press is that as soon as you start getting any resistance in the torque mechanism, the entire press wants to twist as well. Unless you find a good way of bolting that thing to the ground so it doesn't move, you have to fight with that as well. Looks like other people have had similar issues based on a quick glance at the amazon reviews.
Just my personal experience though.
Dictionary.com says metheglin comes from Welsh meddyglyn but doesn't have the others. I assume melomel comes from Greek meli, honey, and melo, apple (see melon).
You can find both of those on Google books.
Or ...
You can get my just-published book called Cider and Perry In Britain to 1700: A Collection of Material from Primary and Selected Secondary Sources. It focuses on the making and use of cider and perry (rather than orchard cultivation) and includes both brief and lengthy excerpts, in modern typeface, from those two and over 100 additional documents, dating between 1130 and 1700. Its on Amazon here https://www.amazon.com/Cider-Perry-Britain-1700-Collection/dp/173246460X
It isn't a how-to-brew, although it contains numerous sets of instructions for making cider and perry. And it does not include a cohesive history, focusing rather on the source documents.
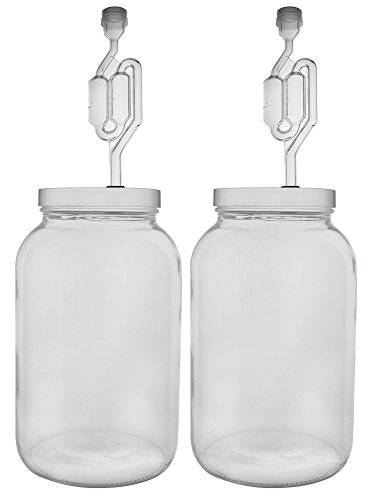
I am using the bottles for fermentation, got the idea from Man Made Meads youtube channel and fairly closely followed what he did. I got the juice in the bottles, added yeast, covered with a paper towel (that I wetted with a little everclear) and out the lids on (very loosely to let the gasses out). I plan on taking them out of those bottles this weekend so they will have been in the containers for about 10-11 days. I do plan on getting some fermentation jars like these, just haven't gotten them yet.
This is one of my favorite bases right now https://www.amazon.com/365-Everyday-Value-Organic-Gravenstein/dp/B074H6YNP8/ref=mp_s_a_1_2_0o_wf?dchild=1&keywords=gravenstein&qid=1614193004&sr=8-2.
I get it at WF, but I think they will ship it. In my area, it's one of the few things WF has that is cheaper than any other store (2.99 vs 4.99).
It's looking good, but I would recommend you get rid of those airlocks and get three-piece airlocks. They just work a lot better for me. They are pretty cheap: https://www.amazon.com/dp/B00IGXQ5I4/ref=cm_sw_r_cp_apa_fabc_Oac4FbBH04TE7?_encoding=UTF8&psc=1.
I had so many problems with airlocks of the design you're using, lots of overflowing. Maybe that's just my experience. If they work for you, then great, disregard my comment. Everybody in this hobby has their own preferred materials.
I would recommend 1.5 cups of sugar and a tbsp of yeast nutrient per gallon. That will get them bubbling.
Best of luck.
For your purposes, maybe something else would work. I like those swing top bottles but they're too expensive like that to give away if you dont think it's coming back.
Goodwill might have something too that seals, for super cheap. They have a lot of glass in my area.
I just bought the corks and a floor corker but I guess it depends what your limitations are.
If you check out grocery stores, you can often find 1 gallon glass carboys full of apple juice. It's the same type of carboy that you can buy from Amazon, but it comes filled with apple juice.
All you'd need then would be an airlock and bung, and yeast (which can be found on Amazon - mostly. I guess I like Amazon.)
You can also find the same things from Homebrew online stores. Or better yet, if you have a local homebrew store, get the stuff there. Cheaper and there's people who love talking about this stuff there.
But I haven't personally tried it. I started making cider this year and I was cheap and got 10 packs of Cotes Des Blancs on Amazon for $8.
Cotes Des Blancs is known to be drier but it also produces fruity tasting esters which add to the flavor and it does sometimes stop at 1.002 in my experience so still a bit of leftover sweetness.
I'm interested in trying the S-04 next but the Cotes Des Blancs is just so cheap lol.
Honestly when you look up Cotes Des Blancs it's regarded as keeping the apple flavor or at least making esters that go well with the apple flavor, so it might be good for you too.
In fact the description on midwestsupplies.com is:
> Cote des Blancs is also known as Epernay II. It is recommended for Chardonnay, Riesling, mead and cider, as well as fruit wines, particularly apple. it imparts a fruity aroma in both red and white wines. A slow fermenter that works best between 50 and 80 degrees. This strain will not ferment to a dryness at the low end of the range, leaving residual sugar resulting in a sweeter wine.
I think they mean leaving residual sweetness when it's used for making wine (higher abv so the yeast will die faster?) but in my experience it's stopped fermenting at 1.002 a couple times and when I calibrated my hydrometer it might have even been more like 1.004.
In my experience it's not a slow fermenter though, I ferment at about 78F (can't get any colder yet I live in the South) and it's done in about 7-8 days.
I'm a newbie also. I've started out with apple juice. I just bought a bunch from costco and went from there. It might be a bit easier as it's pasteurized from the factory and you don't have to deal with microbes and the such that would be on the skin of apples.
If you go with apple juice, make sure that it's only preservatives is vitamin c.
Also a good place to read up is this book. I read it first before making my first cider.
https://www.amazon.ca/New-Cider-Makers-Handbook-Comprehensive/dp/1603584730
​
This style is my favorite for ciders. I use crown caps (same 26mm my 12/22oz take) and have no trouble using a wing capper. Can you get them where you're at?
They don't have the same aesthetic and can't hold as much carbonation, but 22oz bombers aren't a far cry short in volume and I suspect much easier/cheaper to come by.
I prefer super dry cider myself, so my standard recipe is unfiltered honeycrisp apple juice and Lalvin K1-V1116 dry yeast. That yeast is a sugar killer, and will basically leave no sweetness at all. I also like hops, but was never able to find a recipe that ended up tasting good to me, so I ended up just using a small quantity (like 1tsp/gal) of Swedish Bitters. It's a mix of herbal extracts that doesn't actually taste like hops as such, but to me it's complementary to cider the way hops are too beer. You should try some hops though, because my sense of taste is notoriously suspect.
Hiya. I used a 12l press identical to this that I was gifted this year . It did the job pretty well, but some juice made it's way out of the base of the centre spike that is bolted in, next year I will silicone it too.
It needs screwing down to a base of some kind as it doesn't have enough of it's own weight. All in it will likely last a few years of doing apples from my single tree.
This is the scratter I've used this year and it's surprisingly effective. Again, it will last a few years of fairly light use.
https://www.amazon.co.uk/Selections-Apple-Scratter-Pulping-Bucket/dp/B01HXYTA56
Something labeled as for "home brewing" should suffice. I bought these on Amazon years ago for Kombucha and haven't had a single issue. Be sure to read the reviews and check to see if anyone had any issues w/ bottle damage.
I had the 6l version of this and found it very laborious to use with apples. I've since upgraded to the 18l version and it's a million times quicker to juice. I also invested in one of those drill bit scratters (https://www.amazon.co.uk/dp/B01HXYTA56?ref=ppx_pop_mob_ap_share) which was also a massive upgrade from the small food processor I used to use
I got a refractometer and never looked back. Requires very little of a sample and easy to use. Pretty affordable too
It was perfect for me to get into this hobby. Not advertising, but here’s the Amazon link; it comes with us-04 yeast which is a great cider starter
The yeast starter was simply half a gallon of trader joe's organic cider, and some cider house select yeast.
​
https://www.amazon.com/Cider-House-Select-Premium-Yeast-3/dp/B08QH4VHT9
Also, I forgot to mention that Bigger Jugs craft cider yeast is available from Amazon UK and great value at around £7 for a 100g pouch, if you intend to make a lot of batches in the future. That's what I used for my first dozen or so batches.
They also sell Mangrove Jacks M02 cider yeast (which is what I use now), but that's more expensive and harder to get in large pouches.
Second giving it a try with local juice and the basic tools (sanitizer, gal jug, airlock, bung, racking cane) to see how it goes and if you like doing it.
If you're going to press your own apples, be prepared for a lot of work. You have to wash, cut, and grind (scrat) the apples before pressing them. We built our own grinder from a garbage disposal unit, and then built our own press frame this past fall. The hydraulic jack press was SO much better than the rotary-style press (https://www.amazon.com/dp/B00EQFX11K) I bought first. We made 30 gal of juice last fall with the new setup from the "free" apples on the trees at our house. For one tree and just to play around, you can use a food processor to grind, and see if you can borrow a table-top press like the one I linked. Your first few batches will probably taste awful, but just bottle and put them aside. They will improve with age and you can blend with them.
You can always make apple sauce or apple butter out of the apples at your parents' house. Then make fruit leather out of the apple butter. When you have as many trees as I do, you find lots of uses for all that fruit!
You can buy whiskey barrel chips online. You can try adding those to your primary or secondary ferment.
Copy that, these are them. Thoughts?
Bormioli Rocco Giara Swing Top Bottles 33 ¾ Ounce/1 Liter (6 Pack) ROUND Clear Glass Grolsch Flip Top Bottle With Stopper https://www.amazon.ca/dp/B07FWH5Z83/ref=cm_sw_r_apan_i_FK7MX9KX4JGQ14ER79ZB?_encoding=UTF8&psc=1
I was kinda afraid of that so I left em still and dry. Tryed to keep it simple for my first batches. That's a picture from two months ago. Crazy how much you can learn about homebrewing. I love it. I'm moving to kegging already and fermenting in plastic (buckets and fermonster on the way). Glass kinda freaks me out. Will keep the bottles for kombucha however, but I've heard even then to be careful with bottle bombs. I'm pretty careful and technical though, degassing and then weighing my priming sugar plus a PET bottle for firmness. I'm really enjoying using erythritol to backsweeten. Excited to start kegging. Cheers mate
https://www.amazon.com/gp/product/B07NSV96QP/ref=ppx_yo_dt_b_asin_title_o01_s02?ie=UTF8&psc=1
But I'm the only one that drinks it and only do one batch at a time so I don't even label them sometimes. Nevertheless, those labels peel off really easily and in one piece. Obviously designed for food containers like tupperware which what I bought them for before realising they'd work for bottles too (obviously!).
>I'm not a plumber or anything...but it would be cool if there were just a simple temperature activated valve (thermostat?) that controls whether or not the tankless heater is looped into the circuit.
Those exist. It's called a thermostatic bypass valve or thermal bypass. Your automatic transmission uses one to let the ATF fluid get up to heat, then send it through radiator once it's at the propper temp. Here's a 180°F valve:
https://www.amazon.com/Derale-13011-Fluid-Control-Thermostat/dp/B004XONNRQ/
They come in several sizes: https://derale.com/product-footer/fluid-coolers/thermostats-1/fluid-control-thermostats
Oh, I looked it up. Now, I started with this:
Craft A Brew Hard Cider Brew Kit – Reusable Make Your Own Beer Kit – Starter Set 1 Gallon https://www.amazon.com/dp/B019ZRVP7U/ref=cm_sw_r_apan_glt_i_JJHK7R3YHDP0NDJMWT9N
Bezos is selling them:
Plastic Big Mouth Bubbler Snap-On Lid Clips (Set of 3 Clips) - Clamp the lid on your PLASTIC Big Mouth Bubbler https://smile.amazon.com/dp/B08BDR73SP/ref=cm_sw_r_cp_api_glt_i_NBAJ0BJ1ZP3TGEYV0N32?_encoding=UTF8&psc=1
Looks like someone 3d printed them.
I read that on the Google group workshop, and that information apparently came from a Woodchuck representative (second hand).
I thought I had a second source for that information, I will try to dig it up and report back if I find it.
Edit: Having trouble finding confirmation. I admit this source is pretty flimsy, though the individuals posting are well know cider experts. It IS clear that Woodchuck (along with Wyders, Strongbow etc) is not permitted to be sold in Quebec (FWIW), so that seems to be confirmation that some water is added to the product. http://www2.publicationsduquebec.gouv.qc.ca/dynamicSearch/telecharge.php?type=3&file=/S_13/S13R4_A.HTM
Its just a conversion of specific gravity to °Brix, both of which are used to measure the sugar content (useful to indirectly measure your alcohol content).
First chapter of this book explains it in much more detail, but without any reference to alcohol.
> Woodchuck Amber
This page says it's got 21g per 12-oz. bottle. That's pretty sweet. I think standard apple juice has around 41g per 12 ounces.
https://www.fatsecret.com/calories-nutrition/woodchuck/hard-cider---amber
Looks like a wine bottle sulphiter. It should do the job just fine ... I use one all the time on top of a bottle tree like /u/Iaks said. Compare prices, get whichever one is affordable. I fill mine with StarSan.
Yes I see that. It’s a lot like this fermenter I had considered buying.
FASTFERMENT Conical Fermenter 7.9 Gallon Homebrew Kit, BPA Free Food Grade Primary Carboy Fermenter, Metallic (FFT) https://www.amazon.ca/dp/B00OEDYUZ0/ref=cm_sw_r_cp_api_glt_i_8VD2PTKQKRS1DXA8Z9Y1?_encoding=UTF8&psc=1
But yours looks a lot more solid. What is the make and model.
If you're careful about sanitization, you can use a sanitized turkey baster, 100 ml syringe, or "wine thief" and fill the sanitized sample tube for a hydrometer reading, then return the sample to the batch. However, doing so runs a small risk of contamination/oxidation, particularly in low ABV brews. Using a refractometer requires a much smaller sample (like eye dropper small), but you have to correct the values once fermentation has begun since ethanol messes with the reading.
I try to limit my samples to points when I'm pretty sure I'm ready to rack off the lees or ready to bottle.
This is basically what I use. You could probably also use one of those vacuum sealer things too. I don't know how wide those are though. The plywood works great though, strong in both directions. I double layered a pair of 3/4" pieces and then cut it into a circle.
We've got this one (https://www.amazon.com/gp/product/B07SK7D1N9/ref=ppx_yo_dt_b_search_asin_title?ie=UTF8&psc=1) and it works great. Done probably 6 presses with it and it's easy to use, no cracking or creaking and it feels solid.
Is this a good press? I have a vessel (plastic bucket) I could sanitize and clean. https://www.amazon.com/dp/B07MZSNCPL/ref=cm_sw_r_sms_api_i_ojCfFb?th=1&psc=1
I was thinking that maybe it’s biting off too much to not just make cider but also make the juice. It is like learning how to do two things, not just one. But it feels like a fun idea…
Cheapest option if you can't get some starter tea for free from someone you know, is to buy a bottle of GT's raw kombucha. That's all you need. Don't spend the $20 or $30 odd bucks that people on amazon want to charge you (like this garbage: https://www.amazon.com/Kombucha-Brewing-Strong-Starter-Cultures/dp/B07FB9V17W/). A bottle of GT's or HealthAid is $5 or so and perfectly fine to start brewing with.
Keep experimenting. I found that fermenting several mini-batches with something different about each one helps with finding certain desirable characteristics in a cider.
I also write detailed notes about my process and observations. For example, I'll note the starting gravity and final gravity, temperature, yeast, nutrient schedule, precise weight/volume of ingredients, tasting notes, dates and times, etc. If you want to get technical, you can start measuring acidity, and make adjustments.
To improve fruit cider, finding the proper fruit-to-cider ratio is important. If you're using fruit juice, then using a graduated cylinder, which are available at most homebrew shops, helps with determining blending ratios.
Also, choosing to allow the added fruit to ferment or not will make a significant difference in the final outcome. For example, fermenting blueberries can create a geranium character (geraniol) in the cider, whereas adding the fruit after the base apple cider has fermented and preventing the blueberry from fermenting will preserve the natural blueberry flavor.
Nutrient additions can be helpful depending on the yeast and starting gravity of the cider.
To improve 100% apple cider, apple selection is important, if you have access to cider apples and press them. Here again, finding the proper ratio of apples to use is important in improving the cider.
Others have mentioned important things too like yeast selection, fermentation temperature, aging, tannins, etc. Those are all great suggestions.
I think a great resource for improving cider is a good book. I would recommend Claude Jolicoeur's The New Cider Maker's Handbook: A Comprehensive Guide for Craft Producers
https://www.amazon.com/New-Cider-Makers-Handbook-Comprehensive/dp/1603584730
Can confirm. I got one in the kit I bought as my initial foray into this hobby 3 years ago. Having a bit more than a gallon capacity means I can get a whole gallon of finished cider out of it.
I got these spigots: https://www.amazon.com/dp/B0746GXTV1/ref=cm_sw_r_cp_apa_glc_fabc_RNF0GQ6B52ZEF3X24K7S
Also needed a drill with a step bit that goes to (at least) one inch and 5-gallon food grade plastic buckets.
Make a hole in the bucket that's just big enough for the spigot to fit. Then put on gaskets (they come with the spigots) and screw the spigot in very tightly.
Here's a solid video of the process: https://youtu.be/UZh5X2R9sTQ
Good luck, if you find any let me know! I have been looking for the same content and also not finding much.
The closest thing I could find is books about opening a brewery. I think from a business side, they’re pretty close. I’ve got Dick Cantwells “The Brewers Association's Guide to Starting Your Own Brewery” https://www.amazon.com/dp/1938469054/ref=cm_sw_r_cp_api_glt_fabc_00ZJ7AMV8YWPQKX8KVWP Not sure why it’s so expensive on Amazon I think I got mine used somewhere else but it’s a pretty good primer.
I have also been listening to “Cider Chat” podcast, I’m not the hugest fan of the presenter but she does interview lots of small cideries.
What parts are you wondering about specifically? I think it really depends on whether you are building a restaurant that serves cider or if you are building a cidery that has a tasting room with some snacks.
On a side note I’m a graphic designer who specializes in branding small startups. I’ve done branding for cider, wine, cannabis, and lots more. If you want to talk graphics and branding, hit me up!
The easiest way is something like these drops
Or you can rack into another container with enough sugar for the whole batch (usually about .9oz dextrose per gallon), and bottle fill from there.
Carbonation should be finished in 3 weeks at normal room temperature, but longer won't hurt anything.
Ya pear concentrate is hard to find try Goya if you are looking for pear nectar Amazon Goya pear nectar
I’m a beginner. But I used this on batch #3. Dynamic Health Pomegranate Juice Concentrate | No Additives or Preservatives | Antioxidant | 16oz https://www.amazon.com/dp/B000ETLOPW/ref=cm_sw_r_cp_api_glc_fabc_G5p5FbSG5SVEX?_encoding=UTF8&psc=1
I put two Tbsp of this pomegranate concentrate and a tiny squirt of honey when bottling. The result was a very tart (but tasty) cider with Insane carbonation. I recycled the Costco brand Kombucha bottles and the plastic lids were BULGING. it was bubbling up out of the glass like pouring warm coke into a glass (except it was cold).
It's easier to use something like this with a wide mouth. I used that and put my fruit in a cheesecloth bag. Easy cleanup of the fruit and easy to squeeze it out to extract the juice too.
There are flavor extracts of just about everything, including graham cracker:
https://www.amazon.com/Capella-Flavor-Drops-Cracker-Concentrate/dp/B0058DCL4W
A tiny amount of vanilla might help give a dessert-y sweetness? Idk about any other spices since cinnamon is all that's really in blueberry cobbler.
Wine preserver/argon. I've used this one in the past with some success. I usually only have in secondary for about a month though https://www.amazon.com/dp/B0000DCS18/ref=cm_sw_r_cp_apa_i_ODWNFbX3V32JK
I’m in 8b (PNW) so pollination times will be slightly different for you, but there is excellent information on different varieties here:
https://cider.wsu.edu/ciderweb/#l-r
And as far as making the cider and perfecting your blend, I’d look to this book. I have every book I can find in cidermaking and this one is hands down the most comprehensive.
The New Cider Maker's Handbook: A Comprehensive Guide for Craft Producers https://smile.amazon.com/dp/1603584730/ref=cm_sw_r_cp_api_fabt1_slRUFbEDF0SQ7
I highly recommend this book:
The New Cider Maker's Handbook: A Comprehensive Guide for Craft Producers https://smile.amazon.com/dp/1603584730/ref=cm_sw_r_cp_api_i_RVzLFbKTE573Z
He goes into great detail about natural cidermaking- timelines, testing, residual sweetness, natural carbonation. It’s all covered in this book.
It sounds like you may be overthinking it for your first go. Instead of experimenting with spices, start by experimenting with yeasts. Split your batch into smaller amounts and try pitching a few kinds of yeast. Wine, ale, saison, kviek, Brett, and lambic blends have all been used successfully. If the juice is (super) fresh and unpasteurized maybe even try a natural fermentation. You will be amazed by how much the yeast will effect the cider.
Also experiment with the sugar source you use. I prefer honey but I again suggest splitting your batch and running different sugars with the same yeast.
Sweet and sparkling is a tall order for your first cider. Personally I use a keg to achieve it. It’s pretty hard to do in bottles.
Check out this book, he talks in detail about how to achieve a sweet and sparkling traditional cider in a bottle.
The New Cider Maker's Handbook: A Comprehensive Guide for Craft Producers https://smile.amazon.com/dp/1603584730/ref=cm_sw_r_cp_api_i_WqBIFb7Q744AS
I have every book I can find about making cider and this one is the most complete:
The New Cider Maker's Handbook: A Comprehensive Guide for Craft Producers
https://smile.amazon.com/dp/1603584730/ref=cm_sw_r_cp_api_fab_pBZDFb0PDGXJK
This is my 4th batch of cider in the Fermentasaurus Uni Tank. I highly recommend to anyone using a carboy. It allows you to rack, carbonate, and transfer to a keg without any risk of contamination or exposure to air. I do forced co2 carbonation using a paintball gun co2 tank using this thing https://www.amazon.com/dp/B08F7FGD17
Amazon. They’re not expensive. I got one like this for a biology class years ago, and it still works fine. This one is $14 in the US.
Congrats on the first batch!
Oh, and for future reference: If you want to remove the labels from your empty bottles, you can soak them in water with a tiny bit of OxiClean (use the OxiClean Free variety) for a day or two and the labels will come right off, usually without even needing to scrub.
Not sure on the cider and carbonation, but some insight on a small regulator.. I bought [this](ultimate co2 regulator works with 5 types of co2 tanks (0-25psi) https://www.amazon.com/dp/B071ZNP5BS/ref=cm_sw_r_cp_apa_i_BEbCDbWE3WF68) Along with [this](new qiimii mini ball valve npt fxm thread with stainless handle ss304 pn63 (1/8") https://www.amazon.com/dp/B01MTWF0B4/ref=cm_sw_r_cp_apa_i_8FbCDbS8HF4PZ) ball valve (optional) so I can shut off the flow if I need. I also got a soda stream co2 cartridge from my local target. This is a great small co2 setup that I use for my mobile keg set-up.
You pretty much need a hopper.
If you don't have some weight on top of them they don't get pushed through. I have the same crusher and with the hopper I have no major issues. I don't cut the apples so small so that may be part of your issue as well. When I get to the bottom of a bushel I push the last few through with a wooden spatula.
The thing will never be fast, it's a hand grinder, but it can do much better than what I see in your video.
One thing to note: when you are done, take the thing TOTALLY apart to clean it. If not you will get chunks of apple left in there, and they will start to stink.
I'm not sure what your budget is or where you are located, but maybe something like this could help?
​
https://www.amazon.com/FastFerment-Conical-Fermenter-Fermenter-fermenter/dp/B077X2261T/
​
It has attachments to catch a lot of the lees in a mason jar, and some other "upgrades". Hopefully, this helps. Best of luck on your journey!
One thing i'd recommend is an in-line filter like one of these: https://www.amazon.com/dp/B06XYQNBQR/ref=cm_sw_r_cp_apa_AV47BbJZ638XM
When you go to bottle it will catch all of the hops flakes that dissolve out of the pellet. It keeps your sediment levels low!
Also, you don't need to hop for that long...maybe 3-10 days. The aromatics leech out of the hops pretty quickly and if you leave them for too long, depending on the levels of alpha and beta acids, they may volatilize and escape through the airlock.
Everyone else is spot on...one ounce in 5 gal, or between 5 and 6 grams per gallon should do the trick.
If you're using a yeast that promotes apply estery flavors, something like Citra hops works great. For milder middle of the line flavors, Mosaic hops. Centennial is great for a strong, piney flavor. Or experiment with mixing them!
If you have amazon prime then get a gallon of juice $9 and not only do you get the juice but a 1 gallon glass jug. Buy a airlock and a hydrometer
Thanks for the response. I used Safcider from Fermentis. I'm currently storing the cider in a closet where the temp is probably 67-71 degrees.
Thanks again for the tips!
I just found this Gravenstein apple juice at Wholes Food as well: https://primenow.amazon.com/dp/B074H6YNP8?qid=1540990704&m=A1VASERKDRIISR&sr=1-145&ref_=pn_sr_sg_25_img_A1VASERKDRIISR
Looks like there have been some single varietal Gravenstein ciders made, so I might go with that.
This is all I use also white sugar,brown sugar,turbinado sugar and Corn Sugar all provide a different taste so have a try.
I didn't use any sugar, but yeah, plenty of options. I've stuck to ale yeasts so far for cider, but I'll give a lager strain a shot soon; I have a few in the fridge. W34/70 is a popular strain among homebrewers if you're looking to branch out.
Even once you get down to 1.000 there will still be active yeast in your cider. You just need to add a dose of some sort of fermentable sugar to each bottle and you'll have carbonation in a couple weeks. I use these tabs to bottle carbonate and I'm getting nicely consistent results.
So a heating blanket, I think a cheap nylon vest with fleece lining would do the job and the Reptile Heat Cable but the problem I was concerned with was the first 3 days, Fermentation generates heat and without cooling the temp goes over 21c
I'm doing my 2nd batch ever and bought this to sweeten when it's done. I believe the directions on the bottle say 7ml per liter but the website says the directions are twice that amount. idk. I'm just going to add to my preference.
Wine Conditioner 500ml https://www.amazon.com/dp/B002LNT2OO/ref=cm_sw_r_cp_apa_wrhhAbXQ4CX5Y
I use tree top apple juice (SG 1.045) and munich wheat beer yeast plus half can of apple juice concentrate. Let ferment at 20 c for 30 days then bottle, Has some carbonation and taste great.
As for my hydrometer, It's been sitting in the cubbert for 2 + years unused.
Electric wood chipper. Something like this.
Get a Fruit Crusher and a apple press and have a great time.
Probably more than you want to spend, but this would do it- https://www.amazon.com/dp/B000XB5UHE/ref=asc_df_B000XB5UHE5192541/?tag=hyprod-20&creative=394997&creativeASIN=B000XB5UHE&linkCode=df0&hvadid=167124686369&hvpos=1o4&hvnetw=g&hvrand=5708612962213490304&hvpone=&hvp...
This is a good, cheap yeast, just keep the temp down below 65 for best results. Sitting your jug or bucket in a tub/bath of water and frozen water bottles for the first 3-4 days of fermentation should be sufficient. Works great with preservative-free juice and a bit of yeast nutrient, if you've got it.
Noob here:Why do you need tannins in Cider, And have a go at using MUNICH WHEAT BEER DRY YEAST Takes 3-4 weeks to ferment out and I usually rack to secondary for 4 weeks.
I will sometimes filter, or give it time. But I swear by this stuff
https://www.amazon.com/Liquor-Quik-Super-Kleer-KC-Finings/dp/B01KW2H1ZC
It's like magic
Also, as mentioned, pectic enzyme at pitching makes a lot of difference. But only if you care about cider being cloudy. I don't notice any discernible quality difference except one's shinier
Cut the apples up and use something like electric cheese grater and then a press
Powdered Brewery Wash. I actually use pure Sodium Percarbonate (an ingredient in PBW that I can get at my homebrew store) and a bunch of other people use OxyClean FREE--all are excellent cleaners for cidermaking equipment.
You wont regret it, they both will definitely make things easy when you look to bottle/rack between vessels! No worries I figured the UK link would be better :)
Oh just a side note.. a relatively cheap but helpful ingredient when making wine/ciders/meads is a yeast nutrient.
I found that I get better completion of my fermentation and quality of my stuff.
I use a different one but this is roughly what I'm talking about.
Again it's not 100% necessary but you might find it increases the quality of your finished product. To keep things simple, you can add the recommended amount when you pitch your yeast.
If you end up trying to make a ginger beer like that let me know how it turns out!
Hey, this might not be what you're looking for, but it's a pretty good solution, and cheaper than a keg.
Ferroday Stainless Carbonation Cap Counter Pressure Bottle Filling With 5/16" Barb,CO2 Coupling To Carbonate Soda Beer Fruit Juice Water https://www.amazon.com/dp/B01K4GGYT0/ref=cm_sw_r_cp_apa_LS8fzbCZGKM80
I'm a fan of the kegco wide mouth carboys (40-50$ on amazon). Easy to clean, includes carry harness, built-in airlock. I bought a cheap aquarium thermometer to measure the temp (the kind with probe at the end of a cable) which fits through the airlock perfectly. I would recommend the 7 Gallon size for primary fermentation though - they're a tad smaller than they claim and you want some headroom if doing a 5-6 gallon batch.
I like to use 1 gallon jugs for secondary fermentation because it gives me some flexibility to experiment. Whole Foods sells decent one gallon jugs of juice for 10$ each. You'll want #6 or #6.5 size stoppers with holes, and you'll need an airlock. In general all of these items will be cheapest at a local homebrew shop.
Starsan is a food safe sanitizer that is okay to leave the foam of behind. You'll need it. Not a ton, it should last a while.
I'm using Wyeast 4766 and its chugging away at 45F. Not sure about Lalvin 1118 but a lot of the books I've read use this yeast without any problems at temps between 45-50. Good call on the temp though, I had some problems doing a cider with Saison yeast without doing my homework and not realizing it did better at warmer temps.
I think your set up will work just fine if you just make sure the temp doesn't go above 50F. Check out this book for a great reference The New Cider Maker's Handbook: A Comprehensive Guide for Craft Producers https://www.amazon.com/dp/1603584730/ref=cm_sw_r_cp_api_3Td.xbMAE80TZ
It's very technical but will tell you everything you need to know. Also books by Lea are great.
cider season is almost upon us in the states. You could wait for cider mills to start doing their runs, and if you're lucky enough you might have a quality producer in the area with the right kind of apples you want.
This book has a lot of good references and information to help you decide which apple varieties to go for.
Late season varietals that harvest into september/october are typically going to be the highest sugar/acid apples you can get, which imo is what you want for making a cyser.
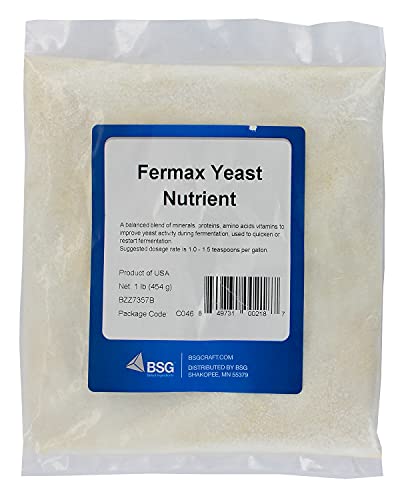
Fermax Yeast Nutrient, 1lb https://www.amazon.com/dp/B0064H0MWY/ref=cm_sw_r_cp_apa_T8hVxbK1Y27SE
Feeds the yeast, keeps it from getting hungry and making sulfates (rhino farts). 3 TBS in my 5 gallon cider went over great.
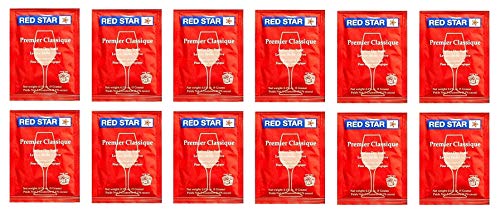
As for the time, it depends on your yeast. I use red star Cote de blanc and before the two month mark it's super hazy and yeasty. Getting it to fully clarify and age out all the yeast flavors can take a full six months from what I understand, but I'm simply not that patient.
I age in the carboy then bottle. Each time I've jumped the gun I've ended up with a huge sediment in the bottom of my bottles. Gross
Well if you're using the same yeast nutrient I use you should have pitched about 2.5 tbs. My instructions said 1-1.5 teaspoons per gallon, and you started out with 3 teaspoons in five gallons (1.5 tsp up front, 1.5 tsp later, right?), so by my math you're still significantly lacking nutrients.
If you add more later do it slow and careful. Last time I tried to pitch additional nutrients was five days into the ferment and had a dissapointing crop of farts going on. I realized I'd done exactly what you did, only pitched 1.5 tsp of nutrients, popped the top and frantically dumped in an additional tablespoon. GUSH!
I have this: https://www.amazon.ca/New-Cider-Makers-Handbook-Comprehensive/dp/1603584730 And this: https://www.amazon.ca/Craft-Cider-Making-Andrew-Lea/dp/1904871984
The basic keys to avoid bad batches (I found out by making bad batches) are: - Avoid contamination... get sulphite into it asap, keep everything hospital-clean. -Keep primary fermentation temps low, like 12-15 deg. celcius
I didn't use any splenda, so mine is very dry, pretty tart... but no vinegar or off-flavors....
Honestly, I didn't even check the spec. gravity when I racked... But I think cleanliness and temps are way more important than most other factors.
I'm sure everyone will frown upon this...but I've been experimenting with store bought juice ciders and have found the best results with Cider House cider....http://www.amazon.com/dp/B00N2WGUPW/ref=sr_ph?ie=UTF8&qid=1458092462&sr=1&keywords=cider+house+cider
I'm still producing ciders that are a bit more sour than I like, but I get the sweetest results from this brand.
Note: have tried Nottingham and K1-V1116...but still like Cider House better. Just my two cents ;)
I came here to recommend the same book! Here's a link to it on Amazon:
I use them to test carbonation levels before actually bottling into champagne bottles. I found this Italian company to be much better quality (glass and seal) than EZ cap and the others.
http://www.amazon.com/Midwest-Homebrewing-and-Winemaking-Supplies/dp/B0064OG55K but you need a CO2 source (tank) to push it through.
You could fine it with Sparkalloid: http://www.amazon.com/s/ref=nb_sb_ss_fb_0_11?url=search-alias%3Daps&field-keywords=sparkalloid&sprefix=Sparkalloid%2Ckitchen%2C511
Buy Drew Beechum's book on Cider. There's a kindle version too. http://www.amazon.ca/Everything-Hard-Cider-Book-making/dp/1440566186/ref=sr_1_1?ie=UTF8&qid=1444707377&sr=8-1&keywords=drew+beechum
I might do one pail of store bought juice 20L.
I am just considering doing a second pail with real apples because I've seen bushels on sale here and there. Cost would be less than the store bought juice.
My friend has a grape crushing machine he would lend me, so smashing up the apples wouldn't be a big deal. I could just chuck them whole into the thing and crush 2 bushels worth in like 5 minutes. The thing is, I don't have a tiny fruit press. The one we use for wine is too huge to press 2 bushels of Apple worth. I used to see them at the wine supply store and think they were decorative, lol... those tiny little presses like this one: http://www.amazon.com/Weston-Fruit-and-Wine-Press/dp/B000JL0G4K (I can buy one locally for under $200)
I've found that with the temperature guidelines for yeast, it's usually best to avoid fermenting above those temperatures do to increased production of fusel alcohols and other unwanted byproducts that will affect the flavor. But fermenting below the recommended temperatures seems mostly just to slow things down (and possibly stall fermentation) but doesn't seem to result in any noticeable increase in unwanted byproducts. So while I like to choose yeasts that do well in colder temps, I've still made a practice of trying all sort of stains just to see what happens. This'll be my first go with sake yeast though. The ones I recommended above have been pretty flexible at temperatures below the guidelines and with fluctuating ambient temps between day and night.
Chris White (of White Labs) co-wrote a great book on yeast. He get's into the nuts and bolts of how yeast is effected by temperature.
have fun pressing!
I've gone almost entirely to using a refractometer, the measurements after converting have been so close to the hydrometer that it doesn't mater. Although, I do know the initial OG... which is a bit important for the calculations to be accurate.
This is the one I use. I've had great luck with it.
I use this infrared thermometer and like it quite a bit. $42, but it's exceptionally useful for all kinds of projects, and doesn't require sanitizing because it's non-contact.
Nice and short and a little pretencious in places but this is a good one:
Mine is for sure not as nice as yours. I bought the Westin apple crusher. Before that I had a home made scratter that was very slow but crushed the apples very fine. You can definitly tell a difference in the amount of juice you get based on how small the crushed up bits are.