
What are
/r/homecockpits'
favorite Products & Services?
From 3.5 billion Reddit comments
The most popular Products mentioned in /r/homecockpits:


The most popular Services mentioned in /r/homecockpits:
The most popular reviews in /r/homecockpits:
Let me tip my hat and respectfully wave a hello.
The link above is my latest in a series of 3 HOTAS chair projects, the first being a simple dining chair bodge. Those with the time to spare can see them here
I'm currently preparing a presentation on HOTAS mounting solutions, and have only just discovered this subreddit as part of the research for that.
When the presentation is ready I'll share it here and on /r/hotas, but before then if anyone has any suggestions for content I'd be very grateful.
One of these for the threads. Gardena 39035 5/8-Inch Metal Garden Hose Connector https://www.amazon.com/dp/B002VED3KW/ref=cm_sw_r_cp_apip_2WSlrxaDSwpon
A ps/2 extension cable for the warthog grip to base wiring. Just check out the "frequently bought together" for the above amazon link. You will have to cut the cable and solder it back together unless you can find one that's less than 6 feet.
I recommend getting the garden hose fitting before the pipe so you can take it and help you decide what size pipe will slide into the fitting. I used 1/2" electrical pvc. I used one 90 degree fitting and one 45 degree fitting. They were only 50 cents a piece iirc. I got a couple of each and used them until I found a combination of length and angle I wanted.
The most difficult part was cutting the pvc to fit in the warthog base. A dremel tool is almost a must.
Also keep in mind that if you put a large extension on your stick you may want to think about buying a stiffer spring. I picked up the blue springs here https://warthog-extensions-by-sahaj.com/product-category/springs/
Thank you! OpenWheeler It is a tremendous seat/base. Super comfy and so many options/accessories to choose from/work with. I HIGHLY recommend! :)
It's the stock plate one that comes with this.
Here's a link of what I used for anyone interested in doing the same;
Drawer Bumpers Pads,Tiny Cabinet... https://www.amazon.com/dp/B08L636363?ref=ppx_pop_mob_ap_share
These ones require that they be cut to size: Clear Adhesive Bumper Pads 106-PC... https://www.amazon.com/dp/B06XPCLN23?ref=ppx_pop_mob_ap_share
Short answer is redneck brail. I added some clear sticky rubber bumps on the middle of the buttons to easily distinguish what button I'm pressing based off texture. Working really well for me so far. Idea stolen from someone else on this sub.
Here's a link if interested in doing the same;
Drawer Bumpers Pads,Tiny Cabinet... https://www.amazon.com/dp/B08L636363?ref=ppx_pop_mob_ap_share
These ones require that they be cut to size: Clear Adhesive Bumper Pads 106-PC... https://www.amazon.com/dp/B06XPCLN23?ref=ppx_pop_mob_ap_share
this chair has removable armrests: https://www.amazon.com/dp/B0049UCECE?psc=1&ref=ppx_yo2ov_dt_b_product_details
they are super easy to remove takes about 10 seconds don't need tools. (it's an amazing chair for the money can adjust everything).
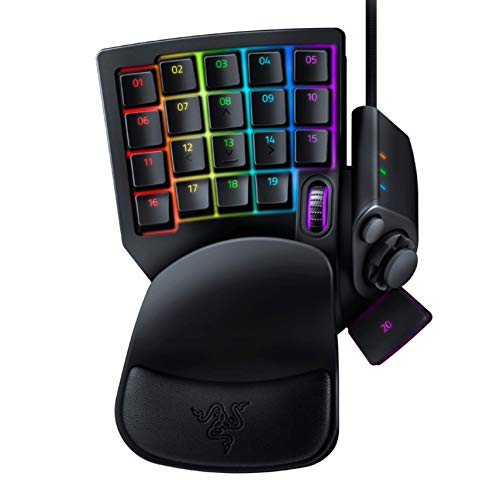
I fly in VR exclusively. I bought some stretchy Velcro straps and trap them onto each leg. On my right leg I attach a trackball controller and on my left leg I attach a Razer Tartarus v2 which has a nice key layout for those added controls. Give it a look! It’s not necessarily good for an UFC but it’s great for whatever keys you need.
Razer Tartarus v2 Gaming Keypad: Mecha-Membrane Key Switches - 32 Programmable Keys - Customizable Chroma RGB Lighting - Programmable Macros - Classic Black https://www.amazon.com/dp/B07754PYFK/ref=cm_sw_r_cp_api_i_29MNYNCHWFP954BXPFR3?_encoding=UTF8&psc=1
I also use a pointCTRL device which allows me to interact with the clickable cockpit. Yes production has been slow but issues have apparently been fixed and it’s well worth getting on the order list.
Thank you. I do. This is the pedestal. It's currently unavailable on Amazon, but other retailers carry it. I bought the seat from Restore Pontoon. It went up sharply in price almost immediately after I purchased it, which is a bummer.
I can't say that my way is the best, and it's certainly not the cheapest. My goal was to find a new, comfy, and durable seat without arm rests that could swivel, slide, and recline without having to have a machine shop modify parts. There are swivel/slide mounting options for car/van seats, but those tend to be more expensive than boat hardware, so I landed on boat seats. It was really difficult to find a boat seat that ticked all of my boxes without costing a small fortune. The seat in V2.0 was literally the only one that I could find that came close.
I cheaped out on critical components in previous versions of my simpit. I found that doing so caused me to replace and re-replace stuff. Now that I have a more permanent setup, my goal is to buy the best version of whatever I can find (within reason), and hopefully use it for many years.
Good luck on your search. Let me know if you have any more questions.
I figured I need (ON)-OFF push button for mouse clicking. I guess that is a wrong button for that job.
Think I will go with something like this:
https://www.amazon.de/gp/product/B08JQ2WS7D/ref=ox_sc_act_title_1?smid=A14EXDXUAG4KXD&psc=1
https://www.amazon.com/Command-17022-Replacement-Strips-17022-ES/dp/B000FDLFBK
I use the small foam command strips and have it mounted directly to the screen of a cheap monitor. I’ve removed them before to change things around with no damage.
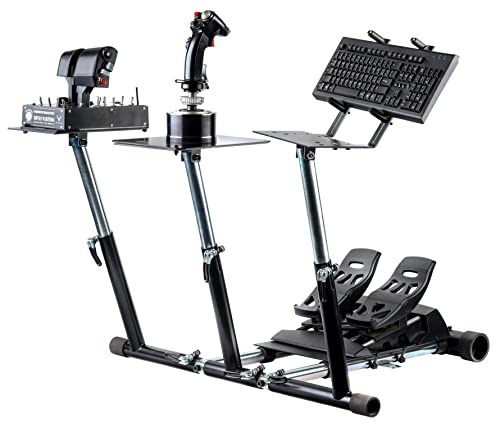
I use VR in DCS exclusively (reverb G2 is awesome). I bought a Wheel Stand Pro super warthog for my setup (link below). It works quite well with the Warthog controllers mounted to it. I know this is not what you are interested in but it’s similar so I thought my experiences could help. I ultimately found it to be a little cumbersome to drag into place as it’s heavy. I had the cheaper Thrustmaster pedals (now replaced with the pendular ones.. so nice). The cheap ones had to be secured with zip ties so it wasn’t ideal. I think there are holes which would hold my new ones but I stopped using it (going to sell it since it just sits there now). I bought the clamp on Monster Tech devices for my control stick and throttle which I like much more as it’s less hassle to clamp on or off. I actually had to stop using the throttle mount as my desk edge curves around and the throttle was at an awkward angle. I have a flight chair which has side mounts for the throttle so I use that (move my office chair away) and then the stick is mounted to the desk. I guess I moved in the opposite direction to what you are doing. Anyway, the stand system actually works quite well. You attach everything to it, adjust the position of the controls and then plug your stuff in. When done, unplug and drag it out of the way (it takes up. Decent amount of space though due to the foot pedal part)
The NLR looks nice as it folds up.
This is what I have..
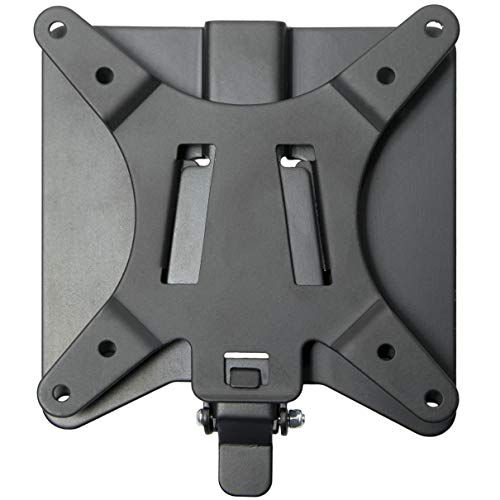
I fly the A-10C, the Mirage and the Hornet in DCS. I've been on a quest to find the best modular and easy to install solution that replicates the buttons/panel shown in the different VR cockpits. As others have said, you won't be able to perfectly replicate the proportions and placement of the panels and buttons. But you can get very close. I ended up using a couple of these with clamps to replicate the exact placement of the MFCDs and UFC. They are modular, fully adjustable and well built. This is a cheap solution. If you want to go all-in on a DIY project, there is the Warthog Project.
I love my OpenWheeler seat/frame, if this is something you are interested in. I absolutely LOVE mine and customer service is second to none. I’ve had mine almost three years and no complaints or worries at all! Good luck! Make it happen, whatever it is :)
I did a similar thing with the 24V lighting on a KingAir 100 sim. Used a MOSFET board connected to an Arduino running Air Manager to dim it.
https://www.amazon.ca/gp/product/B07NRPNQXN/ref=ppx_yo_dt_b_asin_title_o01_s00?ie=UTF8&psc=1
https://www.amazon.com/dp/B0058O8EN8/ref=cm_sw_r_cp_apa_fabc_t9g7Fb7AZF4CN
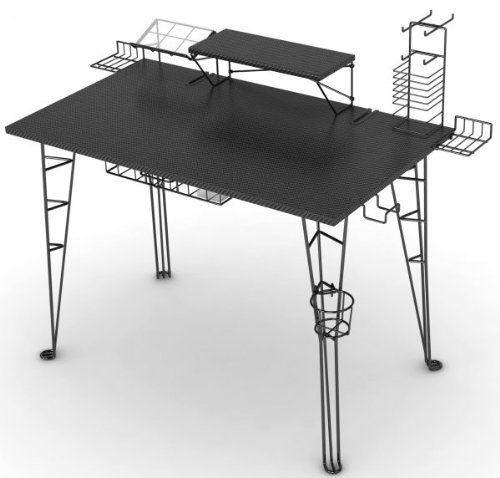
This is what I use. Inexpensive, plenty of places to run pesky cables, fairly stable and easy to modify and add on to if you've got a drill. I run a yoke and quadrant mounted to the table and HOTAS on homemade desk mounts.
Confirming, zero soldering. Though I did have a little difficulty with the "update screen firmware part", it was mostly just down to finding an SD card that was willing to play ball with the setup. Everything else was very easy and took maybe ~30 minutes
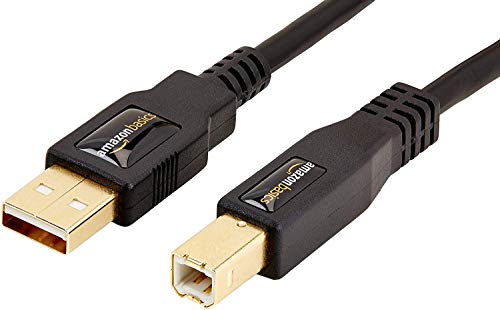
Just be aware you'll need a "printer" USB cable (this is what I got) and have to provide your own screen and hardware (basically anything that isn't the case itself). Still very worth it though!
Under $500 easy: BenQ MW535A 1080p Supported WXGA 3600 Lumens HDMI Vibrant Color Projector for Home and Office https://www.amazon.com/dp/B07DW1GFB2/ref=cm_sw_r_cp_api_i_kzetFbRVGGMW4
Or wait for a sale on: BenQ TH685 1080p Gaming Projector | 4K HDR Support | 120hz Refresh Rate| 3500lm | 8.3ms Low Latency | Enhanced Game Mode | Stream Netflix & Prime Video | 3D | PS 4 | Microsoft Xbox One X https://www.amazon.com/dp/B0858FH81M/ref=cm_sw_r_cp_api_i_dBetFbKK6AA2N
I got an Epson 2045 for $450 on a Black Friday online sale but they have gone up since then.
Any of the Streamdecks are way overpriced for too few keys.
The regular stream deck runs $150, and the streamdeck XL (which they mark as out-of-stock) runs upwards of $200.
Even the more expensive programmable keyboards in the $200 range have way more keys, like this X-Keys 80 key programmable keyboard which runs for $225 and has 48 more keys, or POS keyboards like this Cherry G86 which runs for $120-150 and has 98 more keys (for a total of 130).
I guess the on key display is nice, but a silver marker is 5 bucks, and a label printer is like 40 bucks.
​
[Edit] Programmable POS keyboards on alibaba are way cheaper, like $50-$100 for similarly keyed keyboards.
Thanks! I haven’t finished wiring this one, but the prototype before it was built with a teensy 2.x for anything that required it be a USB HID, and a mega 2560 with ArdSimX for use w/X-Plane. I’m in the process of converting over to a Teensy 3.6 and a set of multiplexers instead to simplify, and I likely won’t include the mega2560 this time (don’t want to be chained to ardsimx/simvim).
Re: the switches, those are just your standard 3-position heavy duty toggles. I’ve got a few of those pictured there along with one standard 2-pos switch. I do have a 3-pos momentary waiting for use in a flaps panel though. Either way, no customization there on my part, just shopped on amazon ( https://www.amazon.com/dp/B00ZWWZ2R2/ for the momentary fellas).
Yes, they are large enough on the wide axis, but only 7cm on the short edge.
This would be more suitable for the purpose of the Cougar MFDs, although 1cm short on the vertical for display size.
It appears the dimensions would fit the MFD though.
It won't be edge-to-edge display but there won't be any gaps.
https://www.amazon.com/dp/B01L6YXZLY/
7 inch - £39
Best but for the MFDs though would be a simple monitor that fits both MFDs and mask the unused bits.
This might be an alternative: AmazonBasics Premium Anti-Fatigue Standing Comfort Mat for Home and Office - 20x36-Inches, Black https://www.amazon.com/dp/B00OUFX0YY/ref=cm_sw_r_cp_apa_FLPQAbFY2Z2BA
And if it's not an optimal solution, they're always nice to have in the kitchen, if you have a bad back or knees. :)
Paracord sleeving is rather easy, a 15 foot cable might take you 20 minutes.
Another way to keep the cables off the ground would be a guide. Like a hook angled upward from the chair base to act as an arm carrying the cable. Or instead of going through all of this you could build from the desk instead of the chair, or put a c shape table on each end of your chair.
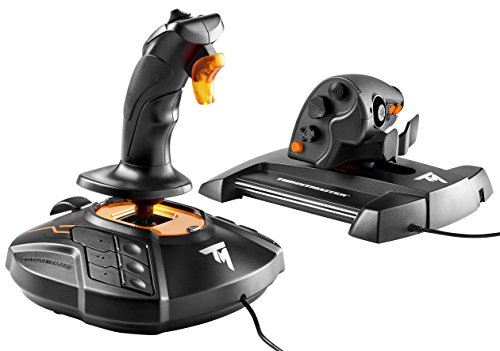
The new thrustmaster fcs hotas is fantastic value, and means he can also fly space sims down the line with relative ease if he wants.
https://www.amazon.com/Thrustmaster-T-16000M-FCS-HOTAS-Controller/dp/B01KCHPRXA
Ah if you're going for that, maybe get something like this
Not having a pit I have a totally different use for it, I strap my pedal and then tie the other end to my chair to keep it from moving forward :)