
What are
/r/ArtFundamentals'
favorite Products & Services?
From 3.5 billion Reddit comments
The most popular Products mentioned in /r/ArtFundamentals:


The most popular Services mentioned in /r/ArtFundamentals:
imgbox
Blender
GeoGebra
Gumroad
Google Photos
SketchBook
Pixabay
Patreon
osu!
Glitch
CodePen
Habitica
Beeminder
MakeHuman
Microsoft OneDrive
The most popular Android Apps mentioned in /r/ArtFundamentals:
The most popular reviews in /r/ArtFundamentals:
He recommends in the lessons to check out “how to draw” by Scott Robertson with Thomas Bertling
Amazon sells a 6 ct for 10$. Sooooo 10 for 15$ WITH free shipping is not a bad deal at all. Especially for people that don’t know what they’re looking for.
Nah, it’s fine. If you want to feel more artisty but get the same general effect get a pack of drawing gloves. Here’s a four pack for seven bucks on amazon
The Drawabox website has a section for recommendations, where he recommends the staedler liner which actually works great and doesn't smudge unlike make other pens (especially gel pens). I still prefer a regular ballpoint pen for the initial constructions, because I found they smudge the least, but the staedler liner works great for darkening lines and adding texture and emphasis afterwards.
You have 10 months of discipline back you up. That's longer than most people stick with practicing a skill. Good for you! You have some grit, some spine, some strong will. If you keep practicing, you will improve. If you want feedback, try spending some time in your daily drawing time copying something on purpose: a still life on your table, a picture you like, a photo you like, and then compare it (like, superimpose a photo of it on a photo of the original). You'll see where your proportions are off. Bookfi has 'Drawing on the Right Side of the Brain' and you can just skip to the excercises, pretty much. They teach you how to gauge proportion, etc, different than the arm and hand control you learn on drawabox. When you can control your pen and gauge proportion, you will be amazing!
Start with this botany coloring book to learn the parts of a plant. Knowing the anatomy of a plant and flowers will help immensely. Forcing yourself to color them in detail may help you with your patience with studying and drawing the details.
He wants you to use pen. but if you wants pencils anyway. I like palomino blackwing 602, get a good sharpener too.
Start with something simple, like snake scales and draw big. I suspect that it is easier to start big and then scale it down later on.
Focus on the pattern/edges and think how you can get it to show in a simple black & white format, since color, and to an extent, shading is "off limits."
Look at various manga's as they almost always use a simple black & white style and still manages to get texture done.
Make peace with the fact that you'll probably have to wade through hundreds of shitty textures before it gets good. Do not compare your own blooper reel with someone else's greatest hits.
https://www.sketchbook.com/blog/how-to-draw-birds-step-by-step-instructions/
They have a link on how to draw the wings as well. It breaks it all down into simple shapes and shows the basic proportions for the body and head. It's similar to the lesson construction techniques, but little more detail for proportions.
Get one of those drawing figures. I'm not talking about the shitty wooden doll but those nice ones on amazon for ~50$ they are perfect for character drawing and can be posed any which way. Practice speed drawing these in different poses each day for like 30min or literally any amount will help. Do a few 1 min gesture drawings and then a few 5 min ones to warm up every day. Don't forget to hold your pencil (or better yet a clear ruler) at full arms length to measure body parts against each other (the hand is the same distance long as the amount of calf I can see from this angle/the feet are about the same distance apart as the torso is long, whatever it may be) and pay attention to exactly the angle of lines (I usually ask myself if the angle was a hand on a clock what minute is it pointing at, and often hold out my pencil at arms length and angle it along the thing I'm drawing to help me see the angle better) . Eventually you will become faster. My main tips when drawing a full scene are to first do a super fast pencil gesture of the scene (even if your just representing a tree or car or person with a oblong squiggle shape it doesn't matter) just to space things out so you don't spend time on the actual drawing of the objects only to realize you drew something too big or in the wrong space. Draw lightly at first with the pencil. Last tip for scenes is to use one two or three point perspective but use it loosely. Don't draw a thousand lines all the way across your paper just use your ruler or pencil to generally guide you.
edit: Bandai Tamashii Nations S.H. Figuarts Man (Solid Black Color Ver.) Action Figure https://www.amazon.com/dp/B01GCACKEU/ref=cm_sw_r_cp_apa_TqEOAbJD5R1KW
That's the figure I'm talking about.
Just use Httptracker.
I have the whole website in my computer (and my phone because yes there is an app too) in case I don't have the internet (no videos though)
It's just a download-and-click type of software/app so it's pretty straightforward to use.
If you're using a fineliner with a tiny tip, that's probably not going to be good when you start dealing with line weight and it'll be easy to wear out. Pen definitely won't be good for line weight. Get you some .5mm fineliners if you can. My .5mm Staedtler pen seems very difficult to wear out. You'd have to push pretty hard to destroy it.
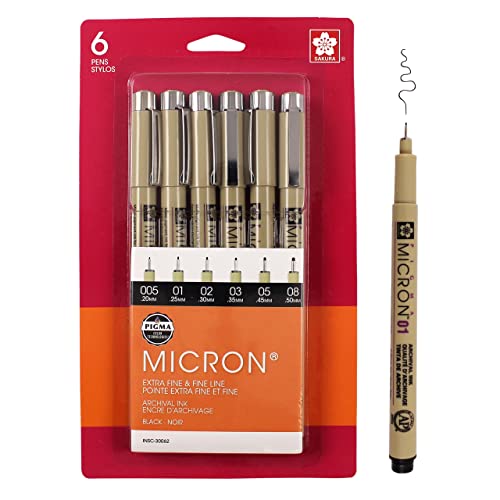
You can get 6 packs of .5mm Pigma Microns on Amazon. https://www.amazon.com/dp/B00K3KRQM2/?coliid=I3OM4RMHN6FD3X&colid=OF8RDB3XZ92&ref_=lv_ov_lig_dp_it&th=1
EDIT: tl;dr because I ramble:
- Pens: Bad for line weight.
- thin fineliners: Bad for line weight and may be easy to wear out.
- .5mm fineliners: Good for line weight, very difficult to destroy.
Use .5mm fineliners. You'll thank yourself later.
The other guy has some really good suggestions. I'd like to also add that you can alternatively consider not using lines at all. Or perhaps only use a few lines to get the proportions.
Instead of considering the shape of the dog and trying to draw lines, consider the *values* of the image. The term values (in case you don't know) means the darkness or lightness of the colors. You have actually chosen a pretty nice reference picture for doing this. Since his snout is all one color, you can focus on the shadows that define the shape of the snout. For example, there are more shadows on the left. These shadows give the image depth and gives the viewer a notion of where the light source is coming from.
I'll warn you that making the change from drawing lines to shading can be a difficult transition, but it's a necessary transition. You can still use lines to determine the proportions of the dog and his face. There is nothing wrong with doing that.
https://www.sketchbook.com/blog/how-to-draw-dogs-step-by-step-with-breeds/
I didn't fully read through the link above, but I think it might be a good starting point for you. Notice how they use lines to determine the shape of the dog, but they don't keep those lines. Instead, they keep the outline and then use coloring or lines to define the shape of the fur and the snout.
I committed to a 365 creative challenge to do this. There are places onine that will give you a prompt or you can get Noah Scalin's book and just do drawings.
On Instagram #100dayproject kicks off today/tomorrow (depending on where you are in the world)
You can grab an ArtBuddy over at /r/ArtBuddy
I set up an Beeminder account that will deduct $5 from my credit card if I do not post my daily art to a site because I was really serious about doing this - and yeah up to day 286 and no deductions yet ;)
If Drawing on the Right Side of the Brain is the book I think it is, I ended up getting discouraged because it wanted me to make this frame to look at everything through. Made sense, but drawing is hard enough work on its own without feeling like you need to go to the store and buy more stuff, and try to figure out where to put things, etc. Maybe I get discouraged too easily. Anyway, that's one of the reasons I'm here. All Draw a Box asks is to use felt tip pen or ballpoint if no other options, and occasionally a straight edge of some sort. Everything I need I already have, so it's just a matter of paying attention and practice.
I'm recently using a pen I had never tried before called the Marvy Le Pen. It's very slim and I think it only comes in one tip size (0.3mm), but it seems pretty good so far, and it's quite inexpensive. The tip seems pretty tough, to me. It's good for writing and sketching.
Yes, the lessons - at least the first lesson, and to an extent the second one - are boring. There are also other approaches to learning to draw (many places will recommend books like The Keys to Drawing by Bert Dodson and Drawing on the Right Side of the Brain by Betty Edwards, though I have never gone through those books and cannot speak to them myself), but ultimately your own boredom and lack of focus is something you will need to conquer one way or another, or else your rate of improvement and your absorption of whatever material it is you choose to study will be hampered considerably.
That is ultimately one of the principles I try to impress upon my students with the early drawabox lessons. To learn to focus on the material, not to stray from it, and not to deviate from the instructions. To learn to set your mind to a task, to approach it patiently and to give it your full attention for the period of time you have set out. You do not need to just do these lessons until they're complete - but when you decide to work on them, you will need the self control to stay focused on it. This, like anything else, is a skill that is learned, not innate.
I use this royalty free image site for still-life and portraits and this gesture sight for full models. I like to go out to the park or the airport sometimes and draw the things I find compelling. You could also try a drawing challenge where someone sets out a different topic for each day of the month (like inktober).
Think about what you find interesting or what you're really familiar with. Drawing is a really cool way to see new detail in old things.
I generally get the staedtlers, and I'll usually buy them in person if possible. Reason being, pens will vary in quality within the same brand and line, and it's very possible to end up with duds that just don't flow too well. Most art supply stores will allow you to test them (they often have a strip of paper where a bunch of people have already scribbled).
Amazon has them (full disclosure, that's a referral link like those on the drawabox recommendations page), but they're overpriced. The staedtlers are more reasonably priced, and personally I prefer them.
Uncomfortable has noted that he isn't super great at teaching figure drawing, adding that he would prefer to teach the topics he feels confident with teaching. Drawabox has a bit of a description on the reason, between Lessons 7 and 14 under the Learn tab.
I think that's perfectly fine, though, it encouraged me to find other resources on those topics, I think Loomis' books are amazing, I started going through Figure Drawing for All It's Worth, I wish I found them sooner.
You can. It has been done with the figure drawing lessons (not mine) that are no longer with the curriculum. This means it's not part of the lessons.
You can pick up Andrew Loomis' Fun with a Pencil as it deals with using basic forms to draw faces, I have not touched it yet, but I assume Loomis' Drawing the Head and Hands uses the same concept, using basic shapes to start with and adding on more detail.
Yes. I usually point people to Fun with a Pencil. Andrew Loomis was a genius teacher and darned fine illustrator. The book is old but the guy knows his stuff. (The link downloads the book immediately, so get ready.)
Get a ream of typing paper and draw your way through the whole ream.
Also recommended: The MAD Art of Caricature by Tom Richmond. I was about to give up on portrait drawing when I found this one. You don't need to like caricatures--the information Tom covers and his teaching style saved me, for sure.
(Of course, other people like Drawing on the Right Side of the Brain, and it is very instructive, but I didn't find it to be fun, which drawing should be.)
Hello Narwhale,
I am late to party I'm sure. I like the different line weights and nice work on taking your sketch to ink. As many have pointed out the tiger's paw looks more human than feline. Looking at the reference photo, at first glance it does look a bit that way. I would suggest curving the paw more. I feel the "disconnect" between studying the photo and going back to the drawing and "forgetting" what you just saw and the brain "giving you the general details". In Betty Edwards' book "Drawing on the Right Side of the Brain", she suggests looking at the negative space around the object you are drawing to help you out. I have used this and it helps when I can't get a form right. Also careful with the pads on the far paw. There are a few perspective issues but nothing practice can't remedy. It's looking good, love the line weight! Keep up the good work!! I'm looking forward to seeing a re-work of this :D
edit: spelling and grammar
> I was just wondering if I should move on to other resources after I finish DaB
Yes.
Personally, I own this book which is fun for doodling, but the last drawings I did from there were in 2014.
I also own Drawing on the Right Side of the Brain, by Betty Edwards, did a couple of exercises but got so frustrated I stopped drawing for another 2 years.
Now I got back to Drawing for the Absolute and Utter Beginner, by Claire Garcia, just did the first tracing contour lesson, and since she wanted me to draw lines and elipses, I thought "hey, /ArtFundamentals has a much better take on drawing lines and ellipses than this book, so I'm here.
Nevertheless, I'm planning to get back into the book and draw from here as well, just so I can produce anything more than lines for a while :P
It's not an easy thing to do, even for a person with average spatial awareness.
What helped me was using a visual aid. You could also just get a children's block toy or something similar, though you can't see the inside faces there. Practice drawing it from different angles and you will start to get a feel for how things change with different rotations.
Obviously the end goal is to not need something like that, but having the visual aid to start will help you start building a mental map.
Failure is the process. It's not an unpleasant potential outcome to try to avoid, it is THE WAY you learn.
It's unavoidable if you want to improve. Failure is the way. Don't be ashamed or deterred. Go back and read the full lesson, also watch the accompanying videos. Take it slow, focus on every single mark you make. Think about the box as it exists in space.
Don't skip any readings though. Don't rush to start making a drawing, really go through every thing that u/uncomfortable has written because it's there for a reason. He commented on how your extending lines go the wrong way every now and then, really try to understand why that is. It'll help you understand the box as it exists in 3d space.
As a little aside, I love using the 3d software blender to help imagine objects in space. It's free, and every time you open the software you see a cube in 3d space.
http://www.makehumancommunity.org/
Makehuman is a piece of free software that lets you make a human model really quickly and easily (sliders for age, gender, weight, etc...) and then export for use in other programs like blender. It's been forever since I used it, but it I recall correctly, it can even export with textures and bones/rigging stuff.
Yes! I think it's awesome how you shared your story and now are actually doing the thing! Very inspirational. I hope this pic won't be the first not-so-proud of pic that you posted and look back at for months :P
P.s. You should try out Habitica, it's great for building habits and staying accountable. Daily.
I always recommend this video for drawing ellipses as I have looked at it multiple times when I started out.
As for your workstation, my desk is always cluttered and I try my best to clear it to make room for my sketchbook and arm. I pointed out the sketchbook size because I am a heavy computer user, and drawing small takes a toll on my wrist/arm very quickly before I need to take a break, so I try to draw larger shapes.
For pens, I always picked up packs of Microns from Amazon, and then eventually at a local Micheal's with a coupon to keep costs low. I never really liked using ballpoints as I don't quite feel like I have control over the pen as much as a fineliner.
Anyway, you just keep trying. It's a painful journey, but it's very rewarding in the end.
That paper is probably part of this brand, lol.. Can't really help you with that, and looking through Amazon it appears that 100g paper is ridiculously expensive in America. I use this
Well, just be aware of your lean and focus on that every time you draw a line. E.g., when ghosting, place to dots, place your hand so you can start ghosting, then check your posture and ghost/draw.
Oh and don't discount muscle imbalances. Even fit people typically have a side they prefer, subconsciously putting more strain on it and thus creating an imbalance. But that's the second step. If you think it's all about consciously fixing your posture, go for it :)
Buy an electric massager. I had similar problems where my shoulder would just be in agony after drawing.
One day, I saw a video of people doing this "Don't touch challenge" where things were put in front of them (Like Foods and toys), and they placed a massager in front of them, and I was like "OH! OF COURSE! THAT'S WHAT I NEED!"
So, I bought one of these puppies. No Regrets.
Sharing your stuff is a great way to stay motivated. I like to follow people at my level of competence on instagram so I can see if I'm improving at the same rate and see what others people at my level are doing to push themselves. Sometimes you get some pretty good feedback as well. Share your work and know that anyone who would make fun of your stuff or give non-constructive criticism is an asshole. Share your stuff because feedback will really help you grow and on more levels than just drawing In closing, share your stuff.
I've seen other recommend "Drawing on the Right Side of the Brain", I do too. It's a big help.
There are PDFs of the Loomis books floating around from the time when it was out of print but most of them are available on Amazon now as well. Figure Drawing for All it's Worth is the one you'll want to start with. Fun with a Pencil is also good. It's not focused on figure drawing exactly but talks about good construction.
I also like Force - Dynamic Life Drawing for Animators by Michael D. Mattesi.
Burne Hogarth also has some interesting Anatomy books. The illustrations are a little heavy in style for my taste but there is good info in there.
Hey, OP! Here I'll mention some of the books I've tried, and I'll keep the subject to books and only books.
I bought the You Can Draw in 30 days book some years ago. It's a fun book, but honestly, it's only a quick medicine to a bigger problem. It barely touches more complicated things (like how to actually shade an object, and things like that).
It's a good book for when you just want to learn how to doodle better.
The "Drawing on the Right Side of the Brain", by Betty Edwards is a very controversial book, but, it can teach some interesting stuff. Before I gave up on it, I actually produced some interesting content using the observational drawing and copying skills. That's the focus of the book, unlike here where we use construction skills to make drawings.
I gave up on it out of frustration, because the drawings I made were in lower quality than the examples she showed on the book. But that was my mistake, because I was comparing a first-time drawing to probably the best ones she found to put the pictures on.
The materials can be kind of pricy too, I remember I had to buy and assemble some things before starting the fun part of the book.
"Drawing for the Utter and Absolute Beginner" by Claire Warson Garcia is a interesting book as well. I only made it through chapter 2 so far, because chapter 2 is about... drawing lines an ellipses, but she just rushes the things up. The first chapter is about observational drawing too, and you can make some nice doodles on it.
All in all, I'm willing to slowly take these lessons here up until Part 3, drawing plants, at least. I think this method produces some sick plants.
But I'm willing to take Claire's book again, since she has interesting things about other mediums, like charcoal on her book.
The Keys to Drawing by Bert Dodson seems to be an overall better alternative. It has the concepts of DOTRSB and more, without the pseudo-neuroscience part (that if I recall correctly was debunked years ago)
Thanks for the feedback, finished the planes now. 4 Pages is a lot of planes 😬
https://photos.google.com/u/1/album/AF1QipNtsUHspMY0iq4i2lp1rn-sx98XFMibqGWRArbZ
After doing the first Page I realised I had maybe gone a bit overboard with the smallness and tightness of the planes as this was shaping up to be a 250 planes challenge so I scaled that back. I also noticed the edges of my sketch book was giving me some trouble so I decided to make a frame I would draw within and just added 1 extra page to compensate. I know I could just tear the page out but it's important to me to be able to document and archive my progress so I'd prefer to have it in sketch books.
The linework in particular I think has improved a lot from my previous ellipses in planes. One of the things that stands out for me with Ellipses is that the ghosting is much harder. When you are ghosting a line, its easy to make sure your ghosting matches both the points you have marked out, and if it does the line is going to be straight. But with an ellipse there are 4 points to pay attention to when ghosting, and even if I'm making sure my ghosting hits all of those 4 points that is not an indication that the actual curvature of the ellipse is anything like what it should be.
I bought these staedtler ones off of Amazon but I was in Flying Tiger yesterday, if you have one near you, they had drawing pens in .5mm for much cheaper, think a fiver
Also in the UK. I got mine from Amazon, worked out less that a pound a pen.
I think it’s these ones, but I don’t have them to hand to cross check: https://www.amazon.co.uk/Fineliner-STABILO-point-Box-Black/dp/B000J6B8A6/
So while it's a ruler I purchased at a local art supply store either where I live now, or back when I was living in LA, googling "transparent red grid ruler" did turn up some promising results, like this amazon listing. It's on canadian amazon, but it should give you the brand name, and a sense of what to look for.
I use a basic three ring binder and a three hour punch myself at the moment. I've also used some spiral bound sketchpads, but they get pricey. I've personally used this before and it worked great (all of my Lesson 3 was done on it). Found that paper in a local art store.
Using a 2016 Cintiq Pro 13 and Razer Tartarus and can vouch for this. OP if you are a Mac user however you will need third-party software to set your own hotkeys.
Also I have my Cintiq set on an adjustable iPad stand/dock/thing (this model specifically) with my keyboard underneath which solves all my problems regarding workspace, so I'd definitely suggest that if you're going that route.
So my next step with drawabox (somewhere mixed in there with rerecording some of the newer videos that have particularly awful audio), is to tackle two new lesson sets. One will cover topics relating to design, like the use of shape and form language, proportion, how to approach idea iteration, etc. and the other will cover matters of illustration - composition, storytelling, guiding the eye, etc. These, assuming I do a decent job in making them, will hopefully help you out on your journey, as these are important skills to learn.
In the mean time, proko's definitely a good place to look, and working on figure drawing in general - especially from a constructional standpoint (also check out Michael Hampton's books) is a good idea.
Ultimately while there are plenty of really excellent free resources out there, I really can't stress enough the value in spending some time taking classes from instructors like those who teach at CDA/Brainstorm (in person) or CGMA/Schoolism (online, though I can't vouch for these myself, I have heard lots of happy students). At the end of the day, a career is going to have some degree of investment to it, so start budgeting/planning for that early if at all possible.
Lastly, you may want to check out the Foundation patreon or their gumroad, as they've got a lot of handy videos. Definitely not the same as a live instructor or anything, but I studied under one of the founders (John Park) at CDA, and he really opened my eyes to a lot in regards to design.
Here's my homework for Lesson 1. Hopefully the quality is good enough! I ended up doing some extra circles because I wasn't sure about my first 2 pages.
You can support him by a monthly subscription or a donation via PayPal to . Both methods will get you access to some exclusive drawabox videos.
Very interesting and informative answer. Thanks alot!
From now I´ll go and make a "finished" line art form of all of my sketches. Sounds reasonable with the brain.
I agree that drawing is a skill, although different from maths, what confuses me is that there is no path and so much different approches, and although I do draw much (2 hours a day), it doesn´t seem to get much better. Maybe that´s because it´s just 2 months.
I guess that every mentioned technique (DAB, Gesture, Trad (Life drawing, Portrait, etc) will have some impact on my drawings / paintings and my question came from a spot of uncertainty.
He said it in his beginner tutorial for 10 here: https://gumroad.com/trentk
Im not sure if he talkss about that in his yt channel.
Unfortunately, online instruction for drawing animals is sorely lacking. You can find any number of courses for figure drawing and cute cartoon animals but realistically, no. If your library was open I would recommend you check out reference books and study them. But ....
This website has great reference photos. Take your time and repeat your drawings as often as you need to gain competence ... dozens. https://pixabay.com/images/search/animals/
Take one animal at a time and study the anatomy of each and draw them. It is very specific; no circles. Generally, learn to use your pencil as a measuring device ... measure feature against feature, horizontally, vertically, and diagonally and compare your basic drawing to a reference.
How long are the legs in proportion to body mass? How thick is the neck compared to the head? Where are the nostrils and eyes set in the head? Is the length of the body shorter or longer than the height? What is the angle of the legs at the joints?
to be honest this was my first time actualy drawing animals, anyway here are the four pages you asked for, i hope these are good enough.
https://photos.google.com/album/AF1QipOzQ3q1bPirnvvRQXGdAJjX70XERmu9Bzp4mkrg
Here you go https://www.patreon.com/jparked?ty=h ... it is $100 every two weeks. Also going to be doing Noah's Artcamp with Titus Lunter. Going to be a crazy few weeks since I quit my job to go freelance!
Hello, I have FINALLY gotten my 250 box challenge completed!
You can see my images at:
Thumbnails! Rip me apart. (Oh dear.)
EDIT: I used the Thumbnail Template from here which is pretty simple but useful for setting up the proper masks: https://gumroad.com/frankhong
The thing about pledging is it drops you in the course wherever it is now, it doesn't get you access to all the content that was posted before you pledged. If you want access to that content, you have to pay again, you can get the archived content here at $8+ a term: https://gumroad.com/foundation_patreon
This isn't necessarily a problem, it's just that the Foundation course is not structured linearly (from basics to more advanced), but each video is a mostly self-contained dive into a particular concept or way of thinking about drawing.
Personally I wouldn't bother shelling out for access to Foundation. Your course is a fundamentally different structure, and one that is much easier to follow and better suited to beginners learning to draw.
If you are using a non-display pen tablet on a PC then an alternative (and fun) way to get used to it would be to play osu!:
Remember to only use shoulder movements only rather than only wrist/elbow movement. There's a really wide range of difficulty levels from very easy to insanely hard.
And the music is great too. :-)
Not terribly pleased with the results, but I don't know whether I'd be better served by moving on, or grinding on this lesson some more. What say you, boxman?
http://imgbox.com/KnBF5YI9 Imgur still won't let me upload, so I used "imgbox.com" since it has gallery functionality and 'box' in the name. Click the arrow in the upper right to go to the next image.
I'm going to work on all the previous lessons using pen and paper by now, but it's good to have these lessons on digital painting, as I can take a peek :)
I have a Wacom Intuos Pen & Touch medium tablet, and for the software I'm really happy with Mischief -- it's a really simple interface. I'm also happy with SketchBook Pro, specially for their perspective tools.
Not sure if it would be worth getting into Photoshop as well, I guess it is as you use it :)
Thanks for making this! I was looking at your code and notice each line is between 90 and 120 degrees from previous line. That range can actually be expanded. I altered the code a bit to reflect that, which should make the Ys have more variation. The link is at the bottom.
Explanation:
For the sake of simplicity, imagine the first line is at 0 degrees.
.____
The second line can be between 90--180 away. I'll draw the second line at the min and max:
.____ _._ |
Because all the lines must be at least 90 apart, we can draw the minimum and maximum positions of the third line. | _._ _._ |
So, you see the second like can be between 90--180 degrees from the first line. The third line depends on the second one though: the third line is between (90 + angle of second line) and 270.
This question would be better suited to /r/learnart or /r/learntodraw - this subreddit is reserved for those working through the lessons on drawabox.com.
That said, I can answer the question for you. It's basically a pad of sandpaper, used in conjunction with a knife or razor to sharpen pencils and expose more of the lead to create more various markmaking surfaces. Like this one.
I have a suggestion: Lynda Barry's <em>Making Comics</em>. She's great at designing exercises that help you to get out of your head and just do stuff. And it's fun to focus less on how "good" or realistic your drawings are and more on just creating representations of ideas and setting them in motion.
I found a pretty cool table top easel with a flat surface on amazon. It's about as wide as my pen display. Thanks for the suggestion!
For the 50/50 rule, one thing that helped a lot was using the Sketch a Day app. It gives you a drawing prompt every day, and has a nice little community where you upload your daily sketch and see what others have posted. It's encouraged me to draw a lot of things I'd normally never try, and helps me to keep drawing even when not feeling inspired or creative.
Thanks for the suggestion. I poked around on Amazon a little and found these for basic reference:
https://www.amazon.com/Prismacolor-Premier-Illustration-Markers-Assorted/dp/B0026HZ4BK
Simply put, since I don't understand sometimes the jargon between pen, marker, etc... would you say both these products would fulfill the general requirements here on this subreddit about the type of felt tip pens to be used? Thanks.
Generally this isn't the subreddit to ask this question - /r/learnart would be more suitable. That said, it's a pretty easy question to answer and you obviously sound kind of stressed out by this.
Wacom is indeed the most common recommendation, but that's not what you're going to want. It's a well regarded brand, but these days brands like XP-Pen and Huion (its main "knock-off" competitors) are getting pretty solid, and for a fraction of the cost.
Something like this should serve you just fine. Don't go for anything smaller though - that's the equivalent of Wacom's "medium" size. Smaller will make it easier to end up with repetitive stress injuries from relying too much on your wrist. Also, try not to clench your stylus too tightly, as that will also make it hard to write for long periods of time.
I am using an official Surface pen. Purchased this one: https://www.amazon.com/gp/product/B074GYX6VR/ref=ppx_yo_dt_b_asin_title_o06_s01?ie=UTF8&psc=1
My microns are near a dear to me, and a lethal weapon for inking. Here’s a 6 pack for less than 10$. Go look at any artist on YouTube, they all use microns at some time or another
4.5 stars and 3,000 reviews
I decided to hold off on it for a bit. Some stuff came up, but I am going to get this one.
Huion KAMVAS GT-221 Pro HD Drawing Monitor Pen Display with 10 Press Keys and 8192 Pressure Sensitivity - 21.5 Inch https://smile.amazon.com/dp/B072KGHD41/ref=cm_sw_r_cp_apa_i_00KQCbXJD8ABD
Photoshop is an entirely different set of skills - a totally different thing- than learning to draw on paper. Illustrator is the adobe drawing program, and also very different than drawing on paper. Illustrator is something you need a https://www.amazon.com/Adobe-Illustrator-Classroom-Book-Release-ebook/dp/B07L9CXPCK classroom in a book guide to learning, or you have to take a class. You'll never figure it out. If you're wanting to learn gaming environments, look up artists who do this for a living and shoot them an e-mail, asking what is most useful. I promise a lot of them will write back. People like mentoring and giving advice, and they're flattered when you ask. Photoshop is an essential tool for gaming environment building, and it is one among a few that you should learn. The more skills you have, the better. If ever the question, "Should I learn... " comes up in your life, the answer is "yes."
I would go with UGEE. Here is a comparable one that is $60.
I bought a UGEE 3 years ago, and I have no complaints. I think I might upgrade and get this one now that I saw this post.
edit: OP, I'm sure either the Huion or UGEE would be fine really.
the thing is you'll be creating your own value range, typically you'll bring it down to 3 or 4 values. Proko has some vids on the subject
https://youtu.be/TfAZt3O0sLY?t=4m
i also recommend Scott Robertsons "How to Render"
he uses a lot of examples with different media, including copic markers. it gets very technical on the physics behind lighting but it should still be of great use in learning how to choose your values before you start shading
Yeah, "Bounce" sounds pretty interesting, I'll have to look at it as well.
If you've not read "Peak" yet, it's written by Anders Ericsson, the guy whose research Malcolm Gladwell misunderstood when writing about the 10,000 rule/myth in "Outliers". In "Peak", Ericsson clears up a lot of the mistakes that Gladwell made when talking about the concept, and he focuses on how people can use deliberate practice, etc. In Ericsson's estimation, a shorter amount of deliberate practice is far more useful than just doing 10,000 hours of something just to do it. In other words, the quality is more important than the quantity.
There is also a great episode of the Freakonomics radio podcast about this very topic as well, I highly recommend it! to everyone! Here's a link
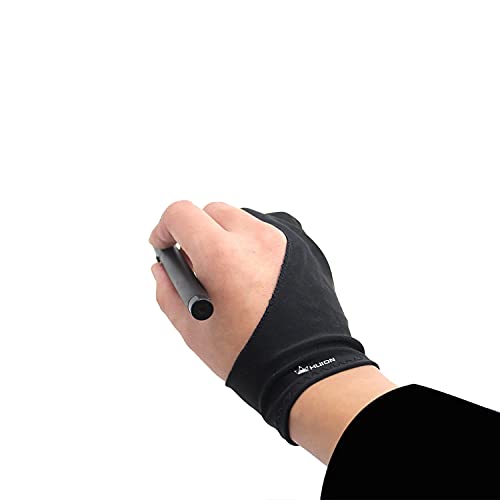
They make special gloves that cover the side of your hand and your pinky to prevent your hand from sticking. Alternatively, try cutting up an old glove leaving just the pinky and wrist part. Here’s one on amazon: Huion Artist Glove for Drawing Tablet (1 Unit of Free Size, Good for Right Hand or Left Hand) - Cura CR-01 https://www.amazon.com/dp/B00VTHAS00/ref=cm_sw_r_cp_api_i_Wb2wBb5BF6F44
Edit: added link
Absolutely. Tbh, this is all you really need to get rolling.
The first tablet I ever had was a Wacom Bamboo that I got for $70 with a student discount, and it was always pretty reliable. I haven't had one in a while, but Wacom still sells cheap tablets for people who want to start out with digital. Looks like the Intuos is their new cheap tablet and it comes with free downloads of art software. It's $100 on Amazon. https://www.amazon.com/Wacom-Intuos-Small-Bluetooth-CTL4100WLK0/dp/B079J2FSQ7 Again, I haven't used one of these in a while since I got a Cintiq, but Wacom is usually considered to have the best tablets.
Thanks! I did some searching and came up with these: https://www.amazon.com/dp/B0787DTHJR/ref=sspa_dk_detail_1?psc=1&pd_rd_i=B0787DTHJR&pd_rd_wg=MQpGv&pd_rd_r=J2BWN6F10H76SRT4XQVV&pd_rd_w=xBV6T
Are they any good?
Well there’s a Wacom intuous tablet that’s about $80 (and this one comes with software apparently which is a bonus) . Wacom is a big company and even though they can have incredibly annoying glitches, I’ve been pretty impressed with the customer service on the whole. I had an issue with a charging jack on my last Wacom tablet and they repaired it free of charge as the issue was a manufacturing problem.
For a strict under 70 budget there’s also something called the Ugee . I have zero personal experience but I’ve read the name on a couple “top ten tablets for less $$$” lists.
Some studies with pen. Not so much sketching.
IME if you are generating a lot of smudges, the most likely cause is your hand rubbing against the paper. The most low-tech solution for this is to prepare another piece of paper that functions simply as a hand guard. Personally I prefer to simply hold my drawing hand such that I don't need to worry about smudging (ie. consistently hover a tiny distance above the paper), and use the guard only for the other hand.
The only other likely cause of smudging I know of is using paper that is too smooth.
You might also want to look into spray-on fixative (example). That's good to have when you finish a drawing, but can be applied at any time.
They make a few large sizes in the same paper I've seen at staples usually around school supply shopping time, probably for teachers. I think these are the ones I saw in person but I can't tell about the paper of these specifically. It has a few options 11x11, 15x15 and 22x22 and looks just like the smaller ones so I would assume it's the same.
is there an appreciable difference between an ultra fine sharpie (0.5mm) and the recommended pens like these http://drawabox.com/images/lesson1/felttippens.jpg?
Hi! I doing most same schedule as yours. I also doing and repeating some of Drawabox exersice daily. And i also got to Proko lessons and "Figure Drawing for All It's Worth". I doing this schedule for 4 month allready, and spend 2-3 hours a day.
>>1. How important is it to try and draw a fully completed... I found out, combining both "fully completed" and scketchy works works the best (more sketchy, and less completed). But i dont really find enought time to do a lot of "fully completed" works >>2. Are there any good resources or books for figure drawing? It depends what you want. Proko, and "Figure Drawing for All It's Worth" is best what i found so far. There are also great great resourses, like some youtube channels, but they are not that complete, as Proko (i like this one, for example https://www.youtube.com/user/KienanLafferty/videos )
As i spend 4 month of allmost of my spare time, i still dont have great progress. I going to check at least a year, how far will i get.
The book "Drawing on the Right Side of the Brain" has helped me a lot and comes highly recommended by more experienced artists.
Its more for drawing from reference (another good way to practice, just Google an image and try to copy it), but I reckon its useful even for people who don't draw that way. Kind of fell off it a bit recently, so I might start it again. It basically helps you unlearn all your bad practices and restart from basics.
The Youtube channels Proko and Sycra are useful for beginners, the former having short overviews of techniques and subjects and the latter giving more in-depth tutorials.
Thanks for the critique. I'll keep working on what needs attention, and I'll do the challenge. Also, I have a question. I just started reading Betty Edwards Drawing on the Right Side of the Brain. I'm sure you're familiar with it. She teaches drawing based on what you see and how to focus on what you see. Is it still fine to read this book? Or should I save it for when I'm done with your fundamental lessons? I'm asking this because Edwards teaches based on what you see, and what I can determine from your lessons, you teach based on perspective and shapes in 3D space and their relationships.
I recommend the goamon graphics tablet: https://www.amazon.com/GAOMON-Drawing-Monitor-Shortcut-Wireless/dp/B075WSRLC6 Its a graphic tablet which means it will allow your daughter to draw on the tablet instead of looking at her computer screen like the wacom intuos. Its in the higher price range at around 410, but it will be much worth it if she is used to more traditional artist. Its also pretty cheap in terms of graphics tablets as wacoms cheapest version, the cintiq 13 hd is around double the price. I have this tablet and it has been treating me well. The only thing i can warn you about is that the tablet is suppose to be used with a laptop. This means if you want to use it for a desktop you will have to purchase an hdmi to display port adapter. Other than that i feel it is a really good tablet.
you can use these, your finger, or a rolled up strip of paper you rip from a regular sheet of paper
Wacom Intuos Pro M and Photoshop CC. I have a graphic design background (hobby wise).
Totally unnecessary and probably way harder to learn the art fundamentals but yeah - that is the way i draw/learn.
I'm a newbie as well, so take my words with a grain or two of salt. I've been working at it for about as long as you have. Everyone trying to follow an artistic pursuit of any kind struggles with that, and it never goes away neither, as the more you know the more you are aware of what you don't know.
Now keep in mind that, just like me, it sounds like you are still working on your fundamentals. Its easy to get discouraged at this stage (heck I know I am right now, as I keep trying to draw plants and feels like i'm hitting my head against a wall) because you are basically learning how to (visually) talk and listen. Its frustrating when one can't express oneself, we are basically at "gugugaga moma?" stage. Learning to visualize 3d forms in 2d space, being able to see the information that you need from the subject that you are examining, being able to break complex forms into simple primaries, being aware of flow within 3d space, etc, these are the things you should be looking for progress in as that has been your focus with the boxes, organic shapes and even the figure drawing stuff I would think. Pretty pictures will come easy after that skill is comfortably under your belt.
Saying that, I try to categorize my progress in 2 ways. Mechanical and Conceptual. Mechanical skills progress is slow but progressive, all it takes is conscious repetition (conscious as in not in autopilot, you don't learn anything if you are not aware of what you are doing), Conceptual thou... that is what gives you the headaches as it often requires you to change how you think, progress in this is far more sporadic, but when it comes its explosive and completely changes how your art work looks. It takes not repetition, but analysis, reflection and study.
This is a good book that address the struggle : Art & Fear
Understanding Comics: The Invisible Art by Scott McCloud can easily be applied to what you're talking about.
Seriously buy this book ($14 on amazon right now)- such good info storytelling/design in "panels" and in general
I used those things all my life, never had trouble with it. Might be worth a try, but I don't know if you can get only black. I have like 50 colored ones, so i guess not.
I can vouch for this being a really nice sketchbook at a decent price: https://www.amazon.com/Leda-Art-Supply-Softbound-Sketchbook/dp/B00YVS969S
Although the nicer the sketchbook, the harder it is to fill it up with less-than-high-quality sketches.
I appreciate and thank you for spending this time for my benefit.
This breakdown that you did, in conjunction with my formal critique, have exposed me to several areas of improvement that I otherwise would not have been aware of and were invisible to me prior.
You are actually hitting on the same things Uncomfortable is: namely, observational stuff. You are absolutely right that I'm making stuff up. And again, I wasn't even cognizant of this prior to. Seeing it on the page is really what I needed to connect the dots, so thanks for the images also.
Antlers: I totally understand. The left one was a function of running out or room on the page. The one on the right is totally made up and subconsciously trivialized. Point taken.
Regarding the line weights: I'm over drawing with a brush pen. While I very much working with this pen, I totally understand the feedback about it and will either drop it's use or scale it back for a bit.
I'm using a Sakura Pigma Micron 08 (0.5 mm) and a 9x12 book. the brush pen is this. I use Imgur brightness improvement on my images because I cannot figure out how to take clear pictures, even with all the lights on, the windows open, in the middle of the day. This does tend to wash out some of the construction lines, and in turn pulls the attention to the brush pen lines.
I will use a caribou in my remediation work. I can't promise any execution improvements, but I'll be trying! Thanks again.
The Practice and Science of Drawing (Fully Illustrated and Formatted for Kindle) https://www.amazon.com/dp/B003WMA7DS/ref=cm_sw_r_cp_api_Qojbzb7RESEXZ
I would say Harold speed also pretty inspirational, but it actually looks like she almost copied him word for word on some parts.
This pretty much. I started doing the lesson using a ballpoint pen and ran into the same problem regarding the indents being left on the paper. When I was doing ghosting lines it really started to become apparent that I should pick up a fineliner. Whenever I would use a ruler to make my first line it would leave an indent in the paper, so whenever I would do superimposing lines I was never sure if I was actually drawing my lines as straight as I was or if my hand was just trailing along the indentation left on the paper.
I'm currently using a Staedtler Pigment Liner that I bought from Amazon for $10.72, I'd recommend it.
Two other things that might help. Some artists use lightweight cotton gloves. Something like these:
https://www.amazon.com/Soft-White-Cotton-Gloves-Pkg/dp/B0028DAFWA
There's something called a mahl stick that painters use so they don't smudge a painting:
https://www.amazon.com/Creative-Mark-Professional-Mahl-Stick/dp/B004WQIIU2/
I have tried sketching ballpoint pen once, it was a good learning experience. So go ahead and don't be afraid to try it out.
Personally, the recommendations were expensive for me and also I had little experience of pen drawings, hence I decided to get Pilot V7, and with printer paper, they worked really good.
Yeah they're similar, in fact I read a lot of people in the comments of these products who used computer glasses as driving glasses. These are the ones I got from Amazon https://www.amazon.com/Harmful-Shield-Glasses-Minimal-Distortion/dp/B00R6TQIRM/ref=lp_7905467011_1_3_a_it?srs=7905467011&ie=UTF8&qid=1480952351&sr=8-3
I picked these because there is minimal color distortion for digital painting, but honestly because it is so easy to just lift em up and check what you're doing it is honestly not necessary.
You can also achieve a similar eye-soothing affect as the glasses by changing your computer monitor settings to mute the blue, but this is tedious especially when you need to check the colors of your work.
Not sure if I have the exact same issue but I do get eyestrain while drawing. I started consciously making sure I don't lean too close into my work while I draw and I also bought some "computer glasses" to help with bright lights and computer screens which also caused strain.
Taking short breaks from your work to either go outside and focus on stuff far away or close your eyes while you cover them with your palms also helps a lot. Not really a solution to the problem, but it relieves the pain and reverses any vision loss you might get from working.
Hope this helps, good luck.
I spent $14 on an introductory drawing book ($14 for finally convincing myself that I just might be able to draw is a pretty good deal in the long run) that is now collecting dust because I realized midway through the second lesson that I had no idea how to draw circles, and I wanted to be able to draw good circles.
Then I realized I couldn't draw lines either, and that scared me enough to look for other resources.
Drawabox has already taught me how to draw lines and circles (and... boxes), so I think $3 a month is a steal. I think it's certainly worth more than $1, which is why I didn't pledge that amount when I signed up.
I will do this thing!
I'm having trouble finding the right pressure, so I end up making light lines instead of super dark ones. I think my pens are just a bit worn down (Micron Pigmas.). Also, I picked up some Staedtler Triplus Fineliners from Target and they are just not fun to draw with, so I use old pens. The shape is dumb, too. They were cheap though. The Microns are hella expensive but I see why.
I watched that Intersection video like three times. It was certainly helpful but every needs to just click for me, I think.
250 boxes, intersections and arrows on the way~