
What are
/r/Cinema4D's
favorite Products & Services?
From 3.5 billion Reddit comments
The most popular Products mentioned in /r/Cinema4D:

![ASUS N550 15-Inch Laptop [OLD VERSION]](https://m.media-amazon.com/images/I/51cZEjsqgxL._SL500_.jpg)


The most popular Services mentioned in /r/Cinema4D:
Vimeo
Behance
Gumroad
Dribbble
Tumblr
Quixel Suite
FileDropper.com
Hightail
Crazybump
Blender Game Engine
Blender
Shutterstock
Google Drive
Imgur
The most popular Android Apps mentioned in /r/Cinema4D:

The most popular reviews in /r/Cinema4D:
If yes, then its just a collision deformer and a jiggle deformer.
Here's the scene file, if you want it!
This was done with a Voronoi Fracture with an 8 point matrix as the point source. Then used Merk's Trypogen to make it look like a skeletal cube. Pretty fun! Check out trypogen if you haven't heard of it: https://gumroad.com/l/trypogen/1 and check out my instagram if you want to see more of my stuff: @stuffianrenders
Looks great, I would consider adding more detailing to where the building meets the floor, so you don't get such a clean line. You could also try adding some more general details to the streets like pedestrian crossings, drains and stuff. There's a great Quixel street asset pack that would be great for projects like this. You could potentially add some litter to the streets in a way that's subtle, so you don't notice it but the street looks used :)
Pretty cool man. It looks a bit dull to be honest though. It's straight out of C4d right?
Add some color correction to this baby. Just with some simple grading it can look a whole lot better.
I also felt like the composition was off center, I fixed that in the above image so check that out (its not perfect since I filled in the spot that was missing in the top, and it won't fix the perspective, but you get the point.) You could pull of a Stanley Kubrick on this one!
Double check if your camera in on center! Also I feel like that life buoy is a bit out of it's place over there, I mean you're in space, not in the water right?
Also add more details! little lights blinking (you could make it a short animation with the camera sliding throught it?), little details can make it so much better! This looks like it is out of the first Halo game where they couldn't use too many polys (no offense by the way), but I'm just trying to say that you're not on a budget in terms of polys.
Also check out /u/NSGSanj his feedback!
I'd say your best bet would be to look into UV unwrapping in Bodypaint. If you create your box or whatever in C4D then export the unwrapped uvs into Photoshop to accurately place the artwork onto the box. Start here Hope this helps
Just finished up Ariana Grande.
Spinning up for another cinematic project with Imaginary Forces, then another Axwell/\Ingrosso set of concert visuals.
bg image https://unsplash.com/photos/mpMaD_BzP8I model by the cool /u/thekinginyello
I love all those arch viz images of dope houses tucked in a mountain top lol. The house sticks out like a sore thumb and the scaling might be off by a bit, just trying to see what quality I can reach in 1 hr work.
Been making some isometric buildings for open game art as I fiddle with new R16 poly pen.
as a quick glance, I'm seeing 2 very clear GSG tutorials, which is never a good thing..... But one you may have changed enough to leave it in (the balls).
Definitely take out the hand though. Its a cool effect, but we all know its from GSG, and so will your potential employers.... and I feel like that's going to hurt you alot more than help you. If you used the effect somehow in a different context and not just on its own, then you can keep it in..... but its a straight up rip from the tut... they even use a hand first in the vid.
Keep making stuff though! just try not to put stuff you get from tutorials straight into your reel, especially stuff from GSG.... its just way too noticeable to the c4d community. :)
Hi, I'm Dshark, I think I can help. It looks like you are using omni lights. One of the most important things that a beginner can learn whilst learning 3D modeling is how lighting works. It doesn't matter how great the modeling is, if the lighting isn't up to par, it's not going to look good. While omni lights emit light they do absolutely nothing for reflections, when it comes down to it reflections are what make things look "real". The main problem with omni lights is that they lack volume, and because of that you're not going to get highlights, you'll just get a bright blur like you're seeing. Also to catch the shine on the edge of things you're gonna need to bevel your edges.
So here is what to do:
Create an object (a sphere will suffice)
Place it somewhere in front of of your text. (You can move it around later to make sure it looks right)
Create a texture, turn on the luminance channel.
Place the texture on the sphere.
Go into your MoText settings and under the caps tab set it to fillet caps. (increasing the number of divisions will help)
In the textures on the text, turn off the specular channel.
Turn on the reflection channel, lower the brightness to about 20 or so.
Move around the light sphere or ad more till you start catching good light.
That should be a pretty good place to start.
I have to really be honest with you, friend. I'm not digging the colors, especially the bright neon green, it's kind of tacky in my opinion. There's just something missing from it and i just can't put my finger on it.
I suggest reading up on color theory because I feel that not enough people realize just how important it is. You can have an amazing logo or design, but if the colors don't work it makes the entire piece unsuccessful
Here's a great site i occasionally visit for color ideas: http://www.colourlovers.com/
You're right, in fact I did use puppet warp at first. But I didn't like the distortion it was causing so I tried the C4D technique. I've seen some really impressive camera mapping, this one is one of my favorites but I'm not there yet!! hahaha
I'm not sure what version of C4D you're running but you could use Simulate - Dynamics - Motor to get your props spinning without the need for keyframes. Here's a quick demo file i put together to demonstrate https://www.mediafire.com/?53mxxm89bu6oxd6
Hope this helps :)
Wrapped this last month, but wasn't released till just recently.
Wrapping Alesso content update now, starting Deadmau5 on Monday. Also wrapped a ton of work for Dolby, but still under content release restriction for most of it :/
The reason your simulation begins very bulbous and smooth is because the way you began your sim does not mimic any real-world type of ignition.
If you are looking to make an 'explosion' - we generally don't see (in realtime) much of the expansion stage as it happens so quickly. An explosion in its nature is an aggressive expansion of fuel/plasma/oxygen/soot breaching/escaping a container of inadequate volume. In doing so - vast amounts of turbulence result.
Your simulation is either the temperature channel with a fire shader - or the burning of fuel being generated from the surface of your crown, neither of which result in aggressive expansion of gasses to create turbulence.
You can add some of these variables artificially - there is an expansion rate (on emitter) as well as turbulence field (simulation container) which can disrupt your smooth surfaces - but still will not have the impact sense of an explosion.
edit
You can cheat this effect by emitting particles at a high speed, using them as the source of the fuel/temperature and simulate the first 10 frames or so at 100% speed, then ramp down to a slower speed. This sort of fakes the aggressive expansion/turbulence - also as the perceived scale of the explosion gets larger so must the time it takes to expand.
edit2
TFD in explosive action In all fairness - its a combination of tfd + some composited elements.
I'm working on a short called "Places"
I do a lot of stuff for corporations and so I'm slowing down the freelance for a bit to do something for myself.
If you've ever seen the movie Baraka, it' sort of similar. If you haven't seen Baraka, it's a documentary showing places, people, and events all around the world. There is no narration or story. It is a display of the beautiful and the the ephemeral of the world around us.
"Places" is a simple way for me to get more expertise in Cinema 4D by being forced to create entire scenes that don't exist and at the same time having less control over what I'm creating. For example, if I want to create a beautiful cave I have to make the things that help the human mind understand it's a cave. Stalagtites/mites, maybe a small river, bats, a slight fog, etc... This is in contrast to previously doing a lot of dailies that were "abstract" aka I couldn't "fail" at making something because its a sphere/bunch of clones/etc... Now I have to learn to make things with no easy way out of doing what I already know how to do.
I have about 4 places created so far. This is style frames of the first one I made to set the tone for the overall project.
Style frames
https://dl.dropboxusercontent.com/u/3772456/style%20frames.jpg
Gif
Thank you all for the criticism, support, and inspiration. Reddit's community has consistently been the best source of feedback and interaction online.
My website if you want to see any new projects before they get posted here.
CrazyBump! http://www.crazybump.com/ It is the most incredible piece of software, you can make bump maps out of any image as well as displacement maps, specular maps etc. I used it for some space landscape shots with images from NASA's photojournal, it looks incredible. Its so friggin easy.
EDIT: Upon closer inspection, this may not answer the question, but its useful anyway :p
It's too long. The shots are too long, the pacing is off as well. You have a number of shots that hold until we see the action/punchline. For example the "Triumph" shot just holds for a few beats, then shows the animation/punchline. There's no contrast to that shot either, so it just seems like a dark hole.
That is but just one shot to harp on.
What's with the weird still frame at the beginning that we never see later? I think it's your thumb/frame. It says "music starts at the roots."
Your first shot has some poetic text or whatnot, that just wipes on. The text is small and in odd places on the screen. It may work as a project on it's own, but does not work in a reel. Also, it's not your best/strongest stuff. So start strong, show me your good stuff as quickly and often as possible.
Lose the live action shots that don't have any mograph in 'em. There's a couple. Also, many of your shots have dark text/elements on dark backgrounds. Or bright text on a bright background. Very hard to read.
There's loads to cut. This could easily be 1min or even less. Short and sweet is ALWAYS better than long and mediocre. There's a saying about the difference between professional photographers, and amateurs. The amount of photos they show you.
I put my suggestions for cuts, etc over your reel here: http://tinypic.com/player.php?v=9i77uo%3E&s=8#.VN2diVPF-hY
I forgot to include dropping the "Add Market Alert" web thing. Nothing too interesting there. You could keep it in if you need a shot for your edit/beat. Also, you could keep the fire ui shot too, if you need filler, i just think it's hard to read with the fire being so dominant.
All in all, keep at it, and you'll def get better.
Soooo
I know little and less about rigging. I've meant to get into it for a while now and just cant seem to find the time to dedicate to it :/
either way, I do know alot about how it works. And those characters arent really built with nulls, theyre built with the traditional bones.... the nulls are just the Controls for moving the rig around. But since R13, rigging is apparatly alot easier than it used to be.....Look up tutorials on using Cinema 4Ds Autorigging tools, or the Character Object Tools. Here's one i found from a quick google, I dunno if it's any good or not.
as for the texture part - its all bodypaint from the look of it. Theyre using photoreferences to map the texture onto the character directly..... I dont use it, but apparantly its pretty cool. So you'll have to look up tutorials on how to use bodypaint. (or maybe someone in here will be able to help more!)
Hopefully that was useful! Good Luck :)
My buddy Alan has a great tutorial on rigging here: https://vimeo.com/79114673
And I also have a course on rigging on Lynda.com here: http://www.lynda.com/After-Effects-tutorials/Mograph-Techniques-Rigging-Robot-Arm-CINEMA-4D/137888-2.html
Haha thanks. I'm not sure if it'll be a fad.
My main inspiration was games like Kentucky Route Zero which, by either on purpose or by limitation, don't have any anti-aliasing
Also, Allison House (who I'm a huge fan of) is also big on anti-smooth aesthetics.
that was quite nice, did you happen to be inspired by 'the secret of animation' or just a coincidence? (well there were lots of windows OS & flash animations like this where objects on the UI start having a battle, so it's not like it's the only one)
I've been learning Xpresso recently and this is something I've had in mind to build. You can set the size, spacing and fillet of the bricks and the depth of the grout, and it will also show you the total width and height of the wall. Feel free to download it and use it in your work -
Sattelites by Ronny Schmidt looks amazing.
Free 3D illustration experiment which plays with the surreal, but yet familiar urban shapes of two-dimensional satellite photos, which were transformed back into three-dimensional worlds using displacement mapping. In order to capture the artificial aesthetic of the resulting urban landscape I used a very shallow DOF and hard daylight, which gives the new structures back its once missing vividness.
It's so cool because they look like pictures of those real life miniature cities made at sundown, it's actually 3D!
I've been getting back into C4D this week after not touching it for ages. Been doing tuts & just messing around with stuff constantly for the last few days. Couple of 'experiment' things up on here if anyone is interested.
Use this: http://www.crazybump.com/
and refer to this: https://www.youtube.com/watch?v=W07H7xeUnGE
Its a blender tutorial, but the same principles apply to all packages and the process should be easy to replicate in c4d at your level.
These models did come from Solidworks files, and it was a pain converting. We used to use Moi for converting step files, but these files were too big for them. This job we used Maya and exported out lwo files to cinema.
Since Rhinoceros came out with a mac program that has become my favorite to convert.
Edit -
But yes, we did have to do A LOT of clean up. Some models were completely recreated, but those would be as simple as a microwave. Anything more complex than that we used there CAD files as a bace.
Those files were huge too. On average a single product would be 400MB. So the kitchen files with many appliances would be 1-2GB.
the black hole in the middle is distracting. if you made it solid green you'd at least be able to read the "R" a little better. try turning down the ray length on your ambient occlusion (I don't have c4d here so i cant remember what the exact setting is called). I guess ignore this advice if the logo is for a company that make skateboard wheels :)
red and green clash big time (unless its christmas, or a sports team or something). Changing that red to black will really make your R pop. If you like red maybe use it to border the circle?
im pretty bad at picking color myself, so i usualy fool around on https://color.adobe.com/explore when im feeling stuck
cheers man keep chuggin!
A quick google lead me to LeoCAD, which exports 3DS and OBJ, both of which can be opened in C4D.
And there's a video or forum thread somewhere that says you can import LDD files into LeoCAD, but I dunno why you may want to do that, since LeoCAD seems to do what LDD does anyway.
Then again I don't know anything about Lego in 3D, so maybe LDD has stuff leocad doesnt :/
either way, Hopefully that helped!
*cringe*
Youre rendering 4000 frames to a movie? thats just crazy talk. if it crashes at 3999, youll have lost all that time.... You should be rendering to image sequences.
Then if you dont have After Effects, you used to be able to use Quicktime 7 to compile it to an h.264 encoded .mov or .mp4 file. I know apple stopped supporting Quicktime 7 and removed that functionality from QuicktimeX.... but 7 is still available to download, so it still might work, worth a shot.
If not, google. There are others....VirtualDub can do it and seems popular... (its what blender uses in its video sequence editor it seems). But yeah... just google em.
Sound design is a whole other beast to tame.
I disagree with /u/crash1082 and I think free sounds CAN work, but you have to put in some time in understanding how to mix. You aren't going to be normally able to just drag and drop a single sound file into Premiere and have a finished animation. Well you can, but you could do better. If you have the adobe creative suite, and you have access to Audition, you can use that. I think there is a free program called Audacity you can use that people praise highly.
Basically, you put in your 15 hours making an animation and you want to add in sound. You can also spend 10 hours finding and incorporating sounds to put in that animation. You can find all of your free sounds at a place like this. But then you need to time them and then modify them to fit well with each other.
I don't know nearly enough about professional sound mixing, but here are some things you can look for. Typically you don't want to overload specific frequencies on the equalizer, because the sound crunches and gets low quality.
The same artistic freedom in animation can apply to sound design. Figure out what you want your audience to pay attention to, then add "secondary motion" or "secondary sound" at a lower intensity to fill the gaps and create atmosphere. I'm no expert, and I'm still learning basic c4d, but if I were to delve into sound design, I guess these are the thoughts in my head that I would typically try and follow up on. Listen to anyone else if they sound more knowledgeable than me, lo.
I'm not sure if this is the place to find more information on how to learn to mix sound, but /r/audiopost might be a place to start asking more specific questions.
start with a cube, make it editable and start box modelling. thats all you can really do. split the bottom into 3 sections, extrude the 2 legs, repeat for the arms, position as necessary. use a subdiv surface to smooth it out.
Here's my very crappy 15-20 min attempt. I know, its not even remotely close. Here's the crappy model if you want it.
But yeah - long story short: Box modelling is the way to go.
edit - I also dont know if i would call it "basic" modelling. Anything organic is kinnnnda intermediate at least.
I made a semi-decent one... using the wind deformer, with the flag setting checked :)
I dunno if thats good enough for you though..... :/
Yup, only one I've tried on android is HD model viewer: https://play.google.com/store/apps/details?id=com.dukedev.hdmodelviewer&hl=en
You could also host it on sketchfab and view it on your phone's browser
How do I achieve this type of art style in c4d? I have been using maya for a long time but my workplace requires me to learn c4d for a better workflow.
So this file uses a little xpresso to assign a random Integer, runs that through a math node, and then spits that out to a bit of user data. It does generate a new seed for every value on every frame, so it wouldn't be usable for an animation right out of the box. But conceivably, you'd be able to put this sample cube into a cloner, generate a million cloned cubes, then make that editable and (hopefully) that kills the xpresso from then on. But I didn't try that.
Thank you. I made this model about a year ago and I knew the next day that my lighting was not enough. Specifically on the "key" light, which was never there :( But I appreciate your feedback none-the-less and I have watched the lighting video about 3 or 4 weeks ago...
Here is some recent work https://imgur.com/a/EcHTw#0
All the best
That's awesome, and sorrry about the CS game, know the feel.
You going to try and vary the new sand layers? (Trying to think what to call these)
Something that you might like is the making of for the video: https://vimeo.com/77328743
My last tutorial series covered making a popcan. I think it didn't do as hot as I wanted because the subject matter was a bit bland, so for the next series I'm gonna cover how to make this! Does that pique anyones interest?
The spirit of exploration and investigation! I was hoping this would be the result of the challenge topic.
In other news, don't beat yourself up if you have a hard time achieving the motion you want from TFD - it has a long way to go in the way of advection control. I just started using Houdini for this on Friday with greater success than my TFD experience.
Also Houdini engine for cinema 4d soon! YEY
thanks for your words, i have added the tutorial credit. i have created new design here https://www.behance.net/gallery/26965987/Lowpoly-Ramadan-2015?
i know i didnt invented lowpoly but i tried in that. have a look when u r free. thanks
You need to spend more time on the hypernurbs, yeah they are going to make your geometry do stuff, but if you take the time to learn how to counteract that, you can have really beautiful results. Not to toot my own horn, but I did this with hypernurbs in c4d.
Yea looks close enough to me. I also did it today without using thrausi. I used a displacer and a polygon in a cloner for the particles. Also added a bit of blurriness to the transparency and luminance with a little fresnel. https://www.behance.net/gallery/26609971/Ice-Cubes
Check out Daz3D, it's free and comes with some generic models that you can pose however you please. There's also a massive library of more detailed characters, poses, clothing etc.
However that pose looks like it came from TFM's Free Asset Pack here: https://gumroad.com/l/OUUsD
That's 2.79 though. The entire blender conference is mostly built around 2.8 which you can currently download the alpha of. The beta, which will be feature complete, comes out this month.
​
It's much more intuitive now. I know a few prominent modo users have switched like Jama & Vaughn Ling. If you're into modeling I would check it out for sure. Also, it's animation nodes look pretty cool as well. Overall I think C4D's stability and motion design tools can't beat yet.
​
Tools like Grease pencil, Sculpting, and Evee really makes Blender 2.8 an attractive option for me. On top of some kickass plugins like HardOps, BoxCutter, and MeshMachine.
​
​
I took inspiration from a piece of work by EJ Hassenfratz (eyedesign) and this is the look I'm trying to achieve: https://dribbble.com/shots/2703953-Graduation-Gifts
Please let me know what steps should I take towards that. I also feel like I need some lighting in my scene but I have no idea to do it.
Thanks folks!
I've started doing these experiments besides my work as a motion graphic designer. Sometimes you just can't go all out when you work for a client, so I love doing these as sort of a creative outlet.
I do realize some of these are rendered quite badly, but I sometimes make these at home on my five year old Macbook Pro haha.
I started posting these on instagram (shameless plug). So if you like it you can follow me there :)
Thanks a lot! I'm working on building a site at the moment, but in the meantime, I have a Behance page, and my Instagram!
Dont Apologize! no stupid questions in this sub. Luckily for you, there is an easy solution!! How do you animate a train?? With this! (its a plugin called Train Driver)
Its really easy to use and works really well. You cant really tell, but I used it for my train in this video. I did a bunch of tests to make sure it would work, if i find one of the tests ill edit my post.
FWIW, I agree. My low-poly post was meant to be humorous and tongue-in-cheek, not douchey and or done with criticism, ill-intent, or malice. If it was interpreted that way, that was not my intent. Sorry.
Also FWIW, I do like the low-poly look that I've seen prior to it popping up so heavily here - the Discovery Channel spot (I think that's what it was - don't have the link handy) was brilliant, Beeple did a great thing a little while ago ( https://vimeo.com/15568767 ), and there was another one with the progression of building a house (while the camera rotated around center) that was really well done.
Thanks for the clarification.
This is more my style. And more recent.
that being said, I dont think theres anything wrong with trying and doing drastically different things. how else will you learn and get better?
Ooh I like it! Love the stylistic choices you made, and the dirtyness in combination with clean illustration assets.
> that realistic?
It is, but you really need to know what you're getting into when you do it. From what I understand....the biggest thing is that no matter what, its rare that it runs 100%. whether it be bluetooth, wifi, sleep/wake, imessage.... somthing usually doesnt work the way it should because its not a genuine apple computer. and stuff 'not working' 100% isn't really somthing that regular OSX users are used to, so thats why I said you need to know what you're getting into.
but the part that matters - the performance..... like the processor speed, the GPU performance... that stuff, works. Once you get the machine running.
That being said, I've also read its not a greeeeat idea to run it as your 24/7 prime machine. I'm not really sure why, but thats the vibe I got from all the forums and posts and stuff when I did the research, because I was looking into doing it myself. I dunno if that general vibe has changed, because I was looking a while ago.
aha! mystery explained! if C4D renders a PNG image file without an extension, Finder gets a little crabby and doesnt know what to do with it. Just one of those quirks of Finder. So its all good. all you need to do is batch add the .png extension to the end of all the frames with something like this. And here is a basic walkthrough of how to do it using NameChanger (scroll down to step 3, its for adding filename extensions).
Hope that helped!
Polygon reduction is your friend :) Cheated a bit on that one, used an existing higher polygon mesh, then dropped the angle on the phong tag to 0 and applied a polygon reduction to get the low poly look.
The sketch look was done by applying a material with white in the luminance channel, turning on ambient occlusion and cranking up the max ray length.
File is here: https://drive.google.com/file/d/0BxYpGMJP6cSHcVlMQWFiYk5fM1E/edit?usp=sharing
Little bit simpler. The man shape is a platonic solid with a noise displacer and polygon reduction modifier applied to it. I then made an instance of it and applied an atom array to it, with a fairly low cylinder radius.
Link is here: https://drive.google.com/file/d/0BxYpGMJP6cSHOE14eUVGdUp1Rk0/edit?usp=sharing
Try Thingiverse (online database of models for 3d printing - some of the models are .STL but you should be able to convert them to .OBJ without any issues).
Huge thanks to /u/chromfell for sharing the website on his IG stories today. I’m also gonna have to pimp him out, as he just released today a building displacement pack that I’ve been waiting for for a while now, you can find it here : https://gumroad.com/l/BDP0
I mean this should be its own post, but I gues I’m just too excited to share the goodies with you guys. So many amazing resources out there that deserve more visibility.
Sadly Cinema 4D is not free, but if you're just starting out and keen to learn some 3D then you can download an extremely powerful program called Blender which is totally free.
It's really quite an amazing piece of software and that fact that it's free is crazy, it can do pretty much everything C4D can do and more. The only problem is it's a little clunkier to use in some ways than C4D because it's open source, but honestly if I was just getting going I'd definitely learn this, it's great.
You can download it totally free and completely legal here - https://www.blender.org/
I post on Dribbble mostly https://dribbble.com/muffinsAKA
Once the project is finished I'll totally post the scene files. They need some cleanup. The only external plugin I've been using is Real flow for liquid but for this one Hot4D could easily replace it.
Have you tried OBS? It's free, open source and really feature full. Here's the link: https://obsproject.com/
I highly recommend it, it helped when I couldn't get any other recording software to work :) And open-source, that's like icing on a cake!
No.... a mac pro trashcan will probably be overkill in terms of price and performance for that particular application... (I love OSX tho.)
if its going to only be rendering - the 4200 ish youll spend on the mac pro you can sink into a 6 node helmerfarm (like this) that will absolutely slay your rendertimes.
and the nice part is, you dont need to install the full c4d. just the team render clients which are unlimited with a studio license. The only sucky part is buying 6 windows licenses O.o ..... It would be nice if Maxon included Linux builds of the render clients, but IFAIK they limit it to "big" farms. but you can contact customer support and see what they tell you.
Thats just my opinion.
(I should add - if you want to go the route of an OSX86 build, thats also an option. there are tonnes of guides to get you going, and as you arent relying on it as a primary machine, i'd say its stability is probably ok)
Thanks! I do have a Behance page: https://www.behance.net/nautilus-d
I haven't done any WIP stuff on it because I'm horrible at updating that kind of thing...but the final result will definitely go up there...
It took about a month in my spare time, but it was a good learning process. Wood textures were downloaded, everything else was made. I even made the graphics around the sound hole in Illustrator. I used the vibrate tag on the camera before I discovered the motion camera, but it's a 30+ hour render so that will have to be taken care of another day.
I wasn't crazy about the stars in the physical sky, and the bokeh effect from the DOF was overkill so I blurred them in AE.
Music credits: Acoustic Guitar 1 by Audionautix is licensed under a Creative Commons Attribution license (https://creativecommons.org/licenses/by/4.0/) Artist: http://audionautix.com/
Mocap Dancing Man
Rapid mocap animation preview by setting the 'bone display' to box and rendering out. The head is a simple sphere placed directly on the skeleton.
Disco style bling done in post. :)
Music track is "XX" by "This Co.", used here under CC BY-NC-ND 3.0
http://freemusicarchive.org/music/This_Co/Untitled_1285/08_XX
https://creativecommons.org/licenses/by-nc-nd/3.0/
This Co. is Jorge Christie (Vox, rhythm guitar), Nicolás Rebolledo (Lead guitar, keyboards) and Carlos Vergara (Vox, Bass)
Beeple is known to use the "NIK collection". That's a collection of free plugins for Photoshop or Aperture. There are also stand-alone applications inside the package (in case you don't have Photoshop or Aperture), but those are a bit clumsy to use.
Sadly it was bought by Google and is now abandoned (no longer developed, so might break any time your OS or Photoshop gets updated), which makes it hard to properly depend on it in your working pipeline. :(
It's still great stuff though, fetch it from here as long it's still available: https://www.google.com/nikcollection/
Mostly you probably want to look into "Analog Efex" to get those nice film noise like and dirt effects. It also has various blur effects (Bokeh can add a nice touch to quick renders easily), but generally DOF is probably something you want to let the renderer do that has access to the geometry of the scene. :)
I enjoy your page very much. My only recommendation would be your exploration into color palettes. You only have a few render where you push your colors, try using adobe color to find some cool color schemes and experiment that way a little more
Also, add some post texturing! Download the Nik Collection for photoshop and bring in some interesting shadings and push your renders further. Most of the renders you see posted here use this!
this is sold work. couple points
With the texture on the body of the camera, it becomes evident it's just a bump map from the side of the camera and the almost mirror reflection. Id say add some displacement to that, or if it is there, crank it up.
You have a really nice subtle texture to the metal top of the camera, but it seems like the metal of the lens is too perfect. Bring in some more of that subtle texture and reflectance variation, as right now the lens seems separated from the body.
Maybe also add in some small text or markings that those old cameras sometimes have around the lens. Little touches like that really help sell the realism
You can save straight to a movie within C4D. It's in Render Settings > Save > Format, MOV or MP4, then select your codecs and such.
That said, you shouldn't do that because it means you're applying strong compression to the still images before you've gone through post, which means you need to get absolutely everything right in the render. If the lighting is a little off, for example, it's easier to just do an adjustment in post on the stills than to re-render everything.
That combination of factors means it's simplest to use a compositor to assemble the still image sequence into a movie. It not only solves your basic problem, it gives you a chance to do all kinds of after-the-fact corrections to the animation before producing the final movie.
If you don't have a compositor, Davinci Resolve is free, extremely powerful, and about as easy to use as C4D itself. It handles still image sequence to movie conversion automatically provided you name the output images properly and use one of the file formats it understands. See its extensive manual for details.
They used to charge $$$$$ for Resolve, but now you get to use it for free. It's amazing software.
This is a deep pool to dive into, with lots of details and tricks, enough to fill a whole career with on its own. For example, you can render out to EXR and have much greater latitude for adjustment in Resolve than if you render to an 8-bit PNG. Then you start getting into multi-pass rendering with alpha channels, and down the rabbit hole you go!
You can use the one I use.... which I "stole" from vRay4C4D (Its actually publicly available to download from here... but obviously comes with Vray Materials. So I just took it, deleted the vray materials and tags and set it up for cinema materials.
TBH I dont really use it - the lighting sucks and I never really got around to fixing it. But the model is useful and all the textures and scene is all set up already..... so..... *shrugs* have at it!
With luck, that's what you're kinda after. Here's the scene file, its just the animation only, the lighting and texturing were from GSG packs just to speed up the process, so i couldnt include that.
either way, you should be able to mess around with settings and stuff to get what youre looking for if you arent happy with that.
Hopefully that helped!
ok,so the problem is that your boolean-ing the cylyndars(which are NOT booled together correctly) with the can. try this. first, boolean the two cylindars together THEN boolean the result of that with your can. example file
There might be a few, and if not the great thing about XP is the multitude of tutorials out there on using it.
I looked a little into it though and it looks like the original creator of that render you linked to used a Processing code to create the paths. So I guess if you're very serious about it, you could get started learning the language!
You may be happy to learn UE4 was just made free! https://www.unrealengine.com/what-is-unreal-engine-4
I have been using ue4 for about 6 months and I much prefer it to unity personally, now it's free, well even better!
Ok! I'll tell you what I think, but that's obviously not always the best way to do things.
So overall, it looks good; clean and neatly ordered, but it also looks a little cold. Askreddit does have some inviting warmer colors that makes it more personal. You could also go with a more lively logo or something like custom upvote arrows to make it feel more human.
There's some UX/UI things that bother me a little, mostly the flairs being on the right. Especially on reddit where a relatively larger percentage has high-res monitors, shifting your gaze to the right of your screen is annoying. You just want to skim the titles on the left, so that's probably where the flair should be.
Then I'm not really sure why the "give gold" link has such a higher visual priority over any of the other links such as 'Reply" and "report" which both seem more important to me, but maybe you want to encourage more gold-giving? Also you could remove the domain link after a title? In a self-post only subreddit that seems a little redundant.
The search-page could use a little work (namely removing the drop-shadow from the subreddit links and making the search-bar area more prominent?), but those are more little details. I realize changing any CSS for such a large subreddit is difficult and you don't want to go too far off reddit's default because reddit gets angry about those things really quickly. So yeah, I do think it looks good but also a little bland.
Finally, can I recommend this article? It's an 8min read and I don't think you'll regret it. It's something reddit as a whole could do better I think. But enough rambling! Hope this helps any.
Looks great! If you’re looking to expand your techniques as well as materials for lighting, definitely check out Light — Science and Magic . Great book that goes over how to light any material and different approaches based on your goals.
It’s geared towards photographers but you can apply its teachings to C4D as well.
I'm pretty sure PNY is still selling theirs through amazon. You can give them a call for clarification if you like as well.
edit
Also the 1080ti should be landing March-ish, which will push the price of current cards down further especially in the used market.
I think that's beyond a list of common subjects clients ask for, and I'd recommend someone who is interested in "making it pop" to learn these:
- Cinematography
- Digital Light and Rendering
- Universal Principles of Design
- Vision Science: study of how our eyes and brain process visual info
On the off chance you haven't seen it, check out Monument Valley. Could give you some great inspiration! It's also for iOS.
A lot of this real-time 3D graphic type of stuff is being done in unreal engine, as you can tie the physical camera to an unreal virtual camera and have the set react to the camera movements and have the perspectives align. The problem with doing it all in Cinema is that you’d have to have locked-off cameras, because you couldn’t alter the angle of the rendered footage after it was done.
So yeah, if you wanted to have complex motion graphics you’d animate the elements in Cinema4D, then bring them into unreal engine for texturing, lighting, and setup. I’m sure you can find more information on how to tie the unreal engine scene into live broadcast hardware for triggering sequences and camera cuts and stuff.... that part I’m not sure about, cause I’ve not don’t live real-time broadcast.
But hopefully this puts you on the right track!
UPDATE: While not perfect, I have come to a style I like for the purpose I'm using it for at the moment. I would like to develop this style further and create a tutorial in the future if there's enough interest.
It's for the logo of a new DIY indie magazine I'm starting called Zen Is Not Enlightenment. Here's the image I'm using for the facebook page header. https://imgur.com/gSliO5i
This comment has helped my get very close. I think it's just a matter of tweaking now. The hair dynamics panel and specifically the drag and stiffness options have been instrumental in getting me this far. https://imgur.com/hbkiOIv
Thank you! +/u/dogetipbot 250 doge verify
I personally like Speedtree but it can be expensive if you're not in a major studio. It's used for video games and movies like Avatar. Speedtree is more intuitive and has it's own software where you just click and draw to grow the branches. Xfrog is cheaper and from what I've seen a little harder to use.
However if you have an iPad, you can get an awesome tree modeler for a price of free. TreeSketch
So really it depends on what you are using it for.
yeah to be honest this was my first actual render/AEcomposite from C4D, and it was originally a low poly water globe, but as I was playing around in AE I accidently turned only the red channel on and I thought it'd be a cool gif. The original water render is here!
This. Completely pointless to do any projection mapping if there is only a Z move with 20px of rotation/xy change.
edit: here are examples of why/when to camera projection mapping https://vimeo.com/40450598
If you're coming from an extensive scripting background or are a power user in Maya for example, doing things this way is more straight forward to you than using Mograph effectors.
I will illustrate how you could do this solely using C4D tools though in reference to the line of code from OP.
Create a cube of desired size in X and Z - line 9, 10. and height - line 12
Put the cube into a cloner, mode set to Grid. Grid size X and Z - line 15, 16
From here you can either use a material or the Color settings of the cloner to assign the RGB base color of 59,134,134 to the cubes. Lines 19-21
Lines 26-41 deal with materials settings, Reflectivity, Specularity etc
Lines 43-58 deal with the amount of clones you'd set the Grid Cloner to have in X and Z (Y would be 1)
Now your cloner should be the same color cubes all of the same height at this point. To add the randomisation OP wants we'll use two effectors to do this.
With your cloner selected, create a Shader Effector. By default this will have Scale checked in the Parameter tab, uncheck this and check Position Instead. I used a value of 100 in the Y Position this is Line 13 from the code. Under the shading tab, assign a Noise shader. You are free to play with the settings on the Noise Shader
With the Cloner selected, make another Shader Effector. Uncheck Scale again, and set the Blending Mode to Multiply, under the Color settings on the Parameter Tab. Again, assign a Noise shader in the Shading tab. The key parameter to change in this Noise shader to affect the color of your clones the most is Low Clip and High Clip values. Lines 22-24 in the code.
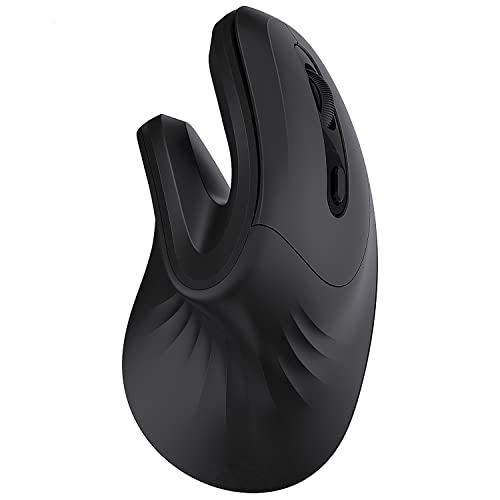
Before I started using c4d I programmed the middle mouse button on my mouse as a shortcut to expose my desktops on mac. I refused to give that up, so I bought I 5 button mouse (2 thumb buttons) and in c4d I programmed button 4 to do everything that middle mouse button does with orbiting and sutff. Also made button 5 change views. This one looks like the one that I have, though it was sold by a different company that looks like its no longer selling them. There's tons of these out there though and its a huge bonus for other apps too like going back and forward on the web. And It's comfy on you hand :)
Hi a bit lazy so i used /u/mrdavidsart ‘s animated rain shader (https://gumroad.com/mrdavids1#sflq ) and i added some more roughness maps i made myself from online photos to get some more specific smudges on the inside of the windows., I'm dad.
I’m a bit lazy so I used /u/MrDavidsArt ‘s animated rain shader (https://gumroad.com/mrdavids1#SflQ ) and I added some more roughness maps I made myself from online photos to get some more specific smudges on the inside of the windows.
And that cursor every time you click... Like someone removed your mirrors. Shit always in the way. Haha.
But... That's all in the past now. 2.8 fixed most of those old pain points.
Go Blender 2.8... It's industry standard and 100% free and this 2.8 version is so easy to use. Ubisoft and EpicGames even just announced they're going to be using Blender now too.
Blender 2.8 was just released too...
- Meets industry standards
- Way more features
- Way easier to use that C4D
- 100% free and open source.
- Windows, Mac OS X, and Linux
https://dribbble.com/shots/2796246-Candy
I cant remember where I watched the tut either. But this was my result. It was a torus with a twist. Then an animated texture and a bump map using the texture.
I think you demonstrate really capable modelling skills, but I'd say your lighting and texturing could use a little work. It's hard to pin point exactly what it is, but try to make your lighting compliment your models, scenes, etc.
Let me point to the Tim Hortons Coffee pots as an example. By the looks of it there are two lighting sources, a blueish one on the left hand side and a warmer color to the right. The issue here is that I'd say the points of interest of the piece (The Tim Hortons logo, and handles) are being obscured due to inadequate lighting. Those handles/lids look damn well modeled but look at the black one, you can hardly make out any of the detail because its entirely shaded. As for the logo, you wanna make that POP, but either the texture is too dull or (like the handle) it just is not under any light. If you're really interested, this video is absolutely amazing in its discussion of lighting theory and techniques.
But like I said, you do really seem to have a grasp on modelling which is great as I find it to be the much more difficult aspect of C4D
You realise Vray isnt magic. You can definatley make equal renders from C4Ds AdvRender and PhyRender... Vray is just better at certain things. the same way AdvRender or PhyRender is better for certain things.
And I hate to reference my own work as an example, but its just the easiest way: This video is all PhyRender with No GI. This video is a mix of PhyRender and V-ray. Your choice of renderer is more like your choice of medium in painting.... Oil or Watercolour, they can both make crazy beautiful art if you use them to their strengths! :)
Things have changed quite a bit in the last two years. This is a great site that in addition to walking you through the setup of a Hackintosh, has recommended parts for different types of builds. http://www.tonymacx86.com/.
The important thing to remember is that you don't need this to be an all-around great machine; what you need is a fast CPU with a decent amount of RAM with the cheapest other parts you can get.
My suggestion would be to
- create a spline
- create a cloner and add the spline as the object
- add leaf geometry into spline
- add a mograph shader into the cloner objects effector
- add a noise to the shader
- animate the noise
- turn on rotation in the shaders transform section under 'parameter' and set value to taste