
What are
/r/ResinCasting's
favorite Products & Services?
From 3.5 billion Reddit comments
The most popular Products mentioned in /r/ResinCasting:


The most popular Services mentioned in /r/ResinCasting:
Autodesk Tinkercad
wikiHow
Blender
Microsoft OneDrive
Shutterstock
Cults.
Imgur
The most popular Android Apps mentioned in /r/ResinCasting:

The most popular reviews in /r/ResinCasting:
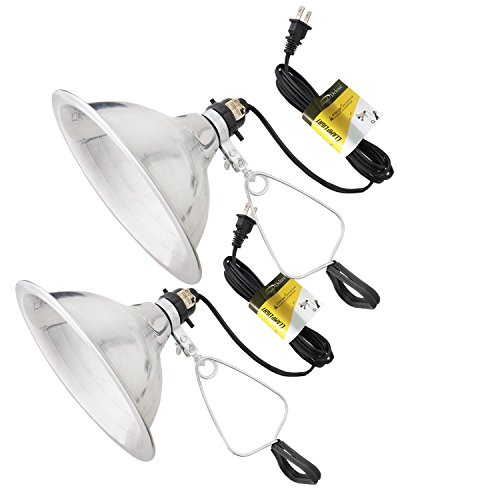
could set it on top of an LED light. something akin to like a display light. similar to this?
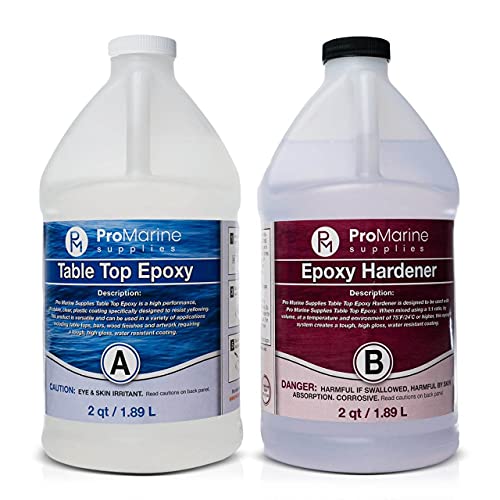
I wish I would’ve bought more when they first came out because I buy resin by 2 gallons & it was only $60 they have obviously bumped up the price now but it’s worth it. (I put the resin & hardener in separate 8oz bottles & let them sit in warm water for about 10mins) https://www.amazon.com/dp/B08HSHVKTS/ref=cm_sw_r_cp_api_glt_fabc_43DZ636R2W1T2Q835HJT?_encoding=UTF8&psc=1
I use this epoxy. So many of my first projects had the problem you’re having, sounds like you’re not mixing the resin right. Make sure to measure out the resin in equal parts and then stir them together very carefully and try to mix it slowly so bubbles don’t form. Mix for anywhere from 3 to 5 min, depending on the temperature of the room and how hot the resin was before you started mixing.
Mix it until all the streaks inside the resin disappear, it should look clear but you’ll have a lot of bubbles. It also should start heating up a bit at this point. As long as there’s no streaks in the resin then you’re good to go! Pour it into your mold but make sure not to scrape the bottom of the cup, it could unearth unmixed resin into your project and then you’ll have an uncured spot on your finished product. If you have a torch then turn it on the lowest setting to help pop any bubbles but make sure to only keep the flame on it for a brief second, you don’t want to scorch the mold.
After 24 hours go ahead and take it out of the mold, if it has a hard time coming out then use warm soapy water. Lastly if your finish piece smells like uncured resin after more than 72 hours then that means something went wrong in the process. It’s okay! It takes trial and error, it was a good month before I learned what I was doing right and wrong. I still will mess up so it’s never a sure fire process. Take your time and enjoy! I hope this could help 💕
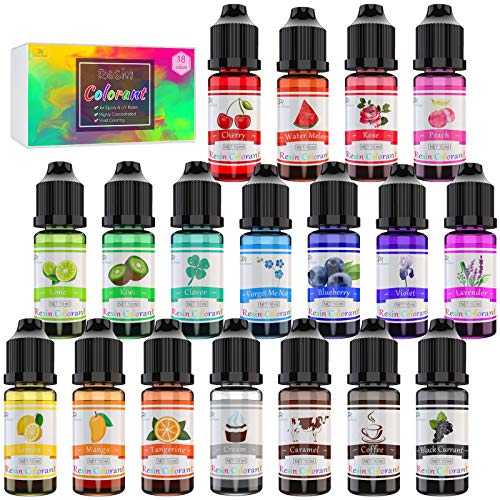
Thanks!! These were my first ever (actually my first try with anything resin!), so I didn't have any expectations. But I bought these pen molds: https://smile.amazon.com/dp/B087RLH5Q4/ref=cm_sw_r_cp_apa_i_XpBpFbMNAKWVP And I used liquid colorant: https://smile.amazon.com/dp/B07ZRHKN54/ref=cm_sw_r_cp_apa_i_TrBpFb4767FMW I just used 2 or 3 drops of color.
You put the ink in the mold first then pour the resin over it. I used a toothpick to make sure the resin was closer to the pen tip. Not sure what I did, either by too much or not enough, but I'll definitely need to sand down some of the edges that are a bit rough.
Here’s what I use!
Milcraft Silicone Rectangular Cake Pans Easy Demoulding, 13 by 9-Inch,Purple,Non-Stick European-Grade Silicone https://www.amazon.com/dp/B013S87TNQ/ref=cm_sw_r_cp_api_glt_fabc_B6CCNH4MHQS6E5KP6T5Q?_encoding=UTF8&psc=1
This is the sweetest idea!
I've got this kit from Amazon in my cart for payday, that seems to have a lot of options. I've found a few silicone molds on Amazon that have worked out great for me!
Does she fill the resin with things like dried flowers/plants, pictures, small crystals, beads or other findings? Is she currently using any types of colorant? There are some great options for those kinds of things. You can color with plain acrylic paint, but alcohol ink and mica powders are really good alternatives if she's wanting to go more transparent.
Also, a good quality heat gun or butane torch is a good idea, if she doesn't have one already.
Keep up the good work! You're killing it at the Husband Game! :D
I more or less just scooped paint up with a metal ball stylus tool and pushed it into the grooves until they were filled. I'd tried painting them in with regular brushes before, but it wasn't giving me a thick enough coat to really fill in the lines. It's a little more time intensive, but it's kinda calming in a way.
There are probably fancier sets out there, but I've been using these!
Oh thank you I was trying to get an opal like effect so yay lol
https://www.amazon.com/dp/B07FF55KHR/ref=cm_sw_r_cp_apa_glt_fabc_AABNMHXXK1N57ZMPXCWF?_encoding=UTF8&psc=1 I used cherry for the red also🙂 I think I used like 1 or 2 drops so you won't need to use much for a deep red
I used this resin and this silicone to make a mold of my hand. I’m going to have to make a new mold though.
the hand didn’t cure fully unfortunately, but i’m quite sure that’s because I was rushing to mix, and it’s a bit soft in some areas. I’m going to attempt this again, but I wanted to make sure I used a decent resin?
Is there a better resin to be using for such a deep pour?
I also noticed there’s a pretty weird/bad smell, is that because it didn’t cure fully?
i use this one its a 2 gallon kit for less than some 1 gallon kits https://www.amazon.com/gp/product/B01NH9RN2T/ref=ppx_yo_dt_b_search_asin_title?ie=UTF8&psc=1
I also just ordered this one but i have not received it yet so we will see https://www.amazon.com/gp/product/B07DM6VH2P/ref=ppx_yo_dt_b_asin_title_o01_s00?ie=UTF8&psc=1
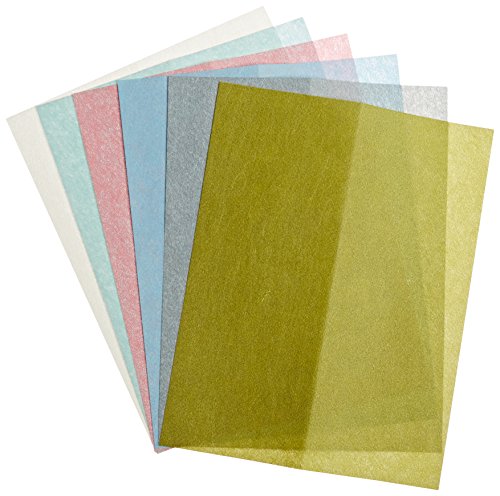
I find it easiest to hand sand for stuff like this. I use 240, 320, 400, 600, 800 grits and then use Zona polishing papers.
48PCS Sand paper, Premium Wet Dry Waterproof Sandpaper, 120 to 3000 Assorted Grit Sanding Paper for Wood Furniture Finishing, Metal Sanding and Automotive Polishing, 9 x 3.6 Inches. https://www.amazon.com/dp/B07QJ3K4D5/ref=cm_sw_r_cp_api_glc_fabc_Ikw-FbG1XWG6A?_encoding=UTF8&psc=1
Zona 37-948 3M Wet/Dry Polishing Paper, 8-1/2-Inch X 11-Inch, Assortment Pack One Each 1, 2, 3, 9, 15, and 30 Micron https://www.amazon.com/dp/B001BHGC7G/ref=cm_sw_r_cp_api_glc_fabc_amw-FbHQKY356?_encoding=UTF8&psc=1
A pressure pot is a small chamber that can be pressurized. You put your fresh resin pieces inside and fill the pot using an air compressor. They can't be bought pre-made that I know of.
The safest and most common way to make one is to take a paint sprayer (like this) and reconfigure the fittings (there are different ways to do this but you always need to source a few bits that don't come with the default paint pot). I built mine for less than $200. That is, unfortunately, not counting the cost of an air compressor if you don't already have access to one.
The pressure essentially squeeze the bubbles until they're so small they don't affect the quality of the finished piece. Some people have developed their own personal workflow to minimize bubbles, but the least messy surefire way to get smooth, clear pours is to use a pressure pot.
Note that the pressure can also squeeze the resin into any defects in your molds, so it's best to make your own molds and cure those at a higher pressure than what you'd use for resin.
How did I not know this was a whole subreddit lol! How's this project coming along? I used plastic measuring cups from Amazon with Kleer Kote for some things I've been working on and it's been great. I haven't done a very deep pour yet, but I think I would feel comfortable trying a couple inches deep worth in 1/4" increments.
I've spent the past year and a half or so dabbling in the wild world of miniature casting. From shoulder pads to lictors and here's what i've learned along the way :
-You resin and silicone are good choices! Muuuch better than oomoo 25 or whatever comes with the starter kit smooth on offers (it comes with a dvd , oomoo 25 silicone and some resin I can't think of right now)
-Invest. In. Syringes. go on amazon, get 10 cc/ml syringes and 14 gauge industrial needles (blunt tip https://www.amazon.com/Dispensing-Needle-Blunt-Inch-Long/dp/B016IEO53Y/ref=sr_1_1?ie=UTF8&qid=1494237634&sr=8-1&keywords=14gauge+industrial+needles) because the problem with casting such tiny things is that it's hard to get a perfect cast. so inject the resin in ups the quality of the casts significantly.
-The final frontier for casting in such a small scale (dude i've been casting mk3 marines, shield drone parts, oodles of forty k noodles) if you want perfect casts or as close to perfect as you can get? A pressure pot. it's a bit pricey since you need to buy a pressure pot (90 to 100 USD ish from harbor freight) and a compressor (80 90 ish are harbor freight ) once you get a pressure pot set it to 2.3/3 bar or 35 to 40 psi it'll force all the potential bubbles to be so small that there will barely be any noticeable imperfections.
Sorry for the novel but I realized it's really tricky to find specific resources for miniature casting! Also this video is where I got started. Good luck!
Do you mean the mold? They're all a pre-made mold so it's 4 different animals in matte or shiny.
https://www.amazon.com/gp/product/B0828Q22NN/ref=ppx_yo_dt_b_search_asin_title?ie=UTF8&psc=1
Nope, found it on amazon. As long as you kind of go in with a toothpick to make sure there aren't any bubbles in the ears, etc. they come out awesome.
https://www.amazon.com/gp/product/B0828Q22NN/ref=ppx_yo_dt_b_search_asin_title?ie=UTF8&psc=1
Clear Epoxy Resin Crystal Clear - Art Resin Epoxy Clear 2 Part Epoxy Resin 2 Gallon Kit Casting Resin Countertop Epoxy Wood Epoxy Resin Kit with Bonus Measuring Cups, Plastic Spreader, Plastic Sticks https://www.amazon.com/dp/B07G5HY79C/ref=cm_sw_r_cp_api_i_8wHhFbF00HN84
I'd think you'd just have to keep clicking the button in 60s intervals. Usually these types of lamps only have preset timings, unless you know how to hardwire the insides... I found this one on amazon so you could possibly message the seller for a copy the manual.
The mold was made with some little crystal skulls I found on amazon like these
https://www.amazon.com/dp/B07K1CCJ2M/ref=cm_sw_r_cp_api_i_UiezFbE0H6NXG
And I just used some clear resin dye i got off amazon too!
Thanks, its for a uni project, you can see my gallery which should explain the porject in a bit more detail
TL;DR - Im creating a giant sized paper weight to raise awareness about the sensationalised headlines newspapers use to sell their papers, this box will present the project.
Yeah I did. I used a resin 3D printer to make master copies from my design . Then I made a tin cured silicone mold with the masters taped down to the bottom of a box. I also 3D printed the box I used for the mold, but thats because I wanted a mold that I could use to pour several pawns at once. Solo cups would work just as well for molds that produce one part per casting.
I'm going to sell these on my etsy shop but the design is totally free so anyone can 3D print these, make molds, modify the source files or whatever
I found mine on Amazon. $10.99 Rolling Tray Mold for Resin Silicone Tray Mold with Sides, Large Rolling Tray Resin Mold for Epoxy Resin, Resin Serving Board Mold with Edge for Resin Casting Shiny Surface & Durable 10.43x7.4x0.98 in https://www.amazon.com/dp/B08PF5QR4G/ref=cm_sw_r_cp_api_glt_fabc_6MJB953X6JKWCSTGKKQA?_encoding=UTF8&psc=1
This is the set I bought (keychain sized letters) https://smile.amazon.com/dp/B08H8G6NBJ/ref=cm_sw_r_cp_apa_glt_fabc_03E1PNHKF85VTEMAM1C8?_encoding=UTF8&psc=1
In this case, the alphabet is mirrored in the mold, so the front is the flat side, inside the mold. So the front is the stuff you pour in first, and the back is what you finish pouring in. So in this case, if you fill each letter until it's domed, the dome is on the backside of the letter. If you just fill the letter to the edge of the mold, it ends up sinking down a little in the final product and leaves a ridge at the edges. So you have to fill it domed just enough that it is flat when it's cured, if that is important to you. It's a bit tricky, IMO, so definitely make a few practice ones without using all your good inclusions.
I've only added glitter and epoxy coloring to my attempts. The glitter did mostly sink to the bottom of the mold (in my case, the front of the letter) so next time I try glitter I'm going to try layering a bit more.
It depends on whether you are getting the cheap wish style molds (like these) or actually getting better quality molds (pretty much anything that doesn't look like the molds in the link). The cheap wish molds are functional but very, very prone to large voids which is annoying. Better quality dice molds work better but you can often make molds that will work just as well for cheaper than purchasing the decent quality premade molds. Regardless of which molds you go with you will have issues with air bubbles although some types of molds have more issues than others.
There are lots of tips and tricks for both using the cheap wish style molds and for making your own molds over in r/DiceMaking as well as just general info about making dice and inspiration. In general I think most people who have used the wish style mold and moved on to better quality molds would suggest skipping straight to making your own. However most of us understand deciding to just go with the quick and cheap option to test a new hobby because we have been there.
It went to comments and not to you…
The shells are here: https://www.amazon.com/gp/product/B08G8BC3X2/ref=ppx_yo_dt_b_asin_title_o01_s00?ie=UTF8&psc=1 And the powder here: https://www.amazon.com/gp/product/B075WVHM53/ref=ppx_yo_dt_b_asin_title_o03_s01?ie=UTF8&psc=1
Thank you! Amazon for both answers. Let me find the links The shells are here: https://www.amazon.com/gp/product/B08G8BC3X2/ref=ppx_yo_dt_b_asin_title_o01_s00?ie=UTF8&psc=1 And the powder here: https://www.amazon.com/gp/product/B075WVHM53/ref=ppx_yo_dt_b_asin_title_o03_s01?ie=UTF8&psc=1
California Air Tools Pressure Pot for Resin Casting, Model 365CW https://www.amazon.com/dp/B084DFT6D3/ref=cm_sw_r_cp_api_glt_fabc_BR0G472T5DTP6EC4ZXSW?_encoding=UTF8&psc=1
No conversions needed and works amazing! Just got it last week and I’ve been using it nonstop.
I just use this one and works pretty fine https://www.amazon.es/gp/product/B083ZXJ6W7/ref=ppx_yo_dt_b_asin_title_o01_s01?ie=UTF8&psc=1
FUNSHOWCASE 6 Shapes Christmas Chocolate Cake Jelly Ice Silicone Fondant Mold Mould Baking Accessories Kitchen DIY Chocolates Tools by TheBigThumb https://www.amazon.co.uk/dp/B00L6FW6P0/ref=cm_sw_r_cp_api_glt_fabc_MC0HYYGHQ7STZ411P299
The top link is the pink and the bottom is the yellow. I've had issues with some pink ink like completely lose color in things I've made a while ago and it's just gone now. One of my bodies I made was all neon pink ink and now it's like super dull peach 🙃
You can get 'em on Amazon or AliExpress. Your kinda always rolling the dice with that though, I have a whole stack of molds that have blimishes that come off onto the resin. https://www.amazon.com/dp/B07LFW4BK5/ref=cm_sw_r_cp_apa_glt_fabc_CWT9G6YMRV7TR47E2GB2
If you look right below the listing there’s a frequently bought together bit, that takes you to a listing of just the hardware and there the rabbit hole begins:
https://www.amazon.com/Hardware-Fittings-Cupcake-Serving-Decoration/dp/B08K8W9YJN
I found it on Amazon. It also comes with a hexagon shaped one. Here is the link: https://www.amazon.com/LETS-RESIN-Silicone-Hexagon-Coaster/dp/B07PZ9JGNZ/ref=mp_s_a_1_3?dchild=1&keywords=resin+container+mold&qid=1605408075&sprefix=resin+contain&sr=8-3
I have something like this that I use. Just a small hand tool.
Look up iridescent confetti here
You’d just mix it with the resin.
Here’s a link! It’s a bit pricey off Amazon but they also sell them at Hobby Lobby for 10 dollars and you can use the stores 40 percent off coupon that they have each week.
Another option for doming your clay pins would be UV gel coat nail polish topcoat. It’s super easy to use!
Modelones Gel Top Coat- 10ML No... https://www.amazon.com/dp/B085NKVWC5?ref=ppx_pop_mob_ap_share
I just got this awesome new set of mica powders. The colors are AMAZING!! https://www.amazon.com/gp/product/B08G65KP7B/ref=ppx_yo_dt_b_search_asin_title?ie=UTF8&psc=1
I just bought these, my boyfriend doesn’t want me ruining his paint brushes 🤣
LORMAY 7-Piece Silicone Makeup Brushes for Face Mask, Eyeliner, Eyebrow, Eye Shadow, Lip Care, and UV Resin Epoxy Crafting (Mint Green) https://www.amazon.com/dp/B07HP9FCXT/ref=cm_sw_r_cp_api_glc_fabc_BVi-Fb8H68056
If you happen to have the same set, which do you find works best for applying a clear resin coat? Do I just let the resin harden once done and peel it off? Sorry for all the questions! I’m so new to this haha
No, I got them on Amazon. https://www.amazon.com/gp/product/B08JPCF4X9/ref=ppx_yo_dt_b_search_asin_title?ie=UTF8&psc=1
Here’s the glitter:
LET'S RESIN 15 Colors Holographic Glitter, Resin Fine Glitter Powder Tumbler Glitter(Each 0.35oz), High Craft Glitter for epoxy, Slime, Epoxy Tumblers, Nail Art https://www.amazon.com/dp/B086ZG4VKQ/ref=cm_sw_r_cp_api_glc_fabc_Znb7FbCZD04CM
This respirator 3M - 51131070264 Half Facepiece... https://www.amazon.com/dp/B007JZ1MK6?ref=ppx_pop_mob_ap_share
With these filters 3M Organic Vapor/Acid Gas... https://www.amazon.com/dp/B00AEFCKKY?ref=ppx_pop_mob_ap_share
Great fit, really easy to put on even with gloves on, and works amazingly well.
I would use a tilt switch. They are enclosed, so resin should not interfere. You can either embed a battery, or build a little inductive power circuit if you put the power source in a base.
I bought pretty much the exact same kit, mostly for making dice. I think it’ll get the job done, but when I want a crystal clear sanding, I use Zona papers and wet sand with them, they’ve worked great for me so far. I hope that your projects turn out great!
Zona 37-948 3M Wet/Dry Polishing Paper, 8-1/2-Inch X 11-Inch, Assortment Pack One Each 1, 2, 3, 9, 15, and 30 Micron https://www.amazon.com/dp/B001BHGC7G/ref=cm_sw_r_cp_api_glc_fabc_nTc3FbWGBA4XB?_encoding=UTF8&psc=1
Suhome Letter Resin Molds Backward Alphabet Number Resin Silicone Molds Epoxy Resin Jewelry Molds for Keychain, Necklace, Earrings, Craft Decoration … https://www.amazon.com.au/dp/B0868914W2/ref=cm_sw_r_cp_api_fabc_O9a0Fb3AB52GD
this is my supplier but you can also find tons of it on Amazon like here
Hey there, I got a 4pk from amazon ✨amazon coasters square
Nitrocellulose lacquer is by far the easiest high-gloss option. Go to Home Depot or Lowes and buy this - it should be about half the price it's listed for on Amazon.
Warning: it's smelly and flammable, so work outside.
I just bought a half face respirator (link is small size) by 3M on amazon (with organic vapor cartridges sold separately) and it works well so far!
The one I got does have a lip on the lid. The only issue I've had is that the sides of the mold are a bit flimsy and have a tendency to bow if not propped up while the resin is curing. If the sides fully cure while bowed the lid doesn't sit correctly.
eta I chose that listing simply because at the time it was prime and was showing the soonest delivery date.
It's a coaster mold. Basically the idea is to cast the jagged outer pieces. then once they are cured flip them around into the straight edge mold and use more resin to hold them together.
Here is an actual listing for this one plus a round coaster.
Plastic measuring cups are good, but my favorite thing to use are silicone beakers. Really easy to peel the resin off once it's hardened since they're soft, and I feel it's much easier to measure 2 part resin on them since they are cylindrical.
Oh and it's much easier to pour when you have the..."beak"...
Oh, right! The kind used for coffee grounds and like that! Good thinking!
I accidental found some bins that seem pretty highly regarded by cigar aficionados as DIY humidors, so fingers crossed that means they'll have a good seal on them. Seems like they have a nice flat base, at least.
YES! The waiting is the worst. I think you'll like the UV, though! This is the kind I use and it's really not that expensive. I would suggest a good UV light, though. I think I got mine for, like, $20 on Amazon.
im still new, but ive done one project similar to yours(different metal pieces, yours are so cool!) clear packing tape should work fine, i personally used this from amazon https://www.amazon.com/dp/B07S2JYX62/ref=cm_sw_r_em_apa_i_Pr85EbE6NBY2Z
are your metal pieces actually flat? just from the picture, they almost look rounded which would make getting a good seam tough. no idea if this would work, but maybe try some hot glue to seal it on the outside of the frame? like, get a bit out and use a toothpick/coffee stirer to apply it. again no idea if that would work, but might be worth trying? someone please tell me if i am wrong, like i said i am still new! 😆
I bought this on Amazon. It works well for small crafts. Its also low cost. I just do 2-3 cycles depending on what I'm making.
https://www.amazon.com/dp/B012MEZP2E/ref=cm_sw_r_other_apa_i_F9z4EbZQRG5PD
Thank you! I found the mold on Amazon actually! They aren’t textured— the ripple effect is from the mica power and the way it settled.
I bought a set from amazon. They have many types available https://www.amazon.com/Silicone-KeyZone-Jewelry-Sequins-Decorations/dp/B07RGV2TH2/ref=sr_1_1?keywords=Jewelry+sphere+molds&qid=1581105370&sr=8-1
I felt really uncomfortable watching the video because of this. Maybe put some metal container over the bowl while using it. If there would be a light source and a camera in the container you would be able to safely view the process. There is even an app that turns old phones into wireless cams.
https://www.amazon.com/gp/product/B001CDBBY8/ref=oh_aui_detailpage_o05_s00?ie=UTF8&psc=1
https://www.amazon.com/gp/product/B01MT86XCI/ref=oh_aui_detailpage_o04_s00?ie=UTF8&psc=1
was what I bought. Don't mix silicone mold in it if you want it to remain unblemished on the inside. Mine looks like a pepto-bismol monster exploded. Still, the good news is that it's still silicone, it's just going to throw off the ratio by a miniscule amount.
Try to avoid eyeballing your mixtures. Weight it or mark it out in two separate containers if there aren't any volume indications on the vessel. Since the volume graduates in tapered containers you'll end up using more of one or the other 1:1 ingredients, and the way your resin cures will vary from rock hard in 10 minutes to a bendiness that never goes away. (Quite a few of my first batches were duds when I threw caution to the wind and said, "Why not 9 colors all mixed individually just by guessing?")
First thing I'd try is broken glass from Amazon or the craft store... just can't use straight up clear glass or the resin will just appear clear.
​
Here is a little known secret. You want flat matte colors that mix great in Resin, tons of colors, and cheap? Get a set of artist chalks. Scrape with a razor blade to get a powder, mix away. Little bit goes a long way.
By small as possible I mean something that is portable and can fit under a desk when not in use, not necessarily pocket size. I don't have a garage or workshop to store it in.
It can be double or a bit more in size compared to the one I linked above. Ideally something like this, but from the video reviews I've watched - it's way too loud. https://www.amazon.de/-/en/Stanley-compressor-DN200-10-AIRBOSS/dp/B00GN89EQE
I found the mold on Amazon. I had to get it, I painted a scene like this for my bf, so he tattooed my painting on his arm, so when I saw the mold, I had to get it lol
Guitar Resin Mold,Silicone Molds... https://www.amazon.com/dp/B09T2P528Q?ref=ppx_pop_mob_ap_share
The pictures make it look way bigger than the mold is. Make sure you read the specs.
If by inexpensive mold set you mean the wish style molds like these the molds themselves are part of the issue. When it comes to dice molds price really is an indicator of quality. While it is technically possible to make decent dice with them it's not an easy process and takes a lot of trial and error to get the hang of. There are a lot of threads here and over in both r/resin and r/DiceMaking about using these molds.
Another good beginner's resource for dice making is Rybonator on YouTube.
Do you mean the pigments in the video description? If so, whoops, I just realized that was a typo! The pigments I used were an alcohol ink. They come in tiny liquid bottle's filled with a mixture of alcohol and a dissolved pigment. You can typically find them in transparent, translucent, and opaque varieties. I'd link you to the ones I have, but they are unfortunately no longer available. You can find a ton of options on amazon, though. Something like this is close to what I have: https://www.amazon.ca/Alcohol-Ink-Set-Concentrated-Alcohol-Based/dp/B084Q79XMV
Sure is a small skull. The trouble with casting such small things in an open back mold is the trapped air due to viscosity and physics in general. You want the resin going in and the air coming out. It's harder than you might think. You can just shoot some resin in and pick at the air bubbles with a toothpick or a needle, and that can be fine to a point. But it might get old quick.
So more advanced moldmakers will do an injection mold instead to do a bunch of casts at once with a better succes rate. But building such a mold comes with its own challenges.
The mold stability for such small castings isn't an issue if doing open backed molds, so I would go for the shore A20.
The pipette method might be a bit to big for this tiny skull, so you might consider syringes with a medium needle on it. The method is to put the tip of the needle to the bottom of the mold cavity and fill from the bottom to let the air out as you fill. You can try cleaning your stuff with acetone before it cures and you might get another use out of it. Most cases implements are disposable though.
The aluminum frame is a fine tool, but you would still have to glue it down with hotglue or tape.
You don't need to pay special attention to the viscosity of the resin. Sure it is better to buy some that has a low viscosity, but pretty much all casting resins are gonna be low enough. Pot life is the thing to look out for. That is how long you have to work with it while it is still liquid. The cure time usually follows along with the pot life, so if you plan to be efficient in your castings you might consider those numbers.
But from here it's pretty much just buy some stuff and start gaining some experience with the process, before you start planning too advanced projects.
Look outside the box hun... nail art supplies are awesome. Powders, decals and flakes. Try unicorn iridescent powder. Either add to resin or experiment on outside with clear overcoat. I use my nail art supplies all the time. https://www.amazon.com/Iridescent-Mermaid-Symphony-Pigment-Manicure/dp/B08CBSC5Z8/ref=mp_s_a_1_5?crid=140ODT19O6S9T&keywords=iridescent+nail+powder&qid=1663244313&sprefix=iridescent+na%2Caps%2C124&sr=8-5
Do you think something like this would be a good pigment to try?
There are some translucent keycaps molds out there, you might have some luck finding them on amazon or on Etsy
This is the brand of UV resin I use and like since it's viscuous, YMMV and I suggest setting aside some $$ since practice batches are a thing and can get costly
You can but if the resin level is above the top edge of the mold it makes it more likely that some resin will spill as you move them into the pressure pot. In my experience the pressure pot doesn't actually affect the level by a noticeable amount unless you have . Some resins may contract more than others while curing but that's a property of the resin and isn't affected by pressure.
In most cases I find it easier to deal with any potential shrinking after the item is cured instead of trying to prevent it. Most of the time the level is fine and doesn't actually need topping off so I just use a deburring tool (example here) or craft knife to remove the lip and smooth the edges down since those spots can be fairly sharp. In the cases where the level is too low I will do another small pour to top it off before I pull the item out of the mold.
https://www.amazon.com/Suhome-Droplet-Miniature-Transparent-Iridescent/dp/B0912RJLXS
They tend to float or sink, depending.
If you are looking for bubbles through out, mix the resin and wait for it to feel warm/start to kick. Then stir like crazy and pour.
>Sun UV Activated Photochromic Powder Pigment White Changing to Violet
This is what a quick search on amazon pulled up... but without the actual brand name from OP I can't be *super* positive, haven't read yet for compatibility in lieu of resin things etc.
You have a lot of good tips here, but I wanted to add that if you’re using a popsicle stick to stir the resin it can introduce some bubbles as it has a porous surface. silicone stir sticks might be helpful to reduce the tiny tiny bubbles.
The best and easiest way to make molds for miniature bases is to make an open back mold similar to a coaster mold. Unless there are overhangs from terrain details that don't touch the base and would create high points in the mold there shouldn't be any extra venting needed.
u/West-Way-8175 I'm assuming your molds are set up like my first paragraph. If not you may want to redo them because that will help with bubbles.
- Using resin with a lower viscosity and that has a longer working time will do a lot to help with bubbles. The lower viscosity means it's easier for bubbles to rise out of the resin and the longer working time means there is more time for that to happen.
- Being careful as you mix the resin will also help since most bubbles are introduced during mixing. Mixing faster introduces more bubbles.
- Going around the edges and any corners/detailing in the mold with a toothpick or stir stick to pull any bubbles that may be clinging to the mold surface out will also help. Just be careful that whatever you use doesn't scratch the mold.
- When preheating the resin you want to keep the temp below 100F (~37.8C). Most resins have a preferred temp range somewhere around 70-90F (21.1-32.2C) although the exact range will vary depending on the specific resin. Too cold and it will slow the cure process down. Too hot and it will speed the process up which can cause flash curing. In some situations resin flash curing can cause damage to your work surface and anything close enough that is temp sensitive.
You can try pouring just a touch of resin over it again, probably the simplest fix. Are you using wet sandpaper up to 3000 grit? after i work my way up to 3000 grit I hit my pieces with some Novus Plastic Polish, here is the link
Pretty much. I haven't used the Jacquard brand pigments but having seen them in person I would say they are the same thing. There are some minor color differences and different brands may carry different interference/ghost colors but otherwise it's basically the same product. For example the ghost blue from eye candy is a slightly different shade of blue as the ghost blue in the lets resin interference set.
Most places that sell compressors will sell a variety of connectors and adapters. We got a multi-pack (similar to this) with different adapters and connectors from the local big box hardware store. The issue is figuring out which one(s) you need to make the compressor you have work with the pot you have because that can vary depending on the compressor.
OP most likely used iridescent cellophane or iridescent flakes (something like this). You can see the edges of some flakes/pieces in a couple of the photos. They are fun to play with although keep in mind that if you are using larger pieces that are crumpled up the cellophane can trap air bubbles leading to large voids that even a pressure pot may not be able to get rid of.
u/wraith7of9 if you aren't getting much of the color effect with the ghost pigments you may not be using enough of the powder. However the background color is also going to affect how noticeable the effect is. It will pop more against a darker background and be a lot more subtle against a lighter or white background.
Well there are other ways of sealing the wood. Something thin and penetrating, so it doesn't suck up pigmented resin, such as shellac. But looking at the log you have there you might be better off using shellac burn-in sticks for all of the filling. It is simpler to uses and easy to rework/reapply if you don't get it right the first time.
In the case of using resin on end grain, it will suck right into the wood if not sealed well, leaving tiny spots of black resin in every pore.
I only have experience with one, but it was so easy, it kinda made me feel like I screwed it up lol it’s called Teexpert and it’s actually on sale on Amazon right now because of Prime Days.
https://www.amazon.com/Gorilla-Silicone-Waterproof-Resistant-Cartridge/dp/B01MQW8AEM?th=1
The good kind smells really bad, like my grandpa's feet, but works really well.
Yes, depending on the strength of the magnets, and the thickness of the resin/distance between them and the metal tray.
I've used these magnets for a variety of projects and they are surprisingly strong.
If it helps, I bought these in the past. They make for a real nice stained glass look! I also bought a pack of small suction cups with hooks to hang them. Make a bunch using glow in the dark pigment and gave them to my mom and grandma back on mothers day :3
I believe it's spelled Alumilite Clear Cast, if so we're using the same resin. I haven't had any problems with the cheapy inks I'm using: https://www.amazon.com/gp/product/B084Q79XMV/ref=ppx_yo_dt_b_asin_title_o06_s00?
That said too much water causes cure inhibition and there is water in the alcohol so if you're using too much 🤷♂️
But what I'd suggest most is to mix your resin with your mix cup in a bath of hot water and to mix it for 5 min. making sure to scrape along the sides and bottom of the mix cup.
I see this same mold piece pop up all the time on amazon for me. I've been so tempted to get and try it, but haven't convinced myself to yet haha. But yours does look great :D
For those curious: This is the mold
Dose this cheep casting resin look good at all? Art ‘N Glow 16 OZ Clear Casting and Coating Epoxy Resin Kit- 2 Part Multifunctional Low Odor & VOC Free & Food Safe Epoxy Resin - DIY Starter Resin Kit Made in USA https://www.amazon.com/dp/B07BM9LHRB/ref=cm_sw_r_cp_api_i_JVR3XNCD52VJHKRNFVRC?_encoding=UTF8&psc=1
Microfiber clothes suck, your right. They leave all kinds of marks. I use lint free wipes for nails like these. I just fill the bottle with 91% alcohol rather than nail polish remover. They are much smoother, and softer.
I do sand off any sharp edges left from molds, or just trim them off with sharp scissors. A fingernail file also works great to quickly knock off any sharpness.
I try to tease the resin to the edges with a toothpick. If it still moves away, I brush a thin layer over it. It can sonetimes take a couple tries, but should quickly smooth over. Resin wants to naturally self level and full ridges smooth for you. I just do it slowly, in very thin layers at a time. As you found, it's easy to add more, a real pain to remove when you add too much.
You will get the hang of it, it just takes practice. Just go slow and keep your layers as thin as possible.
Thank you for the compliment. I'm just glad to help. When I started there was very little info in the US. I spent all my time watching Japanese artists videos. I could see what they did, but not understand why. I had to just experiment on my own. Drove me nuts! Lol
I use Mounting Putty.
Works great, and you can use it over and over. As long as you keep it clean, is reusable, yet easy to remove when your done, and doesn't leave any residue on your pieces.
Hey! I ran into this issue as well and the best solution I found was buying these specific furniture feet: https://www.amazon.ca/dp/B09FPRWBPL/ref=cm_sw_r_apan_i_ESCCARMR10K4NJ069CFT?_encoding=UTF8&psc=1 These feet have flat square tops and plastic screw shafts that move up and down to adjust their height. I just put a large cutting board on top of them and adjusted until it was level. Took a while but it works and you don't need to attach them to anything. Also it's easier to adjust with 3 feet than all 4.
The pressure pot you have is great. I use the larger version.
The air compressor will not work. Its to slow. You need to be filling the pot up asap. If you are using super slow cure though like over night then you might be able to get that little mini compressor to work though.
Its a little more but you might try something like this. Having the tank allows it to keep a lot of pressure stored up to transfer to the pressure pot all at once. You may want to use a faster cure resin so this would make that possible.
https://www.amazon.com/PORTER-CABLE-Compressor-6-Gallon-Oil-Free-C2002-ECOM/dp/B09BXYP2R9
This is what I use and it's pretty reliable. Large thin or flat items will warp a bit when heated but I don't generally have trouble.
Alumilite Amazing Clear Cast [0.5 gal A + 0.5 gal B(1 Gallon) 2 Part Liquid Kit] High-Gloss Plastic Finish | Multi-Purpose Epoxy Resin for Casting & Coating Countertop, Wood Crafts & Encapsulation Art https://www.amazon.com/dp/B087KPRJM5/ref=cm_sw_r_apan_i_ZSV5CAHB3C5PE6AJPY5K?_encoding=UTF8&psc=1
I’ve been using this epoxy brand for a little over 2 years now. I do smaller projects like you’re thinking about like resin krambits. Also I’ve made a number of solid resin & wood / resin hybrid knife scales to good success. Good company communication also after my 3rd - 4th purchase IIRC, they reached out with some pretty decent discounts and free product.
Only had minor issues and I believe they were more on my end with temp and mixing inconsistencies. If you decide to try, let me know and I’ll share details of what I’ve learned on working with the product. Best of luck 🙏
I use this one, the timer goes up to 30 min