
What are
/r/Tau40K's
favorite Products & Services?
From 3.5 billion Reddit comments
The most popular Products mentioned in /r/Tau40K:


The most popular Services mentioned in /r/Tau40K:
Cults.
DocDroid
Cambridge Dictionary
Buzzsprout
Adobe Color CC
Paletton
Overwatch
Project Gutenberg
LibriVox
Straw Poll
Facebook Marketplace
The most popular Android Apps mentioned in /r/Tau40K:


The most popular reviews in /r/Tau40K:
I hate to be 'that guy' and repeat what everyone else is going to say, but in the long run, you may want to magnetize before you paint. That way, you'll be able to mix and match as many weapons as you want, and swap them between models. I usually add a single 1/8" magnet to the the outside forearms, and the tops of the thruster pods, so that you can take up to four weapon/system hardpoints at a time.
In terms of the actual benefits of each weapon, check the datasheets/codex, since each one has different uses:
- Burst cannons are medium range, have four chances to hit, but middling strength, zero armor penetration, and negligible 1 damage. Take these if you're looking at a horde enemy with tons of low-toughness models.
- Plasma rifles have one shot at long range, another if in short range, and better strength and decent armor penetration. However, they still only do 1 damage once they get through an enemy's toughness. They can be used to snipe weaker models from afar, or raise the chances of a single wound against a closer enemy.
- Fusion blasters are medium range, get only one shot, but much better strength and armor penetration than the plasma. They can conceivably do major damage (D6), and are best at taking down moderate armor.
- Missile Pods have the longest range, get two shots at decent strength, but have weak armor penetration and only do minor damage (D3).
- Flamers are extra-close-range, have a variable number of attacks (D6), have decent strength but low armor penetration. They do only one damage if they make it through saves, so flamers are really for against swarming melee hordes.
I'm still pretty new to the tabletop, but that's what I've been able to pick up about these based on the math and the few fights I've lost against plague boys.
Sharpie Paint Marker - Aqua/Turquoise
Example, but I used the fine tip: https://www.amazon.com/Sharpie-Oil-Based-Paint-Marker-Medium/dp/B00E3XXLOC
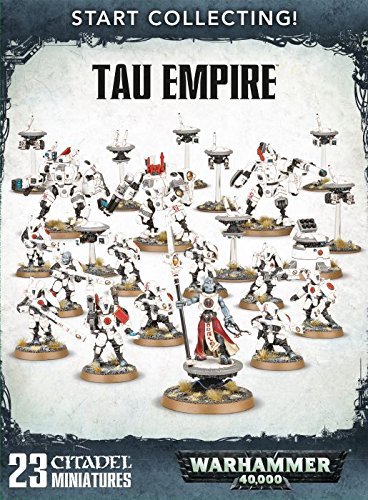
Hey everyone, I was the pilot of that list at BAO this year and ended up finishing 3rd overall. The list had 43 drones total, 36 of which were shield drones. I built the list to be as safe and durable as possible for a 6 round (potentially up to 9 round tournament) since, for me, Tau is the ultimate late game army.
The list does give up points early by having so many small units (butchers bill and kill more), but I prefer the small drone units for a couple of reasons. 1) I use them as screening units against assault, deepstrike, and aggressive knight lists and with so many units I can cover most of the board quite quickly and force them to move where I want them to. 2) They allow me to take board control secondaries like King of the Hill or Recon. 3) Unlike the large tactical drone units, it is much harder for high volume single weapons like the Crusader's Gatling Cannon to pick up a large squad in a single turn. Often times my opponents split fire too much and only end up killing 1 of the 2 drones in the small shield drone squads. 4) Since against opponents who take Butchers Bill against me I often pull as many of the small drone units as possible through savior protocol in a single turn to deny them kill more and butchers in future turns.
If you are interested in hearing more about my list and the games I played at BAO, I talked about it with my teammate John Lennon on the Fog of War podcast this week (https://www.buzzsprout.com/250236/1209689-fow-episode-16-bao-shows-florida-does-have-good-players).
Yeah the store tries to hide stuff that's perceived as being extremely bad. If you insist on seeing for yourself, here's the link:
https://play.google.com/store/apps/details?id=com.gamesworkshop.warhammer40k
That's made from a Gundam Gatling gun weapon kit, you can pick them up on Amazon.
AFAIK there isn't any canonical translation for ogryn. Both Shio and He have canonical translations though: Shio is the nasal slit Tau have, and He is "without number".
I'd go for something like Gue'elan (strong/sturdy human).
I've been shilling a lot for the Expanded Tau Lexicon as of late.
The ETL doesn't mention Gue'va'garro. Garro isn't mentioned at all, but Va means "greater" or "better", not really a good fit either. Wae'bo is definitely some sort of weaboo joke.
Something like this? https://www.amazon.com/dp/B001JJZDSK/ref=cm_sw_r_cp_apa_glt_fabc_5SZ8F6N45ZNGRCFZWN1Y
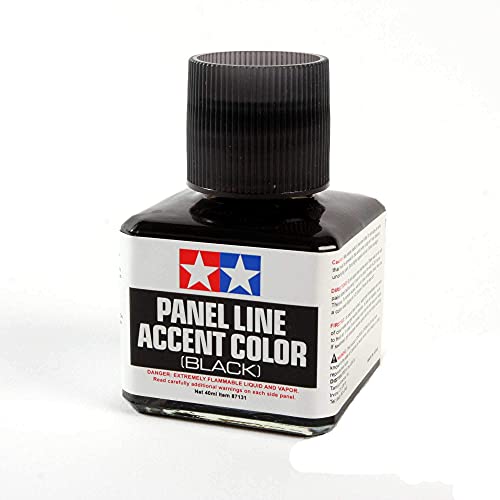
Just paint it on the panels and try not to get it in the groove, then apply the enamel liner and wipe away whatever got on the varnished panels? Will the highlights, etc need to go on first or will the acrylic paint stick well to the gloss varnish? Then, after it's all said and done, do I need to finish with a more matte or semi varnish so the model isn't so shiny?
Sorry about all the questions, I'm a bit of a perfectionist!
Clear 2 piece Christmas ornament bulbs off amazon?
Seekingtag Clear Plastic Fillable Ornaments Ball - 100mm Pack of 10 Individual Ornaments https://www.amazon.com/dp/B017VXXXHU/ref=cm_sw_r_cp_apa_i_XhtSCbGEG24K9
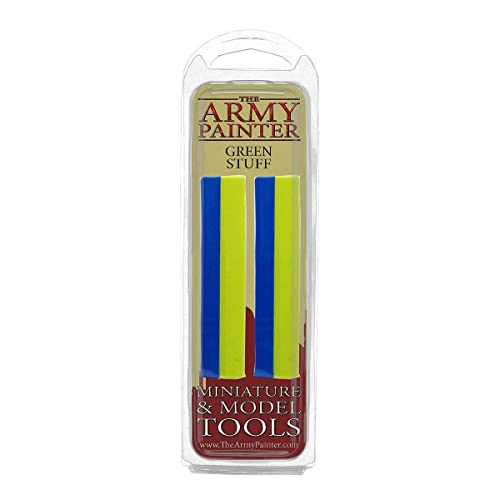
Basically silly putty? It’s a masking putty that’s a bit more pliable than silly putty. I rolled out little “snakes,” flattened them, and then wrapped them around the models to mask off areas….
Here’s the link where I got it: https://www.amazon.com/AK-Interactive-Elastic-Masking-Putty/dp/B083LK58BF/ref=mp_s_a_1_3?crid=3CFZCIUXYFU6K&keywords=ak+camouflage+putty&qid=1643095899&sprefix=ak+camouflage+putty%2Caps%2C170&sr=8-3
This is where I got the files from: https://cults3d.com/en/users/mrshinbbles/creations
There's more than just broadsides on this person's profile too, so download away! 😄
Also, ty for the suggestion! Good thing I only have synthetic brushes from the dollar store lol
Thanks! I'm scratch building a whole 3d printed army. STL files are available at my cults page https://cults3d.com/en/users/davidmckenzieart/creations
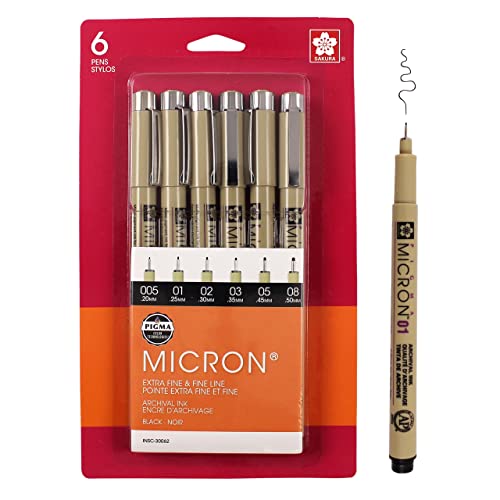
These are what I used - Sakura Pigma Micron drawing pens set, (Size: 005, 01, 03, 05,08, Brush tip) black fineliner artist pen (Pack of 6 pen) https://www.amazon.co.uk/dp/B07BWJ53R9/ref=cm_sw_r_cp_api_glt_fabc_MSTS9SH5KB6659ZTT1CF?_encoding=UTF8&psc=1
Something I was going to share with you on Saturday that I just learned (and got one for you), that others in this thread might appreciate. I picked up this cheap Calligraphy Dip Pen Set for $12. With the .004 nib, it picks up Agrax Earthshade like a dream and allows you to drop it exactly where you want it in razor-thin lines, with almost no need for clean-up. It is pretty slick.
Something I was going to share with you on Saturday that I just learned (and got one for you), that others in this thread might appreciate. I picked up this cheap Calligraphy Dip Pen Set for $12. With the .004 nib, it picks up Agrax Earthshade like a dream and allows you to drop it exactly where you want it in razor-thin lines, with almost no need for clean-up. It is pretty slick.
I cheat and use this:
Panel Liners for Gundam kits
Still have to repaint over some areas, but it's usually a one-touch thing and you are done. It goes immediately through any panel recesses you would like to get into and usually keeps everything clean. After that, all you do it a touch up and should be good to go!
Otherwise, as mentioned, just thin down some washes, go over the model on the recesses you want to get in, and then go over the panels that you want to keep the original colors, and do the same coat of paint on it.
I am building my first crisis suits right now and I have to say don't be intimidated by magnetizing them. It's super easy. I found this guide. Get a nice pin vise, (I like this one) some 1/16 x 1/32 magnets, a 1/16 drill bit, some super glue, and something to press the magnets in. Push a thumb tack in to start the hole and just keep drilling and checking the depth until the magnets will lie flush. Then just put a tiny bit of glue in and press the magnet in. The biggest challenge will be to keep the direction of magnets consistent. I have a little magnetic rod that I use to press them in that's marked on one side with tape. The tape side is for pressing in to the bodies and the other side is for weapons.
God I feel you about the alignment and warping.
I have three Hammerheads and each one has needed Tamiya Extra Thick cement and excessive clamping for days afterward.
If you're not already, I cannot recommend enough a small air compressor, airbrush,, and hood for this stuff. Even if you're not doing big projects and vehicles, it massively improves the coverage and preserves detail for your primer and basecoat, to say nothing about actual shading or highlighting.
https://www.amazon.com/Terrain-Miniatures-Landscape-Artificial-Railway/dp/B07H92VPGM/ref=mp_s_a_1_6?keywords=static+grass&qid=1662490326&sr=8-6 that’s the item! They are a bit long per strand so you can use something to cut them in half if needed
I was daunted at first but it's super easy to do and it's great being able to switch out loadouts based on the army you're going up against.
Here's the magnets I use - https://smile.amazon.co.uk/gp/product/B007JTKHR6/ref=ppx_yo_dt_b_asin_title_o00_s01?ie=UTF8&psc=1
Plenty of YouTube guides to magnetising too if you need advice.
If you really can't be bothered magnetising, and you have friends who're cool with you just saying "this counts as x, y, z" then feel free to lue. But bear in mind if you go to games store or want to get involved with tournaments in the future, there can be those who insist on WYSIWYG and then you're stuck with whatever loadouts you built them with.
You actually helped me find what I was looking for with the brand name. I found this..
https://www.amazon.com/TAMIYA-America-Airbrush-Needle-TAM10325/dp/B08KGYTBQF
The gun is 115 and the needle is 15.
Thank you! I went on Amazon and got a pack of 3mm magnets and a 3mm hand drill. Then it was just a lot of drilling and super glue lol. There are a lot of videos on YouTube about the actual process.you could probably us smaller magnets like a 2x2 but I used 3x2
These are the ones I got AYGYIYH 200Pieces 3x2mm/(0.12x0.08 Inch) Magnetic Push Pin, Refrigerator Magnet DIY Multi-Purpose Office, Dry Erase Board, Whiteboard, Personalized Multi-Function https://www.amazon.ca/dp/B07FYC8H7X/ref=cm_sw_r_apan_i_YZ7RYEWJD72049TJ8B3H?_encoding=UTF8&psc=1
Honestly even on my stormsurge, I use this magnetic sort of sticker paper from Amazon. Magnetic Sheets with Adhesive Backing - 5 PCs Each 8" x 10" - Flexible Magnetic Paper with Strong Self Adhesive - Sticky Magnet Sheets for Photo and Picture Magnets, Stickers and Other Craft Magnets https://www.amazon.com/dp/B07V5WGK3R/ref=cm_sw_r_cp_api_i_Y2ZSQ3E2HWB11HJJM9KX?_encoding=UTF8&psc=1 Just stick the bases to it, hobby knife around, and you can transport on a baking sheet or metal carrying case.
Use these little ones for the guns: https://www.amazon.com/dp/B07G3TSMGM/ref=cm_sw_r_apan_i_5M84DTQ8D1WB9ZJ9XT0T?_encoding=UTF8&psc=1
Use these bigger ones on the arms (you will want stronger magnet to make sure the guns don't flop around): https://www.amazon.com/dp/B08NZSL2V6/ref=cm_sw_r_apan_i_8316WDNT4HCDR4W1XTTG?_encoding=UTF8&psc=1
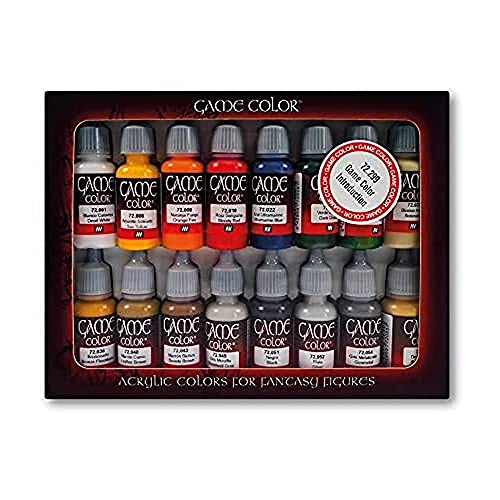
I agree with what others said about the affect not being just one paint or layer, but if you are just looking to get a specific color for your army ans not the airbrush affect of the army, I had a great expirence getting this Vallejo paint set (which is on sale?!) the droppers let you mix colors easily unlike the games workshop paints. You can just record a few different drops of colors and see what you like best!
https://www.amazon.com/dp/B002UZZ06M?psc=1&ref=ppx_yo2ov_dt_b_product_details
Pretty cheap, I use these for all my armies. And under beds for vehicles and bigger stuff.
Magnet Expert® 3mm dia x 1mm thick N42 Neodymium Magnet - 0.19kg Pull ( Pack of 50 ) https://www.amazon.co.uk/dp/B007JTKMA8/ref=cm_sw_r_apan_i_X05SNN3NTJTDSR62VJJ2?_encoding=UTF8&psc=1
From amazon - cheap and strong. Fits most situations - I've used these for crisis suits, ghostkeels, hammerheads etc. They also do 2mm diameter magnets if needed.
For hand drill, I just use a cheapo one from a craft shop with a selection of drill bits, never let me down.
If you're magnetizing them you can use these magnet sheets. They have an adhesive on the bottom that you can stick to the bottom of the bases of the drones. https://www.amazon.com/dp/B00B2SE5KA/ref=cm_sw_r_apan_glt_i_ECGWP37MGE9AA86Y3VDQ?_encoding=UTF8&psc=1
The paint looks a little thick. Make sure you're using a wet palette like this. You put some paint on it, mix a little water into it, and it stays workable for a few hours without drying out so you can paint a model or two. If you're using GW paints, I highly recommend this product as well... converts their terrible paint pots into droppers, so you can put a drop of paint on the palette, mix it up with some water, and you're good to go. Great for use with airbrushes as well if you ever want to get into that later.
I have both a filament and resin printer and I can say for printing figs you want a resin 3d printer, I have a Mars 2 pro and have been very happy with it. Resin runs on average $35 for a 1000ml bottle which goes further than you would think. There are upkeep costs on 3d printing you should be aware of parts on the machine will need replaced over time, LED screens on resin and extruders for filament but if you plan on printing a fair amount of stuff it's worth the investment.
Micron Art Pens. The classic outlining lifehack. Take the small tip and run it back and forth through the lines until you reach your desired darkness.
https://www.amazon.com/Airbrush-Clamping-Standing-Alligator-Modeling/dp/B07MH8FQD2
I use something like this (although without the rubber tips, just metal) and clamp the magnet. Mine have flat metal bits on the bottom too that I blutak onto my bench as I pick them up individually as I go. Super handy, I bought them for shits n gigs along with my airbrush, but they are actually super super handy. I also use them upside down with blutak on the flat end and spray, clipping the end to a bit of cardboard for drying.
I specifically use this glue for anything that breaks off, for basing, and for doing metal to metal or metal to plastic, this is the best glue ever but it is very brutal to your skin compared to plastic glue.
It's only this one specific bottle type that works. Any other dap product that is not this bottle will simply suck and waste your money.
I'm pretty sure this is what I have. It was a present so im not sure exactly but it looks the same.
Yes I did The Army Painter Brush-On Grey Primer - Non-Toxic Water Based Primer Paint Surface Preparation for Tabletop Roleplaying, Boardgames, and Wargames Miniature Model Painting- 18ml https://www.amazon.com/dp/B07RGYL121/ref=cm_sw_r_cp_apan_glt_i_W3MNTSA2PNKBQSXRVZN3?_encoding=UTF8&psc=1
Its actually gloss varnish Vallejo Acrylic Paint, Gloss Varnish https://www.amazon.com/dp/B001JJZDSK/ref=cm_sw_r_cp_apan_glt_i_BMBYRY5WHHJ97GTNDJG6?_encoding=UTF8&psc=1 and I use it to protect my minis from scratches and stuff
Isopropanol and cotten buds. Isopropanol alcohol is absolutely the best thing for stripping minis. I don’t soak them I get a jar of clean alcohol and brush it onto the mini let it sit for a minute then rub it off with a Cotten bud. It’s fine as most people don’t clean the resin properly especially in the gaps so paint tends to come away easy. My mate just chucks them in with the plastic minis, he’s never had an issue but I’m not that brave. You can buy isopropanol on Amazon. Trade Chemicals Isopropanol Alcohol IPA 99.99% 500ml https://www.amazon.co.uk/dp/B08FCK988C/ref=cm_sw_r_cp_api_glt_i_85JY4GNQF07BH3XQZYW3?_encoding=UTF8&psc=1
It’s actually called streaking grime. It’s very cool, it’s an enamel that you coat the entire model with. Then you use mineral spirits to wipe off the raised areas. Gives a very cool look. Check it out here
For VOCs, you want something with a carbon filter and a high airflow rate. This is the one I use, but as long as it has a carbon filter it should be ok.
I stripped paint from plastic minis like that using:
- pure (96%) lab grade iso propanol (you can buy it on amazon):
https://www.amazon.co.uk/Hexeal-RUBBING-ALCOHOL-Isopropyl-Isopropanol/dp/B08BCP1ZBV/ref=sr_1_2_sspa?crid=1852CSQFAAV0A&keywords=isopropanol+lab+grade&qid=1644316382&sprefix=isopropanol+lab+grade%2Caps%2C58&sr=8-2-spons&psc=1&spLa=ZW5jcnlwdGVkUXVhbGlmaWVyPUEzU1JSM05KVVA1WDBGJmVuY3J5cHRlZElkPUEwMzA4OTA0MlMzWVlSSVJPMk1TRSZlbmNyeXB0ZWRBZElkPUEwMTM0NTUyMTdSOE9NRE03QlRLVSZ3aWRnZXROYW1lPXNwX2F0ZiZhY3Rpb249Y2xpY2tSZWRpcmVjdCZkb05vdExvZ0NsaWNrPXRydWU=
- old toothbrush
the process essentially looks like this:
- pour some isopropanol into a plastic box
- put the model in (or models)
- close the lid
- keep it closed for few hours or even a day
- then open, and start gently scrubbing with an old toothbrush, the paint will just com off nicely.
Use latex gloves when doing it, but generally isopropyl is safe-ish to contact with skin, unless you are allergic or something, but it definitely won't burn you or anything if you accidentally touch it. It does have a strong , quite unpleasant smell, so perhaps open a window when you do that :)
https://cults3d.com/en/3d-model/game/the-enlightened-battle-mech-helm-mk100
Here is the link to my Cults Store, I'll have a link to my shapeways momentarily, just setting up the product now. Any questions please let me know.
the flamer is from /u/thekyle1231 who posted it on reddit and was nice enough to list it on cults when i asked about it, see here
3d printed in resin
I would look into other drilling options if you can. I use this little hand drill and it works pretty well
Mr. Pen- Hand Drill with 10 Drill Bits (0.6-3.0mm), Jewelry Drill, Resin Drill, Mini Drill, Hand Drill for Jewelry Making, Pin Vise Hand Drill, Hand Drill for Resin, Micro Drill Bit, Mini Drill Set https://www.amazon.com/dp/B08BJ9WDMH/ref=cm_sw_r_cp_api_glt_i_6M13YC7Q94P1A6CNBW2N?_encoding=UTF8&psc=1
I guess you could do a power drill but that might get away from you and is dangerous if you intend to hold the model in your hand while you drill
There are a lot of ways to go about building that base. But if it were me, I think I’d actually buy some miniature bricks and lay the full pattern down, for best effect.
https://www.amazon.com/Hiawbon-Dollhouse-Miniature-Landscaping-Accessories/dp/B08L8M5X5V
get a electric mini drill and a 2mm drill bit, along with 2x2 magnets
although i wouldn't recommend the one i linked, i try to tighten the thing as much as possible but the drill bit randomly goes loose
Well it says "Temporarily out of stock", so perhaps it will become available again sometime soon.
Could try calling around to FLGS.
Here's 2 in stock. Bit pricey tho.
Tamiya’s basic file set has lasted me through almost 8,000 points - cheap as dirt, too:
TAM74104 Tamiya Tools - Basic File Set - Smooth Double-Cut https://www.amazon.com/dp/B00CE3L96K/ref=cm_sw_r_cp_api_glt_fabc_A282549NT1N47JCBXE07?_encoding=UTF8&psc=1
I used these magnets:
POWER MAGNET STORE 2mm x 1mm N45 Tiny Neodymium Rare Earth Magnets good for craft, hobby, warcraft, magic etc pack of 50 https://smile.amazon.co.uk/dp/B01929N6NW/
And this pin vice:
Pin Vise for Resin Casting Molds, LEOBRO Steel Hand Drill, Resin Drill with 10 PCS Drill Bit, Precision Hand Drill Tools for Epoxy Resin Arts Crafts, Wood, Clay, DIY Resin Keychain Jewelry Making https://smile.amazon.co.uk/dp/B07Y18JCNW
I'm really happy with both of those purchases. Very easy to use!
https://cults3d.com/en/3d-model/game/space-communist-lionfish
That's where you can get the file individually however for a sub to her patreon she releases exclusives and other models monthly.
You should be able to find someone to print them for you. I found it cheaper than spending 40 odd quid on 1 single hazard suit from forgeworld? For the file and three prints you can probably get it cheaper and the quality is brilliant. :)
It's a 3D print, the file is available on https://cults3d.com/en/3d-model/game/space-communist-lionfish to buy or you can sub to her patreon and she releases new stuff monthly, got a bunch if variants and proxy types on there. Just have to find someone who can print them for you.
a lot of these models are available on my cults page for 3d printing! Im working on a full army of available models. https://cults3d.com/en/users/davidmckenzieart
Hi Grevous, yeah I printed that suit myself. The designers name is Poyper and prepare yourself because he's got some really awesome stuff. He sells digital models i think the model cost me 12.50euro but it was so worth it. Here's the link ...enjoy :-D https://cults3d.com/en/3d-model/game/space-communist-starfish
War and Peace is free on Librivox, along with tons of other cool stuff (Poe, Lovecraft, Mary Shelly). Listening to books while I paint is definitely my favorite way to relax.
So, in stories they have used numbers; (page 70/73) https://www.docdroid.net/dwpTimc/expanded-tau-lexicon-2018-ver-21-pdf
But you could also use colours and reflect these in painting in some way ( page 72/73).
:)
Dewalt Tstak stuff is working pretty well for me. Its modular and the linked one has a big handle and the top bit is great for dice, pens, tape measure or what ever smaller stuff.
You can get a bunch of different sizes that just stack and clip together. If you want to line one with metal for magnetized bases, go for it. Want you line it with foam and make your own layout, do it
I haven't tried oil washes yet. I did use panel liner on my first batch for the combat patrol box. I'm going to try some their muted colors next - https://www.amazon.com/Liquitex-3699355-Professional-Acrylic-White/dp/B07HQ26ZMD/
Can I share my absolute best tip for this. Try these:
SAKURA - Pigma Micron Wallet - 3 Black Pens POXSDK3 https://www.amazon.co.uk/dp/B00GS8HO34/ref=cm_sw_r_apan_glt_fabc_7RGN76QBQTWF0K4WA985?_encoding=UTF8&psc=1
Or something similar. The nib fits in the panel lines perfectly and you can just run the pen along. I just wish I'd found these at the beginning of painting my army. 😁
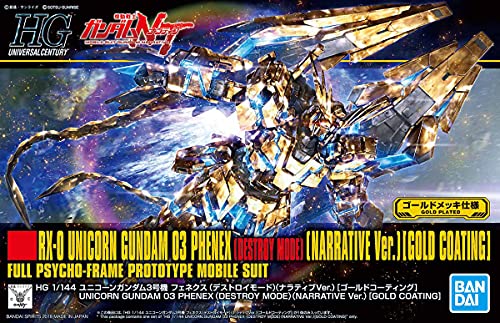
If you want a cheaper option, they released a line of Gold Unicorn Gundams that have a reflective metallic finish that would be indistinguishable from real gold for a much cheaper price https://www.amazon.co.uk/Bandai-Unicorn-Destroy-Narrative-Coating/dp/B07FTG1DLQ
Sadly the legitimately gold plated versions were limited release contest prizes
http://glimited.blogspot.com/2016/05/list-top-10-most-expensive-gundam-model.html
But you can get models that LOOK like they're reflective Gold plated for £60
https://www.amazon.co.uk/Bandai-Unicorn-Destroy-Narrative-Coating/dp/B07FTG1DLQ
Here is the battlesuit uploaded. Just as a heads up, it may be bigger than the official GW coldstar since I don't have the official suit (3rd Ed player here with a lot of old school models). Please let me know if I need to rescale the suit to match GW proportions!
https://cults3d.com/en/3d-model/game/space-communist-mobile-battlesuit
Enjoy!
Sniper, gun, marker and stealth drones mixed from a bunch of different STLs I've found on thingiverse and cults3d. I've just made a cults3d account to upload them here:
https://cults3d.com/en/users/kohiproduction/creations
Enjoy!
Just created a cults3d account to upload the drone files here:
https://cults3d.com/en/users/kohiproduction/creations
​
Enjoy!
https://cults3d.com/en/users/El_Mutanto/creations
This is the guys page because all the different part are in separate files. Like the helmet file includes 40 different helmets. Theres even upgrade kits for chaplains, librarians, and so on.
It might be a bit gauche to comment my own post at this point (I'm still learning proper reddiquette) but for posterity, here's the materials used:
- Citadel Corax White - spray for prime/base, and a pot for touch-ups.
- Villejo Model Color Azure
- Villejo Model Color Black
- Villejo Model Color Gold
- Villejo Model Color Flat Red
- Villejo Model Color Flat Blue (for lenses, they don't really show in the photos)
- Citadel Mechanicus Standard Grey (for the highlights on the backpack)
- Citadel Nuln Oil (washed over black areas)
- Citadel Agrax Earthshade (diluted 1:3 with Citadel Lahmian Medium, then applied into recesses and washed over the gold.)
Thoughts: It bares saying that I'm standing on the shoulders of giants to get my first model looking this good: from this community to official video guides to my FLGS, I had plenty of help. Villejo colours are all from this starter set, and I'll be using more of them to experiment with colour schemes. Still need to finish decorating the base (plan is Astrogranite followed by a Praxeti White drybrush and a Mechanicus Grey rim). The nuln oil doesn't really show on the black areas, Villejo black is a bit too much of an absolute black for that - I might experiment with using the grey for the machinery on my crisis suits and see how that looks after a nuln oil wash. Thanks for all the encouraging comments so far, I'll keep sharing my other squads as I get them painted up!
This is what I use. I fit 1x4", 3x3", and 1x2" pluck tray in mine. the 4" is big enough for a riptide laying down (mine has the gun magnetized, that had to come off to fit), with room left over. You could probably fit 2 in there. The 3" ones have commanders, devilfish, broadsides, and piranhas, with drones squeezed in with them where possible. 3x10 man breacher squads and 3 stealth suits fit in the 2" tray
I hated trying (and usually failing) to cleanly panel line my tau with washes until I realized it’s 10x easier and cleaner just to use a small micron pen, you can even get them in different colors:
I used the thrusters from backback in this Iron Blooded Orphans Accessory kit.
I cut the ball joints on the kits backpack off and attached them to the crisis commander's normal backpack because I didn't see a way to easily mount the whole backpack.
I use these: Marietta Magnetics - 10 Magnetic Sheets of 8.5" x 11" Adhesive (30 mil) Create your own Magnet! Flexible Peel & Stick Self Adhesive for Photos Crafts Stamp Dies Signs & More https://www.amazon.com/dp/B01IRQZ2L0/ref=cm_sw_r_cp_api_glt_fabc_TY3H1B5NFEDK3KSYX66P?_encoding=UTF8&psc=1
They are thicker than some of the other ones on Amazon, and work very well. I can hold my box upside down and shake, and the models do not come off. The key is to have no gap between the magnet on the base and the sheet, so measure and see what works. I use 4x2mm magnets and those seem to work well for most bases, but bigger models will require more magnets.
I recommend these. They are the perfect size for most 40k models and they come with a matching drill bit.
I recommend investing in some good Vallejo paints. Citadel paints are not the worst paints on the market, but they have a lot of problems. The pots they come in are defective, and they’re hard for beginners to work with.
This basic set of Game Color has a beautiful red, as well as all the other paints you’ll need to get started. There are some wonderful tutorials on YouTube to help you out, particularly by Sonic Sledgehammer and Midwinter Minis. Remember to thin your paints, and good luck!
https://www.amazon.com/Game-Color-Intro-Set-16/dp/B000PHCTRK
Deryun magnet 300pcs mini Magnets Small Magnet Tiny Magnets Miniature Magnets Little Magnet Small Round Magnets, Tiny Magnets for Crafts,magnit,mini Magnets for Crafts https://www.amazon.com/dp/B084NZVDQ3/ref=cm_sw_r_cp_api_glc_fabc_71gZFbA37KAM8
would anyone say that this looks decent? seems to have good reviews but I’m unsure and wanted a better opinion
Amazon. This here is the exact one I'll be getting https://www.amazon.com/dp/B07FY5YMHW/ref=cm_sw_r_cp_apa_i_ZIkmDbSB3ZK3P 10$ for two sizes of magnets in about 400 total magnets this exact posting was recommended to me when I first started asking around.
As suggested already... I use a metal tool box. Picture here with with 5 hammerhead/devilfish. I also use it for Tyranids, so bas on a Trygon being about the same height as a Riptide (as I own Trygons but don't have any Riptides) I know they would fit but they have to be magnetised to the side.
I used to use these Feldherr Soft Foam cass from Amazon but then I recently swapped to running pretty much fully mechanised lists and the tool box can just handle more.
Well here is the link. If this is a breach of the T&C's then can a moderator please delete this comment/post
Didn't post before as I'm not sure I was allowed to
I can give you a dump from paint rack!
PAINT SET: T'au Empire
Base - Sand: Pallid Wych Flesh - Citadel - 9092 Agrax Earthshade - Citadel White Scar - Citadel - 9035
Base - Bushes: Athonian Camoshade - Citadel Ogryn Camo - Citadel - 9066 Militarum Green - Citadel - 29-24 Creed Camo - Citadel - 29-23 Dark Angels Green - Citadel - 29-20 Pallid Wych Flesh - Citadel - 9092
Metal: Screaming Bell - Citadel - 9033 Warplock Bronze - Citadel - 9034 Agrax Earthshade - Citadel
Armour: Incubi Darkness - Citadel - 9012 Coelia Greenshade - Citadel Sybarite Green - Citadel - 9057 Gauss Blaster Green - Citadel - 9158
Trim: Zandri Dust - Citadel - 9017 Agrax Earthshade - Citadel Screaming Skull - Citadel - 9068 White Scar - Citadel - 9035
Under Armour: Skavenblight Dinge - Citadel - 9089 Grey Seer - Citadel - 21-54 Agrax Earthshade - Citadel
SUBSET NOTES: Drybrushed Highlights
Sept: Ratskin Flesh - Citadel - 9020 Ungor Flesh - Citadel - 9074 Agrax Earthshade - Citadel Wraithbone - Citadel - 21-53
Glow: Genestealer Purple - Citadel - 9045 White Scar - Citadel - 9035 Dechala Lilac - Citadel - 9154
Lenses: Abaddon Black - Citadel - 9027 Mephiston Red - Citadel - 9004 Wild Rider Red - Citadel - 9041 Fire Dragon Bright - Citadel - 9039 Flash Gitz Yellow - Citadel - 9037 White Scar - Citadel - 9035
water : Sotek Green - Citadel - 9054
Battle Damage: Dryad Bark - Citadel - 9024 Stormhost Silver - Citadel
Columns on Bases: Pallid Wych Flesh - Citadel - 9092 Apothecary White - Citadel - 29-34 White Scar - Citadel - 9035
Powered by paintRack v1.32.0.2 for Android by Courageous Octopus! Get it now on Google Play at https://play.google.com/store/apps/details?id=com.courageousoctopus.paintrack
Something like this works well for chains: https://www.amazon.com/WXJ13-Silver-Stainless-Lobster-Jewelry/dp/B075FPDNFD
You can also find cheap plastic versions at craft stores.
For drapes/banners, you can buy some cheap fabric (or old t-shirts), cut it to the size you want and then use paper maché to keep it in place.
I personally went down the route of buying some plastic stackable boxes, putting a magnetic sheet at the bottom and then putting magnets in all my bases. It's kinda expensive with all the magnets you need, but it's way easier and less prone to breakages than the foam lined carry cases they charge the earth for.
The only breakages I've had with this technique were a couple of oldschool crisis suits and broadsides cos their ankles went. Classic.
This is the brand/style of box I use, they come in all different heights, so I have a mix of short ones for infanty and tall ones for big bois
Why not both? Amazon still has the holiday battleforce for $144
I tend to use something like 1mm x 2mm magnets for crisis weapons. Uk has a much better option on amazon, but this is the closest i found in a quick search.
https://www.amazon.com/Magnet-Expert-F321SC-50-Samarium-Cobalt/dp/B00TACKXV0/ref=sr_1_1?keywords=Magnet+2mm+dia+x+1mm&qid=1579015508&sr=8-1
Welcome aboard! I recommend downloading the Citadel Paint app. It has very easy to follow tutorials as well as color recipes.
https://play.google.com/store/apps/details?id=com.gamesworkshop.citadelpaint
As for the model itself, to give it a more defined look, you're going to want to do some Edge highlighting. This is a more Advanced technique that takes a little bit of brush control, so I recommend practicing on either test models or an inconspicuous spot like the back of a leg. The Citadel app also gives a great example video of this as well.
> Feldherr boxes
I use their cardboard ones, and greatly recommend the 72 + cubed, and the 144 unit boxes. The 180 box one was just too small, it's probably better for world war 2 games with smaller dudes.
With the 72+precubed box I can get fit anything as big as a stealth suit into the infantry slots, and the bottom precubed portion is deep enough that I was able to make slots for a hammer head, and 6 crisis suits standing up, with an extra slot for miscellaneous weapons.
If I were to do it all again, I'd giverserious thought to the metal magnetic cases.
For the moment then i'd highly suggest holding off on doing the crisis suits. Or at least dont assemble with weapons yet.
For a tenner plus a bit of super glue, you can pick these up:
Pin Vise: https://www.amazon.co.uk/gp/product/B07CTG5CR5/ref=ppx_yo_dt_b_asin_title_o01_s00?ie=UTF8&psc=1
Magnets: https://www.amazon.co.uk/gp/product/B00WGA59AI/ref=ppx_yo_dt_b_asin_title_o02_s00?ie=UTF8&psc=1
It's a super fast process and all you need to do is drill a hole with the pin vise into the mounting point of the gun on the arm, and into the mounting point on the gun, then glue the magnet in. Just need to check you have the magnets around the right way. The whole process takes around a minute per magnet and it will save you an absolute fortune which, as you're on a budget, is something you'll really want to do.
If you absolutely don't want to magnetise, then i'd say don't worry about it. If you're just playing friends just set them up however you think looks good and just inform your friends what weapons you're using in the game. They don't have to be represented on the model if both parties know what the loadout is in a casual game.
Amazon. This here is the exact one I'll be getting https://www.amazon.com/dp/B07FY5YMHW/ref=cm_sw_r_cp_apa_i_ZIkmDbSB3ZK3P 10$ for two sizes of magnets in about 400 total magnets this exact posting was recommended to me when I first started asking around.
Note I am in US.
I also use 1/16" magnets for the subsytems, if you feel like magnetizing those.
​
https://smile.amazon.com/MagNetSol-Magnets-Drill-Combo-100pcs/dp/B074SYK3H4
https://www.amazon.com/dp/B07MVD261C/ref=cm_sw_r_other_apa_i_Rax2CbS3ZHR3Y
Im using these. The bit is kinda trash, but it works. Pro tip: make sure all of them are facing the same direction on the model! I didnt and it makes getting the right loadout difficult.
This brush ?
These are what i have, besides a couple of citadel brushes that are frayed and ruined (my fault ) https://www.amazon.com/Miniature-Brushes-Detailing-Painting-Watercolor/dp/B01M7UFLP5 some of these brushes seemed fine others split immediately
the lining is super simple. do your paint job as normal, then when its all dry go over the panel lines with one of these https://www.amazon.co.uk/uni-ball-Eye-Medium-UB-157-Rollerball/dp/B00842INKA
EDIT: better link
im still relatively new my self but just basic card drawing(https://www.amazon.com/Warhammer-40-000-Datacards-Empire/dp/B07BJ9BLPS/ref=sr_1_1?ie=UTF8&qid=1545636495&sr=8-1&keywords=tau+data+cards) would add something just to start with.
For just Infantry, I really really like Feldherr cases. Fits lots of infantry and very small and light. Cheap for what you get.
For Suits I like to use Game+ Bags. They offer a variety of pluck foam trays at different heights to place your models in. I've found them to be really handy for the weird shapes of things like Broadsides and Devilfish. It's not a perfect solution, because you'll need a whole new tray for a single models sometimes, like a Riptide, but I haven't found anything I like more for the cost. Beyond the foam trays, the bag is really nice for carrying your codex in the back pocket, dice & templates, etc. in the side pocket.
The Paint Rack Android app has some great color tools for things like this. You can throw in (or scan the barcode of) any color in any brand and get some really useful things out like complements and triads.
Try a wet palette so your paint doesn't start to gum up. And try a larger brush (it holds more moisture so the paint on tip doesn't dry as quick)
I personally bought a wet palette on amazon and a winsor & newton series 7 size 3 brush and it's really helped smooth my paint out. The clumps are coming from paint drying.
People who say "expensive" brushes aren't worth it and that you should be Michelangelo before buying anything nice are pretentious.