
What are
/r/fixit's
favorite Products & Services?
From 3.5 billion Reddit comments
The most popular Products mentioned in /r/fixit:


The most popular Services mentioned in /r/fixit:
eHow
How-To Geek
Amazon
Slickdeals
Instructables
IFixit
Hiren’s BootCD PE
ConsumerReports.org
Lifehacker
Walmart
Alibaba.com
IGN
Google Groups
Best Buy
Costco
The most popular reviews in /r/fixit:
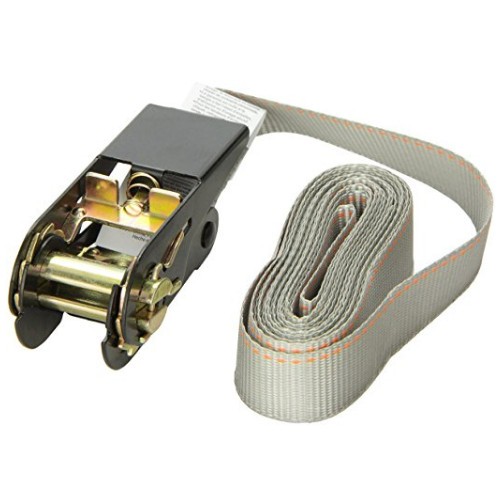
Break off the old link from the strap, use a big key ring and a small carabiner- here’s some examples so you can get an idea. Hardware store or any place they make spare keys will have these. You can find them much cheaper than these examples.
Here’s one for $10 that looks fancy
Evelots Ceiling Clip-on Light Bulb Shade-Lamp-Dome-Antique Diamond Cut-Acrylic https://www.amazon.com/dp/B00VAK4AI2/ref=cm_sw_r_cp_api_glc_fabc_wMl.FbMX4S5TG?psc=1
Here's a video that shows you how to replace the stick:
Here's a replacement stick with the tools you'll need:
https://www.amazon.com/Joystick-Assembly-Replacement-Nintendo-Controller/dp/B07D4DHQD2
It's easy. I've done it myself.
I had this problem when I worked nights and slept during the day. Very noisy apartment neighbors. I ended up getting some really good ear plugs, a large fan for some dull noise, and picked up an alarm clock for deaf people. It has a vibrator extension that goes under your pillow.
Once I started doing all that I never had an issue sleeping again. This would be easier/quicker than messing with your door.
Good luck.
This is the alarm clock I got:
https://www.amazon.com/Sonic-Alert-Extra-Alarm-Shaker/dp/B000EX7LNM
If you're not feeling like the elbow grease these work wonders
You most certainly do not need to repair it from behind if you're not so concerned about a pristine appearance. Look, people here don't seem to know anything about fiberglass repair. I know it's a little bit of a lost art it seems. Please don't make assumptions that you don't have any background knowledge on. Here is a fiberglass repair kit that is more than enough to do the job for $36. It comes with a Bondo spreader, which will work great as the only tool necessary, besides that pair of scissors. It can all be done from the front side and it doesn't need to be painted or filled. I am giving knowledge on the economical repair for the poor. Can I not share my knowledge as a poor? https://www.amazon.com/dp/B00H2WG2NS/
It's called cane webbing. Fairly easy to replace and you can purchase kits like this. Here's a basic video on how to do it too.
I dealt with one of those recently. You pull away from the socket. It is a firm pull. No twisting.
Pull from the base though (not the glass). It requires enough force that it is way too easy to pull the glass off the plastic base. Both need to come out together.
These are the bulbs I am thinking this is. Or at least this style.
Sylvania 10 Pack 20890 CF42DT/E/IN/841/ECO 42-Watt 4100K 4-Pin Triple Tube Compact Fluorescent Lamp, White https://www.amazon.com/dp/B00PB4A8RA/ref=cm_sw_r_cp_api_i_G0YnCbRG4R8HC
Go to your local hardware store and buy a screw extractor kit or a left hand drill bit, they're cheap and easy to use(i'll put an example at the end of the comment) punch the screw um the middle and with the extractor kit(instructions should be included) or with a left hand drill bit just drill ir out, it should come right of, i used the following kit to remove a broken crankshaft pullei bolt with success:
If you have any other questions, ask, im here to help.
We had this happen. There are tiny invisible cracks in your ice trays. They drip out slowly leaving only a bit in ice tray. It was making me nuts! We bought some silicone bottom ice trays that wont split or crack. So awesome
You can try this stuff called epoxy sculpt. Try to apply it as smooth as possible and then sand if and buff when it’s dry. It comes in grey and should blend in really nicely. The stuff is really strong.
It's a dowel nut or barrel nut. You could get a tap and cut your own threads. The fine pitch makes me think it is metric. Measure the male threads with a caliper or take it to a hardware store to compare its thread. My guess is it's 6mm. https://www.amazon.com/dp/B00KRY0AS6/ref=cm_sw_r_cp_apa_glt_fabc_FGVXC585GC0ABB5VBRDA?_encoding=UTF8&psc=1
I'd suggest gutting all the LEDs and replacing them with a few strips of LED tape. Would be much faster and cheaper.
Someting like this:
You can look around and find smaller strips that will fit. You'll end up rewiring the entire lamp but should be pretty easy.
Seconded on the heat shrink. Something like this
Also- don't use a lighter, use actual heat from an extra hot hair dryer, or a heat gun. A lighter will give you a hard time and just burn the tubing- source: I've burned tubing with a lighter.
That's a delta faucet, the handle is a dead giveaway. You can get a rebuild kit at any hardware store. Pop the red/blue indicator off and there's a set screw you can loosen to remove the handle to get to the guts. You will need a rebuild kit that ideally comes with the ball, seats and springs, and the top seal. It is will most likely come with a tool as well to help take it apart.
Edit: you can also just call delta and they will send you parts for free. It's lifetime warranty for everything
Edit 2: video https://youtu.be/AipEYoYiIhc
Edit 3: example of parts you will need https://www.amazon.com/dp/B0195V2NKE/ref=cm_sw_r_cp_apa_i_coAeCb6BS97NC
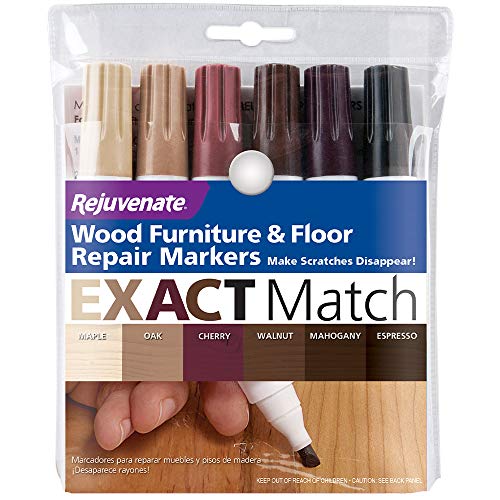
The Decocolor Gold (not the same as the Decocolor Gold Leaf) metallic marker pens work nicely for this sort of thing, and in my experience, give some of the best uniform coverage of the various metallic markers out there.
Just some questions for you and /u/brokenleko
1) I've never used gaffer tape, is this okay? Or maybe this?. Or anything on amazon.ca that you guys would recommend?
2) Is there any harm to just cutting it off? I'm unlikely to land on it when running
I used this and it worked great. You shoot the screws in from the top and the little tripod thing breaks them off under the floor level.
I personally would put some chalk or spackle in that there hole and sand it a bit when dry (of using spackle)
Then cover the whole counter top with a nice contract paper. Land lord will be none the wiser.
amazon contact paper for kitchen
You can get different colors
I’ve used a perforating tool and spray/soak the wall with vinegar. Still a nasty job. At one point I just skim-coated the entire wall (on top of the wallpaper, since it was bonded by Satan) with a thin coat of joint compound.
RUST-OLEUM 02966 1Head Wlpr Remover Tool https://www.amazon.com/dp/B0000DI7WP/ref=cm_sw_r_cp_api_i_dcwcEbQSCYFSX
You could try some self-fusing tape. It would give it a kind of tennis racket grip look, but it would be inexpensive.
To fix this spoon correctly, you will need a Wenger 16999 Swiss Army Knife Giant. Be sure to read the comments of this knife for directions on how to fix this spoon, save a baby whale, and to become a country/western singer.
You can buy a metal eyelet and reinforce the tear. 401Pcs 1/4 Inch 6mm Grommet Eyelet Pliers Kit, Grommet Tool Kit with 400 Metal Eyelets in Gold and Silver, Eyelet Grommets, Portable Grommet Hand Press kit for Leather/Clothes/Shoes/Fabric/Belts https://www.amazon.com/dp/B0932SZCGV/ref=cm_sw_r_cp_api_glt_fabc_56AB2PM7RJ6J8X1N7CZZ?_encoding=UTF8&psc=1
Plastic welder that uses specialized staples. https://www.amazon.com/dp/B08XB5WJX3/ref=cm_sw_r_cp_apa_glt_fabc_0E59CBT0YWV9K4ZY8YNR?_encoding=UTF8&psc=1
I have this one and the kind that just looks like a soldering iron and, with them , you can work miracles on plastic.
it looks to be stranded copper wire and you already did the hardest part by finding the issue (if this is the issue). your best bet
- Get some wire about the same gauge (size)
- Strip off the sheathing on both sides with a tool (this tool might work)
- Decide how you want to spice the wires together (video how to splice wires together). If i was you i would do a linemens splice on both ends (heat shrink already on) and then solder it. I would not want it come apart again and would not want to do the job a 2nd time or have it fail in the future.
- Heat shrink and/or wrap in good electrical tape.
You might have to reset the error for you car when done. that is different for every car and you need to google it.
If your solvent doesn't come packaged with tool for removing the sealant then you should pick one of those up too - they're a couple of dollars and will save you a lot of headache on even a little job like this.
You can get the scraping tools with rubber covers for applying the sealant neatly too. This isn't a specific recommendation, but here's an example of what I mean. Some people find it easy to apply silicone very neatly with a wet finger, but personally I've always found it tricky (especially in corners - which admittedly you don't have to worry about here) and that type of tool was a game changer for me.
Lots of people don't bother with the solvent and tool and just scrape at the sealant with a knife. Not only will that mark your tiles, but the proper kit is cheap and will make the job so much less frustrating.
This is the best I've ever used. Can spray more than 20 ft off ground and kills instantly on contact. It's a little on the expensive side, but this is what I use at work, and I won't use anything else....and then burn the sucker, when its not attached to the house.
Get a roll of silicon weather seal tape that will glue to the wall and cover the gap. Something like this, but make sure the size is right:
https://smile.amazon.com/dp/B07XRVBSYC?psc=1&ref=ppx_yo2_dt_b_product_details
If you have calipers.
With all the variants you can have (SAE Coarse, SAE Fine, Metric, whitworth, reverse, ACME, etc.), unless you deal with fasteners on a daily, it's pretty easy to mistake one for another. There are a few crossovers between metric and SAE that are very close, and unless you're careful and deliberate, it would be an easy mistake to make.
Threat checkers are much more foolproof, and are an inexpensive way for the casual DIYer to ensure the proper match. Hell, the time saved from one unnecessary trip to the hardware store (or one unnecessary order from an online place) is well worth the cost of a thread checker.
I prefer this style, myself. I keep one hanging in my shop.
https://www.amazon.com/CKE-Bolt-Thread-Checker-Metric/dp/B08L38BJDS/
I have a pair of these sheers like this. Take a look at the photos in the link and you might be able to figure it out.
I think what you have on the bottom is backwards. I would focus on the two parts and the spring mechanism first and then there is a lock that keeps them closed.
You could use a food safe epoxy to seal it. Get it at any hardware store. Mix the two parts and you have about 20min to work with it. Spread it evenly across the bottom and let it dry upside down for a few hours. You can even add color to it.
https://www.amazon.com/dp/B087PKBYLX/ref=cm_sw_r_cp_apa_glt_fabc_F9SMHNCNXHA0SKV5PC7N
WEN 61721 18-Gauge 3/8-Inch to 2-Inch Pneumatic Brad Nailer with 2000 Nails https://www.amazon.com/dp/B079FCZT4N/ref=cm_sw_r_cp_api_i_5H8cFb1WC3646
Here is a kick ass nailer for only $35. Have fun OP
According to this post from another user, it's a part from a bar stool. I wasn't able to find your exact part, but you might try contacting these people to see if they can help you.
I love the idea of wicking it in as another has recommended, however there is a couple types of super glue that are made for glass, and they are great if used properly.
Replace. Hardest part will be finding the match. Search for butler tray hinge. Sewing machine table hinges may work too but have an extra joint.
Edit link.
JB Weld isn't great for plastic. OP, you want to use a two-part "plastic welder" epoxy similar to this one. I've used several types and this brand works very well.
https://www.amazon.com/Devcon-22045-Plastic-Welder-Dev-Tube/dp/B003NUGL9S
As this part is going to support weight, you'll want to add reinforcement.
1) Scuff up the existing plastic with rough sandpaper or score it greatly with a razor blade. This gives something for the glue to grab on to.
2) Get reinforcement strips of plastic. Sturdy zip ties will work. Cut them to whatever length you need. Repeat step 1 on those.
3) Mix up the plastic welder and get to work QUICKLY. It starts to set in about 3 minutes and is unusable in 5-10.
Squish it into the scored/scratched areas. Make sure the plastic reinforcements you add will hold in whatever direction the repair is going to be stressed (pulling down, sideways, whatever).
Put on more than you think you're going to need. It's going to look like hell, but you want it to HOLD.
Buying a replacement part is definitely your best bet, but if that's not an option you can attempt this repair.
> blow any debris off the fins
You should be spraying your condenser fins with a can of coil cleaner and rinsing it off with a hose once every year.
This *might* work. If possible, disassemble the red piece from said pokeball (also, release any pokemon living inside). Use denatured alcohol and a soft rag to slowly remove the red coating. No coarse materials or the chrome is destroyed. Underneath is a vacuum chromed coating that will hopefully stand up to this. Next, without touching with your bare hands, use an adhesion promoter like this. Careful nice light coat or it will run. Finally spray 3 light coats of this. You want one light coat, wait 10 minutes, 2nd coat, wait ten minutes, third coat. Don't handle until the next day (yes, it's tempting). The red paint is very thin so you may want to practice on something like a pepsi can first. If you get runs on the ball you will have to start all over again. Best of luck, and God bless!
If you don't want to do any electrical work you could get a motion sensor light socket. Just remove the bulb, screw this in, and screw the bulb into it, and cut/tie-up the cord. Now the lights go on when you come into the pantry and off when you leave.
Yeah, I was going to suggest Mother's - not that I've used it on chrome faucets.
Amazon.com: Mothers 05101 Mag & Aluminum Polish - 10 oz: Automotive
Paper shade. You could probably make your own too with some wire and paper.
Push pin holes are easy to fix and hardly noticable. I doubt you would even need to paint, and if so, it would a tiny dot of paint. Unless you're looking directly at it, you wouldn't know that there used to be a hole there.
Lemme find the product:
https://www.lowes.com/pd/3M-Nail-Hole-and-Small-Hole-Repair/50199661
I don't like that product as much as a previous product that had a nice angled tip. I can't find the angled tip product any more. Lemme check Amazon.
Oh, this is close. Get this stuff instead: https://www.amazon.com/Amazing-GOOP-310010-Filler-Adhesive/dp/B000PI7TVK/ref=sr_1_6?ie=UTF8&qid=1484318989&sr=8-6&keywords=nail+hole+filler
What happens is you squeeze a bit into the hole through the center of that large tip, and then you pull down, effectively wiping off the surface but leaving the filler in the little hole. Works great.
I suggest Endless Loop Ratchet Straps like this one on Amazon. One size fits all and, once you decide what length works best, you can cut it to that size and make it more user friendly.
My opinon is that by the condition of the roof, a repair would be a waste of money unless you are trying to fix a leak. Looks like it may be time for a new roof.
Acticle: "Curling Shingles - When shingles reach the end of their life the roofing reinforcement can contract and cause the roof to “Curl”. If the roof is over 15 years old and the shingles are curling it could be a sign that it is time to replace the roof. If the roof has been recently installed and the shingles are curling it could be a sign of a roofing manufacturer defect and should be inspected for determination."
Without replacing? Hmm. You could crack the rest of the tiles to match. :)
There’s crack kits you can buy that include a palette of colors to mix match your tile. You could start there.
As someone with several cats, trust me, get a fabric shaver. Basically it cuts extended fabric, works great on clothes, blankets, cushions, etc. https://www.amazon.com/Conair-Fabric-Defuzzer-Battery-Operated/dp/B008I25368
Ouch, putting a piercing tap inside a wall is not a good idea. You should get a valve box like this one. https://www.amazon.com/dp/B00FL6RIZI/ref=cm_sw_r_cp_apa_glt_fabc_JM86WVHB236BJ7H6WPET?_encoding=UTF8&psc=1
I fixed a pair of heels with rubber taps from Amazon, super glue, and an exacto knife rubber taps
Will be hard to find the exactly one, but you can change all of them... Link to amazon
On this seat this isn’t actually true. It’s odd but the cover is actually what holds the seat to the mounting bolt/bracket. You mount the black bracket, slide the seat onto it and the cover actually holds it in place. Here is a pic of mine disassembled.https://i.imgur.com/9Rhlcn5.jpg I think this is probably the cover but they are pricy on amazon atleast. KOHLER K-1109092-0 Hinge Base Cover https://www.amazon.com/dp/B007B11XUW/ref=cm_sw_r_cp_api_i_EGmbBbGB73XKP
I agree with framerotblues - it looks like it should be a part of the pump assy, but they don't sell pump internals, so it's hard to tell. fwiw, your replacement pump's only $30 at Amazon.
https://www.amazon.com/General-Electric-WH23X10030-Washing-Machine/dp/B00OMR17TA
Don't listen to them. Here you go.
Make sure it's compatible with your vacuum first, but most of those Dyson parts are really interchangeable.
>. If the manufacturer can’t provide you with one you’re SOL.
Not really true. I bought a third party battery and plastic "bin" piece for my Dyson stick vacuum off Amazon. Just type in the model number. Looks like Amazon even sells the official one now
Not sure what you are trying to do, but this might be helpful.
https://www.amazon.com/dp/B08VWCSG7G/ref=twister_B096X2GZ94?_encoding=UTF8&psc=1
If you are trying to do something electrical and are turning off the main instead of the individual circuit breaker, this can help you find out what breaker you need to turn off.
Maybe try this?
OXO Good Grips Silicone Drain Protector for Pop-Up & Regular Drains, Grey, One Size https://www.amazon.com/dp/B00OCEBMFM/ref=cm_sw_r_apan_glt_fabc_N7V448AY38CX5S64RX36
There's also something called Tub Shroom that works amazingly but you need to have a drain that you can insert it into
If it's under warranty, then I would go that route. If not, and you don't mind buying soldering equipment, you can try to fix it yourself. However, the pin pitch (distance between what needs to be soldered) can be tricky for a new comer.
You can look at some soldering tutorials to see if it's something you want to tackle: https://www.youtube.com/watch?v=6rmErwU5E-k
Then, you can buy a replacement port (assuming you were unable to locate the one that fell out) and attempt the soldering job. Be sure to remove that battery before you do.
I think this is the right connector (USB mini), but you may want to compare some pictures of the cable you have to confirm. https://www.amazon.com/QMseller-Female-5-Pin-Degree-Socket/dp/B07G9FW4QQ/ref=sr_1_5?dchild=1&keywords=mini+Usb+Port&qid=1624542796&sr=8-5
Yes, take the plastic case off (remove the screws, be careful with the screen, may have wires awkwardly placed) many charger jacks are soldered "through hole" so the bottom of the board will show where the solder is broken. Newer boards are "surface mount" where the solder is on top, but usually with jacks there is enough of a "tab" to see where the break is and extra solder can be added.
And yes, the alternative is external battery charging, like this: https://www.amazon.com/dp/B07L2PF2T4/ref=cm_sw_r_cp_apa_glt_fabc_C3KA5ESRHQ7NARH2QV12
You can check the pin measurement to verify it's JST
You can also find a 2nd battery to do quick swaps
That should work, but you really don't need anything fancy. A basic double tube from the local hardware store or amazon will do just fine.
Replace it and the sub-flooring underneath.
​
Related, our stupid bulldog just peed on the living room rug with hardwood underneath for the 2nd time. 2nd time we caught it quick enough that it didn't seep through the cheap Amazon 7'x10' carpet like this one: https://www.amazon.com/Maples-Rugs-Area-Artwork-Collection/dp/B0711Z45QF
​
Unintentionally, we discovered this rug's non-slip bottom is sealed with a rubber layer that appears to not let liquid get through it.
Try the mattress on the floor like someone suggested to rule out the mattress. We got a platform from Amazon after having the same problem and it's been amazing.
This is what we got: Zinus Demetric 14 Inch Elite... https://www.amazon.com/dp/B00TGHI56Y
> WD-40 isn't actually a true lubricant. WD stands for "water displacing" and its main use is as a solvent or rust dissolver. The lubricant-like properties of WD-40 come not from the substance itself, but from dissolving components. ... WD-40 can be a good substance to start with — it can help clean up rust or other grime.Mar 9, 2012 When Should I Not Use WD-40? - Lifehacker https://lifehacker.com/5891936/when-should-i-not-use-wd-40
There are plenty more references that say you're wrong, that was just the first one.
And if you still want to stick to your guns... argue with these people: https://www.reddit.com/r/YouShouldKnow/comments/1wa9a6/ysk_wd40_is_a_solvent_not_a_lubricant_mistaking/
Not me.
I read something a while ago about using dental floss and superglue. The gist of the idea was to drill a series of very small holes on both pieces of the broken plastic, such that the holes line up like the holes for laces on a pair of shoes. Then use a needle and some dental floss to sew the pieces back together. After each round through the holes you put a layer of super glue over the dental floss and let it dry (all layers of the wrapping should be part of one contiguous piece of dental floss).
Oh shit here's a similar article
That's a short term fix that won't last, and will be much worse to try to get off.
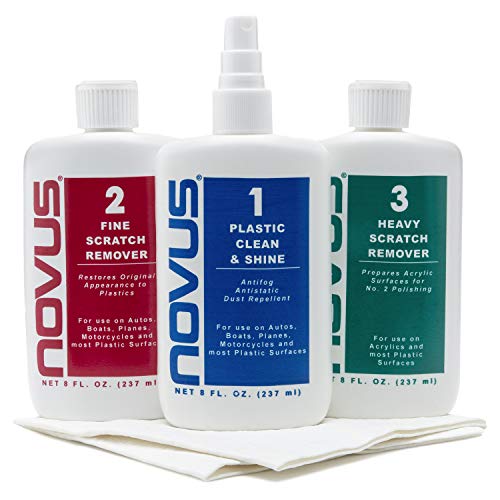
There are several retail products for headlight restoration that require manual sanding/polishing, that do a fair job, but ones with a drill option are much easier and usually provide better/longer lasting results.
manual: Turtle Wax, Sylvania, RainX, one of the 3M kits, and a few no-names.
power drill: 3M, Meguiars, Mothers
Use some painters tape/masking tape to protect the painted areas around the lights, especially if you use a drill option.
I like the 3M kit to use with drill. Tried the Turtle Wax and RainX, they did okay, but like I said, lots more work and not quite as good results.
Consumer Reports tested some kits in Feb 2014 online:
http://www.consumerreports.org/cro/headlight-restoration-kits/buying-guide.htm
How much higher do you need it? If an inch or maybe a bit more, you could try these wheels.
NOTE: The above comment contains link(s) which have an affiliate marketing identifier:
amazon.com/DaierTek-125VAC-Waterproof-Automotive-Aircraft/dp/B07T6YNRZS/ref=asc_df_B07T6YNRZS/?tag=
That means that someone gets paid if you follow that link and make a purchase.
I am a bot, and this action was performed automatically. Please [contact the moderators of this subreddit](/message/compose/?to=/r/fixit) if you have any questions or concerns.
I'd suggest using heat and a piece of metal so you can melt both pieces at the same time and stick them back together.
A screw driver would probably work well for this. You're going to need to get it pretty hot, the type of plastic that kind of thing is usually made of has a fairly high melt temperature. We're talking something like 300F to start the melt process.
Where that's at and what function it does is likely to phase out any sort of adhesive repair you might try and some of these adhesives may not even properly bond to that type of plastic.
If you do the melt route make sure you're in a well ventilated area because some plastic can let off some pretty nasty fumes.
If you're going to prefer to try an adhesive I'd suggest This
It very much depends on how wet you mean by 'flooded'. I've no experience with damp rid, but it looks to be designed for humidity absorbtion, rather than flood absorbtion, so depends on how wet I guess.
The most important thing is ultimately ventilation - leaving the windows open as much as possible. If you have a secure place where you live, ideally in a breeze, and it's above freezing, leave the doors open all the time.
The brand Shop-Vac sell a small wet and dry vacuum which would be great to suck excess moisture from carpets before ventilation. Not sure where you are or if you can find it in stock, but I paid £30 GBP for one earlier this year for dealing with carpet stains and am very happy with it. And it would absolutely suck 99% of moisture from a wet carpet.
If the sink moves, get something like this: https://www.amazon.com/CINCLIPS-NEVER-FAILS-Undermount-Installation/dp/B00O1HKYMW/
You don't want it to fail full of dishes.
If the ribbon idea doesn't work out, you could try supergluing a light statement piece over the nibbles. I was thinking something like this before I saw your comment about masculine details, but you could totally make it work with a pair of big chunky earrings? Maybe something like this (sans earring hooks) superglued over the bite marks?
If you're looking for more creative ideas, you might ask at r/upcycling.
Further to the excellent advice earlier in this reply, before repainting, use stain block on the water damaged area, then paint over that. Otherwise the stain will just reappear through the new paint over the course of 3-6 months or so. Any stain block product similar to this
put some bubble levels on the bed frame as you adjust it so you know when you have it exact
Use a sealant like this https://www.amazon.com/Red-Devil-0497-Adhesive-Squeeze/dp/B000BQO2UC/ref=asc_df_B000BQO2UC/ to affix the tile. Then apply grout to the gaps, after the sealant dries. Grout, alone, won't hold the tile tightly.
I swear cast iron pans where created just to start arguments.
Get yourself a stainless steel pan unless you want to cook eggs.
And one of these bad boys. https://www.amazon.com/dp/B07CTHPJYK/ref=cm_sw_r_cp_apa_glt_fabc_FVT2Q686SHYTKS1RTA47?_encoding=UTF8&psc=1
There is no reason for someone to use cast iron unless your using it as body armor in a old wild west shootout.
https://www.amazon.com/gp/product/B01EAMB1W4/ref=ppx_yo_dt_b_asin_title_o00_s00?ie=UTF8&psc=1 A person recommended this on another subreddit, what do you think?
Looks like they make one for plastic: https://www.amazon.com/J-B-Weld-8237-PlasticWeld-Plastic/dp/B003S2E4UE?ref_=Oct_s9_apbd_orecs_hd_bw_bNWtBT1&pf_rd_r=NEQR18CPMWVTC6KTGGVV&pf_rd_p=1a4a0f7d-8e1c-5eee-ac8f-658a8bfbc279&pf_rd_s=merchandised-search-10&pf_rd_t=BROWSE&pf_rd_i=21557050011
If that was my fridge, I would use this putty, it hardens like steel. Easy to use, it's like 2 part clay and just mix it together briefly and put where you need it. You can just cover the hinge hole and drill a new hinge hole into the putty.
I’d use one of the two part putty tubes such as this one to form a nice patch into the hole. Get it on both sides and smooth it out the best you can while trying to avoid making ledges for water to collect. You can file it down later if you want to, but easier to do it before it is dry where able.
I feel like if you did it properly it would be fine. If you want you could buy some mending plates as well:
All the other replies are much better permanent solutions, just figured I'd link this because it was kind my initial thought as a temporary cover-up.
You will need to immobilize the break, like splinting a broken leg. Reinforce it with a bit of spring steel and wrap it well with friction tape like https://www.amazon.com/3M-3407NA-Friction-0-708-Inch-240-Inch/dp/B001AXF416 Stretch the tape tightly.
It will never look the same, but you will keep the use of the headphone. Tape is black, matches the color of the original.
Iron Out spray. We have iron in our water and the spray cleans the stains in about 10 seconds. I also put the powder in with our water softener salt and it makes the rust stains not build up so quickly.
You can fill the indention with a “plastic wood” filler and then sand and paint it. It’s like $4 at Walmart.
Here’s an option from Amazon
I would prefer to have this section replaced, but I received some quotes that seem quite high, so right now replacing is not in the cards.
I will look at Akemi. Thank you for that.
​
By any chance have you heard of this epoxy? Was eyeballing this as a fix
You may want to try "never fall" sink brackets.
The Never Fall Sink Repair Kit System – Granite Man Products
That's an oak floor, and the tannins (soluble acids) in the floor have reacted and darkened the wood. They can sometimes be a few mm deep, depending on how wet/how long it was in contact. Tannin stains in oak can be mostly gotten out by careful bleaching. When I have to do it, I use a two part bleach/hydrogen peroxide system like this:
Which can be brushed on in two seperate passes for precise control.
If you go that rout, I suggest using a very diluted solution and doing just a little bit at a time, over several days, with multiple applications, neutralizing the bleach and letting it dry thoroughly between applications. Otherwise, it's very easy to go from having a dark spot to having a light spot, or from a dark spot to a matching spot with a lighter halo around where the dark spot used to be. It's better to sneak up on it slowly.
I went on Amazon and I think I found the exact type Upholstery Chenille Saxxon Floral Leaf Drapery Home Fabric The Yard 56" Wide (Treasure) https://www.amazon.com/dp/B01HSGVFRK/ref=cm_sw_r_cp_api_fabc_tA1UFbT8Y6ZFS?psc=1
What model is your Maytag? The water likely comes from the freezer coil defrost process, but the ice comes from a clogged drain plug forcing the water to drain into the freezer compartment instead of into the evaporation pan. It's a known issue with Whirlpool.
I did this repair on a KitchenAid brand refrigerator recently, but they are likely the same since both are manufactured by Whirlpool. Once you have the part it's an easy process and takes about 30 minutes.
Part on Amazon - https://www.amazon.com/Whirlpool-W10619951-Drain-Tube/dp/B0156NFUV4
Note that the replacement part is a re-engineered part from Whirlpool to address the clogging issue so it will be different than the currently installed part.
Video on how to repair - https://www.youtube.com/watch?v=Tk24ISRzSRs
This will get you started.
It's an RJ11 6P4C (6 pin 4 connection) jack. You can find them all over. Here's a 20 piece on Amazon:
https://www.amazon.com/Vertical-Mounting-Modular-Female-Connector/dp/B00E6QICFE
Check Newark.com and Mouser.com as well.
If you can still return them, do so. If not, grab a set like this from Amazon. Way more than you need for this job, but these things are very handy to have around. Surepromise Pack of 30 Sets 17mm Poppers + 3 Tool Punch Die Snap Fastener Press Sewing Leather Craft https://www.amazon.com/dp/B01APQ6KI4/ref=cm_sw_r_cp_api_i_8n-5Ab0312W0S
> What is the name for the two pronged input?
It's the "Samsung says F**k you, we're not going to use standards, we'll make you pay for an adapter" plug.
............See earlier reference to Hell.
Seriously, no idea, it's unique to Samsung. If you have HDMI available then an HDMI adapter will get the job done. Unlike the Samsung adapter this can be used on anything that has HDMI. Here's one on Amazon: HDMI Converter
This is weird but has 4/5 stars on amazon Nerdwax Stop Slipping Glasses as Seen on Shark Tank https://www.amazon.com/dp/B00O0CK2UM/ref=cm_sw_r_cp_api_i_BQ9qCb3YFT3V7
And there’s some other stuff like this Anti-Slip Glasses Ear Hook Grip - 3 Pack - Stretchy Fit Strap for Sunglasses and Glasses https://www.amazon.com/dp/B07FH7WDL9/ref=cm_sw_r_cp_api_i_iR9qCb2ZB73SX
Maybe would be worth it for you.
I'd probably get a hand crank barrel pump. Here is the first one that came up on Amazon to give you an idea. Lumax LX-1318 Gray Rotary Barrel Pump https://www.amazon.com/dp/B000MCZK1U/ref=cm_sw_r_cp_apa_i_i63rCb9C124NW
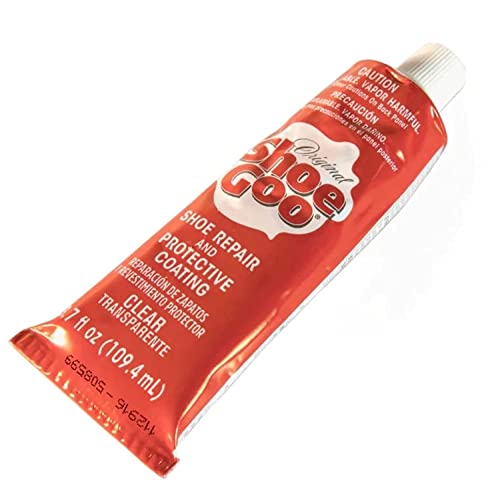
Easy fix with Shoe Goo.
Apply generously to both sides of that strap and squeeze some into the sole. Use a bamboo skewer or toothpick to spread it around. Clamp it in place for a few days to let it cure properly.
Just make sure to squeeze all of the air out of the tube before putting the cap back on or it will turn into a hard lump. That way, you will get many more uses out of a single tube.
You can buy a new shell and then move the guts to it. I found a nice turorial on how to do it. There are plenty of replacement shells on amazon for around $30, you can get pretty much any color you want!
I doubt it but you have to know WHY the gear sheared. is the motor locked up? At any rate, this new one will solve all of your problems if you do it yourself or you can of course, call a pro. I installed this one after my first one failed. Couple hundred bucks & approx 1 hour labor. Craftsman Garage Door Opener 1/2 hp Chain Drive, Security w/ Anti Burglary https://www.amazon.com/dp/B003YNGIZG/ref=cm_sw_r_awd_POHFub0DVE30Q
I'm no water softener expert, but a quick google search brought up this article. I'd give that a run through to make sure you aren't forgetting anything that might be hiding right under your nose!
You don't even need a window unit this is 12,500 btu and it stands on the ground and just plugs into an outlet