
What are
/r/homeassistant's
favorite Products & Services?
From 3.5 billion Reddit comments
The most popular Products mentioned in /r/homeassistant:


The most popular Services mentioned in /r/homeassistant:
Home-Assistant.io
hastebin
Node-RED
Mycroft
Hackster
Amazon Alexa
Cloudflare
IFTTT
OpenWeather
Healthchecks.io
Sweet Home 3D
Traccar
Docker
Let's Encrypt
Atom
The most popular Android Apps mentioned in /r/homeassistant:

Tasker

IP Webcam

BLE Scanner

Notifications for Android TV

MQTT Publisher Plugin

HTTP Request Shortcuts

Sleep as Android

Automate

tinyCam PRO - Swiss knife to monitor IP cam

RESTask for Tasker

Join by joaoapps

QPython3 - Python3 for Android

GPS Logger for Android
Button Mapper: Remap your keys

Reverb for Amazon Alexa
The most popular VPNs mentioned in /r/homeassistant:
The most popular reviews in /r/homeassistant:
IP Webcam is pretty well established. I've used it before, and it has a HomeAssistant integration. It exposes a bunch of sensors, including motion detection.
Do what i did.
Check everyone else's github pages ( https://home-assistant.io/cookbook/ ) and copy and paste from there. Trying to figure anything out on your own is going to slowly drive you insane.
The answer is: maybe
There's virtually no surge suppressor that will save you from a direct lightning strike, but they will go a long way to protect sensitive equipment from the kinds of surges that course through power grids during really bad storms. They're not expensive, even professionally installed - I had two of these ( https://www.amazon.com/gp/product/B01AQAKRSS/ref=ppx_yo_dt_b_search_asin_title?ie=UTF8&psc=1 ) installed by an electrician for a total of about $350. Given that I've got about 30 Z-wave switches direct wired in which each cost me about $35 it seems like reasonably priced insurance for the most common killers of the equipment.
Sorry for your loss OP :( I would sulk for days if that happened to me. Not even so much the cost of the gear, but the time invested in getting it right.
https://play.google.com/store/apps/details?id=com.joaomgcd.join&hl=en_GB
​
Great app and has an integration into Home Assistant and Node Red
Do not use RGB unless you're going to always have colored lights on because RGB does not create a pure white light. It uses red, green & blue to create white light and it looks horrible, something you don't want in a kitchen.
Instead use RGBW, this will be a more expensive LED strip but includes a pure white LED along with the RGB. Find the temperate of white light you like and you won't regret it!
You can then use a NodeMCU with WLED software at each strip to control all the LED strips.
What's going to take up the most room is the power supply, which will be a 12v or 24v AC to DC converter.
what i purchased:
https://www.amazon.com/gp/product/B01N2PC9KK/ref=ppx_yo_dt_b_search_asin_title?ie=UTF8&psc=1
And then use a mounting kit for LED strips because the sticky backing won't hold it up for long.
I was able to use this one: https://www.amazon.com/gp/product/B07L491F8K/
< $10 and identical hardware. I had to update the firmware with the xiaomi app first, but works fine now.
Using it with esphome on an ESP32
This doesn't quite fit your needs (more than $200, 16 channels, 1-3 phase) but in case anyone else is interested: I flashed an Emporia Vue with ESPHome and it provides full panel monitoring, completely local. It has been working flawlessly for about a year now.
As a fellow developer that uses NR, I would like to point out that NR has git integration built in. You must enable it though. Includes a diff tool so you can see exactly what changed.
Previous comment about flow meters is incorrect, they are In fact ultra cheap and the best way to go. Bonus is that you can measure water usage! I've been using this one with ESPHome for over a year now without issues.
Maybe $20 into the whole setup including ESP, sensor, couple of adapters from hardware store to make everything attach.
I have this GoControl GC-TBZ48 thermostat that is Z-Wave, so it's not internet connected at all. It's only controlled via Home Assistant via the Z-Wave USB controller in my server. It's exposed to Google Assistant, so I can control it with my Google Home devices and my phone as well.
I've done it both ways, it's far easier with a USB stick. Not only that, but you eliminate a possible point of failure by removing smartthings. There's a combo zwave and zigbee usb stick on amazon that you can also connect smart bulbs to.
Edit: Added a link
Thanks for helping it clarify. I guess we should have done a better job at explaining this in the podcast and blog post. Could have avoided a lot of angry posts.
I called it cloud and not bridge because I hope we can make it do other things too (see second question in FAQ)
https://www.reddit.com/r/amazonecho/comments/7a2np6/can_you_remove_smart_home_devices_from_alexa/
Looks like the answer is: You can do it from the web, but not the app.
I just bought simple Hunter 3 speed fans. Wired them to a z-wave wall fan switch. Work great. Full control from HA, full control from wall switch.
https://www.amazon.com/dp/B06XTKQTTV/ref=cm_sw_r_cp_apa_glt_fabc_1HBR357M9RTA0RXWSMYD
https://www.amazon.com/dp/B00DOQJHUG/ref=cm_sw_r_cp_apa_glt_fabc_5MYNT1JMBQNPEPB522QN?_encoding=UTF8&psc=1. any old school pull chain fan will do. Just use the chain to set the fan speed to high, then remove the chain and do all future control from the wall switch/HA. One of these I also bought the light kit and have that wired to a dimmer wall switch.
My new method is with 2 of these magnets and metal plates
Ditch whatever cameras and install these bad boys: https://www.amazon.ca/gp/product/B0797QYVHT/
I've gone through many, many cameras over the last 10 years. These things are excellent.
For devices a mix of Insteon and Z-Wave. Insteon for the robustness of communication, and Z-Wave for all the cool devices.
I made the mistake of buying a Z-Wave Yale touchscreen lever door lock thing. Garbage. Do not do this. Learn from my mistake.
Ecobee is looking real nice now. I wanted to switch even before, as I believe that Ecobee can be controlled locally.
*edit: The Nest thermostat was literally the first smart home device I bought and what got me started down this path. A couple years of education later, I'll be getting one of these: https://www.amazon.com/TRANE-Thermostat-Z-Wave-Works-Alexa/dp/B00SYPSIRU/
Agree, changelogs are important.
On a basically unrelated note… If you want to have the best time of your life Reading some notes you should do a quick “codekit app changelog“ search on Google (or click here https://codekitapp.com/updates/). That developer is awesome beyond my abs’ ability to keep functioning because of laughter.
Things like: > If you email me, "CodeKit breaks my site!" and it turns out you forgot to configure PurgeCSS, I get to put a MIDI of my choice on your website for a month.
You don't need anything other than your google home and your home assistant installation. If you want to use Googles native smart home capability you can use the Google Assistant component. This allows you to control anything, it will display as a light, switch, or scene in the google assistant settings.
If you want any other commands like "turn up the tv volume" you can use IFTTT with Google Assistant as trigger and a webhook to Home Assistant as action.
> mac: BT_B0:5C:E5:CE:B5:10
That's a bluetooth device. Per the Bluetooth Tracker docs: > Devices discovered are stored with ‘bt_’ as the prefix for device mac addresses in known_devices.yaml.
That's why it doesn't show up on your router. I don't use Bluetooth Tracker myself, but it seems like it's just auto-discovering a nearby phone that's discoverable.
I got these for my fans, works great , design for single swotch bur with independent light and fan control Inovelli Z-Wave Fan & Light Switch (Red Series) | ZWave Fan Control & Light Dimmer | Independent Controller of Fan Speed & Light Bulbs https://www.amazon.com/dp/B08665WJ2B/ref=cm_sw_r_apan_glt_fabc_8VSZY714RQT0N55EFDV8?_encoding=UTF8&psc=1
All dahua cams.
I have a custom server I built running unraid with 42tb of disk space and 32 gb of memory. This runs HA and everything else.
I have a mikrotik 24 port poe+ switch.
I built my own router running openwrt + wireguard on a small but powerful x86 machine with dual gig nics.
The rest is a series of zwave devices like door sensors, motion sensors, inovelli light switches, hue lights, an nvidia shield on a 77” oled with a denon avr with Dolby atmos. Anoth 75” Sony Bravia. An iPad wall mounted as seen here https://m.imgur.com/a/RXKGNyO MyQ for the two garages (I want To replace myQ with something local). Generac 22kw generator. A couple battery backups. Two wax-610 access points. A few arylic devices around the house for whole home audio. And a lot of other stuff I’m leaving out. https://www.amazon.com/dp/B08QMDHY9N/
I have a recessed outlet behind it with a perfectly fitting USB plug. Here is what I used.
Outlet: https://www.amazon.com/dp/B077Y4ZG7Q/ref=cm_sw_r_cp_apa_i_eCHdFbPP9TZZB
USB brick: https://www.amazon.com/dp/B07T82D4YF/ref=cm_sw_r_cp_apa_i_qEHdFb5YHSEGJ
https://home-assistant.io/components/http/
Make sure you enable x_forwarder in the http section. use_x_forwarded_for: True
In your nginx config, make sure you have proxy_set_header X-Forwarded-For $proxy_add_x_forwarded_for;
I know what you mean, I'm not a huge fan of the markup myself. I can offer you a tool to help with the typing errors however. I recently discovered Atom from GitHub. It's a plug-gable text editor and they just so happen to have a YAML package and several linters. I've been a fan of Notepad++ for years but Atom is becoming my new BFF. If you go this route, Atom makes it easy to open your entire config folder and I recommend taking advantage of its native GitHub functionality for source control.
To create a plan. Use a program to make the .svg of the plan. Inkscape is easy and free (https://inkscape.org/en/). Draw your walls and other static things. Then add icons or draw stuff that will been controllable (like a light bulb, or a thermostat). Make some text for sensors if you want. Now for anything that will be controllable or reading data, you need to name them the same as what you have in home assistant. For example a lightbulb icon must have the name light.kitchen.
As for multiple floors, I use two custom panels and therefore two "floorplans". My floor plans settings are in two yaml files....floorplan_downstairs.yaml, and floorplan_upstairs.yaml. I switch between them using flyout on the left...see images.
rPi's are great for the low DC power draw, allowing it to run for a long time without mains power.
Ideally everyone already has backups off their HA server. I'm using https://community.home-assistant.io/t/hass-io-add-on-auto-backup/99557 and http://duplicity.nongnu.org/ to back those archives up off-site. No matter what you're running you hopefully have offsite backups of your HA config.
Recovering from a dead microsd is as easy as reflashing hassio and restoring the backup.
Been using this for a few months near the bottom of the PetSafe water station. Tied into a Wemos D1 mini running esphome.
You should be able to make a snapshot and restore to the new server.
While you’re upgrading why not go all the way and get a low end NUC? It’s a little more cost for a lot more power and future expansion possibility. I use this one with a cheap SSD that’s way more reliable than the sd card in a pi.
https://www.amazon.com/Intel-NUC-Essential-Kit-NUC6CAYH/dp/B01MSZTD8N
I tried that out, and ended up using this instead. It's free and OSS, also has some nifty stuff like face / motion detection to turn on the screen
https://play.google.com/store/apps/details?id=com.thanksmister.iot.wallpanel&hl=en_US
Hass.io is NOT Hassbian and if you're seeing mention of it when you SSH in, then you haven't written the Hassbian image to the SD card. Follow the instructions here and I promise it will work: https://home-assistant.io/docs/installation/hassbian/installation/
On top of listed already - I'm using external service https://healthchecks.io/ to monitor my connection with HA. This way I can receive notification on Telegram when my internet is down (or HA died) and I'm outside. Can't do a lot with it, but at least I know something went wrong.
This post explains the change. Short version is that IDs are slightly easier to read now, and you can now change IDs manually in the ZWave configuration to work around conflicts.
The way I do this is with Tasker and Sleep as Android. After I get my bedtime notification, when I plug my phone in after laying down to sleep, Tasker sends out a REST API event to HASS which is tied to an sleep/shutdown automation.
> drawing more power than the QI charger could replenish
Maybe use sensor detectors to turn on the screen only when you are in front of it? Either with the proximity sensor, if you have one :
https://play.google.com/store/apps/details?id=novum.inceptum.proximity
or the front camera
That should cut the power drain, plus you could potentially turn it into a security camera/trigger for Home Assistant at the same time.
I'm by no means an nginx-expert but it seems to me that you're defining locations for each server which the subservices don't have. What I basically read is that nginx listens on port xyz and it should forward this request to three possible locations (sub-servers?). So if you open domain.com/hassio you'll be proxied to local:8123, which responses with domain.com/states for example. Since that location is not defined in your server config, it'll use the location /. As a result your browser request ends up in a mixed website like in your screenshot. At least that's what my logic tells me. So imho your options are: 1. Let nginx listen to multiple ports and pass each of them to one service at a time. 2. Work with subdomains and multiple certificates. 3. Define all possible locations.
You can read up on this here: https://www.digitalocean.com/community/tutorials/understanding-nginx-server-and-location-block-selection-algorithms
If an expert comes around, please let me know if I'm completely wrong.
Nest-like thermostat designed for LoveLace. Credit goes to https://github.com/ciotlosm/custom-lovelace/issues/4 who showed me this: https://codepen.io/dalhundal/pen/KpabZB Dal Hundal did an amazing job on it. All I ended up doing was wrapping the his files into a web component. It's far from done and I don't have a good way to really test it as I don't even have a smart thermostat. I'm going to be looking at how to simulate an thermostat entity so I can test this.
I plan on finishing it up by the weekend.
There are instructions for installing home assistant in a virtualenv. The point of hass.io is using images for specific boards or environments. Here is instructions on installing in a virtualenv: https://home-assistant.io/docs/installation/virtualenv/
Erm...do we really need a spammy 3 minute video on this? It's like stupid-simple. In-fact, you can follow the official instructions here in like 30 seconds: https://home-assistant.io/docs/installation/raspberry-pi-all-in-one/#upgrading
Yes! I have something very similar setup using HTML5 push notifications - this will work on any phone or computer you may have, OS-independent. Check the Actions section here. If you want more details, I'll be glad to help.
You can run it locally only and then your phone will sync as soon you enter your home wifi.
Someone made a home assistant assistant add-on for that as well:
https://community.home-assistant.io/t/syncthing-addon/320452?u=ajfriesen
I use Wiki.js. It's based on Markdown, it supports tagging, full text search (using elasticsearch), and I use it for all my documentation.
Each device gets its own page where I document where it's installed, what automations I have set up for it, what the device names & IPs are. I also include any notes, like any wiring quirks.
My favorite inclusion though, is definitely a PDF of the device manual.
You can change your trigger to fire on any state change - don't specify the 'to:'
Then you can use templating to check what the 'to:' actually is, and fire the respective action for each state.
https://home-assistant.io/docs/automation/templating/
https://home-assistant.io/docs/configuration/templating/
This should start you off since you asked to be pointed in the right direction rather than given the answer - but if you need more info just let me know :)
I'd suggest using the Ping device tracker and set up an automation script to trigger the smart switch off-wait-on sequence when the presence detection switches to 'Not Home' for the computer you're pinging.
All device trackers can optionally take configuration parameters that you can use to customize how often you're probing for connectivity, which can help identify a misbehaving router quickly, instead of waiting for a speedtest or other component that runs once an hour or whatever.
Try setting the delay for the nodes with the problem, like this:
zwave: customize: light.entity_2_0: delay: 5
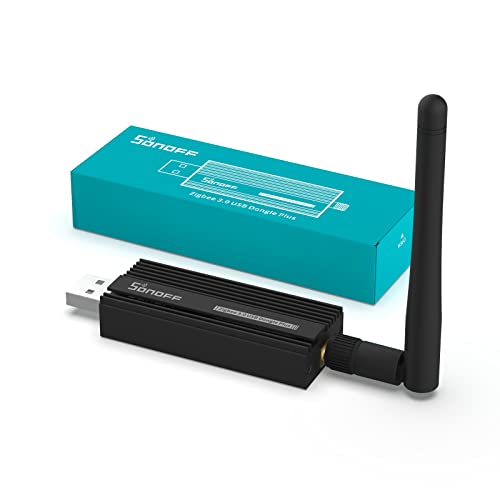
I personally really like this HUSBZB-1 stick, it's worked great for me so far.
I think it's worth getting the combo stick—then you at least don't have to buy yet another stick later if you ever want to add a few Zigbee devices.
For WiFi connected devices, just make sure to plug your device in using ethernet if at all possible, since it'll benefit from the additional bandwidth and not conflicting with other devices or Z-Wave & Zigbee.
Make sure you put the stick on an extension cable—it's best to keep it away from the main unit to avoid interference.
I have like 30 aquara sensors and the trick is get repeaters. Smart outlets or led strips, anything that's a zigbee repeater. Even if you don't use them for anything. It fixed so many sensors going offline issues. Without repeaters I could maybe get 10 up at the same time. But now I have no issues.
Aquara even has smart outlets that work pretty well for a TV or something. But I use mostly these https://www.amazon.com/dp/B08P89M8P9/ref=cm_sw_r_cp_apa_glt_fabc_32Z8RTWZGB49MER6CWGX They are cheap and work fine enough
Easiest way to do this is with ESPHome and a k type thermocouple sensor. You’ll also need to add a breakout board between the sensor and your ESP. The sensors come in at different max temps. The one I linked, for example, can measure/works up to 1000 C (1832 F) so it is ideal for a smoker/grilling situation.
Edit: disregard this message. I misread and thought you were asking for suggestions. Now I see you asked for use case scenarios and not parts advice. Leaving this up in case anyone comes across your post and is curious in regards to how to make their own sensors.
Amazon Fire Tablet for $40 and POE to USB for $22
/u/terrynova :
I recommend Reolink: https://www.amazon.com/Reolink-Outdoor-Surveillance-Security-RLC-420-5MP/dp/B07FQ2T89L/
Stay away from Ubiquiti unless you just want/need to stay in their ecosystem; their cameras are pretty expensive for the resolution/clarity they give. You can get a better picture for half the price with the Reolink above. If you DO go with Ubiquiti cameras, buy them directly from Ubiquiti; my friends got burned when 1/5 cameras was DOA and we didn't find out until it was too late to return it to Amazon. They tried to get it replaced via the Ubiquiti warranty but they refused because it wasn't purchased directly from them.
I've had one Dahua for a few years now and it has a clear image & is reliable, but it has a quirk where I can't login to the admin page with anything other than Internet Explorer. Any other browser will delete characters from the login fields as you type/paste.
I'm also a fan of these $30 1080p Wansview camera for indoors or protected areas: https://www.amazon.com/Wansview-Wireless-Security-Surveillance-Audio-K3/dp/B075KGNB58/
Saw this mentioned in another thread. I haven't tried it yet but the features list mentions MQTT or HTTP commands to control the device, brightness being one of the settings mentioned.
https://play.google.com/store/apps/details?id=com.thanksmister.iot.wallpanel&hl=en_US
On Amazon the 16-channel version is only $165, and the 8-channel ver is only $125.
https://www.amazon.com/Emporia-Monitor-Circuit-Electricity-Metering/dp/B08G37ML2R
that second one is beautiful. it probably wouldn't take much work to get everything restarted- if you swapped your syslog for elastic (though I don't know if this is available on the free tier) you could set up a metrics threshold alert that fires when it doesn't see packets on port {whatever} for {some period of time} and fire a webhook back to HA to turn on all your stuff
> https://home-assistant.io/components/device_tracker/
I wrote it to run standalone. I'm just starting with Home-Assistant and didn't realize it had something similar already. Thanks for the info. I'll check it out and see how my implementation differs.
https://home-assistant.io/components/device_tracker/
This is what you're looking for. Don't need to sign up for a third party service. This checks to see if a Mac address is appearing as connected to your router.
How did you go about getting the URL for your local radar from wunderground?
Edit:
Go to https://www.wunderground.com/weather-radar/united-states/
Choose your area, it wont be exact, but you can narrow it down later.
On the big map that comes up, click the station closest to you.
Next page, adjust your settings for zoom and what you want to view.
Right click on Save Image and copy link address.
Use that address in your HA camera config.
I don't know why this wouldn't be doable. One thing to note though is HASS doesn't have any type of group/security structure. So anyone with access to the webui would have full access to anything.
The compatible thermostats can be found here: https://home-assistant.io/components/#climate
As you pointed out those like Next and Honeywell both connect back to their respective companies and you point HASS to them.
There are some I believe that can be tied into the wifi and controlled directly with HASS but I don't have any direct experience with these.
I'm using a z-wave one for home, but that wouldn't be idea in your case as everything would be too far apart to all talk back to a single point.
You don't need to use mqtt. You can read the sensor state directly: https://home-assistant.io/components/sensor.dht/
Depending how you've installed HA you might need to add the homeassistant user to the gpio group to allow it to read the pins >sudo adduser homeassistant gpio
You'll actually connect your switch to the smartthings hub using their app.
Since (once properly configured) hass will communicate with the ST hub over MQTT and the ST hub will communicate with the switch, you won't actually have a zwave entry in your config at all.
Here's a fully walkthrough: https://home-assistant.io/blog/2016/02/09/Smarter-Smart-Things-with-MQTT-and-Home-Assistant/
Nice! Not 5 minutes ago I was trying to cast things through HA. I failed to cast anything from Netflix but I did manage to do pictures! Under "Developer Tools" in the main HA screen click the "Services" icon (the first one).
Domain:
media_player
Service:
play_media
Service Data:
{"entity_id":"media_player.NAME_OF_YOUR_CHROMECAST", "media_content_type":"MUSIC", "media_content_id":"http://www.mememaker.net/static/images/memes/4384239.jpg"}
I realize it says type "MUSIC" but that parameter doesn't matter and is required. The only thing you need to change from the example is the entity_id. Click CALL SERVICE and voila.
As for the map image, I also happened to find this today which shows you how to get the URL of the image of the map of your location: https://home-assistant.io/cookbook/google_maps_card/
Let me know how it goes!!!
Or you can use the built-in !secret directive.
For example in configuration.yaml:
## Zones ###
zone:
- name: Home
latitude: !secret latitude_loc_home
longitude: !secret longitude_loc_home
radius: 100
icon: mdi:castle
- name: Jess School
latitude: !secret latitude_loc_ub
longitude: !secret longitude_loc_ub
radius: 100
icon: mdi:school
Then in Secrets.yaml:
latitude_loc_home: 0.0001 longitude_loc_home: 0.00001
latitude_loc_ub: 0.001 longitude_loc_ub: 0.001
There's a time automation platform that you can use.
https://home-assistant.io/getting-started/automation-trigger/
Look at the Time Trigger section's code for automation 3.
I would do this:
- Organize the lights' states into 2 scenes
- Create a script that activates the first scene, waits 5 minutes, then activates the second scene
- Create an automation that activates the script every 10 minutes.
This will have the effect of toggling the scenes every 5 minutes.
If you have root I use this app https://play.google.com/store/apps/details?id=com.slash.batterychargelimit on the phone that I use as an alarm clock on my nightstand. i Just set it up to enable charging when the battery falls to 49% and stop charging when it gets to 51%.
Looks pretty sweet. If you want to tidy it up even a bit more you could get a 90 degree USB C ribbon connector and a USB C coupler.
Not sure you could fit it all behind the tablet because a QI charger is sort of thick generally but I use a 90 degree ribbon to QI pad for my iPad. I put magnets on my wall and on the back of my tablet so that I can take it off the wall when I want.
Rewired a majority of the main level of our 50 year old house with smart switches.
Used the GE Z-Wave switch for anywhere that we didn't have a three way switch.
And for those three way switches we used the Zooz Z-Wave switch. It was pretty sweet as you can only replace the first switch in your three way setup with the smart switch and re-use your regular dumb switches for the other switches. Once it installed the dumb switch will toggle the relay inside the smart switch -- very cool.
I've been having Tasker dial *3282# at 06:30 daily for a long time now. At first I was going to load it into a .csv file and just monitor it via Google Sheets but I figured let's add it into HASS.
Tasker dials *3282#, waits 30 seconds, copies the SMS contents onto the clipboard, then runs a python script via QPython3.
Regex queries are run over the message contents against a dictionary of users/number suffixes. Then the data is dumped into JSON formatted strings and POSTed to my HASS instance.
Next I'll be working on automated Emails or Push Messages to family members who exceed limits.
Sure, it's a little hacky but I can program in Python already. Once I work out a few kinks and sanitize the code I'll be posting the code to GitHub.
A Pi is a terrible choice for running HA on anyway.
I use one of these. It has a real SSD, not some silly USB dongle. It's (slightly) less idle power consumption than a Pi 4 + USB SDD, too. At $160 (with coupon), it's cheaper than a Pi 4 8GB + USB SSD + power supply + case.
If it died, I can just get another, since there's a million of them available.
The HA website really needs to quit promoting the Pi as a good choice, it's really not. Here's a $70 (with instant coupon) NUC clone, brand new, that just completely wrecks a Pi for performance and reliability.
Seriously, Raspberry Pi for running HA is just plain dumb these days. There's WAY better options for the same price, or cheaper.
An automation can have multiple triggers, so you could cut it down to two that way one for on, one for off.
Alternatively cut it down to one by using templates. An automation that triggers whenever the state changes and selects either the on or off service depending on the Roku's state in the action.
https://hastebin.com/rubimebuno.cs
Edit: Written it in hastebin. May need the spacing sorting I wrote it on mobile.
Sure! You have to use this link to generate the map: https://www.windy.com/-Embed-widget-on-page/widgets
Once you click on it, it should automatically insert your longitude and latitude at the end. Then you configure the attributes by clicking on the top right icon on the map itself, depending whether you want to see rain or humidity or whatever.
Then you use the link it gives you in the bottom left (everything after "src") in a webpage card (iframe). I'm actually using five different windy maps and cycle through them using an input select (those blue buttons above it).
hue: allow_hue_groups: false
I'm guessing you have hue setup via the discovery component, just add the above code to your configuration.yaml and it will no longer add rooms that have been setup with Hue, only the lights.
emulated_hue is practically broke at this point cause it no longer connects locally without an old version of google assistant and people have been having a lot of problems connecting with it. The good news is, is that Home-Assistant now supports Google Assistant directly with the Google Assistant component. It works better than emulated Hue and can differentiate between lights, switches and scenes etc.
Try setting up the Google Assistant component:
Instead of installing Rasbian and then installing Home Assistant, just install Hassbian: https://home-assistant.io/docs/installation/hassbian/installation/
Hassbian is just Rasbian with Home Assistant but someone has already done the work for you.
Once Hassbian is installed, there are some helper scripts installed: https://github.com/home-assistant/hassbian-scripts
For example, to install Samba and create a share for your Home Assistant configuration directory, you can run:
sudo hassbian-config install samb
So, I picked up a couple Digoo DG-M1Q's when they were $13 on banggood. They're about $20 now. But I wanted the same as you. Cheap IP cam for little image recognition projects.
They're OK. Only 2.4ghz WIFI and you have to use their App to set them up. The app requires a ton of permissions which made me nervous, so use a junker tablet or something. The quality is fine, nothing amazing.
Yes. I just so happen to have written a guide just for that.
I use EventGhost to launch SteamVR at my PC.
https://www.reddit.com/r/homeassistant/comments/6d2g58/getting_eventghost_to_talk_to_home_assistant/
- EDIT *
You can also use the webserver in EventGhost with HASS - use HASS Shell commands to hit the URLs https://home-assistant.io/components/shell_command/
+1,000,000 here. Ben is the reason I got into Homeassistant, and has taught me TONS about it. A lot of people share their configs on Homeassistant too, which help with things like this here, under "Example Configuration.yaml": https://home-assistant.io/cookbook/
I don't think there is anything to figure out. It's just letting you know that it's taking over 10 seconds to setup, (an eternity for a computer), not necessarily that it has errors to fix.
I think there is the ability to exclude: but not sure what this would be. Warnings?
Your mac should not have dashes in it, it should be either colon separated or not separated at all, like the examples.
> mac: 'B4:43:0D:CC:0F:58'
Sort of off topic here, but if you're storing time-series data like power usage, etc, you may want to look into a database more geared towards that. I've used InfluxDB in my day job, and it was super easy to tie into Grafana to get some pretty dashboards. It also should be less resource-intensive than MySQL.
Conditions are where you want to look.
Your automation should trigger when the device is home:
trigger: platform: state entity_id: device_tracker.your_phone state: 'home'
And there should be a condition to make sure it's dark out:
condition: condition: sun after: sunset
And then your action which will run when the device state is triggered and the condition is met:
action: service: switch.turn_on entity_id: - switch.light1 - switch.light2
I didn't test this, but you get the idea.
Have you looked at the customize or organisation sections on the website? https://home-assistant.io/components/group/
What you will want to do is put the devices in a group. You can mix and match as many different device types in a group as you would like, and name the group what you want as well, e.g. "living room", instead of "switches" or "lights".
I may be wrong, but the automation will trigger when the state changes to 'unknown'. In your case, it is initialized as 'unknown' and hence it is not triggering the automation. You may want to try the 'HOMEASSISTANT_START` event trigger to run the automation when HA restarts.
Forgot to mention you can do a manufacturer lookup of the MAC addr at https://www.wireshark.org/tools/oui-lookup.html
Just looked it up, and unfortunately you are correct. It's not an ESP (manufacturer comes back as Tuya Smart, not Espressif)
I've done about 20 transplants where I remove the Tuya module and replace it with an ESP, but most of those were replacing the WB3S Tuya module with an ESP-12 which is a drop-in replacement. The few I've done with Tuya modules that don't have a direct replacement worked but they were not fun to do
I use waterproof LED strip lights outdoors but I like to put them in aluminum channels with milky white covers, which gives a much more finished look.
Here is an example of the type I use:
https://www.amazon.com/Muzata-Aluminum-Mounting-Installations-Diffuser/dp/B01M09PBYX
My immediate thought is to attach a 6-axis sensor to your head. This thing https://www.amazon.com/dp/B082Y6YTY5/ is about the size of your thumb and this particular kit has a watchband adapter someone could possibly attach to a headband for you. Inside this unit is an ESP32 processor with Wifi and Bluetooth which integrates very well with home assistant. It also has a small battery inside so if someone had to unplug it to move you, no problem there.
Caveat: I was just playing with my m5stick last week and not all components are working yet. I'll report back here in a couple of days if I can get it working.
(If this idea sounds good, respond with + and if its dumb respond with a - ...or whatever yes/no is easiest for you)
u/OOBIDUB posted the right one, I bought mine from Amazon. The sequence is pretty simple, I just have the bot go to to the location and then delay the switchbot click for 29 seconds which is how long it takes to get to the mini fridge.
There are many available. Search Amazon for AAA battery eliminator. Note that the total number of batteries determines voltage to the device, so order the battery eliminator based on the number of batteries it replaces.
Here’s one that replaces 3 batteries (4.5v) as commonly used in candles, and plugs into USB as you requested. You can also find battery eliminators that go straight to a wall wart/wall plug.
It‘s an Android app called „Wallpanel“ that displays the dashboard in kiosk mode. It has a rest API to control several things remotely, amongst it firing up the display. It even has a build-in motion detection via front camera, however it‘s too resource-sucking, laggy and buggy, why I now use the Ikea motion detection and just send a display wakeup rest call then. Works w/o issues all the time.
Keep in mind that for a Chamberlain opener you have to buy a button from them or hack your existing because they're all wireless remotes. The wires only supply power. This one is cheap and easy to mod.
I used this Gikfun Qi Wireless Charger PCBA Circuit Board Coil Wireless Charging Micro USB Port DIY EK1854 https://www.amazon.com/dp/B073W7P5T8/ref=cm_sw_r_cp_api_fabc_XTCTFb8VNF18X?_encoding=UTF8&psc=1
And this:
QI Receiver Type A YKing– Samsung Qi Wireless Receiver– Charging Receiver- QI Receiver Samsung- Wireless Charger Receiver for Samsung Lg Huawei-QI Receiver Micro USB- Samsung Galaxy J7 Qi Receiver https://www.amazon.com/dp/B0785ST823/ref=cm_sw_r_cp_api_fabc_RUCTFb0P0VH4F?_encoding=UTF8&psc=1
For the wireless charging.
I haven’t tried Kiosk mode. I didn’t know it had that...
Wall Panel. Saw this mentioned in another thread. I haven't tried it yet but the features list looks purdy good.
https://play.google.com/store/apps/details?id=com.thanksmister.iot.wallpanel&hl=en_US
I also wanted to mention there is an Android tablet version of this application as well. Unfortunately there is no support for Android phones at this time.
The Android tablet version can be downloaded from Google Play: https://play.google.com/store/apps/details?id=com.thanksmister.iot.mqtt.alarmpanel.
You can also side load the Android application by downloading the APK from from the GitHub repository release section: https://github.com/thanksmister/android-mqtt-alarm-panel.
I did a lot the past couple weeks, I got my presence detection working using a modified form of Phil Hawthorne's method.
I also was getting ready to put together the AV Remote card from sharethelove.io but with the whole Logitech debacle I decided to modify that card to be a remote for the Sony Bravia component using scripts (example below)
Here are the scripts I used https://hastebin.com/apacajosom.css
And here is how I formatted my card https://hastebin.com/esawidodut.sql
Nice guide, but it's possible to do it directly on windows. Just install nodejs and then open a windows command prompt (either cmd or powershell), you should have access to npm.
Untested, but off the top of my head: the recorder component stores historical data in various DB formats: https://home-assistant.io/components/recorder/. You could use something like AppDaemon (a full, unrestricted Python environment) to query that database (using the appropriate package), calculate the correct duration for your timer (using whatever algorithm you devise), then use it either in AppDaemon itself or with the timer component: https://home-assistant.io/components/timer/
Since you’re new to HA, I would recommend HASS.io, it will give you a good feel for the software and has a small learning curve re initial setup. Here’s the setup guide: https://home-assistant.io/getting-started/.
I haven't got any presence detection implemented at all, but am researching it. I am going to start to add Bayesian probability as a first order.
https://home-assistant.io/components/binary_sensor.bayesian/
That gives you priority detection on things. My wife has a habit of shutting off mobile data as well, and my middle child likes losing his phone in the house, so I am familiar with the oddities of presence detection.
Ideas are
Give every phone's wifi a static DHCP lease, ping devices.
Bluetooth beacon/tracker for car keys, house keys, purses.
GPS tracking of phones.
Google calendar events (just thought of this one)
Implant RFID tags in everyone and have scanners at every entrance. (Not serious).
Yes, I believe the Microsoft Face Identify and Face Detect components will do this, I haven't gotten to mess with it too much though. https://home-assistant.io/components/image_processing.microsoft_face_identify/
Assistant Component is what you'll need.
I'm new to HASS but if you follow that exactly you'll be able to add lights/switches/etc directly to your Google Assistant when you configure them.
It should persist even when you change names/ass need components.
You want the Google assistant component. It works really well for me.
First get home assistant externally accessible with an SSL cert, however.
Your attitude is shitty and you need to read up more:
Hass.io IS a docker build of HASS, if you don't want to use docker then you install just HASS (https://home-assistant.io/docs/installation/virtualenv/)
There are no plugins that are "ONLY for hass.io". They're just other applications that run in docker. You can install them and configure them the same way. Look at mosquitto for example: https://github.com/home-assistant/hassio-addons/tree/master/mosquitto