
What are
/r/photography's
favorite Products & Services?
From 3.5 billion Reddit comments
The most popular Products mentioned in /r/photography:


The most popular Services mentioned in /r/photography:
Flickr
TreePad
500px
eBay
Google Photos
darktable
Hugin
PhotoRec
Instructables
Vimeo
IGTV
EyeEm
Google Nik Collection
Best Buy
The most popular Android Apps mentioned in /r/photography:

DSLR Controller

Snapseed
ScoutLog - Save map markers

Phocus

Sun Surveyor (Sun & Moon)

Open Camera

Exsate Golden Hour

raw2dng
Posing App

Remote app:PlayMemories Mobile

Camera FV-5 Lite

DSLR Remote

Exposure Calculator

Manual Camera

Adobe Photoshop Lightroom CC
The most popular reviews in /r/photography:
> There’s no reason they didn’t license them
Are you sure about that??? Like many 3D artists, I bought this book/texture library as well, many years ago. It was advertised as a collection of textures with a CD-ROM of files, ready to use by designers. I never saw a hint that the author would begin to file lawsuits against the customers who bought and used it the way it was advertised, or that she was selling any kind of additional "licenses" to the customers who bought the product.
The book is out of print now, but you can still see an old description on amazon -- here are some quotes:
> Surfaces offers over 1,200 outstanding, vibrantly colorful visual images of surface textures--wood, stone, marble, brick, plaster, stucco, aggregates, metal, tile, and glass--ready to be used in your designs, presentations, or comps
> Photographed by a designer for designers,
> CD-ROM included: easy-to-use screen resolution TIFF files of every image!
https://www.scribd.com/doc/252318574/gov-uscourts-ohnd-209347-1-0
He's not being personally sued for $500,000; he's one of SIX PAGES OF DEFENDANTS, including Amazon, Model Mayhem, Shutterstock, Playboy, Barnes & Noble, and Clear Channel. There's even a duplicate entry in the list of defendants, Mezzo Media (listed twice consecutively) and eight "John Doe Internet Pornography" companies.
This is basically a get rich quick scheme by a pair of lawyers running out of a suburban strip mall. I hope the lawyers get crushed in court.
What a beautiful shot! Sometimes sacrifices must be made haha.
If you dont mind me making a small suggestion, I would try using an abrasion resistant polycarbonate infront of your lens because its the least likely to scratch or pit from debris. You can get just basic polycarb for like $5 so you could also just buy 10 and use them as disposable parts. It would save you a lot of money in the long run, and polycarb is the least likely to warp your image and if you get the thin stuff (under 0.5") it will have minimal effect on your light.
As for dew, you really just need to make sure youre above the dew point. If you have a power source, I would just buy a heat gun and point it at the edge of the poly carbonate, about a foot away. This way air is traveling along the surface of the polycarb and the lens. This would whisk away anything on them, heat them above the dew point preventing any of it, and wouldnt blow any dust in the way.
Anyway, great to read these detailed accounts from first hand photographers. Than you so much for sharing!
> 2. Don’t Shoot Panoramas
I feel like he has never used any good panorama software and only used the basic one that comes with photoshop/lightroom.
Any good panorama software will completely remove any distortion and will add a shit-ton of extra features.
Using a wide angle lens in portrait mode is one of the best things about wide angle lenses.
edit: Software I personally find best is Kolor Autopano.
If you haven't heard of this, Kelbyone is one of the greatest resources I've found. It does cost a bit at 20/month but it was one of the most comprehensive and professional series I've seen. Here is one of his earlier videos that is completely free on youtube: https://www.youtube.com/watch?v=FpHMuK7Htic *The videos on kelbyone are not a group setting like this one.
The website content isn't produced by Kelby anymore but the people he has hired to do are all really great. I've not found a single video I didn't like.
> Also how labour intensive would the process be?
It's not much work, the equipment is cheap and it's very easy to do. I studied photography in the '80s and most of my friends and I would develop B&W film in our apartment bathrooms. Many of us had the exact kit you linked to. Some people had the stainless steel version, I had the plastic one.
If you have a laundry room or kitchen with about 3 feet of countertop that's all you need. You don't really need a dark room either, you can load the film onto the developing reels in a dark bag.
Options are good. Thank you Affinity for leading the charge on iPad.
I still don't know if I can bring myself to drop the cash on a nice iPad. That's lens money.
in this pic https://instagram.com/p/zcKU_Mv9kd/ you can see the softbox, a shade to block out light for the background and he's probably using a hasselblad? At least it's no DSLR.
btw checkout this awesome pic from last year: Bill Murray: https://instagram.com/p/zVOTgAP9p0
Yeah, he was a tenured professor at the University of Toronto who explores how the body and technology work together. The glasses were permanently attached to his skull - he calls himself a cyborg - so they actually couldn't be ripped or punched off. He invented the technology and carries a letter from his doctor to explain it to people if they get uncomfortable, but the McDonalds employees didn't care.
http://eyetap.blogspot.ca/2012/07/physical-assault-by-mcdonalds-for.html
The only camera gear he carried:
Canon 7D mk1, Sigma 30mm f/1.4 ART, 3 batteries+charger, 4 CF cards, Pedco Ultrapod, and a camera-to-iPhone adapter (he edited his social media photos on the fly via VSCO app). So once again for the gearheads, pretty great photos for a camera released 2009. :)
For this type of photography, my guess is that the elements of success are:
Camera choice: 10%
Lens choice: 15%
Food prep skills: 25%
Mastery of lighting techniques for glass containers and liquids: 50%
A good book is Light, Science, and Magic
and the Strobist website mentioned in another comment is also very good to study.
For the camera, it might be important to pick one hat you can shoot tethered (connected to a computer) so you can use a big computer monitor or TV screen to preview the shot in the studio.
You have to click on the image of the book "take a look inside", then you search for page 336.
If you have an Amazon Prime credit card, you can get 15% back (this includes the normal 5%, so it's NOT 20% back) off of a bunch of different camera gear. The most notable I saw (and purchased) was the Fujifilm X-T3:
https://www.amazon.com/Fujifilm-X-T3-Mirrorless-Digital-Body/dp/B07H49QWN4
$1,299.00 - $194.85 (15%) = $1,104.15 before tax, which is the lowest I've seen the camera ever go for.
I don't know how many people know this, but if you go into Chase's CC interface for the Prime card, you can convert the rewards into real cash, so it really is a discount versus Amazon store credit.
Here's the link to the overall promotion:
For those interested in Dropbox's terms of service when it comes to uploading data:
"By using our Services you provide us with information, files, and folders that you submit to Dropbox (together, “your stuff”). You retain full ownership to your stuff. We don’t claim any ownership to any of it. These Terms do not grant us any rights to your stuff or intellectual property except for the limited rights that are needed to run the Services, as explained below."
Full link to Terms: https://www.dropbox.com/terms
Hey, I do theater lighting so I think I can help, though I'm not the best photographer.
Gel is pretty easy to get your hands on. Look on Google for a Theatrical lighting company in your area, any one that rents gear should sell gel, it goes for about $6 for a 2' by 3' sheet, most of which can be reused. Be careful putting it to close to particularly hot light because it can melt. Get a Swatch book while you're there to see all the ones they sell, Rosco and Lee are the leading brands. If you're in the Ann Arbor, Pittsburgh or Chicago area you can have some of mine, I've got too much.
In terms of lighting equipment, you don't need to spend much. I've lit entire (extremely low budget) musicals with lights from the hardware store. These lights are cheap and directional and you can tape gel right over it: https://www.amazon.com/Power-Zone-Clamp-Light-PZ-300/dp/B000KKLPOU
To control intensity with these lights you can either buy portable dimmers which aren't too expensive, use ND filters (another kind of gel) or different wattage lamps (light bulbs). They each have strengths and weaknesses but I wouldn't worry about it yet, just play with whatever is cheapest.
LEDs are nice because you can change color, but you don't need expensive ones. I believe Amazon sells some for cheap with RGB control, but for faces I would stick with incandescent light, tends to make the actress look better.
In terms of the photos, they look great. One thing I try to do is light the subject and the background separately. An amber model on a blue background really pops. Lighting the background or actor from two different angles with different colors also leads to a nice effect, you seem to have figured this out, but keep playing with it and try doing it with different lights for the subject and background.
Anyway, keep it up and let me know if you have anymore questions.
I'm going to assume that this guy has never had to resize images before. An easy way to fix the "big files" problem is by using ImageMagick. It's as easy as opening a command prompt or terminal and running a quick command.
On Ubuntu for example you'd type
sudo apt-get install imagemagick mogrify -resize 4000x400 your_image_file_name.jpg (or .gif or.png...)
That's it. If the guy can't quickly do that then he's lazy. ImageMagick is available for Windows, OSX, and *nix.
Budget: under $10
These things help keep equipment dust-free without risking over powered blasts or scratching or leaving streaks. 90% of lens and sensor cleaning can be done with a puff from these IMO.
Unshielded electronics are actually light-sensitive! Due to the photoelectric effect metals actually emit electrons when struck by extremely high-intensity light.
This got a little bit famous recently when DIYers found that the Raspberry Pi 2 would power off spontaneously if you flashed it with a xenon flash.
Most modern electronics are encased in epoxy or ceramic that block light, so they are not susceptible, but unshielded electronics are totally susceptible, and it results in an electrical disruption. What this disruption would do to a 1950s fictional robot is up to you :P
Read The Photographer's Eye. On the impact/price scale, it was probably the best thing I did for my photography.
Edit: Then go out and shoot of course :)
Ooo, perfect opportunity to post this photo.
It was taken with a wet plate around 1865, during the American Civil War.
Screw the new gigapixel camera. Amazingly detailed photos could be taken over a hundred years ago!
Pre-GPS/cell phone days, I was checking out backroads in nowhere, MO looking for shots with the help of an atlas like this:
https://www.amazon.com/Missouri-Atlas-Gazetteer-Delorme/dp/0899333532
Damn useful atlas by the way, if you are a backroader. Anyway, I saw a nearby road on it that looked interesting, so I found said road and went down it,(my girlfriend at the time was driving.) The road went at least half a mile and got real narrow. We decided this was likely a private drive and wanted to get out of there, but there was no room to turn around and she didn't want to back all the way out.
Very quickly we come upon a farm house in the distance with like 8 vehicles parked outside it. We needed to get the hell away from there, and now had the opportunity to barely turn around. As she got the car pointed back toward the way we came, another car was right behind us. We drove as fast as we safely could and got back on the rural highway.
The car stopped at the end of the driveway, and a young, tall, thin woman got out of the driver's seath. She had long, beautiful flowing red hair. I got out my video camera and leaned out the passenger window. Looking through the viewfinder and zooming in as much as I could, I noticed she was zooming a camera at me also, presumably to get my license plate number, but she didn't have a camera, she had a deer rifle, and I stared right back at her through her scope. As soon as I realized, and got back in the car, the shots began. 5 or 6 total, I think.
Not one hit our car, so I figured they were just warning shots, fair enough, we found their meth lab, or whatever. Then, she got back in the car and followed us for 20ish miles down obscure backroads until we got to a small town and she finally backed off.
Totally agree. I think the winner is an interesting social commentary but the image itself just good to ok.
Wildebeast one. OMG. That shot is amazing. It literally caused me to hold my breath and sphincter to clench at first glance. I can just feel myself falling. Just incredible. I don't think I have ever had that kind of reaction to a photo. Compared to this one the other two are just....ok.
EDIT: Found her 500px account for any other interested: https://500px.com/NCambre
Benefits:
The more data a software developer has about how their software is used, the more accurately they can identify, diagnose, and solve bugs and compatibility issues. For example, if they discover that one of their products suffers from a particular type of crash immediately after performing a specific action and that this scenario only occurs while another software product from another manufacturer is also running, this can help them to identify a potential compatibility issue between the software products, which can, in turn, lead to a solution.
Concerns:
Adobe has, in the past, been known to remotely disable licenses to Adobe software. This predominately affects software pirates using serial numbers known to be stolen. However, some folks have also claimed that their legitimate, purchased licenses have also been disabled, and that this has caused concern in the design/photography community.
Also, the scope of what information is reported back to Adobe is not clearly defined, leading to privacy concerns. (Perhaps similar to those related to Blizzard's Warden software. And considering that Adobe has been compromised in the (recent) past, there is also the potential for concern that, that regardless of what Adobe says they will or won't do with your usage data, this information might make it out into the wild.
How accurate are these concerns? I have no idea. But that's what folks have been known to worry about.
2.8, and then 1/60 (static photos) to 1/160 (moving people)
turn your flash off so you can see the ambient light on the back of the sony
dial up the iso until you get about an -0.7 exposure, keep it there
flip the flash back on, TTL, and don't be afraid to ride FEC depending on the subject - black clothing will be like -0.7, for example. white clothing +0.7. You get the idea
I'd use AF-C w/ face detect but stick to 2.8 if you do so. I like to stick to zone for event work, but you can use wide if you're in tight on a subject, it's easier sometimes
ez-mode with the sony is Av+auto-iso+TTL
ps: use one of these
just make your image smaller then 4mp then shutter stock wont take it
You very likely still have lots of those photos unless you have used that card a lot since then. Formatting doesn't actually do anything aside from designate that data as being able to write over. Go here http://www.cgsecurity.org/wiki/PhotoRec this is really awesome free software - you have to use terminal but it is very self explanatory if you have some computer experience. The first time I tried it I found photos from 4 months prior on my card!
Budget: $40
- Light Science & Magic (Book) - An oft-recommended book here in \/r\/photography, it's a great resource for photographic techniques with regard to lighting.
Budget $50
https://www.amazon.com/Behringer-XTOUCHMINI-BEHRINGER-X-TOUCH-MINI/dp/B013JLZCLS
For the photographer who uses lightroom to edit and is looking for a way to speed up edits and use something besides mouse and keyboard.
Try the The Photographer's Ephemeris?
I know right? Really well done. I have no experience with film, but this article names some of the tools used (scalpel, glue, paint, airbrush) which makes me think at least part of the image was just painted in. http://www.openculture.com/2017/08/long-before-photoshop-the-soviets-mastered-the-art-of-erasing-people-from-photographs-and-history-too.html
One quick look at fashion trends and "style" feeds on instagram would show you the editing is pretty standard. People use filters/apps like facetune that do this for them.
I haven't lost a job due to gear, but I was part of a group that fired a photographer because of his lack of gear. He was hired to produce videos for a friends company, and his solution to recording audio for the commercial was to put tape personal voice recorders (like https://www.amazon.com/Sony-ICD-BX140-Digital-Voice-Recorder/dp/B00IZEJFF4 ) under everyone's shirt, and was using zoom flashlights for his lighting. He came highly recommended from someone who had used him while he had his partner, but his partner left him and took all the gear.
He didn't take it well...
I've been researching and preparing for this, so let me pass it onto you.
First I went here: http://www.timeanddate.com/eclipse/in/usa/madison
This will tell you the time the different phases will happen and also which direction in the sky it will be. Knowing that maximum eclipse would be at 212 degrees, I went out in my city and picked out some potential spots (using a compass to determine direction) that would give me a good foreground subject to make it interesting. That way, I can go exactly where I want to shoot and I know where the moon will be.
What /u/dinoalt suggested for camera settings sounds like a good start: >f/8, ISO 400-800, 1/400th sec.
I'm going to play around with bracketing (haven't done much with this) to make sure I get a properly exposed image. I'm planning to shoot it with my Capital building in the foreground, which is usually super lit up, so I need to make sure it doesn't get all blown out.
It's pretty straight forward actually.
Step 1) Record a *.gpx waypoint file on either the phone / gps unit... I use my android phone with "GPS Logger" because it automatically emails me the file when I stop logging.
Step 2) Photograph the screen of your GPS unit, making sure it shows the current 'satellite time' - this will be important later in case your camera clock is out. Although you might want to take the time at some point to accurately set your camera clock.
Step 3) Save the gpx file into the same folder you downloaded your photos to.
Step 4) Finally, download Geosetter (freeware) from http://www.geosetter.de/en/ and go into the pics folder and tell it to sync geo data (Ctrl+G I think).
Step 5) This might not be nessesary if your camera's clock is reasonably accurate. If there are any time variances use the time offset in geosetter. To calculate the offset compare the satellite time in the photo of your gps unit to the timestamp of that image.
EyeEm has 'Missions' that I sometimes use for inspiration: https://www.eyeem.com/missions/photographers
Even if I don't necessarily participate in any of them via the site, it can be fun to do just on a personal level.
Budget: $30
- Sensor Cleaning Kit (APS-C / Full Frame) - Altura makes good kits, and everyone should know how to clean their own camera sensors.
Brand new Lumix GX85 w/ 12-32 and 45-150 for $447 on Amazon.
I already picked one of these up for the stabilized 4k 30p in a tiny package. No mic jack though, so off camera recorder is necessary.
I've taken it out for stills a couple of times and find it to be good enough for an extremely portable walk around / travel camera. Neither of the lenses included are great for low light, but I can get useable shots at 1/3rd of a second with the awesome stabilization system.
Shutter is really quiet, probably pretty good for street but I haven't tried.
G7 is also on sale for $447 on amazon, but only with the kit lens. BH has kit + 45-150 for $597 USD.
I recently had a sort of similar experience, except mine went South way more than yours did.
Someone recommended to me the book, The Legal Handbook for Photographers. I bought it, and can't recommend it enough. If you're concerned about what you're taking pictures of, and how people will react, that book is money very well spent.
And yes, you have every right to stand on the sidewalk and take pictures of peoples' houses in the US.
Lowepro Slingshot edge 250 is what I'm currently ruining and I love it. I had the predecessor to this bag with my first DSLR and loved it. Plenty of room for lenses and other accessories plus external straps for attaching tripods and it has a built in rain cover. I paid $63 on Amazon
Lowepro Slingshot Edge 250 AW - A... https://www.amazon.com/dp/B013MC8H2A?ref=ppx_pop_mob_ap_share
The photo is by Matthew Henry. Here is the link to his photo page on Shopify
All his photos have the same look and feel, and he's definitely legit. Contact info, web links all line up to him. His instagram has many of the same photos over a long period of time: https://www.instagram.com/matt_henry_photo/
I use darktable, and also of note is RawTherapee. Both are free, in contrast with the $150+ alternatives he shows off.
Edit: ~~Can you tell me why I'm being downvoted?~~ Sorry, I'm new to /r/photography. If there's a rule here I don't know about, please tell me!
Edit 2: From -2 to +5? What gives? I've been on reddit for a year and I still don't always get it… :P
I have had a lot of luck with the free PhotoRec but any of the others will do really. The key thing is to stop using your card. Even if you have used it a bit, you should still be able to get most of the things back but the sooner you stop using it the better.
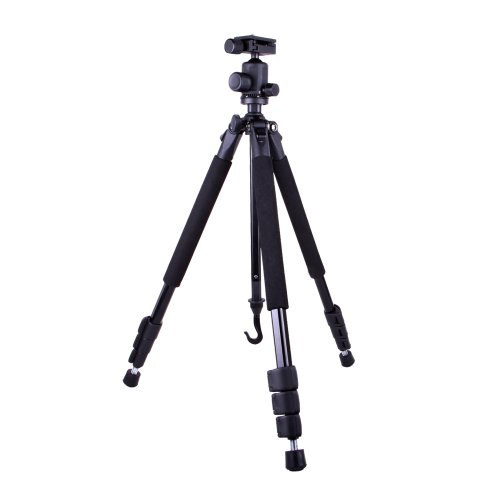
Yes I have quite a few of their straps, grips etc. They always struck me as a really good value brand. But the bags are silly prices and although this tripod looks cool it's quite pricey.
I got one of these for £90 a few years ago and that seemed very good value. https://www.amazon.co.uk/gp/product/B00K4N4C48/
Wait, what? ... you sell images via a stock agency and you haven't bothered to read their license terms?
https://www.shutterstock.com/license
> AN ENHANCED IMAGE LICENSE grants you the right to use Images (which rights are in addition to 1-5 above and exclusive to Enhanced Image Licenses):
> In any manner permitted under a Standard Image License, without any limitation on the number of reproductions, impressions, or budget;
> Incorporated into merchandise intended for sale or promotional distribution (collectively "Merchandise"), including, without limitation, textiles, artwork, magnets, wall-art, calendars, toys, stationery, greeting cards, and any other physical reproduction for resale or distribution, provided that such Merchandise incorporates material creative or functional elements apart from the Image(s).
> In wall art (and without requiring further creative or functional elements) for decorative purposes in a commercial space owned by you or your client, and not for sale.
> Incorporated as elements of digital templates for sale or distribution.
Note the phrases I've bolded above. Sounds to me like you have found a license violation. Certainly it would not hurt for you to report it to Shutterstock.
(Speaking very generally, stock image licenses typically allow things like mass-producing on greeting cards but not outright selling prints of the image)
Same thing for $19 on Amazon. I only looked for a second. I'm sure there are others cheaper on eBay or somewhere.
Still, that's less than half the cost of OPs DIY fuseless firehazard.
To be a successful (or an improving) photographer, your subject matter has to be accessible. If you're in NYC, then street photography is a good idea. Live in a one traffic light town in Alabama (sorry about the US centric examples) where you see a pedestrian once every 15 minutes, then street photography is not a good idea. Same with landscape photography. If your lifestyle precludes you from long stretches of driving (or flying) to get to locations, then that's probably not the right subject matter for you.
That being said, before you get too depressed with my advice, look up Michael Kenna. Most of his photography was done in a specific locale (i.e. not too much travel) and several of his books pick pretty ordinary landscape or urbanscape subjects. Yet he creates masterful b&w work.
Without seeing this "very boring part of Germany" that you live in, I'm fairly certain that you can make amazing pictures. It just won't be the traditional, cliche, color landscape photography that is all over insta. You'll have to figure out a style that works for your geographic location.
http://techcrunch.com/2013/09/10/apple-unveils-the-iphone-5s/
"According to Schiller, it also does autofocus matrix metering."
Facepalm. Still people getting confused between what autofocus and exposure metering is.
Always, always, always, ALWAYS compare prices between major retailers and amazon.
http://camelcamelcamel.com/ is an amazon price history site.
Every holiday is a golden opportunity for retailers to jack up the prices 2 weeks before the sale to advertise 40% off, or go by the MSRP that they never sell it for.
I've seen things go on sale, for the a price higher than they usually go just because people are duped by advertised prices and specials.
Two junk photos and a clown who always bends over backwards to talk about how he knows this, he knows that, he's a pro, he's a master of lighting, he's a journalist (lol), he trained at Magnum (l-o-fucking-l, he was a blogging intern), and so on. I really don't like jumping on the internet hate wagon, and this article is actually tamer than most, but Chris Gampat puts the cart so far ahead of the the fucking horse it's unreal. These are two terrible, rote, overprocessed, horrifically cliche street photographs. And don't get me wrong, it's totally okay to take shitty photos - God knows I do - but don't pretend to be something you're not.
It's like that Margaret Thatcher quote - if you have to tell people you're powerful, you aren't. Same applies to being a good photographer.
When I go to https://photos.google.com/albums all of my previous Picasa albums have been migrated across. Those that had public visibility still have 'shared'. Even my iPhone app for uploading still works.
I actually read two books, that I found pretty interesting:
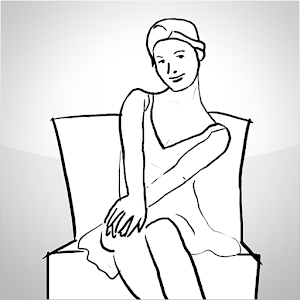
"Picture Perfect Posing: Practicing the Art of Posing for Photographers and Models" - Which takes on the rather technical side, almost drawing charts about where to put which body parts and what it signals. (Amazon link: https://www.amazon.com/Picture-Perfect-Posing-Practicing-Photographers/dp/0321966465)
"Psychologie der Fotografie: Kopf oder Bauch?", which is a German book about the psychological aspects. Here the focus is not about the perfect focus point, but telling stories with the pictures. I'm not sure whether there is an English version of the book, but I bet there are similar titles or articles if you google.
What I've learned: just start doing something. Just shoot some models. While during that, try out some weird and creative stuff. If you like the not-so-posed pictures, do stuff with them and document them in the meantime. Personally, I find that more fun than just posing, too. But it's all down to just getting started, learning to see, learning to communicate and direct, and then start exploring while using the experience.
You can support the development of DisplayCal directly by making a donation on their site: https://displaycal.net/
Every little bit helps!
There is even more fantastic Free Software for photographers: darktable and rawtherapee for raw development, hugin for stitching and stacking, luminanceHDR and HDRmerge for HDR, gmic for all sorts of filters and awesome sharpening, gimp for pushing pixels, etc
Something everyone already knows. Re-saving jpegs reduces quality.
This video is more a promotional piece for FLIF and it's been posted here a few times already. https://www.reddit.com/r/photography/comments/4el82b/flif_the_next_gen_image_format_demonstrates_its/
I also made the same upgrade you did, and only recently started using this method. I just ordered these from Amazon which I hope will help further :Sony A6000, A6300, A6500 Flash Bounce Cards https://www.amazon.com/dp/B00LEX4RW4/ref=cm_sw_r_cp_apa_isHwyb4Q7RVRF
I ended up using a method similar to this guy. I also used the same target which you can get for $6 on Amazon. I definitely recommend working through each focusing distance at a time so you're not constantly moving the camera around and use a tripod.
> $200 or more for a memory card is obscene,
Nope... https://www.amazon.com/Sony-Performance-Blazing-SF-G128T-T1/dp/B07H9GDFRW About what a top performing SD card costs...
>Am I being unreasonable?
Yep... Pro level gear has a higher price tag compared to consumer level stuff... Compact Flash Cards back in the day used to sell for some of them up to $800-900 for a card
Sorry for the brevity of the last comment. I was late for an appointment. I promised to show what I am talking about, so here's one from last week which contains the Unsplash image. Beto Galetto won't realize a financial gain from my use of that image (and I almost certainly won't either) but he made the world a better, nicer place by uploading it and that is worth something.
Listen, it's not the mods fault you haven't learned how to link properly on reddit. See how easy that was? Even smaller link than your shorturl.
I found this quote here:
>The camera and its software are designed for a social media world. Plug it in via USB and you get an iPhoto-like interface on your screen, with a single button that lets you share the photos you’ve selected on Facebook or other networks. There your friends will see an embedded image with all the focus information built in. Click around the picture to refocus it where ever you want.
>This is where the camera’s shortcomings are evident, however. That embeddable photo is as large as you’ll ever see the picture — a pro camera this ain’t. But for the early-adopter, Instagram-loving crowd, Lytro could be a dream come true.
So it's mainly some sort of social media horsecrappery. I suspect some early adopters expecting a camera will be disappointed.
Did you ever see the street view of the ISS and how many DSLRs and lenses they got up there? Everybody could be dual wielding cameras and they still would end up with lots of spares.
https://www.google.com/streetview/#international-space-station/
There is currently a deal going on where you can get a Nikon D3500,18-55mm lens, and a 70-300mm lens for 396 dollars on amazon https://www.amazon.com/Nikon-DX-Format-3-5-5-6G-70-300mm-4-5-6-3G/dp/B07GW23M7T
The days of being a photojournalist are dead. That being said, if you want to be one, start building a portfolio, to include spot news, prep sports, portraits, several photo stories, and the like.
This book is the standard in PJ School: https://www.amazon.com/Photojournalism-Professionals-Approach-Kenneth-Kobre/dp/1138101362/ref=sr_1_1?s=books&ie=UTF8&qid=1548607490&sr=1-1&keywords=photojournalism+the+professionals+approach
Ken Kobre is an awesome professor who is a professor at San Francisco State along with Pulitzer Prize Winner Kim Komenich.
Once you've got your book together, you've got journalism ethics down, you can write, edit video, and shoot great stories. It's time to intern, apply, apply, apply. Pray that you land something, grind for a few years doing internships and bottom feeder jobs. Note that most newsrooms have gone from a staff of over 35 to like 7 photojournalists.
Anyways, so you've gotten through PJ School, internships, workshops, staff jobs, etc. Now it's time to step it up to the big leagues, you put together a story that you've had in your head, you gather your savings up and buy a ticket to get started. Once you get back, then you can start editing through images and pitch them to agencies and media outlets. If your work is good enough, you'll travel back to work on your story on someone else's dime, if not, you'll keep grinding away and head back out once you've got more money to continue working on it, hoping that someone will pick it up and that all your work is worth it.
Another great read is: https://www.amazon.com/Its-What-Do-Photographers-Life/dp/0143128418/ref=sr_1_1?s=books&ie=UTF8&qid=1548607906&sr=1-1&keywords=it%27s+what+i+do+a+photographer%27s+life+of+love+and+war
Yes, it exists! Give ScoutLog a try, it's an Android app that lets you save places, along with photos and notes, and tags to keep them organized. You can sync your places and photos to a Google Drive account, and then use the Chrome extension (still in beta) to edit them on the desktop.
You can also import any existing starred places you have from Google Maps or existing photos on your phone that have GPS EXIF data.
I'm actively working on both apps, so if you have any feature requests, please let me know.
The other day I was backing up my harddrive and on my ancient 120GB behemoth from 2008, I found a folder called best photography. It had my favorite pictures I had taken up to about 2008-2009. I thought it might be fun to compare it to my top 10 from up to 2014.
It's fun to see how you've improved!
one of the downsides I think, it could start getting to you in the sense of weighting your worth as a photographer from likes. If you are already an established photographer it wouldn't hurt, but if you are starting then it could kinda not help you as you would spend more time monitoring your Instagram than actually improving your photography.
Here is mine: https://www.instagram.com/delacroix.1218/ and the other one where I'm part of: https://www.instagram.com/realitylvn/
Stock is good if it's generic enough to be used in many places, but it also has enough white space to lay text over when necessary. This is my most-sold image by far: no branding, colorful and eye-catching, and blur fall-off on the left side where you could put copy if you wanted.
This one seems to be #2 for my sales, but it pales in comparison to the first one in terms of sheer volume. Same deal though: generic enough so it can be used for a wide array of topics, plenty of open space to put copy if you want, colorful and eye-catching.
I haven't gotten into it much, but the company I work for uses stock pretty frequently and stuff with a human element tends to really be used a lot. Lifestyle, casual office, general carefree-ness. Of course, now you're in the realm of model releases and whatnot which is part of why I haven't gone down that path, but it's popular.
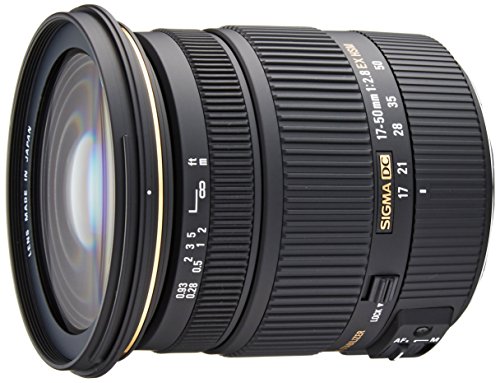
Pretty pricey lens, but I've been really happy with mine. Have to get out and shoot more with it. The lenses Fuji are rolling out recently are really nice.
https://www.flickr.com/photos/mooshoepork/13119458025/
Tempted to get that 14mm too!
It's actually a commercially available product. A bit of poking around found this one on B&H. There's a newer version on Amazon
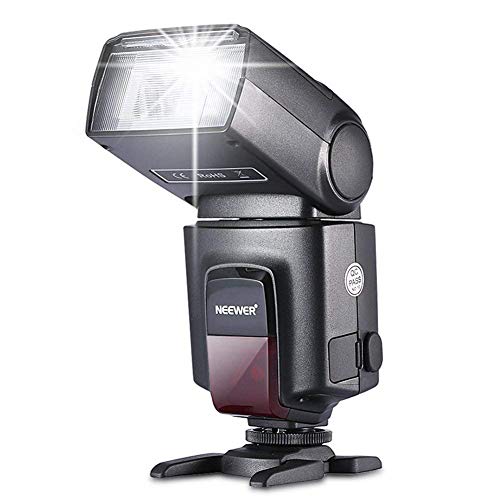
I've been using a couple of their generic flashes (the YN560) for years. I sold my Nikon Speedlights to pay rent back when things weren't so good, and bought a couple of these, along with a couple of the Aputure trigmasters, to fill in the gap.
That was ~6 years ago. And, while they don't see daily use, there's always at least one of each in my camera bag, and they're still going strong. I highly doubt I'll ever go back to a Nikon one. Only gripe? No TTL. But, TBF, I never use that shit anyway.
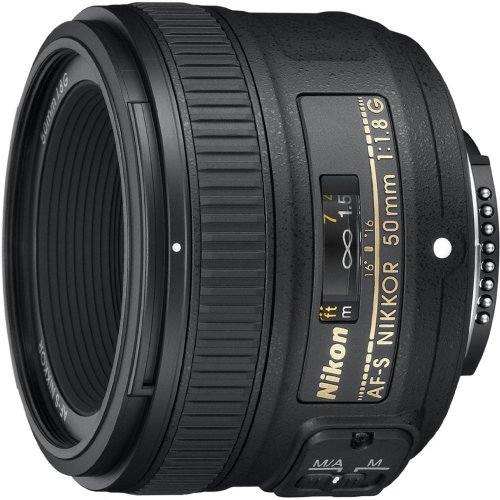
Long and short of it is that, should I ever need to replace my 50 1.4, I'll be looking at this one, for sure.
Any of my photos from this day. Climbing up a 50ish story building with some creative ways of entry to make it up on the crane platform that is in progress of being built.
here is my favourite photo from the day I took
Unfortunately it's not as sharp as I would've liked as my gorillapod ball head broke off that day and it was very windy!!
We had a huge (for us) storm really late at night/early morning. Masses of lightning and I wanted to get a shot of it, no usable shots from the first night but I changed location for the second night and managed to get my favorite shot of the year.
I made a series about people dangerously crossing a busy, wide street in Berlin, on a bridge. At first I was very cautious but I needed shots I wanted and forgot about the fear and I was going up and down the bridge, with a 24-105 mm lens, shooting (1. F it). They thus could easily spot me and they did as you can see in the series (4.) and I like those particular ones - but they were busy getting across safely (2.) which pushed me into reacting quickly (3.).
The series:
Flickr has options for different copyright types to search within, one of which is Public Domain: https://www.flickr.com/creativecommons/pdm-1.0/
Anything with the Public Domain mark is open for you to use: https://creativecommons.org/publicdomain/zero/1.0/
These two instructables will give you a general idea.
This is one on developing film:
http://www.instructables.com/id/Developing-Black--White-Photos-at-Home/
And this is one on printing in black and white:
http://www.instructables.com/id/How-to-Print-BW-Photographs-in-a-Darkroom/
Compiled list of materials from those two (not including the camera)...
Developing tank
Measuring Jug
Thermometer
Developing solution
Fixing Solution (Fixer)
Clothes Pegs/Film Clips
A film to develop
Film extractor (possibly optional)
A pair of scissors
A clock
A negative to print
100% Cotton cosmetic pad
Rubbing Alcohol
A light tight room (Must be well ventilated) (Bathrooms with towels shoved under the door can work well)
Running water
Safe light
4 Trays for chemicals
Enlarger with a condenser head (and bulb)
Paper easel (holds the paper in place under the enlarger)
Timer
Squeegee (Technically optional, but highly recommended)
Drying rack/clothes line and pins
Grain enlarger (optional)
Emulsion paper - doesn't matter much what you use. I prefer fiber paper.
Gloves and apron are optional.
Chemical storage bottles
Developer - I use Kodak Dektol
Stop bath - I use Kodak Indicator stop bath
Fixer - I use Kodak Fixer
Hypo clear - I use Kodak Hypo Clearing Agent
Agreed but didn't they also write the #1 selling book on digital photography? To me that gives them a little more cred than most of the other youtubers that just grab a camera and start spouting stuff:
As others have said your big difference is power, but most people don't understand how huge of a power difference there is.
For these examples I am going to compared flashes to Something like the
https://www.amazon.com/Neewer-Dimmable-Professional-Photography-3200-5600K/dp/B01NCJSK5V
a 660 LED light panel. For those 660 LED you get 3360 lumens of light. That is a lot for a light. A 60w old school bulb would give out 800ish lumens. So its already equivalent to 4 60w bulbs. But if you have a pop up flash on your camera, you know the really underpowered flash no one ever really uses, its around 10,000 to 12,000 lumens. So you are going to need 3-4 of those light panels for the same amount of light from your pop up flash. A full powered speed light will be around 500,000 lumens or 149 of those LED panels. A studio strobe like your Einsteins will be well over 1 million lumens with a reflector. They are world apart different in power.
Can constant lighting be used in photography, sure, you will need to shoot wide open with slow shutters and higher ISO though to come anywhere close to what a single strobe can bring to the mix.
If size and portability is the issue, look into mini strobes like the AD200 with its remote head or an AD360 or even speedlights to be super portable with setups
I work in an image lab, get the Fuji XT-100. It'll be the BEST bang for your buck and it's versatile. Trust me.
English Daguerreotype camera, plate holder and glass back.
f/8 Goerz RR with stops for f/11, 31, and 96.
f/6 Darlot Petzval
1/2 gallon water, 8 oz developer, 12 oz collodion, 16 oz silver nitrate solution, 8 oz cyanide fixer, 6 oz clear varnish.
2 rinse trays, paper towels, dark cloth, red LED light, tripod, a couple camp stools to set the case which doubles as a darkbox and a dozen or so plates for tintypes.
The biggest thing imo that separates bad landscapes from good ones is 1. how dedicated the photographer was in finding a truly great spot and 2. how patient the photographer is in waiting for just the right light.
Most amateur photographers take landscapes that look like this. Terrible, hazy direct sunlight, kills all the contrast. Probably because they happened to go on a hike in the afternoon, because that's a good time for a hike. But not necessarily a good time for landscape photography.
Here's the work of Mark Adamus, who has been on the front page of earthporn so much he should pay rent. Look at the lighting. Do you think he just went on an afternoon hike and took snapshots? Or do you think he waited for exceptional lighting?
Like I said, I use a creative commons license for that reason. The internet as we know it would not exist if people didn't give away their work for free. Linux, Chrome, Apache, Python, etc - all the tools that reddit uses to serve you this page are given away 100% for free by developers and by companies. There's nothing inherently wrong with making money off free stuff, so long as you have permission from the creator.
You don't really have much choice, there's only one iMac under £1000.
If you're set on Apple you could potentially get her a 13" Macbook pro, which would be useful if she needs to edit away from home. If she already has a desktop that she's happy with then this would be more helpful. Plus, (although it is £100 more) the Macbook is significantly faster than the iMac according to this comparison of CPUs.
Alternatively you could get her a custom-built PC. You might be able to get one at a local computer store, but if you have a geeky friend who knows about computers I'm sure they'll help you out for cheaper. If she uses a PC currently then this might be the best option. Apple Macs cost significantly more for the same performance, plus the OS is unfamiliar to Windows users.
Again, going in a completely different direction, have you considered getting her something other than a computer? You can get some really nice lenses around the £1k mark, which she would definitely appreciate.
I was at Zion National Park in an area called, "The Subway". It's a slot canyon with water running through it covered with a ton of slippery algae. I took 3 photos with my new Nikon D60 and 18-55 VR lens when I slipped with it attached to my tripod.
I watched water fill the sensor and lens as I slid down the slick rock. I think I said in a sad sad voice, "Oh No....". Kind of like the kid on Christmas Story when he dropped the F Bomb.
I did get off this shot moments before the heartache since the SD card wasn't destroyed:
https://www.flickr.com/photos/94415686@N00/4124211730/in/set-72157612903582051
I recently shot my first ever live music event after a good friend of me was playing at the festival. This is the album. It was my first ever music festival so it was great doing two things I loved at once.
Edit: As a after thought, the hardest part of this is getting a paid job doing this after emailing a few magazines and photography companies here in Australia.
Sorry, it was EXIFTool that I use... here is the script I use. Basically I create a root folder where all of the images will eventually reside, then run this command from within that folder:
exiftool -d %Y\%m\%d "-directory<${model}\${datetimeoriginal}" -v -r C:\SourceDir
This will move files into the folder it it executed from.
If you wish to be a bit more cautious, you can run the following command to perform a copy, rather than a move:
exiftool -o . -d %Y\%m\%d "-directory<${model}\${datetimeoriginal}" -v -r C:\SourceDir
Link to EXIFTool:
If you're comfortable with the command line, you could use ExifTool to remove some or even all of the metadata. To remove everything it would be as simple as:
ExifTool -All= <DIR/FILE>
To remove just the preview images, it might depend upon the camera. My Nikon, for example, has two preview images and to remove both I'd need to use :
ExifTool -PreviewImage= -ThumbnailImage= <DIR/FILE>
One thing to take note of is that this will not change the base image. It only affects the metadata.
If you are a little tech savvy there are very cool self-hosted options such as photoprism which allows for sharing albums. It has ai tagging and facial recognition but it is all done locally on your own hardware so you don’t have to worry about some company having ur data. https://photoprism.app
Here is a demo of it up and running: https://demo.photoprism.org/browse
If you are using a Mac there is another very good option between the free GIMP and the more expensive Lightroom or Photoshop.
This is Pixelmator.
This app works very much like Photoshop. It will cost you about $30.
There is a free 30 day demo that you can download if you want to give it a try.
My moment has come! Here is my gear organized in Dewalt TSTAK organizers for tools, along with the foam insert they make for them.
They aren't waterproof but I spent around $75 for 4 cases and foam. They can all lock into one stack or be used individually, and the one with the big handle I use on top to carry the whole thing. Works way better than the random bags and bookshelves stuff was in before.
Get a tripod, a light table, if you have the camera and lens already this is about a s cheap as you can get it. Blurry image of my setup a while back
I'm a portrait photographer primarily. I wouldn't quite say I'm exactly where I want to be, but my photography has improved tenfold in the last 12 months, which I attribute entirely to deliberate effort.
For me, there are two major components- education and practice.
For education, I've proactively worked to educate myself with reading, watching, and asking lots of questions.
Here's a book I found invaluable to understanding light. The main focus is the behavior and characteristics of light, and would be useful for all photographers: https://www.amazon.com/Light-Science-Magic-Introduction-Photographic/dp/0415719402/
Also, following photographers on YouTube/IG/etc. who make work I admire has been greatly helpful. Often, they're available for questions and providing feedback on your own work.
Reading and interacting with the community here has been incredibly useful as well, of course.
For practice, I've worked to establish a feedback loop which enables me to receive critique and evaluation from others I respect. Joe Edelman's TOG Chat group on Facebook provides the most insightful critique I've found and has been invaluable in helping me refine my work.
I also work to be critically honest with myself. This starts with reverse engineering work I admire so I can pick apart the elements which I appreciate.
What does this look like? I focus on the pose, clothing, background, lighting, retouching, sharpness, composition and any other elements of a given image which can be defined and manipulated by the photographer. Once I can understand these variables and how their manipulation changes an image, I can take intentional control of them during the photo-taking process, rather than allowing them to happen incidentally.
I think that these two components- education and practice, are the basis for becoming an "expert" in any field, especially photography.
I wanted a Laowa 15mm f/4 1:1 macro lens w/ shift but for ~$450 it didn't seem worth it for a fully manual lens. came across the Opteka 15mm f/4 1:1 lens w/o shift & after research determined it was the same exact lens without the shift adapter on the back of it. so i got one as it is much cheaper. and Gosh what a lens. it is brilliantly sharp in the center since it is made for shift and that close focusing is the bees knees.
It also has the ability to do shift still is ill probably 3d print a shift adapter for it myself. It can also do massive 45 degree tilts! (though astigmatism happens but that is sort of negligible if the image is composted right. AK distort the sky and not the subject)
I haven't used it for photography projects, but as a "single stop" for project management I can't but suggest trello.
Basically you got some columns (The basics are "To do", "Doing" and "Done", and I usually add some more for links, articles, random thoughts and such), and put cards (Which are tasks) on these columns. You can attach documents, add checklists, comment on them, etc etc).
Then its just up to you how do you want to sort it out. I got some projects with the standard "To do/Doing/Done" organization, but also a weekly planning board in which each column is one day of the week.
It can be yours for the low, low starting bid of just US$3000!
... God that thing is awesome
Apple used a screenshot from an app called Polarr. Polarr used (with my permission) that image in their app. Which means Apple didn't really picked my image directly :) If they had, they would have written me.