
What are
/r/ZBrush's
favorite Products & Services?
From 3.5 billion Reddit comments
The most popular Products mentioned in /r/ZBrush:


The most popular Services mentioned in /r/ZBrush:
Gumroad
ArtStation
xNormal
Cults.
OBS Studio
NUKE
MakeHuman
Houdini
Blender
Blender Game Engine
Adobe Color CC
SculptGL
Memtest86+
TouchMousePointer
ZBrush
The most popular reviews in /r/ZBrush:
I started with Michael Pavlovich's intro to zbrush series found here https://gumroad.com/pavlovich.. The entire beginner series is free. It's when I actually started to get good with zbrush. Have fun!
clothing can be done in zbrush, but it takes months/years to get good at sculpting cloth. marvelous designer helps artists out. i wouldnt recommend painting in zbrush/maya, substance painter is the way to go.
yes, these outside programs would be more effecient for better looking models.
personally i make my uv's in max, or you could use maya. i bake my normal maps in substance painter,xnormal, or handplane
topology question: for your final low poly model, zremesher is not the way to go, you'd have to do that in maya or any other program that retopologizes. zremesher is used to get bit more cleaner topology (its usually used after dynameshing), but its not animation friendly topology.
rigth now the only turorials i could recommend would be anything by michael pavlovich (not sure if thats how you spell his name)
https://gumroad.com/pavlovich
his creature production tutorial is pretty good
I really like the first model. Did you have dynamic perspective disabled? You should turn it on! It's a lot less awkward for viewing than orthographic view.
Also, I'd love to see actual screenshots or renders of this, instead of grainy photos of a monitor. It would really let us see all the nice detail you've sculpted. Ever thought of giving <strong>ShareX</strong> a try?
Great work though! From what I can see, the skin complexion on the human character looks nice!
I'd recommend this series from Rafael Grassetti before dropping the huge cash needed for those courses. Not saying they're bad, just saying you might not need to spend that much.
> most high to low workflow videos involve getting lower resolution geometry using decimation master
I guess I'm a bit confused by this part. What is it about Decimation master that you don't like? This is my main zBrush workflow for getting a working low-poly version of my mesh.
For normal maps, I love using xNormal. It's an open source software where you plug in the low and high poly meshes and it generates an awesome normal map to use on the low poly.
I don't think you'll be satisfied with the features of Zbrush strictly for painting. But if you want to dive in you should watch the videos on pixologic.com under zclassrooms. They'll give you a better handle on how the program works.
For a free photoshop alternative, try Krita. https://krita.org It's most recent beta is fairly stable and will do most of the important things photoshop can. If your tablet pressure isn't working, chances are yu need to reinstall some drivers, search the manufacturer website, uninstall your tablet, install the new driver and restart your computer. You probably already knew that, but better to put it out there to begin with. Good luck.
P.S. Maybe request help a bit more politely next time. Lest you get downvoted before anyone reads it.
I dig this book, and only had gotten it last year - was $32 then and often see the price much higher. Here is an amazon link that is showing me $28, and that is a great price for this one.
Consider it another great tool to have in the tool chest vs. an either or. Your tools should also include vid tuts from Flipped Normals (highest recomendation)/Gnoman/Udemy (the good ones)/youtube! With all those any many classes purchased, I still dig flipping through this when away from PC.
What makes this book cool:
There are 3 character models the book provides step by step examples of creation that helps get your gears turning a bit on approach. A female fantasy elf complete with weapons and clothing/leather armor - think table top like miniature. An Orc with robo armor and cyborg appendages, and finally a complete mechanical drone with legs. Basically; an organic with clothes to a hybrid hard surface example, to a complete mechanical demo. I thought that to be cool and was and why this is still helpful to me.
If I'm going to be honest, the lack of drawing shows, which is why I suggested it. You aren't going to be good at it at first. Most professional athletes aren't good at first, either!
One of my favorite anatomy books to recommend to people starting out is Bridgeman's Complete Guide to Drawing from Life His sketches are loose and seemingly "scribbly" but those scribbles are damn accurate.
Another good book with a bit tighter drawings is "Artistic Anatomy" This may be more helpful after a bit of practice, as there aren't as many pictures as you'd think. But the information in it is absolutely priceless.
As far as tutorials, ehhhh, I don't know of much. There isn't a "right" way to draw so it's hard to make a good recommendation. My best advice? Find artwork you like. Find artists you like, and COPY them! I'm not talking tracing (though there are merits to that if you use it wisely) but actually finding an image, sitting down, and copying what they did free-hand. You begin to notice things about how they did their work, and you pick up on things. Don't know of any off the top of your head? Google is an amazing tool! I'm a professional artist, and I still do this. It's kinda like studying for a midterm. Just a different type of studying.
Lastly, STAY DISCIPLINED! Start a sketchbook. Practice is the only way you will get better. Challenge yourself to do one drawing a day. The better your drawing, the better your sculpts. I promise. :)
Happy Drawing!
yep, badking, cubebrush.co and gumroad there are freebees everywhere.
The other one you might find helpful is the Orb crack brush
the kit is here
I've found it worthwile to spend some time setting up a custom Zbrush layout, or more over, if you find yourself constantly menu diving for [thing] add [thing] to one of your menu bars.
I've got most used brushes along the bottom and the side and top bar is slowly having things added/replaced by tools I use more frequently.
that's a lot of "app" talk 🙂
BPR can do lots, but it's also fairly basic compared to full and feature rich renderers imo, so you can render your model in an external renderer. there are many options and most cost non-insignificant amounts of money
the only one that works directly with Zbrush is Keyshot ($). keyshot integration is set up so that you can send your subtools and materials to Keyshot in one click. Keyshot will also allow you to build your own materials and scene lighting
otherwise you can manually export your models for rendering elsewhere. a free option would be Blender and its Cycles renderer
keep in mind that any render setup and materials you do in Zbrush will not carry over to external programs (besides keyshot, with limitations). you will have to learn to set up new materials/shaders and lighting inside the confines of your chosen renderer
as you start doing it, it's not a very complex process imo
I think it's a great tool to work on your anatomy skills. Especially if you have some kind of background to translate it from 2D to 3D.
Rafael Grassetti is one of my favourite artists and he also has a Gumroad page with one of the best anatomy courses for beginners. I followed his tutorial as a complete beginner and I was amazed what came out.
https://gumroad.com/grassetti if you wish to check it out.
Thanks :) I mostly just used damien standard, and clay Buildup. I did however use some of the default alphas when creating pores for the stomach, and then I tried some of the orbs crack ( https://gumroad.com/l/nOkHw ) brushes for creating skull details.
Here is the speedsculpt if that helps any.
https://www.youtube.com/watch?v=G7he3w27i5o
I did go a bit back and forth, so I don't know how entertaining it is. I'm fairly new to zbrush, so I'm primarly just using the same brushes :)
http://zbrushcore.com/features says it lacks texture map support, but should have basic polypainting. If you export a sculpt with polypaint turned on, then the vertex color data should be saved to the OBJ (it does in zbrush anyway, not sure if Core is the same). This vertex color data isn't actually a standard part of the OBJ file format so not every program will be able to read it. Xnormal can however, and you can use this tool to bake the polypaint (and other details) from the sculpt to texture maps for a lowpoly UV'd mesh (you might need to use another tool to do the UVs, there are some free ones available as well like Roadkill, Blender, etc).
Not sure if this qualifies, but instead of using image planes or spotlight for ref pics you can use this 'always on' image viewer while you're sculpting in Zbrush. I couldn't live without this thing, highly recommended:
makehuman (http://www.makehumancommunity.org/) can help somewhat, but zbrush is not made to be a real world measurement kinda program. You can do a couple of those measurements and use the resulting model as a base to sculpt on.
Great. You've probably heard this a hundred times but anatomy is something you wanna learn right from the start.
It's actually simpler than you think when you realise the body is just a machine, and the various muscles/tendons/bones operate like levers and pulleys. Two books that drastically helped me were 'Artistic Anatomy' for the fantastic plates and descriptions, and 'Atlas of Human Anatomy for the Artist' for its breakdowns of the forms and functions (this one is more reader-friendly).
Good luck buddy, if you have any questions I'm not the authority on the subject but I'd be happy to help you out.
I have a couple that I keep on hand at all times when working, Zbrush Digital Sculpting: Human Anatomy by Scott Spencer, is more zbrush orientated, but there's plenty that you can take from it. And my favourite: Atlas of Human Anatomy for the Artist by Stephen Rogers Peck, this one is more fine art based, but the detail it goes into is fantastic and the last time I checked it was really cheap on amazon (£10). Hope this helps!
I spent two years learning ZBrush inside and out. I would absolutely recommend checking out ZBrushWorkshops (now called UArtsy) and would highly suggest taking Paul Gaboury's course and getting his book. He is one of the creators of ZBrush and his knowledge and expertise is unmatched. His book is also THE best ZBrush book out there. I use it so much that my copy looks like it has been to war.
ZBrush will be perfect for your Form1. You can make watertight meshes with Dynamesh and the 3D Print Exporter and you will love the detail you can get from your printer. If you are into jewelry, you may need to use your CAD knowledge to bring some exact size base meshes into ZB for sculpting on. At UARtsy, there is also a course with Tomas Wittelsbach, who makes amazing jewelry with ZBrush and MODO.
i had a intuos pro and i like my xencelabs way more https://www.amazon.com/XENCELABS-Wireless-Battery-Free-Pressure-Sensitivity/dp/B08VNRC69B/ref=sr\_1\_3?crid=383MGBQB1V579&keywords=xencelabs+med&qid=1669305258&sprefix=xencelabs+med%2Caps%2C164&sr=8-3&ufe=app\_do%3Aamzn1.fos.08...
I tried i give up never buying a Huion again I’m buying one of these instead maybe a little bigger than this one https://www.amazon.com/XP-PEN-Artist13-3-Full-Laminated-Graphics-Function/dp/B07VPHR6GD?th=1
It’s better than I did for my second sculpt for sure. The hair on this is the best part in my opinion. Hair is deceptively difficult to do. When I started I was recommended to look into anatomy and I will recommend the same book that I was recommended and has helped me immensely - [Anatomy for Sculptors by Uldis Zarins](www.amazon.com/dp/1735039020/ref=cm_sw_r_cp_api_i_WP9BR7TX6J9XRG62BWS6)
I have the paperback version since it is MUCH cheaper. But the book is great, I can’t recommend it enough. The difference it caused after browsing it a couple times and then modeling with it as a reference is night and day.
Here is the download link: https://gumroad.com/l/NTPi
They are mostly more clean and flowy Clay Buildup like brushes and really sharp pinchy carve brushes (something like DamStandard) for various occasions which also includes fancy double action 2 sided variations. There is also a wet ish average flatten brush, a simple fur buildup brush and a polish sculpting brush.
cryid's suggestion of local symmetry seems to be what I was after. I've used zspheres in the past but I find I have better results using primitives to build up shapes as used in Matt Thorup's tutorials
What style are you referring to, the creature itself or the presentation? If you're looking for some type of introductory course to creating creatures/characters for the purpose of 3D Printing, I can recommend /u/Follygon_'s gumroad tutorial. It's a good foundation for this sort of thing.
No you were right, the Cintiq is the actual monitor you can draw on, but it can be tricky for fine detail work because the pen is in the way of whats underneath it and you still have that level of screen gap. They're very expensive which is why I suggest holding off on it and using your money for something else. The Intuos is the next level down (without the screen). I'd highly suggest going this route first. It doesn't matter what the pros use (a lot of pros use Intuos or even lower tablets) its all about results and knowing the software.
As for ZBrush I use it a lot for organic modeling or quickly exploring shapes. I'll use it in conjunction with Modo (an awesome combination) where I'll create something using ZBrushes Dynamesh, Retopo it in Modo, and then paint it in Mari, and render it in Modo. It's an amazing workflow.
Here is an example of someone doing the same thing (this guy is VERY good): https://vimeo.com/67268980
And here's another: https://vimeo.com/64119063
This will be a common workflow when you have ZBrush. You'll do a lot in ZBrush but it's really only good for creating maps since its geometry is too high res (or too messy) to use in production. You'll create a base model in either ZBrush or Maya, do fine detail sculpting in ZBrush, then export maps from ZBrush to Maya for use on your models.
You can watch zBrush classes for 1 week and then go directly to complete workshops. I haven't watched zBrush udemy videos but I you will learn a complete workflow from this workshop:
(In case you want to add a dragon to your portfolio)
I've updated my ZBrush material pack. Now there is a total of 92 materials. Free sample pack is still available. If you use the coupon code 'happynewyear' during checkout, there is a 20 percent discount from the price of the full pack.
To add on this.
If you go to https://gumroad.com/pavlovich there is a new series "zbrush for ideation" which is basically his intro to zbrush series but updated for the newest version, and updated with new techniques and stuff. The whole part 1 (it containts 7 parts) is free on his youtube, so if you like it you can buy it and continue watching.
He is very very knowledgeable about zbrush and is concise and not boring to listen and watch (imo).
The two best beginner tutorials I've seen so far are Michael Pavlovich's Intro To ZBrush Part 1 (it's free): https://gumroad.com/pavlovich#
And Madeline Scott Spencer's Gnomon tutorial: https://www.thegnomonworkshop.com/tutorials/introduction-to-zbrush-4r7
What's good about both of these tutorials is that they're broken down into small chapters.
One really cool thing about Zbrush in general is that you don't have to know everything right off the bat to create cool sculpts. I learn new tools and functions with every new project. For example the project I'm working on right now is the first time I've used IMM brushes.
Once you get the basics down then it's just a matter of searching for specific answers and workflows on ZbrushCentral or even here on reddit.
This was a continuation of my ZBrush sculpt from my Intro to ZBrush class in 2018. I cleaned up a lot of details and added the base. There are more renders/turntable on my portfolio if you wanna check it out here: www.artstation.com/jinyao
Totally open to constructive criticism or questions when I get back later! I'm not a pro lol Thanks for looking! :)
I'm new to learning ZBrush and anatomy as well. I've watched and read dozens of anatomy tutorials and Rafael Grassetti - ZBrush Anatomy helped me the most, hands down. What I like about this tutorial is that he starts from the scratch, sculpting a torso. I learned the workflow of sculpting human bodies from that tutorial. Costs $22+ for 5+ hour content.
I also like Anatomy for Sculptors which I use as a reference whenever I sculpt. I especially like the page where it shows you the muscles layer by layer. Costs $30
First sculpt I done was with watching tutorials on using zbrush as a tool and no actual tutorials on form or proper use. I dove head first with no idea and thought my first sculpt was actually good.
I stopped using it for a month and spent it watching tutorial vids on form and brush use. Mike Pavlovich(https://www.youtube.com/playlist?list=PLkzopwqcFevYqrk_0MKIaUwrWYILzYsp6) and Chung Kan (https://gumroad.com/chungkan) mostly.
The one on the left is the most current and I did this while I'm here at the beach with a mouse and no tablet. (left them at home but brought my laptop).
Any CC would be awesome, always looking to improve.
ok i hope you havent watched them already.
This guy helped alot, Matt Thorup, he has good tutorials on his gumroad page, also i remember learning a clay tubes method for hair sculpting on a video from Ryan Kingslein called sculpting dynamic hair on his workshop site but i cant find it again, seems like he took it down... will post it if i find it.
nd theres Frank Tzeng who has a good hair tutorial also and some good likeness tutts that im gonna follow up when im good enough.
Since it depends on the tool it sounds like the tool got corrupted.
I had this happen regularly when I had a PC with bad ram.
You may amwant to run a ram checking program.
https://www.memtest.org/#downiso
If you have a Mac I don't know what you'd use.
I think you should accept that it is not a technical tool, no parameter-based modification, no scale at all. It is an artistic tool. For parametrisation you can use Autocad+3dsMAX or even Maya. This is meant to simulate sculpture, not technical drawing. And you can click GoZ to take your sculpt back and forth into parametric programs pretty easily.
While I agree with some of the points (like placing the useless 2.5D tool and mode somewhere far away, adding the 3D move/rotate gizmo only in 2017 where the others had it for 25 years maybe) you are forgetting that this is just a tool and it is completely optional. If you don't have to sculpt 12 million polygons on your screen you can use Mudbox, Blender, 3D Coat or whatever. Heck, there is even a browser-based sculpting app I like a lot (https://stephaneginier.com/sculptgl/).
Alternatively, just use xNormal, it's used quite a lot in the industry and is free. Then you don't need to spend time re-projecting, and you get a better normal map than ZBrush gives you.
I'm learning about this myself, i've been told to learn a program called XNormal XNormal . With that program you load up the high poly mesh, and the low poly mesh, and it will then bake out the normal map to a texture. the program seams to do other stuff as well, but so far thats all I've used it for.
http://www.mygoodeyes.com/eyedisorders_clip_image006.jpg match the eyes from every angle.
Focus on anatomy, you have a good start, but for characters I cant stress enough how important anatomy is for an appealing model :)
http://www.artstation.com/artist/Grassetti anatomy anatomy anatomy!!
also. consider. We rarely see white all around the iris, (it makes him look insane).
I'm going to second that something more akin to makehuman is probably more for this kind of project.
Also, it is a free and open source program, so even if you need to do something more specific, you didn't invest money with makehuman.
You might also see if any businesses in your area do 3D scans. You could get a direct to life model of yourself, though it won't be cheap I'd wager.
In Udemy.com there's plenty of courses for less than 20 euros/$. But youtube have a lot of tutorials too! Also look after artist in Gumroad or Instagram, they always post stuff about free or cheap courses.
Happy zbrushing!
So I figured out what the mistake was. Rotating with higher resolution objects puts an extreme load on the CPU. If you have a small CPU with only 4 cores, the CPU is 100% loaded and the delay occurs. If you switch off Multidraw, then there is no longer the delay error, but the sculping becomes very unperformant. one trick is to switch the Max CPU down a CPU. this is enough to avoid the delay and still the sculping remains performant.
​
Translated with www.DeepL.com/Translator
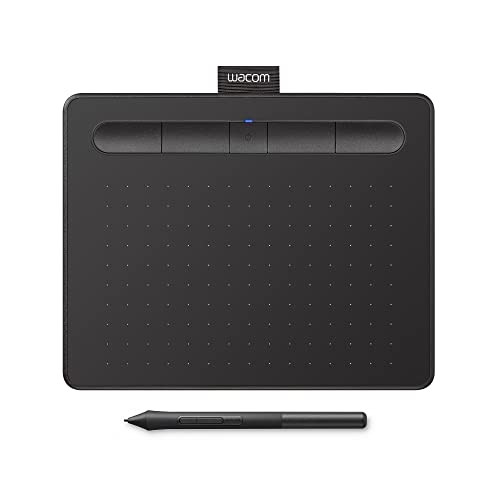
I would highly recommend one with a screen, a true display tablet if at all possible, even something on the lower end of Wacom, the hand eye coordination for the ones you listed can make using them incredibly difficult and damage your confidence in your project/desire to advance.
I haven’t tried this one personally, but the reviews show that it is good, and if you’re on a budget looking to experiment with sculpting, I’d give it a shot and you can advance to a larger, more advanced tablet later.
I went to barnes and nobles to look at books for anatomy and i picked up this one. https://www.amazon.com/Students-Anatomy-Stretching-Manual-Fully-Illustrated/dp/1438003919/ref=sr_1_1?dchild=1&keywords=the+Student%27s+Anatomy+of+stretching&qid=1617231857&sr=8-1
(it's on sale,,, i payed full price.... -_-)
it has Basic Reference without overloading you with informations if you're only using it to study anatomy.
watch pixologic's channel on twitch. they have multiple zbrush artist show different workflows because they're is just so many ways of doing things. plus you're able to ask questions!!!
So I got the Lenovo and tested it out some today. There are a few similar models, the one I got is this one for $700:
https://www.amazon.com/gp/product/B086226DDB
I tried Krita first and it required a little setup. One I had to go to the Lenovo website and get the Wacom driver for the specific model I had. Then enable Windows Tablet Ink in the Tablet settings of Krita. By default it uses the older driver and that was all messed up and pressure sensitivity didn't work. However, once I got everything updated it does work pretty well. I think there is a slight delay on the screen, I haven't used the newer screen tablets, so I don't know if this is normal or not. It's minor though and still good enough I guess.
I also tried ZBrush. It was working fine. Pen was detected, pressure sensitive worked, and the zoom/pan/rotate navigation was good with the right-click on the pen (and thankfully the pen works like within 1 inch of not touching the screen, which is generous). To be honest, I recently got a HUION INSPIROY Q11K tablet for my desktop machine, and that definitely has better pen control than the Lenovo 2-in-1. Probably for very serious work, I would rather use the Huion (or a similar quality graphics tablet) as it just feels more nuanced and accurate. But the Lenovo is still better than acceptable, and for mobile use, travel, etc. it is probably good enough. I just don't think I would use it as my main computer, though I'm more of a desktop user and only keep a laptop around for travel.
Otherwise, the laptop seems decent quality for the price. While not a gaming powerhouse, you can game with it, and ZBrush seemed okay in the viewport. General desktop browser use was fine, wifi is fast, it has a finger print reader, just overall a nice package for the cost. Not sure you will find much better than this for $700, so I'm happy with the purchase.
Triggered a childhood memory of the book "Where the Wild Things Are" ... see the image here https://www.amazon.com/Paper-House-Productions-PUZ-4001E-Puzzle/dp/B01LSDYT8G
Ok so i just discovered amazonglobal they ship to south africa i found this one would you reccommend it? https://www.amazon.com/Graphic-Drawing-Pressure-Sensitivity-Carrying/dp/B074DTP2V4/ref=sr_1_1_sspa?crid=1WJAWC79JANJO&keywords=wacom+intuos+drawing+tablet&qid=1555244628&s=gateway&sprefix=wacom+intuo%2Caps%2C464&sr=8-1-spons&psc=1
I’ve only personally used Wacom products, I’d probably just get one of the Intuos tablets in your budget.
I personally wouldn’t get the one you linked, as the price is very low, considering it comes with a few extra items.
This is the 8 inch model. There are other sizes to choose from. I don’t know what your budget is.
It wasn't a video, but an Amazon product review. Check out this link:
​
Just look up the tablet on YouTube and you'll see many reviews. Watch several reviews on the tablets you're thinking about getting. You can even ask the community on Amazon of those who have purchased the product if you have any questions. I'm sure you'll come to a decision then. I personally think it's a great tablet. Good luck!
This is a great start! Anatomy is a tough subject to nail down. The biggest thing I can say to you is to work on your forms. It appears to me that you are falling into the trap that a lot of new artists do when starting with anatomy in ZBrush and thats "carving" in the muscle definition rather than building up the forms that create the muscles. By building the forms up in order form deeper muscles to surface muscles you will end up with a lot of the "Creases and lines" between muscles that a lot of people identify with being "ripped" or "shredded"
When I'm doing anatomy I like to use the clay tubes brush to build up base forms, hPolish to setup my plane breaks, and than the clay brush to do a final refining pass.
One of the best books I can recommend about true anatomy that looks at it for what it is and avoids the artists personal style is "Atlas of Human Anatomy for the Artist" by Stephen Rogers Peck (http://www.amazon.com/Atlas-Anatomy-Artist-Stephen-Rogers/dp/0195030958/ref=sr_1_2?ie=UTF8&qid=1406854979&sr=8-2&keywords=anatomy+for+the+artist). Its a little known gem among most people and its super cheap. this guy really knows how to break down the subject into terms for an artist and avoids unnecessary detail.
Keep up the practice!
I would also love to know what mounting arm setup that is. Thank you!
edit: I ask because I've been looking for a mounting arm just like this for my MSP16. I have several ergotron arms, but all of their products i've seen dont seem to come in this configuration. Thanks again! (trying to find it myself, but if you wouldnt mind providing a link that would be excellent!)
edit: Haha, just found the post on your twitter and eveyone is also super stoked about the arm. I found a couple arms that seem similar. (had to zoom and enhance your pixel >:])
Is this the model arm that you have in your setup? https://www.aliexpress.com/item/Thinkwise-S100-full-motion-desk-mount-gas-LCD-monitor-arm/1235953226.html
theres also this one: https://www.amazon.com/gp/product/B00SSMHB4U/ref=s9_acsd_al_bw_c_x_2_w
If so it would be a great help to know what you at least searched for the actual vesa laptop adapter that holds the tablet in place! Also, did you happen to paint your stand? I havent seen any mounting arms with any option other than silver/black.
I use one of these with my Cintiq. I love it. It's changed everything. That stupid little stand it comes with is basically useless.
If you want a taste of concept art, I recommend this book: https://www.amazon.com/Big-World-Concept-Video-Games/dp/1624650201
Fairly awesome resource for a pretty low price, and if you happen to live in the North Texas area, the author teaches Concept Art at a community college here.
you can get the basic wacom tablet thats small for a couple dollars linked below that way you can get your feet wet not spent a lot of money and just upgrade later. This model also comes in a medium and large size and yes you need a tablet no matter what you would nto draw on a piece of paper useing a piece of charcoal would you ? Thats exactly what its going to be like drawing with a mouse. you can email me if you need any help man I love helping people with zbrush im available 24/7
To help with the lack of hotkeys I got one of these: http://www.amazon.com/Logitech-G13-Programmable-Gameboard-Display/dp/B001NEK2GE
Makes life in ZBrush much easier - left hand on this, right hand on the stylus. No full keyboard necessary.
As a medical student trying to tackle anatomy I found anything written/drawn by Netter to be invaluable. I would also try to reach out to a local medical school/university and see if they offer anatomy classes. Dissecting a real cadaver will greatly enhance your skills. That is if you're not squeamish.
http://www.amazon.com/Atlas-Human-Anatomy-Interactive-Ancillaries/dp/1455704180
A good way to do it in ZBrush is to model with the mouth closed, then use Morph Targets and Layers to open and close the mouth while you create the mouth bag. There is a pretty detailed explanation of this process in Scott Spencer's book, ZBrush Digital Sculpting Human Anatomy.
You might also be able to find something free online or figure it out by messing with those two features on your own.
Study the skull and how the facial and head muscles connect. It always helps understand how anatomy works. Get this book, from Scott Spencer, it's awesome and helped me a lot.
I found this book to be very helpful. Its not exactly an online course, but it got me started & comes with an example disk: http://www.amazon.com/Introducing-ZBrush-3rd-Eric-Keller/dp/1118244826/ref=sr_1_10?s=books&ie=UTF8&qid=1425581277&sr=1-10
Don't get the e-reader edition. I found it harder to read in that format.
I would suggest picking up a couple anatomy books and simply copying them. Like I said, you'd be surprised at how much this teaches you. First, take a look at Bridgman's guide It's very loose and probably easier to learn from because of it. But there is complete accuracy in the looseness of his drawings, so I know I learned a ton about the figure from him.
Secondly, I'd pick up Richer's Artistic Anatomy This is a ton more informational, and the drawings are much tighter, but spot on figures and great info. This is one of my teacher's favorite reference books, and he's been published in Spectrum 13 times, and worked for George Lucas.