
What are
/r/bleachshirts'
favorite Products & Services?
From 3.5 billion Reddit comments
The most popular Products mentioned in /r/bleachshirts:


The most popular Services mentioned in /r/bleachshirts:
Imgur
Inkscape
Newgrounds
Wikiwand
Shutterstock
Dribbble
Pexels
Adobe Color CC
PosteRazor
Amazon
Etsy
Microsoft OneDrive
TeeSpring
FileDropper.com
WordReference
The most popular reviews in /r/bleachshirts:
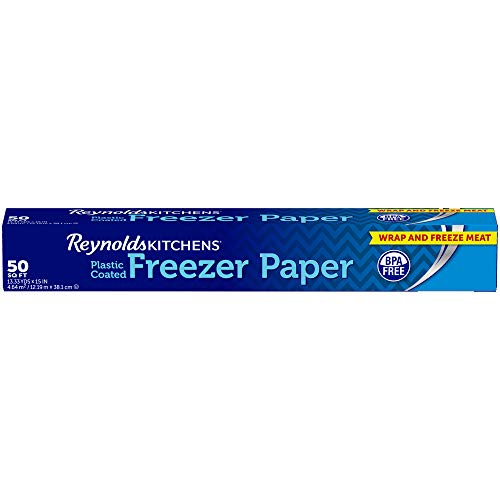
This is far better stuff than that waxed stuff. It's what we all use over here. It is backed with polyethylene so it doesn't bleed through any cracks that form, and removes cleanly. Over here we can get it at Walmart, but I get mine in the hunting section of the sporting goods store. you can get it at Amazon UK. Freezer Paper
Edit: Thanks, Bot!, Thanks, Coffee!
Full disclosure: I saw this design some time ago on /r/DnD , and decided to ~~steal~~ borrow it!
Made by Kelly Matten and availiable for sale here!
Amazon had the Cricut explorer air 2 the other day for $179
Cricut Explore Air 2, Mint https://www.amazon.com/dp/B01GSOMVRG?ref=ppx_pop_mob_ap_share
Also there are cheaper blades and holders than the Cricut versions. I’m making stencils for my bread!
I got some of these and some adhesive spray. Reusable, and since it's thin mylar you can use it in a laser cutter or a cameo.
8: Here are some pictures of a 2-3 year old bleach shirt. You can see how well the bleaching held up even though the shirt's fabric has started pilling a bit.
edit: the last picture is the inside of the shirt, showing where the bleach did / didn't get all the way through.
Eau de javel is bleach in French. It is exactly the same as American bleach. You will likely still want to dilute it according to instructions found for bleach shirts because it is very powerful. It should have a slippery texture and a distinctive smell.
So I just tried this on a junk shirt last night with the inverse of the template I am going to be using. I used Freezer Paper and it turned out better than I had hoped. Make sure on the freezer paper that you trace your design on the non-waxed side.
I had a piece of cardboard inside my shirt (to prevent bleeding) and when I had the shirt where I wanted it and wouldn't be moving it much, I put my freezer paper template on the shirt wax side down and ironed it. Ironing the freezer paper will make it cling to your shirt which will prevent bleeding under the paper. The iron doesn't have to be super hot, just enough to make the paper stick.
Then spray lightly, and immediately take a white rag or paper towels and dab the bleach lightly (being careful not to pull or more your freezer paper), around the freezer paper specifically. This will also help prevent bleeding.
Here is the test I did last night on a old junk shirt I had: Junk Shirt
*Edit: Oh, and as far as criticism, I love the template idea you used, it would look really good if it didn't have those drops.
Fruit of the loom on amazon usually does stuff for a few quid, I use em for gym stuff, and other clothes to wear while painting/doing messy jobs. Not sure what colour it goes im afraid!
They fit well, but I find after a year or two they get a little baggier and stretch out a little, that might be because I use em for exercise though, so who knows.
I'm assuming you want more specifics about how I used gimp, but if you meant something else let me know.
When I start with something detailed like a 3d rendering I tend to try to simplify it. I almost always Desaturate it first since I'm primarily working on stencils and color isn't important. Then I use a combination of changes to contrast and brightness, levels and posterize -- all of these options are in the Colors menu. These are settings you have to play around with to understand, so just load up an image and start changing the settings to see what they do.
Depending on the level of detail I will use Filters -> Artistic -> Cartoon which can help make the image look like a shaded line drawing. Sometimes I do this before adjusting the colors and sometimes after.
The Filters -> Generic -> Dilate and Erode are useful if I need to make the image more stencil friendly -- they do exactly what they say: expand light areas or expand dark areas.
For the effect in this stencil I used the Filters -> Distorts -> Newsprint. This can do a variety of cool things, but for stencils the most useful way to use it is to lock all the channels (this is a checkbox), set the Spot function value to Line, increase the Oversample as high as it will go and then play around with the Cell size and look at the preview to see what you're getting as shown here.
Lightening or darkening the image first can give you much different results. And if you invert the black/white that can do other cool things. You just have to play with it until you find what you like.
I use mounting spray to hold the stencils I've made before and its worked
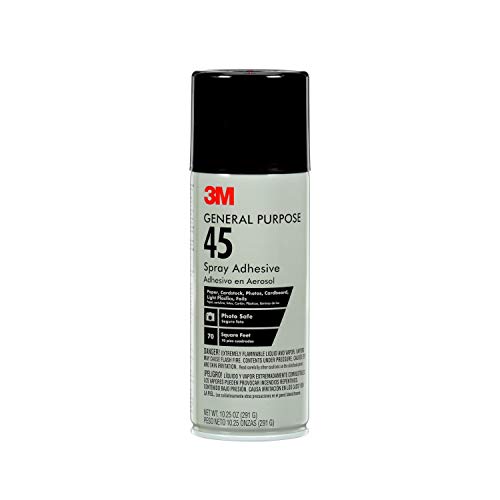
I use lamination sleeves (specifically Amazon Basic laminating pouches, but doubt it matters). Run them through the laminator empty so it fuzes the two halves, they are perfect (for me anyway). Last forever, I have a couple of designs that I have done over 100 shirts with. I use 3M Repositionable adhesive spray, and just respray when it isn't sticky enough anymore. I rinse them off and stick them to freezer paper and file them in a cabinet for storage.
AmazonBasics Thermal Laminating Pouches - 8.9-Inch x 11.4-Inch, Pack of 100 https://www.amazon.com/dp/B00BWU3HNY?ref=yo_pop_ma_swf
You can get a cheap laminator machine for like $20. I guess as a side bonus, you can also laminate stuff.
I got the Amazon knock off version and it worked sooooooon good
Thanks!! I don't have a stencil per se, but I used this image.
However, if you look closely at my shirt, I changed one of the buildings since it had way too many tiny windows, and I was running out of time to make the shirt (in was a x-mas present)
Thank you so much!! Sadly, I don't have a pattern to share for it since I freehanded it - I'm actually hoping to make a craft out of handdrawn bleached shirts!
I got my reference picture from here though: https://www.pexels.com/photo/brown-tabby-cat-sitting-on-brown-wooden-stool-3885948/ :)
You have quite a bit of islands in a few of those (small circles, hard to cut out). This your first time making a sketch? If you plan making it on a shirt, I would try simplifying down the colossus' like so: https://imgur.com/a/zAfSA
I think I'm probably going to share the stencil in another month or two. I just debuted the shirt on my Etsy store and I spent a ton of time making this one by hand, so I'd like to give it a chance before I make that design freely available.
And yes, I made it myself. Once I got the final layout planned, it took me about 15 hours with a drawing tablet and the pencil tool in Photoshop. Since the original image had strange levels of contrast, it was utterly impossible to do it with thresholds and filters.
EDIT: I forgot to mention that I did make a coupon code just for Reddit! Use SPR15BORNE for 15% off anything in the store.
I use 4 mil mylar plastic. sometimes i use thicker for more detailed stencils, but the 4 mil is really all you need and its easier to cut out. I've pretty much mastered getting crisp images at this point, and even though people always say paper gives more clean and crisp lines, I've found that material doesn't really matter for that stuff. Instead, i think it is just really important to have the stencil lay flat and to have a very even mist of a spray. Here is an example of my work with the plastic and here is a link to some plastic on amazon. I hope this helps!
There's also OUT White Bright, that I've seen other people have pretty good success with, but I haven't used it.
Yeah I had trouble too with brushes at first, but learned that just a quick press on paper towels is enough. just have crumpled paper next to you and do a quick press before each stroke. I got my Bleach pens on Amazon.
I got these on Amazon
They are awesome!! Continuous spray for 2 seconds while pressing trigger. Here is video of flairosol in action
I use lamination sleeves:
AmazonBasics Thermal Laminating Pouches - 8.9-Inch x 11.4-Inch, Pack of 100 https://www.amazon.com/dp/B00BWU3HNY?ref=yo_pop_ma_swf
I pass them through the laminator empty to seal the two halves together, then use temporary adhesive spray to stick them to the shirt:
3M Repositionable Clear Spray Adhesive, 10.2-Ounce https://www.amazon.com/dp/B000BKQD82?ref=yo_pop_ma_swf
These are reusable (I have some designs that I have done over 100 shirts with, just have to reapply adhesive after 10 - 20 uses). If you don't care about reusing them, you can use the same sleeves unsealed (don't need a laminator, plastic is half as thick - a little flimsy, but easy to cut). Really you could use anything relatively non-porous (trash bag, etc.) and stick it down with the adhesive spray.
The photo doesn't do it justice, it's actually a solid red. I used Jacquard Fabric Paint. The red came out pretty much as red as the paint bottle is.
You can get an iron for around $10. Freezer Paper is around $8. Your shirts will come out much better using the proper tools. Good luck!
I've used spray adhesive, but I used it with [this]9https://www.amazon.com/Apollo-Printer-Copier-Transparency-Sheets/dp/B0040YC7FI/ref=sr_1_sc_3?ie=UTF8&qid=1481164639&sr=8-3-spell&keywords=trasnsparency+sheets0 as my stencil.
As long as you LIGHTLY spray the adhesive on it works fine. Spray too much and it's a gigantic PITA. I'd suggest practicing with the spray before doing your project.
I could see cardboard being useful if you are going to make multiple shirts with the same design in one, possibly two or three, sessions. You can get some spray adhesive and get it to stick really well I think (haven't tried it, but have heard it works). Anyways, nice finished product!
Should be what you're looking for and it works very well, not too much either
one of the roller's advantages over the brush is even paint application (meaning, no streaks). on top of having a wider area (usually) so applications are faster.
depending on what type of material you used for the stencil, the methods differ.
if you used a freezer paper stencil, just make sure to iron it well. you can always test the adhesion by pulling/tugging at a corner (no where near the actual stencil of course). my general rule of ironing is that i should be able to go end to end with the iron and not have the iron snag on a corner of the stencil.
i've been using overhead transparencies (for reusable stencils) and i'm using elmers (i think, might be 3m) spray adhesive. i always make sure to apply a good portion of body weight on it by placing a large flat object (tray/book) and pressing on it.
if your stencil shifted, while applying paint, it's probably because there was no adhesive material to actually have the stencil stick to the shirt. just pinning the stencil to a backing isn't enough, especially if you're brushing. the shirt/stencil will (probably) wiggle.
also, if you're using acrylic paint on the fabric, it will fade/chip pretty fast. i'd suggest making the move/adjustment to fabric paint. personally, i'm a big supporter of fabric spray paint.
edit: i'm also a big supporter of several thin layers of paint vs applying it all in one go. it's entirely possible with the stencil you had, if you had let it dry a bit and painted some more white, it could've looked more even.
This, this is what you need
For my reusables I use this stuff: https://www.amazon.com/gp/product/B00HWI9IKG/ref=oh_aui_detailpage_o07_s00?ie=UTF8&psc=1
Cut with an exacto.
The most use I've gotten out of a stencil was 16.
Made shirts for our beer league softball team.
Semi-intricate, just was careful peeling it off each time. And they all came out nearly identical.
if you want to reuse stencils, duralar sheets with temporary adhesive work great. more expensive, but worth it to me for some of my designs.
A previous redditor who did this suggested this paint:
http://www.amazon.com/gp/product/B0018N9UDQ
Which has been sitting in a drawer of mine for a year in a half now, waiting for me to actually do this.
I've used this fabric paint. Do you know if there is a difference between what I used and what you used? Or are they basically the same thing? Ink vs Paint
This: http://www.amazon.com/Sheets-100micron-Waterproof-Inkjet-Transparency/dp/B00HWI9IKG
Plus this: http://www.amazon.com/Elmers-Repositionable-Mounting-Adhesive-E454/dp/B000BKRLMO
I've successfully used at least one stencil 16 times. I've got 5 stencils that are still going strong after 5 applications.
Ironing - absolutely not. Hair dryer. Hair dryer.
That's actually the plan once I use up the stuff i have now. I bought this stuff without realizing that it had an adhesive back. I've actually gotten pretty good with it, it was just initially disappointing because i was hoping to reuse the stencils and it's almost impossible with how sticky it is.
For the reusable stencil - what glue you using?
I've had the best success with using Elmer's Repositionable Mounting Adhesive http://www.amazon.com/Elmers-Repositionable-Mounting-Adhesive-E454/dp/B000BKRLMO.
I also never iron, but do use a hair dryer in between applications.
I've had success with a similar method cutting up plastic pocket folders instead of transparency sheets. They're thicker so they're more durable, and you get a bigger surface area to work with for larger projects. They're a bit more expensive per piece, but you can buy them individually and if you wait til after the back to school sales are over in the fall, you can pick up a bunch on clearance for dirt cheap at a lot of stores.
I have the same question and am looking for verification for my solution.
I am planning on making shirts for my softball team and think that these will suffice as reusable stencils: http://www.amazon.com/gp/product/B00HWI9IKG/ref=ox_sc_act_title_1?ie=UTF8&psc=1&smid=A3QJOP3X7HNRVL.
Apply to shirt using elmer's all-purpose spray adhesive after letting sit for a couple minutes to tack dry: http://elmers.com/product/detail/E452.
Continue as outlined in tutorial linked by /u/bedpanplayer and housed in sidebar.
Yes? No? Am I an idiot?
It looks like you can have success with the sticky paper, but I've never tried it myself. If you order it online, I would go with This or This from amazon. It's what I use, and I know it works. The second link is 45 cm wide, wider than printer paper is long. (11 in) I don't know how much shipping is, but I think its a better value than the individual sheets.