
What are
/r/cade's
favorite Products & Services?
From 3.5 billion Reddit comments
The most popular Products mentioned in /r/cade:


The most popular Services mentioned in /r/cade:
Retropie
Mame
Facebook Marketplace
HyperSpin
eBay
Google Sites
JoyToKey
Instructables
Batocera.linux
Hackster
Lakka
Internet Archive
Youmagine
Dropbox
Autodesk Tinkercad
The most popular Android Apps mentioned in /r/cade:

The most popular reviews in /r/cade:
Thanks for spreading the good word about RetroPie! It's a great project and makes setting up a retro gaming emulation system really easy.
Unfortunately, a lot of this advice is incorrect. Here are the corrections I noticed:
- The download page is now https://retropie.org.uk/download/ not the old blog URL.
- You don't have to format the sdcard, just image it.
- The filesystem is expanded automatically on boot, you don't need to do this manually.
- You don't actually need to drop to command prompt at all after first boot, you can do everything required with a controller.
- I would not recommend running an upgrade after install, there are sometimes additional steps required to work with updated kernel or library or other packages.
- There is an option in the RetroPie menu to show IP address, you don't need to drop to commandline.
- If using commandline you should use
ip addressbecauseifconfighas been deprecated for a decade or so. - It would be nice if you mentioned that pretty much any USB controller works, I personally don't think the iBuffalo controllers are very good. XBox 360, PS3, 8BitDo and other Bluetooth controllers also work, the RetroPie wiki details specific steps required for those.
- It is not necessary to manually update the controller config file, RetroPie does this automatically when you configure the controller at first boot, and uploading your suggested file will break other non-Buffalo controller configurations.
- For MAME ROMs you should explain how to verify a ROM or ROMset using romcenter or clrmamepro, as MAME ROMs and emulators come in many different versions, and the two must match: https://github.com/RetroPie/RetroPie-Setup/wiki/Managing-ROMs
Everybody is bad-mouthing it but nobody is offering advice.
You can salvage this if you lay a piece of 3/8" over the top of the control board and undermount the joysticks. Then use some of these to undermount the joysticks. They will show through the top though, so get yourself some spray adhesive and some laminate/melamine to cover the top of it.
Secondly, the piece that your monitor is mounted to and that (what appears to be) an audio controller... Redo it and this time take your time and use measurements and a template.
Cardboard is your friend. Use it to template things with exact measurements. Use a ruler, a straight edge, and a nice pointy pencil.
You've got this!
The other question is: if I can legally use the ROMs, can I legally use the emulator itself?
For Mame, the response is no. Sadly Mame is not Open Source, precisely because it forbids commercial usage: http://mamedev.org/legal.html
Ultimarc Servo-Stick is great, if you're running a PC it can automatically switch based on the game you selected or you can run it from a button to switch between modes. here's a video of mine in action and a better picture of the panel
If you're specifically opening an arcade bar and y'all didn't think of this, get another lawyer or more informed advisors. Game licensing sounds like it's a critical aspect of your business model.
1) Technically possible but violates most licenses.
2) No. A console game is not the same code and not purchased/licensed in the same manner as arcade titles.
Edit: "...cabinet with the console in it" Oops. Doubtful due to personal-use licensing restrictions.
3) Probably not shut down. Few entities have the authority to "shut down" a commercial business. Lawsuits OTOH...
Read all license agreements carefully or hire an expert to read them for you. For example, MAME license prohibits commercial use, including free play in a commercial establishment. Even if you were to obtain roms with a license which allowed you to play them, you would stiill be infringing on mame's license. http://mamedev.org/legal.html (source: /u/lehk)
Also consider searching for multi-cade amusement machines sold for commercial use.
Edit: And good luck with your business. Thanks for trying to keep some aspects of arcade games alive.
You can find ROMs that have been released into the public domain here: http://mamedev.org
You are allowed to raise money with MAME but only if you have the legal right to the ROMs being used for that purpose. Those from the above site should be okay.
The object of a project like MAME is always to get the best experience into the hands of the most people possible.
This is not the object of the MAME project.
From http://mamedev.org/
MAME is strictly a non-profit project. Its main purpose is to be a reference to the inner workings of the emulated arcade machines. This is done both for educational purposes and for preservation purposes, in order to prevent many historical games from disappearing forever once the hardware they run on stops working. Of course, in order to preserve the games and demonstrate that the emulated behavior matches the original, you must also be able to actually play the games. This is considered a nice side effect, and is not MAME's primary focus.
You'll need to use the "autosave" functionality of MAME since the actual cab also lost scores when powered off. That also means you'll want a button that does a soft power down so MAME exits and saves properly.
I grabbed a cheap tower from my local microcenter. Ryzen 5, 8gb DDR4 and a 500gb m.2. I had a spare 780ti I wasn’t using so threw that in. Playfield is a cheapo 50” vizio 4k from Sam’s and the back glass is an older 1080p Samsung one of my sons didn’t use anymore. I’m also gonna order this for a DMD.
There’s plenty on amazon, here’s one similar to mine: Hilitand Coin Operated Timer Controller Board Multi Coin Acceptor Selector Slot for Arcade Game Mechanism Vending Machine https://www.amazon.com/dp/B07DNK2XX8/ref=cm_sw_r_cp_api_i_LVlfEb2D8F0RE
This is minimum of 10 pieces, and slightly smaller, but it says "1 pc for sample accepted" and it's cheaper :). Good luck!
Forgot the link!
Games up to about 2002/3 run fine. Though there are some games here and there that don't run great or at all. There is a compatibility list within the Official RetroPie documentation that will help finding what run and what doesn't.
>The reason is I do a YouTube series called Coin Wasters where I plug money into an Arcade game and see how much it will cost to beat.
Not to rain on your parade (idea).. but that doesn't sound like a great idea for a YouTube series. Most arcade games I would argue are skill based. Your skill in all the types of arcade games could vary drastically to someone like me. Simple example, I would say I'm alright at vertical shooting scrollers. I'm shit compared to people that play bullet hell games casually, I know they would destroy any older arcade game with a single credit.
My suggestion, if you aren't doing it already. Is to have a group of people play, like at least 4 people, and use the average to get a real idea. Also games change greatly depending on the number of players. Take TMNT for example. I find it much much easier with 2-4 players than going solo. Are you doing the game solo? Or are you doing it with 2-4 players?
Are you going to average the cost across the players? Going back to TMNT, that game has a limited number of health pickups, if one player hogs them of course they're going to use less coins.
Final note, most games have dip switches and a service menu to change the cost per credit, and a fair amount have difficulty options. This can also vastly change the cost per player to finish a game.
At this point I might as well watch a Let's Play video, rather than your video as I know whatever you pay could be very different than what I pay. If you're commentary isn't great, then I'm not really left with a reason to watch. Though that is just my opinion. This does sound like a good idea for a database site. Similar to how HowLongToBeat, where lots of players enter data and it shows people the averages based on few criteria of the play through.
A raspberry pi 3 will run just about anything on any of the consoles you mentioned. There are issues however, running some of the newer arcade games and consoles (N64 and later.) That being said, it would probably work just as well as your 10 year old system. Hell of a lot easier to get up and running too. Just start with RetroPie.
I bought the smallest momentary buttons I could find on eBay which happened to be these.
And the joystick was from Digi-Key, part# GH7453-ND.
Your performance will depend on the laptop specs but as long as it has a decent processor you should be able to run most things smoothly.
For controllers you can either buy usb adapters if you want to use original controllers or you can get a computer game pad, I would recommend Logitech. For MAME you can get USB fight sticks made for consoles and they usually have drivers for windows, at least the ones made by HORI usually do.
For hooking it up to the TV you're kind of limited. If your laptop doesn't have something like an S-Video output or your TV doesn't have a VGA input your only real option is to get a VGA to Composite/S-Video converter.
Front ends are kind of optional but if you want to hide everything you could try something like Hyperspin, it's kind of a pain to set up but it looks great once it is. There's also other front ends that support multiple emulators but I don't really have much experience with them, you would have to look around.
The body is 3/4" MDO (a.k.a. signboard) and the CP is 1/2" MDO.
The design is original; I just played around with a website meant for making small 3D printed things until I got a shape I liked, then translated that to inches when I cut it out: https://www.tinkercad.com/things/jSMfKQzdihv-arcade-cabinet#/
I built my own bartop back in December and stuck a Raspberry Pi 3 into it.
I'm happy with it so far - it's well able to handle pretty much any of the games I've wanted to play on it (including various Cave shooters - which I only learned about thanks to this sub). If there are any particular titles you're interested in, let me know and I'll try to do some testing over the weekend.
So, I'd also recommend what /u/WookieeHoleRoll suggests. If it turns out that you end up swapping in a PC, you can re purpose the Raspberry Pi for something like this, for example.
since you're using a tv and not an arcade monitor, you may need to do something with an ir blaster if you want it to be automated.
since you're using a raspi, something like this might work: https://www.hackster.io/austin-stanton/creating-a-raspberry-pi-universal-remote-with-lirc-2fd581
It's not much better down here in what might as well be the Seattle of the South (Mobile, AL). A bunch of $899 Multicades and people who think their already beat-up Arcade 1-Ups are worth $200+.
We are trying this: https://www.amazon.com/dp/B00KI67L2G/. First attempt was a little subtle for my liking after top coat was applied so may try a second attempt.
I didn't have any plans to follow, it was all done by me. I don't actually have any drawings or plans this project as I pretty much drew it up right onto the wood! Parts are pretty simple, old 19 inch dell monitors, red legend ferrari thrust master racing wheels and pedals, these coin door and buttons from Etsy : https://www.etsy.com/ca/listing/977348311/custom-3d-printed-coin-door-replica-kit
Cheap "EG Starts" buttons and usb encoder from amazon, and an 8 in port extended as I used my laptop: https://www.amazon.ca/dp/B08HK3V4RH/ref=cm_sw_r_cp_apa_glt_i_MP3Q6CQERBEDNRQ1R9CD?_encoding=UTF8&psc=1
Marquees were home printed onto cricut adhesive vinyl, hand cut out and put on plexi. (Backlit by cabinet lights)
And vinyl came from amazon too.
Seems high, right? Amazon Link - PacMan
Any ideas how to go about finding someone to build a custom hyperspin setup? I found this website: https://www.homearcadesystems.com/
Try JST SM connectors. I bought a kit from amazon for under $10 here The housings do both male and female with the pins being the difference.
I picked up the mini version and it’s quite enjoyable, a bit annoying with the tiny stick, but my kids enjoy it quite a bit. Just be careful they (and you) may rage quit and throw it across the room, that’s the the biggest advantage the full size cab has over the handheld one :)
Arcade Classics - Q'Bert Retro Mini Arcade Game https://www.amazon.com/dp/B071HHL1L6/ref=cm_sw_r_cp_api_i_U1DKFbPWABHX9
For Android currently and soon to be on iOS. I don't really know anything about MAME for now so maybe it's quite far for us to be able to go. Thank you!
Yeah, I was planning on adding marquees to the screen...but, haven't yet.
Similar to this...
https://retropie.org.uk/forum/topic/18140/vertical-16x9-with-marquee-project
The adapter and the extenders
You need to start using PPA's. Here is MESS/MAME in a PPA with Xenial support.
https://launchpad.net/ubuntu/+source/mame
I use sudo apt-add-repository from the terminal, but you can do it from Synaptic as well...
Then sudo apt-get install mame
etc.
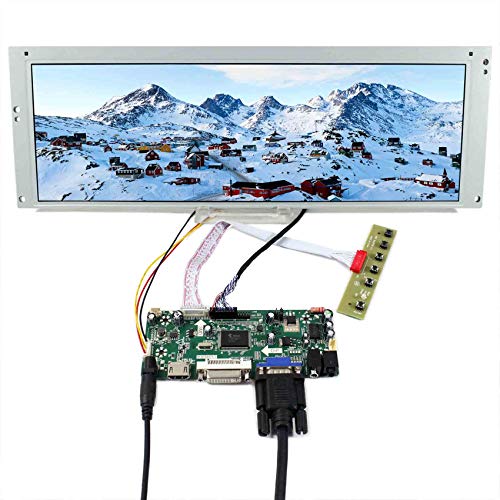
I tried both. GBS has several issues like screen tearing in fast horizontal scrolling games, it doesn’t save your configuration between power ups , and the worst is that I’m pretty sure it outputs at 480i, not 240p, but I can be wrong.
On the other hand, I use the GBS to connect a PC to a s-video monitor and it works decently for microcomputer emulation, because in this case I haven’t found a more cost effective solution.
Also the GBS is a plug and play device, you have to configure your Raspberry Pi to use the VGA 666 hat and then configure Retropie to use super resolutions. You can find the configuration files here: CRT configuration
Very nice job indeed, including the cabling!
A few things:
- TV seems a bit too high (hard to judge)
- You can easily "hide" the TV cables with some cheap white cable duct (like this)
- The i3 can do a lot more than emulating a N64. Get a bunch of Dreamcast games (and stuff from Steam)!
- Still not a fan of this layout, nor of Happ buttons. Viewlix w/ Sanwa ftw :)
You could try setting the OS filesystem to read only after you've made all your configurations. It's not necessarily the most ideal way of accomplishing your goal since you'll need to do all your configuration up front but it will definitely keep people from altering your configuration files.
Setup a search on craigslist that hits what you are looking for. I recommend the following, change your location, modify as needed:
Get an ifttt account.
Create a recipe using your craigslist search.
Choose a desired method of update. ifttt could send you a message on your favorite social media or email, send you an sms, or lots of other ways. I have mine to send to my gmail.
Keep a budget in mind. Do you want a ready to go working machine? Does it need to be pristine, or a fixer-upper? How much repair are you ready and capable of doing?
> I modded the pots on the gunblade guns to a USB analog pad and will have it hooked up to a Hyperspin pc with a library of shooting games.
You are aware this is against the MAME licensing agreement, correct?
>Question for you. Can mame machine be used for coin op and be put out on route?
The short answer is not legally, no. The slightly longer answer can be found on the MAME legal questions page. Pretty much anything involving money and MAME is in violation of the license terms.
Well get on it! Actually, this listing brings up another question... How much did you spend on some of the really rare/sought after carts? Last time I found a Waku Waku 7 listed it was going for around 650$.
i really like it, it reminds me of late 80's arcade gaming. dark colors work really well for arcade machines. I want to give you some ideas!
please put in some side buttons! very easy to create 2 holes on the side, and then you can play proper pinball! Future Pinball is very easy to use, and a lot of replicas of real tables are on the site (or other sites) as free downloads. it is super fun, and i found it to be acceptably realistic with even a low powered graphics card. Have fun, it's great having your own arcade!
I was PM'd a question about plans so I've included the response here for anyone that might stumble across this post and have similar.
Yeah planning is key really. I spent a lot of time just thinking about it. How I would assemble the parts the order in which I would do it, assemble first and then paint or paint and then assemble. I didn't bother with Sketchup or any kind of CAD. I am a graphic designer so I just used the tool I could work quickest in which was Illustrator. The front plan isn't so important because it's just straight parts as wide as you need so i spent time just laying out positioning on the side. You can see how I modified the plans here. https://www.wetransfer.com/downloads/a3c31aba4f4534618e9137f8cd48bb3920160830102757/f5b20be7fdf775fd286e93f65a187d5420160830102757/a8c536
Another key part was designing my cuts, the local DIY store would cut the straights for free so I gave them the dims and they handled it. The rest I did using a jigsaw. I used 18mm MDF
The order I built was. • Straight cuts • Jigsaw cuts • Primer • Router mm T-Mold slot • Sanding (240grit +) • Sanding (It's important to get the surface smooth for paint or vinyl) • Sanding (Keep sanding) • Matt black vinyl covering (I spent a week trying to paint, don't paint! It looks pretty bad IMO unless you get a professional spray job) Vinyl went on quickly and evenly. • T-molding • Fix together (This is the order I did it) - Base and sides - Front - Back brace - CP base - Top panel (marquee top) - marquee bottom - Monitor support - Acrylic
Hope this helps
Nice. I got the 43 inch as well. 4 player classic Arcade style like you. I agree the company is shit, but it does come together fairly well when done. I would never buy from them again, however. Too much shoddy work, and very poor job with wood and no directions. You are essentially on your own.
I have a 8tb hyperspin setup and have a hard time trying to setup my usb encoders. i have the 4 player cabinet.
Also, for those front holes, i suggest getting this to put them in the front holes. I got two and they are clean and super convenient to plug up controllers or flash drives if needed.
These types of wires are not meant to be soldered, best method is crimping. This looks like it might be the right setup for you, but there's a few different sizes of these kinds of connectors so it's hard to be 100% sure: https://www.amazon.com/Qibaok-Crimping-Ratcheting-Connectors-0-1-0-5mm%C2%B2/dp/B07ZK5F8HP/ref=sr_1_1_sspa
I ordered and received the RGB Controller. Love the arcade and the artist did an incredible job. The software isn't the challenge as this isn't my first arcade, but I have found it overly difficult to find a computer with a spare molex adapter. I bought the power supply Wayne suggested and ordered a bridge adapter with on/off to avoid the inconvenience of managing the on/off. Wayne really tries to scare you not to power with 12v or your void everything. Almost feels like a trap.
I bought an Alienware R11 that has a spare PCIE and ordered a PCIE and Sata to female molex adapters to see if I can get one to work.
This is the bridge with switch referenced above. I use a coin door that I open to power on the PC and plan to attach the bridge adapter switch to make it easy to power on the RGB.
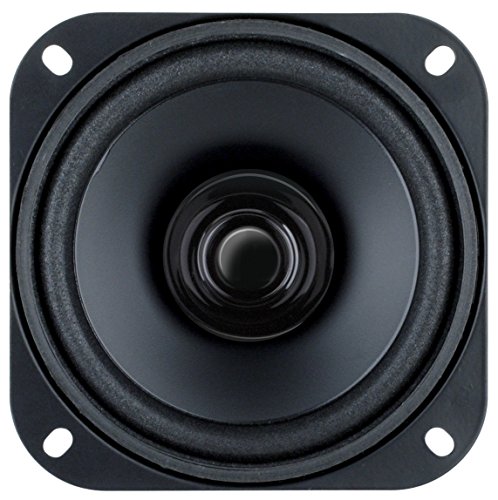
Not the person you’re asking but I’ve got a huge Bose home theater sub in my cabinet just because it was free from a relative. It is amazing and I highly recommend it. Never had an issue with it shaking things loose. I use it in conjunction with these $25 car speakers hooked up to a 2.1 stereo receiver and it allows me to use my cabinet as a jukebox too.
I went with this one because I wanted a 3 incher for Golden Tee
Great work! Super impressive. I have a question about the toggle switch on the back. It looks similar to this one and was wondering how hard it was to wire. I saw a few reviews about it potentially being a fire risk and was wondering if you had any qualms when installing it.
Those connectors are crimped on the wire, so you can't really reuse them. However, you don't need a new set of wires, you can get a crimping terminal kit (which comes in very handy when building arcade cabinets) and just add the connectors to your existing wires.
https://www.amazon.com/dp/B07RZSSTSJ/ref=cm_sw_r_cp_apa_fabc_SBDSFbFEV0516?_encoding=UTF8&psc=1
Sure thing!
The side art I actually printed at Costco on a poster sized print (20x30). I sprayed it with a sealant to protect it from running and fading, cut it, and used a max strength spray adhesive to mount it. I've found that you have to really coat it on (about 4 layers) to prevent edge peeling.
The light behind the marquee is off Amazon: https://www.amazon.com/gp/product/B001ET6D8E/ref=oh_aui_detailpage_o01_s01?ie=UTF8&psc=1 I wanted an LED solution but I couldn't find one small and cheap enough. To get the light looking brighter and even across the marquee, I surrounded the light enclosure with reflective foil tape.
Hope this helps!
I think you're on track! I used to buy the encoder separately from all the buttons and joysticks, but now there are a lot of options for bundles. I just finished my first bartop (my 4th machine overall). That was also my first pi. That pi bundle came with usb controllers, so that's what I used in that cab for now. May switch out later.
I'm building a small console machine now, and this is what I bought off Amazon. The little easy-get kits, with the zero-delay usb encoders. I've used the zero delay encoders before, and they are a great cheap alternative to the $30/$40 encoders.
https://www.amazon.com/dp/B00WAY9848/ref
The 4.3mm and 6.8mm reference, was that in reference to the dimensions of the cherry switch? That is too large to be in reference to "how far button travels before triggering the switch".
Sometimes there is also a measurement on how much presssure takes to activate the switch. This amount of pressure can make it feel more/less realistic to an original arcade machine. My unskilled fingers cannot tell the difference...
The 8bitdo n30 is the only other stick I know of for the switch but seems to be more difficult to customize. The HRAP is available on Amazon Canada. If you want to just build a stick I'm not really sure what the options are. Do any pcb makers have switch parts available yet?
HORI Nintendo Switch Real Arcade Pro V Hayabusa Fight Stick https://www.amazon.ca/dp/B01N4P40LG/ref=cm_sw_r_cp_apa_7nsBAbTRN4HM1
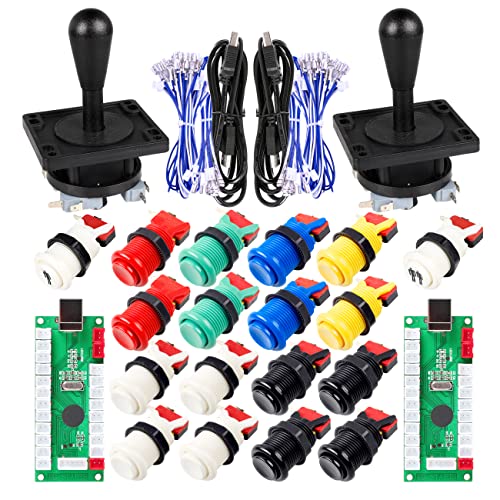
The joysticks are Suzo Happ 8-way Ultimate units. I bought a bundle on Amazon that included the joysticks and most of the main buttons, and I supplemented it. I'll be using the other two joysticks to build stand-alone player 3 and 4 controllers.
I bought it off Amazon, and then purchased the cheapest tablet I could find to act as a dedicated source for it... It's great for streaming old 80's music videos while listening to the music on the jukebox...
https://www.amazon.com/gp/product/B0753FS5VW/ref=ppx_yo_dt_b_asin_title_o06_s00?ie=UTF8&psc=1
When using a PC, you can probably just wire a power button to the power switch pins on the computer's motherboard. Something like this.
https://www.amazon.com/NOYITO-Chassis-Extension-Suitable-Computer/dp/B07PPDHKDT/
And just mount it wherever is most convenient for you on the cab.
I think the only game with a track ball and more than three buttons is Golden Tee. FYI, you can do an advanced game search here. Hit additional filters and you can filter by any inputs that you like. If you only want 0-1 button games, with a buttons for start and coins, you get some good ones (Centipede, Darts, Marble Madness, Simpsons Bowling), but there are a whole lot more that use 2-3 buttons (Shuuz [GREAT!], Missile Command, Crystal Castles, some Golden Tees).
That being said, you don't need to map any buttons at all to your track ball. I am assuming that whatever you have just maps left, center, and right, mouse clicks. With MAME, you can map any buttons to the game, you don't have to use the ones on your track ball. You can hack an old keyboard or buy a $10 board to map a number of buttons to keys.
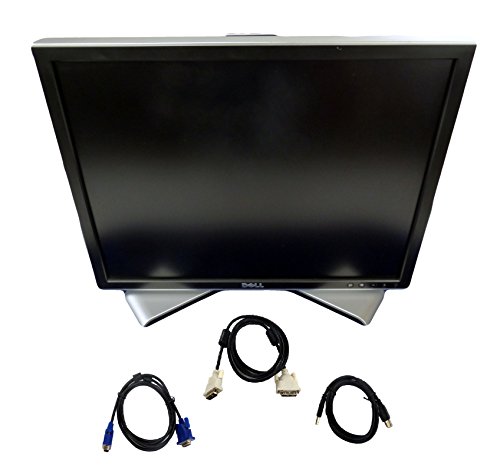
It is this dell one, https://www.amazon.com/Dell-2007FP-Ultrasharp-1600x1200-Height-Adjustable/dp/B000UVDONY it’s wayyy overpriced on Amazon and you can find it for sub 100 or even 75 on different sites. It’s been a perfectly good square monitor for me, 1600 x 1200 and works great for the aftermarket bracket I used!
Edit: It’s also 4:3
There is a link in that youtube video but I was afraid of linking it directly to this post. It's for android currently and we'll make another one for iOS soon. Thanks!
It's the Easyget USB controller in this kit:
I made one based on this design using a coil out of a $5 Goodwill TV, a spare Happ button, a lamp cord, and some electrical tape. I omitted the light bulb (because I don't make good decisions), and the coil getting painfully hot has the added benefit of keeping me from hitting a monitor for too long, so I consider it a feature. It looks like hell, but works every bit as well as this guy.
What /u/sigmaseven said.
As for drilling new ones, you can use a hole saw with a drill. Most hole saws do wood and metal.
I don't have this one in particular but I'm tempted to buy it myself: 1 1/8" hole saw
If you're good at wood working, think about designing/modding a cab where you can swap control panels. Get access to unplug the controls' USB connectors to your NUC, then pop off the CP in one piece. Swap in the CP with the star wars yoke, and start playing.
This is also something you can approach later, after you have your cab.
How is this Geekpub kit holding up for you?
Do you know if their encoder is recognized as Dinput or Xinput on windows?
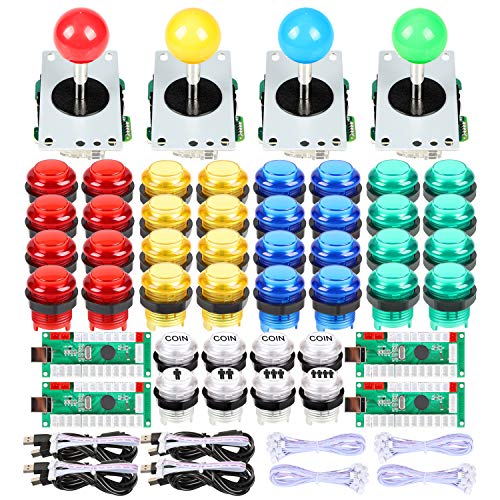
I got an amazon 4 player kit. The sticks have Sanwa printed on them, so they seem legit, the buttons are very meh and I have having some input issues...
https://www.amazon.com/dp/B071WC7TGK?psc=1&ref=ppx_yo2ov_dt_b_product_details#customerReviews
Yes, they do!
So what I did is I have one HDMI cable going into one of these. This way, instead of having to duplicate displays, and maybe put more strain on the GPU, only one signal goes into the HDMI matrix, and then two output HDMI cables from that splitter go into each of the cabinets' respective monitors.
Additionally, I have these wired up to the sticks and buttons. If you think about it, it's basically like having two duplicate monitors and controllers on two big pieces of furniture. Hope this helps!
I went through the same search months back for a 20A switch and struggled to find what I was looking for. In the end I used a Leviton 1221-PLR 20-Amp, 120 https://www.amazon.com/dp/B003AUCKLO
It wasn't the toggle style I wanted but I kept reading about how the cheaply made cool looking switches were melting so I decided on something solid!
Yeah, that sounds like a cost saving measure. For VGA all of the center row of pins along with pin 5 are ground. So if they bridge those internally on the connector they don't need to run the wires for them. Not sure how you would go about testing for that when searching for an alternative cable.
What you might want to do is make your own using some breakout boards.
Example: https://www.amazon.com/Uxcell-a15011600ux0309-Terminal-Breakout-Connectors/dp/B016FBVIJY/
Just make sure you get the right gender connectors, then you could use two ethernet cables (8 wires each) to connect the two.
Ok. I did not read the diagram properly. I thought those were the blanks, not the 2x additional white spaces with the other buttons.
If there are already holes in the cabinet for 6x buttons per player, I would fill them up. No reason to have holes on the top of your control panel. That would be awkward.
You do need 1p coin, 1p start, 2p coin, 2p start buttons so it makes sense to use the ones on top for that. Some games won't have separate buttons for 2P coin, but the ones that do, need the button to work properly.
With MAME and other emulators, you assign any function of your choosing to the buttons. Some game will have random additional buttons that are not used for other games, so it's good to have options. If you look at the button configuration for specific games it will show you which buttons/controls are assignable for that game. I would suggest looking into your favorite games and playing around with those settings while you wait for your orders to arrive.
You can also wire up an arcade button to the power of the computer for turning it on if you want. Something like this would plug into the motherboard and give you leads to solder the button wires to. https://www.amazon.com/NOYITO-Motherboard-Extension-Silver-Gold-Plated/dp/B07BVV3G15
I used these https://www.amazon.com/gp/product/B06XBR8S74/ref=ppx_yo_dt_b_search_asin_title?ie=UTF8&psc=1
You can read and see more pics of what I did here: https://www.gamingnexus.com/Article/7295/Atari-Ultimate-Dual-Arcade-Fight-Stick-with-Trackball-Mod-e28093-Light-It-Up/
https://www.amazon.com/Adhesive-Standoffs-Height-Offset-0-6x0-6/dp/B00R4ZT1FY/
Full Amazon links are needlessly messy and easily glitched. You don't need anything beyond this point when sharing them, so when you encounter broken Amazon links in the future, try cutting them off like this 9/10 it's something after that point breaking it.
Spread the word so that we can end the scourge of ridiculously long and easily broken Amazon links!
I use this: 3M Dual Lock Reclosable Fasteners... https://www.amazon.com/dp/B007OXK1AK?ref=ppx_pop_mob_ap_share
This holds anything! Even used this to hold my cabinet's PC power supply vertically. The glue is super strong and lasts for years and years. Heck, i mounted a network switch to a closet wall with the stuff 5 years ago and it is still held securely.
>I just need the power to go through for a second to activate the machine
A falling quarter striking a wire attached to a leaf switch might not provide a full second of circuit closed state, hence the suggestion to consider a latching circuit. If your device is polling the circuit at some interval it could miss the moment of coin strike, just keep that in mind.
If you don't want to mess with actual coins, perhaps a faux coin slot button would suit your needs. Not endorsing any specific one, but here's a link to an example: https://www.amazon.com/Atomic-Market-Credit-Arcade-Machine/dp/B07XXCX889
Good luck with your project!
Well, I've read that people are split between the square gate and octogonal gate. I'll try the square for now. I'll buy an octagonal for it later if I don't like it.
http://forums.overclockers.co.uk/showthread.php?t=18528892
http://www.gamefaqs.com/boards/975211-super-street-fighter-iv/55406605
http://wiki.answers.com/Q/What_is_the_difference_between_MDF_and_particleboard
FTA:
Question I'll be making cabinets for a garage. Is particleboard stronger and more suited for the cabinet frame, or is MDF just as good?
Forum Responses From WOODWEB's Cabinetmaking Forum MDF is better in every category except one, cost. But the spread in cost is not as great as it once was.
I agree - MDF is always my preference even over veneer core, and definitely over particleboard.
.... and from elsewhere: From my perspective, it's easy to differentiate between MDF and your regular old particle board by the density of the material.
MDF = Medium Density Fiber.
Particle board is typically used inside cabinets, as it doesn't provide a good paintable surface.
MDF can be routed, cut into simuated panel doors on cabinets, and even cut into trim pieces. It paints out well.
>Also I have no idea what kind of connection is on this hardware
It's likely a proprietary wiring harness like this...
https://www.amazon.com/Wiring-Harness-Terminal-Compatible-Pandoras/dp/B07XLZQ6W2
JAMMA only supports three buttons and two players, most systems like this use CHAMMA if they have an edge connector at all.
I had a similar idea until I cut it out. Took one look at it and realized how stupid it looked. Went out and bought these instead:
https://www.amazon.com/Invincible-Marine-Folding-Drink-Holder/dp/B007ZZGCIW
and screwed them to the back of the CP, now they fold up and out of sight when I dont need it. Doesnt clutter up your eyeline.
Ah yes, the analog sticks are kinda weird. I watched a YouTuber who was using them and I thought they were neat. The left stick works as nudge, and the right stick works as the plunger (by pulling it towards me, so I still get the analog feeling although much smaller). And the placement means I can easily nudge or launch a ball with my thumbs without taking my hand off the unit.
I'm using a Raspberry Pi 4b, with an SJ@JX control board. This is the package I bought for the control board and the sticks: https://www.amazon.com/dp/B08J47Y4X4?ref=ppx_pop_mob_ap_share
I also have a heatsink on the Pi since I'm not sure how hot it's gonna get in this box and it gives me a little peace of mind. https://www.amazon.com/dp/B07V35SXMC?ref=ppx_pop_mob_ap_share
What's not shown here is a small soundbar I need to mount on the top instead of the speakers that are just sitting inside, lol.
The software is an Android image I found from the same YouTuber. The specific app that is running is Zen Pinball.
I have it on the top of the cab, so I can push it, but not see it.
I have one of these: https://www.amazon.com/GOLDEN-FIELD-0837-Button-Computer/dp/B07CJ7Z3VB/ref=sr_1_11?keywords=power+button&qid=1663249345&sr=8-11, but if I did things over today, I would just use an arcade button.
https://www.amazon.com/Guwarry-2-Player-Joysticks-Raspberry-Arcade1Up/dp/B07RNQLMJR
These zero delay encoders work with happ and have a spot for a 5 pin (sanwa style) joystick. Also will do LED buttons
There are off the shelf options [LINK] in various sizes, but really you're going to want something cut to size. The RecRoomMasters 32" is close to a Vewlix in shape, so perhaps start there looking for either a pattern to sew one yourself or check on etsy etc.
Oooor add something like this to the existing monitor's VESA mounting points and then jury-rig the marquee onto that
https://www.amazon.ca/VIVO-Black-Steel-Bracket-Holder/dp/B07B44VRL2
(I'm not affiliated with VIVO in any way, but used some of their stuff to build my standing desk setup)
Or if you've already got a mounting solution for the primary monitor, maybe just one of these that can hang the marquee over top:
https://www.amazon.ca/VIVO-Monitor-Adjustable-Articulating-STAND-V001/dp/B00B21TLQU
Not sure about mounting one monitor directly to another, but maybe you could use a vertical "dual lcd" stand and attach them both to it?
Something like this: https://www.amazon.ca/VIVO-Monitor-Stacked-Vertical-STAND-V002T/dp/B00DGTP57A
If the marquee is smaller and too far back, you might be able to add a VESA compatible arm to the upper mounting point to bring it forward.
I have used this in my arcade cabinet for years now. I like having access to an HDD activity light/power light and the design just fits my cabinet. :)
https://smile.amazon.com/Segotep-Button-Extension-Desktop-Computer/dp/B097QV6ZD2/
Here you are. Alas, I don't took any pictures of the process itself. But you can see how smooth the foil looks in the end. Every surface of my cab is laminated, nothing is painted.
Car foil is a remarkable thing bordering on magic. Apart from becoming nearly liquid when heated (up to the point when it may rupture, so be careful and practice with some non-essential pieces beforehand), its glue is encased in tiny bubbles with air canals between them, so you can a) remove the foil easily again if you applied it incorrectly, and b) push any remaining air bubbles towards the edge to remove them. Only when you press the foil down firmly, the glue bubbles will burst and the foil will adhere to the cab properly. A squeegee like this one will make this process much smoother.
I strongly recommend you to watch videos about the proper handling of vinyl foil. Be sure to include some of people wrapping whole cars in it. It's a stunning sight to behold. 😮
something like this for the switching
https://www.amazon.com/RetroArcade-us-Arcade-Control-GBS-8118-Switcher/dp/B00F1YQMQQ
one of these for video
https://www.amazon.com/DEVMO-GBS8200-Converter-Monitor-GBS-8200/dp/B07TWZBQ75
id just get a monitor that has vga and save yourself a second conversion to hdmi
and definitely Portrait mode, should be able to fill the screen with the gbs-8200
I'm not necessarily making a recommendation that you go my way, but just confirming what I did as preferable to anything arcade1up based.
I began with a lep1customs bartop kit - this one.
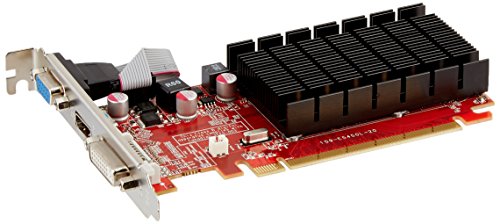
To that I added a new 27" monitor, and a used small Dell workstation with an i5 CPU and 8GB of RAM. I added an inexpensive GPU (RX460 2GB) to that as well. I also bought high quality switches, buttons, and joysticks from a combination of Arcade Paradise and Amazon. Also purchased are all the other miscellaneous bits; speakers, amplifier, light for the marquee, front USB extension cables, rear power switch, etc.
I also extended the control panel deck significantly as I thought the original one was shallow, and installed a piece of acrylic in front of the monitor. I painted everything and had some artwork printed for the control deck and marquee. I let my kiddo decorate the side with vinyl stickers. The completed unit is here.
All told I spent some $600, which is in the realm of what you're discussing. But for my $600 I got exactly what I wanted, with great quality parts all around and custom artwork. I'm supremely happy with it and it has hundreds of hours of play on it between myself and my kid/family. Right now it still sits on a desk so that my kid can sit in a chair, but eventually I'll build a pedestal for it.
So I ordered the power button and the power strip and I have a couple concerns/questions.
Given the unusual way the power strip senses the PC is drawing power, etc, do you think it’s safe to cut the plug off the cord so I can solder it to the inside of my socket ?
The power button is soldered directly to the motherboard on this unit. Do you think I can solder a couple pigtails to the underside or desolder the switch and solder a couple posts to the board to accommodate the switch you suggested?
Thanks for your help. I may create a new post on this topic to see if anyone has any suggestions/advice.
Like others mentioned, my PC is plugged into this, which controls other outlets for my marquee, amp, fans, etc https://www.amazon.com/dp/B002K8S2J6 Then, to turn my PC on I just wired an arcade button up to my y PC power button end mounted to top/back of cabinet. I did this by unplugging existing power button from motherboard and replacing it with this https://www.amazon.com/dp/B01LMZ I just cut the switch off and added my own arcade button
This worked good for me as I didn’t have access to an actual drill press. Made clean straight holes using fornster bits with it
just for additional info I actually went with this subwoofer as a replacement just in case you are also looking for suggestions or anyone else stumbles upon this thread in the future:
​
​
the specs I believe are almost identical to the original one, it's not overly expensive, and it fits PERFECTLY in the original spot. The original screws/holes lined up and everything
One blinky key.
You may need 2 LED controllers depending on how many buttons you have, because each button requires 3 inputs. One each for red, green, blue, and each controller has 32 inputs. So... about 10 buttons per controller if you're using RGB. If you're using a single color, then you have 32.
I use these for the controller inputs since the ipac is a keyboard encoder. All the button prompts in PC games would be keys.
https://www.amazon.com/gp/product/B07RNQLMJR/ref=ppx_yo_dt_b_search_asin_title?ie=UTF8&psc=1 However, you can use anything you'd like.
Led Blinky does all the lighting. Launchbox has an option for it for attract mode, and as you scroll through the list it will show each games proper controls (and colored buttons). Blinky has a config file that has a lot of community made color maps for games. It's kinda hit or miss since people use different LED setups. Those Ice 2 buttons are simply amazing in person. Unfortunately, you probably will have to program many games yourself. It's really simple, but doing a lot of them is a chore.
ahh so if I wanted to get something that could play Tetris, all I would have to do is buy something like this and then switch out the board?
https://www.amazon.com/WINIT-412-Cocktail-Arcade-Vertical/dp/B01BY4YWIQ
currently this is the what board inside the machine looks like
I know lots of these have bad emulation, but at the end of the day I am a Tetris feen, and if im gonna have one of these machines in my house it better play Tetris lol
I use a stream deck mini to do exactly this, but it is a little pricey.
I have programmed it to have buttons for save state, load state, exit, shutdown, restart etc.
It's not limited by the number of buttons either, if you need more buttons you can add a second page and program one of the buttons to scroll between pages.
The plan is to run a switch and Xbox series s, also plan on using emulators on the Xbox.
I used this wheel as it's compatible with both systems.
https://www.amazon.com/dp/B08BZ8KLT8?ref=ppx_pop_mob_ap_share
Not off hand… got a pile of them. Can’t remember what size spade connector and gauge wire, which would dictate which crimper. Also, lots of mine are generic. Not sure I could tell you where to find them.
Don’t need anything fancy. A quick check on Amazon turned up this…
https://www.amazon.com/Terminals-Self-Adjusting-Ratcheting-0-5-1-5mm²-Connectors/dp/B0824SFZ35
Again, not remembering the spade size… so double check that it matches.
Gotcha.
On the last build I made, I used something similar to this by plugging those into the cpu & drilling holes in the front of the CP, caulked the small gaps, then sanded, painted to clean it up.
The cab was a dedicated single player cab that I ended up giving to my brother, but wanted to give him some more flexibility so he could play multiplayer with his kids- so I needed a clean way to give him a player 2 (& 3 if need be). So it’s a single joystick setup with two usb female on the front for when they want to play multiplayer games (if two controllers are using the usbs on boot, they default as players 1,2 for purposes of 1v1 games).
If interested I can send you a pic.
Asus makes a 16:10 24-inch that while designed for color reproduction/ photographic/ design applications specifically works fantastically. The problem is they are not cheap.
I went with these instead. Holds drinks, keeps it away from the arcade, and lets us keep track of who's won the most games, which is a bonus.
The ones on the right are Arcade 1up stools. One is an MK and the other is the MvC one. Honestly they are not comfortable but the designs are great.
The red ones are on Amazon and were easy to put together and very comfortable https://www.amazon.com/dp/B08FDQ16RW?ref=ppx_pop_mob_ap_share
Here you go. They have a bunch of different colors and sizes.
Diamond Plate Vinyl Tape, with Self-Adhesive (Blue, 4 inch x 25 ft) https://www.amazon.com/dp/B0776LDGKQ/ref=cm_sw_r_apan_i_8E4XN3ZV540NBRSDH93K?_encoding=UTF8&psc=1