
What are
/r/prusa3d's
favorite Products & Services?
From 3.5 billion Reddit comments
The most popular Products mentioned in /r/prusa3d:


The most popular Services mentioned in /r/prusa3d:
Cults.
Autodesk Tinkercad
Youmagine
PrusaSlicer
Hackster
ImgPile
Banggood
Pi-hole
Inkscape
Meshroom
Nextcloud
Snipboard
balenaEtcher
Font Squirrel
DietPi
The most popular Android Apps mentioned in /r/prusa3d:

The most popular reviews in /r/prusa3d:
I use a nozzle brush like this https://www.prusaprinters.org/prints/69467-nozzle-brush-no-supports-or-bridging-needed to clean the nozzle. If needed, a use a soft wire brush (eg https://www.amazon.com/gp/product/B07XNZ33MZ) to get rid of crud on nozzle and hot end.
Another option is to use a silicon shoe around the hotend. But I'd put this under "fact of life", in particular if you print PETG, which likes to curl up and stick to anything.
Others are recommending water and soap to clean the bed. I'm using a quick wipe with ISO propyl alcohol before every print, nothing else, and never had a problem;
My friend suggested I get a Milwaukee reaming pen. He was super crazy right. It's like 15 or 20 bucks and you'll use it to trim your prints every time. https://www.amazon.ca/Milwaukee-48-22-4255-Reaming-Pen/dp/B017Y7QRJE
Not oil, grease. Needs to be a Vaseline-like consistency.
Any automotive grease should do, just pick up a tube of synthetic or white lithium grease at any auto parts store. Here's a cheap tube on Amazon
You have to remove the bearings to properly grease them, putting grease on the rods won't help at all. You can use this printable bearing packer to really get it in there good. A small craft brush also works pretty well, just smush it directly into the bearing races (small channels with the balls on the inside of the bearing), just take care not to knock any of the balls out!
The screen is a Pimoroni Hyperpixel 4.0 Square. It's powered by a Raspberry Pi Zero. DIY instructions are here: https://www.hackster.io/mark-hank/sonos-album-art-on-raspberry-pi-screen-5b0012
I replaced all the linear bearings on my MK3s with these. https://smile.amazon.com/gp/product/B06XPRCMJS/ref=ppx_yo_dt_b_search_asin_title?ie=UTF8&psc=1 They don't need lube and are quiet. Its been 3 years and still going strong with them. Recommended 100%
It's common for large rectangular objects to warp. Assuming Live Z is well calibrated and the steel sheet is clean (using hot water and fragrant-free dish washing soap), here are a few approaches that have worked for me:
Slow down print speed.
Add mickey mouse ears to the corners. You can add a cylindrical part in PrusaSlicer, maybe 10mm diameter, change height to single layer height, then place the part at the corner. Repeat for each corner.
Add a brim around the model, 5 mm or more.
Use Layerneer Bed Weld (https://www.amazon.com/Printer-Adhesive-Layerneer-Original-Filament/dp/B079984GV5/). Works better in my hands than glue stick, and you need only a thin layer.
If you have design control over your part and it's possible considering the intended use, you can try to round the edges and/or add holes to the base of the model.
Combination of above. Usually, brim and Layerneer works for me but large, rectangular objects can be a challenge.
No you don't need it.
But it is very useful, you can use it to start, monitor and stop prints "remotely". You can upload gcode directly from the slicer.
I have a screen (hyperpixel 4.0 rectangle), it is a good screen (resolution, refresh rate, responsiveness of touch input) but any screen is kind of useless addition, just use your phone or any other device with a browser instead.
The camera I use is a wide angle raspberry pi cam variant. https://www.amazon.de/gp/product/B074W6TPHF there aer no-IR version if you want to see something without visible lights. Don't forget to get a longer flat cable.
It is on cults: https://cults3d.com/en/3d-model/game/godzilla-no-supports
The designer charges a small fee for it. Well worth it for the quality of the model.
It is just too tall to fit on the Mini at 100%. It is 139x141x191.
I reused the screws that were already holding the bed in place. I ordered this silicone tubing. Any similar silicone tubing should work. I don't remember the inside diameter required for the tubing to fit properly though.
First of all, not even all of the batches of Prusa orange are exactly the same. Many people who order orange printers with a roll of orange filament find they don’t match perfectly. There are slight variations from batch to batch.
Prusa’s supplier is Filament PM. They do not have a US distributor. Their Canadian distributor has cheaper shipping to the US than Prusa. Unfortunately they are out of stock on orange right now — https://3dcustom.ca/filament?keywords=Orange%20pet&olsPage=products%2Fprusa-orange-petg-not-available
Edit: reviews also say Hatchbox orange PET is very close to Prusa, but it’s also out of stock at Amazon — https://www.amazon.com/HATCHBOX-3D-Filament-Dimensional-Accuracy/dp/B014VM9ALM
Get some 99% isopropyl alcohol. I get it from amazon.
And definitely checkout this guide on getting your bed level. It will save a lot of headaches. https://github.com/PrusaOwners/prusaowners/wiki/Bed_Leveling_without_Wave_Springs
Nozzle socks are good, can make life easier after a catastrophe. https://www.amazon.com/Genuine-E3D-Socks-Pack-V6-SOCK-PRO-3PACK-x/dp/B07779TP4S
As for filament, Hatchbox , eSUN, and Amazon brands have been working great for me.
Am trying to learn large, thin, shells and a co-worker asked for a Judge Dredd helmet so he could put it on and tell his 14-y-old twins "I am the LAW!" I found this helmet on tinkercad
https://www.tinkercad.com/users/fZWm1K78k2d-fraser-sim
and gave it a shot. This was the result of trying to print the 4 sections of the back of the helmet all at once, no brim, no supports, then going to bed.
https://imgur.com/a/CWNLc8Q for a few more images. 0.35 nozzle, 0.2 layers. Prusament Mystic Green 210C temps. 5% infill No supports.
This is purchased STL from https://cults3d.com/en/3d-model/game/godzilla-no-supports
I use the satin sheet now for almost anything.
If I need a coarser surface structure, I go with the BCZAMD Gold sheet (https://www.amazon.com/BCZAMD-Double-Textured-Spring-Powder/dp/B07XC673ZT/). I found the Prusa textured sheet to be too temperamental. The BCZAMD sheet has worked perfectly with any material I have thrown at it... PLA, PETG, ABS, PC Blend.
I buy sunlu master spools. Unfortunately they always come with one of the spools and I couldn’t find them selling just the filament but it’s cheaper and in my experience has always been pretty good, both PETG and PLA. I buy on Amazon here.
Some of the Polycarb and nylon blends are higher heat, but the inside of your car gets CRAZY hot. Here is an idea - import your model in tinkercad (or similar). Make it into a "hole", and drop that hole into a solid block to make a reverse of model (we are making a mold). Then cast your model in something heat resistant. I looked at the model you are using - heat resistant silicone would probably work well. I use 3d printed molds to pour silicone "hot socks" for my prusa mini. This is the silicone I use. This silicone is nice, because it releases easy from 3d printed molds. You get about a pound I think, which would make a few of your pass holders. You could probably sell the extras or give them to friends or something, but it would probably be cheaper overall than ordering an exotic filament that might be hard to print with.
You could use this one too, I have it on my clone and it works fine. Same connectors and available on Amazon. FYSETC Prusa i3 MK3 Cool Blower Fan Kit 4010 5015 DC 5V Extruder Hotend Cooler Radiator for 3D Printer DIY Parts Accessories, 2Pack https://www.amazon.com/dp/B07NTKXVN8/
Yes I mean a tap like this one (my translations into english are rarely on point): https://www.amazon.com/Thread-Metric-Machine-Hand-Screw/dp/B07FKDMWWH/ref=sr_1_6?dchild=1&keywords=thread+tap&qid=1622983935&sr=8-6
But I think for small threads in 3d printed material you can theoretically cut the thread with a regular screw, I do this in this design with the two M2 screws. But for the larger threads like M4 and M5 I'd definitely recommend a proper tap
You could give the silicone leveling mod a go. See if that fixes it. Or just do the first few steps to see exactly how warped your bed is.
$8 after tax for more than enough silicone tubing from Amazon.
Had a noticeable effect on my prints. Just don't forget to redo live Z calibration afterwards.
Unless things have changed the bearings don’t come greased. Only oiled to prevent rust. I never greased mine and they got pretty loud. If I would have known how good they were when I originally assembled mine I definitely would’ve just waited and put Drylin bearings instead of the regular ones.
Check this one out on Amazon. It's a meanwell as previously posted but slimmer. I bought this myself when my power source died recently. It has been perfect so far and is thinner than the factory one. I liked this but had to reprint the mount and lengthen the wires going to the board. Worth it in the end. MEAN WELL LRS-350-24 350.4W 24V 14.6 Amp Single Output Switchable Power https://www.amazon.com/dp/B013ETVO12/ref=cm_sw_r_cp_apa_RmR2AbG1XW1EY
I think you just happened to search amazon for not the quite right thing. You'll be way happier with "white lithium grease". This is what they want you to use.
You can also buy it in nice small tubes and it doesn't make a huge mess.
Print the parts first obviously (don't use supports!) and then it just took me a few hours to tear down and build it back up with the new extruder. Pretty easy, though make sure you have a box of M3 screws of different sizes. I got one off Amazon a while ago so I honestly don't know if I needed anything I didn't already have but I believe I did.
I'm currently using my stock motor since I didn't think the Winns Pancake I ordered would be in for at least another week or so... Of course it shows up the day after I do the upgrade lol
If you're going to buy a new motor then it MUST have the following :
1.8 degrees 1A of power and AT LEAST 16Ncm of torque
There's really only two options from what people could find. An expensive Moon's motor which granted are INCREDIBLE. or a $11 WINSINN pancake motor (the one I bought and have heard is perfectly fine)
WINSINN Short Body Nema 17 Stepper Motor Bipolar Step for Titan Extruder 3D Printer CNC 4-Lead 1.8 Deg 6V 1A Holding Torque 16N.cm/22.8oz.in with 1m Cable & Connector https://www.amazon.com/dp/B075J8CP7Y/ref=cm_sw_r_cp_apa_i_I1qeCb612HASR
Mine is working great with the stock motor though. I'm really curious to see what the difference in less weight will make with the pancake motor.
When I put mine together, I had an issue with the screen contrast. But it sounds like yours may have just died.
You can find replacement screens on Amazon (like this one) and AliExpress. It's a standard part, so they're pretty cheap.
Look for a fysetc prusa (3 wire) fan on amazon for quick replacement with the correct molex connector and then order a few sets from Ali express (also fysetc) for super cheap to have on hand.
Their hot end fan is way better than the noctua if a bit louder.
FYSETC Prusa i3 MK3 Cooling Fan 5015 50x50x15mm 5V DC 0.35A Hotend Cooler Blow Radiator Sleeve Bearing for 3D Printer Parts Accessories, 2Pcs https://www.amazon.com/dp/B07NTKG9K4/ref=cm_sw_r_cp_api_i_r2GSDb2DT4CRQ
FYSETC Prusa i3 MK3 Cool Blower Fan 4010 40x40x10mm DC 5V 0.2A Hotend Cooler Radiator for 3D Printer DIY Parts Accessories, 2Pcs https://www.amazon.com/dp/B07NTNQ5HF/ref=cm_sw_r_cp_api_i_O4GSDb8K22KAQ
I got these:
Basically when the filament comes out it might curl up still, but does not melt on the silicone and just drops away. I am digging it.
Be very careful when installing it, the sock kind of goes under the wires so I poked it in with some thin tweezers being careful not the put pressure on the wires. That's why I wish I did it during assembly, then I could have left more slack in the cables.
Expect for that install is easy.
This is freakin awesome.
I did some research after this to figure out the process and found this Youtube video and a similar Hydrographic on Amazon.
/u/holzkleber /u/bossdj09 /u/Haywood_Yabuzzoff
If you have a raspberry pi check out
they have lists of known malware ads that you can set as a blacklist and allow the good sites without getting this issue
having said that, thingiverse suuuuuuuuuuuuuucks
Looks like OP used this one here
I have also seen a black and silver one here posted on this reddit as well.
Both are paid models but it's pretty cheap for the design work that went into them.
Is that connector rated for the power that would have to go through it? I love the idea of a quick-detach system to make maintenance easier, but it has to remain safe.
edit: according to https://www.hackster.io/viktorsilivanov/quick-swap-board-for-3d-printer-hotend-fb26e4 which /u/hartk1213 linked in other comments, it is. Interesting.
Among several other, Onshape has free accounts (student trial?) but your parts are publicly accessible.
OP, this is a super simple part to make (one dimensioned cross section sketch and one central axis revolve) and export to STL.
Thank you!
File: The Sorceress
Creator: Loubie
Link: https://cults3d.com/en/3d-model/art/the-sorceress
At the price of a candy bar, it's definitely worth it for the quality and reproducibility. It also comes in 2 sizes.
Ah, definitely not overhangs (although I agree they look that way... they aren't, hence why I'm trying to eliminate them). The scars occur in the middle of a flat and perfectly vertical face.
Maybe this image helps highlight the issue? https://imgpile.com/images/7uu2ph.jpg
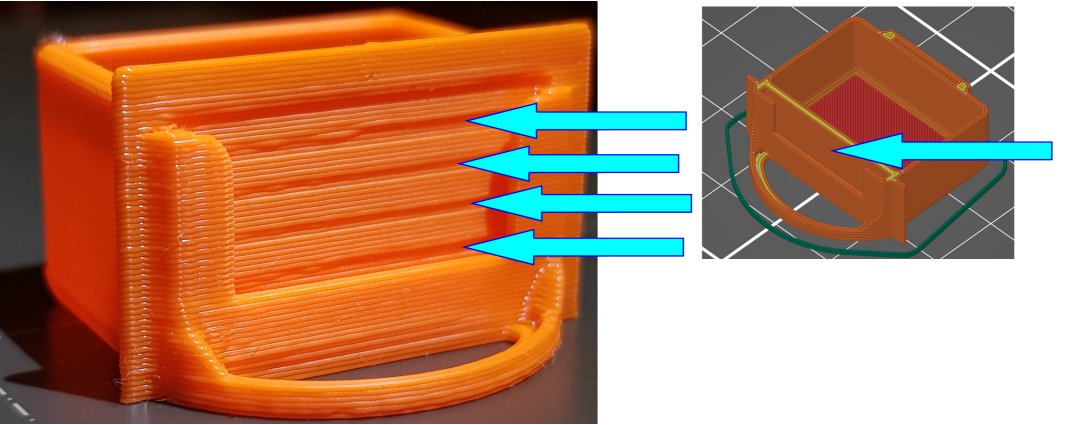
The nozzle is a 0.4mm one, so not that large - probably the perspective of the picture is making it look big. The whole model is just 30mm wide.
https://www.tinkercad.com/things/gywntps0lDz-chicago-dog/edit
If that link doesn't work for some reason, you can search "Chicago Dog"
MacOS software - Little Snitch, it's worth the money. I think there was a CVE some time ago that mentioned a worm that would discover if little snitch was installed and uninstall itself to avoid detection.
A card reader? Something like this(not specifically, just first search result)
Sorry, even though it was written in larger font and bold, it didn't register with me.… :-(
So it's stuck inside the Bowden tube? Assuming you have disassembled the brass fittings at both ends, maybe try a long 1.5mm Allen wrench from either direction to push it through. Or some other long, thin metal rod. Beyond that, yeah, maybe replacing the bowden tube is the only option left.
On my Minis, I've replaced the brass fittings with PC4-M8 pneumatic fittings. Makes it a bit easier to remove the Bowden tube.
Plated copper nozzles like this one:
Triangle labs on aliexpress makes a good one too.
Exactly this. Works like a champ. Here's a link to one if OP doesn't know about them. (edit to fix the link)
Well that is what I said when I got my first printer. Now I don’t use PLA at all, I print only PETG and ABS and even built a Voron for special materials only printing. If you get into design your own stuff you will find very soon that a 3D printer is a very powerful tool and know what material to use depending of the project and be able of use that material is very important. You will get there, only PLA is a very limiting in many ways.
Btw.. ABS is not that hard to use. Get a photo booth like this one:
Neewer 24x24 inch/60x60 cm Photo Studio Shooting Tent Light Cube Diffusion Soft Box Kit with 4 Colors Backdrops (Red Dark Blue Black White) for Photography https://www.amazon.com/dp/B00GKGGICC/ref=cm_sw_r_cp_api_glt_fabc_GNHYSC9VH7KVGSQC22GJ
Put your Prusa inside and you got all you need to print with ABS.
It appears that no-one has responded yet. First off, get rid of the USB key, it's known for being unreliable. Copy the included software off from it, and replace it with a good brand name USB stick.
Second, for your convenience, get a short right angle USB extender like this one:
https://www.amazon.com/gp/product/B07LBF5CST/ref=ppx_yo_dt_b_search_asin_title?ie=UTF8&psc=1
You'll be much happier. I know I was!
Late to the party I know, but one extra thing that I find helps after cleaning and ensuring the nozzle isn't leaking from the threads is to use a pinhole silicone sock-
https://www.amazon.com/Genuine-E3D-Socks-Pack-V6-SOCK-PRO-3PACK/dp/B07779TP4S/
I'm not sure what the general consensus on them is, in that I'm sure if enough leakage happens it can get loose and lead to nasty plastic blobs/print failures but I do regular maintenance including checking that mine is snug every once in a while and I've never had problems.
Heater Catridge:. https://www.amazon.com/Prusa-MK3S-Heater-Cartridge-Replacement/dp/B08LC6L561
I know you mentioned your in Europe, but that should be a starting point. The heater is E3D V6 compatible, just make sure it's 24v. The board could be anything you wanted, you could throw in an aftermarket board, but it won't be a drop in replacement.
Honestly, the lack enclosure is a big let down in terms of printer enclosure quality. The Lack tables are cheap, but once you factor in the total cost for the plexiglass, you're better off considering other options.
I had a lack enclosure and then changed to a network server rack/enclosure because the entire enclosure would sway constantly during use. Here is the one I bought note that I bought it much cheaper and you can likely find a similar used enclosure off craigslist for much cheaper. I added a paver stone inside the enclosure and printed some feet for the enclosure it's been solid & significantly better then the lack.
I would suggest a Wyze webcam and an Alexa or Google Assistent compatible smart plug. Let's you easily monitor prints from away and "kill" a print it something goes awry.
I've looked at many enclosures and while I'd love to have just any of them, the thought of spending another $250 at the least hurts too much, so all my Mk3S and Minis are in LACK v2 enclosures.
Go filament storage, I use large Ziploc Weathershield storage boxes https://smile.amazon.com/gp/product/B00MWTJXHS/ that can hold 10+ spools, combined with renewable mini dehumidifiers https://smile.amazon.com/dp/B00LVN7BM0/. As long as you keep an eye on the color of the dehumidifier and recharge it as needed every month or so, I have had filaments in there for more than a year with no apparent degradation in performance.
If all you're planning to do is print PLA, you'd be all set. For other materials such as PETG, I'd get a textured sheet and I recommend getting nickel plated copper nozzles and perhaps a nickel plated heater block.
The only other must have in my book is a set of spares. Thermistor, heater, heat sink, heater block, etc. Stuff will break.
First thing I did when I bought my prusa printer was toss the bearing it came with and purchased drylin bearings. Never had a problem and been printing over 15kg so far.
My solution is large Ziploc Weathershield storage boxes that can hold 10+ spools, combined with renewable mini dehumidifiers. As long as you keep an eye on the color of the dehumidifier and recharge it as needed every month or so, I have had filaments in there for more than a year with no apparent degradation in performance.
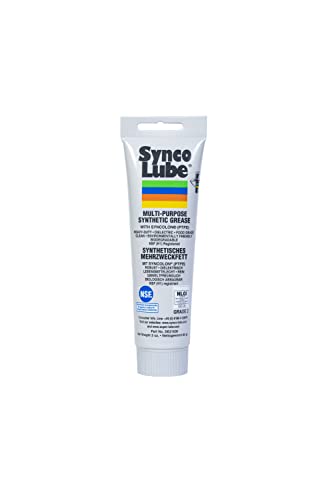
Prusa recommends one of these alternative lubricants.
>Lubricant: the best option is the Prusa lubricant. One is sent with the printer, but it can also be found in our e-shop. Other recommended lubricants are Super Lube 210XX, GLEIT-µ HF 400, and Mogul LV 2-EP. We do not recommend lubricants with a very high viscosity.
So this would be good.
yes, but I would not recommend regular paper towels because they leave small paper fibers. I just use these thin towels which are can be used for cleaning electronics. A microfibre cloth should do it as well.
Here is the bearing fr the mk3, I'm not going to promise it's the same for the mini. But I assume from a BOM standpoint it should be. As stated below, you might not need to replace it, you can tell by looking at it if you do or not.
This one is the toothless version that I used, but some people prefer the teeth. Imo it doesn't matter if that belt slips and if it does, it only reduces friction.
Amazon:
MUYI 10 Meters = 32.8 Feet PTFE Teflon Tube OD 4mm ID 2mm for Chemical Electrical Equipment https://www.amazon.com/dp/B019PZ5MY4/ref=cm_sw_r_cp_api_glt_fabc_8CQNC2NM4551PVNS1FYT?_encoding=UTF8&psc=1
I had the same thing happen to me last month. It is the pulley. Here is a link to the pulley I used to fix it.
https://smile.amazon.com/gp/product/B07BPLPM7Y/ref=ppx_yo_dt_b_asin_title_o06_s00?ie=UTF8&th=1
I'm using the Tinmorry white PLA. I saw in some reddit threads that some people had good results with that one, so I gave it a try. Looks good up till now.
Besides all the other advice in this thread, which are all sound, get a silicone sock to prevent PETG from catching on the nozzle. I use this one and it has definitely helped with stringing to some extend. I almost exclusively print with PETG, and the silicone sock is a must.
The silicone sock is consumable and should be replaced every 2-3 months, depending on how often you print.
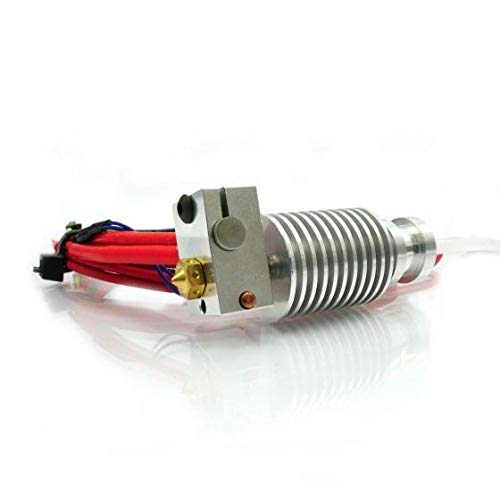
I haven't bought this, but I see they have hotend replacements on Amazon. I thought about getting a new extruder setup and when I do I planned on buying a second hotend so I can have a backup setup incase something goes wrong.
That being said if the pinda is the only thing broken maybe just order that part. I know the thermistor can be fragile so I'd try to make sure that is working too.
I was referring to stuff like this which is much finer than iron filings:
Description says "very fine 320 mesh" which I take to me equivalent to 320 grit sand paper, but I don't actually know the definition. And this kind of powder is very readily available, without warnings.
What's the threshold that requires protective gear like described earlier?
so i went to the craft store and got some of those squares of decorative duct tape and wrapped mine, then set it on a oxo silicone drying mat.
like these :
Duck Brand Duct Glitter Tape Prism and Fabric Sheet Variety Assortment Bundle 18-Pack 8.25 inches by 10 inches (Set J) https://www.amazon.com/dp/B07PXG9B3C/ref=cm_sw_r_cp_api_glc_fabc_yVAaGbRN3A3P6
OXO Good Grips Large Silicone Drying Mat https://www.amazon.com/dp/B004ZLAG54/ref=cm_sw_r_cp_api_glc_fabc_2VAaGbRX9XM4S
No problem, glad you got it fixed. I blew off both of my spares before I figured out that I had a more serious issue.
You can order replacements from Amazon you need 4mm inside diameter for the tube.
https://smile.amazon.com/dp/B07P7GJCGF/ref=cm_sw_r_cp_apa_fabc_c7GaGb1W37GYR?psc=1
Windex or generic version, you don't need to use IPA, glass cleaner works great (it's what prusa uses in their print farms).
I would say those are the only need to have things, the hex driver is a need to have IMO, makes things so much easier.
You get pliers and zip ties with your kit along with various allen keys. They also ship with a tube of lube now so you don't need to buy that.
Calipers (even from harbor freight) are a good eventual purchase, very useful when you get around to modeling your own parts.
I wouldn't bother with the nylock mod unless you feel you need to do it, same with any other printer 'upgrade'.
Some use a brass brush to clean the nozzle which is fine, but I just use some stiff paper towels that I bunch up.
When I first started 3D printing (roughly 90 years ago, aka March) I bought the Filament Friday Tool Kit. Everything is cheap aliexpress type stuff put into a set by Chep from Youtube but it's great to get started with. If you use anything enough to break it then you know to spend a little extra money on the next one.
Apart from the brass brush (which gave it's life doing battle with a hot-end blob) I'm still using everything else. https://www.amazon.com/Filament-Friday-Print-Tool-Kit/dp/B07CY15LYR
Your printer will come with better needle nosed pliers and (I think) a couple acupuncture needles, but I'd recommend some variant of everything else in the kit.
See https://www.amazon.com/P-I-N-D-Sensor-Leveling-MK2-5S-Printer/dp/B07ZVLJPDY#customerReviews some say it works great, some say it doesn't work that great. Like said before: try and return if it isn't good.
If you want to buy genuine, your best bet is to go via Prusa. But remember the PINDA was replaced by the SuperPINDA, I doubt the PINDA will ever be in stock again.
You need a USB A-B cable to connect to the MK3S, like https://www.amazon.com/AmazonBasics-USB-2-0-Cable-Male/dp/B00NH11KIK of a decent length.
The display is useless if you are not near the printer/pi, use you mobile or (desk|lap)top.
The camera has narrow FoV. If you want to see the whole bed get a wide angle version. And 50cm cable might be just enough depending on how you want to position.
I went way oversized for sure. More because I used an 8A buck converter that I found on Amazon. I'm quite confident smaller ones will work, but this is what I used: https://www.amazon.ca/gp/product/B00C4QVTNU/ref=ppx_yo_dt_b_search_asin_title?ie=UTF8&psc=1
Thanks. I'm going to program an arduino to adjust the exhaust fan speed based on the value from a temperature sensor. I just ordered the fan and some HEPA filters to filter the exhaust. I'll probably add some adjustable vents in the floor too.
I've had good luck with this filament. Depending on the size and infill of what you're printing, the quick color change works well.
https://www.amazon.com/dp/B07VJ2RHKF/ref=cm_sw_r_cp_apa_i_ZxlOFbJKWJQAB?_encoding=UTF8&psc=1
I see that the Anet A8 is going for $202.20 on Amazon. I wonder if the $145.95 "expert installation" includes assembly and calibration?
You definitely want the tube all the way down to the heat break. In fact, if you cut yourself a new piece of PTFE, you want to make sure it is as square as you can get it to minimize the gap. Otherwise, that gap can catch on the filament and cause jams.
This, however, is otherwise an easy fix. A roll of PTFE tubing is pretty cheap on Amazon (I got https://www.amazon.com/gp/product/B01CUPV90M/), and you just cut a piece off the same size as the existing piece and shove it in.
As the others said, the .4mm nozzle that comes with the printer will serve you well for most any kind of filament you want to get. If you start to get in to more exotic materials like woodfill or metalic, then you might want to get a hardened steel nozzle, but I would wait on that. As for different sizes, by the time you need something bigger or smaller, you will know it.
Any 1.75mm filament will be fine. Stick with PLA until you get comfortable with things since it's the most forgiving. Hatchbox from Amazon is fine, but Bam Tack has worked for me too. Flexible filaments like NijaFlex are harder to work with and mostly for specific uses, so don't get those yet.
Get a nice set of metric balldriver screwdrivers. The kit comes with a tool from what I hear, but a decent set will be much more comfortable. You will be using them on occasion throughout the life of your printer. If got https://www.amazon.com/gp/product/B0006O4ADI/ as an example, but whatever you find will work.
Some 97% isopropyl alcohol from any drug store and some paper towels are handy for wiping down the print bed between prints. A green dish scrubby works for me for the occasional build-up removal when things stop sticking to the bed.
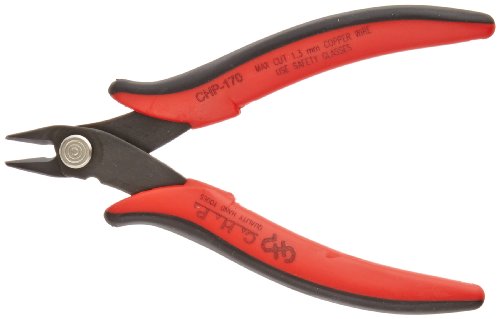
A set of snips and needle nose pliers is also handy. You can use them to grab strands of plastic off of a hot nozzle, trim filament before loading, getting stubborn nuts to fit into their holding slots, all kinds of things.
That's about all I can think of that I use on a regular basis.
If you haven't purchased yet, consider going with the Fun Pack instead. You get a wider variety of sizes to play with. They're all brass in the fun pack, so not so well suited for abrasive materials, but you can buy specific sizes in hardened steel. I'd suggest a 0.60mm hardened steel nozzle for abrasives. 0.30mm and 0.35mm are just about ideal for miniatures. Small enough to pick out detail, but large enough to print reasonably fast and strong.
What I have done is purchased one of the craptastic nozzle packs off Amazon. The nozzles are crude and probably will fail printing anything but PLA. They're good enough to do a few prints with to get a feel for the differences though. I then buy genuine E3D nozzles for the sizes I care about (0.25mm & 0.35mm nickel plated for detail, 0.40mm and 0.60mm for hardened steel). The best part about that kit is the 7mm screwdriver socket handle. Saves burnt fingers and hot dropped nozzles.
I had the same issue.
It's actually really easy to take apart and get to the extruder if you want to check everything.
Unscrew the fans and let them dangle to the side, then you unscrew the parts that are holding the extruder in there. After that you should be able to wiggle the whole thing out.
But honestly, just by looking at your picture, it doesn't look like you have heat creep, or plastic issues. So I doubt it's going to be an issue with the heat break, block, or anything like that. So probably just the heater cartridge.
I was just in your shoes, and successfully spliced a new heater cartridge onto my old wires.
Basically snip off the old wire about 6-8 inches down, strip the wire coating, and splice on a new heater cartridge.
This is the bundle of heater cartridges I got from Amazon. They work perfectly with my MK3. The cartridge itself is slightly longer than the base, but still works without issues.
Also to make splicing easier and faster I got these and they have been working really great.
That hole thread is M3x0.5mm you can probably buy a tap from a local store, amazon, or ebay, for very little money. I use a standard cordless drill to retap threads all the time.
Here is a link to the correct tap on amazon.com:
If its too badly stripped then you can use a 'heli coil' to put new steel threads into the hole. A machine shop can do this but will be bery expensive unless they do I out of the kindness of their heart.
Here is a link to the correct heli coil set on amazon.com: https://www.amazon.com/Helical-Thread-Repair-Kit-M3x0-5/dp/B007IBSG0U/ref=mp_s_a_1_1?keywords=m3x0.5+helicoil&qid=1555207351&s=gateway&sr=8-1
Glue stick is definitely a great way to reduce adhesion. It works great until that one time when you forget to do it, and then you end up ruining your PEI sticker.. I've done that twice to mine.
I switched to the textured PEI sheet, and it's no worry at all- no glue stick needed, it cools and the prints pop right off even with PETG. Since the PRUSA sheet wasn't available, I ordered one from "Thekkiinnggg" on Amazon. [Link here](https://www.amazon.com/Thekkiinngg-Double-Sided-Textured-Powder-Coated-Version/dp/B07HQZCWDV) - it's a little pricey at $50 plus shipping, but works great.
I know...when you first start it is frustrating to see all these tips that say “just print this” lol. Although soon enough...if you are like me...you’ll be printing mods for the machine! All the info can be a bit overwhelming at first but it’s pretty easy once you get started.
As to your question a good option would be one of those medication syringes you can get at CVS or amazon. Here’s a good one that has a really nice tip vs just a regular syringe: 12 cc Disposable Syringe with Tapered Curved Tip https://www.amazon.com/dp/B0002YFRAW/ref=cm_sw_r_cp_tai_V4HWCbPBHEA7S
You might have to cut the tip a bit to get the thick grease to flow...but that should allow you to get the grease in there nicely and then just leave the syringe set up for later use. To fill just take the plunger out and squeeze grease into the syringe body.
Or you could always try a toothpick or something but the syringe would probably work better.
I was in exactly the same place ~a year and a half ago. If you don't mind a little effort, I think it's totally worth DIYing this so it's less mysterious. You'd be surprised how many things are thrown away because e.g. the power cord is damaged.
If you're going to the hardware store, just bring the terminal with you and match it up by eye, if you're sticking with Amazon, you can buy an assorted pack like this to have your bases covered. Then you'll need a crimp tool (like this) to actually attach it. If you're stocking up you can get some cheap wire strippers, but in a pinch you can use a knife or even scissors. As u/vp3d said, these are all run-of-the-mill things that should be both cheap and readily available. When you're done, put them all in the same box so you can find them next time you need them.
Measure out the length of wire you need (leave extra, especially on the first end), strip off the insulation far enough that the connector can fit on (but don't leave it bare outside the connector), stick the wire in the connector, match the color of the insulation on your connector to the color on the terminal, and squeeze! While it's possible to screw up, you can just snip off the terminal and try again. Worth googling quickly, but the only real thing you need to worry about is that the crimp is decent (look up images of good and bad) and that it's secure - you should be able to tug on it and not have it budge at all.
Talking to prusa support and getting another set is also a very reasonable option, but doesn't come with near the same sense of satisfaction.
They're common 2-pole right angle screw terminal blocks. 5mm pitch. Sometimes called "Phoenix type connectors"
The ones I used were off Amazon
https://www.amazon.com/dp/B00MJGPEOU/ref=cm_sw_r_cp_apa_i_kInKFbCA3HFXH?_encoding=UTF8&psc=1
Here, this kind.
But you can find bigger "plates" to cut yourself for much cheaper in hardware stores.
If increasing the cooling moves doesn't help. Take your whole extruder/hot-end apart, remove your heat break from the heat sink (the thing with the cooling fins), apply some good thermal paste, reassemble according to the instructions at Prusa for your model.
I was having exactly your issues, and after doing the above, I've not seen it since.
I used this: https://smile.amazon.com/gp/product/B06Y156V4Z/. Worked wonders.
EDIT: I use an MMU2, so I can't do this, but for anyone with this issue that doesn't use an MMU (not OP obvs.) and doesn't intend to get one, you can replace that heat break with the "standard" V6 one from E3D that doesn't have that extra large bore which will probably eliminate this issue (I'd still do the thermal paste too though).
I printed my spare parts with Priline PC CF . It's prints beautifully, and is way easier to print than ABS. Hot end parts are great with this. I have been using it with any parts that need strength and heat reliability. Also, combined with this fan shroud cools the print nicely. Direct replacement. Fan shroud replacement
Did they mean electrical conductivity, or heat?
From a heat conductivity perspective, if the thermistor is loose, it could form an airgap and give you weird readings, but they are usually in there fairly tight, and a grub screw holds it in place.
If you've damaged the leads (or insulation on them, which is more likely) just as they enter the thermistor, and they are touching each other or the hotend, it would do the same thing. If it has blue fabric insulation then IMO those are crap and should be replaced with something like this:
https://www.amazon.com/gp/product/B07Y4NYMSN?th=1 (HT-NTC100K)
But, do your homework, as I print on a Mk2.5, not a Mk3s, and these do fit the Mk2.5 E3D block, have got a long enough cable, but I had to replace the connector to make it fit the rambo board. But at $2.40 each, I'm prepared to add a connector myself, no biggie.
You likely blew up there 5v regulator. A quick check if the datasheet gives the absolute maximum Vin as 45 volts.
Check the 5v rail. If it's 0v, then you could replace U3 and be back in business.
Worst case, https://www.amazon.com/dp/B079QS4KR8/ref=cm_sw_r_cp_apa_i_8dPwFbPW6Z4WP
Been printing PETG for a few years on smooth sheet with no issues. Just a quick wipe with Isopropyl to clean finger prints followed by quick wipe with Windex. Prints stick great and pop right off with a flex of the sheet. Keep one of those little pump bottles of each by the printer, so only takes a second and no mess.
Like this: https://www.amazon.com/dp/B07B7J57G5/ref=cm_sw_r_cp_apa_i_JGniFb2D7PW7Z
These would work: https://www.amazon.com/Ewigkeit-Straight-Connector-Penumatic-Extruder/dp/B07M6B5W9L/ref=sr_1_8?dchild=1&keywords=PC4-M6&qid=1595890162&sr=8-8
Though you'd also be ordering a few pc4-m10 fittings with that.
Missing items from other post. Extra thermistor and heater cartridges. At least 2 of each. And extra heat block. Spare fans. Get the filament sensor for sure. Make sure the ipa is at least 91% or more. Small bottle of pure acetone. For the smooth sheet only! And very infrequent at that. And this for all the future projects: https://www.amazon.com/dp/B0812TYT5L/ref=cm_sw_r_other_apa_i_9ZygFbZ4Z6M7P
I got it from Amazon, it's called "Shiny Silk Multicolor Rainbow PLA Filament" .
​
amazon link: https://www.amazon.com/gp/product/B07TTP8NCR/ref=ppx_yo_dt_b_asin_title_o00_s03?ie=UTF8&psc=1
It took me a long time to find a good quality short cable to do this. For the longest time I had the USB cable that came with the printer coiled up and shoved between my Pi and Einsy board. Link for Amazon Canada
Amazon 100Pcs M3 x 0.5mm 304 Stainless... https://www.amazon.com/dp/B075ZZW7VL?ref=ppx_pop_mob_ap_share
It’s doubtful a local store would card m3 nuts anyway...too small to be used commonly/not stocked.
Not directly what you're looking for, but there are phone apps to connect to octoprint so you don't have to run back to your PC. I'm using OctoRemote, but Printoid looked nice as well.
It's a rainbow PLA from Amazon. PLA 3D Printer Filament 1.75mm... https://www.amazon.com/dp/B07HG48P9Y?ref=ppx_pop_mob_ap_share The color change is slow so if you print several items, real low layers, or large items, you'll be able to get a shift.
I have a Pi Zero W through the GPIO into my I3 MK3. With this you have the ability to send a file to the Pi, or the I3's SD card via a web page. Sending it to the I3's SD card is painfully slow and if I'm going to run it from there I will move the files myself.
Control seems to work pretty well but there are times when a pause or abort just seems to hang. No print I've ran has failed do to the Pi yet. I do have a camera watching it but it isn't a USB webcam. I couldn't get the only webcam I had to work so instead I grabbed an old Android phone I wasn't using, loaded it up with IP Webcam (free), and now I can monitor the phones camera through a web page. If all you want to do is monitor it, with the option to run down stairs and abort manually, this might be a good option since the files still print from the SD card and even if the Pi locked up you could view the status. And if you do go this route you can still use a Pi for control and link the camera to octoprint so things like timelapse take pictures from the phone.
Since the camera stuff isn't running through the Pi I'm hoping this means less system resources are being used there.
Before you buy a new nozzle, have you tried cleaning filament yet?
eSUN 3D Printer CLEANING Filament 1.75mm Natural 0.1kg for all 1.75mm FDM 3D Printers, 1.75mm Cleaning https://www.amazon.com/dp/B00MVIYNFW/ref=cm_sw_r_cp_api_NetQBbX0VWR7E
This may help you get the gunk out of that nozzle. Run that thru it and do some cold pulls with it. It may revitalize your nozzle for a lot cheaper and you wouldn’t have to take apart your extruder to do it.
On Amazon there is some stuff called Techflex. It looks like the same stuff that my MK3 came with for the heated bed. I'm not certain as to what size would be appropriate but I think 3/8" would be very close.
https://www.amazon.com/Techflex-Split-Braided-Cable-Sleeving/dp/B01MRLJ93K/
DAISEN Octopus Camera Holder and Phone Tripod for iPhone/Universal Smartphone, White (4326573160) https://www.amazon.com/dp/B01JYV46HS/ref=cm_sw_r_cp_apa_s4tNBbCC42QK1
That's what I use for a camera tripod. The thread pattern matches the Logitech. I'll sent the octolapse settings in a bit.
Kimwipes are lint free, come in a nice dispenser box, and just the right size for bed cleaning.
Bad bed adhesion. Use a good filament. Clean the surface. Do a proper 1st Layer Calibration.
It's a good practice to use a sock to help with cleanup. This is like insurance:
I replaced mine with PC4 pneumatic PTFE connectors. M8 is the size of the screw that goes in the extruder and the hotend
Like this: https://www.amazon.com/Pneumatic-Connector-M81-25mm-Quick-Release-Straight/dp/B07QM1WP9X
So much easier to work with as the bowden tubes wear out sooner or later and you need to replace them sometimes
I use the following printer dust cover. It is not a perfect fit, but it does the job and is not too big. A more "fancy" version is the hotbox.