
What are
/r/voroncorexy's
favorite Products & Services?
From 3.5 billion Reddit comments
The most popular Products mentioned in /r/voroncorexy:


The most popular Services mentioned in /r/voroncorexy:
Aliexpress
HackADay
Discourse
Amazon Drive
FileDropper.com
Files.fm
Google Photos
Autodesk Tinkercad
Youmagine
Visualping
Straw Poll
HackMD
Banggood
Matrix.org
The most popular reviews in /r/voroncorexy:
I don't feel so bad about my impractically tall voron anymore. :) Seriously, though, nice job.
Here's a white paper on torque loss: http://users.ece.utexas.edu/~valvano/Datasheets/StepperMicrostep.pdf
And then you pile on the real issue, which is precision under load. Here's a good article on it: http://hackaday.com/2016/08/29/how-accurate-is-microstepping-really/
This combined with personal experience tells me that you do in fact lose torque and precision, which is a bad combo.
Has anyone tested any cloned dampeners or knows were to buy the original Astrosyn part in Europe without paying a fortune in shipping.
I would be happy to sponsor and install/maintain a chat server - something that I can do to give back to the community - Matrix.org looks interesting - I will set it up and you can take a look
thanks. that's a power meter , see below. i've also added a camera , lights and a separate SSR/circuit to switch ON/OFF the 24V from Octoprint.
https://www.amazon.com/gp/product/B09292HLTP/ref=ppx_yo_dt_b_search_asin_title?ie=UTF8&psc=1
Sure thing, I bought them on Amazon. You can buy the same thing on Ali express I’m sure.
Very nice and clean!
Before you heat the bed and set the adhesive, I'd peel it off, clean everything with isopropyl alcohol (the good industrial stuff) and attempt to re-adhere the PEI. If you got yours from Amazon, you should have spare sheets of it.
I rolled on 3M onto the bed first, using an empty wine bottle to drive the bubbles out. Then I trimmed the adhesive and carefully peeled off the other side. Next, I bowed the PEI a bit, lined up the 2 corners, and started rolling it on, using a bottle as a pressure roller. Worked out pretty good.
Also...
Not quite. Its designed for M3 bolts with the M3 t-slot nuts: http://www.thingiverse.com/thing:19885
Has room for a 6mm bolt head.
Step file is here: http://www.filedropper.com/voronnameplate
Perhaps wait until i have tested it before putting effort into generating more though. :)
thank you very much. yes, the China drag chain is really installed
Here is the one I bought on Amazon. https://www.amazon.com/gp/product/B097BCG69C/ref=ppx_yo_dt_b_search_asin_title?ie=UTF8&psc=1
The big tree tech tft50 with klipperscreen installed
BIGTREETECH Upgrade PI TFT50 V2.0 TFT LCD Display DSI 800x480 for Raspberry Pi 4 3 2 Model B RPi 1 B B+ A A+ 3D Printer Controller (5in Capacitive Touch Screen) https://www.amazon.com/dp/B08FD2YZ23/ref=cm_sw_r_cp_api_i_JEMQ1NHZ31PANATB6ZAY?psc=1
No diffuser, I think the camera just blew them out in the photo. The work really well though. The strip lights I used are https://www.amazon.com/dp/B097BX7LRT?psc=1&ref=ppx_yo2_dt_b_product_details3.3feet 60 LED
Thank you! I really like how it turned out. It's hatchbox abs. I love the color selection they have but just a warning, I think they're having some quality control issues because it measures 1.68-1.74. Amazon link
Hello,its a 5“ Bigtreetech PiTFT connected via DSI directly to Raspberry Pi. 😊
It was 3DFilaments purple ABS, and I can't say I'd recommend it (although ABS is all new to me, so no real expertise here). I got it because I wanted a dark purple (looked nice in the lying photos https://www.amazon.com/gp/product/B0992SV8M7/ref=ppx\_yo\_dt\_b\_search\_asin\_title?ie=UTF8&th=1), and was somewhat disappointed how light it came out. It also seems quite a bit softer and chalky compared to the Hatchbox black that I used for the structural bits (highly recommend).
P.S. the webcam mount is actually PLA, and more like what I wanted; yes, I know it might melt, we'll see that's an easy fix.
Cut some of these up and controlling them from one of the ports on the octopus. Super clean and pics+videos don't do them justice.
Lamomo LED Neon Flex, 16.4ft/5m... https://www.amazon.com/dp/B08SHWJGW7?ref=ppx_pop_mob_ap_share
I got these from AliExpress and they were exactly what I wanted. Took about a month to get them...
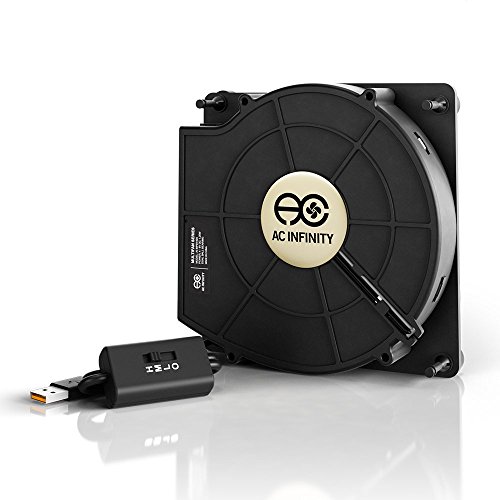
My Voron is a bit different as I only have a single extruder and a single hotend. I use an E3D V6 style setup. I also have 24v power which is a little harder to find alternate fans for!
I have been using these, they seem to work well:
You can file down the M5 bolt on one side to make the grub screw sit better.
For me, I couldn't tighten the grub screw enough so it wouldn't slip, after filing down the bolt everything was fine.
1/32th microstepping is very taxing on 8-bit hardware and the DRV8825 actually are very imprecise on that microstepping level which will do more harm than good. Check here
They're using this, which is actually a filament motion sensor. It will detect broken filament, a clog, or the end of the spool.
4.3 inch Raspberry Pi IPS LCD Capacitive Touch Display Screen 800×480 4.3inch IPS Wide Angle MIPI DSI Interface for Raspberry Pi 4 3 2 Model B B+ A+ Raspbian Retropie Ubuntu Driver Free @XYGStudy https://www.amazon.com/dp/B083TG7Y9B/ref=cm_sw_r_cp_api_glt_fabc_BE31ZYCFBVJAMGBKRVP8?_encoding=UTF8&psc=1
What is the nylon sleeving you are using in the kits? This isn't part of the BOM so I can only guess. The usual braiding I have for my RC stuff (similar to this) isn't solid enough to hold the cable upright.
https://www.amazon.co.uk/gp/product/B09BVQYZMS/
Not cheap but it is a 10m roll and I've got a requirement for the remainder. I build and fly some rather large RC aircraft and it makes really decent wing bags. Also works great on your car windshield at this time of year as a cover to keep the frost off.
I didn't cover the entire bottom as I retrofitted it after I'd finished the electronics and so the acrylic panels and heated bed extrusions were already bolted in place. It's cut into strips and held in place with some small sections of VHB tape and also installed the Z belt covers over the top. I've been printing ABS and so far not even a hint of warping so you probably don't need to cover the whole of the acrylic anyway, just the exposed parts.
I know you already printed yours. You may want to try my own home brew belted extruder. Its ratio can be anything from 2:1 or 2.5:1 if you use a 16T pulley, I recommend the 20T pulley and stick to a 2:1 ratio. Here is a link to it. https://www.youmagine.com/designs/modicum-extruder-v1
I recommend 3d printing it in ABS in 100% infill.
I did not, I exchanged the acrylic for a composite plate. But something like this should work.
This is the link from the Switchwire Sourcing Guide. You need to select the 28"/20oz option. It looks like the 20oz model is currently OOS so you may need to shop around.
I have an abundance of yellow filament. Paramount’s Simpson Yellow and this roll I bought and never opened because I ended up using the Paramount (https://www.amazon.com/dp/B07CDS45HZ/ref=cm_sw_r_cp_api_glt_fabc_GD0AMT1C9ZMBTR2NVB6Y?_encoding=UTF8&psc=1 ) If you’re US based, DM me and I’ll get you yellow accent parts on the cheap.
You'll honestly probably want the pancake stepper either way, the weight savings on the moving carriage is enormous between the two. I bought a cheap one on Amazon for $9.
I appreciate the offer, but I have two of these cheap ones coming https://www.amazon.com/gp/product/B08K8VF6G7/ref=ppx_yo_dt_b_asin_title_o00_s00?ie=UTF8&psc=1 and will be here Tuesday. When I get back from vacation I'm going to check the wiring and if needed replace it with one of these. Once I can print, I'll print and setup the klicky bed leveling. Thank you
To light my printer I use "fake" neon lights that are basically a LED strip with a big silicone diffuser on top of the strip. The one I used is here and is I think 6 by 8mm in length. the LEDs are 12v so a simple buck converter is glued to the bottom of the screen so I can flip it up and adjust the input voltage to change the brightness. hope this helps others who want to do the same thing.
You can probably find these in UK BSTEAN Syringe Blunt Tip Needle and Cap - 10ml, 5ml, 3ml, 1ml Syringes 14ga 16ga 18ga 20ga Blunt Needles - Oil or Glue Applicator (Pack of 10) https://www.amazon.com/dp/B01HFTYINS/
FYSETC 3D Printing Build Surface Double Sided Textured Pei Spring Powder Coated Steel Sheet Flexiable Build Plate 300 x 300mm for 3D Printer Lulzbot TAZ 6 https://www.amazon.com/dp/B07V9DY7SM/ref=cm_sw_r_cp_api_glt_fabc_28PTR6GAPWYAC5FEC6TD
The plate above the electronics in the Formbot kit is made of Polyethylene which is flammable, a characteristic that strikes me as being bad karma. So I applied a self-adhesive heat barrier to it both top and bottom. The material I used is: https://www.amazon.com/dp/B08GG3RPYL?psc=1&ref=ppx_yo2_dt_b_product_details . It is thin and easy to apply. I haven't tried to light a fire yet, so can't say if it's effective.
I used this one. Cheap. Works great. Has the tips you can use for inserts.
Limited-time deal: TOAUTO Soldering Station,80W Digital Solder Iron Station Kit with 176°F-896°F Temperature, C/F Func, Auto Standby & Sleep, Temperature Lock,5 Extra Solder Tips, Solder Bracket, Solder Sucker,FT-80W https://www.amazon.com/dp/B082HP4513/ref=cm_sw_r_cp_api_glt_fabc_G5PTD5ZTGAN6BA7PE38Q?_encoding=UTF8&psc=1
You legitimately seem like your are shoe-stringing this, we’re building the same thing, and you remind me of myself as a kid. I’d be happy to print these parts for you. Get yourself some inserts. These worked for me:
[initeq] M3-0.5 Threaded Heat Set... https://www.amazon.com/dp/B077CJV3Z9?ref=ppx_pop_mob_ap_share
Pm me and we’ll work out the details
It's an OSOYOO 3.5" DSI screen , supposed to be this one Amazon.com: OSOYOO 5 Inch DSI Touch Sceen LCD Display 800x480 for Raspberry Pi 4 B 3 Model B+ 2 | Capacitive Finger Touchscreen | Plug and Play Monitor Compatible with Raspbain Ubuntu Kali RetroPie Windows 10 IOT: Computers & Accessories , but it seems the the 3.5" is not listed anymore, to be honest it is already a replacement unit. the first one was defective and had lines when the unit heated up. Seller had excellent support though and sent a replacement unit right away. (might be the reason for the product being pulled out)
It's a blue petg so i'll be reprinting in abs once i get it enclosed here's a link https://www.amazon.com/gp/product/B01M63N09Y/ref=ppx_yo_dt_b_search_asin_title?ie=UTF8&psc=1
the lights are 24v led strips in this aluminum extrusion. I painted it black with some spray paint here is the extrusion https://www.amazon.com/gp/product/B01LL3S006/ref=ppx_yo_dt_b_search_asin_title?ie=UTF8&psc=1
KVP Metallic Silver, and KVP Sea Blue. Thermometer/Hygro combo from Amazon. Designed the little holder, just snaps in and is attached with VHB tape
https://www.amazon.com/gp/product/B07GR65CNT/ref=ppx_yo_dt_b_asin_title_o09_s00?ie=UTF8&psc=1
Pro tip - try ESun ABS+ for your first build. It’s hard to find in the US, but much easier to print than standard ABS. That’s what I used to build my V0.
I’ve never had much luck with a draft shield, but have used this bed adhesive with success in preventing warping.
That is the correct camera mount! I used it with this Pi camera:
https://smile.amazon.com/gp/product/B083BHJZ16/
The field of view could be a little wider, but it is fine for for monitoring prints and basic time-lapse videos .
Made the mount. The screen I grabbed from Amazon. Pretty nice little screen. Just plugged in the ribbon cable and it worked.
https://www.thingiverse.com/thing:4638156
https://www.amazon.com/dp/B08634Y16L/ref=cm_sw_r_cp_apa_i_GQqNFbKF04EGY
Got my spring steel from Amazon. My PEI also came from Amazon, but I wanted to get it from a seller with more hits than misses.
You might be asking the wrong guy here, but having used Flashforge, Raise3d and E3d v6 hotends previously, the mosquito is far and away my darling favorite. I don't know if it's "worth it" but I would not print without it at this point.
This one was amazingly cheap, and had full 1080p goodness
​
https://www.amazon.com/gp/product/B074RG377C/ref=oh_aui_search_asin_title?ie=UTF8&psc=1
​
For V2 I am planning to test an air filtration system using large blowers and both kinds of filters you mention, in a setup similar to this. We'll see how it goes.
He sent me the source via PM, they are on Amazon UK. You can of course order them from IGUS directly as well.
how would I stop the pi from powering the ramps? Is that even possible?
The pi connects to the arduino via USB, the arduino ends up pulling power from USB. I see no way to prevent that.
This is the power supply I'm using:
https://www.amazon.com/gp/product/B00XTHAXNU/ref=oh_aui_search_detailpage?ie=UTF8&psc=1
Nope, no binder clips.. I use this stuff which works very nice and really grips both the metal plate and glass when it's heated up but releases the glass pretty easily when it cools.
Yes, was talking about the bed springs. I built without the spring in the gantry. As an update, using a lower force switch actually made the behavior worse. Does anyone have a part number of a limit switch they are happy with for Z? (preferably on a 12 inch + build).
https://www.amazon.com/gp/product/B00GIIE2AM/ref=oh_aui_search_detailpage?ie=UTF8&psc=1 worked ok but not great
https://www.digikey.com/product-detail/en/panasonic-electric-works/AH1684619-A/255-4103-5-ND/644930 doesn't have enough spring to unswitch once its activated.
The difference in performance between the two was dramatic.
It's a ramps board, here's the exact board (including stepper drivers): https://www.amazon.com/gp/product/B019TNELNU/ref=oh_aui_search_detailpage?ie=UTF8&psc=1
> stepper drivers, microstepping, steps per mm.
I don't have the setup for steps/mm but what would that have to do with thermal runaway?
> Have you tried swapping hotends/ changing to single?
it's happening on both hotends, so swapping hotends won't make a difference.
> What message you see on screen when it happens
The message on the screen is what's in the title,t hat there was a thermal runaway.
> does the printer restart itself?
The firmware isn't programmed to restart itself after a thermal runaway. You need to hard reboot it.
> Does it happen always at the same time/when?
Not that I have noticed.
> Edit: Do you print from SD card or through the cable?
Cable via octoprint.
Here is the one got. I also have a Sunon 50 and 60mm blower coming along with some Sunon Axial fans for the Chimara. Not to sure what I'm going to do yet.
What material did you print them in? PLA you can heat treat to strengthen it and that will also induce some shrinking. If you're careful with application there's also E6000 as well.
Oh, it's a translation thing I wasn't picking up on- "mains power" means plugged in to the wall. Got it.
So you're saying the leads for this don't go to the PSU, but to a plug that goes to the wall, yet every plan I've seen shows them plugged in to the PSU.
Should maybe change the BOM to reflect this. Also added bonus is not as much extra heat generated. I wouldn't call it clean 5v power. The resistor would provide cleaner power. You can use this:
If you don't want to mess with soldering.
>I would never use adhesive to hold a thermistor because it can become loose with time, which is a fire risk on a silicone bed heater.
Kapton tape is fine for holding thermistors on, and so is rescue tape, they're rated way above the temp any heated bed is going to get and they're even used on hotends. Most firmware handle runaway temps caused by the thermistor becoming dislodged by checking to see if temp has risen every X secs. That being said, I always install a thermal fuse on all of my heated beds. They're standard on all household appliances that heat up so I think they should be with printers too.. and they cover all the other things that could go wrong in addition to the thermistor falling off like the connector fusing open, etc.
You know, I have a shitload of M3-M5 nuts and bolts but very few screws that fit electronics. I guess now that I am a budding maker I need to remedy this lack. I've got 50 #1 screws coming to address the issue ;) I keep my hardware in several of these boxes. I will be printing some cases soon.
I bought these ones from Amazon for $9.98 for a set of 10 in my latest build.
They worked fine for me, and now I've got some spares on hand.
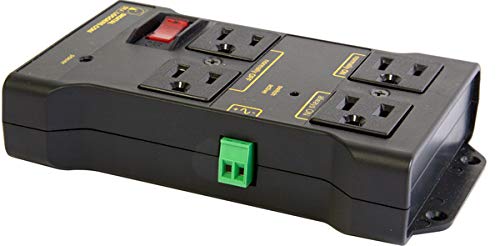
I had to make some modifications to where the extruders sat to make it functional but this is my enclosure. I use OctoPrint and this Power Strip to remote control powering on and off the printer and lights. It's got a couple fans and some activated charcoal batting to help with any smell.
I meant the body. I believe the motors are intended as replacements for reprap printers.
These are the exact motors: https://www.amazon.com/gp/product/B013J7CA6M/ref=oh_aui_search_detailpage?ie=UTF8&psc=1
I'll take a look at the 1.5. sadly, I already printed everything so I'll probably have to reprint some parts.
Edit: WOW, there's a LOT of additional parts for the 1.5. are they all different from the parts I originally printed as part of the voron folder?
I used this tapping bit and this cutting oil and they worked marvelously.
And to re-state the re-stated: Take your time.
Many options here!
Personally I've used this heat shield tape which is meant for reflecting heat but only ever took it to about 70C. Don't know if it'll unglue at 100C. Did a pretty decent job, making my bed heat up faster and stay warm longer while cycling the heater less. I also used this tape on my hot end before the silicone condoms were out but the heat was softening the adhesive, and I had to use kapton tape to secure it. Also worked reasonably well.
Have you played around much with different springs as far as how much force is needed? For example, would this spring be close enough to work? It's the same dimensions, but a bit stronger spring force. My concern is finding the balance between spring force here vs. not compressing the bed level springs when probing.
Specifically, this is what I've got.
As far as I can tell, it seems similar to the part recommended in the BOM—though I could be mistaken, of course.
No, those are not gonna fit. Trouble with these switches is everyone has their own part number for them. I'm gonna eventually find a brand-name switch from ZF or Honeywell and use that.
[These are the switches we're using](https://www.amazon.com/dp/B008SO0IGQ/ref=cm_sw_r_cp_api_awGxybVHVJXZT
I bought and use this one on mine:
Gizmo Dorks PEI Sheet, 10" x 10" 3D Printing Build Surface with 3M 468MP Adhesive Tape https://www.amazon.com/dp/B01KGDTNQ2/ref=cm_sw_r_sms_apa_OX0jybYDAW5SC
Seems pretty clear, and when it's at temp, nothings is coming off.
Using a splitter cable is a bad idea. Because of how USB protocol works (it's a beast) you'll blow one of the controller chips, most likely the one on the RAMBo.
What you need is a KVM switch, or just the USB portion of that. Get this: https://www.amazon.com/dp/B006Z0Q2SI/ref=cm_sw_r_cp_api_t9NPxbBF3J8HX
You're not the only one with this problem. I'm working on a good solution for enabling flashing over Raspberry Pi. Ran into the same inconvenience a bunch of times.
What did you pack the bearings with originally?
Here's what I use: https://www.amazon.com/Super-Lube-21030-Synthetic-Grease/dp/B000XBH9HI/ref=sr_1_1?ie=UTF8&qid=1468280863&sr=8-1&keywords=superlube
Here's what I'm using for non-current carrying stuff: https://www.amazon.com/Belkin-250-Foot-Cat5e-Stranded-Networking/dp/B00004Z6HU/ref=sr_1_1?ie=UTF8&qid=1468862053&sr=8-1&keywords=stranded+CAT5E
For everything that carries a lot of power, 20AWG wire is used. Max length of run is 3ft (1M) so your current drop is going to be nonexistent. Amazon carries 100ft spools of that stuff.
I've never used CAT5 but I can say that 22 guage stranded wire works for almost everything, including the hot end. This is what I used: https://www.amazon.com/Electronix-Express-Hook-Stranded-Gauge/dp/B00B4ZQ3L0/ref=sr_1_1?ie=UTF8&qid=1468851524&sr=8-1-spons&keywords=22+gauge+stranded+wire&psc=1
You will want some 16 guage for the PSU to board wires and for the bed, but the heater pad already has long enough wires on it.
I'm using these for the feet: https://www.amazon.com/dp/B003IMJ3S2/ref=cm_sw_r_cp_api_FCzwxbQR7D42P
I also have a set of ninja flex ones. They are not completely noise dampening, but my noise requirement are different from most people's. I'll push the STLs today or tomorrow for those. I believe there was another guy here that did the feet in OpenSCAD for it.
well my heated bed jst connector just melted... so i did some research and im going with these for the heated bed http://www.amazon.com/Anderson-Powerpole-Connectors-20-pair/dp/B00GPRIC8Y?ie=UTF8&psc=1&redirect=true&ref_=oh_aui_detailpage_o00_s00
Any chance you can produce a version of the probe holder for this one?
http://www.amazon.com/LJ18A3-8-Z-Approach-Sensor-Inductive-Proximity/dp/B008FZC8F2?ie=UTF8&psc=1&redirect=true&ref_=oh_aui_detailpage_o00_s00 OD on the threads is 17.8mm
Unfortunately that's not going to work. There's not enough current in that circuit (even if you add a load resistor) to trigger that circuit.
If you really want to go Amazon, and don't want to wait for a month for shipping from China, order this one It's not Prime, but it's free