
What are
/r/CR10's
favorite Products & Services?
From 3.5 billion Reddit comments
The most popular Products mentioned in /r/CR10:


The most popular Services mentioned in /r/CR10:
Files.fm
Cults.
Autodesk Tinkercad
Youmagine
Repetier
Gofile.io
Gumroad
Slic3r
MeshLab
Slickdeals
ImgBB
PuTTY
SD Card Formatter
sitejabber
Banggood
The most popular Android Apps mentioned in /r/CR10:

The most popular reviews in /r/CR10:
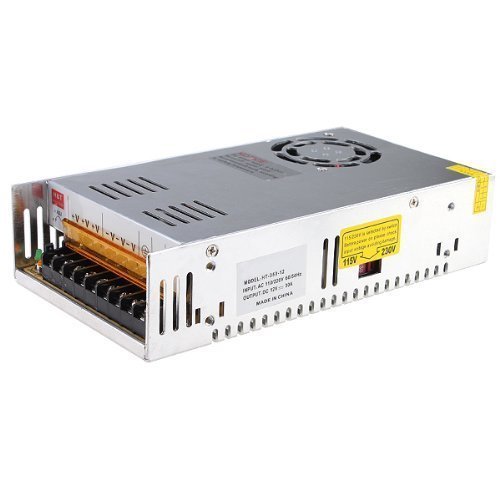
If its factory yes. They are cheap Chinese power supplies and will go bad. First the fan will start making noise usually, then things go bad from there. Go to amazon order you a meanwell. This one here MEAN WELL LRS-350-12 348W 12V 29 Amp Single Output Switchable Power Supply https://www.amazon.com/dp/B0109IMRPS/ref=cm_sw_r_cp_apa_i_tdO3DbC8JMAXM
I used about 80% of 1kg spool with 12% infill. This is what I used https://www.amazon.com/gp/product/B08CVG2RVP/ref=ppx_yo_dt_b_asin_title_o00_s00?ie=UTF8&psc=1
2nd picture, rectangular chip, 4th silver connector on right side down, burnt connection and chip
You should check with the seller for a replacement power supply first, otherwise
or this should work from amazon but it won't fit in the box according to the reviewer, still 18.99
I purchased some dampers from Amazon and they really cut down on the noise level. Now the fan in the control box makes the most noise.
Personally I got a 10-foot USB mini cable off of Amazon and it worked fine for me, not sure why you are having issues with other cables.
Here is the link to the one I bought: https://www.amazon.com/dp/B002KL8N6A/ref=cm_sw_r_cp_api_glt_fabc_7ZNMVFPMZMSQ5B7KCKR6?_encoding=UTF8&psc=1
TLDR: Looking for the bed that came with this machine: https://www.amazon.com/dp/B07Y2TYPG5
So, we tend to learn from our failures more than our successes. For example, I will never again walk my wife through starting a print for me over the phone. Never again will I use alcohol on these awesome beds that say to use only water. Absolutely loved this bed, held prints like a rock when hot and they practically fell off when cooled. I ordered one from Amazon to realize my bed is not 310x310, but 320x310, so back it went. What I thought was an identical bed arrived today, but it doesn't seem to have the same texture. I'm dragging my feet on running a print to see if I can find the exact one the machine came with.
Yes, I did try contacting the seller but they said they don't have parts and are provided parts from Creality for warranty purposes only. Great folks but, alas, unable to help.
Reading on it, I'm thinking it's a carborundum bed, but I'm not positive.
This should be your first item to check, and additionally based on your video it looks like you are still running the stock plastic extruder drive feed. When I had this issue in 2019 the plastic piece cracked after some time. I had to replace it with a metal one.
https://www.amazon.com/CHPOWER-Extruder-Upgraded-Replacement-Extruders/dp/B079JZ374W/
Oh here, this is a pretty good anti blob profile for most of my pla.
Set your extrusion multiplier and temps as need be
Also, just looked at your picture, pretty sure besides the kinda low retraction speed that vertical lift is way too high, like try maybe .12 or even .08 but 1 solid is going to give you blobs and some bad seams, probably stringing too. Also wipe nozzle isn't that great, I'd just leave it off.
Oh and on the layer tab check out the start points, try positioning your model to where a lesser seen area is towards the start points closest to specific location option with maybe a x150 y300 and have the back of the model towards that point (back middle of the plate basically), that way the zipper seem will be more hidden and you won't have to worry about the random start location option causing retraction marks over most of your model. Makes cleaning a lot easier. You can check it out in print preview to see where it'll be more or less.
Correct, Super Glue. Get this: https://www.amazon.com/gp/product/B08KS5P2JX
I use it for all my prints and it helps a lot if something breaks as well. AMAZING stuff.
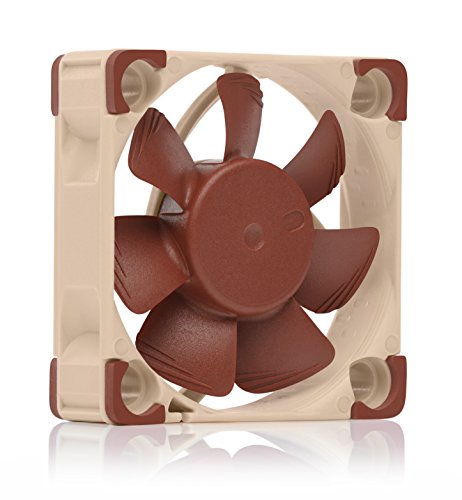
I used the Noctua version (https://amazon.com/gp/product/B07654PNFQ) but its maximum dBa is supposed to be nearly the same as the Antec version you used. The only difference is that I used only one fan and used the other space for my Raspberry Pi 3B running Octoprint. My setup is about 5x quieter, maybe more than the stock fans. I don't believe we used the same STL but that shouldn't matter.
There is a barely audible fan sound coming from the control box, and now 90% of any fan noise emanates from the heat break and part cooling fans on the hotend. Maybe that's what you're still hearing?
Also did you use any voltage control/step down circuitry for fan power? I have the CR10 V3 model and the power supply outputs 24V, and these fans use 12V. If the fan is connected directly to 24V it's not going to last long, and that might explain the noise you're hearing...it's working twice as hard and will likely burn out soon, and hopefully not catch on fire!
I had this happen, heat gun helped a lot at pulling it off, but then I couldn't remove thermistor and heating element, so I eventually just got a new nozzle assembly. I might consider just chucking it and getting a new setup. MAKE SURE you check 12v vs 24v when buying.
Something like these made it a lot easier to splice in the new wires without running them through the cable management back to the motherboard.
I’ve been using these on my cr-10s pro v2:
BIQU PC4-M10 Male Straight Pneumatic PEFE Tube Push for E3D-V6 Fitting Connector Bowden Extruder 3D Printer (Pack of 10pcs) https://smile.amazon.com/dp/B01IB81IHG/ref=cm_sw_r_cp_api_glc_fabc_xoEaGbB7VMYYM?_encoding=UTF8&psc=1
I got them in December 2019 when the originals failed after less than a month and I replaced them again in March 2020 because I hadn’t replaced the Bowden tube. My March set is still going.
Amazon has them for $22. Match with one of these to attach it.
The actual product doesn't have that weird edge, it's just a flat sheet.
Since no one actually ANSWERED the Op's question - it's two half bed sized masking tape sheets, which I found hilarious since it's such cheap quality masking tape.
Throw them out as well as the roll of tape they give you, it's crap.
If you MUST use tape, as many have stated, use Blue painters tape.
That said, IMHO you should run, not walk to your nearest Lowes or Home Depot (in the US) and get a 6 pack of 12" square "mirror tiles" for $10 USD. (Note, IKEA has them too, 3 for $4 as I recall, but not one near me.)
OK. Why mirrors? They're flat. Who wants a wavy mirror? Most are very close to dead flat, and it's cheaper than ordering some specialty glass.
Many people print directly on the glass, no tape, hair spray, glue or other gunk. Works for many prints, but some prints will require more hold, so you'll hear a lot of opinions as to what's best. Some even say to flip the mirror and use the back, it's rougher. TOO rough for my taste...
Personally I favor a PEI sheet attached to a mirror. Glass smooth bottoms, sticks like mad, prints pop off when it cools. No mess, just print and go. There are others like BuildLok which gets great reviews too. I sometime pull it when done printing, load another mirror and go.
I rough up a NEW sheet's surface with 400 Grit (some people use 220 grit) silicon carbide wet/dry paper and a flat rubber sanding block under running water. Same thing with a mirror, the prints stick better if there's some "tooth" to the surface, but I want a smooth print bottom, so I use 400 grit.
While I'm at it, I also smooth the corners and edges of the glass under running water with a diamond sharpening stone. I'm fond of my fingers, cuts are a drag. LOL!
Cleaning - I use 99.9% Isopropyl Alcohol in a small sprayer - which started life as a deodorant bottle ... ;-) About $13 on Amazon: https://smile.amazon.com/gp/product/B005DNQX3C
Lasts forever, last bottle lasted also 2 years.
Have Fun! PuterPro
I would recommend contacting amazon through amazon chat and asking for a replacement as the item is defective. They will likely have you order another and send the first back. I got mine on amazon though mine it is a hictop version. Here is the link https://www.amazon.com/gp/product/B074QLQSQV/ref=oh_aui_detailpage_o05_s00?ie=UTF8&psc=1
Also I would recommend this as well as the microsd card slot on the control box isnt the greatest and is going to be alot more expensive(time or money or both) to replace than this 8 dollar cable. https://www.amazon.com/gp/product/B01D9JIUU0/ref=oh_aui_detailpage_o06_s00?ie=UTF8&psc=1 You will need a microsd to sd card adapter for it though. I just find handling a sd card much easier than using the micro sd.
Don't forget to check the bed control board on the back wall of the control box. Mine arrived with a wire loose.
There are 4 wires, two thin ones that go to the control board, and two thicker ones direct to the power supply, very short distance.
Also UNPLUGGED you might check the screws and wires on the power supply, one may have come off and shorted somewhere.
If that's true, it blew the power supply. (Bad news)
Good news - they're cheap to replace.
Here's one on Amazon that works:
https://smile.amazon.com/gp/product/B00D7CWSCG
I looked closely at your pics and all looks OK, it's probably the power supply. Be happy, it's the least expensive thing in there!
Seriously, look for loose wires, the big ones that are screwed on, not the little ones with white plugs. Look both at the terminal block of the power supply and where those wires go into the motherboard.
If no joy there, (and just to be thorough) check the wires to the bed and turn the printer over and check the bed heater with good lighting. You'll know if you see a problem ....
Good Luck!
PuterPro
I replaced the stock glass with mirrored tiles from Home Depot. I used to use tape and glue sticks but read a comment on how much better PEI sheets were to print on. No more glue or tape, just rub it down with rubbing alcohol between prints.
It sticks very well when heated up, and comes off almost effortlessly when cooled down. You also get a shiny surface on the part touching the PEI sheet which is nice. Well worth $21 from Amazon.
I got mine on Amazon that is supposed to be Creality shop. Didn't have any issues, an love it.
​
https://www.amazon.com/gp/product/B07DCGMKK8/ref=oh_aui_detailpage_o05_s00?ie=UTF8&psc=1
BQLZR Silver Aviation Plug 4-Pin 16mm GX16-4 Metal Male Female Panel Connector Pack Of 5 https://www.amazon.com/dp/B00IJ673ZW/ref=cm_sw_r_cp_apa_i_RcT3Cb9KB8BNS
Bought those from Amazon and they worked fine, though soldering was a bit of a pain
Before spending on a mains powered heater. Have you tried applying one of these? Helped me with my CR10.
Settings change with filament. But looks like there is an issue with your speed and your extrusion. Maybe run a 100 mm test at 100 flow. Measure the diameter of your filament. The cr-10 is a workhorse not a race horse, try printing at 40-45 mms. Also looks like it needs more heat.
Here's my cura, still messing with supports. This uses the latest 3.3.1, adjust your flow and temp as needed.
This is my Simplify 3d
Simplify 3d is a good slicer and does some things automatically that you need to adjust in cura, like line width to 120 percent of nozzle and good support generation by default, you can make your own for free in meshmixer but yeah, it costs 150 usd and that's a hard pill to swallow.
Oh yeah check your gcode flavor in cura under machine settings, make sure it's on marlin.
https://www.thingiverse.com/thing:2549082
This is good to check your level just to help more than eyeballing it. Raft is good if a little overkill. I'm pretty happy with my last profiles supprts. I only enabled support roof under support interface to give a good layer. However there is an option for support floor which is supposed to help with adhesion. Also it's possible you're overextruding a touch and that's carrying over into your support. Sometimes enabling a z hop of say .16 helps.
Cura profile, make sure to adjust temp and flow
Here, upload my profile in cura. I see a lot of settings there are off what you want to start with from your picture. Preferences, profiles, import. Then select.
https://files.fm/u/yz8qt4f9 (uploaded one for the current 3.3.1 version of cura, testing it today but you can probably use it without issue)
But to answer your question, when you hover over speed you see a cogwheel, if you click it you see all available settings for speed, one of those will be called Initial Layer Speed. That one was what I set to 15 for example for a 45 speed print. Also if you want a finer layer height try .16 instead of .15. 80 on the build plate is hot, 60 for glass is normally right. Printing at 210 is probably high, check the range on your filament, and try and print towards to the colder end normally. Infill density of 20 is about right for keeping things upright but for hollow models you can get away with less. Wall thickness is kinda weird at 1, if your line width is .4 you'd want maybe 1.2. Things like that mostly.
Print your first layer at 30 percent of your print speed, try a print speed of 40 or 45, it looks hot, try decreasing print temp to 195, initial layer temp to 205. Try printing something small and flat to see if that works.
Here's a copy of my pla profile for cura from today in case you want to mess around in your settings. Change temp and flow as needed.
Not sure if you're using anything for adhesion but it helps.
This might be worth trying, I have custom support settings and support interface enabled, uses a bit more filament but should help. Change your flow and temp settings per filament as needed, this is just guessing normal pla which has a slight over extrusion tendency. Also enabled brim with 4 lines just to give you an idea of what it does.
Threw some things into cura, hopefully some of it will stick
Also Z hop helps, try maybe .2 to start, increase till you feel it's dialed in, you might have to go up to 1 though depending on the filament.
Edited a profile to get your settings about right, should help.
Also heat guns eat up strings, just use quick passes once the gun is up to temp, if you linger on a miniature for more than 2 seconds you'll probably start to get deformations.
It's a bit work to setup, but once you do it's really easy to flash firmware. I use a Windows PC, so your setup me might be different. I originally followed TH3D's instructions (it's very close to their easy board light, same thing just a different processor).
First, you need to install an IDE. TH3D suggested "Atom", but I had issues getting everything working. I found that using Microsoft Visual Studio Code was easier to get going. I suggest installing that.
Next you need to install PlatformIO (PIO) for Visual Studio Code (or Atom). Check out https://platformio.org/install/ide?install=vscode
Then just grab Marlin 2.0, either the vanilla or you can grab the SKR 1.3 version from BigtreeTech. They are pretty much the same thing, only the latter is preconfigured for the SKR.
I used vanilla for mine, because at the time the SKR firmware was a few revs back. I used the SKR version to modify the stock. But once you slog through the firmware a few times it's not too complex (unless you start messing with confirmation_adv.h or, like I did, pins.)
Then you just build the firmware (Ctrl+alt+B in vscode) and grab the firmware.bin file that's generated. Copy to your SD card and pop in you printer and turn it on. The printer will automatically apply the firmware file on boot (and rename it to .CUR).
FYI. For tiny wires like that, I like stuff like these quite a lot:
https://www.amazon.com/Connectors-Haisstronica-Electrical-Waterproof-White26-24/dp/B07J3V7SB3/
Just strip the ends of the wires back a bit (I use my fingernails, YMMV), shove them in so they overlap in the middle (it doesn't require any particularly-special alignment), and heat it up (heat gun preferred, but a lighter also works well with practice). It shrinks, the solder melts and sticks stuff together, and the glue makes it stay in place.
Bingo-bango, a nicely-insulated soldered splice on a tiny wire -- with strain relief -- perfect, at least for light-duty stuff like low-current/signal wires.
(Also, I turned the BLTouch on my own CR10 v2 180 degrees around so the connector wasn't next to the fan. It's uglier, but maybe more-lasting.)
Creality CR-10S Pro + v2/CR-10 MAX use a different thread: M6x.75mm. Most nozzles will not fit the original hot end, you can go with
MicroSwiss: https://www.amazon.com/gp/product/B07NF7B1ZX/ref=ppx_yo_dt_b_asin_title_o01_s00?ie=UTF8&psc=1 (this is the most expensive route, and they have .4, .6 and .8 varients)
or Creality official, that ship from China, so might take longer to arrive: https://www.creality3dofficial.com/products/official-creality-cr-10s-pro-cr-10-max-nozzle-3pcs-0-2-0-4-0-6-0-8-1-0mm
I have a Pv2 and use the .6 MicroSwiss one. Good Luck!
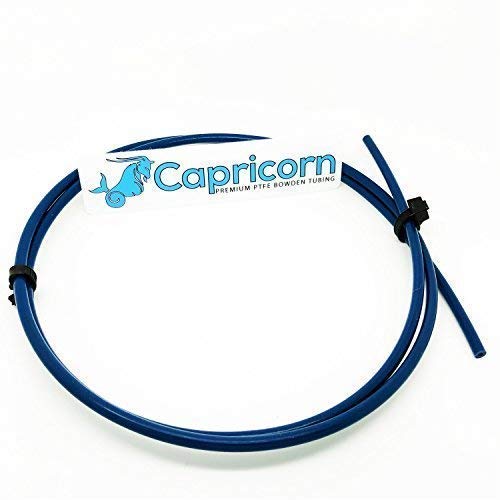
Genuine Capricorn Tubing 1 Meter XS Series 1.75MM Filament with Upgraded PC4-M6 and PC4-M10 Pneumatic Fittings & Capricorn Tube Cutter for Creality Ender 3/Pro Ender 5 CR-10/10S 3D Printer https://www.amazon.com/dp/B0915V313C/ref=cm_sw_r_apan_glt_fabc_Y8AEPD9B9XMPRVFKV1C4?_encoding=UTF8&psc=1.
This the one I bought and it works great. Also has one of those nice cutters with it!
the case fan was this one. the other two where slightly thicker, not bigger. https://www.amazon.com/gp/product/B009NQLT0M/ref=ppx_yo_dt_b_asin_image_o00_s00?ie=UTF8&psc=1
Same happened to me and it was the aviation plug connector that comes from the hot bed to the control box. Look at the video attached and a link to the part.
Aviation Plug Connector 10 Pairs... https://www.amazon.com/dp/B07D7SHKGK?ref=ppx_pop_mob_ap_share
I started with one like this: https://www.homedepot.com/pep/Ronco-5-Tray-White-Electric-Food-Dehydrator-FD1005WHGEN/314872933
If you look at the last photo, you can see what the round stacking trays look like. They serve as both tray and outer structure. You can trim out the center part of the plastic lattice and leave a good space for 1-2 spools to set down into. IMPORTANT! Leave the bottom tray intact so the spool has something to sit on that will allow for good air flow all around. Extra trays are also available if you want to stack more. This is a very good price for new, but you can often find them at thrift stores or on Craigslist for around $10 (US).
Then I got lucky and found one of these for about $50 on Craigslist:
https://www.amazon.com/dp/B00A826ZEA
That exact model isn't available anymore, but there are many out there that are very similar. I can get up to 10 spools in there at once, and still leave the top tray in place to dry dessicant packets. The other nice feature these have is adjustable temperature control.
Not plug and play, but i use something like this 4 pin wire to extend stepper cables. The stepper side connector is jst-ph with 2.0mm pitch. I dont remember if the steppers are on the round connectors, but it is going to me much easier to extend the end of the cables opposite from the stepper. Either the end inside the case or near the round connector. Inside the case is normal jst-xh or dupont with a normal 2.54mm pitch.
Ive got the same printer and I've had it for about 2 weeks. Things that worked for me were:
First thing, is upgrade the firmware to the Tiny Machine version. It helped quite a bit with kevelling
https://tiny-machines-3d.myshopify.com/pages/10spro.
Secondly, I upgraded my bed to this magnetic one. It allows for easy print removal and it levelled a lot easier than the default bed (though I did swap it around the time I figured out how to get the bed level)
Finally, I got Octoprint up and running on a Raspberry pi 3b+. This allowed me to add a Webcam to my printer and offload the usage of my printer off of my pc so I can use it for other things while printing, as well as remote viewing a print.
Look At the wires for the thermistor and heater cartridge. The heater cartridge wires should have red insulation around them. The crimp connection should be under the insulation. You can move them up with some force or remove them and replace the insulation with kapton tape afterwards.
https://www.amazon.com/CREALITY-Printers-Original-Replacement-Accessories/dp/B078MSLF7P
The first photo on the top left for this listing shows what I am talking about. You may have to push the black sleeve encasing all the wires up.
PC on a cr10 without an enclosure sucks, bad. Been there, done that, anything wide will warp, anything tall will warp and crack. PC really needs and enclosure.
I was liberal on the temp on my first cr10 doing lots of 260c prints, when i took the hotend apart I was horrified with how burned the ptfe tube was. My current stance is never ever ever go over 240c without an all metal hotend.
Your best bet for PC on a CR10 is to upgrade to all metal and use carbon fiber PC. The carbon fiber really helps with the warping.
https://www.amazon.com/gp/product/B074DS3986/
The guy that designed the CR-10 standalone upgrade (eliminates the external control box) linked specifically to this power supply that he used to power his Pi. I have not used it, as I haven't even mounted my Pi in the new enclosure yet, so I can't speak to how well it works.
At first I thought it was a broken wire coming from the heater, because it would go out intermittently. After replacing large chunks of the cable, I realized the problem was actually at the connector. I replaced and re-soldered the connector in the back of the box. Because I had already hacked up the cables, I also replaced the heater. Everything's been great since.
These are the replacement parts I used: https://smile.amazon.com/gp/product/B07174LCGR/ref=ppx_yo_dt_b_search_asin_title?ie=UTF8&psc=1
Good luck!
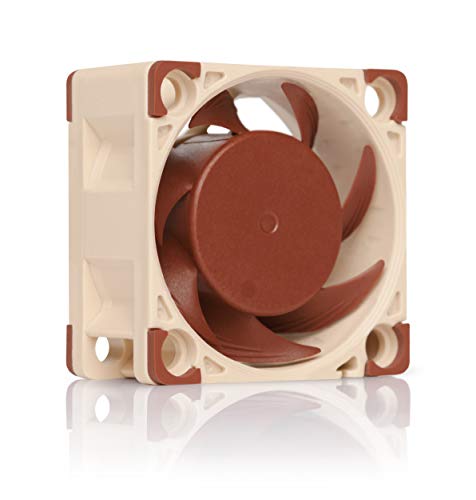
Hi friend. I swapped every fan on my CR10s Pro so that I would be able to sleep in the same room as it! For the hot end fan I switched to a Noctua fan, and anywhere I needed to reduce voltage I used these step down converters (LINK ). I also changed over to a single 5010 fan for the part cooling with a HeroMe setup.
I use these Swiss mirror clips. They work well and don't take up too much room on the build plate.
Yep. That's what they do. It's like metal confetti.
The good news is, they're readily available on Amazon and are very inexpensive. Here's just one of many: https://www.amazon.com/Pneumatic-Fitting-Connect-Straight-Extruder/dp/B07Q9Q9JDP
FYI - If you decide you need to replace your Capricorn bowden tube, too, they often come as part of the package - check your options.
I print on 12” mirror tiles held to the bed by heat sink pad. I usually use purple glue stick on the glass.
Home Depot, Lowe’s, and IKEA all sell 12” mirror tiles. They’re all pretty much the same, some a little thinner than others.
The heat sink pad is this, or very close:
ZUPAYIPA 400mm x 210mm x 0.5mm Silicone Thermal Pad for CPU GPU Heatsink https://www.amazon.com/dp/B01N9HGKR1/
I put the pad carefully on the aluminum bed without air bubbles. Then the mirror just sits on top. The pad is kind of tacky so nothing moves and I have no need for clips.
Anything not Creality :)
I don't have any brands or anything. I think these are the ones I'm using now (https://smile.amazon.com/gp/product/B07TD9J29C/ref=ppx_yo_dt_b_asin_title_o08_s00?ie=UTF8&psc=1). The one thing to watch out for is the, and I'm going to struggle to explain this clearly, inner diameter of the fitting where it screws in. I bought some that the PTFE tube slipped in nice and secure, the fitting threaded into the extruder just fine, but I couldn't get filament through. Turns out the inner diameter was less than 1.75mm so they were worthless to me.
I would suggest Capricorn PTFE though.
Build a dual z-sync.
(Be warned, these worked on my original CR10, not sure about a V2)
And swap your filament. You clearly seem to have problems with keeping the leadscrews in tandem according to your comment, so the z sync mod will fix that. As for the print, looks like you gotta dehydrate/change your filament. How old is it?
I use these: https://www.amazon.com/Adjustable-Converter-Step-Down-Regulator-Stabilizer/dp/B081N6WWJS
Just instal it in-line with the wires going to the fan inside the control box, dial it to 12v using the handy-dandy display and the tiny screwdriver your printer came with, mount it somehow (I printed some spacers and used nuts and bolts through existing vent holes), and.... done.
Now you have a fair amount of 12v to do 12v stuff with.
edit: Cooling seems fine for me -- no clogs even when printing ABS at 255c -- and the v2 has plenty of power to spare for occasional odds and ends.
It looks like you’ve got a plastic textured bed. They’re great for adhesion but shit for removal unless you get one that’s magnetic. I highly suggest a textured glass bed. And printing with bed around the 60-65 range. When the bed cools the basically delaminates themselves.
I use this one and it’s been fantastic the last few months. Stock bed was crap for me without an additional build plate.
Creality 3D CR-10/ CR-10S Tempered Glass Bed New Upgrade Heated Bed Built Platform Plate for CR-10/CR-10S 310x 310x 4mm https://www.amazon.com/dp/B07DTFG4W2/ref=cm_sw_r_cp_api_glc_fabc_rCxZFbZHC1D90?_encoding=UTF8&psc=1
But you might look at an all metal magnetic build sheet. I hear great things about them.
You'll pretty much never get a flat piece of glass from creality. It's not worth your time trying to get a replacement.
Set it up so the bowed section is assumed downward in the center.
Use binder clips to hold it down at the corners.
Shim with aluminum foil as needed.
Then go to a hardware store or online and buy yourself a set of mirrors, and order a set of textured build plates off the web. Stick one of them to the mirror, and you'll be set for life.
If you want to never use the binder clips, you can put silicone thermal sheeting down on your aluminum, and rest the mirror on that. It's a bit tacky, and holds it all in place during printing. You can then, if you want, easily pry your build plate off without screwing around with clips.
I had the same issues when I had mine new. Adjust the z-stop switch just a tad and you’ll be good. Also look into this to replace the glass.
Creality Tempered Glass Bed New Upgrade Heated Bed Built Platform Plate for CR-10/CR-10S https://www.amazon.com/dp/B07DTFG4W2/ref=cm_sw_r_cp_api_fabt1_tvTUFbM3M3S25?_encoding=UTF8&psc=1
ZERO Adhesion issues once I got the bed leveled and tensioned properly. No tape or anything needed. Works phenomenal
As an org we decided to purchase a pack from amazon. Here is the pack: Creality CR-10S S5 3D Printer DIY Kit With 2kg CCTREE PLA Large Printing Size 500x500x500mm Filament Monitor Dual Z Axis T Screw Rods https://www.amazon.com/dp/B072NGV6G6/ref=cm_sw_r_cp_apa_WUauAbDWN6F4T
EDIT: spelling
Very sorry to hear this!
Odd are good it's a power supply issue. :-(
A lot of times the power supply will go wonky (that's the tech term, sorry ...!) and shut down. You must UNPLUG it and let it "rest" for about 15 mins before it works again.
Turning the power switch ON after unplugging sometimes speeds it up, but the printer is useless if you can't trust it to stay on!!
It's possible it's the motherboard, this capacitor thing is still new enough a problem that we're just seeing the 1st few factory boards arrive in the field, so there's not much track record.
Plus no one who's a real Tech or Engineer has reported what Creality is doing on the fix, what's they're actually replacing, and what parts they've chosen to use.
Plus, we don't know if LITB is not just doing the repairs in-house to their existing boards...
You can fight with LITB Tech support, see if they'll send you a new power supply, or you can do what I'd do - replace it myself.
Here's one on Amazon that will work:
https://smile.amazon.com/gp/product/B00D7CWSCG/
Under $20 ... up to you, but for that price ... even if it's NOT the power supply, LOL!
Let us know what happens!
PuterPro
As /u/Phil12312 pointed out, the brass coupling should have it's screws a little loose.
You may have a burr on the leadscrew that doesn't "move a little faster".
Try moving the leadscrew using the 1mm setting from the bottom to the top by hand see if you can spot it.
If there is a burr, you can smooth it by hand with a piece of fine (400 - 600 Grit) silicon carbide sanding paper.
Lubricant - \u\Dylanator13 's suggestion of 3-in-one Oil is just plain WRONG. (Sorry, Buddy! :-) )
It's fine that you used what you have handy, it's your machine. If you choose to mistreat it, that's between you and your machine. But PLEASE don't recommend this to anyone else, it's just wrong!
"There are many different suggestions of what lubricant to use online" - Yeah, and the majority of them are the blind leading the blind. Threaded rods need a fine GREASE, not a light OIL that breaks down quickly, and can run down the shaft fouling the stepper motor.
The proper lubricant for a leadscrew is a VERY THIN, EVEN application of either a Lithium based grease, or what many have found superior, a heavy duty PTFE based grease like Super Lube.
It has excellent lube properties, has a very long breakdown time (unlike many greases), and isn't prone to attracting dust which wears bearings.
Here's an Amazon Link: https://smile.amazon.com/Super-Lube-Dielectric-Synthetic-Authorized/dp/B00C5014K8
But I got mine here in the US at Ace Hardware (was actually MUCH cheaper!) :
http://www.acehardware.com/product/index.jsp?productId=3506761
If you're in Europe, UK or Australia, I don't know where you can get it, maybe someone can jump in!
Let us know if you solve it, K?
PuterPro
OK - the 1st one lists itself as a CR-10 S5, which has a 500x600x500 build area. What is listed is the base CR-10 with a 300x300x400 build area. It's also NOT the "S" version which has lots of upgrades: mainly a filament sensor, a second motor for the z axis and has a Atmega 2560 instead of Atmega 1280 for the controller board.
The 2nd one lists itself as a base CR-10 and by all appearances seems to be one.
Seeing how a CR-10 sells for $499 on Amazon, this seems to be a good deal. You'd have to look at the eBay vendor's feedback to see if they are delivering what they advertise. It seems like the $400 price isn't out of the range of what they cost coming straight from China, but is on the low end so be careful.
Honestly, I'd strongly recommend getting the CR-10S as they upgrades, especially the board, are well worth it. They sell on Amazon for $599 https://www.amazon.com/HICTOP-Printer-Filament-Monitor-300x300x400mm/dp/B074QLQSQV and the Hictop is a solid build as far as CR10S go. You cold probably find a better deal on one from overseas.
If that price is too steep for you, and you are OK with a smaller bed size the Monoprice Select Mini is another good starter printer. For $220 you get a heck of a lot of printer: https://www.amazon.com/Monoprice-Select-Printer-Heated-Filament/dp/B01FL49VZE
Amazon Link There are plenty of designs on Thingiverse for a dial holder for the cr-10. Try searching cr-10 dial holder and that should show some results.
I am using a build surface called Athorbot. It sells in a package of 3 and was only $16 on Amazon. In the past I've printed with BuildTak and PEI on my other printers. I prefer BuildTak to PEI, because with PEI I'm always adding chemicals to it (IPA to clean, Gluestick to reduce adhesion with Flex, Windex to Reduce adhesion with PETG, etc.). I have no idea how good the Arthorbot sheet is, but I've seen people on this sub with it and they seem to like it, so I thought I'd give it a try. It's cheap as chips- so if it doesn't work out, no problem!
The filament I prefer for my flex parts is Sainsmart TPU. I would definitely recommend using some gluestick as /u/PuterPro mentions, because otherwise you'll never get it off, or damage your sheet. I've actually managed to tear up my PEI before because of over adhesion. To be honest, I've also ruined a BuildTak sheet with it, but that was because I was printing too close. (Fortunately, BuildTak is super easy to replace compared to PEI). To clean off the gluestick residue after the print, use a wet (water) paper towel. Don't just rub it with IPA, as it will make an even bigger mess.
Hope this helps and best of luck!
My brand new CR-10s was doing that for a the first few weeks. Here's what I did to fix it:
Calibrated my extruder, it was under extruding almost 10%. You have to change the firmware from stock to save the settings.
Replaced the extruder gear, the stock one even though new didn't feel like it was grabbing the filament well enough. Like it wasn't keeping up sometimes. I bought these: Stainless gears on Amazon. They are 36t while the stock was 40t, doesn't matter because the outside diameter was exactly the same 11.0 mm. I did recheck the calibration to be sure.
And print just a touch slower, not sure that's necessary after the first two tweaks but the prints look great now so I'm not messing with it for now.
Those connectors are, but the wire that came on them IS NOT. It's 28 AWG which has a max rating of .228 amps for power transmission. Those wires are fine for the small fan, but not the blower. You'll need to desolder and resolder some thicker wires. You'll need at least 26 AWG but I don't go below 24 for ease of use.
Edit: After looking at the amazon link again and the pictures, you can probably slide the wires out of those connectors and use the metal connectors that are on those wires on new wires that are of a higher rating. I personally bought this set of connectors which can be used directly with blower fans such as yours. Plus, those connectors are also the same used for 3 pin endstops, 4 and 6 pin steppers and so on. Best 9 bucks I have ever spent.
Also, that fan seems kind of overkill for part cooling. I bought these and they are more than adequate. I use a single fan and I only have it at 70% (unless bridging) and it is plenty strong enough with just above 1/3rd the amperage.
It is exactly the same as my buddy S5, just with the Saintsmart logo on the firmware. It works exactly and function exactly the same. When I first got it, it had a bad resistor or at least that what I thought. I first contacted Saintsmart and was redirect to Creality. A little bit of language barrier with both companies but that's how I learned that the parts and printers are supplied via Creality. Even looking closer at the part numbers, labels, and even end cap, it's all Creality branded. All in all I received my new mainboard and it is functioning like a dream.
The one listed on Amazon is actually the updated version of the mainboard 2.1. And does come with the filament run out sensor. In actuality it is an CR10S* S5 and not the older CR10 S5 even though it is listed as CR10, if that make any sense. The older CR10 has the older mainboard which does not support the filament sensor.
This is the one I have purchased SainSmart x Creality CR-10 Plus Dual Z-axis Semi-Assembled 3D Printer, Massive Print Size 500x500x500mm https://www.amazon.com/dp/B073VJBQ79/ref=cm_sw_r_cp_apa_AuttBbM546N4M
I use the Capricon XS Bowden tube. It works really well, especially if you are going to print Flexible filaments. The only downside is that if you are using super cheap filament that doesn't have a consistent diameter, it can get stuck since the tube has tighter tolerances. Here is a "clone version" from TH3d that I hear is pretty good and is about half the price. Otherwise, pretty much any garden variety 1.75mm PFTE tube on Amazon would do the trick, just make sure the reviews are good and people aren't complaining about the diameter.
Ii bought this off amazon and figured I could use it for my printer it’s self and small projects or prints that require screws. Adiyer [340-Pack] Metric M3 Screws... https://www.amazon.com/dp/B077BBJX6Z?ref=yo_pop_ma_swf
Amazon has a five pack of heaters and thermistors for like thirteen bucks. I recently bought it to repair a bunch of printers and only had one bad thermistor in the batch. https://www.amazon.com/CHPOWER-Cartridge-Thermistor-Creality-Makerbot/dp/B079K299MM/ref=mp_s_a_1_3?ie=UTF8&qid=1541352983&sr=8-3&pi=AC_SX236_SY340_FMwebp_QL65&keywords=cr10+heater&dpPl=1&dpID=518IBAFo40L&ref=plSrch
If you can't remove it even while the nozzle is hot, that leads me to believe that it is cross-threaded. I wouldn't use the block again.
You are probably best off ordering a new hotend assembly from amazon. It $20.
https://www.amazon.com/gp/product/B07CKQRT89/ref=oh_aui_detailpage_o07_s00?ie=UTF8&psc=1
If you really want to try, use a pair of vice grips to clamp onto the nozzle. I know you said you tried them, but if they are slipping then you don't have the vice grips tight enough.
I got some of their tubing and was severely unimpressed.
First of all, the tube's inner diameter is far too narrow for my filament and made it seem very difficult for the filament to get to the hotend. I bought some cheap stuff on Amazon and it works so much better since there's 2mm inner diameter instead of 1.9 on the XS series I got. Also, the inner portion of the tube was off center which further worried me.
The one thing that really put the final nail in the coffin was the PTFE fitting for the hotend. It MUST be a straight-through fitting and they sent the ones where it has the lip in the end to prevent the tube from going any further.
After waiting for my new fittings from Amazon, I was just disgusted with Capricorn and decided to go with my cheap stuff. Haven't had any problems besides bed adhesion. That stuff is over-hyped and over-priced for what it is. If you look at their data sheet, it's vague, but what it lists are the exact same ingredients which you can get from China for 1 dollar. I mean, it's blue. That's the only thing different really besides the price.
If I were you, I'd make sure your tube is reaching all the way to the threads of the nozzle-area in the heater block and then once it's heated up to around 240°, screw the nozzle in tightly. If it's not tight up against the nozzle it WILL clog. Guaranteed. And cause under-extrusion. If you keep getting problems, I'd honestly just pick up some of this stuff on Amazon. https://www.amazon.com/Meters-White-Teflon-Bowden-Filament/dp/B01CUPV9KC/ref=pd_m_ba_rp_of_1?_encoding=UTF8&psc=1&refRID=ERCGEDCS42S40CX5WAN2&th=1
Great performance and quality for a fair price.
Sure here ya go
I used this 50mmx20 fan to replace a failing fan in my CR10s control box: https://smile.amazon.com/gp/product/B07KX258SR/ref=ppx_yo_dt_b_asin_title_o00_s00?ie=UTF8&psc=1
You will have to be a little creative when installing it though. I had to reverse the pins in the fan connector. Also, the stock fan is only 10mm thick. I had to screw the fan bracket back into the case first, then I used longer m3 screws (30mm I think) to secure the fan to the bracket. I only used 2 instead of 4. It was more than secure enough and won't go anywhere. I had the same situation where it sounded like a small chainsaw was starting up when I turned on my machine, but it would fade after after a few minutes or on/off cycles. Now it is very quiet. I haven't noticed enough noise from the other fan in the case or the power supply fan for it to be an issue.
I think you’re talking about the sticker on top of the build plate. Maybe it wasn’t attached/installed well? It’s a glue backed sticker. When I wanted to replace mine, It peeled off pretty easily And you can get replacements here: https://www.amazon.com/Creality-3D-Printer-Platform-310X310MM/dp/B07QCTHPTP
Bowden push fit connector.
Amazon Link:
Creality Original 3D Printer Straight PC4-M6 Pneumatic Fitting Push to Connect + PC4-01 Quick in Fitting for CR-10,10S,S4,S5, CR-10S Pro,Ender 3,Ender 3 Pro Series Printer (Pack of 10) https://www.amazon.com/dp/B07PLFZKKY/ref=cm_sw_r_cp_api_i_DIGjFbQ1CWQZJ
Edited link to CR-10 specific connector
Left is the original, right is the new one. The motor bracket wasn't positively activation the switch and would keep trying to push when homing and would make a god awful clicking sound. I ordered a 5 pack of replacements from amazon with beefier switches and they sound great when they click.
Now when trying to move the z axis the motors can go up but can't come back down. On closer investigation these switches have some additional resistors and such. What do I do from here? :( These switches were highly rated and sold as for the CR10 (link)
Read why, not what... The fan is https://www.amazon.com/gp/product/B071WMHNG5
The damper, I knew the comment was coming. The original setup I had there was a cover that went over that end and had a damper on both sides. Total overkill and thought the extra heat the cover was causing probably wasn't to the best for the motor. So I took it off but never got around to taking off the damper.
I plan to make the top enclosure removable with clips. It will look similar to the bottom "cart". I got an extension kit for the cables. I'll be putting the control box on the shelf below outside of the enclosure. I haven't decided exactly where I want the filament yet, on top is looking good. I will post more pics and info as I progress.
Okay cool, yeah the silent one was coming up frequently in searches. So, you are saying this one should be a simple drop in replacement…Ender 5 Plus Silent Mainboard v2.2? Thanks for confirming! Might pick up the TH3D one too, just to mess around with, looks like they have some site to easily compile firmware for their boards. No VScode necessary.
my favorite upgrade so far was a glass bed likethis one. that said my printer is currently pulled apart around me while I install a bl touch. wish me luck haha
never tried the hair spray thing tbh, always seem like it would be too thin and weak to me. I use the purple prit sticks, elmers. gives very strong adhesion and since it turns purple when wet its easy to see and wash off etc.
https://www.amazon.co.uk/Elmers-Disappearing-Crafting-Washable-Child-Friendly/dp/B08PCHSL7Y
If you have troubles with the glass bed (I assume you're using that). Just buy a CR-10S bed (310x320mm) and new small profile clips. Sticks out a bit but it is flat and prints stick perfectly. Look at my latest post to see how it sits on the bed.
Bed: https://www.amazon.se/gp/product/B0882RH737/ref=ppx\_yo\_dt\_b\_asin\_title\_o00\_s01?ie=UTF8&psc=1
Clips:
https://www.amazon.se/-/en/dp/B09R46M7LX/ref=sr\_1\_2?crid=6236GA2F5AA7&keywords=krealitetsglas&qid=1669301095&qu=eyJxc2MiOiIxLjc3IiwicXNhIjoiMC4wMCIsInFzcCI6IjAuMDAifQ%3D%3D&sprefix=creality+glass%2Caps%2C90&sr=8-2
Just make sure you buy glue as well! It's useless without it, I use this stuff and its perfect:
https://www.amazon.co.uk/dp/B08PCJKKS9/ref=pe_27063361_485629781_TE_item
Heat the bed to 50c, apply 3 layers to the area that your print will fill (each layer dries within seconds) and you're good to go.
It's decent stuff as it shows as purple when its either wet or applied too thickly, it makes it really easy to wash off your prints as well since soon as you wet the bottom of the print with water the glue all turns purple so you can easily spot and scrub off any residue. I just use the green scouring pad on the side of a kitchen sponge.
Those numbers are pretty good, but you can make it better. I often make prints that use up the ENTIRE build space of my CR10S Pro V2 so keeping the bottom totally flat was important to me.
The solution was to switch to a glass bed, the metal ones seem to be always warped - I'm guessing even the hotbed under it isnt flat either as its basically the same sheet of metal as the bed you put on top of it.
The glass ones however are completely flat and wont bend.
https://www.amazon.co.uk/Creality-Printer-Platform-Tempered-Surface/dp/B0882RH737
I use printbed visualizer with octopi and my total variance across the entire bed is never more than 0.2mm.
I have some like this: https://www.amazon.com/Kester-Rosin-Soldering-Bottle-Clean/dp/B01MR49JY1
It's not that cheap, but a bottle will last you a long time. Mine usually clogs up (lost the little rubber cap) and I have to heat the needle with the soldering iron. But I've been doing that for years with the same bottle.
Either a new build plate or something like a BL Touch.
Pieces of glass are fairly inexpensive from a local glass retailer. Though, those may be warped as well. No real way to tell until you print on it. I had fairly decent luck myself.
I've heard some people having success with mirror tiles from somewhere like Home Depot too, but it didn't quite work for me.
Installing something like a BL Touch takes a bit of work, but it software levels your bed and automatically adjusts the Z height of the print in specific areas to compensate for bed sagging.
Your best option would be a combination of both.
i think this is the best you can do then. it does not have the threads but your dont need them.
Yeah you can buy the assembly on amazon Here For 7.99. If you need the fan shroud and such with it so you don't have to solder This is a direct full replacement for 25 with the connector at the end for the control box. I checked my local home depot/Lowes yesterday while I was there, and they no longer carry these screws, so I would agree with everyone above.
When I first got into 3D printing, I got sick of hardware store runs for one or two fasteners that they might not have anyway and started accumulating a hardware store worth of stainless metric fasteners.
I get them cheap on Amazon in pre-packed assortment kits. The sizes that I go through a lot of get refilled from a little shop in Florida called Monster Bolts, because their pricing and shipping seemed good to me and the dude who runs the place is responsive to questions.
These look like M3 screws. They're flat-head, and Philips. Measure them to be sure (the outer diameter of the threads should be just under 3mm).
If I wanted to replace these, I'd pick up an assortment of "Stainless Steel M3 Flat Head Socket Cap Screws" from Amazon.
Maybe specifically something like this: https://www.amazon.com/Socket-Countersunk-Assortment-Kit-304-Stainless/dp/B076J3W7R4
I also have a pair of crimping pliers that I bought just for its ability to cut M3 and M4 screws, so I can make longer screws into shorter screws: https://www.amazon.com/8PK-CT009-Multi-Purpose-Pliers-Crimping-Stripper/dp/B072TZ6JBG/
(It's a lousy tool in possibly every way except for its ability to trim small-diameter metric machine screws, which it does very well. It won't cut hardened grade 10.8 M5 screws, but I mean: You'll have that.)
I wouldn't bother removing them, you don't need the very top or bottom clean. I used this stuff after removing the grease it came with with a rag and alcohol. Just dripped it on multiple parts of the screw then used the control menu to move the gantry back and forth over the area I applied the lubricant. I got this from a youtube guide, you might be able to find it with some searching.
This or similar Teflon or silicone dry lube.
Once the solvent carrier evaporates it leaves a dry film of lubricant behind.
I print almost exclusively ABS on my CR10s, and it's just as fast as PLA. It's PETG that needs to go slow.
The only upgrades necessary are an all metal hot end, a heat bet upgrade, and an enclosure. A BL Touch is helpful but not necessary.
I have a printer running a "BIGTREETECH SKR Mini E3 V3.0" and it runs great. Silent stepper drivers, large heatsink, dual z axis drivers, 32-bit chip supports Marlin and Klipper. Pair it with the "TFT35 E3 V3.0.1 Touch screen" and it's like having a new printer. I thought the Touch Screen was gimmicky but it makes running pre-heats, baby stepping, bed leveling, etc. so much easier and quicker. Even quicker than running the Octoprint app from my phone. The extra SD Card Slot, USB slot, & Filament runout detector don't hurt either.
This is what I bought:
HzdaDeve 3D Printer Motor Cable... https://www.amazon.com/dp/B091XYP9S6?ref=ppx_pop_mob_ap_share
But I have an Ender 5 Plus, and not all cables are the same. I don’t have any experience either, I just did a bunch of googling to make sure I ended up with the right wire. I did learn that you often can’t buy just the connector, you just buy a pig tail, or in my case, a whole cable and snip off the end you need.
I just got an enclosure from Amazon
I haven’t had ANY shrinkage peeling anything up. I have the same problem with a cold environment. It’s magic
I went with a Biqu H2 on my CR-10s. I used the heater cartridge that came with my printer, which is working perfectly. I did replace the thermister, since the tiny 'bulb' type had nowhere to mount on the Biqu's heatblock.
Other than printing this mount (I only printed Simple_Plate_D2_NoBLTouch.STL, and ignored the rest) and calibrating the e-steps, it worked perfectly with the stock control board.
Heyiarbeit Thermal Fuse 250V 10A 133 Celsius Circuit Cut-Off Temperature Thermal Fuse 10pcs https://www.amazon.com/dp/B0995HZJKQ/ref=cm_sw_r_awdo_99S7GEYXW7VQAMDT5M83
TWTADE Solid State Relay SSR-40 DA 40A DC 3-32V to AC 24-380V + Heat Sink https://www.amazon.com/dp/B079B63N3T/ref=cm_sw_r_awdo_XC1BVR6B323NDJX358EZ
I realized I don't have to post pictures I can just link to the items. Will those work for me?
No adhesive. It’s a smooth, rubbery surface with a little grip to it on both sides. I just get my finger under one corner of the glass and lift. The glass comes off. The pad stays on the heater.
It loves to stick to itself and is easy to tear, so application requires a little focus. It collected some air bubbles underneath, but I was able to smooth those or lift and replace the material. This what I bought back in 2018:
FBApayipa 400mm x 210mm x 0.5mm... https://www.amazon.com/dp/B01N9HGKR1
With the EZABL and mirror tiles on my CR-10S and Ender 3 Pro, I just don’t really think much about leveling beyond tuning the z-offset when I change nozzles or babystepping at the start of a print. I do run a G29 every time, but I don’t mind waiting for that.
Finally, both printers do have solid bed mounts from TH3D. These are fine, but I felt like I needed to shim one or two on the Ender.
yes this replaces the part that goes under the extruder
https://www.amazon.com/E3D-Groove-Mount-Bowden-Adapter/dp/B01F5Z49W4/ref=rp\_sccl\_2/137-5687549-7963420?pd\_rd\_w=ogvDN&content-id=amzn1.sym.208e539a-c534-423e-b534-e4dcccf63aa5&pf\_rd\_p=208e539a-c534-423e-b534-e4dcccf63aa5&pf\_rd\_r...
Here's a link on Amazon for a 4 pack of the silicone socks if you haven't found one yet. They work great and have not melted on me on either of my printers. https://www.amazon.com/gp/product/B07N18BZQM
Also another mention, the silicone socks reduce heatup time and help keep temperatures consistent while you are printing.
For my CR-10s, I did:
- Also the realiability of the actual prints and not having spaghetti happen half way through it.
- I ditched the glass and switched to a PEI coated spring steel sheet. I purchased one that came with a magnet sheet, applied the sheet, then installed the print bed. This required I also slightly raise my Z endstop, since the spring steel sheet was a good deal thinner (and lighter!) than the glass.
- and a realiable way to check the bed level as im not sure I have it setup correctly
- I don't use auto bed leveling, and never have. I swapped the bed springs with silicone spring replacements. I use the 'bed tramming' function to level the four corners, and then generally don't have to set it for months. Even when I do have to set it, it's usually very minor adjustments (moving the adjustment knobs maybe a millimeter or two, at most).
You’ll need to replace the threaded adapter inside the extruder with a Bowden adapter which doesn’t have a thread that sticks out. This is the part - https://smile.amazon.com/dp/B07DGL78WN/
You can also 3D print this part as well - there’s a lot of files available on Thingiverse
I decided to recrimp my wires from the new E3D heater cartridge instead of trying to solder the old wire onto the new ones, but I honestly couldn’t get it to properly crimp as well as the stock from Creality. It was really loose and I didn’t want to chance it so I went with the stock heater cartridge
The stock heater cartridge is also 40W while the one in your kit is 30W - you’ll get better temps by keeping the heater cartridge
I also forgot to mention that you’ll need a Bowden adapter for the stock Titan extruder because the E3D V6 needs a spacer between itself and the extruder. It goes inside the extruder so you’ll need to partially disassemble it to replace the stock threaded one. You can 3D print this part or you can buy it off Amazon. There used to be a super cheap one, but it seems like options are getting limited nowadays