
What are
/r/PlaystationClassic's
favorite Products & Services?
From 3.5 billion Reddit comments
The most popular Products mentioned in /r/PlaystationClassic:


The most popular Services mentioned in /r/PlaystationClassic:
Retropie
Gofile.io
PortableApps.com
WinSCP
The Eye
Rufus
CDRomance
The-Eye.eu
Notepad++
7-Zip
DuckStation
USBDeview
balenaEtcher
DOSBox
VirtualBox
The most popular Android Apps mentioned in /r/PlaystationClassic:

Sync for reddit

AParted ( Sd card Partition )

Termux
The most popular reviews in /r/PlaystationClassic:
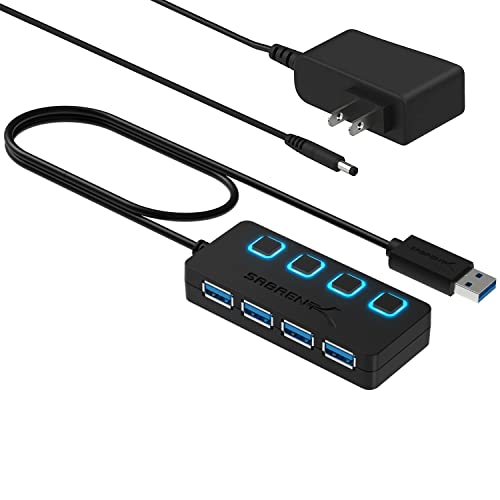
Used a USB hub with this usb adapter and sd card reader. https://www.amazon.com/gp/product/B07JMTW1YD/ref=ppx_yo_dt_b_asin_title_o06_s00?ie=UTF8&psc=1
https://www.amazon.com/gp/product/B016W4M5BE/ref=ppx_yo_dt_b_asin_title_o05_s00?ie=UTF8&psc=1
This one from Amazon has a micro USB for optional power. I got it from a recommendation on here. Works great!
https://www.amazon.com/gp/product/B00LN67RU6/ref=ppx_yo_dt_b_asin_title_o03_s00?ie=UTF8&psc=1
I had bought one of these AmazonBasics 7 Port Powered Hubs a few years ago now. Tried it for the hell of it on my PSC. Works like a charm!
For those looking for Portable usb image burner, here is Rufus - https://portableapps.com/apps/utilities/rufus-portable .... Instructions for Rufus - https://www.lifewire.com/how-to-burn-an-iso-file-to-a-usb-drive-2619270
This theme only works with autobleem 0.6.x or higher and EvolutionUI and includes:
- Main background
- Game selection background
- icons and graphics
- fonts
- sound effects
- Croc Legend of the Gobbos Soundtrack background music
How to install the theme:
- Extract 'crocautobleem_0_6_0_theme'
- Copy the contents of 'crocmain' to 'themes' folder placed in the root directory of your usb.
- Copy the folder 'crocautobleem' to the folder structure 'Autobleem' -> 'bin' -> 'autobleem' -> 'theme' (and you can rename it to 'Croc' (Important!: If you don't have any EvolutionUI Theme yet, the folder has to be named 'evolution' or else it wouldn't work.)
- Copy the background music '.ogg' to the folder structure 'Autobleem' -> 'bin' -> 'autobleem' -> 'music'
You can now safely eject your flash drive
- Insert the usb flash drive into the PSC and power on.
- Press 'Select' on the autobleem title screen
- Set the following settings in the correct order otherwise the sound effects will be not enabled due to autobleem bug:
- Set 'Autobleem Theme': croc / evolution (if its a new theme)
- Set 'Menu Theme' to: croc
- Set UI: EvolutionUI
- Set Music: CrocLegendoftheGobbos
Done
Download: https://gofile.io/?c=YHY04D
NOTE: This theme is made by myself and is non-profit for the ps classic community.
I followed the folder contents of user 'NewbornfromHell', to help get the hang of how these themes are created, so I would like to say a big thanks for the themes he/she created, they are awesome!
someone else posted a case on this sub a couple of days ago. I think its this same one on amazon.
This is the one you want. Ten bucks from Amazon and I've hacked three classics with no issue using it.
Not sure about shipping from microcenter, but they are on amazon for $24
Finally it works great now just I bought this from amazon: the otg https://www.amazon.com/AuviPal-Micro-USB-Cable-Power/dp/B07FY9Z9GD/ref=mp_s_a_1_5?keywords=otg&qid=1562099539&s=gateway&sr=8-5
Then install bleemsync using usb old 2.0 When I finish all install I use my another usb 256gb 3.0 You can see all steps here : https://youtu.be/uyy7HRNHVz4 Thank you guys ❤️
I TRIED TILL MY THUMBS GOT NUMB! To change the label to SONY using my android phone but just could, not, DO IT! Ughh... so yeah... I don't recommend it. Unless you have a rooted phone and know how to use a terminal to access the usb stick. Which, even then, Im not sure can be done. But hey, be my guest. If you do manage to make it, make sure to share your findings with us. �� Good luck... you'll need it.
Edit: Here is a good android/linux terminal that should in theory help you out. Which is what I tried to use along side many others. Termux seems like the one to go with on an android phone. Like I said, if your phone is rooted and can get sudo, (Super user do) you might... MIGHT have a chance.
https://play.google.com/store/apps/details?id=com.termux
I dont have a rooted phone so couldn't move forward.
It happened to me as well. But in my case my Mac was still able to recognize it as a USB flash drive even though it couldn't mount it or format it. I could make it working again by erasing the disk with the command line using the steps described in this article: http://osxdaily.com/2016/08/30/erase-disk-command-line-mac/
On Windows and Linux you have tools to do the same. Search for a tutorial on how to zero a disk or low level format it.
I just looked into it as well
"there will be no different Versions of Retropie for the different Ram-Sizes in the Pis"
Mods on the retropi forum seem to confirm 2gb is fine, which is interesting as emulators usually need quite a bit of ram but I guess they work magic in other ways. At the same time I understand given the ethos of the Rpi foundation and probably retropi it's probably easier to work on everything for the base model to gain max support.
So yeah, disregard that, more you know!
I know how I'd generate a config file (hand-code and test on my Pi), but that's probably not a helpful suggestion here :-/ The format of the controller config files is illustrated here.
If you plug the adapter into your PC and go to gamepad config, you could at least see if the dpad maps as a couple axes, or if it reads as buttons, and get the button numbers. There's a good chance that those would map over to the RetroArch config file.
For those wondering how to do this on an unmodified PlayStation Classic - extract the contents of this zip file onto a FAT32 formatted USB 2.0 flash drive with volume label SONY, then plug it into port 2 of the console and turn it on.
(See this comment for more info)
Rendered properly, it looks like this.
I'm not sure how exactly the graphics are constructed, but it's likely either a masking or transparency effect that the emulator doesn't handle correctly. Run it on a more accurate emulator, or on real hardware, and the problem should go away.
Take songs you want, build an Audio CD out of them, switch to a bin+cue image of that in RetroArch when the game has you swap discs using the Quick Menu's disc controls.
--
Simplest dumbed-down way would be to use MagicISO to directly build an Audio CD image from your songs. Note that when unregistered, MagicISO will only let you export a bin+cue that's under 350MB.
i have a different setup with the usb hub in the back and the front open only for controllers, and these cables (6ft) work fine. you might want to double check if the front port can produce enough juice to power the whole setup (controller, hub, and extension)
https://www.amazon.com/gp/product/B00TPMEOYM/ref=ox_sc_act_title_1?smid=ATVPDKIKX0DER&psc=1
​
Would something like this be sufficient?
I run AB 0.9.0 on a WD 2TB Portable HDD via Rii OTG Cable with my PSC without issue. YMMV
If you're in the US, I have a spare powered USB hub I can mail you, if you pay for shipping. This is the one I have
I used this one. Same one madlittlepixel used in his tutorial
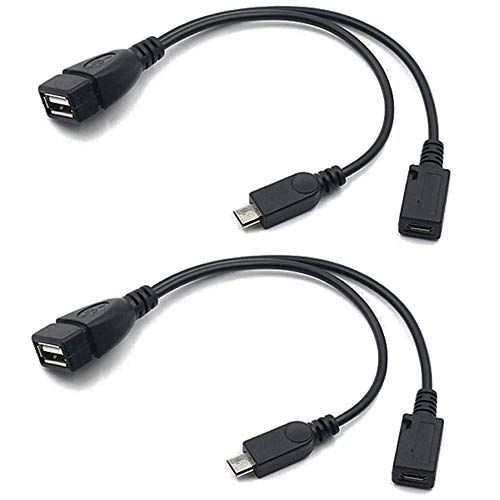
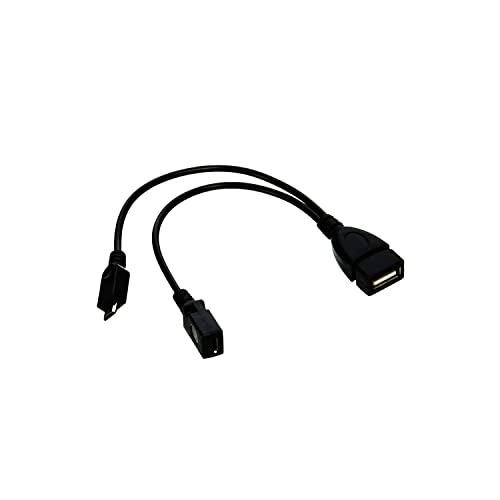
You can use a USB OTG adapter to plug in from the back so you don't lose the 2^(nd) player slot.
I personally use this OTG hub because it has multiple slots.
Nah they're not overly expensive, you can get them on amazon easy enough.
It's basically just cable that has a micro USB port on one end, and a micro USB plug on the other, and in between there is a standard USB port. So you plug one end into the micro USB slot on the back of the PS Classic, then you plug a standard micro USB cable like the one you would normally use to power your PS Classic into the port on the other end, and then in the middle you've got a slot to insert a USB drive. So you're powering both the console and the USB drive through the OTG adapter at the same time, and the console can also read the drive.
This is the one I'm using; https://www.amazon.com/AuviPal-Micro-USB-Cable-Power/dp/B07FY9Z9GD/ref=sr_1_4?crid=2VYONTTYEGH41&dchild=1&keywords=otg+adapter&qid=1609542474&sprefix=otg+ada%2Caps%2C270&sr=8-4
There are lots of different ones available. Just be careful about the kinda L-shaped box ones, you don't wan't one that angles to the right when plugged in because it will obstruct the HDMI port. That's why I went with the cable type.
Worth noting that this doesn't work out of the box, you need to have installed the custom kernal that comes with either Project Eris or AutoBleem 0.9.0. But you're on AutoBleem 0.9.0, so you've already done that. It would just be a case of plugging it in with your current USB drive as is, and it should all work.
Putting it on my Amazon wishlist now.
Edit: Is this it? https://www.amazon.com/UGREEN-Adapter-Samsung-Controller-Android/dp/B00N9S9Z0G/ref=sr_1_3?keywords=otg+adapter&qid=1559147017&s=gateway&sr=8-3
I feel like this might not be it.
I used a Sandisk Cruzer Blade 8GB USB 2.0 for the initial BleemSync 1.1 OTG hack, as I knew some USB 3.0 sticks wouldn't work and didn't want to mess around trying different sticks. USB 2.0 is the best and probably most reliable way to go for the initial hack.
Now I use an Inateck OTG Hub with a 128GB Sandisk Ultra 3.0 flash drive for the games.
I believe they sell those on Amazon US too.
Project eris installs a kernel that sets up something called otg. I use something like this to plug my flash drive through the power cord in the back. Rii F1 Micro USB Host OTG Adapter... https://www.amazon.com/dp/B07GDBPBTR?ref=ppx_pop_mob_ap_share
Power cord plugs into one and usb into the other and the micro usb plugs into the power port on the console.
that does not mean modifying console itself. if you're using a powered otg , all you do is installing a kernel that Eris automatically installs. if it fried your HDD , you probably used wrong hubs/otgs or wrong Adapter for PSClassic's USB cable. fast chargers can kill it
modifying console is only when you open it to Solder the power limiter points , so it can be bypassed , which DoctorDalek showed it perfectly on his Youtube channel , but is not recommended but yeah it is strongly recommended in all communities to use either a Powered OTG or a Powered USB Hub as those don't require opening console and are safe. here's one that works very well https://www.amazon.com/gp/product/B07FY9Z9GD
Avoid the trouble of using usb drives, especially slow 2.0 drives. I can guarantee it will not work and if it will it will be painfully slow.
Get this instead and a usb adapter
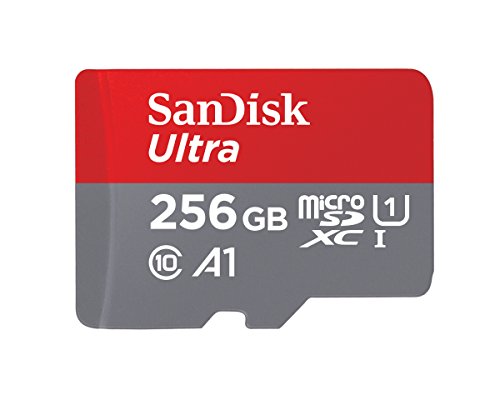
https://www.amazon.co.uk/SanDisk-microSDXC-Memory-Adapter-Performance/dp/B0758NHWS8/
I use a SanDisk 400gb microSD card, boot time is 10 seconds with 470+ ps1 games on the card, and I still have plenty of space left. Any microSD card will do, but i've had excellent performance with the SanDisk brand, can't speak for other brands.
Here's the adapter I use btw https://www.amazon.co.uk/Beikell-High-speed-Adapter-Supports-MMC-Compatible-Windows/dp/B07L9VT8YY/ I put the microSD card into the SD card adapter and then the SD card into the usb adapter which I then connect to my psc's OTG hub
Haha, no worries. Just be aware that the system doesn't come with a USB AC adapter but I'm sure you have one lying around.
You also want a USB drive that doesn't draw too much power, I would personally suggest the one below:
https://www.amazon.com/dp/B001XURP8G/
And if you plan on playing multiplayer, the hub below has worked well for me:
Yep. This one works great. The price keeps fluctuating, I've gotten two now for around $18 each for the 128gb model.
>Can i use an usb 3.0 otg hub? Or it has to be 2.0?
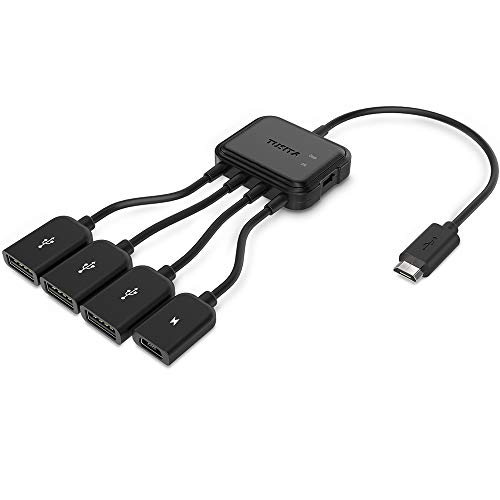
If you're looking for an OTG solution with multiple ports? Then you need something like THIS:
https://www.amazon.com/TUSITA-Adaptor-Charging-Adapter-Raspberry/dp/B00LTHBCNM
This is the one I'm using right now, Though I don't know what to tell you if you're looking for a hub not just a single port.
It's interesting how sony decided to use an open source emulator instead of an in house one. This TechCrunch article talks a little about that. Just more proof on how little time and effort sony put into the OS of the PSC.
>In the licenses list for the console can be found PCSX ReArmed, as Kotaku noticed in its review yesterday. That’s the ARM port of PCSX Reloaded, itself an offshoot of the original PCSX emulator, which ceased development in 2003. Don’t worry, it’s not a crime or anything: Sony is well within its rights to do this. It’s just ironic, and indicative of the hard work emulator developers have done for over two decades, that a tool most famously (though by no means exclusively) used for piracy is being deployed officially like this. PCSX and its derivatives are open source under GPL.
Source: https://tinyurl.com/yc8hjtdp
Would it not be good enough?
The front ports only put out around 100mA, far less than most flash drives require. There are some drives that work ok at first and then cease to work after a random amount of time will stop working. This is due to the power requirements changing as the drive gets full and/or ages. We've seen lots of it on the MMC discord. OTG is the way to go, and I recommend this OTG hub.
https://www.amazon.com/SUYAMA-Adapter-All-New-Nintendo-Playstation/dp/B07VVNNQ8Q
personally I bought this one and it works perfectly.
https://www.amazon.ca/gp/product/B07D7Q41PM/
I formatted it to NTFS first and then I used Project Eris.
This is the current USB port I am using. Is this an otg or should I buy another?
Sorry to bump an old thread, but this did not work for me. I am trying to get the following usb drive working:
I have a 64GB drive that I used to initially install both Project Eris and AutoBleem (on separate occasions). After install I’ve tried FAT32, NTFS and exFAT. I’ve tried using it after installing the Project Eris kernel. Didn’t work. I used fastboot to get back to stock with my backups and tried again with AutoBleem. Once the kernel was installed I tried again via otg. The PS Classic still doesn’t see the drive at all. I’m using a 5V 2.4a adapter, so power shouldn’t be an issue. I did try putting the drive into controller usb port 2 while I had 1 game installed and it booted fine. But as soon as I add more, the PSC boots to stock.
I asked in the AuthoBleem Diacord and while they gave suggestions, nothing has worked. I’m really at my wits end here. I really want to use this drive for the capacity but not sure what else to do.
Yeah. You can use Filezilla or even something on your phone if you don't want to get up from the sofa.
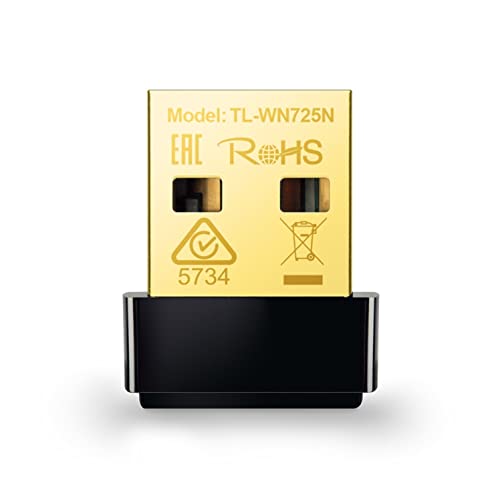
Autobleem devs have recommended RT5370-based adapters in the past. You can find those cheaper on eBay or other places, but they seem to go for around 10 bucks on Amazon
Eris has generally recommended the RTL8188EU-based TP-Link TL-WN725N. Do note that you may have to manually create an ssid.cfg file with Eris if the Network Manager doesn't work for you.
Either an OTG hub or a single-port OTG adapter with a bog-standard USB hub plugged in. If you don't have an OTG adapter already then I'd just go for an OTG hub.
And best pair it with a USB power brick that can output 5V at 2A+, since you're going to be powering multiple USB devices.
from what I've read, that should work. Haven't tried something like that myself though.
if you've already paired the 8bitdo with the ps3 controller then you shouldn't have to re-pair. You should be able to just plug it in and then turn on the controller, and it should just work from there.
I'm not sure about that one. The OTG I use didn't seem to be available on your country's version of Amazon, but I was able to find this one that I'm more confident would work : https://www.amazon.se/SUYAMA-Adapter-Stick-Classic-PlayStation/dp/B07Z4RHJ2D/ref=mp_s_a_1_8?crid=2PJIAWM63X10F&keywords=micro+usb+otg+hub&qid=1659098795 The one you already have may work just fine though, doesn't hurt to try.
Good luck, and I hope it all goes smoothly for you.
https://www.amazon.com/AuviPal-Powered-Adapter-Charging-Streaming/dp/B07TX8FY6W/
These are similar...why don't you have a try. You can return to Amazon if they don't work!
Question: I have this one. Which forces me to use a usb to usb
MakerSpot Accessories 4 Port Micro USB OTG Hub High Speed Sync and Charging Dongle Extension Cable Adapter Works with Raspberry Pi 2 3 Pi Zero W/Windows/Android/Raspbian Jessie Tablet, Linux https://www.amazon.se/dp/B075ZKJ76L/ref=cm_sw_r_cp_api_i_W86DXZAW0TT9PY4G1WVP?_encoding=UTF8&psc=1
Is this one ok to use? Thanks!
Im getting this in tomorrow and will let you know if you decide to revisit. I found a good wifi dongle but the targus BT I had was kicking back an error.
​
I had one like you're mentioning. It didn't work for me and got so hot it started to melt.. The 1 star reviews on amazon also said the same thing so I am not alone. I don't recommend this one as it can be a real fire hazard. https://www.amazon.com/TUSITA-Adaptor-Charging-Adapter-Raspberry/dp/B00LTHBCNM
But it need to be micro usb right ? ike this one ? https://www.amazon.fr/SUYAMA-4-Ports-Splitter-Adaptateur-Raspberry/dp/B081VBHCCW/ref=sr\_1\_8?\_\_mk\_fr\_FR=%C3%85M%C3%85%C5%BD%C3%95%C3%91&crid=IKJJ8Q3N93WA&keywords=micro+usb+hub&qid=1653732025&sprefix=micro+usb+hub%2Caps%2C187&...
>you can use the original psp charger adapter
No the PSP-1000 did not charge over USB (maybe you're thinking of this cable).
I use an 2TB portable HDD for AB on mine, have the entire PSX archive (sans the Lightspeed preschool titles I omitted) as well as a bunch of beta, cancelled, demo, import & prototype titles & still have plenty of room for anything else I may ever want to add in the future.
this is my OTG Cable: Micro USB HUB Adaptor with Power, TUSITA 3-Port Charging OTG Host Cable Cord Adapter Compatible with Raspberry Pi 2 3 Pi Zero Android Smart Phone Tablet Samsung Galaxy HTC Sony Google LG / Linux https://www.amazon.com/dp/B00LTHBCNM/ref=cm_sw_r_cp_api_glt_i_NW6190N16R36360NPWFD?_encoding=UTF8&psc=1
I use a left angled USB adapter that has a power pass through and a 128GB slim USB. I can't get a picture at the moment, but works like a dream, and you don't see anything once in a cabinet or TV stand.
Link to the adapter: https://www.amazon.com/dp/B013ENUF0Y/ref=cm_sw_r_apan_glt_i_TH28ECH6C6XTCMT48T3T?_encoding=UTF8&psc=1
Try one like Zfast Pi or other options you can find among these Light Shaders.
Can be downloaded from here (many screenshots if you scroll down).
You can convert multiple .bin / single .cue files to a single .chd file. I did this with all my multiple .bin files and haven't had any issues. I installed chdman from the link below to a raspberry pi following the linux method. I couldn't get the batch methods to work, but was able to do them one at a time. Once you point the command line to the file containing all the .bin /.cue files, I used this command. chdman createcd -i "your .cue file name here" -o "what you want it named as here.chd" https://retropie.org.uk/docs/CHD-files/
Sure, but not how you think Here is a capture card meant for Svideo and av inputs.
For just 21 bucks if you insist on being backwards you can have that..
Keep in mind that it most likely functions as a webcam input.
Might as well grab one of these, can always return if it doesn’t make a difference AuviPal 2-in-1 Micro USB to USB Adapter (OTG Cable + Power Cable) for Fire Stick, Playstation Classic and More - 2 Pack https://www.amazon.com/dp/B07FY9Z9GD/ref=cm_sw_r_cp_api_glt_i_KR4J28E0YMWQHSTQGHF7
/u/megafan11: I am submitting your comment with all the referral and tracking links in the Amazon link.
> SanDisk 2.0 64gb works fine for me https://www.amazon.com/SanDisk-Cruzer-Glide-Drive-SDCZ60-032G-B35/dp/B007YX9O9E You can use any size drive just remember the larger the size the slower the loading times but 64gb should hold a very large amount of rom files across multiple platforms. Hope this helps.
https://www.amazon.com/SanDisk-Cruzer-Glide-Drive-SDCZ60-032G-B35/dp/B007YX9O9E
I have spent countless hours making these. I don’t have any skills, just wanted something better than a screenshot. Did it all in Paint.Net. Also included my template if anyone wants to help out and make/upload more. Please, I need help!!!!
https://retropie.org.uk/forum/topic/26304/custom-nes-hacks-scaper-artwork
its a bit confusing but i followed this person's guide and got it to work:
https://retropie.org.uk/forum/topic/10888/help-running-ps1-protected-games/9
basically you gotta go in your retroarch Cheats folder, goto the PCSX Rearmed folder, open notepad and paste this code in:
cheats = 1
cheat0_desc = "Anti-Mod"
cheat0_code = "D0016B58+0006+80016B58+0001+D0016B6E+1043+80016B6E+1000+D0018838+0006+80018838+0001+D001884E+1043+8001884E+1000+D00201C2+1044+800201C2+1000+D00201B0+0005+800201B0+0001+D00217C4+0005+800217C4+0001+D00217D6+1043+800217D6+1000"
cheat0_enable = true
if Word wrapping is enabled make sure you uncheck that in notepad. (format -> wordwrap). Save it something like sakura.cht
make sure the extension is cht and not something like sakura.cht.txt
Then load the game in Autobleem with retroarch, press select+start then scroll down til you see "Cheats". Select "Load Cheat File (replace)" and open the sakura.cht file. Click "Apply Changes" then go back and click "resume".
if it doesn't work then simply press select+start again and click "restart"
I have this problem:
https://retropie.org.uk/forum/topic/4029/ps1-games-that-have-bugs-in-retropie
I think I read somewhere that this was a protection in the original game, but not sure. It's hard to find information about a game named "Driver".
You can test drives/readers on Windows with usbdeview by looking at the Power column and looking for devices that draw under like 200mA.
--
My go-to has always been these type of little microsd readers that draw like 120mA (or 150mA for ones from a later run/revision that used slightly-transparent plastic).
--
Sadly they're from years ago...back when they were plentiful and flooding every China/etc seller, they used to be like 99c shipped...but nowadays they're just silly-priced :/
here you go. just put this file on your existing snes mini themes icons folder
the point of this post is if someone here have a complete icons. im also looking.
Unfortunately there is no way of knowing exactly, as they all look similar, have no branding, and are sold by a variety of different front shops that change names constantly. Your best bet is to go on amazon and buy 3-5 adapters from different sellers that look like this one: https://www.amazon.com/Zer-one-Controller-Converter-Compatible/dp/B07W91HMQJ/ref=sr_1_14?crid=1ZO1HO9F8QA7B&keywords=ps1%2F2+to+ps3+adapter&qid=1640652493&sprefix=ps1%2F2+to+ps3+adapte%2Caps%2C135&sr=8-14
Then test them all and return the ones that don't work. To test them you should use Ace Combat 2 in Retroarch. Plug in the controller and see what it is recognized as. The adapters that work will usually recognize as "Playstation 3 controller" (as opposed to USB controller or similar).
In Retroarch when you have booted the game go into the Retroarch menu and go to OPTIONS and then PLAYER ONE and switch the controller type from "Standard" to "Analog". DO NOT go into "Controllers" or mess with any other kind of binding.
Then in the Ace Combat 2 settings menu go to controller configuration and you should see the dual flight stick on the screen and then be able to test all the functions and analog movement of each stick.
There was actually a commercial travel case for the PSC that did this. Had enough space for a battery bank but you can just as well run a couple of leads from a car USB charger or 12-24v to 5v module. No real magic. Just need a 5v HDMI display and sufficient amp supply.
Look there, he put them in the BIOS folder, which for us is called system. Find the "system" folder, create an "fba" folder and inside it a "samples" folder, all lowercase. And put the 118k dkong.zip file in there. Then use the game's dkong.zip from an FBA romset.
If you can't get it to work let me know and I'll check it out tomorrow on my PSC, I like these little mini-adventures. By the way, I use the FBA2018 core for everything.
I am not, I've seen people running the game with no issue at all. Check
https://retropie.org.uk/forum/topic/6433/how-to-replicate-setup/3
I'm glad you posted this here.
There must be a solution. we need the exact person with the exact expertise
https://retropie.org.uk/forum/topic/6433/how-to-replicate-setup/3
So something was done once and worked. That's my point. lets research a bit.
Thank you, regards.
OK, set the 4 gamepads to Standard and all multitap back to Auto or however they were before. Get to the point where you were before, where the first twk controllers worked and the rest didn't. Then take a look here:
https://retropie.org.uk/forum/topic/763/psx-multitap-retroarch-4-players/65
They had the same problem with only the first two controllers working and 3 and 4 not working. Then they say this: "go to controllers and switch from retro to retro/w analog for user 3, then it will work fine. I have to do this every time I start a three player game".
Can you try this? https://retropie.org.uk/forum/topic/18161/recommended-way-to-switch-to-xmb/3
But why the heck isn't the cfg editing working? That's so weird. Maybe get the default cfg from the Bleemsync 1.0 or whatever hack you're using.
The bios file should go in RetroArch's system folder. Make sure it's titled a recognized name. You can find the recognized names each bios file here: https://retropie.org.uk/docs/PC-Engine/.
I don't know how this thing compares to a rpi3. Do you think it would be able to run some of these CRT shaders specially made for the pi's level of performance? If I'm remembering correctly, zfast_crt_curve in particular is really lightweight and works really well and so do a lot of the others:
Currently using this one on my PS Classic. Also used the same one to tear down and solder into an RG351P which works flawlessly; both these devices are known to be a pain to find working wifi cards for but after some research this is the one.
Ah! Then that emulator must not expect you to try to mount audio CDs (even though that's what you would be doing playing that game). You might want to submit an issue to its author on github as it's still being actively developed. Just say you're trying to swap to an audio CD image for the game vib ribbon and the emulator complains it won't mount an image that doesn't have a binary track for track 1, but some games support audio CDs so it'd be a good idea to let those mount.
I reckon you should try a different emulator in the meantime, but if you want to see if it works in Duckstation, put a small PS1 game .bin file in the folder and name it Track01.bin, then use:
```
FILE "Track01.bin" BINARY
TRACK 01 MODE2/2352
INDEX 01 00:00:00
FILE "Track02.wav" WAVE
TRACK 02 AUDIO
INDEX 01 00:00:00
FILE "Track03.wav" WAVE
TRACK 03 AUDIO
INDEX 01 00:00:00
FILE "Track04.wav" WAVE
TRACK 04 AUDIO
INDEX 01 00:00:00
FILE "Track05.wav" WAVE
TRACK 05 AUDIO
INDEX 01 00:00:00
FILE "Track06.wav" WAVE
TRACK 06 AUDIO
INDEX 01 00:00:00
```
This is AMAZING! I do have 1 cover that I would like to ask for... Resident Evil Uncut, please!
https://cdromance.com/wp-content/uploads/2018/07/Resident-Evil-Uncut-Version-CDromance-Coverart.jpg
https://en.softonic.com/download/fat32-format/windows/post-download
Yes, it's labeled as SONY. I'm not new to doing simple console hacks, so I'm perplexed because this seems super simple.
From a old ngemu forum post, haven't tried but I assume still works the same:
I've tried a couple times in the past to make an audio CD image to use with Vib Ribbon, but hadn't succeeded in finding a reasonably simple way to turn some MP3 files into a CD image (without having to resort to things like burning a physical CDR, then make an image from that).
The release of Vib Ribbon on PSN today inspired me to try again, and I've found a pretty quick, easy way to do it. I thought I'd share that here.
You'll need PowerISO (http://www.poweriso.com/). It's a paid app, but they do have a trial version that limits you to 300MB CDs (which will just limit how many songs you can put on your CD image).
- Start PowerISO.
- From the dropdown arrow by "New", select "Audio CD".
- Drag some MP3 files onto the app.
- Click "Save", and choose a filename and where to save (the same folder as your Vib Ribbon ISO is a good choice). It'll save a .bin and a .cue file.
- You can now close PowerISO.
- Run ePSXe, and run your Vib Ribbon ISO as usual.
- In the game, choose to play with your own CD. It'll prompt you to insert your music CD.
- Escape to the ePSXe menu, and select File->Change Disc->ISO.
- Select the .bin or .cue file (either will work) you saved in step 4.
- Have fun! 📷
It was step 4 that used to trip me up. I kept looking for some way to write to an image file (instead of a CDR). I didn't realize I could just save in PowerISO, and it would save in bin/cue format.
I have mine backed up. I have the SanDisk Ultra Fit USB 3.1 64GB....I have had to revert back to BackUp before with no issue.......I use a portable program called FastCopy when transferring the files. https://portableapps.com/apps/utilities/fastcopy-portable
When I do my backup, I backup the whole system with the game folders.
Yes.
How to uninstall BleemSync:
- Download the uninstall image here: Uninstall Image
- Unzip the img file to your computer
- Burn the image to a USB using something like Etcher (Link can be found here: ) https://www.balena.io/etcher/
- Completely unplug everything from your console and insert the usb in PORT 2
- Plug in the power and press the power button (once the LED is ORANGE)
- This should only take a very short time and the LED should go out and back to orange when done.
Please Note: You can now uninstall BleemSync since 1.1 by creating an UNINSTALL file (USB:\bleemsync\flags\UNINSTALL) and plugging in the usb into the console. (You will need to remove power cord after shutting down console.)
Source and download links: https://modmyclassic.com/bleemsync/
Some of my early experiments used a 2GB drive, booting Autobleem. I'd consider some problem in the partition tables to be more likely, myself. I've heard enough stories of using Rufus to reformat fixed issues (since it apparently also recreates the partition table). Just make sure to select "MBR" as the partition scheme, along with a Bleemsync-supported filesystem.
I use two drives:
1.
I did my initial setup of Bleemsync (1.1) with a Verbatim Store ´n´ Go Pinstripe 64 GB 3.0 and installed around 15 games through it.
2.
- Then I came across a large games collection which I download on my Western Digital Elements Portable (1TB). I copied all Bleemsync-folders over from my USB-stick and put all files in the "transfer"-folder. I connected it through OTG and booted the PSC without ever thinking it would start.
-After a couple of minutes of loading Bleemsync started ( mind you, don't try loading covers of such a large amount of games because the system will crash because of memory issues).
-Now I have an almost endless collection of games (about 1650, some files where corrupted while downloading) to choose from.
Did a bit of digging on Github and the author confirms
`Only raw bin files are supported as tracks in cuesheets.`
That means you have to convert wav to bin for Duckstation :(
The only way I know how to do that off of the top of my head is with the command-line only tool SoX.
sox.exe "input.wav" -t raw -s -c 2 -w -r 44100 "output.bin"
All the tools I know are similar in complexity to CLRmamepro, where you have to supply a dataset that gets compared to your ROMs to identify missing/broken titles. I have used romcenter in the past, but mostly used it for consoles.
​
https://alternativeto.net/software/clrmamepro/
​
> Rule #1: No linking, discussion or asking for links to actual ROMS, ROM-sharing websites, or other copyright-infringing websites. First offense receives a ban.
Although: 7z files are just archives. They're kind of like zip files. Download 7-zip. There are likely .bin and .cue files in there.
r/roms is one of the few Reddit communities that would probably be more open to talking about sources for retro-games. I'll mention that redump.org is a group that documents information for unmodified and cleanly-dumped disk-based games, and that you can find collections of ISOs based on Redump's data.
.7z files are compressed archives, like .zip files. Install 7-Zip (https://www.7-zip.org/download.html). After, right click the .7z/.zip files, highlight the 7-Zip menu, and hit extract. It should produce the .cue+.bin/.cue+.iso files needed.
Yep, easiest would be to edit by hand as mentioned above. Don’t use Windows Notepad though, use something like Notepad++ and ensure it’s set to UTF-8 text encoding and LF for Line Feed. The Windows Notepad will make a mess of text encoding and line feed (LF) and carriage return (CR) that’ll cause issues with the OS on the PSC.
> I ve tried opening that cfg file with every txt editor I knew without luck (only some strange symbols shows)
Use a notepad editor like Notepad ++ Notepad ++
It shows the full file which you can read.
My DS3 works great in retroboot wirelessly. Ditch that 8bitdo crap. All their stuff is tuned specifically for the switch now and doesn't work well otherwise. Just get a cheap Bluetooth dongle like this:
TP-Link USB Bluetooth Adapter for PC(UB400), 4.0 Bluetooth Dongle Receiver Support Windows 10/8.1/8/7/XP for Desktop, Laptop, Mouse, Keyboard, Printers, Headsets, Speakers, PS4/ Xbox Controllers https://www.amazon.com/dp/B07V1SZCY6/ref=cm_sw_r_apan_glt_fabc_33SVBRWVBT0JFGCTXJ0J?_encoding=UTF8&psc=1
Thanks for the response.
Sorry, I'm not really a console gamer at all, just getting into retro stuff on the classics. What's a dualshock clone? Is it a specific thing or just a category of controller like this one?
MOVONE Wireless Controller Dual Vibration Game Joystick Controller for PS4/ Slim/Pro,Compatible with PS4 Console (White+Black) https://www.amazon.com/dp/B07RLWTXKG/ref=cm_sw_r_apan_glt_fabc_AR96M1BZT158AP4P03FE?psc=1
If the latter, any specific clone that is recommended?
Instead of using a usb hub, use a otg hub like this one
https://www.amazon.com/SUYAMA-Adapter-All-New-Nintendo-Playstation/dp/B07VVNNQ8Q
And make sure to use a decent power adapter, with at least 5V 2A output.
They certainly not cheap on Amazon UK.
Probably have more luck getting them cheap on Ebay.
Sure. You can plug in a wall-powered USB hub straight into the front port, but if you've already installed a custom kernel (eris/autobleem) then you'd be much better off getting an OTG hub so you don't have to have two power bricks.
A drive formatted ExFAT can be larger than any commercially available drive, and with 512 TB being the suggested minimum implementation you should have no concerns.
I use these on all my mini consoles and my Nexus 7 2012 - they are cheap and they work.
The ports in the front are power limited. Using a y cable, you split out to a full size usb port and a tiny female micro usb that you connect the power cable into. You don't need to buy a specific brand or anything, as long as it looks like the one in this link: https://www.amazon.com/AuviPal-Powered-Streaming-Nintendo-Consoles/dp/B0826R1HL1/ref=sr\_1\_2?dchild=1&keywords=playstation+classic+splitter&qid=1627096457&sr=8-2
Looks like I'm still having trouble with this. The power adapter from https://www.amazon.com/gp/product/B00TPMEOYM/ref=ox_sc_act_title_1?smid=ATVPDKIKX0DER&psc=1 didn't connect to the PSC.
​
Does anyone have a picture of their setup with the above as well as the power adapter you're using.
Some apparently work better than others. I got a cheap one from Amazon like this and it works fine.
I'm not good with rewiring things or anything like that. I wish I was though.
I bought multiple cables off Amazon some with power on off switches some without. I've always used an Insignia USB 3.0 superspeed hub as power source, and any cables I could find. No matter what I did or what cables I used on my Pi, always had the brownout signal. Even when I unplug the keyboard or hard drive or controllers. Just the system sitting there on the menu I would get the error. I think it was a Pi 3b.
https://smile.amazon.com/dp/B01K8TTDQE/ref=cm_sw_r_cp_apa_glt_fabc_EF89WCWSADFNH5MQZDDH?_encoding=UTF8&psc=1 this is the hub I use for everything. When I'm not using that, I'm using a wall outlet with USB 3.0 plugs built into it.
https://smile.amazon.com/dp/B07FY9Z9GD/ref=cm_sw_r_cp_apa_glt_fabc_7KRVX1T2EY4EB0J2VJSF?_encoding=UTF8&psc=1 Here are the main cables I use, they seem to work with everything else just fine.
Still not entirely sure why I can get everything else working otg without the powered hub, but not the PSC. I'll try the ideas everyone on here gave me hopefully one will work.
Mayflash NSMagic works with Xbox Series X Controller - but only wired connections are supported with this new gamepad. Wireless is impossible.
Any that look like this: https://www.amazon.com/dp/B07TWZC4WD/ref=cm_sw_r_cp_api_glt_fabc_VHEQ32HN9K18TZN25D0A
I’d buy like 4 or 5 at a time on Amazon, test them all until you find one that works then return the rest.
I fixed it by using slot 1. I'm now working through cleaning up the files in my original bleemsync folders. They were all named by the game not disc ID and did not have ini files.
How do I handle multidisc just name them DiscID - Disc 1?
I am currently using the Inateck OTG but I've heard that one is no longer really recommended. I switched it up and ordered this one.